

Before you begin
If you are new to PBX or the Personalization builder, review Create a widget with PBX and Set up and launch a personalization before continuing.Step 1: Build the widget
Describe your exit intent popup in a text prompt and let PBX generate it.- Go to Studio > Widgets > New widget.
- Select Using a prompt.
- Enter a name for your widget and click Create.
-
In the prompt field, describe your popup. For example:

- Review the generated widget and refine it with follow-up prompts, such as “Make the CTA button larger” or “Change the headline font.”
- When you are satisfied with the result, save the widget.
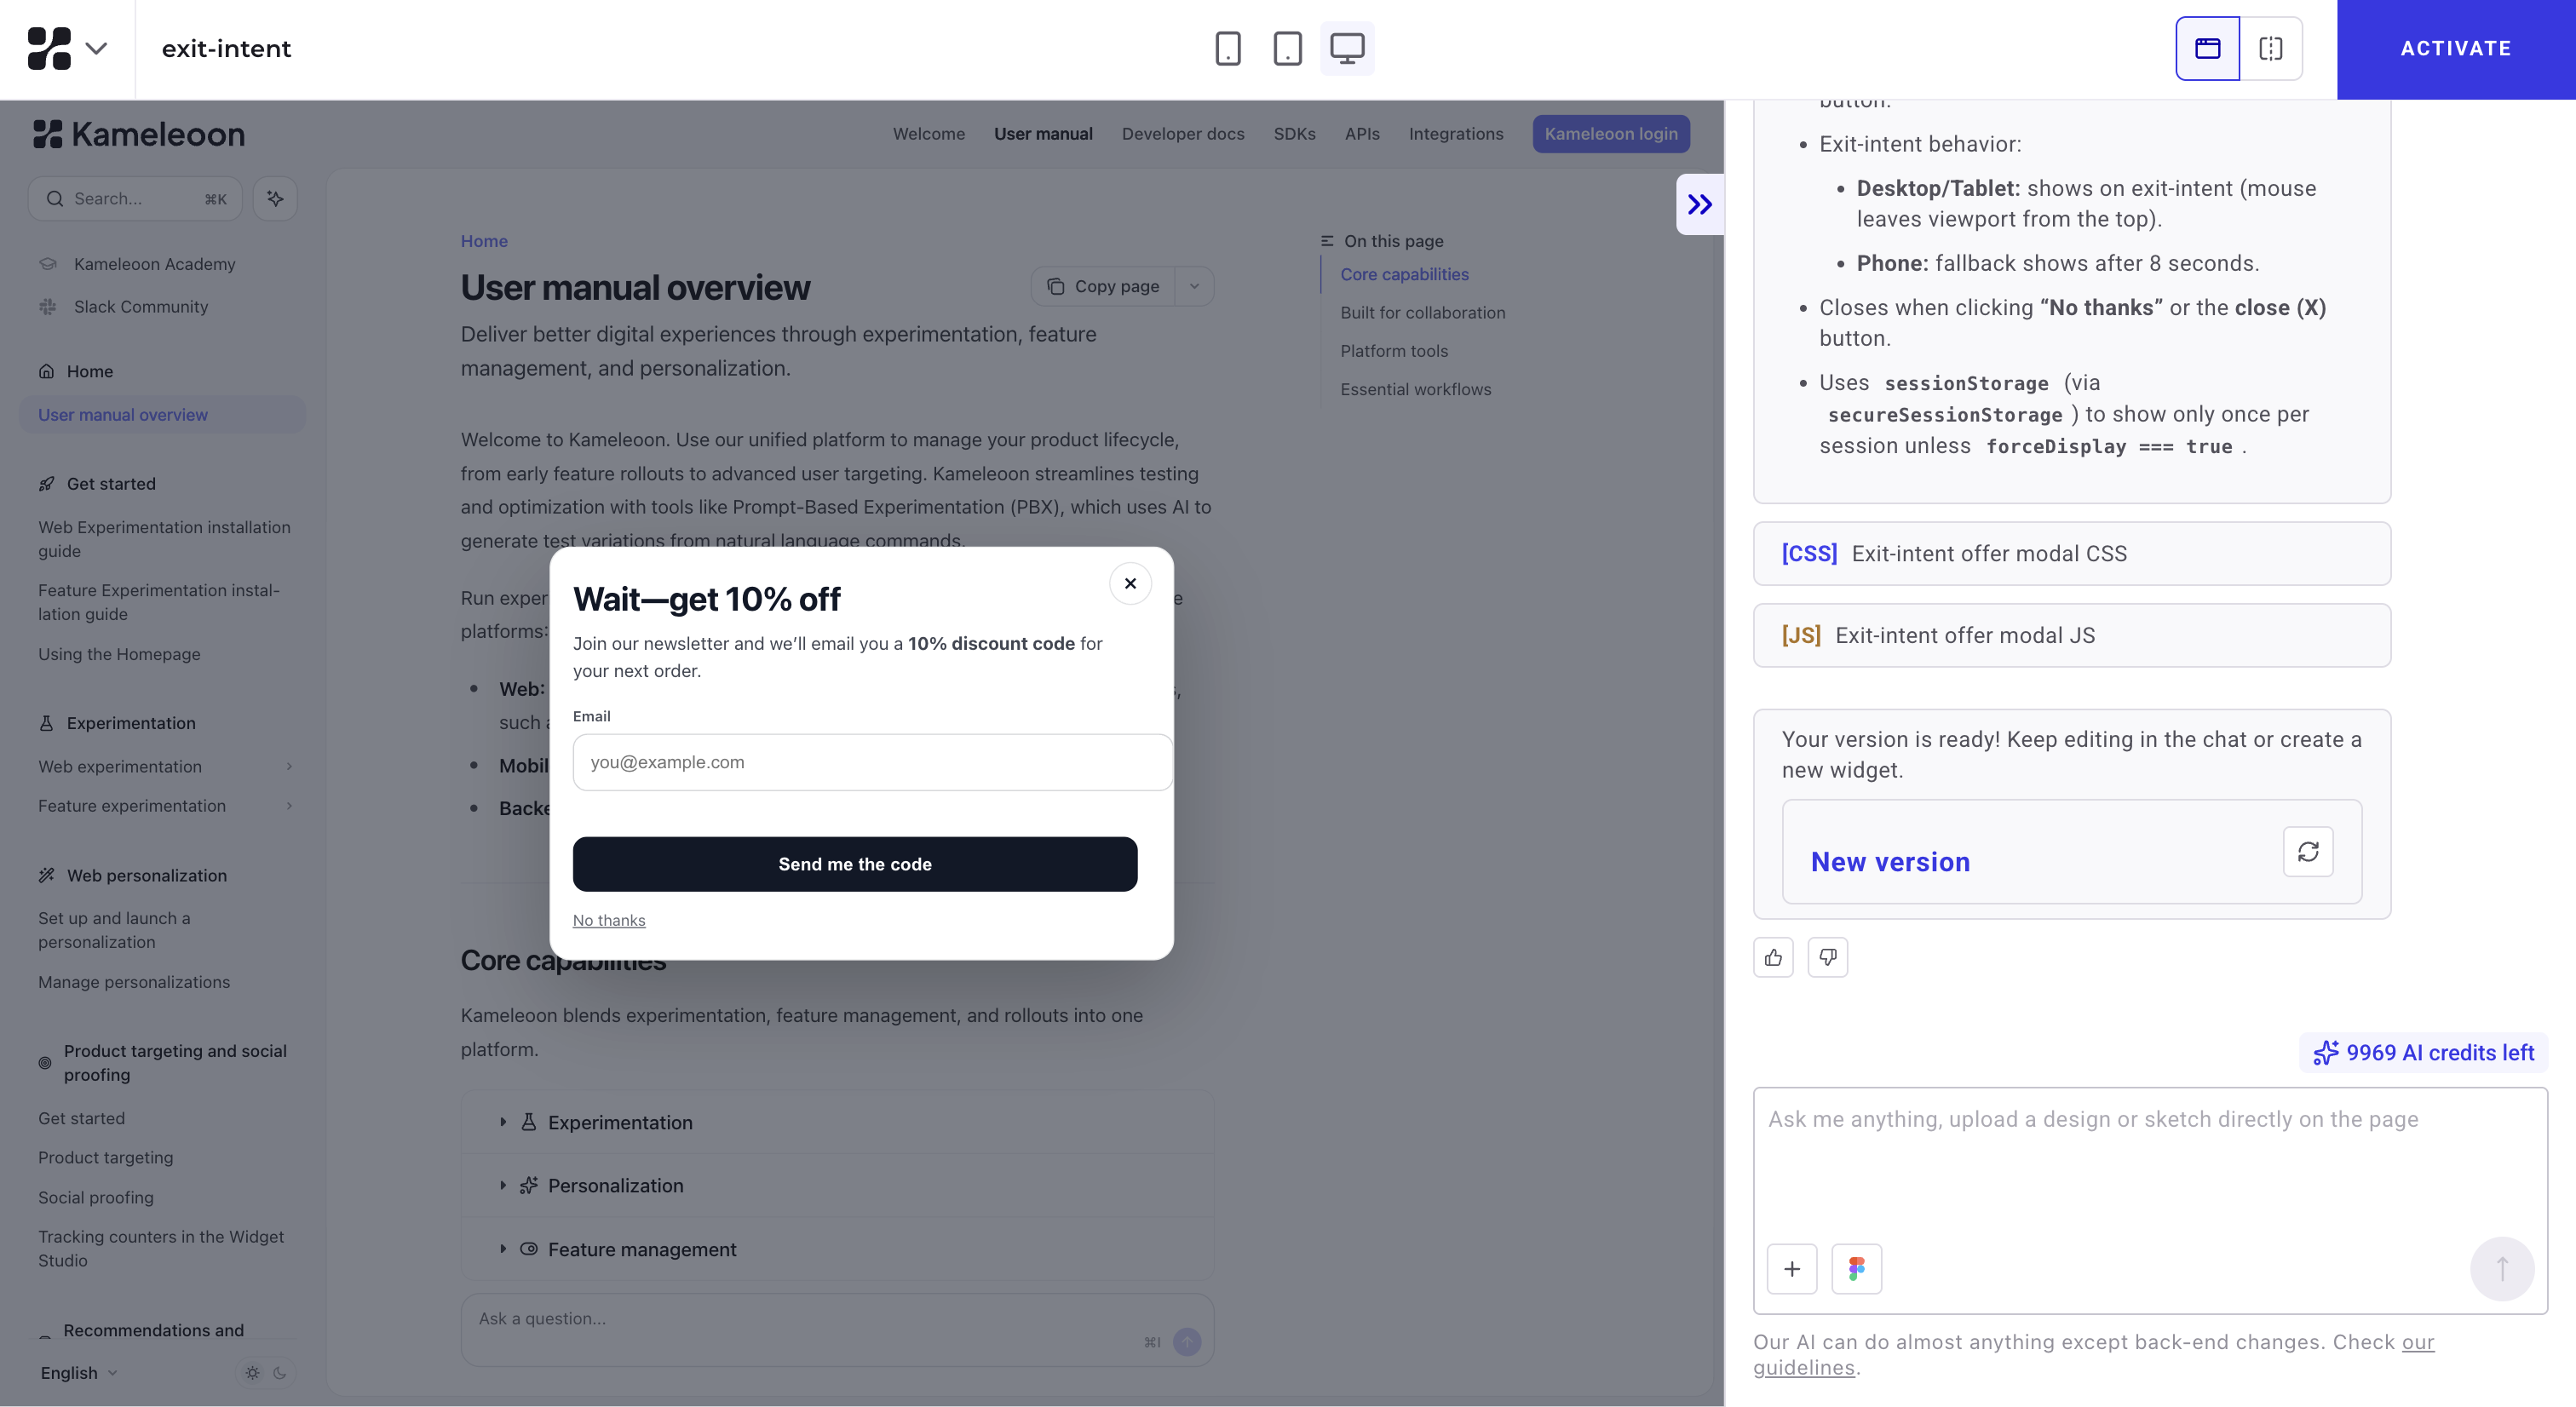
PBX widgets do not support legacy personalization. Contact your Customer Success Manager if you need access to the new personalization builder.
Step 2: Create a personalization
Create the personalization campaign that displays your widget.- Go to Experiences > Personalization.
- Click New personalization.
The step for adding your widget to the personalization content is not yet available. Full instructions for this step will appear here once the Using widget option becomes available.
Step 3: Set up the Website exit trigger
Configure the personalization to activate when a visitor’s cursor leaves the browser window.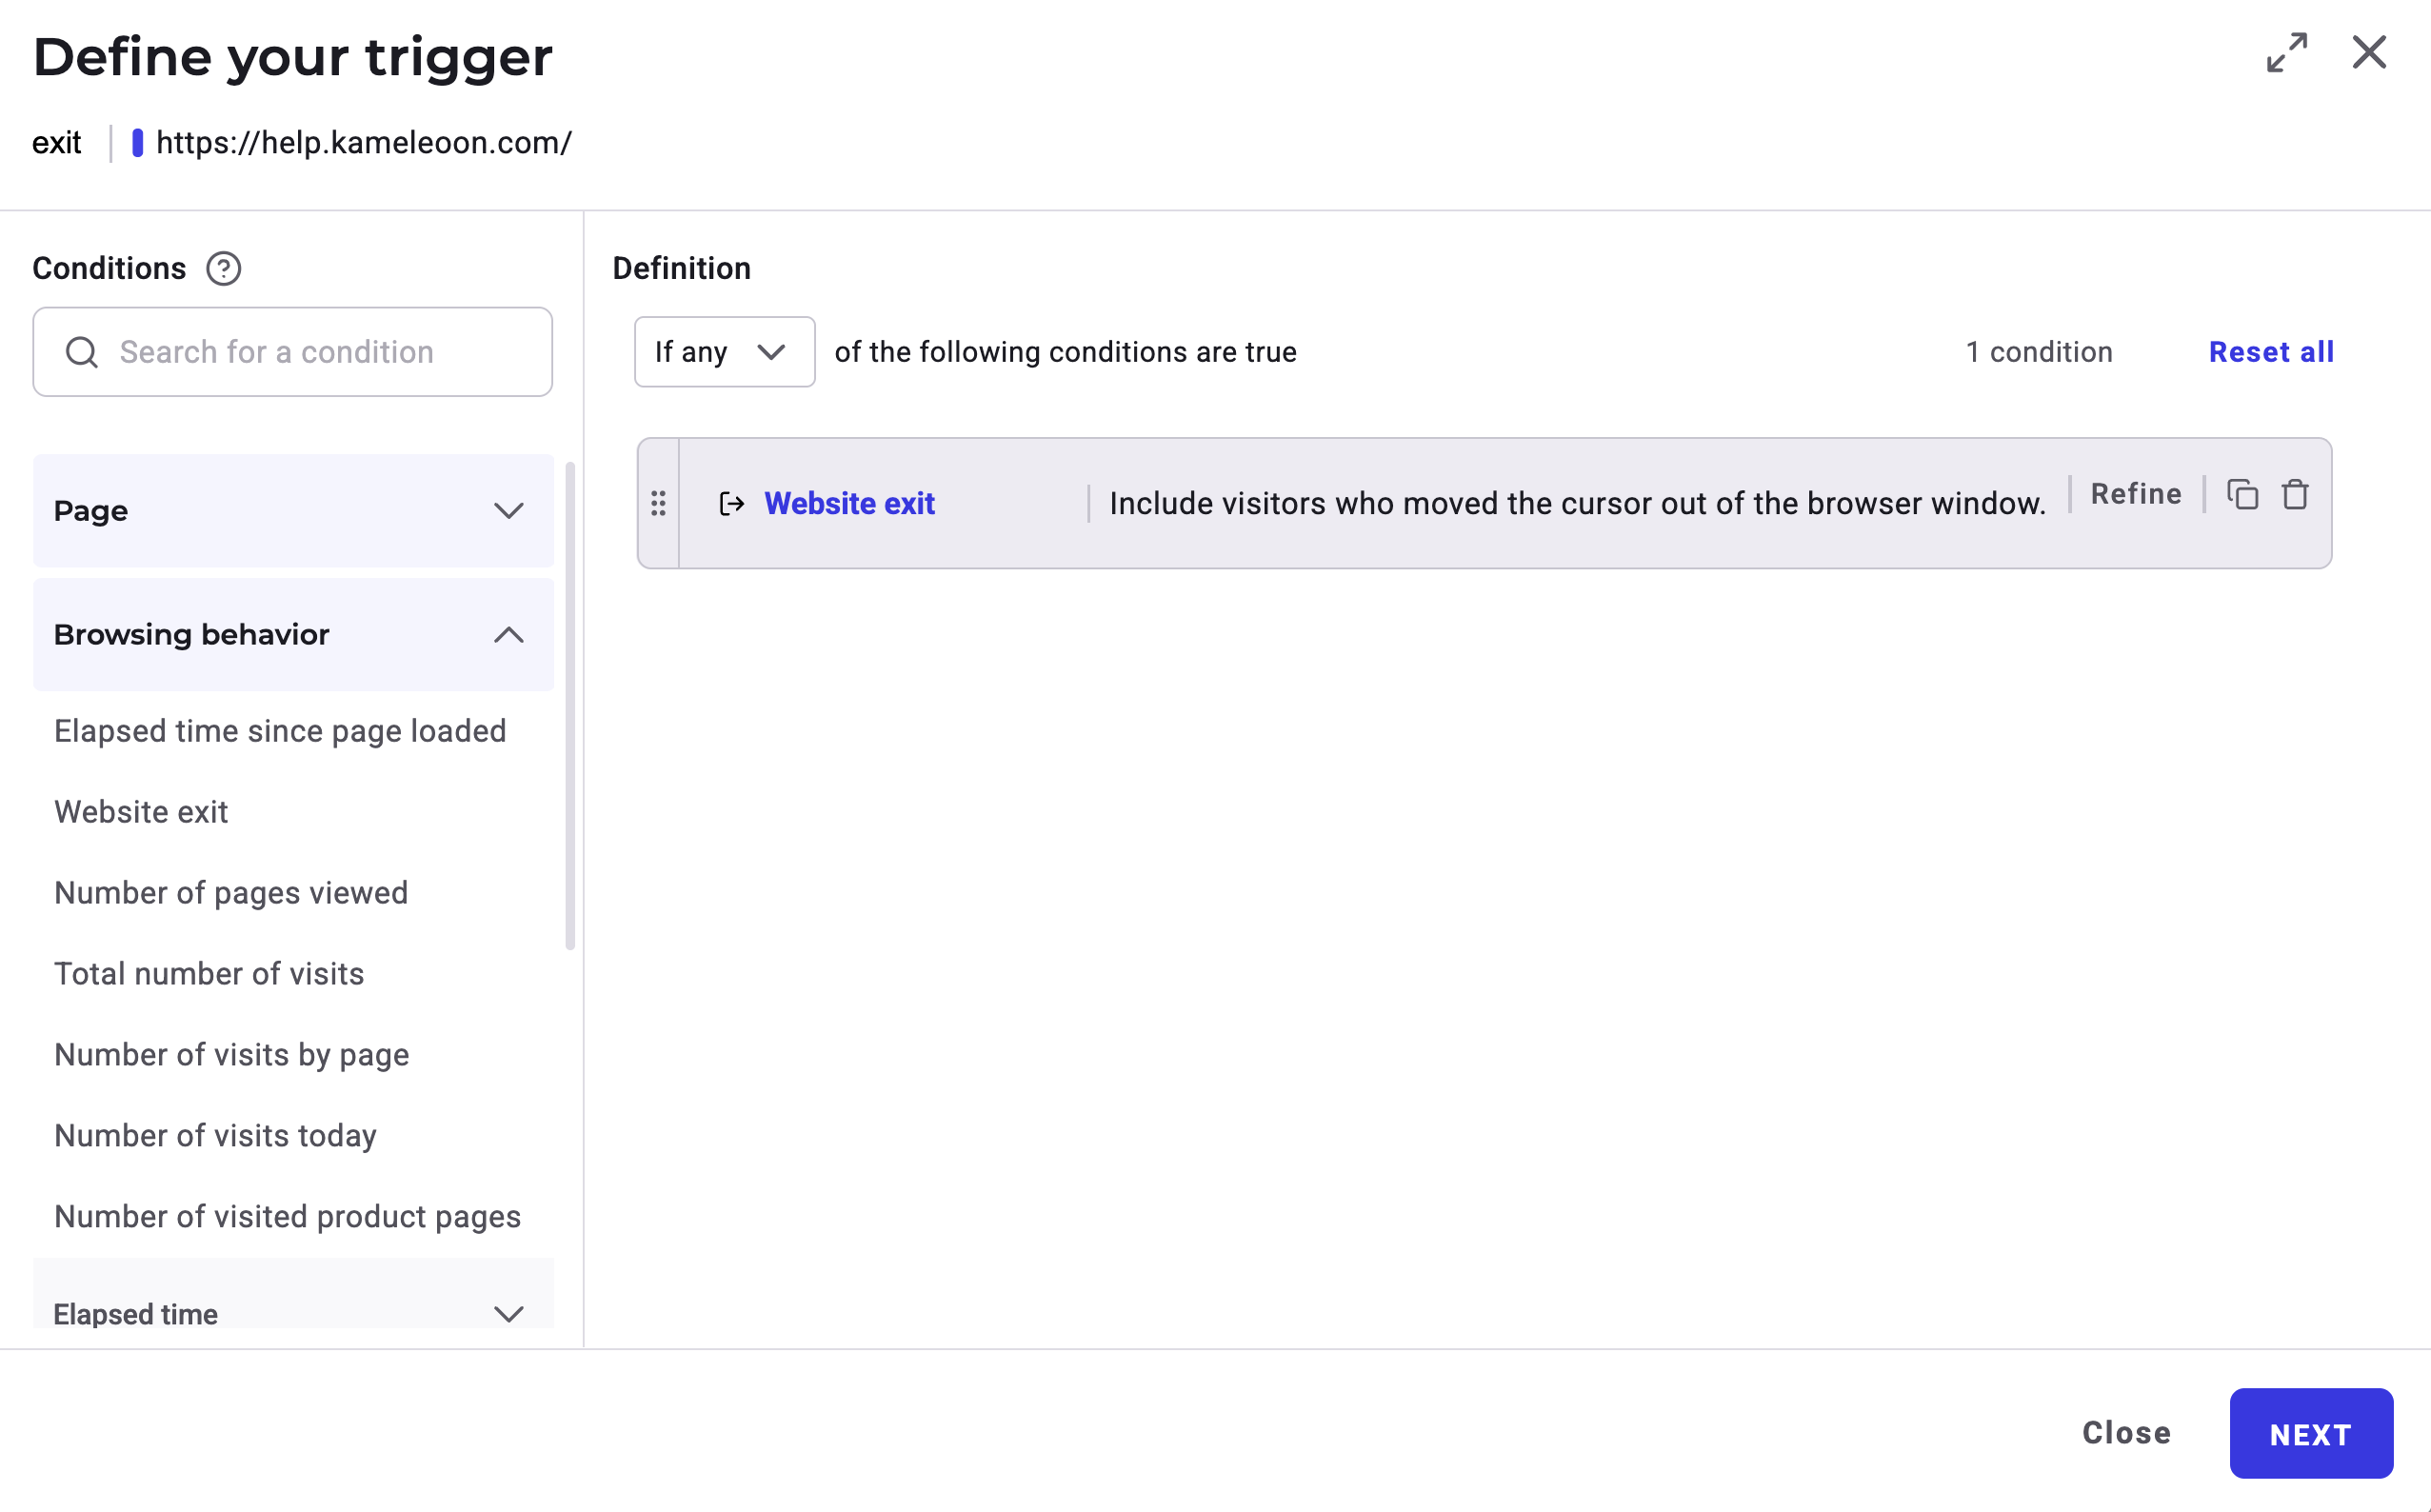
- Click the Targeting rules tab and expand the Triggers section.
- Select When a specific trigger occurs.
- Click Create a new trigger, or select an existing Website exit trigger from the dropdown.
- In the Trigger Builder:
- Enter a name for your trigger, such as “Website exit—all pages.”
- Select your project and click Next.
- In the conditions panel, select Website exit under Browsing behavior.
- Click Next, review the trigger summary, and click Create trigger.
- Select the trigger you created from the dropdown.
Step 4: Limit display frequency
Prevent the popup from appearing repeatedly by restricting how often it displays.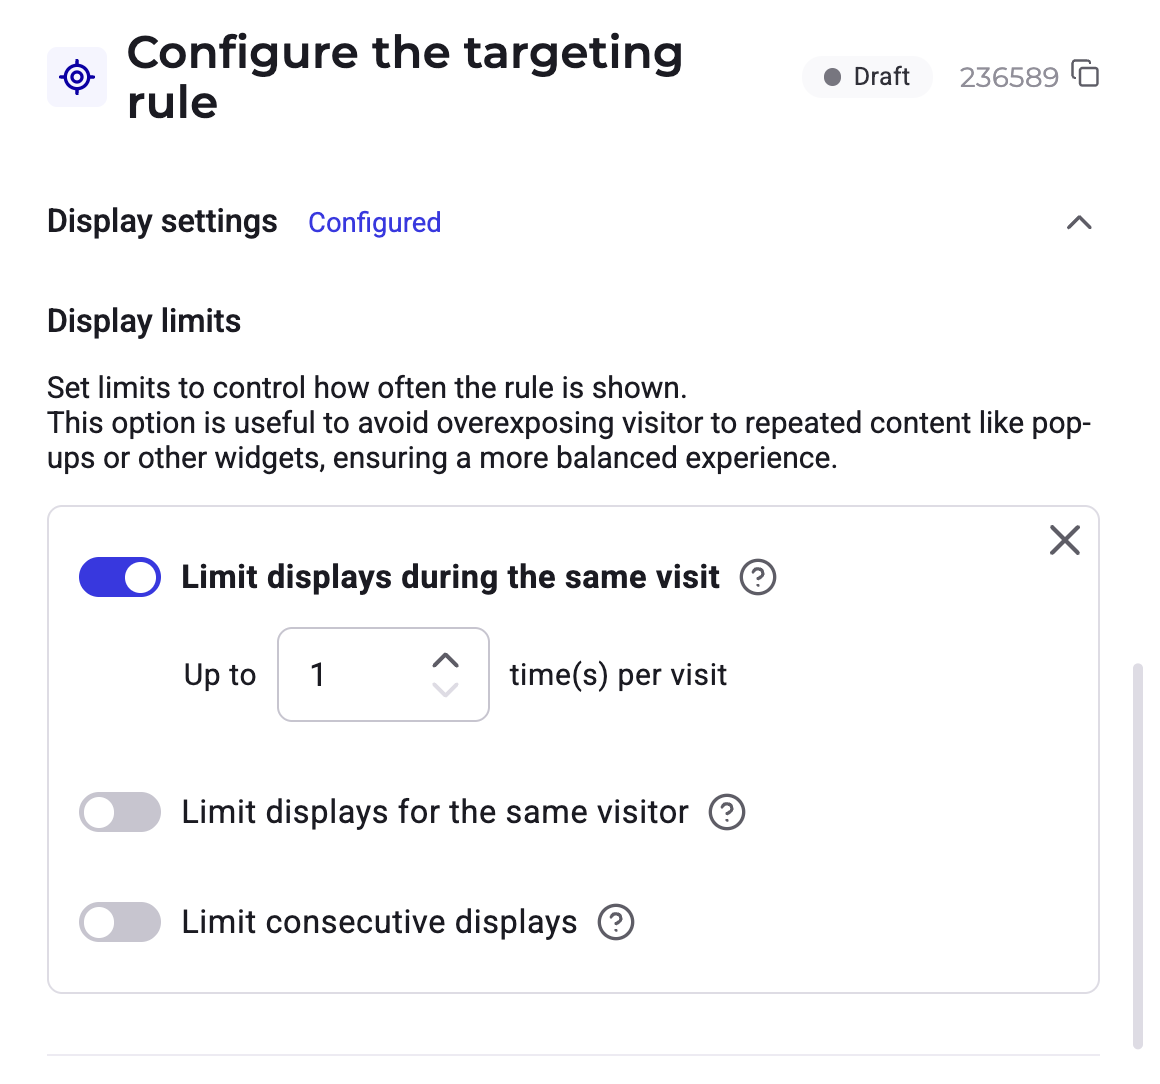
- Expand Display settings.
- Under Display limits, set the per-visit display limit to 1.
Step 5: Launch
Save your personalization, preview it, and launch it to visitors.- Click Save.
- Click Simulate to preview the personalization in your browser.
- Click Launch to go live.
Next steps
- Create a widget with PBX: explore advanced prompt techniques, goal tracking, and Google Sheets integration.
- A/B test your widgets: run experiments to find the most effective exit intent message.
- Set up and launch a personalization: configure advanced display settings, scheduling, and rollback conditions.