

Create a widget with PBX
PBX Widgets is an AI-powered UI generator that helps you create widgets for your experiments and personalizations created in the new personalization builder. Instead of manually writing HTML, CSS, and JavaScript, you describe the widget in natural language, and PBX generates the component automatically. This approach enables marketers, product managers, and CRO specialists to build UI components quickly without technical expertise. Typical widgets created with PBX include:- Newsletter subscription popups
- Promotional banners
- Exit-intent offers
- Lead capture forms
- Product recommendation panels
- Survey or feedback modals
PBX widgets aren’t compatible with legacy personalization. You can ask your CSM to get access to the new personalization if needed.
Create a widget
Follow these steps to generate and refine a widget using PBX.1. Open PBX
To start generating a widget in the Kameleoon interface:- Go to Studio > Widgets.
- Click New widget.
- Select Using a prompt.
- Enter the required information in the pop-in menu.
- Click Create.
2. Write a prompt
Describe the widget you want to build in the prompt field. PBX uses this description to generate the widget UI automatically. Example prompt:
3. Preview and iterate
Use a prompt-iteration workflow to reach your desired result. Review the generated widget and refine it by writing follow-up prompts, such as:- “Make the CTA button larger”
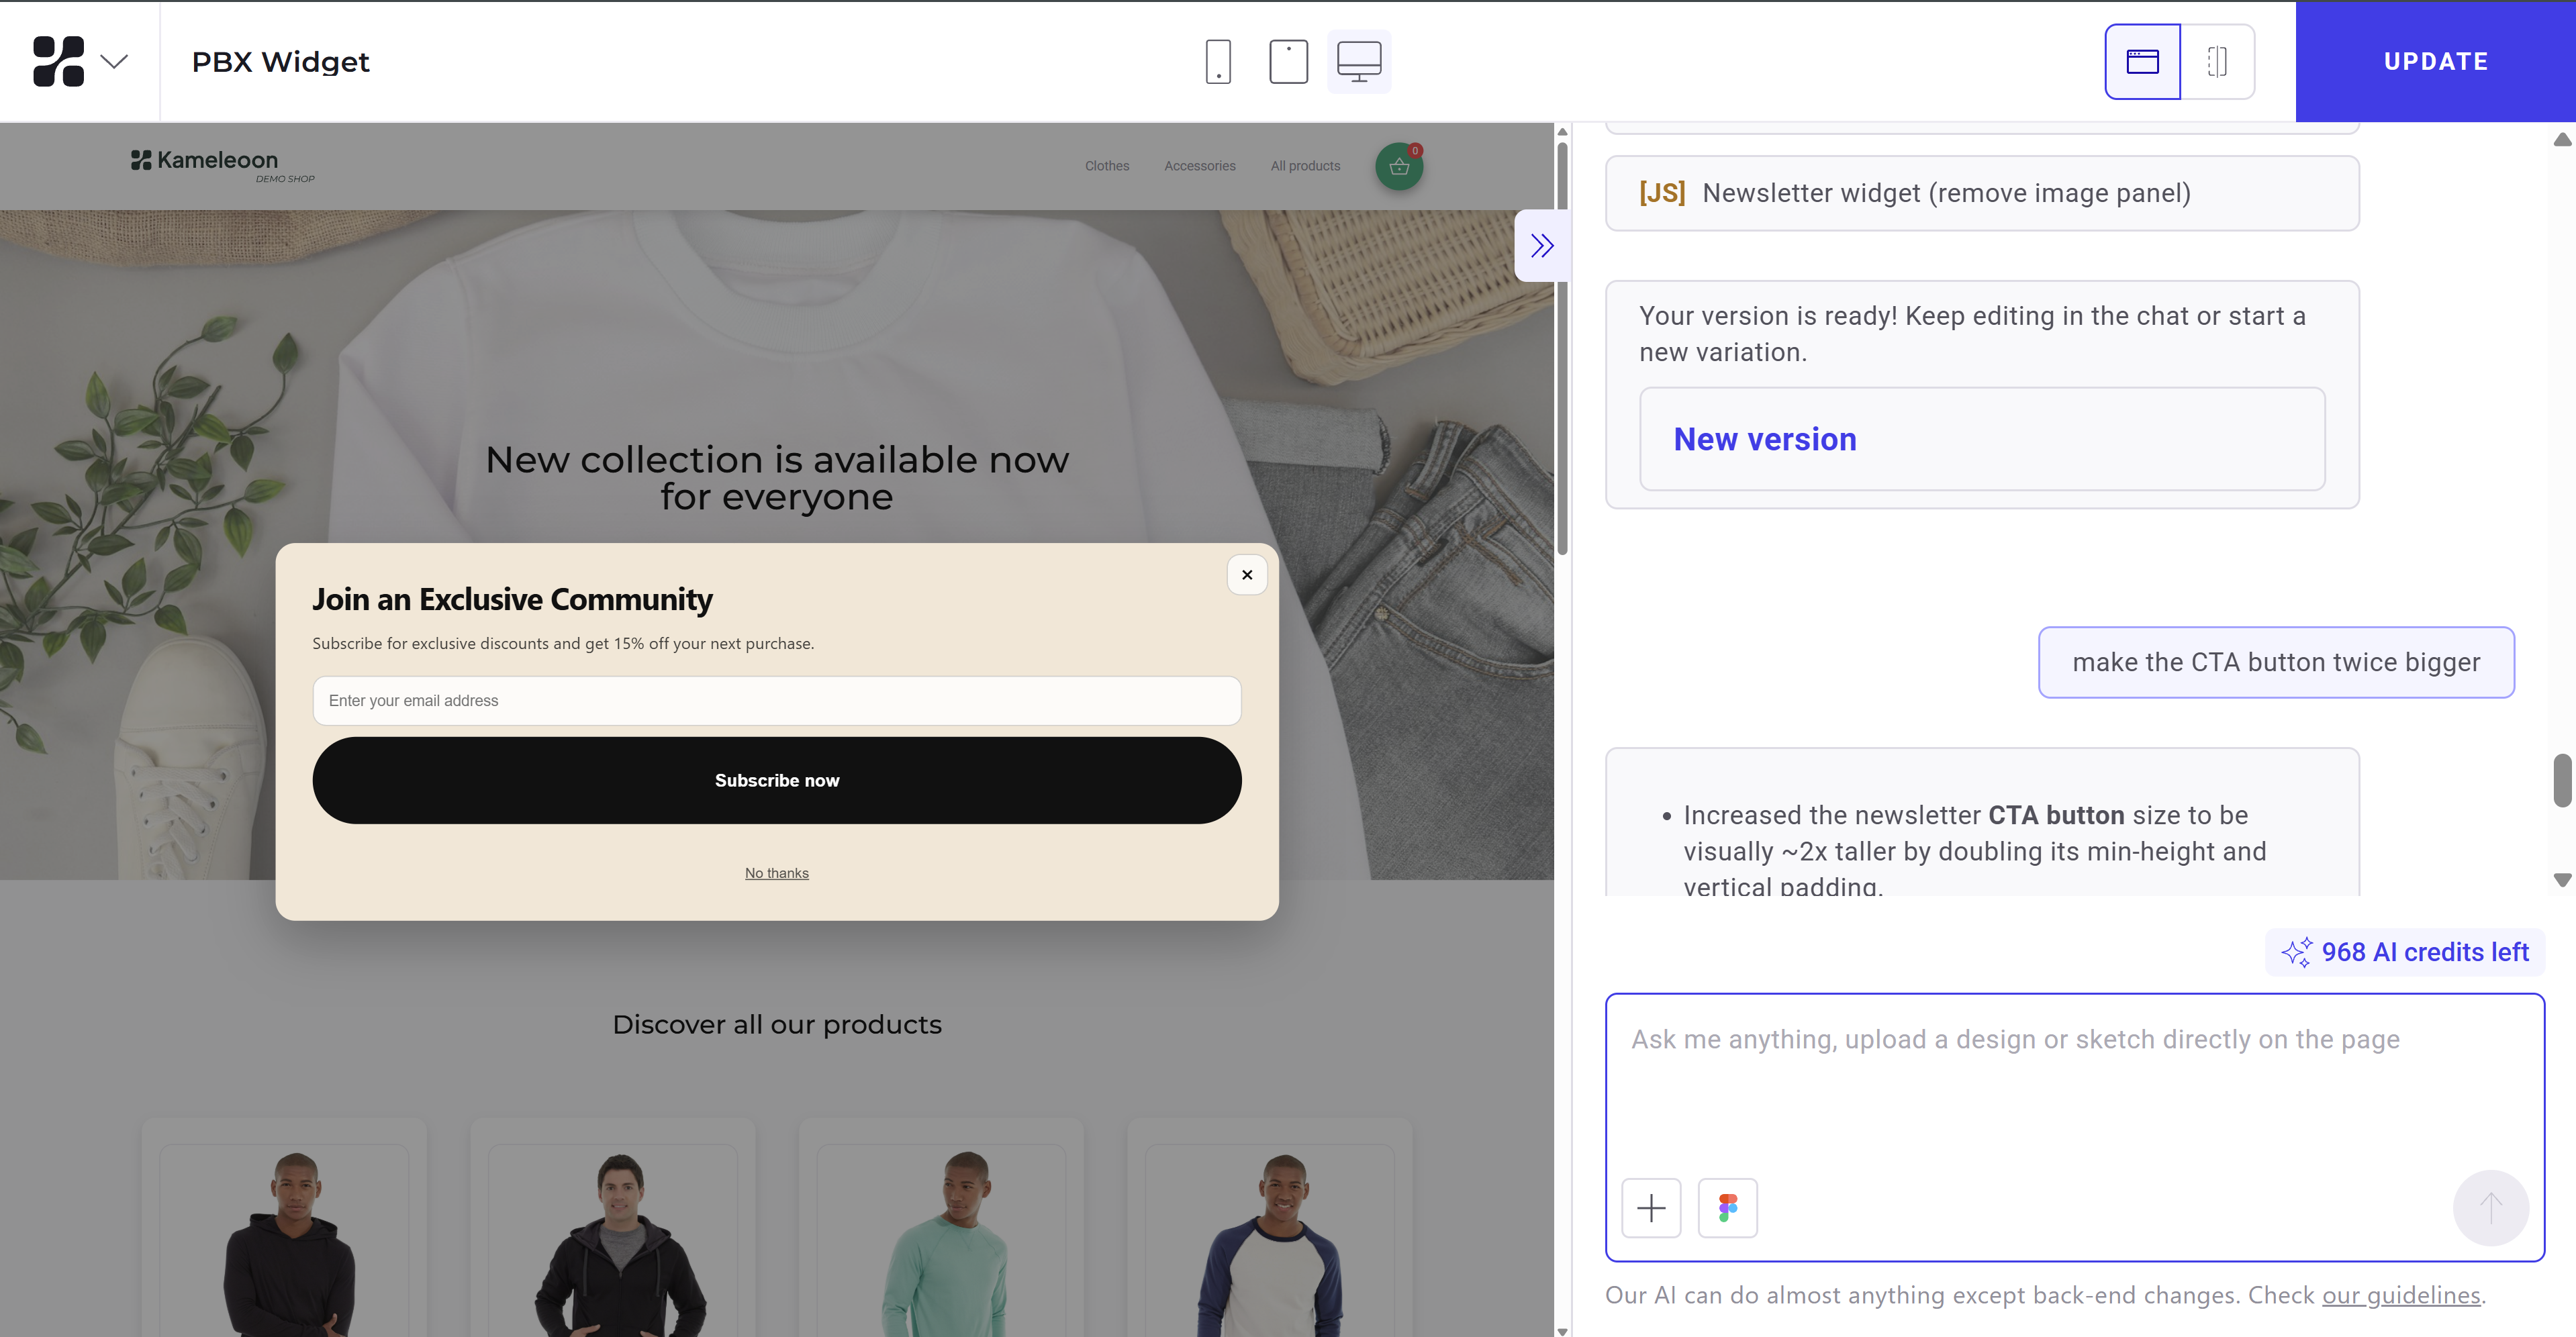
- “Change the background color to a darker beige”

- “Make the popup appear after 3 seconds”
4. Edit the widget’s code
Edit a generated widget’s JS or CSS code directly, instead of refining it through prompts.- Click the code icon in the header to open the View code tab.
- Click Edit code.
- Edit the widget’s JS or CSS code.

5. Add goals
Track user interactions (such as email submissions, button clicks, form completions, or widget displays) by adding goals to your prompt.You must configure the goals in Settings before you can track them in a PBX widget.
- Newsletter signup:
Track a goal called "Newsletter Signup" when the user clicks the Subscribe button. - CTA click:
Track a goal when the CTA button is clicked. Goal name: Promo CTA Click - Widget engagement:
Track a goal when the popup is displayed. Goal name: Widget Viewed
Generate an accessible version of your widget (optional)
Generate accessible version is in beta and available for selected customers only.
- Open the menu on a PBX version.
- Select Generate accessible version. PBX shows which accessibility rules it applies to the widget.
- PBX creates a new version of the widget and lists every change it made.
Collect widget responses in Kameleoon (optional)
If your widget asks visitors a question, such as an NPS score or a feedback comment, you need a way to gather those answers without setting up an external tool like Google Sheets. PBX detects when a widget contains a question or input and lets you collect the resulting responses directly in Kameleoon (in beta), then export them as a CSV file.1. Enable response collection
When PBX generates a widget that contains a question or input, it prompts you to choose whether to collect the responses.- In the Collect widget responses? prompt, select an option:
- Yes, collect responses via Kameleoon: Kameleoon collects each response and makes it available for CSV export.
- No, don’t collect responses: Kameleoon doesn’t collect widget response data.
- Click Apply.

2. Name the widget fields
Kameleoon uses the widget field names as the column headers in the exported CSV file, so give each field a clear, descriptive name.- Open the Widget response settings panel.
- Review the automatically generated field names, listed as Field 1, Field 2, and so on.
- Hover over a field name and click the pencil icon to edit it.
- Enter a name, then click the checkmark to confirm or the cancel icon to discard the change.
- Click Apply to save your changes.

Apply isn’t available until you make at least one change to a field name.
What’s included in the export
Kameleoon exports responses collected through a PBX widget under the same conditions as survey CSV exports. The exported file includes:- Response timestamps
- Visitor code
- Answers per question
- Campaign and variation details
Send widget responses to Google Sheets (optional)
You can configure a PBX widget to send survey and form responses directly to Google Sheets. You must first configure your Google Sheet as described in Send survey responses to Google Sheets. When writing the prompt to connect your widget to Google Sheets, follow these guidelines:- Define a clear submission trigger: Specify which element triggers the request. The trigger is typically the main CTA button (for example,
SubmitButton). - Use an external HTTP POST request: Set the method to POST and include your Google Apps Script Web App URL.
- Provide the Web App URL explicitly: Always include the full URL (for example,
https://script.google.com/macros/s/XXXXXXXX/exec). PBX can’t infer or generate this automatically. - List all elements to send: Explicitly name every field (for example,
email,rating,comment).
- Match parameter names exactly: Ensure the names match exactly across your widget element names, the request payload, and the Google Sheets column headers.
Write effective prompts
Well-written prompts significantly improve the quality of the generated widget.Use a clear structure
Effective prompts follow a logical structure:Be specific
Specific prompts produce more accurate layouts and styles. Bad prompt:Create a popup for a newsletter
Better prompt:
Create a centered modal popup for newsletter subscription with a modern ecommerce design. Include an email input field and a large CTA button offering 15% off.
Define UI elements explicitly
Always specify the elements you need, such as titles, buttons, inputs, secondary links, icons, or images. Example:Describe behavior
PBX can generate widget logic if you specify it. Examples:Show popup after 5 secondsClose popup when clicking outsideClose popup when clicking "No thanks"
Iterate instead of rewriting
Rather than rewriting the entire prompt, refine your widget step-by-step. Iterative prompting improves results efficiently. Examples:Make the CTA button darkerIncrease padding inside the popupAdd rounded corners to the input field
FAQ
Can I edit PBX widgets or AI-generated widgets in the Widget Studio?
Can I edit PBX widgets or AI-generated widgets in the Widget Studio?
PBX widgets and AI-generated widgets have different editing requirements:
- PBX widgets: Use natural language to create these widgets. You can only edit them within the PBX interface. You can’t open or edit PBX widgets in the Widget Studio.
- AI-generated widgets (Widget Studio): When you use the Create with AI feature in the Widget Studio, Kameleoon uses standard Widget Studio elements. You can edit these widgets manually in the Widget Studio. You can’t open or edit these widgets in PBX.