Add a new project
You can set up as many projects in your account as your plan allows. A project can be a website, a mobile app, or any environment (for example, staging or production) you use internally. To add a new project:- Log in to your Kameleoon account.
- Click Admin > Projects.
- Click New project.
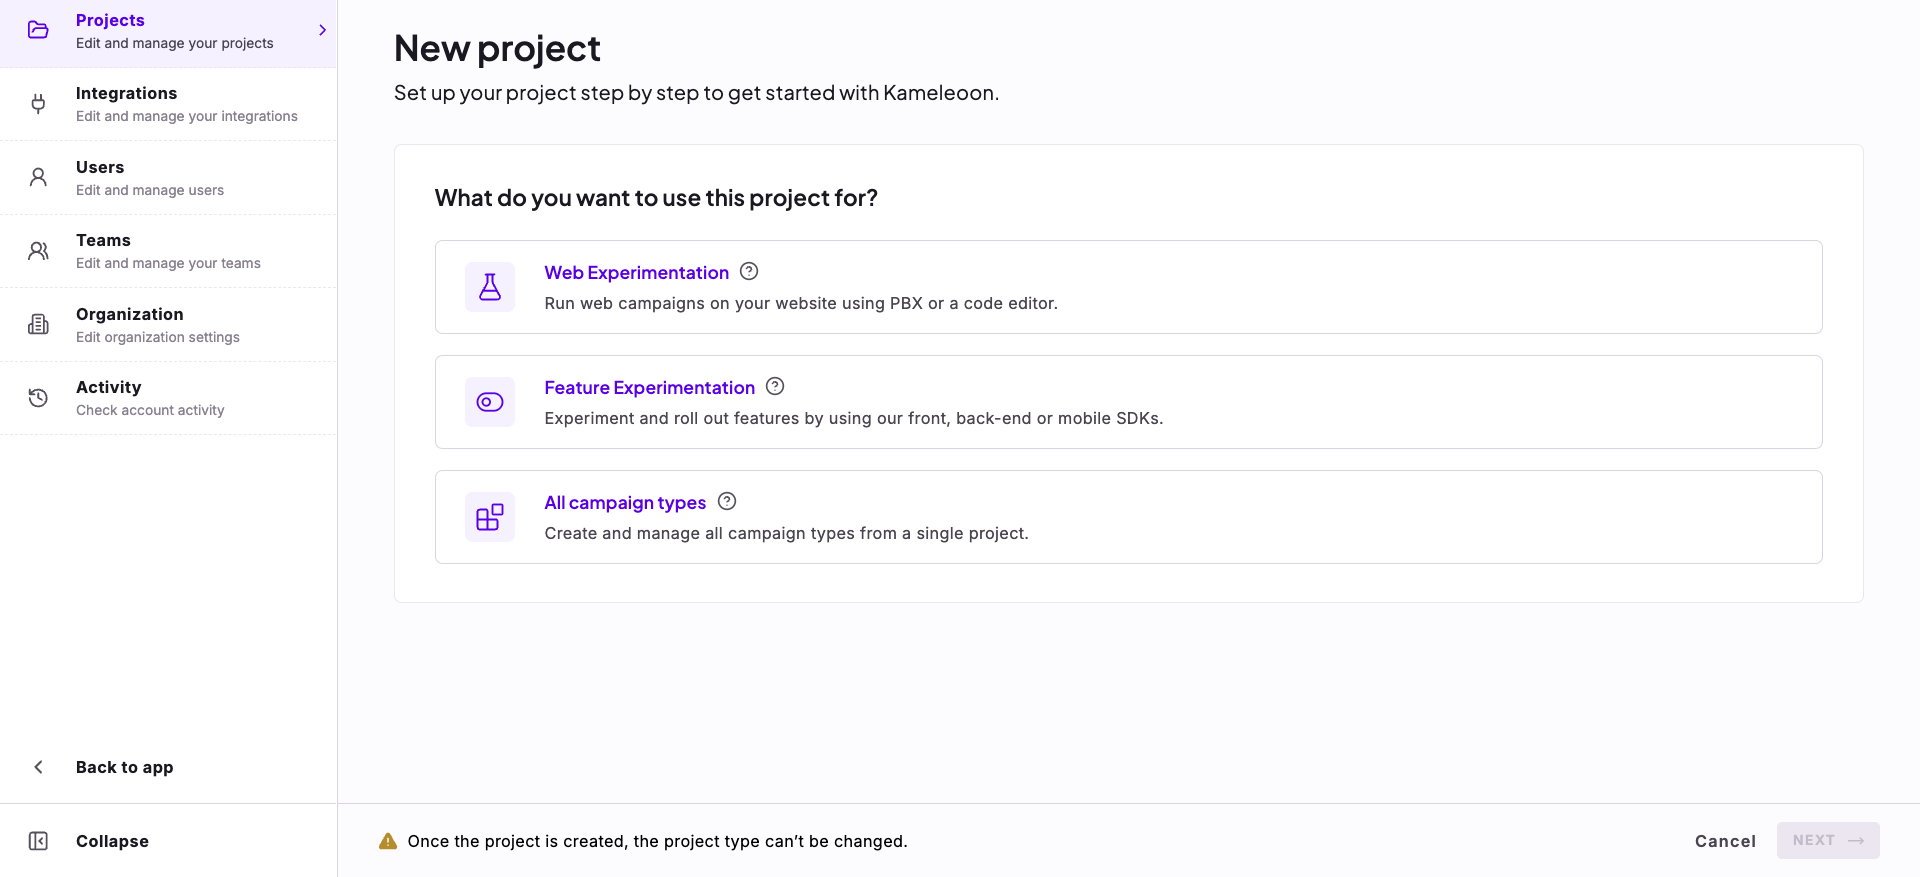
- Under What do you want to use this project for?, select a project type. After you create the project, you can’t change its type.
- Web Experimentation: Run web campaigns on your website using Prompt-Based Experimentation (PBX) or a Code editor. You choose how to install Kameleoon on your website in a later step.
- Feature Experimentation: Experiment and roll out features by using frontend, backend, or mobile SDKs. You install Kameleoon with the Kameleoon SDKs.
- All campaign types: Create and manage all campaign types from a single project. You install Kameleoon on your website, and with SDKs for Feature Experimentation.
- If you selected Feature Experimentation, under What platform is this project for?, select Web / Backend or Mobile app:
- Web / Backend: Experiment on websites and backend-driven features.
- Mobile app: Experiment on native mobile app experiences.

- Click Next.
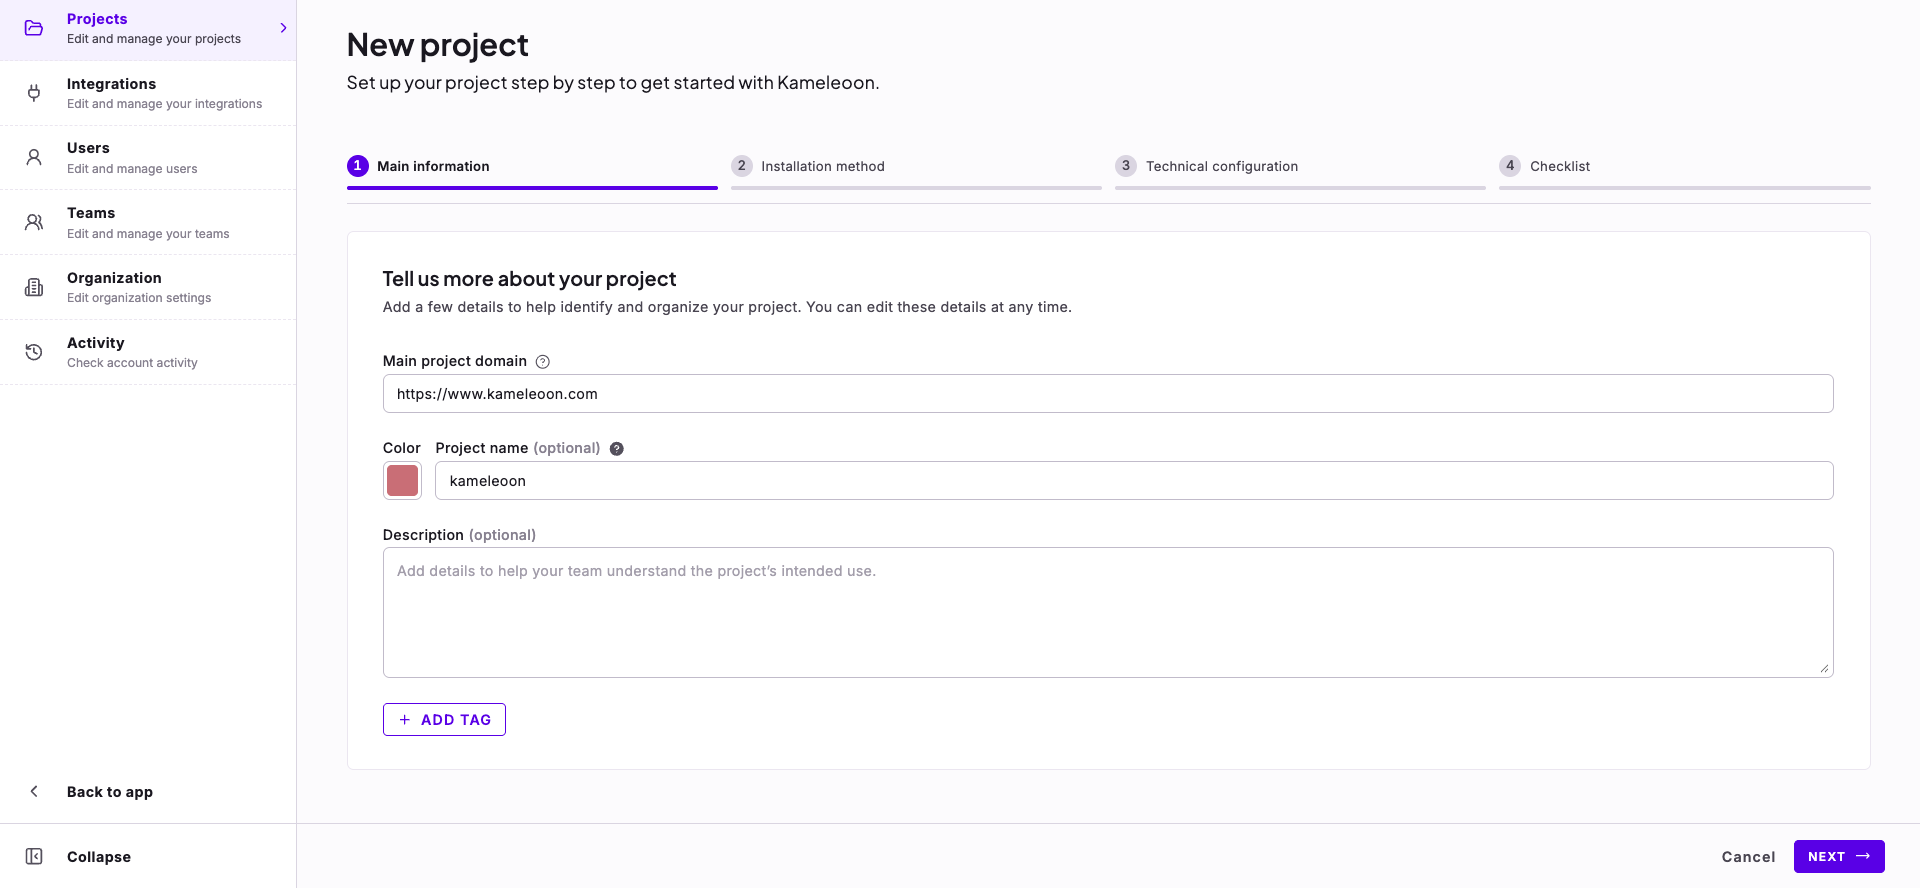
- Enter the project’s main information:
- Main project domain: The main domain associated with the project. Kameleoon can run experiments and personalizations across multiple domains and subdomains, so the main domain is where Kameleoon configures your JavaScript snippet by default. A project with the Mobile app platform has no Main project domain field.
- Color: Select a color for the project.
- Project name (optional): A clear, recognizable name that makes the project easier to find across dashboards and lists. Kameleoon displays the name across the platform instead of the project URL. If you leave it blank, Kameleoon displays the project URL. A project with the Mobile app platform requires a project name.
- Description (optional): Details that help your team understand the project’s intended use.
- Tags: Click Add tag to add a tag.
- Click Next and complete the remaining steps. See Project setup steps.
Project setup steps
A step-by-step form guides you through installing Kameleoon on a new project. In an existing project, the same steps open when you click Edit in the Installation method or Technical configuration section of the Setup tab of an existing project, without the Main information step. The steps you see depend on the project type and the installation method you choose.Steps by project type
Two installation choices change the steps further. If you select Shopify as the installation method, Kameleoon skips the Technical configuration step. If you select Tag Manager, the Loading mode options and the dynamic website options don’t appear.
On the Main information step, click Next to continue, or click Cancel to exit without saving. On the Installation method and Technical configuration steps, click Back to return to the previous step, Next to continue, or Save for later to save your progress. On the Checklist step, click Back, or click Complete setup when you finish your tasks. When you open the steps from the Setup tab of an existing project, the last button is Save changes instead of Complete setup.
When you click Save for later, Kameleoon saves the project as a draft. The project appears on the Projects page with the Draft status. When you click Complete setup, Kameleoon saves the project and sets its status to Enabled. To finish a draft, click Edit on the project’s row, then complete its required information in the project creation flow.
Installation method
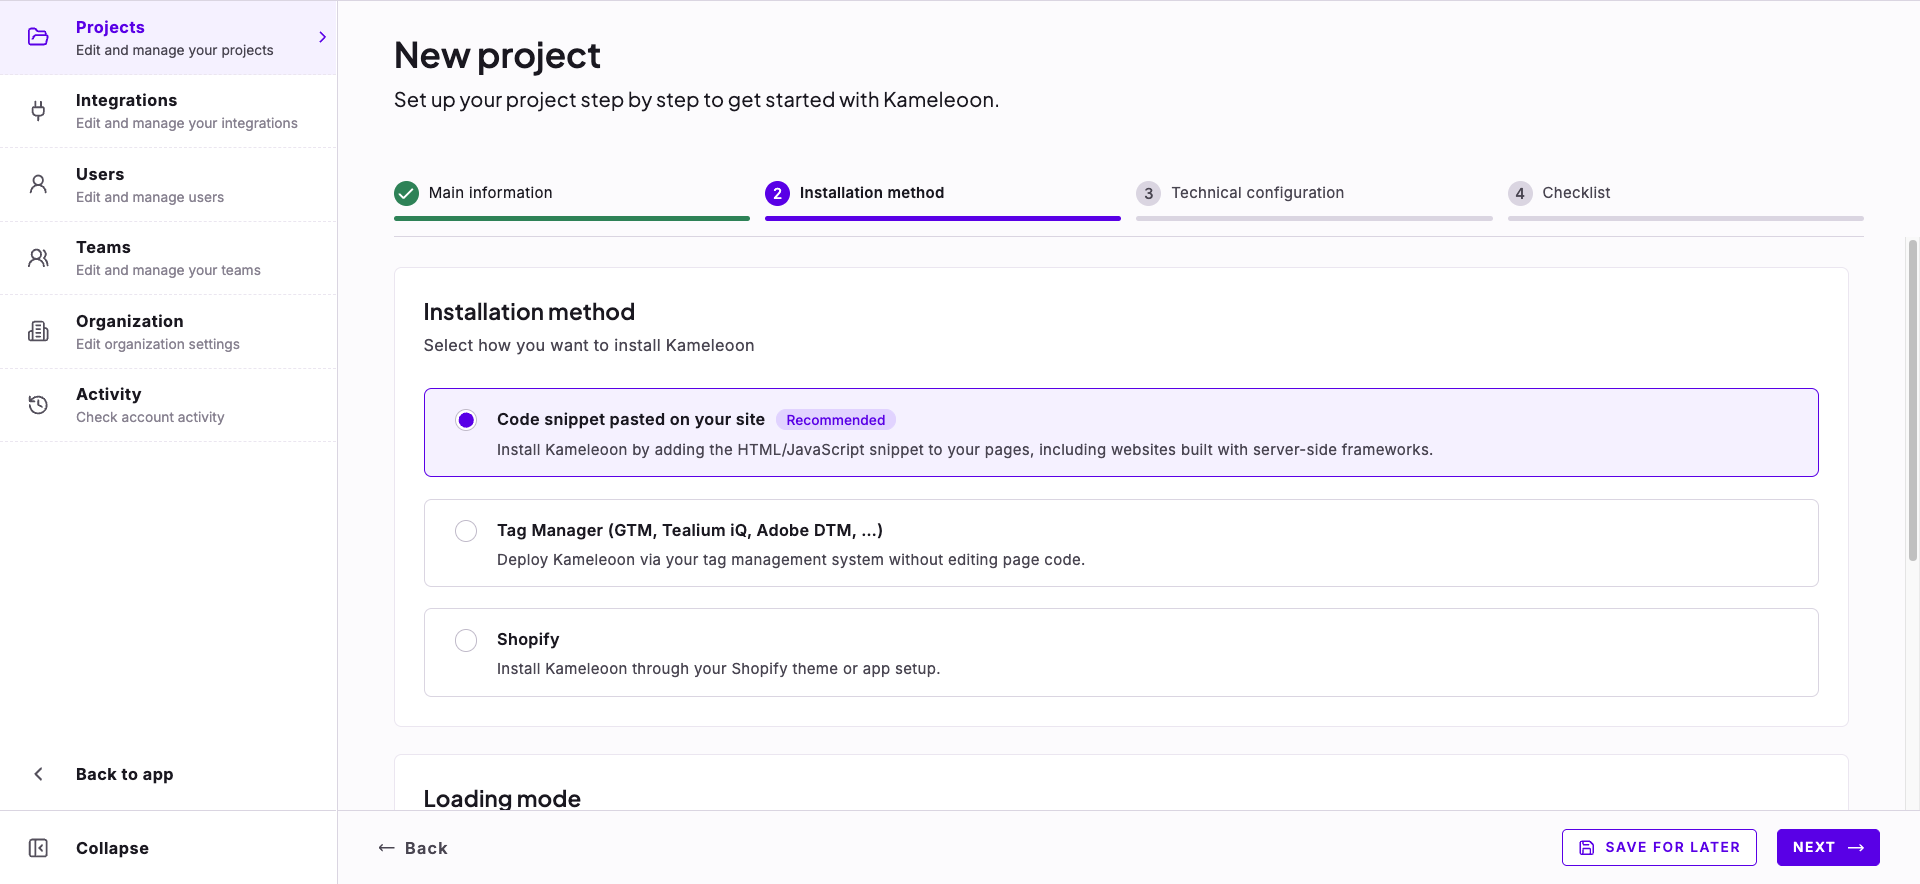
The Installation method step defines how Kameleoon runs on your website. It applies to Web Experimentation and All campaign types projects. Under Installation method, select one of the following options:- Code snippet pasted on your site (recommended): Install Kameleoon by adding the HTML/JavaScript snippet to your pages, including websites built with server-side frameworks.
- Tag Manager (GTM, Tealium iQ, Adobe DTM, …): Deploy Kameleoon through your tag management system without editing page code.
- Shopify: Install Kameleoon through your Shopify theme or app setup.
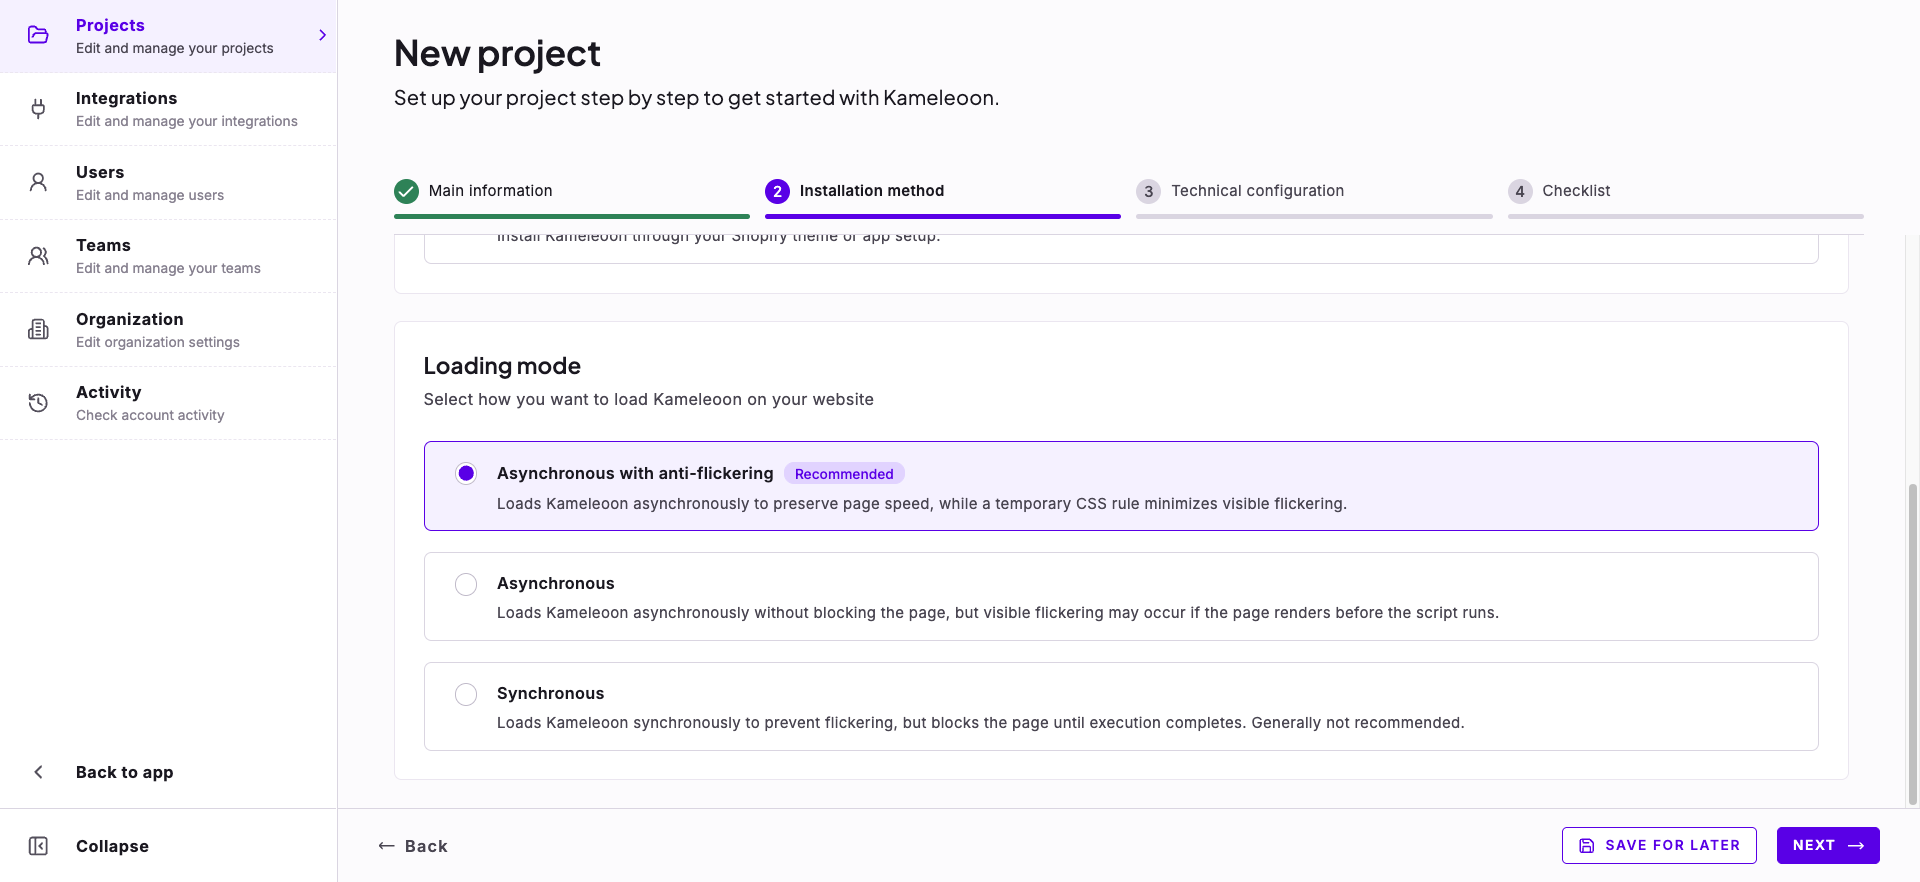
- Asynchronous with anti-flickering (recommended): Loads Kameleoon asynchronously to preserve page speed, while a temporary CSS rule minimizes visible flickering.
- Asynchronous: Loads Kameleoon asynchronously without blocking the page, but visible flickering may occur if the page renders before the script runs.
- Synchronous: Loads Kameleoon synchronously to prevent flickering, but blocks the page until execution completes. Kameleoon generally doesn’t recommend this mode.
Technical configuration
The Technical configuration step defines how your site, domains, and hosting work with Kameleoon. It applies to Web Experimentation and All campaign types projects, except when you select Shopify as the installation method. With the Tag Manager installation method, the step starts directly with Resource hosting.
Dynamic website support
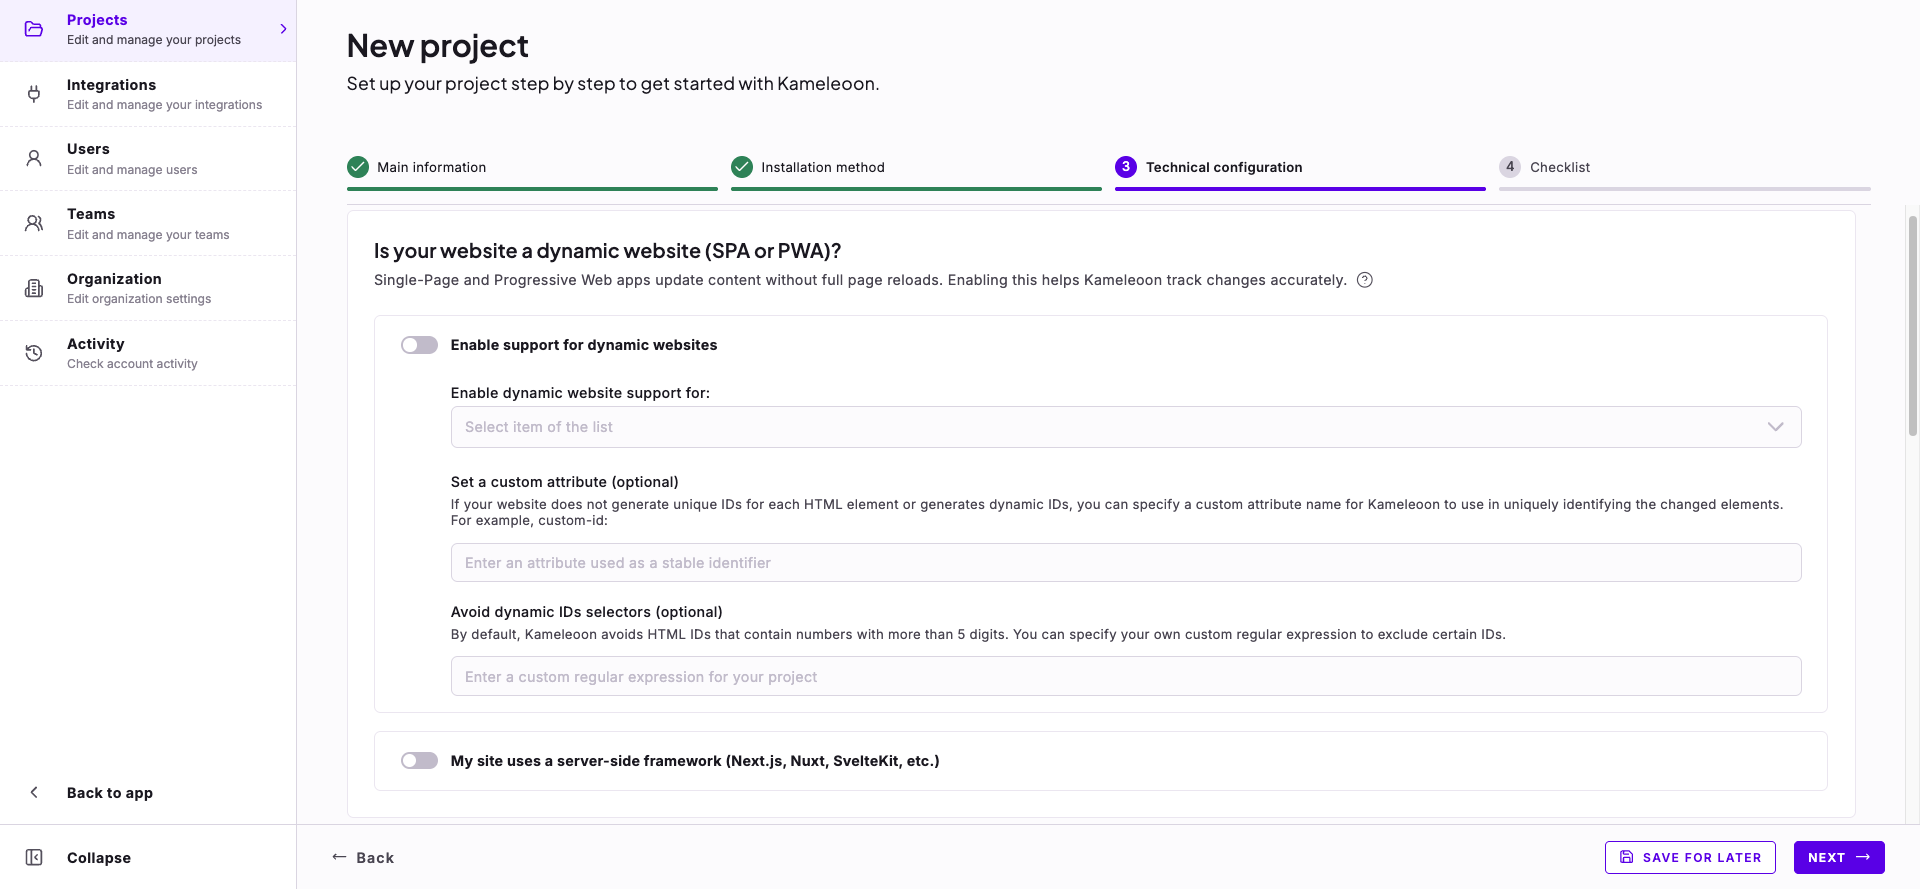
With the Code snippet pasted on your site installation method, the step starts with the question Is your website a dynamic website (SPA or PWA)?. A single-page app (SPA) or Progressive Web App (PWA) loads content dynamically without reloading the page. Turning on dynamic website support ensures Kameleoon detects URL changes and runs scripts correctly for A/B testing, personalization, and tracking.- Enable support for dynamic websites: Turn on this toggle if your website is a web app with virtual URLs.
- Enable dynamic website support for: Select the scope. You must select a scope when the toggle is on. The options are Entire website and Chosen elements in the visual editor.
- Set a custom attribute (optional): If your website doesn’t generate unique IDs for each HTML element, or generates dynamic IDs, enter an attribute name (for example,
custom-id) that Kameleoon uses to uniquely identify the changed elements. - Avoid dynamic IDs selectors (optional): By default, Kameleoon avoids HTML IDs that contain numbers with more than 5 digits. Enter your own regular expression to exclude other IDs.
Resource hosting
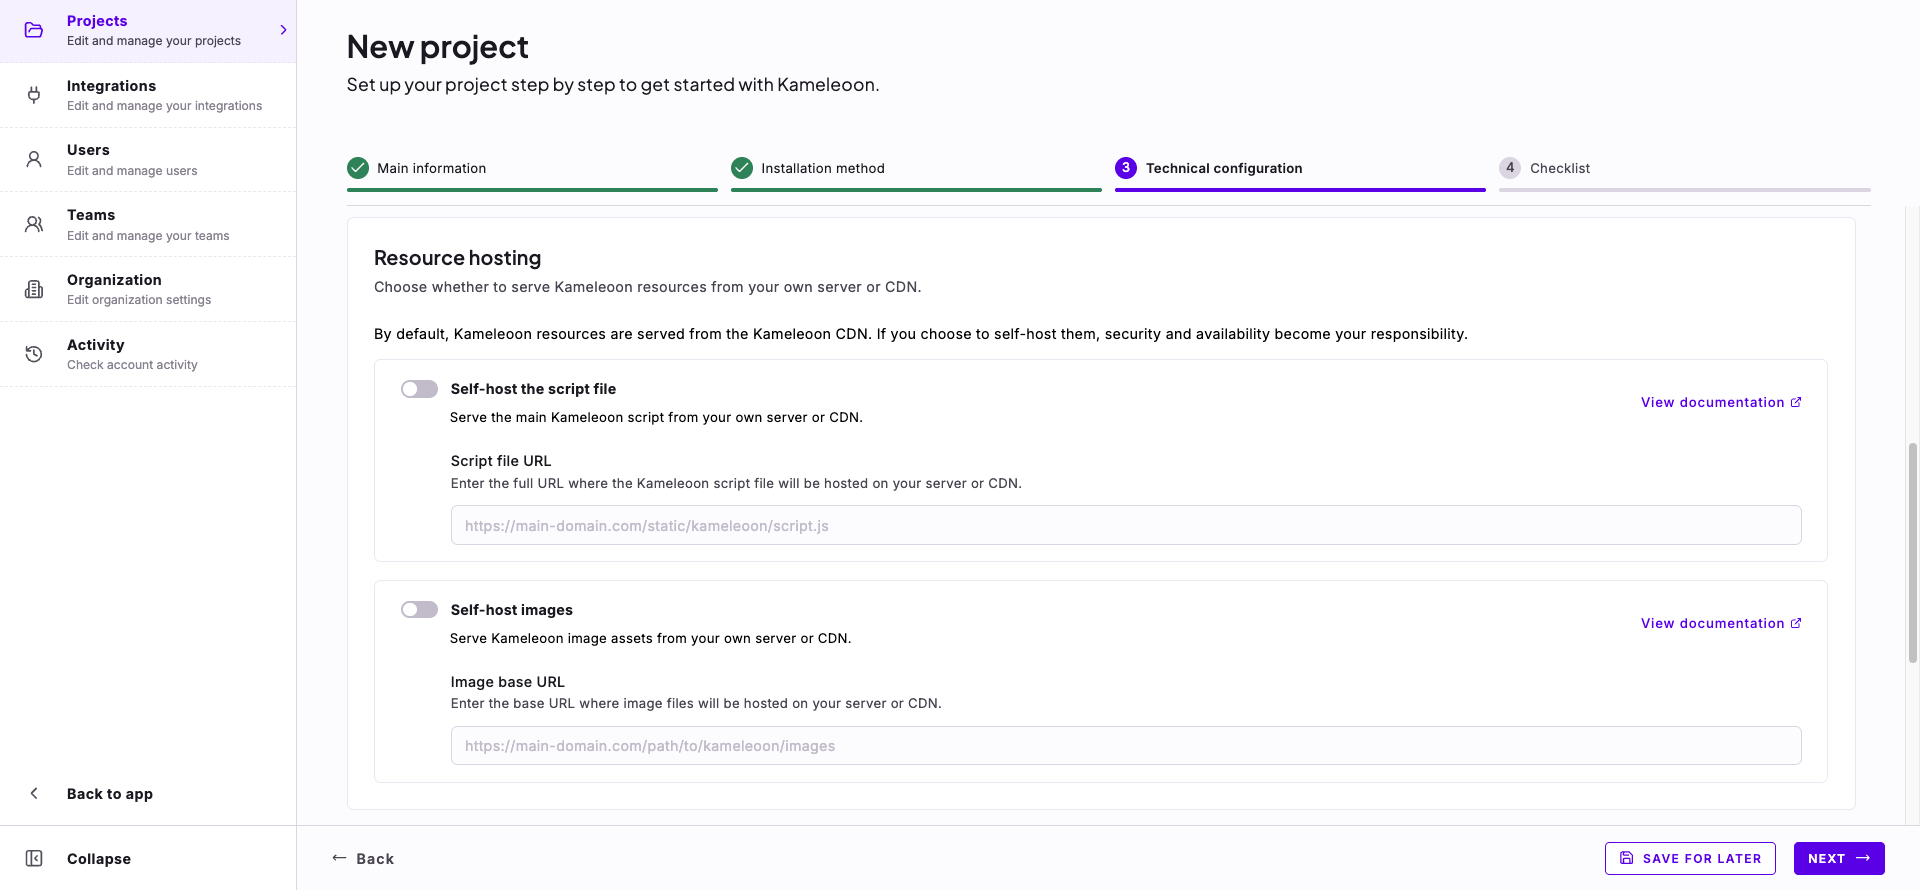
By default, Kameleoon serves its resources from the Kameleoon CDN. If you choose to self-host them, security and availability become your responsibility. Each option has a View documentation link.- Self-host the script file: Serves the main Kameleoon script from your own server or CDN. Enter the full URL where you host the script file in Script file URL.
- Self-host images: Serves Kameleoon image assets from your own server or CDN. Enter the base URL where you host image files in Image base URL. Use image self-hosting only through a CDN that provides a built-in replication mechanism.
Domains and subdomains
By default, Kameleoon allows only your main domain and its subdomains (*.example.com). Only listed domains and subdomains can use the Graphic editor. They also apply when experiment targeting relies on visitor data shared in real time between the main domain and its subdomains.
Kameleoon pre-fills the list with a wildcard entry for your main domain. To add another domain, enter it in the field below the list and click Add domain. To remove a domain, click the X at the end of its row.
Under Cross-domain tracking, turn on Track visitors across listed subdomains to share visitor data across the listed domains for real-time targeting.

example.com and payment.example.com). Kameleoon doesn’t treat your visitors as new visitors when they navigate across your domains and subdomains, and their experiences stay consistent across your digital properties. Cross-domain tracking is only required if you intend to use session data across all your domains for advanced behavioral targeting. For more information, see Unify session data storage across subdomains.
Checklist
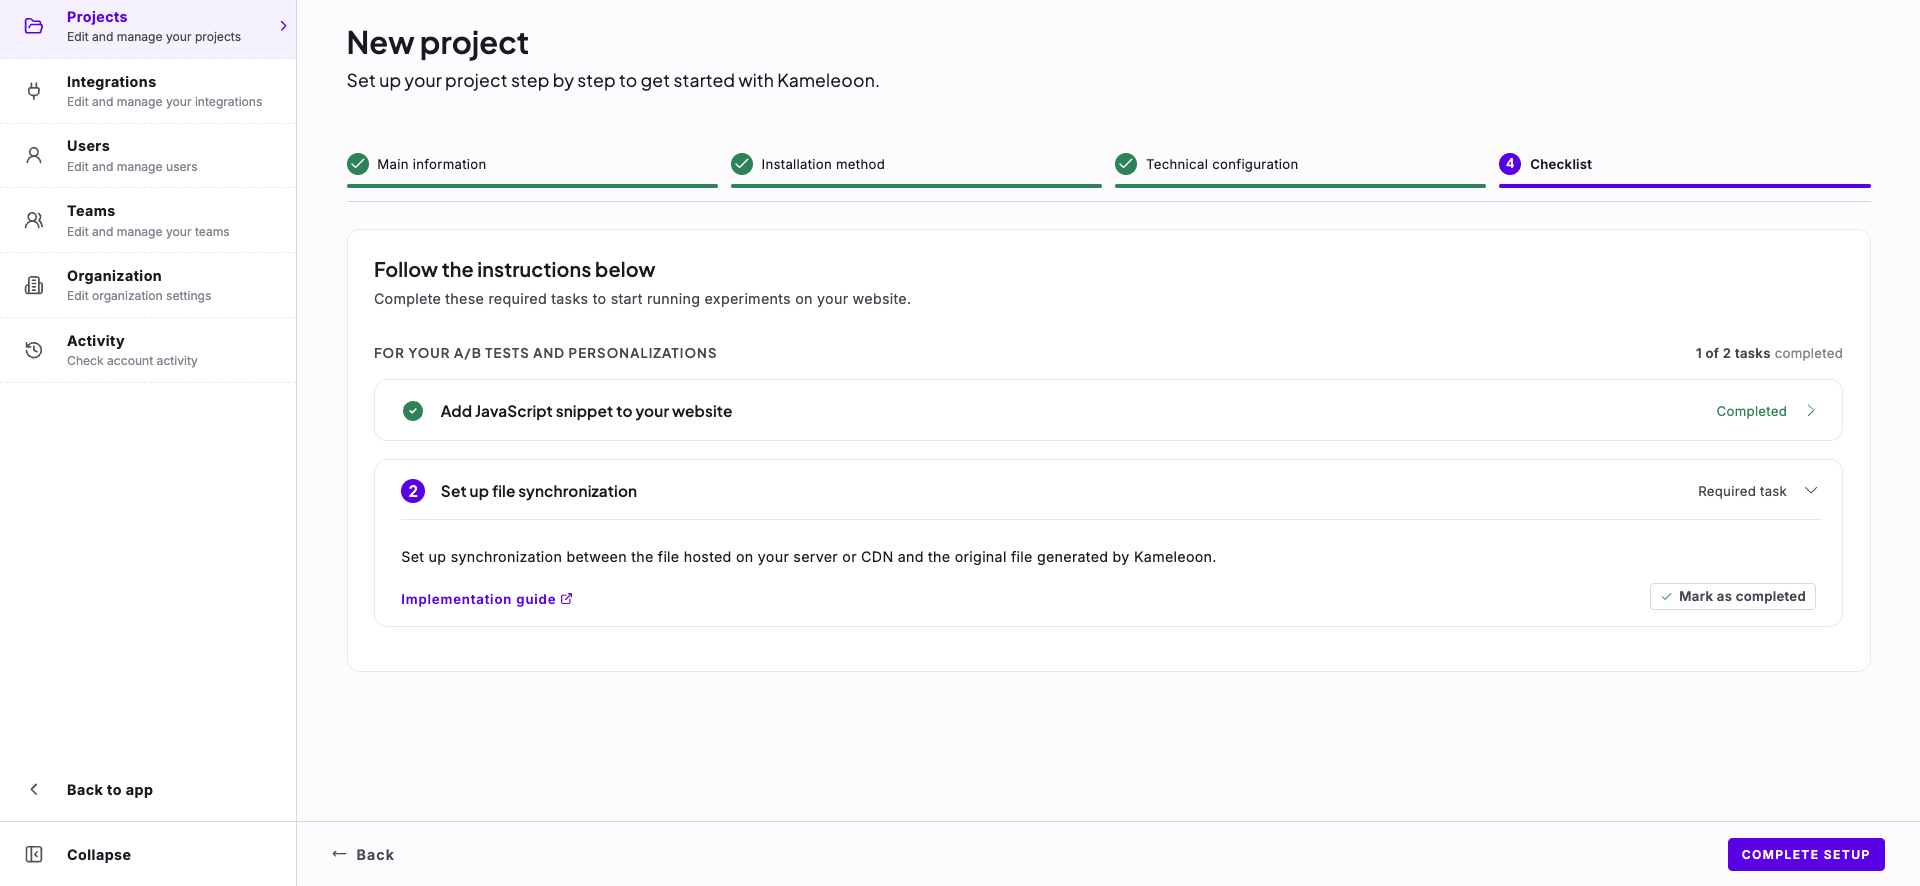
The Checklist step lists the required tasks you complete to start running experiments. It can also list optional tasks. Open a task to see its instructions, and click Mark as completed when you finish it. Each group of tasks shows how many of its tasks you completed, for example 0 of 2 tasks completed. When you finish, click Complete setup. The tasks appear in up to two groups:- For your A/B tests and personalizations: Tasks to install Kameleoon on your website. This group appears for Web Experimentation and All campaign types projects.
- For your flags and feature experiments: Tasks to install a Kameleoon SDK. This group appears for Feature Experimentation and All campaign types projects.

Tasks for web experiments and personalizations
The For your A/B tests and personalizations group lists the tasks to install Kameleoon on your website. The tasks depend on the installation method you selected.Code snippet tasks
With the Code snippet pasted on your site installation method, the checklist includes the following tasks. Add JavaScript snippet to your website installs Kameleoon on your pages. Click Copy, paste the snippet right after the<head> tag in your web pages, before any other scripts, and click Mark as completed. An Implementation guide link opens the installation instructions.
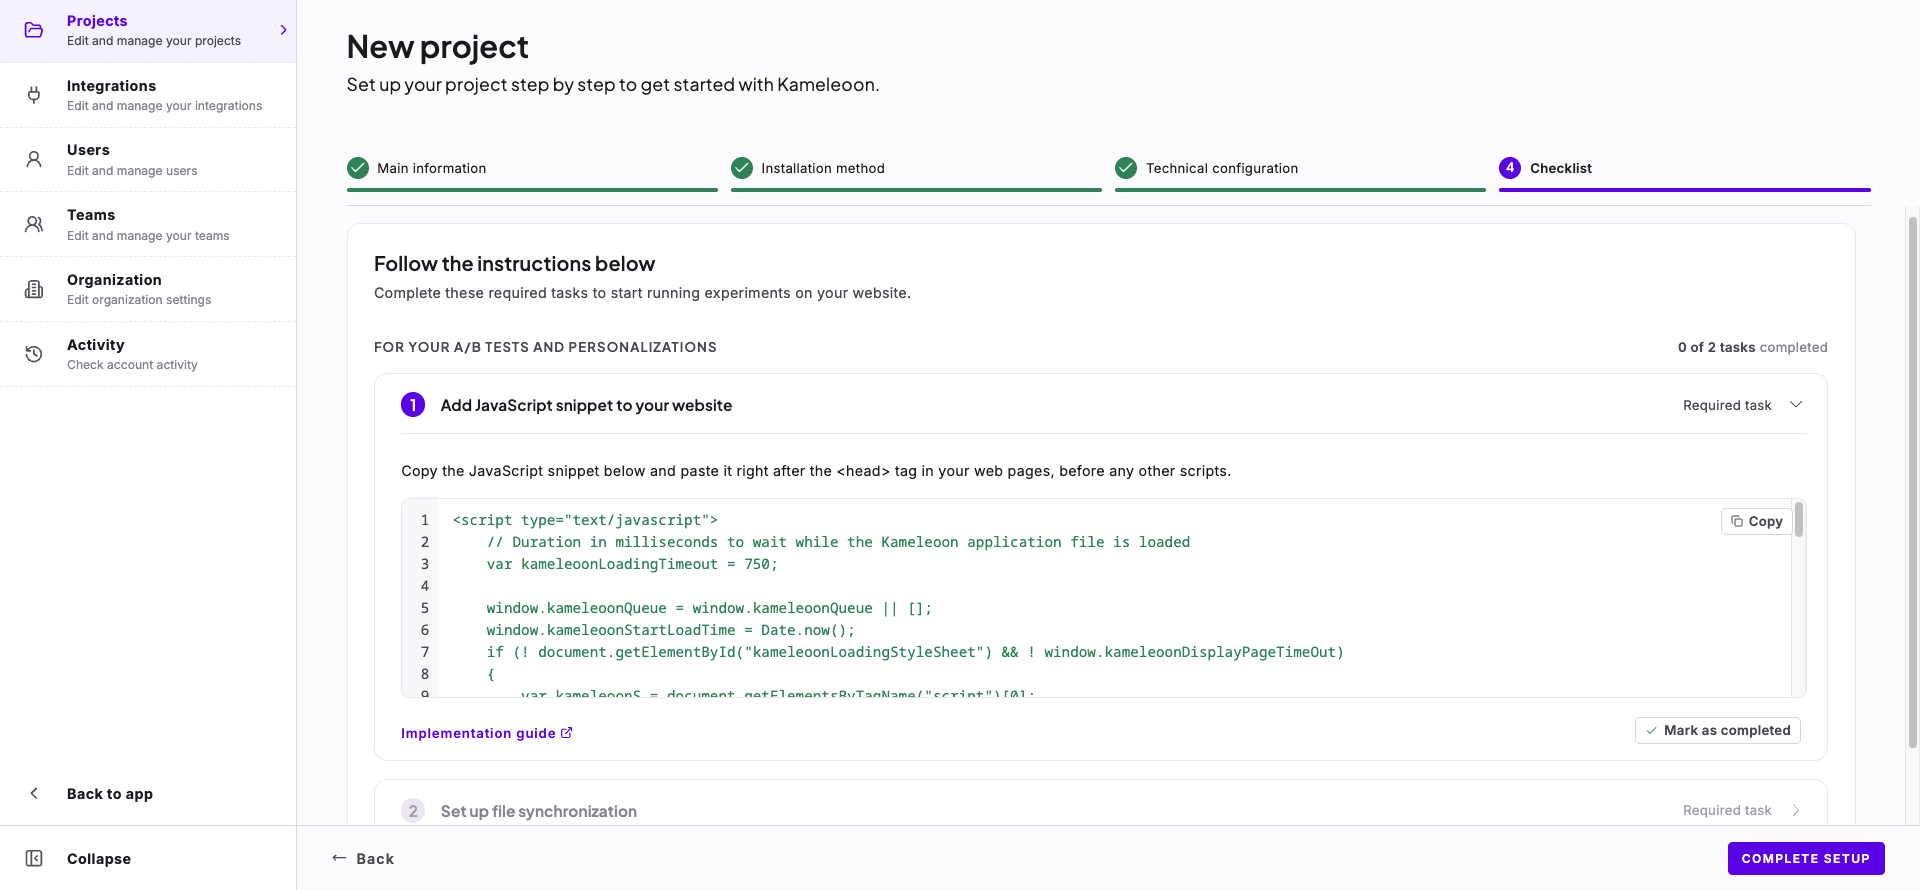
<head> tag in your web pages, before any other scripts.
Set up file synchronization covers keeping a self-hosted copy of the Kameleoon application file current. The application file is dynamic: its contents change every time an experiment or personalization status changes on the platform, and every time you change the configuration. Set up synchronization between the file hosted on your server or CDN and the original file that Kameleoon generates, then click Mark as completed. Your CDN provides its own interface for this configuration. On a standard HTTP server such as nginx or Apache, use a cron job that runs a wget command to retrieve the file every 5 minutes. For commands and details, see Application file and public resources self-hosting. The task appears for the code snippet and tag manager installation methods, and an Implementation guide link opens the instructions.
Tag manager tasks
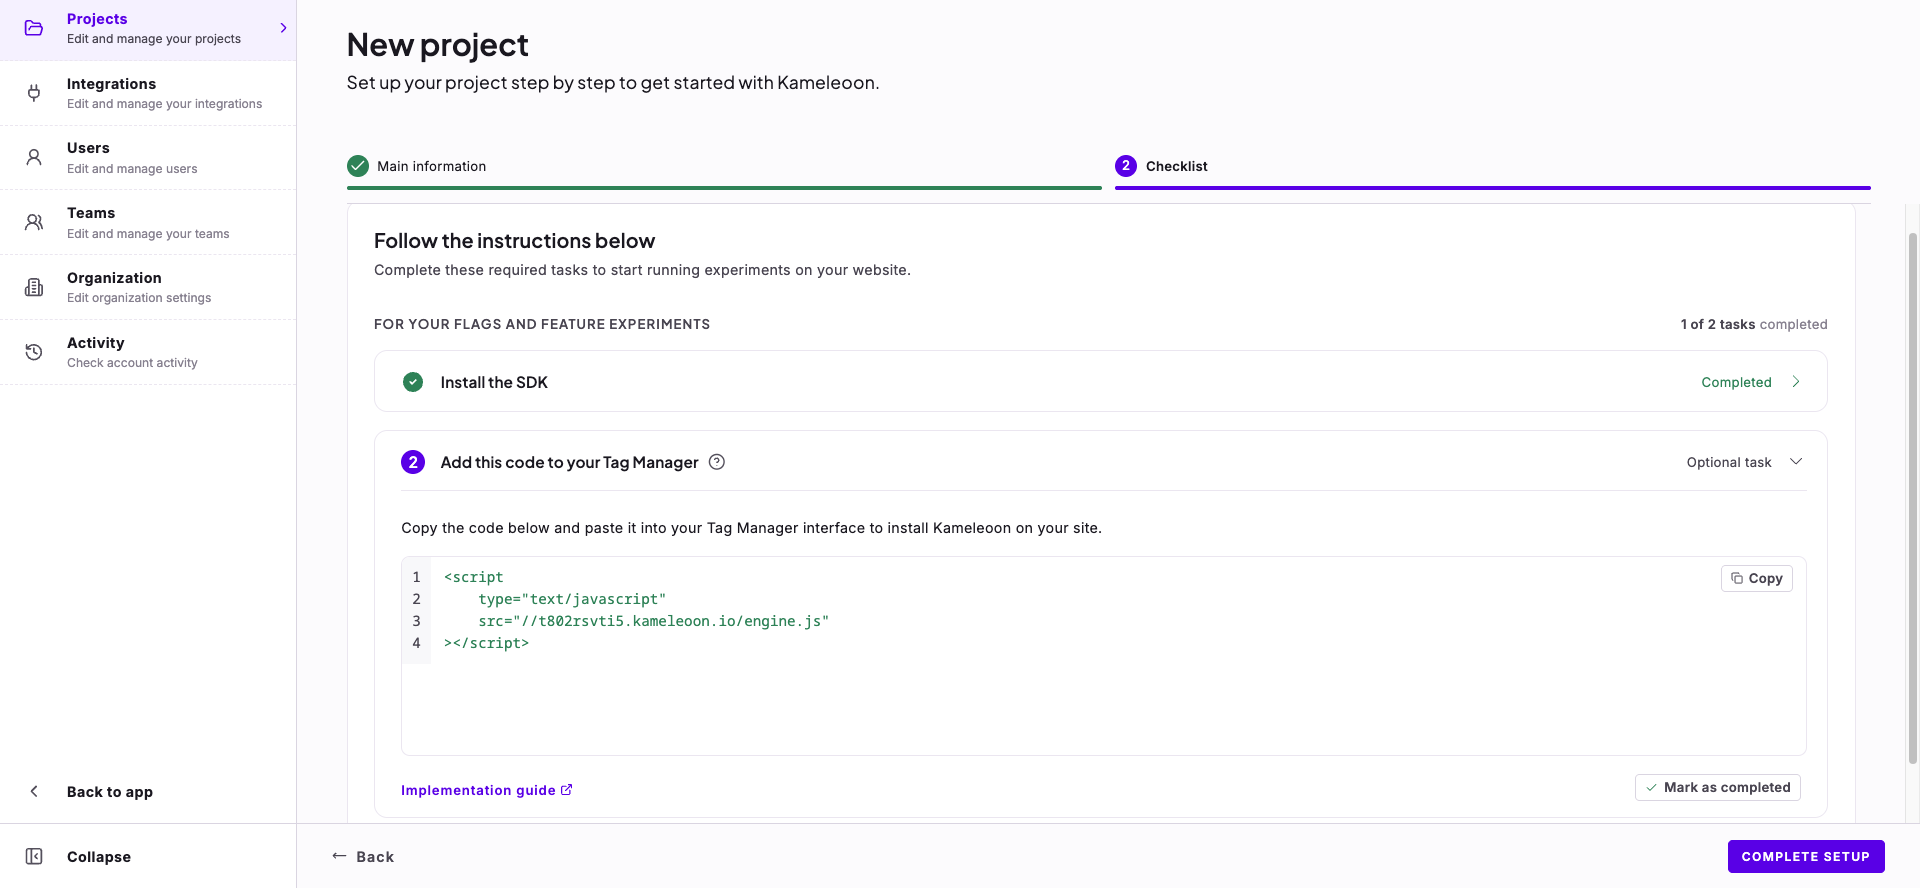
With the Tag Manager installation method, the checklist includes the following tasks. Add this code to your Tag Manager installs Kameleoon through your tag management system. Click Copy, paste the code into your tag manager interface, and click Mark as completed. An Implementation guide link opens the instructions.

Shopify tasks
With the Shopify installation method, the group has a single task. Installation via the Shopify app installs Kameleoon through the Kameleoon integration in the Shopify App Store. Copy the project sitecode, use it in Shopify to install Kameleoon on your site, and click Mark as completed. A link in the task opens the installation guidelines.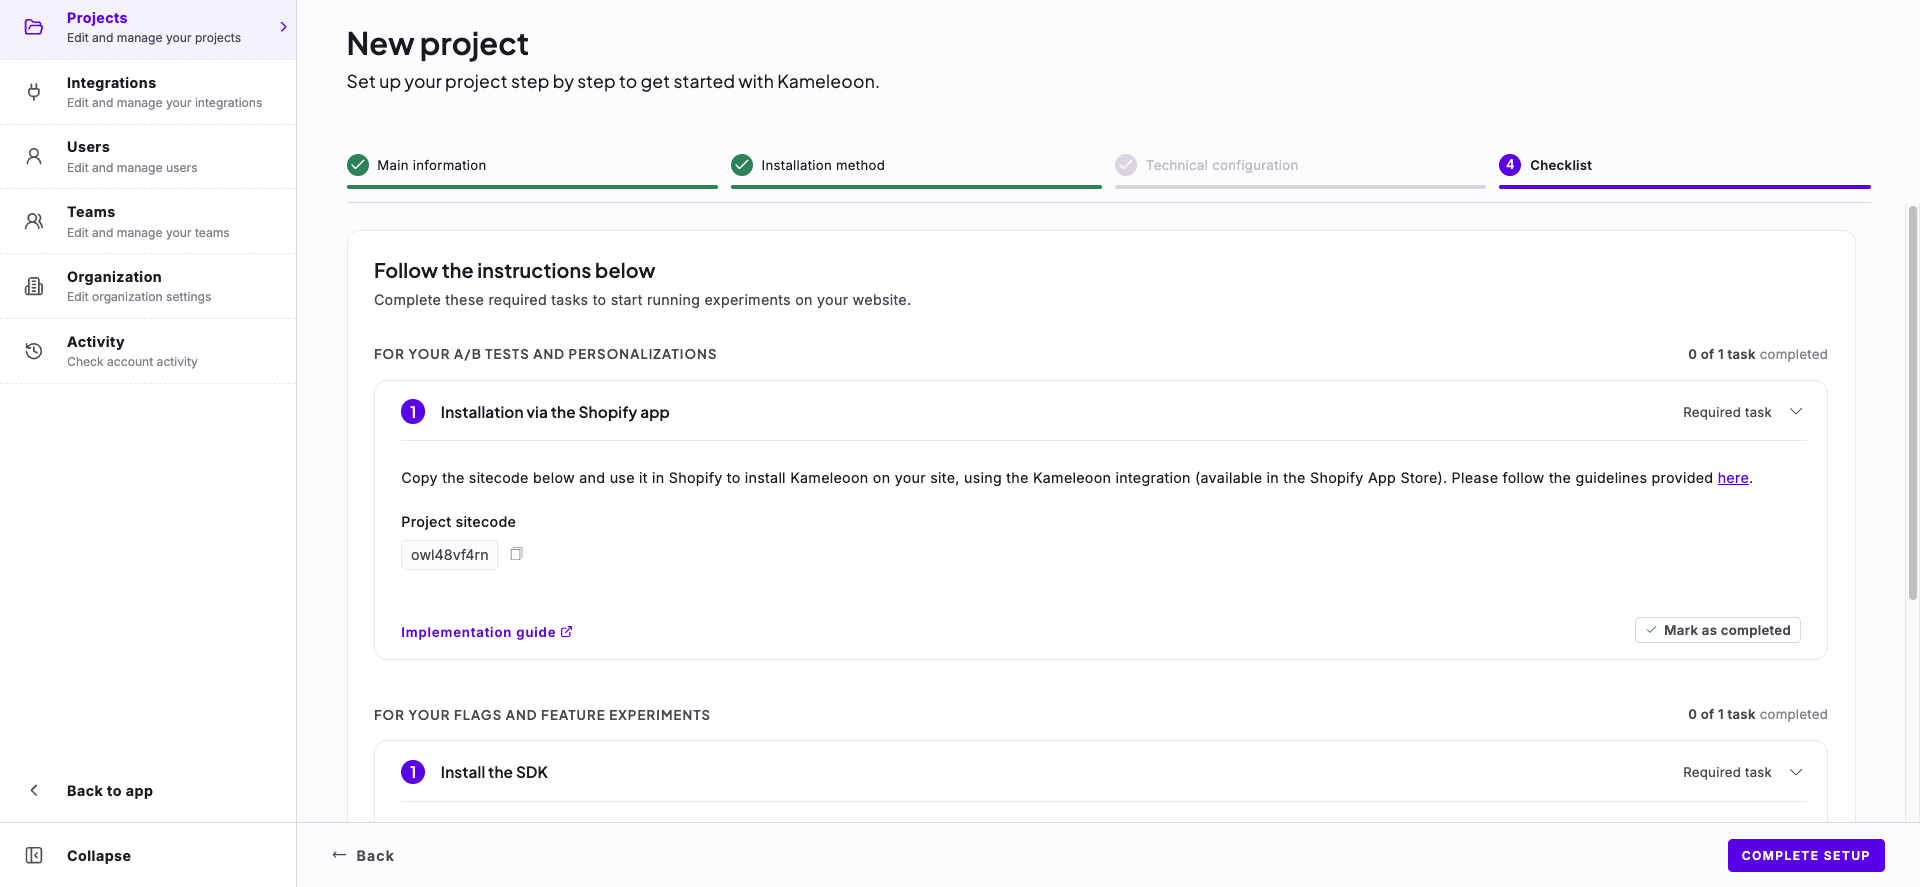
Cross-subdomain tracking task
If you turned on Track visitors across listed subdomains in the Technical configuration step, the checklist also includes Host the Kameleoon static HTML file. The task enables cross-subdomain targeting across your listed subdomains. Download the HTML file, upload it to your main domain’s static directory so it’s publicly accessible, enter the full URL of the hosted file, and click Mark as completed.
Tasks for flags and feature experiments
The For your flags and feature experiments group lists the tasks to install a Kameleoon SDK.Install the SDK task
Install the SDK is a required task. Follow the SDK installation guide for your programming language, and use the sitecode linked to your project to initialize the SDK. The task shows the Project sitecode with a copy button. Select your SDK in the Select your SDK list and click Apply. The SDK appears in a table below the list, with a link to its documentation on the left side of the table. Click Mark as completed when you finish. To install Kameleoon on a site, web app, or mobile app with an SDK, see the documentation on client-side and mobile SDKs.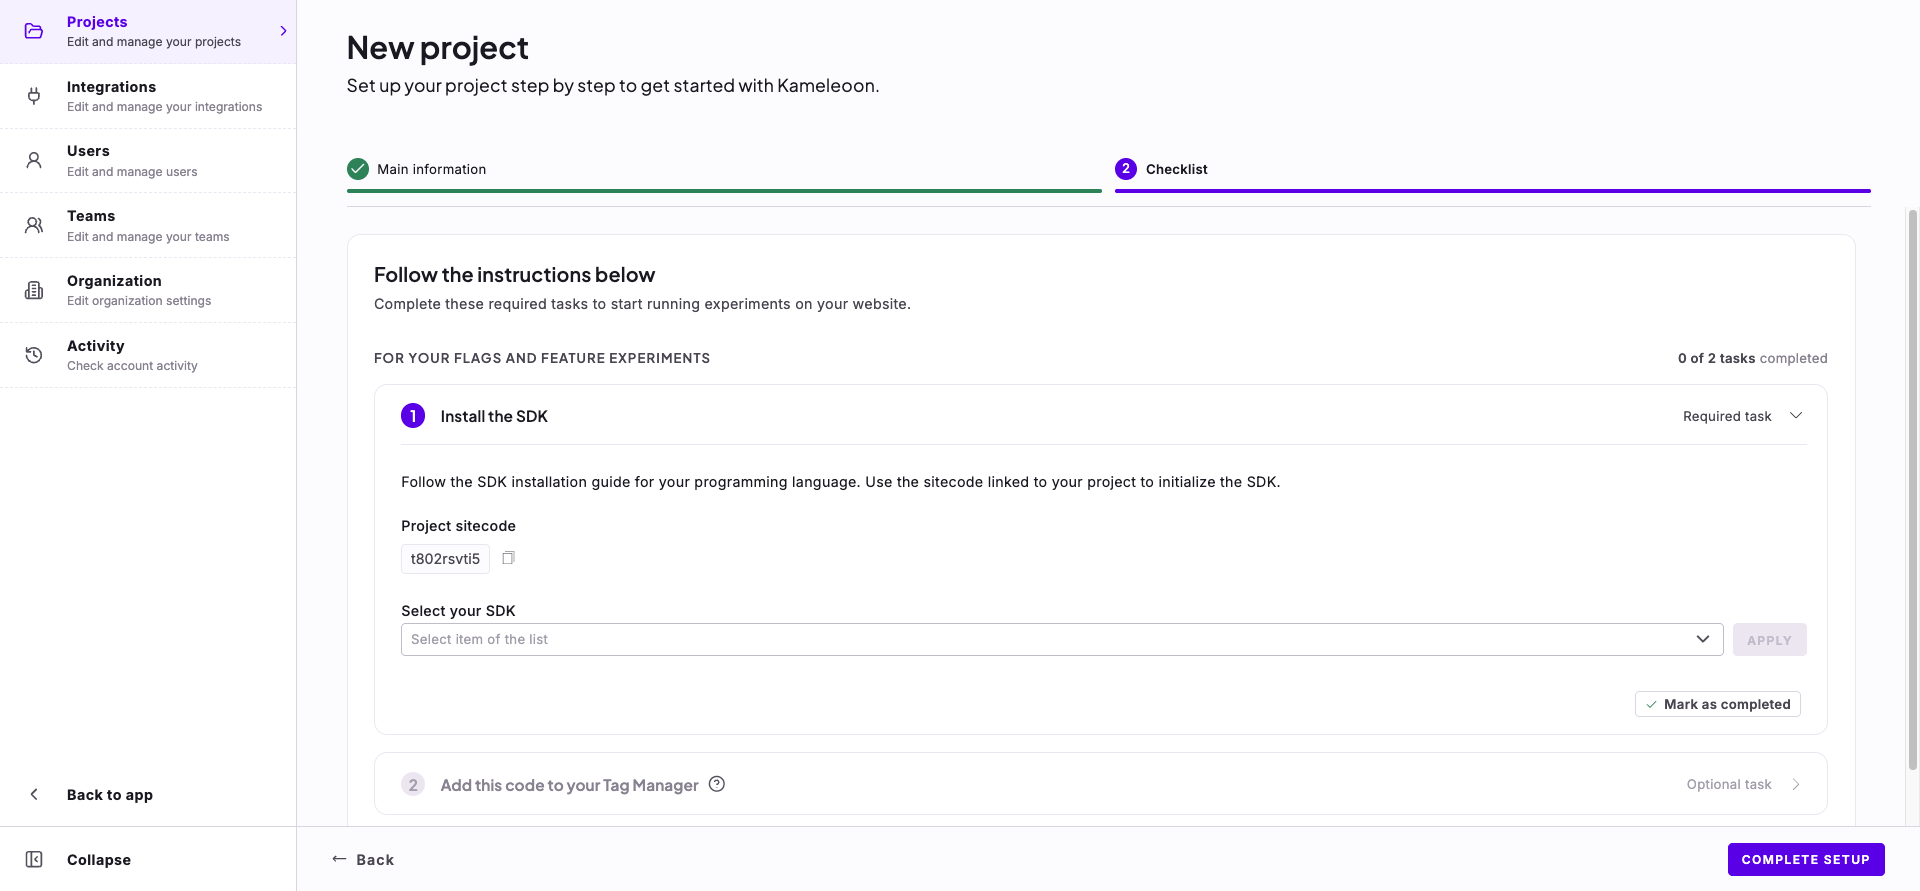
Optional tag manager task
Add this code to your Tag Manager is an optional task. Copy the code, paste it into your tag manager interface to install Kameleoon on your site, and click Mark as completed. The task doesn’t appear in a project with the Mobile app platform, whose checklist has the Install the SDK task alone.