

Access the Feature flag creation page
- Click Features > Flags & Experiments > New feature flag.
- Enter a name for your flag.
- Choose the project on which you want to activate the flag.
- Choose a flag type: Temporary for a flag you plan to remove after launch, or Permanent for one that stays in your codebase long-term. Read Manage feature flag technical debt to learn how Kameleoon tracks each type.
- Add a description (optional).
- Click Save.
The flag key is the unique ID that identifies the feature flag in your source code. Be sure to update the key in Kameleoon before editing it in your source code.

Structure of the Rollout Planner
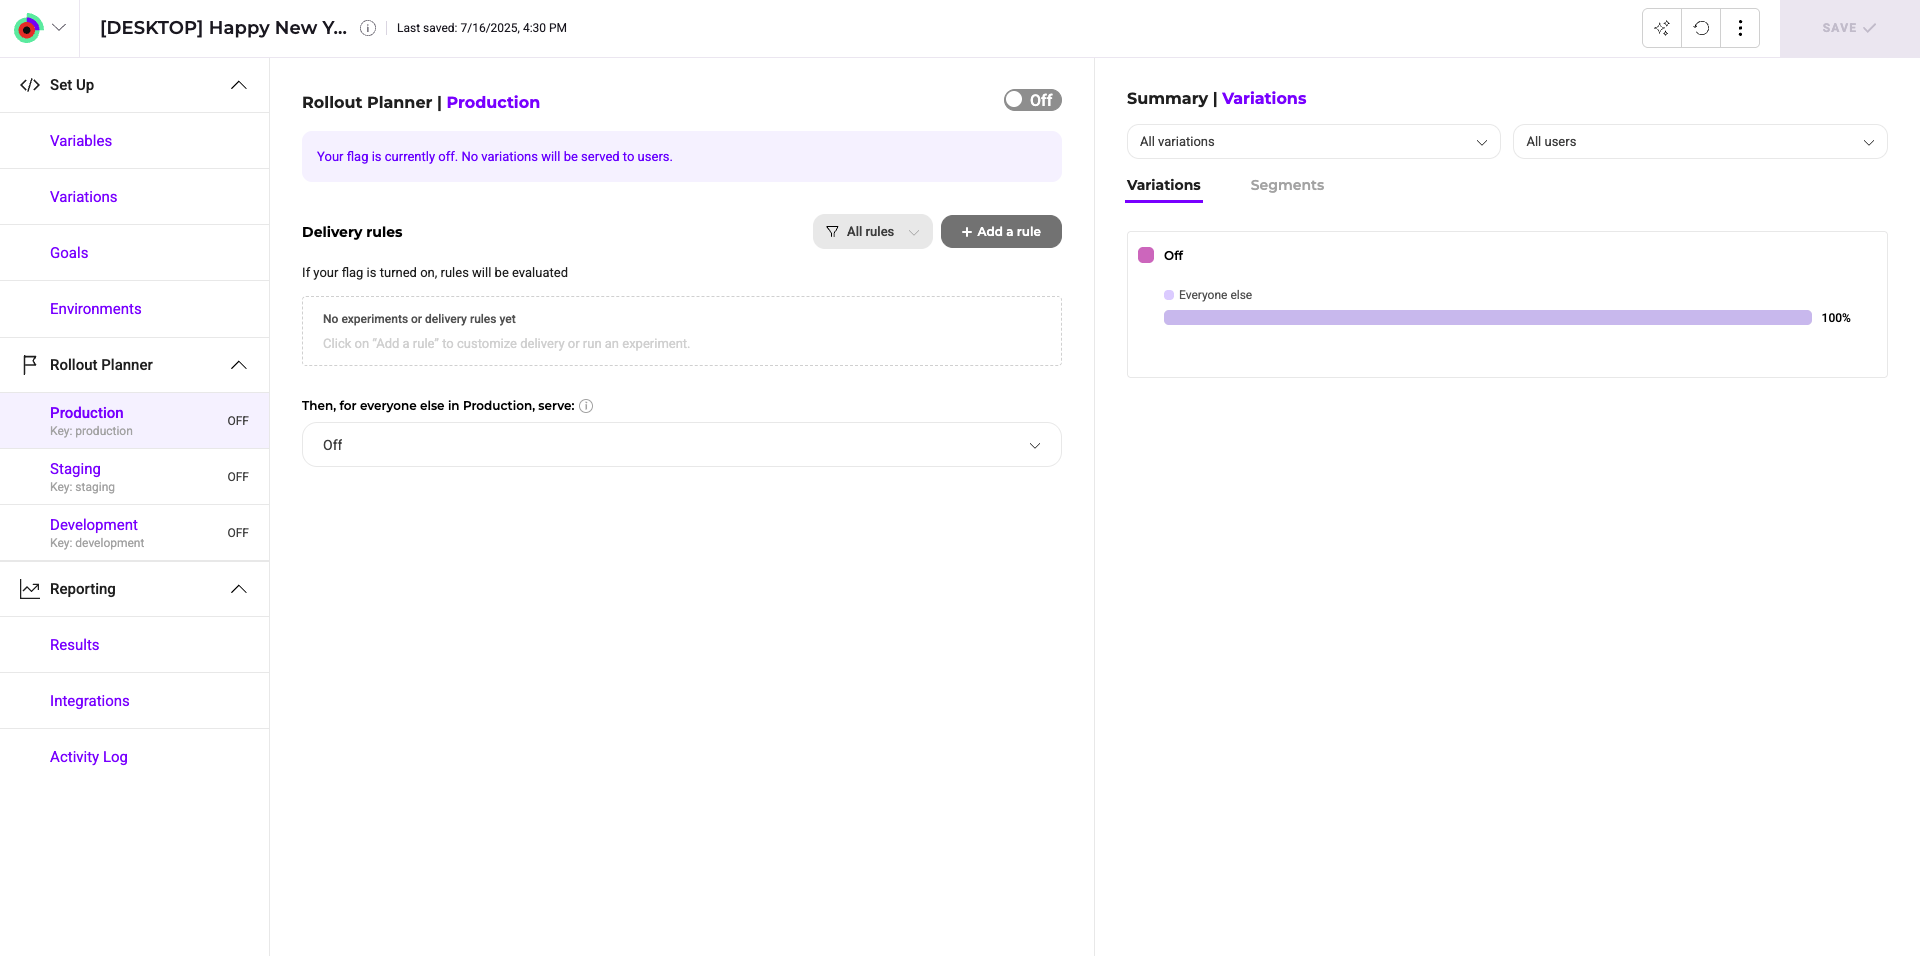
- A header indicating the flag’s name, the associated sitecode (you can copy and paste it directly from here), and the flag key. Click the flag’s name to edit its details.
- A Setup menu, to create and manage your feature variables and feature variations URL.
- A Rollout Planner specific to each environment. Changes to a feature flag apply only to the environment you select in this section. Kameleoon lets you link your production and staging/QA environments to the app.
- A toggle that turns your feature flag On or Off.
- An area for you to add rollout rules.
- A toolbar for accessing the AI assistant, reverting your changes, and opening secondary actions (Simulate and Calculate duration).
- A Save button.
Confirm the flag exists in Kameleoon and that you can retrieve it from your source code with a Kameleoon SDK’s
isFeatureActive() or getVariation() method. Then go to your feature flag in Kameleoon and continue configuration.