

For more information on the Kameleoon Graphic editor extension, refer to the article on getting started with the Graphic editor.
Installation of the extension
- Add the extension to Chrome by downloading it from the Chrome Web Store.
- Open the web console (F12 on PC or command+option+I on Mac).
- Click the Kameleoon tab from the web console.
- Click the link to log in using the Chrome extension icon.

- Click the Kameleoon icon in the Chrome toolbar. A pop-up opens, allowing you to log in. See Simplified authentication for the full pop-up walkthrough.
Simplified authentication
You can also use the Kameleoon icon of the extension to start the authentication process:- Click the Kameleoon icon and a pop-up will appear.
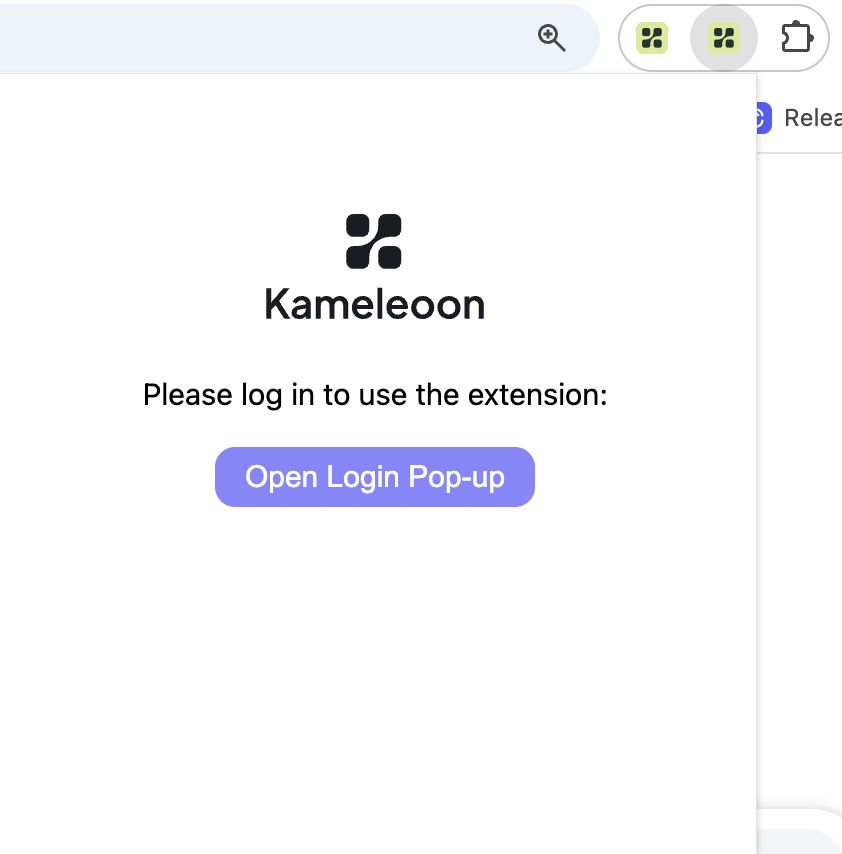
- Click Open Login Pop-up to display the login pop-up. You can use the login pop-up to enter your email and password to login.
Cookie authentication
Click the Kameleoon icon and a pop-up will appear. If you’re already logged in on your browser, a section will appear below the Open Login Pop-up button, allowing you to log in with your current session. Click Log in as….Logging out follows the same steps as logging in. Just click the Kameleoon icon > Log out.
Authorizations
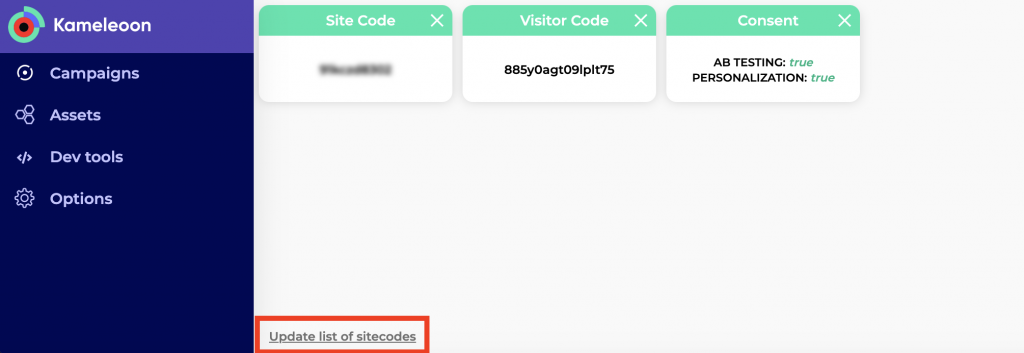
The My Sites page opens. The extension activates and gives you the authorizations to use the extension on all websites configured in your Kameleoon account. The first time you activate the extension, you’re redirected to your website so you can use the extension straight away. If you add a new website to your Kameleoon account, you’ll see that you don’t have permission to use the extension on the site. Click Proceed to tag injection. The button takes you directly to the Tag Injector. Then, update your authorizations. A message confirms the update.If you add a new website to your Kameleoon account, you can also update your authorizations by clicking Update list of sitecodes at the bottom of the extension dashboard.
Structure
The extension provides several tabs:- Campaigns
- Assets
- Timeline
- Dev tools
- Options
Dashboard
The dashboard appears by default when you open the extension. Click the + icon to build and customize the dashboard, so it contains essential information. You can enlarge, reduce, and close each widget. You can increase the number of lines by clicking the three-dots menu in the top left. The inserts at your disposal are as follows:- Consent: Indicates whether you gave consent for Experiments or Personalizations (true indicates that you gave consent or that consent isn’t required; false means that you refused consent or that, pending your consent, Kameleoon blocked the experiments).
- Custom data: Lists the active custom data on the page, their ID, and value.
- Experiments: Lists all experiments running on the page and indicates their ID, evaluates targeting (true/false), and displays the ID of the registered variation and displayed variation.
- Personalizations: Same for all personalizations running on the page.
- Site Code: Displays the relevant sitecode.
- Visitor Code: Indicates the visitor code assigned to you, which allows monitoring of visits among other metrics.
Campaigns
Experiments
In the Experiments tab, you find all your experiments running on the page.- ID: ID of the experiment. Click to display details.
- Name: Name of the experiment.
- Triggered: True if the experiment triggers on the page, else false.
- Triggered In Visit: True if the experiment triggers in the current visit, else false.
- Active: True if the experiment is active on the page, else false.
- Activated In Visit: True if the experiment activates in the current visit, else false. Note that triggering an experiment doesn’t necessarily mean Kameleoon activates it, as several additional factors affect activation (for instance, the visitor being part of traffic excluded from the experiment, or set capping options).
- Displayed Variation: ID of the variation displayed (No variation when not targeted; 0 when targeted but assigned to the reference).
- Associated Variation: ID of the variation Kameleoon assigns to you with your visitor code (0 when not targeted). You can force a variation by selecting it in the dropdown. The eye icon on the right lets you preview it.
- Date Modified: Date of the last change made to the experiment.
- Assignment Time: When Kameleoon assigns you to the variation. If the variation is the original and you haven’t been targeted, the value is Not assigned yet.
- Online since: The date the experiment went online.
Variations
When you click an experiment’s ID, a menu opens with three tabs: Variations, Configuration, and Targeting. The Variations tab shows the JavaScript and CSS code associated with each variation. Switch between variations by clicking the variation ID in the left-hand list.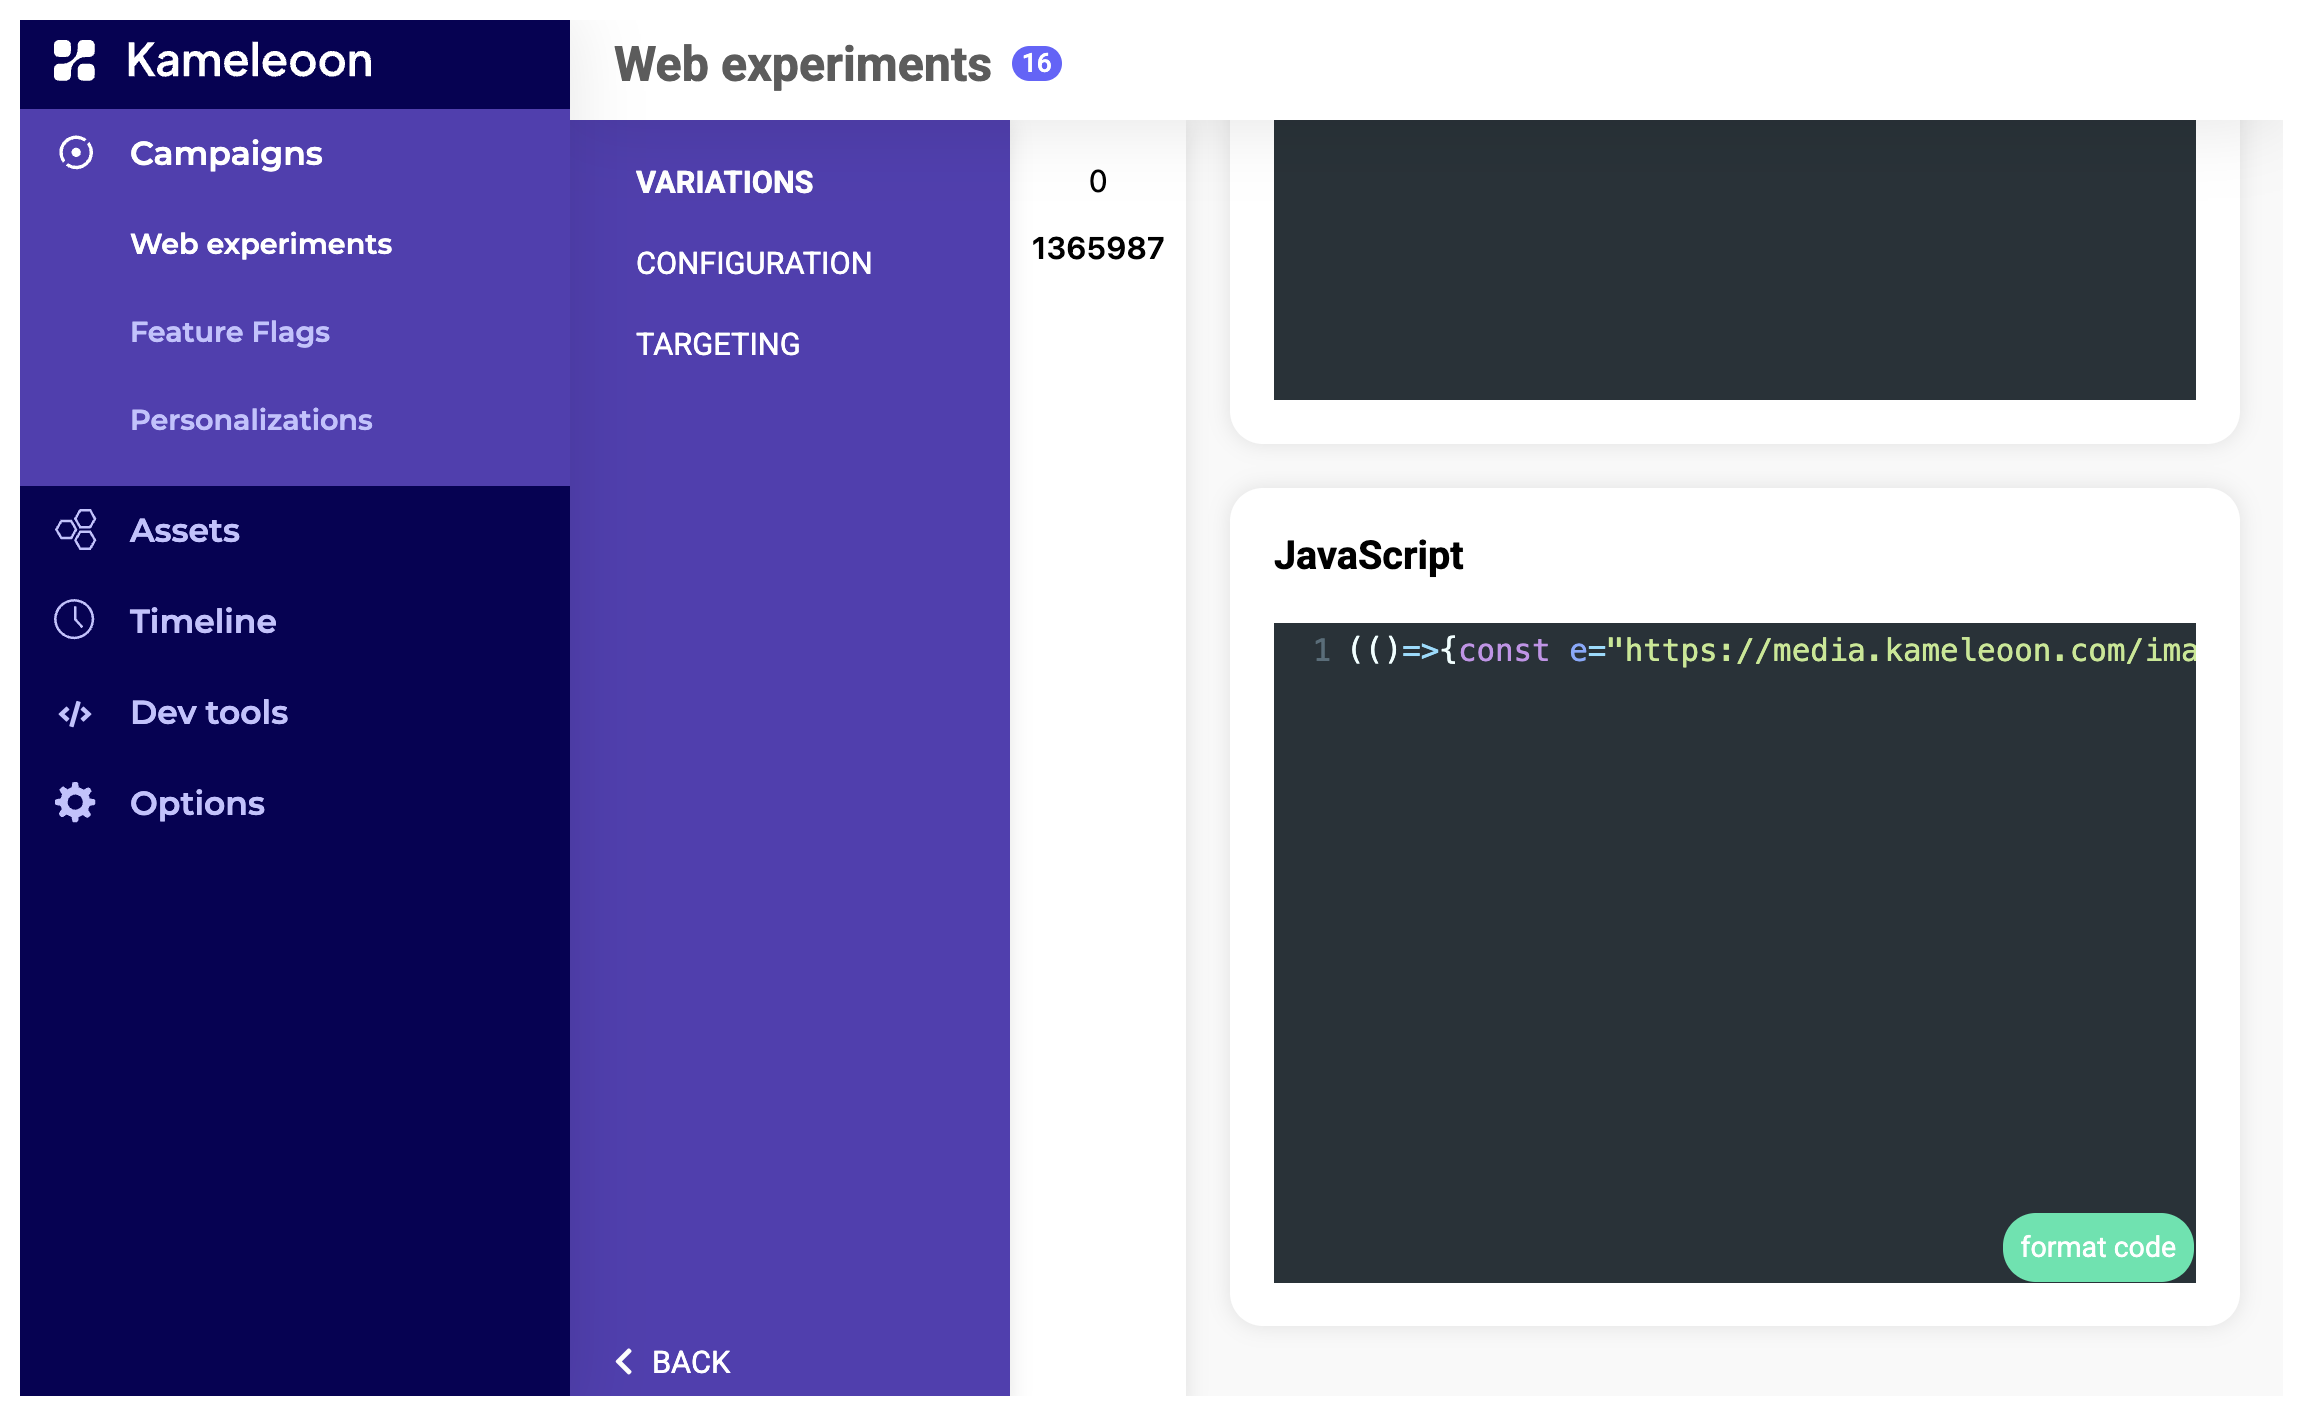
Configuration
The Configuration tab displays the experiment’s entire configuration as a JSON tree, including its ID, name, base URL, goals, and variations. You find the same information that’s normally in the console.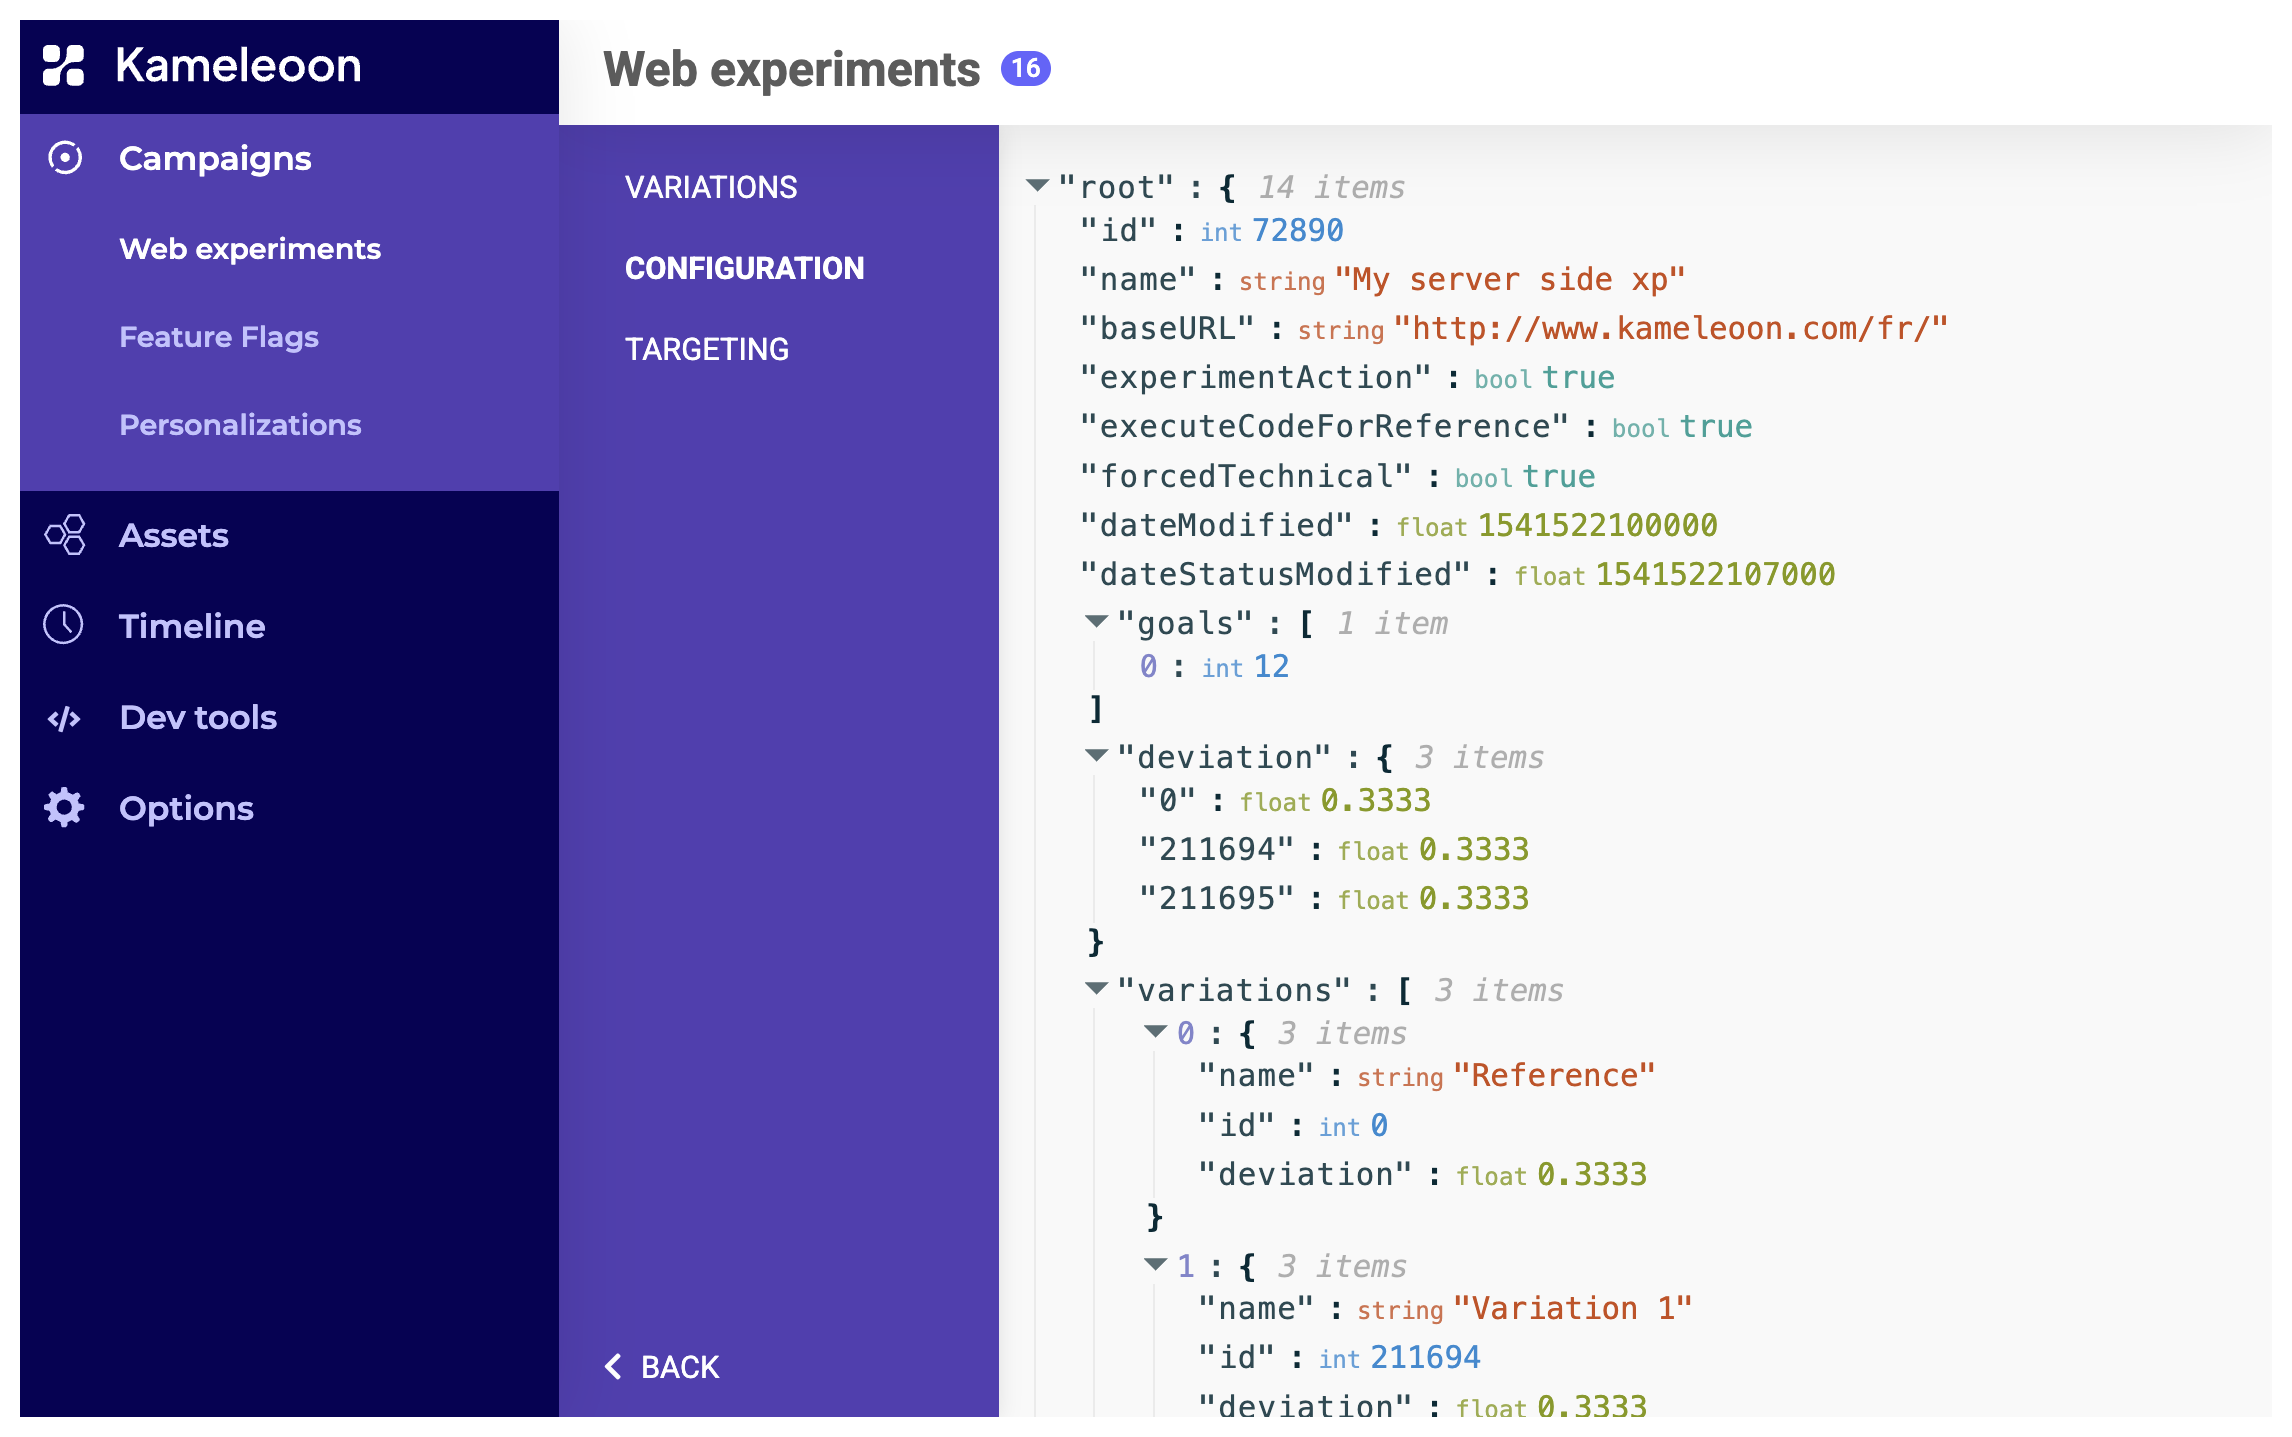
Targeting
The Targeting tab displays the targeting conditions with logical links between them.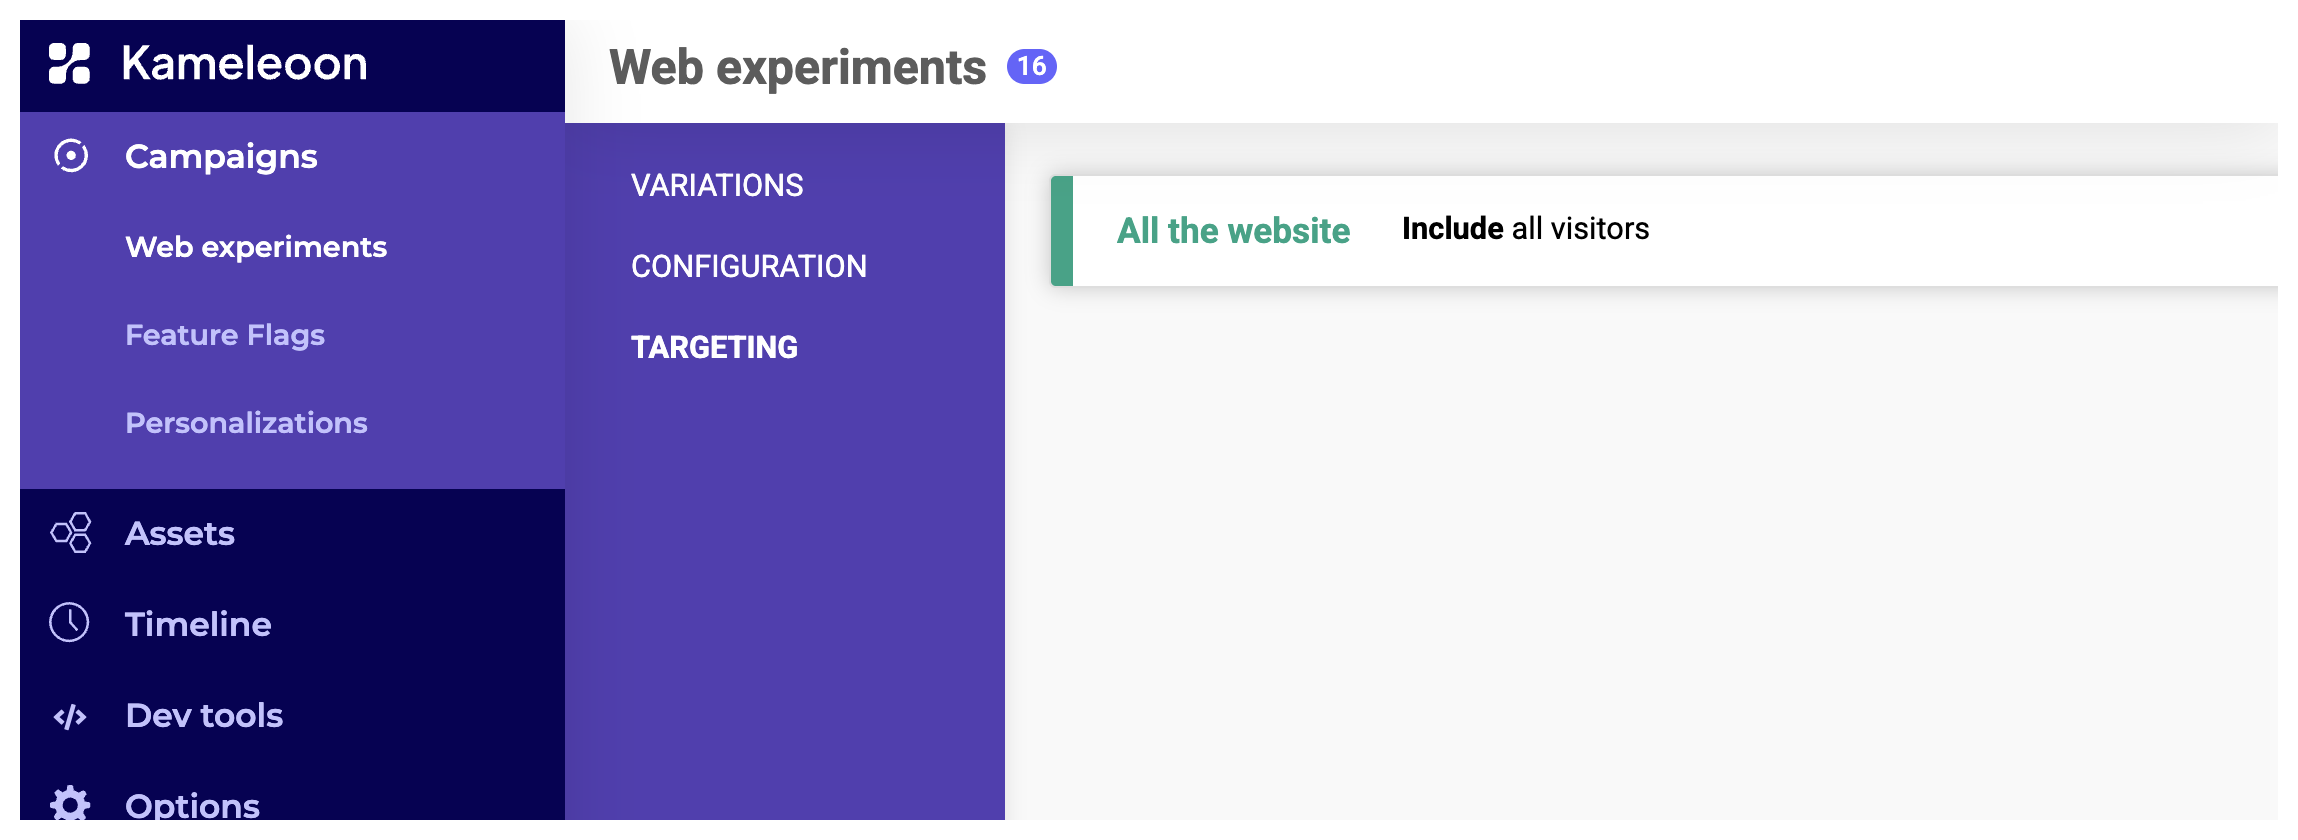
Feature flags
The Feature flags tab contains all feature flags that Kameleoon detects on the page.
- ID: Feature flag’s ID. Click the ID to view detailed information.
- Name: Feature flag’s name.
- Triggered: True if the flag triggered on the page.
- Triggered in visit: True if the flag triggered during the current visit.
- Active: True if the flag is active on the page.
- Activated in visit: True if the flag activated in the current session.
- Displayed variation: ID of the displayed variation. No variation indicates that the user isn’t targeted. 0 refers to the reference variation.
- Associated variation: The variation to which Kameleoon assigns the visitor. Use the dropdown to force a variation. The eye icon allows you to preview that variation.
- JavaScript or CSS code injected for each variation (if any)
- Targeting and segmentation conditions
- Timeline and last modified date
Personalizations
In this tab, you will find all personalizations running on the page- ID: ID of the personalization. Click to display details.
- Name: Name of the personalization.
- Triggered: Whether the system targets you.
- Triggered In Visit: True if the personalization triggers in the current visit, else false.
- Active: True if the personalization is active on the page, else false.
- Associated Variation: ID of the variation Kameleoon assigns to you with your visitor code (0 when not targeted). You can force a variation by selecting it in the dropdown. The eye icon on the right allows you to preview it.
- Activated In Visit: True if the personalization activates in the current visit, else false. Note that triggering a personalization doesn’t necessarily mean the associated event occurs, as several additional factors affect execution. For instance, capping options may prevent execution, or you may be part of a control group for the personalization (in which case Kameleoon doesn’t display it).
-
Not Exposed Reason: If the personalization triggers but the system doesn’t display or activate it, the Not Exposed Reason field details the reason. Possible values are:
GLOBAL_EXCLUSION(the visitor is part of the population globally excluded from all personalizations).PERSONALIZATION_EXCLUSION(the visitor is part of the population excluded from the current personalization. For example, the visitor is in the control group).PRIORITY(another personalization has higher priority).SCHEDULE(the personalization is off according to its schedule).PERSONALIZATION_CAPPING(the personalization has reached its global capping in terms of visitors).VISITOR_CAPPING(the visitor has reached a capping preventing the display of the personalization).SCENARIO(scenario conditions aren’t met, so Kameleoon won’t display the personalization).SIMULATION(in simulation mode, Kameleoon forces non-exposition, which can’t happen in production; the reason is available if the personalization triggers on the current page and the active property is false, else the value is null).
- Date Modified: Date of the last change made to the personalization.
Variations
When you click a personalization’s ID, a menu opens with three tabs: Variations, Configuration, and Targeting. The Variations tab shows the JavaScript and CSS code associated with each variation. Switch between variations by clicking the variation ID in the left-hand list.Configuration
The Configuration tab displays the personalization’s entire configuration as a JSON tree, including its ID, name, base URL, goals, and variations. You find the same information that’s normally in the console.Targeting
The Targeting tab displays the targeting conditions with logical links between them.Assets
Segments
In the Segments tab, find all active segments on the page to verify parameters and targeting. The segment is Triggered if your visit fulfilled the conditions at some point. If you click the segment ID, you can access the conditions’ details.Custom Data
In the Custom Data tab, find all configuration parameters of custom data to verify the settings.- ID: ID of the custom data.
- Name: Name of the custom data.
- Value: If the custom data has one or more associated values.
- Format: String/Boolean/Number
- Type: Unique/List
- Scope: Page/Visitor/Visit
- Local: Indicates if the custom data uses the visitor’s local browser.
- Mapping Identifier: Indicates if the custom data uses a unique identifier on your side, such as an account ID or email.
- Learnable: Indicates if you activated the “learnable” function on the custom data.
Goals
The Goals tab contains goal configurations to verify proper conversion.- ID: The ID of the goal.
- Name: The name of the goal.
-
Type:
- Click
- Scroll
- URL
- Engagement
- Time spent
- Page views
- Converted: Whether the goal converted during the current visit.
- Conversions: The total number of times you converted this goal.
- Revenue: The total revenue associated with this goal (if applicable).
Global custom script
You will find the global script (equivalent to script tracking in the app) here.Timeline
The Timeline tab displays all campaign events and their timestamps.- Load event: When Kameleoon starts to load.
- Consent initialized: Consent initialized for A/B Testing or Personalization.
- Consent enabled: Consent enabled for A/B Testing and/or Personalization.
- Consent disabled: Consent disabled for A/B Testing and/or Personalization.
- Custom data set: The custom data appears with value XXXX.
- Global script executed: The global script executed.
- Experiment triggered: The experiment with ID XXX triggered.
- Experiment activated: The experiment with ID XXX activated.
- Variation displayed: The variation with ID XXX appeared.
- Personalization activated: The personalization with ID XXX activated.
- Personalization triggered: The personalization with ID XXX triggered.
- Loading aborted: Loading aborted for reason XXX or for opt-out reasons.
- Conversion triggered: The goal XXXX with ID XXX triggered.
Dev tools
Performance analysis
Use the Performance analysis tab to analyze the script’s composition and identify parts that might slow down the website.- Script size: Script size according to CDN.
- Script size (uncompressed): Overall size.
- Last updated: Date of the script’s last update.
- Script size < 120 KB
- No experiments (experiments running for more than three months)
- Less than 50 segments
- Less than 50 goals
- Global custom script < 30 KB
Request analysis
The Request analysis tab allows for easy debugging of all requests.Visits analysis
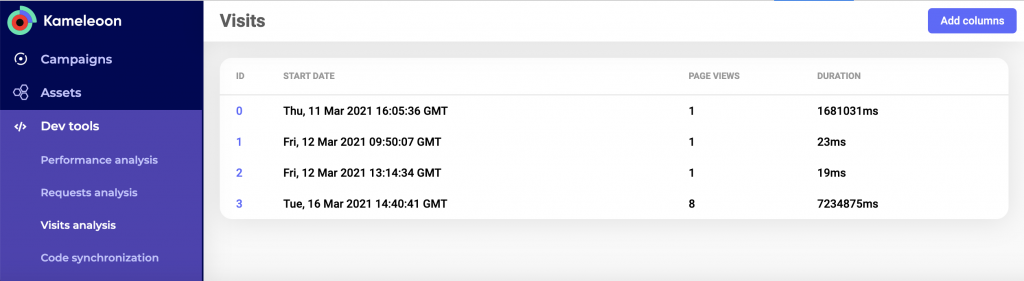
- The number of visits
- The timestamp of the beginning of each visit
- The number of pages viewed during each visit
- The duration of each visit
Code synchronization
You can synchronize Microsoft Visual Studio (VS Code) with the Chrome extension. Synchronization automatically sends updates to Chrome via a websocket between VS Code and the Kameleoon Chrome extension to test JS and CSS code. Chrome then injects the new code into the Kameleoon engine and reloads the page. Refer to the VS Code extension article for more information.Custom code injection

- Open the Kameleoon Chrome extension.
- Click Custom code injection to access the page for managing your custom JavaScript code.
- Write or paste your code into the text field.
- Click Inject code.
Tag injection
To inject the Kameleoon tag on a website:- Select your environment (development, preview, test, production).
- Enter the code you want to inject.
- Click Inject tag.
Options
Two additional options are available.Block Kameleoon script
This option is useful for developers that must work on their website without any Kameleoon experiment or personalization running on the page.Block Kameleoon tracking request
This option is useful if you don’t want your own visits and conversions to impact results.Troubleshooting: The extension doesn’t load all data or isn’t working
In exceptional cases, the Kameleoon Chrome extension requires reinstallation. Follow these steps:- Log out of Kameleoon by clicking your avatar in the upper-right corner and logging out.
- Close all windows and reopen Chrome.
- Go here and remove the Kameleoon extension.
- Download the extension again.
- Click Install, then navigate to your site.
- Click the Kameleoon icon in the Chrome toolbar and log in using the pop-up. See Simplified authentication for the full walkthrough.
- Go to the My Sites page to complete the installation.
- Close your site and reopen it.
Note that if you’re not logged out, the installation might not work.
Web plugin
The web plugin is a “light” version of the Chrome extension that works in other popular browsers, including Safari, Firefox, and Chrome. The web plugin is responsive and works on mobile devices. The plugin provides information about experiments, personalizations, segments, custom data, and goal performance metrics. To use the plugin, add “/?kameleoonLightExtension=true” after the site’s URL. For example:
https://www.yourwebsite.com/?kameleoonLightExtension=true