

Step 1: Create AWS IAM user and role
You must create an IAM user and role that Kameleoon uses to access your Redshift cluster. You can create these in the AWS Management Console or the AWS CLI. Kameleoon provides example commands for the AWS CLI.1. Create an IAM user
Use the following command to create a dedicated IAM user for Kameleoon:aws iam create-user --user-name kameleoon_user
Next, generate an access key for the kameleoon_user:
aws iam create-access-key --user-name kameleoon_user
Keep the AccessKeyId and SecretAccessKey fields from the JSON that this command returns. You provide them to Kameleoon in Step 3.
2. Create an IAM role
Create a role that Kameleoon can assume, allowing it to interact with your Redshift cluster. Use the following command to create the role with an inline JSON trust policy:{account_id} with your AWS account ID.
If you use Redshift only as a source, you can omit s3.amazonaws.com. If you use a provisioned cluster, you can omit redshift-serverless.amazonaws.com.
For Amazon Redshift as a destination — grant S3 Redshift access rights to an IAM role
To let Kameleoon stage events in S3 and load them into Redshift, attach a policy to the role with the following command.{s3_bucket_name}, {aws_region} and {account_id} with your data.
Alternatively, use the existing AmazonS3FullAccess and AmazonRedshiftFullAccess policies.
Step 2: Grant permissions to Kameleoon role
Grant the necessary permissions to the IAM role associated with Kameleoon to allow interaction with your Redshift database. Grant permissions at the SQL user level via SQL commands. AWS names the default SQL user created for an IAM roleIAMR:{role_name}, so if you name the role kameleoon_role, run these commands for SQL user IAMR:kameleoon_role.
For Amazon Redshift as a source
1. Grant access to existing schema
Provide the Kameleoon IAM role access to the relevant schema and tables in your Redshift database. For example, if you want Kameleoon to import data from your “users” table in schemaschema_containing_data, run the following SQL commands:
2. Create Kameleoon configuration schema
Create a new schema for Kameleoon configurations and grant the necessary permissions:3. Grant DML permissions in Kameleoon configuration schema
Grant the Kameleoon role permissions to insert, update, and delete data in thekameleoon_configuration schema:
4. Set default privileges for future tables
Ensure that any future tables created in thekameleoon_configuration schema automatically grant the necessary permissions to the Kameleoon role:
For Amazon Redshift as a destination
1. Create Kameleoon events schema
Create a new schema for Kameleoon events and grant the necessary permissions:2. Grant DML permissions on Kameleoon events schema
Grant the Kameleoon role permissions to insert, update, and delete data in thekameleoon_events schema:
3. Set default privileges for future tables
Ensure that any future tables created in thekameleoon_events schema automatically grant the necessary permissions to the Kameleoon role:
Step 3: Enable and configure the integration in the Kameleoon UI
Log in to your Kameleoon account, and click Admin > Integrations. Then find Amazon Redshift in the list.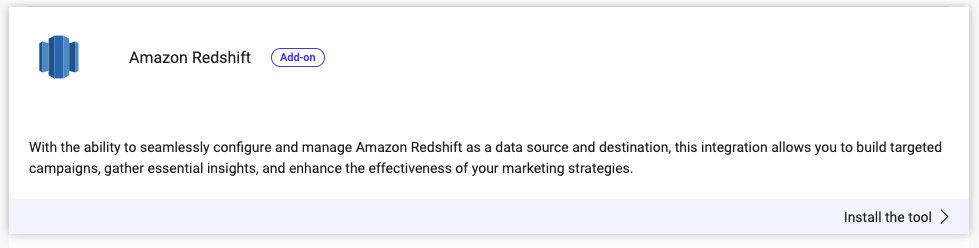
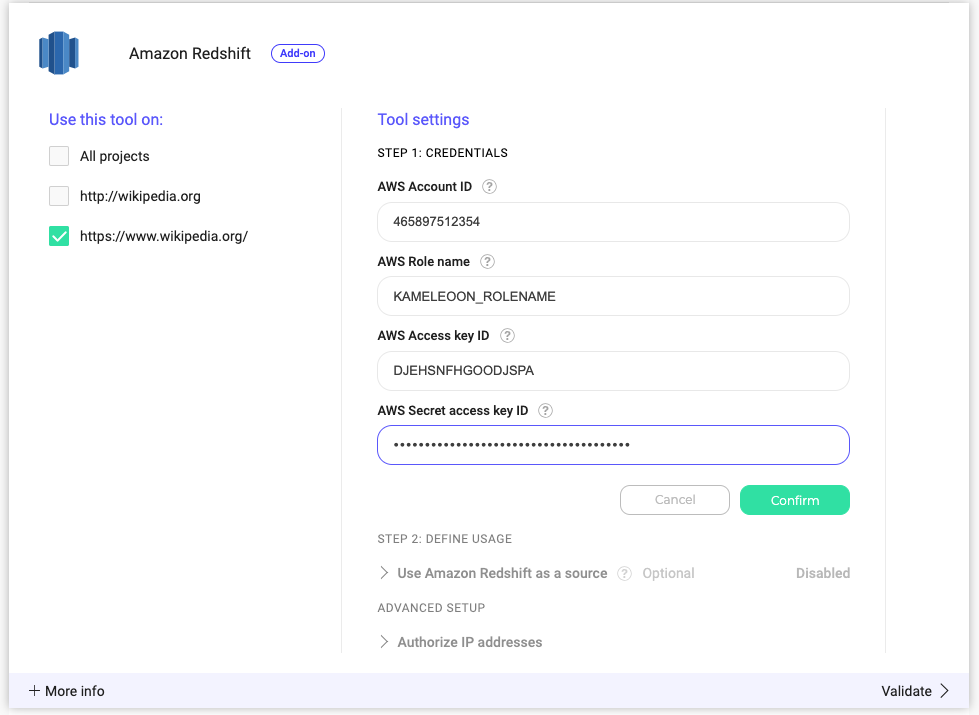
- AWS Account ID: the unique numerical identifier of your Amazon Web Services account
- AWS Role name: the name of the AWS IAM role you created for Kameleoon, for example
kameleoon_role - AWS Access key ID and AWS Secret access key ID: AWS provides these two fields when you create an access key for the IAM user. If you used the AWS command line interface to create this key as described in Step 1 of this article, you received these two values in the JSON response to that command
Step 4: Configure security group for Redshift
To allow Kameleoon to connect to your Redshift cluster, authorize queries from Kameleoon’s IP addresses in your security group. You can authorize these IP addresses in the AWS console:- Identify the security group: You can see the security group associated with your Redshift cluster in the Redshift dashboard, and you can access the configuration page of this security group from there. If you use Redshift Serverless, look for the security group of your workgroup.
- Add inbound rules
- Navigate to the Inbound Rules tab.
- Click Edit inbound rules > Add rule.
- Set the following parameters:
- Type: Custom TCP rule
- Port range: 5439 (default Redshift port)
- Source: Custom (add the Kameleoon IP addresses displayed in the Redshift integration section of the Kameleoon UI)
Step 5: Open the VPC to external connections
Configure the VPC associated with your Redshift cluster to allow external connections. For simplicity, you can make the VPC publicly accessible and rely solely on the security group settings. A more secure approach is to fine-tune the network access control list of your VPC subnet. To do so, modify the VPC settings in your AWS console as follows:- Access VPC settings: Go to the VPC dashboard in the AWS Management Console.
- Modify Network ACLs:
- Navigate to the Network ACLs section.
- Locate the ACL associated with your VPC.
- Modify the inbound and outbound rules to allow traffic from Kameleoon’s IP addresses on port 5439.
- Update route tables: Ensure that the route tables associated with your VPC are correctly configured to route traffic to your Redshift cluster.