Send user data to Kameleoon
To store data for one or more keys, send a JSON object to thePOST /map/maps endpoint, with one entry for each key. Each entry can hold several fields, such as userSegment and categoryAffinities. You can also use the Map endpoints to retrieve the data stored for a key.

Retrieve user data in Kameleoon
To use the stored data in a campaign, create a custom data point, then set its value from your website’s global script with theretrieveDataFromRemoteSource method of Kameleoon’s Activation API. All of Kameleoon’s SDKs use the same method.
Create a custom data point
To receive the user data, create a custom data point with the Kameleoon Activation API retrieval method.- Click Settings > Custom Data, then click New custom data.
- Name your custom data.
- Select your project.
- Select Kameleoon Activation API as the retrieval method.
- Choose the type List and the format String.
- Choose the scope Page.
- Click Next.

retrieveDataFromRemoteSource method.
Set the custom data from your global script
Add this code to your website’s global script, which loads on every page. ReplaceNAME_OF_YOUR_CUSTOMDATA with your custom data’s name, and replace NAME_OF_YOUR_USER_ID with the key that you stored with the Map endpoint.
userSegment field of the stored data. Create a separate custom data point for each field that you want to target.
Save the values for the targeting condition associated with the custom data point
To choose values in the segment builder, turn on Save the values for the targeting condition associated with the custom data point in the Options step. In the code field, return an array of objects. Each object has avalue, which must match the custom data’s type, and a label, which the segment builder displays. Add one object for each value that the segment builder should offer.

Create your segments
Create a new segment for your project
To create a segment that uses your custom data, create the segment first, then add the custom data as a condition.- Click Settings > Segments, then click New segment.
- Name your segment.
- Select your project.
- Select Campaign type, then choose All types.
- Click Next.

Add a custom data condition to your segment
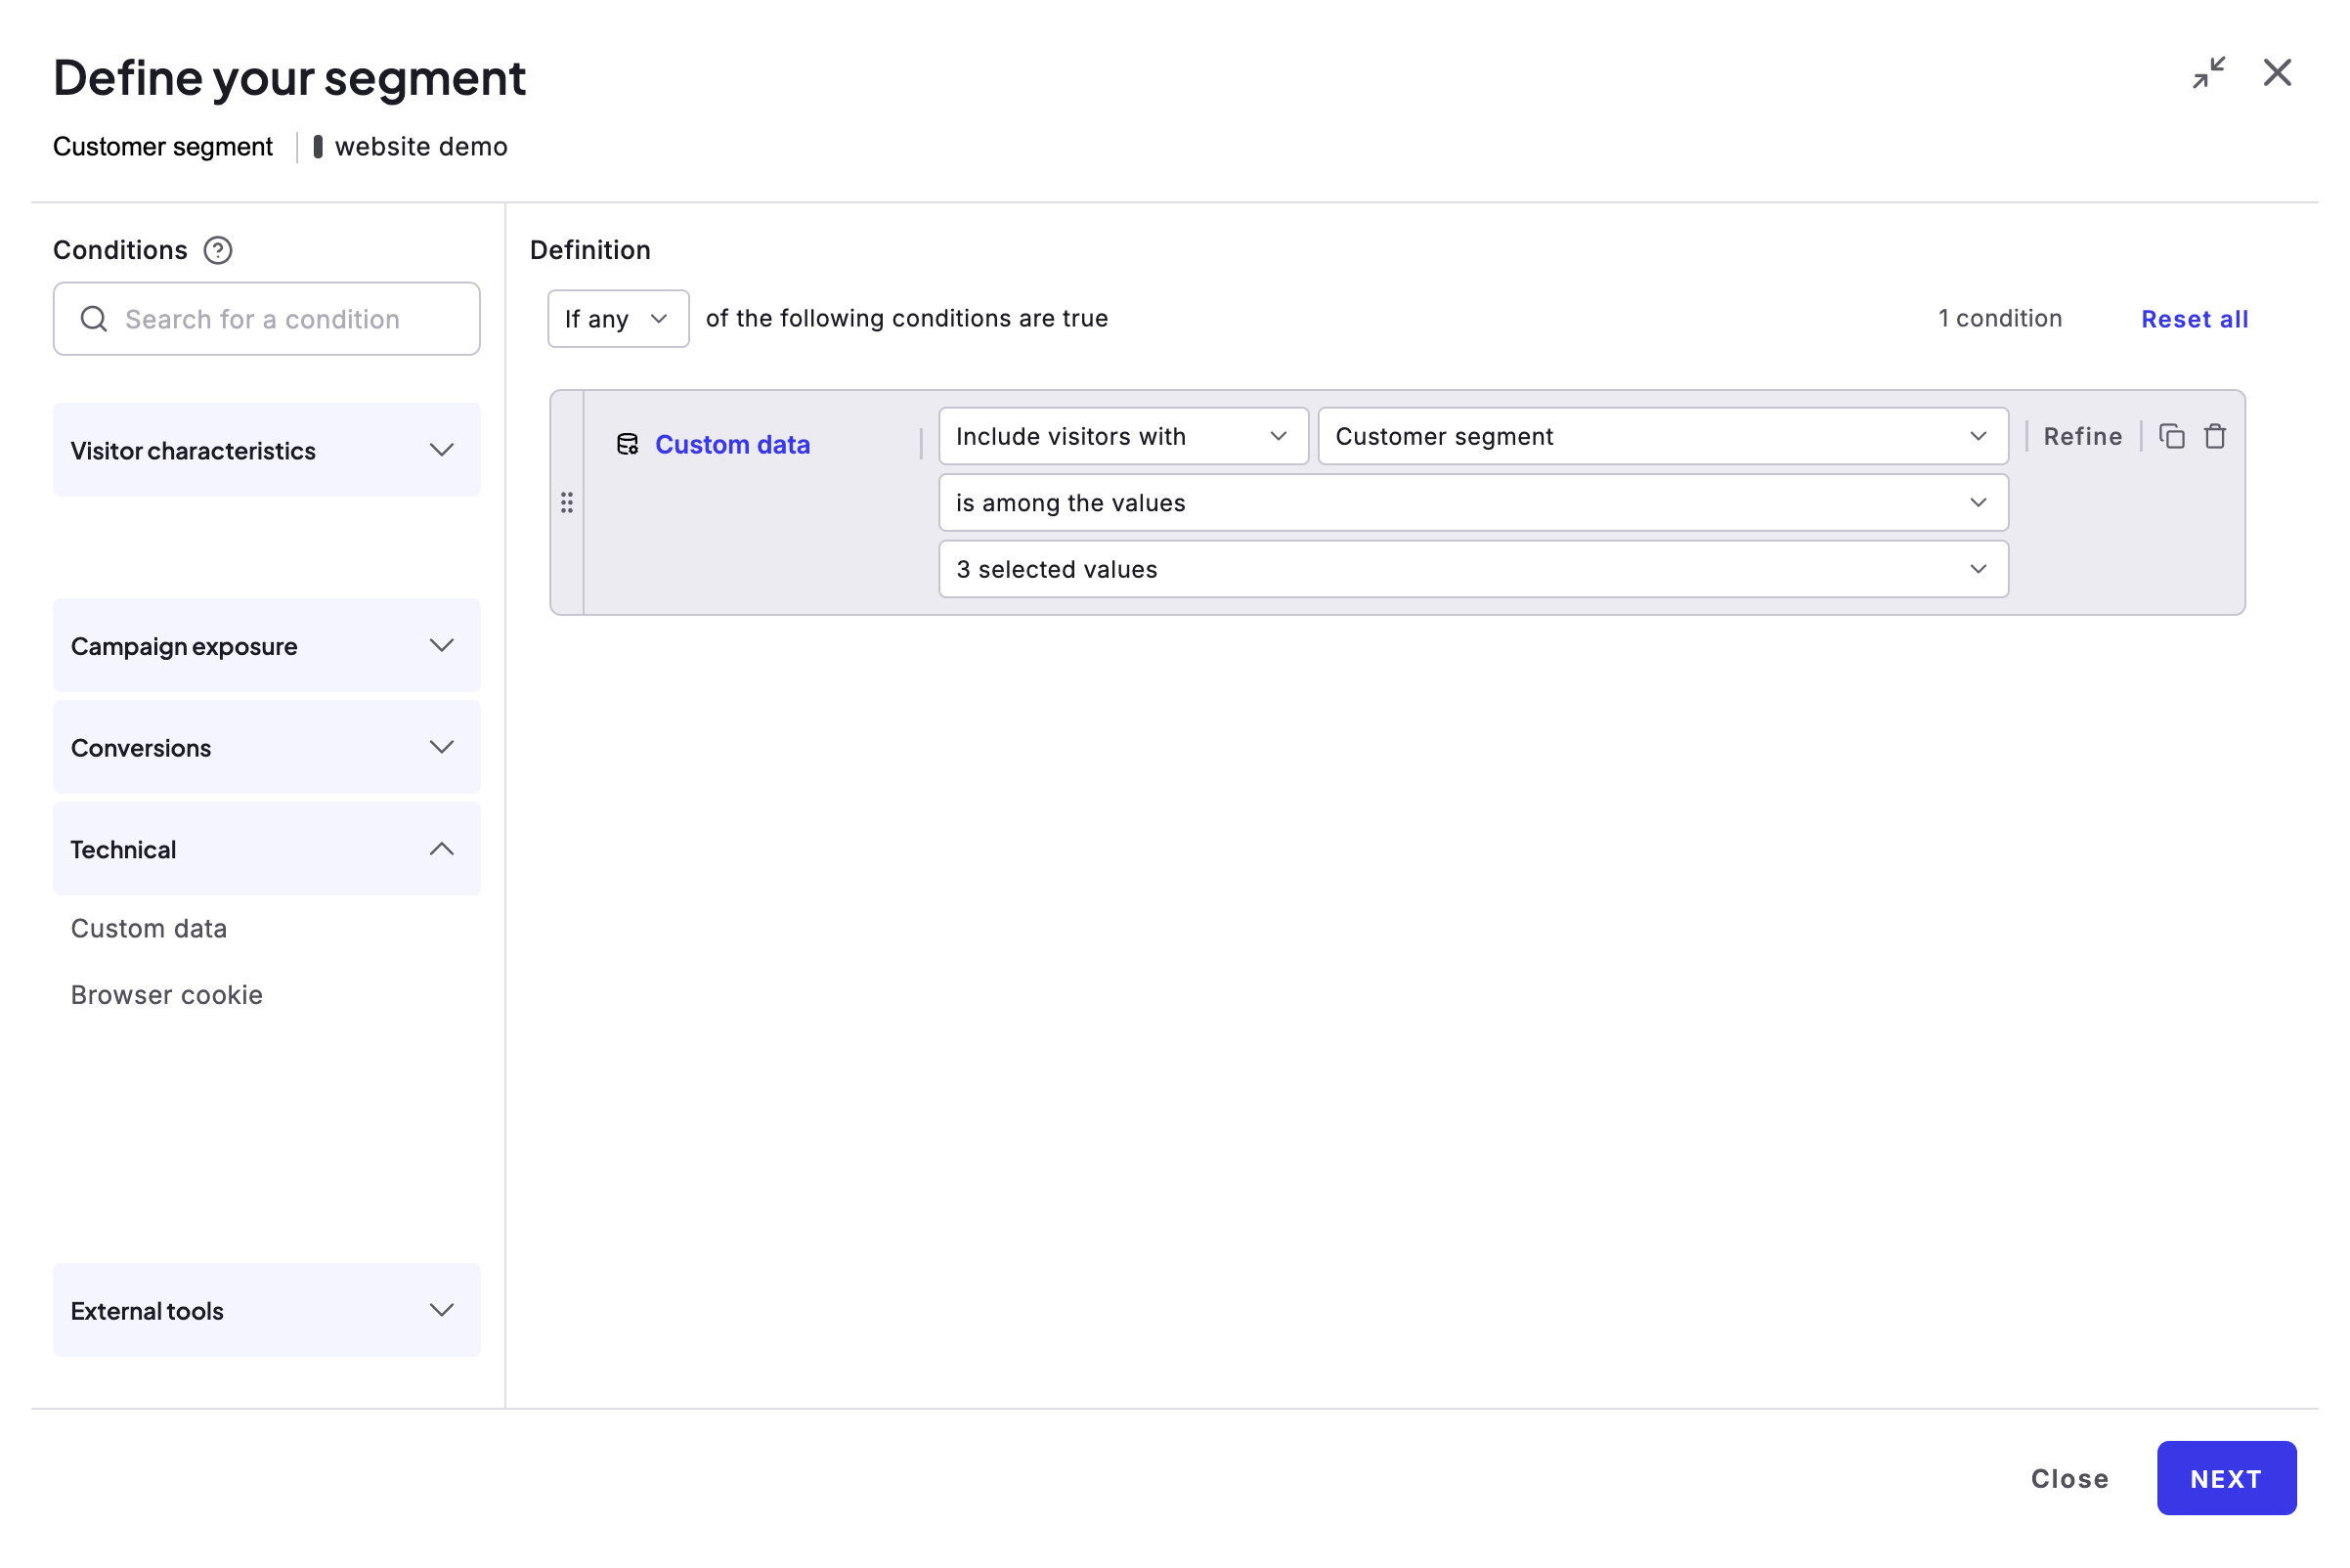
To target visitors by the custom data, use it as a condition in your segment. In the segment builder, expand Technical in the Conditions column, then double-click the custom data condition to add it. In the Include visitors with field, select your custom data point and choose is among the values. Check each value that the segment should include. The list shows the values that you saved when you created the custom data.