> ## Documentation Index
> Fetch the complete documentation index at: https://docs.kameleoon.com/llms.txt
> Use this file to discover all available pages before exploring further.
# Build success and error screens
> Design additional widget screens and configure HTTP response events to display success or error messages after form submission.
Once you have designed your form widget's elements, established rules, and set up data transmission, you can create additional screens to inform your visitors about the success or failure of sending the form.

## Design your screen
To design your screen:
1. Click the name of your widget in the top left of the Widget Studio.
2. Double-click **Add screen** to create a validation screen or an error screen.
3. Design your screen as you wish.
## Configure Events
After creating your screens, you must set up events to display the appropriate screen based on whether the visitor's data submission succeeds or fails.
To set up events:
1. Click **Event** > **Add event**.
2. Select **HTTP Response**.
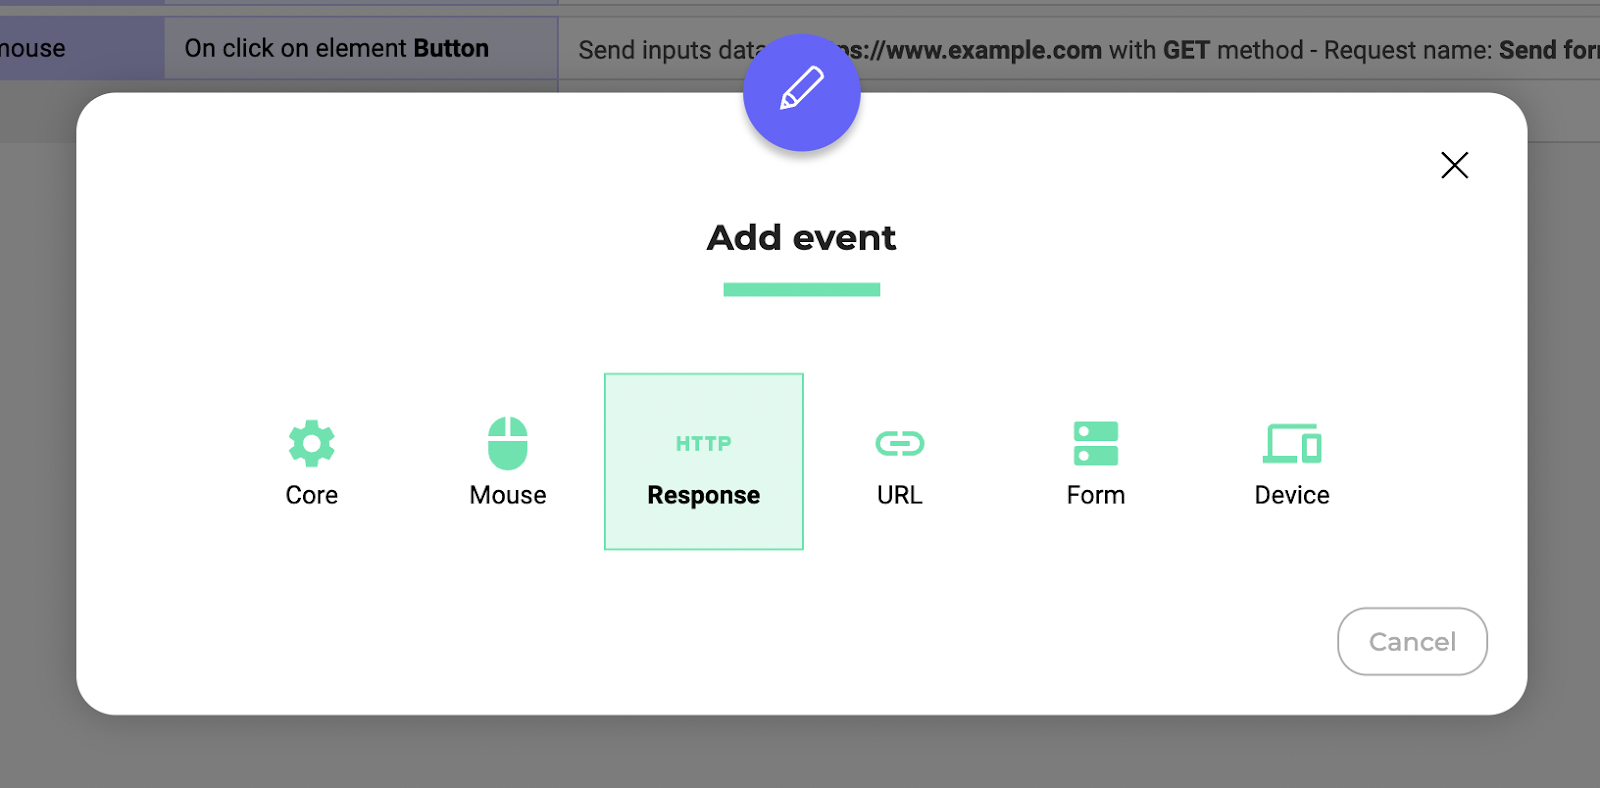
The HTTP Response event only appears if you've added an HTTP Request action. If you haven't, you must define what happens when a user submits the form by setting a trigger and adding an HTTP request action to send the form data to the specified URL.
3. Select **On success** or **On error** depending on the screen you want to display.
4. Select the name of the request linked to your HTTP Response in the **Response Name** menu.
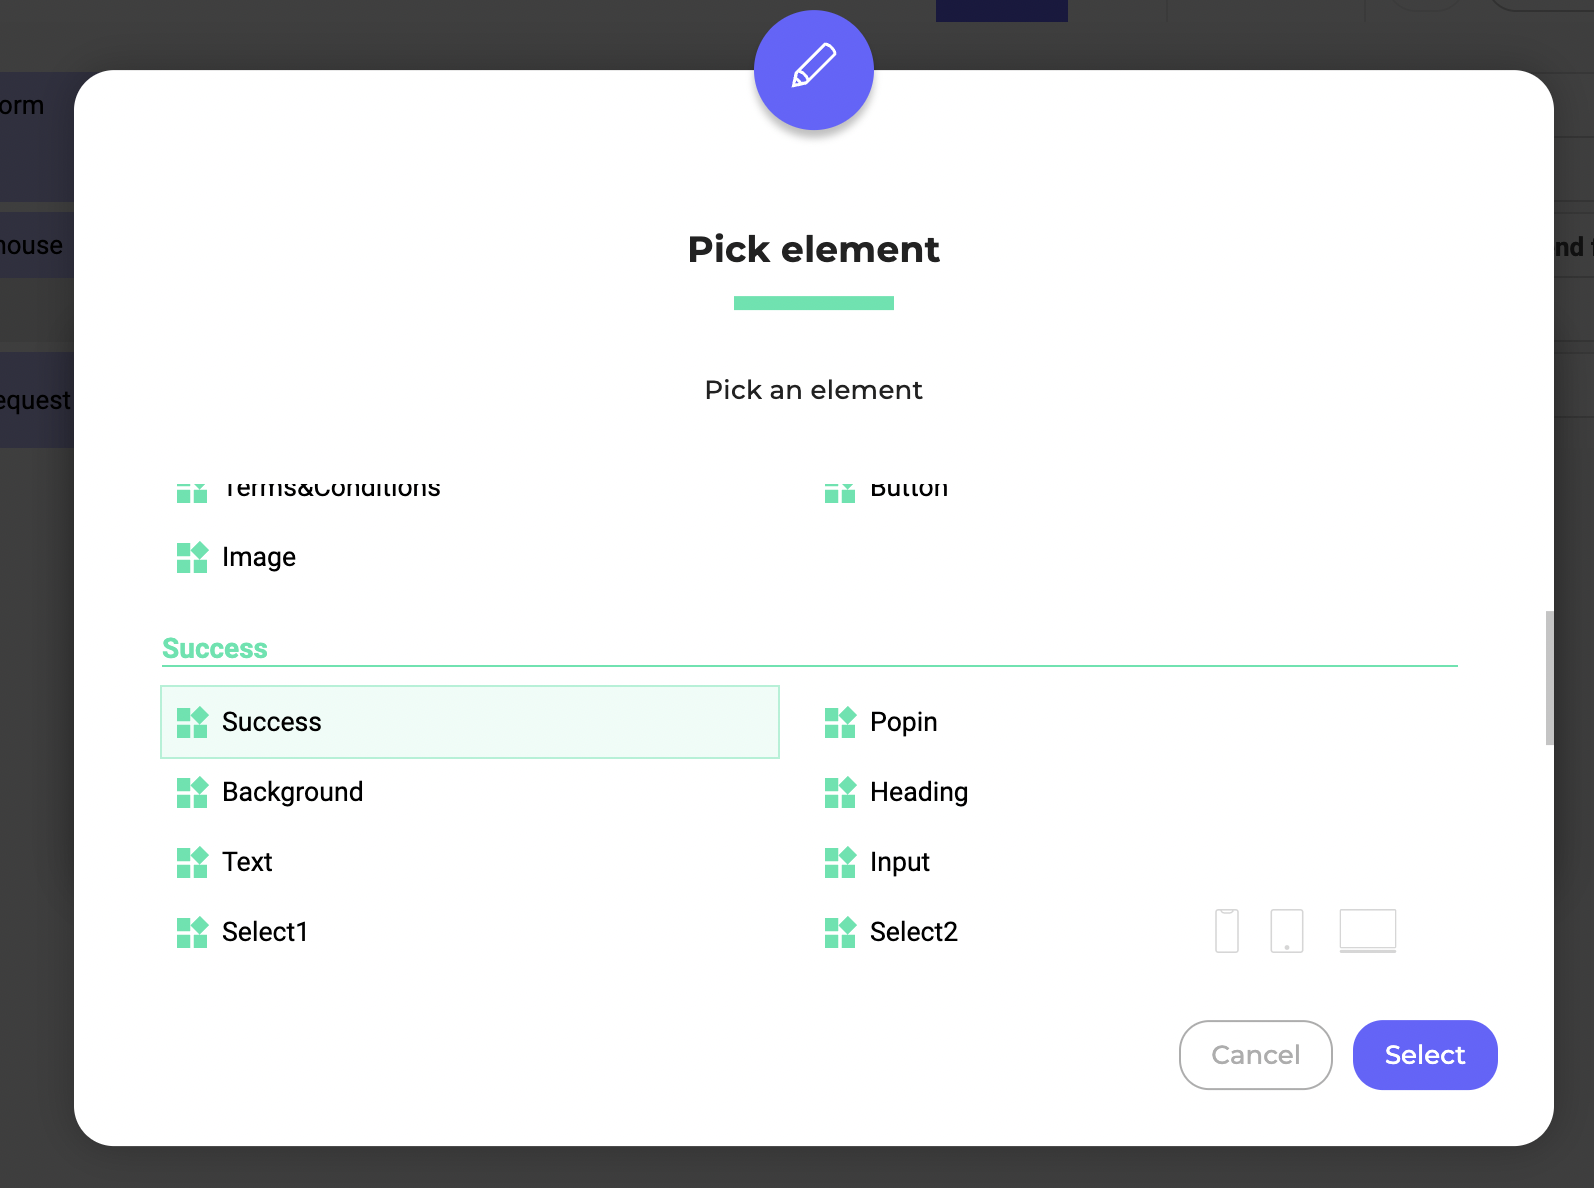
We now need to specify what happens when your event is triggered. To do this:
1. Click **Add action** > **Elements** > **Show element**.
2. Select either **Success screen** or **Failure screen** depending on the screen you want to display.
Your event is created. When the request is successful, the success screen will be displayed. If an error is detected, the error screen will be displayed.
