`). | Use for global styling or in combination with other selectors. | **Broad scope:** Alone, this targets many elements and can break page layouts. |
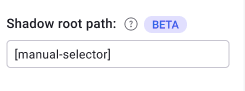
| **Manual** | Applies custom CSS or JS selectors that you write. | Use when you need complex logic or specific targeting not handled by other types. | **User error:** Requires CSS knowledge; typos or site updates can break the experiment. |
## Change an existing element
Once an element is selected, you have multiple modification tools at your disposal.
The tools are accessible in the element toolbar and the right-hand panel.
### Element toolbar

The element toolbar appears right above the selected element, providing quick access to several editing options:
* **Move**: Change the element's position.
* **Resize**: Adjust the element's dimensions.
* **Duplicate**: Create a copy of the selected element.
* **Delete**: Remove the element from the page.
* **Edit content**: Modify the text or image within the element.
### Right-hand panel

The right panel in the editor provides in-depth options for customization. Here you can access more detailed settings for the selected element, including:
* **Content**: Edit the text, image, or other content within the element.
* **Text**: Adjust text alignment, line height, and make text capitalized, uppercase, or lowercase.
* **Background**: Change the element's background color or image.
* **Opacity**: Change the element's opacity.
* **Border**: Add borders or modify their color, style, and width.
* **Shadow**: Apply shadow effects to give the element depth.
* **Padding and margin**: Fine-tune the spacing around and within the element.
* **Device styling rules**: Customize how the element appears on different devices (desktop, tablet, mobile).
* **CSS and classes**: Add custom CSS classes or styles for more advanced customization.
* **Attributes**: Edit HTML attributes of the element.
* **HTML content**: Directly modify HTML content if needed.
## Add a new element
Adding a new element in Kameleoon's Graphic Editor is straightforward and allows for extensive customization to fit your design needs.
### Open the Elements panel

In the left sidebar, click **+ Add** to open the elements panel.
### Choose an element to add
You have several options such as Text, Heading, Image, Widgets, and HTML. Click on the type of element you want to add.
### Select position of the element
You can choose the new element's position relative to other elements. Options include **Inside the page** or **Above the page**, and can be set to **Relative** or **Absolute**.
Specify the exact position relative to a selected reference element (for example, before, replace, or after).
#### Manual positioning
For precise positioning, enable the manual position option and specify the element's top, right, left, and bottom values in pixels.
### Define the reference element
You can define the reference element's CSS selector to position the new element accurately.
Click the reference element in the preview zone or manually input the CSS selector.
### Adjust display settings
Choose the display settings for different devices (desktop, tablet, mobile). You can modify the element's visibility in the left panel later if needed.
### Use the color picker
#### Eye dropper
Use the eyedropper tool to select any color on your site's page and apply it to another element.
#### Contrast ratio
In the same color picker, you can check the selected color's contrast ration with white.
#### Colors preset with the ones used on your site
In the lower part of the color picker, you will find the colors you use most on your site. Click one to apply the color to an element.
## Advanced actions
### States
The states feature allows you to customize the appearance and behavior of elements based on their interaction states. To edit an element's state:
1. Click the element you want to edit. The element toolbar and right panel open.
2. Click the **State** tab in the right panel.
3. Select the state you want to assign to the selected element: **Hovered**, **Active**, **Focus**, or **Disabled**.
Once you select a state, various customization options appear. You can change font, text, line, style, color, alignment, line height, border, shadow, padding, and margin for the selected state.
For example, if you select the Disabled state, you can change the text color to indicate that an element is inactive.
### Device styling rules
In the right-hand sidebar, you can define styling rules for an element that may differ from one device to another.

By default, changes made on one device mirror across all other devices, except for size, rotation, padding, and position settings. **Kameleoon recommends this synchronization method for A/B testing, as it yields more reliable results.**
In some cases, you can select the **Customized per device** mode. Changes made on one device remain exclusively on that device. **Kameleoon does not recommend the customized per device setting for A/B testing, as it may lead to less reliable results.**
#### Multi-device feature
You can use the multi-device feature in the Kameleoon Graphic Editor to preview how your design appears on different devices.
To view your website's appearance on different devices, click the phone, tablet, or desktop icon at the top of the editor.

You can toggle between devices to test responsiveness and make necessary adjustments to your design elements for optimal display across devices.
To test your design on different smartphone resolutions, click the three-dots menu near the device selection toolbar. A submenu lists various smartphone models along with their screen resolutions. Click a specific model to change the preview area resolution. You can then review and adjust the design to ensure it functions on the specific device.
#### Enable dynamic elements
If you [enabled support for dynamic websites](../advanced-experiment-types/set-up-experiment-single-page-app#native-setup) in your project settings and set the scope to **Selected elements** in the Graphic editor, you can include specific elements by clicking the **three-dots menu** next to a modified element and selecting **Enable dynamic elements**.

## Edit hidden elements
To edit a click-triggered menu or hover-over text on a card:
1. Enter navigation mode by clicking the icon in the header.
2. Hover or click on the trigger element
3. Hold CMD (Mac) or CTRL (PC) on your keyboard.
4. Click the element.
You'll be redirected to design mode.
# Getting started with the Graphic editor
Source: https://docs.kameleoon.com/user-manual/experimentation/web-experimentation/graphic-based-experiments/getting-started-with-the-graphic-editor
Open and navigate the Kameleoon Graphic editor to create A/B experiment variations directly on your website without writing code.
*Watch the [video tutorial](https://academy.kameleoon.com/get-started-with-web-experimentation/164219) for instructions on using the Graphic editor.*
The Graphic editor is Kameleoon's visual, no-code tool for building A/B experiment variations. It loads directly on top of your website in the browser, letting you click on any element and modify it without writing code. You can update text, swap images, restyle buttons, and adjust layouts, then preview and launch your experiment immediately.
Building test variations typically requires writing and deploying code, which creates a bottleneck when product managers, marketers, or designers depend on engineering resources. The Graphic editor removes that bottleneck so your whole team can run experiments independently.
**Before you start:**
* The Graphic editor doesn't work in incognito mode.
* When cross-site cookies are blocked, the Graphic editor won't work.
* Firefox blocks cookies by default. If you're using Firefox, you must manually enable cookies.
**Enhance the use of the Graphic editor with the [Kameleoon Graphic editor extension](#kameleoon-graphic-editor-extension).**
To troubleshoot issues with the Graphic editor and view best practices, [refer to the troubleshooting article](./troubleshooting-the-graphic-editor).
## Open the Graphic editor
Kameleoon's editing mode provides the tools to create webpage variations and launch A/B experiments.
### Via your website
To launch Kameleoon:
1. Navigate to a webpage on which you have installed the Kameleoon script.
2. Press **shift + F2** on Windows, or **fn + shift + F2** on Mac.
If nothing happens, add `#kameleoon=true` to the end of your URL.
3. Once Kameleoon loads, a pop-in opens. Fill in your username and password to access the editor.
4. A pop-in opens prompting you to select an experiment (if you've already created one) or create a new one. Click **Create** to create an experiment.
5. Fill in your experiment's information, and select **Classic A/B** under **Experiment type**.
6. Click **Start**.
The Graphic editor opens on your web page.
### Via the Kameleoon app
You can also launch the editor from the Kameleoon app.
1. Log in to your [Kameleoon app](https://login.kameleoon.com/app).
2. Click **New experiment** > **With the graphic editor**.
3. Fill in your experiment's information, and select **Graphic A/B** under **Experiment type**.
4. Click **Create**.
The Graphic editor opens on your web page.
## Structure

### Experiment panel (left side)
**Function**: Manages the current experiment, including variations and elements on the page.
**Features**:
* Add variations and elements.
* Edit CSS selectors.
* View and manage elements present on different pages.
### Main editing area (center)
**Function**: Allows direct interaction with webpage elements for editing.
**Features**:
* Select and modify text, images, and other content.
* Access editing shortcuts.
### Right panel (right side)
**Tabs:** Design, State, History
**Features**:
* Customize content, text, background, border, shadow, padding, margin, and more.
* Manage element states (for example, default, hovered, active, focus, disabled).
* Manage change history for each element.
### Top toolbar
**Function**: Offers tools for viewing and finalizing changes.
**Features**:
* Device mode switching.
* Simulate changes.
* Finalize the experiment.
## Customize the Graphic editor display
* **Zoom**: Adjust the zoom level to fit your screen and preferences.
* **Reduce Left Panel**: Minimize the left panel to increase workspace.
* **Hide Left Panel**: Completely hide the left panel for a distraction-free view.
* **Full screen Mode**: Expand the editor full screen for an immersive editing experience.
## Simulation and finalization
* **Simulation**: Click **SIMULATE** to preview how changes will look and function on your website.
* **Finalization**: Click **FINALIZE** to access the Finalization steps.
## Device switching
Use the top toolbar to switch between different device views (desktop, tablet, mobile) to ensure the design is responsive and displays correctly on all devices.
## Kameleoon Graphic editor extension
Enhance the use of the Graphic editor with the Kameleoon Graphic editor extension.
### When to use the Graphic editor extension
* Some websites restrict the usage of an iframe. To address iframe restrictions, use the Graphic editor extension to override these limitations and launch the Graphic editor.
* Certain websites present a mobile version when detecting a mobile user agent. To ensure the Graphic editor displays the mobile version correctly, the browser must identify as a mobile device. The extension facilitates the mobile identification process.
### How to install the Graphic editor extension
[Visit the Chrome Store](https://chromewebstore.google.com/detail/kameleoon-graphical-edito/jglbnpagaignkdmebicmmblgmledhpip) to download the Kameleoon Graphic editor extension.
# Troubleshooting the Graphic editor
Source: https://docs.kameleoon.com/user-manual/experimentation/web-experimentation/graphic-based-experiments/troubleshooting-the-graphic-editor
Diagnose and resolve Graphic editor issues including failed loads, CSS selector conflicts, and data discrepancies with third-party analytics.
The following section provides instructions to troubleshoot issues with the Graphic Editor and describes best practices to avoid issues in the future.
## What scenarios do the following tips resolve?
* When changes you made to an experiment's variants in the Graphic editor don't appear, even though you saved and simulated them.
* When edits you made of all pages with the Graphic editor don't appear after pushing an experiment live.
* When the Graphic editor won't load.
## How do graphic editors work?
While making changes with the Graphic editor seems easy, your webpage's architecture (for example, how it's coded) can make editing complicated.
Like most visual editors built to create experiments, Kameleoon's Graphic editor uses [CSS selector](https://www.w3schools.com/cssref/css_selectors.asp) paths to identify the elements you edit. Selectors are the cornerstone of any action you take in the Graphic editor.
Kameleoon uses two types of CSS selector paths:
* **Simple selectors, such as the unique ID of the element:** Because it is unique, it cannot be repeated on a page or assigned to another element on the same page. Therefore, changes to this element made in the Graphic editor are confined to that element.
* **Combinator selectors:** The element is selected based on a specific relationship with its parent elements.
Kameleoon's Graphic Editor follows two straightforward rules:
* **If Kameleoon finds an ID for the selected element:** Kameleoon uses the ID by default to identify the element when the page loads and applies the changes.
* **If Kameleoon doesn't find an ID for the selected element:** Kameleoon creates a combinator selector from the closest parent element that has an ID. For instance, if a product name element lacks an ID but the header has an ID, Kameleoon creates a unique path from the header element to the product name.
## What causes issues?
In general, IDs assigned to elements on [single-page applications](../advanced-experiment-types/set-up-experiment-single-page-app) are generated dynamically, meaning their values and selector paths continuously change. However, Kameleoon can track these changes. To activate the tracking option, you must set an element selection method on a page by indicating a custom attribute. To do so:
1. Click **Admin** > **Project**.
2. Click the **pencil** icon for the project you'd like to edit.
3. In the **Configuration** menu, click **General**.
4. Under **Advanced settings**, toggle **Enable support for dynamic websites (Single Page App, Progressive Web App...)** to **ON**.
5. Under **Set a custom attribute (optional)** define your desired custom attribute (for example, `data-id`, `data-qa`).

### The selector path used does not allow for the precise selection of an element
Not all elements have an ID. When the ID is absent, Kameleoon will generate a unique path from the closest parent element with an ID to the element you want to change.
Here is an example of a selector path that identifies the block that contains product thumbnail images: `#ProductSection-product-template > div:first-child > div:first-child > div:nth-of-type(6) > div:first-child > ul:nth-of-type(1) > div:first-child`.
This path starts at the parent block, `ProductSection-product-template`, and goes through five other child blocks before reaching the thumbnail block. So, the selector follows Product section template > block1 > block2 > block3 > block4 > block5 > thumbnail.
Generally, the broader the selector path, the more likely the selector will fail to cover all use cases on the website. Because each website is unique, the selector limitation presents distinct challenges for graphic editors.
Product pages may have varied layouts (such as different HTML markups); therefore, they require different selectors. For instance, some product pages may have a block for ratings, while others do not. The inconsistency in element presence breaks the original selector path Kameleoon found when creating the variant.
The risk of inconsistent element changes within an experiment grows proportionally to the length and breadth of the selector path Kameleoon identifies and depends on the dynamic nature of the product webpage layout. When the risk is too great, use other selection options Kameleoon offers from the hierarchy toolbar. You may find an HTML class that is safer to use or ask a developer or CSM to create a CSS selector or validate a choice.
Alternatively, you can have AI generate a path for an element.
1. Select an element.
2. In the left sidebar, click **Edit selector**.

3. Click **AI generation** > **Validate**.
### Conflicting changes
One reason for the popularity and widespread use of graphic editors is the ease with which they allow you to start experimentation without requiring any code. Changes are straightforward in the Graphic editor; however, you must be cautious about introducing conflicting changes to your variants.
Conflicting changes generally refer to edits made to a child element that override edits made to a parent element. An example includes editing the color of a text element (the child), then selecting the parent and changing the color again. Kameleoon will not apply or display the changes correctly because the change to the child element renders first.
To avoid conflicting changes, follow these rules:
* Never combine HTML code with other native editing capabilities of the Graphic Editor, unless you understand the exact results.
* If you plan to make changes to the same element, ensure you always select the element with the same CSS selector. Watch out for elements consisting of multiple elements.
## Graphic editor fails to load
There are a few reasons the Graphic editor may fail to load.
### The Graphic editor fails to load for anyone
#### Step 1: Verify the Kameleoon script installation
If the Graphic editor isn't loading, and you are being redirected to the login page or another destination, check whether the Kameleoon script is correctly installed on the page. To do this:
1. Open your browser's developer tools.
* On Mac, press **Command + Option + I**
* On Windows, press **Control + Shift + C**
2. Navigate to the **Elements** tab and press **Command + F** (Mac) or **Control + F** (Windows) and search for **Kameleoon** in the DOM.
Alternatively, you can:
1. Open the **Network** tab.
2. Filter by **Kameleoon** after refreshing the page to confirm if the script is being loaded.
* **If the Kameleoon script is present:** Move on to the next troubleshooting step.
* **If the Kameleoon script is not present:** You must install the script on the website to proceed.
To install the Kameleoon script, refer to the [Web experimentation installation guide](../../../get-started/web-experimentation-installation-guide#install-the-kameleoon-script)
Alternatively, if you have the [Kameleoon Chrome extension](https://chromewebstore.google.com/detail/kameleoon-debug-assistant/nimncjjomfcjmfnghgaopccmdggjfoam) installed:
1. In **Developer tools**, click the **double arrows** > **Kameleoon**.
2. Click **Dev tools** > **Tag injection**.
3. Enter your sitecode under **Sitecode to inject**.
4. Click **Inject tag**.
#### Step 2: Verify domain and subdomain configuration
Ensure that the domain and all relevant subdomains have been correctly configured in Kameleoon.
1. Click **Admin** > **Project**.
2. Select **Setup** for the relevant project.
3. Click **Modify setup**.
4. Navigate to the **Domain configuration** section and add all necessary domains and subdomains.
* For subdomains, use an asterisk (`*`). For example, `*.mywebsite.com`.
5. After adding the required domains, validate your configuration.
6. At the top of the page, click the **pencil** icon next to your project title to modify the domain URL if needed.
#### Step 3: Check for CORS policy errors
To ensure the Graphic editor functions correctly, check your browser's console for any CORS (cross-origin resource sharing) policy errors.
1. Open the console using the following shortcuts:
* On Mac: **`Command + Option + J`**
* On Windows: **`Control + Shift + J`**
2. Look for any CORS-related errors in red, as shown in the image below.
If you encounter CORS policy issues, you must whitelist the following Kameleoon domains and subdomains in your server's CORS policy configuration:
* `*.kameleoon.com`
* `*.kameleoon.eu`
* `*.kameleoon.io`
For more information, follow the steps outlined [here](../../../../developer-docs/web-experimentation/faq#what-are-the-kameleoon-domains-that-i-need-to-whitelist).
### The Graphic editor loads for some users and not for others
#### Step 1: Clear cache
You may be viewing an outdated version of your website, which could prevent the Graphic editor from loading. To resolve this issue:
##### Option 1: Empty your cache
1. Open the browser inspector using one of these shortcuts:
* On Mac: **`Command + Option + I`**
* On Windows: **`Control + Shift + C`**
2. Right-click on the browser's refresh button and select **Empty cache and hard reload**.
Once complete, try relaunching the Graphic editor.
##### Option 2: Use private browsing (incognito mode)
You can also try opening the Graphic editor in a private browsing window to ensure that no cached files are interfering.
#### Step 2: Allow third-party cookies
Ensure that your browser allows third-party cookies, as they are essential for the Graphic editor to work properly.
To enable third-party cookies:
1. Go to your browser's **Settings**.
2. Navigate to **Privacy & Security**.
3. Locate the **Third-party Cookies** section and ensure they're allowed.
#### Step 3: Disable ad blockers
Ad blockers can sometimes interfere with the proper functioning of the Graphic editor. To resolve this issue, try one of these solutions:
1. Disable your ad blocker and relaunch the Graphic editor.
2. Open a private browsing window where the ad blocker might not be active and relaunch the Graphic editor.
3. Try using another browser without ad blockers and see if the Graphic editor works there.
#### Step 4: Disable other browser extensions
Check if you have any browser extensions activated that could interfere with the proper loading of the Graphic editor. Extensions related to privacy (such as Ghostery) or performance optimizers (uBlock Origin, for example) can prevent the editor from loading correctly.
#### Step 5: Disable the VPN
Check your **VPN** application settings or taskbar for active connections and toggle it off if it’s enabled.
Disconnecting from the VPN will allow direct access to your network without routing through a different server, which may help load the Kameleoon graphic editor correctly.
#### Step 6: Switch to a different Wi-Fi network
If the Graphic editor still won't launch, there could be network-related issues. Try connecting to a different network and relaunch the editor.
#### Step 7: Use the Chrome Dev browser
The Chrome Dev browser is often more compatible with tools like the Kameleoon Graphic editor. If you're facing issues with the standard Chrome browser, switch to [Chrome Dev](https://www.google.com/chrome/dev/).
#### Step 8: Install the Graphic editor extension
Installing the [Kameleoon Graphic editor extension](https://chromewebstore.google.com/detail/kameleoon-graphical-edito/jglbnpagaignkdmebicmmblgmledhpip) can help bypass common errors, such as CORS policy issues, and improve the editor's loading performance.
#### Step 9 – Check firewall or security tools (such as Edgesuite or WAF)
If your company uses a firewall, Web Application Firewall (WAF), or proxy tool such as Edgesuite/Akamai, the Kameleoon Graphic Editor requests may be blocked.
To resolve this:
Contact your IT team and ask them to whitelist Kameleoon’s domains in the firewall/WAF configuration.
The domains and subdomains listed in [the FAQ article](../../../../developer-docs/web-experimentation/faq#easy-setup-with-wildcards) must be accessible.
Ensure both HTTPS traffic (GET, POST, OPTIONS) and WebSocket connections are allowed to these domains.
After updating the firewall configuration, relaunch the Graphic Editor to confirm if the issue is resolved.

## Data discrepancies between Kameleoon and third-party analytics platforms
Kameleoon offers many [analytics integrations](../../../integrations/integrations-overview) that measure campaign impact. However, you may see different results (such as visits, visitors, or conversions) between the Kameleoon reporting system and the third-party analytics platform. Small variations are usually normal, even if the integration is correctly set up. Different analytics platforms often define metrics or are configured differently. Some analytics platforms do not manage [ITP issues with the Safari browser](../../../../developer-docs/web-experimentation/technical-concepts/itp-management), as Kameleoon does, and [bot filtering](../../../faq#how-does-kameleoon-filter-bot-traffic-from-my-results) rules are not identical. However, investigate discrepancies greater than 7–10%.
# Visualize modified/tracked elements on a page
Source: https://docs.kameleoon.com/user-manual/experimentation/web-experimentation/graphic-based-experiments/visualize-modified-tracked-elements-on-a-page
Highlight added and modified elements in the Graphic editor to track and manage all changes made across your experiment's variations.
Kameleoon allows you to track site changes in web experiments. Tracking changes helps large teams manage multiple modifications.
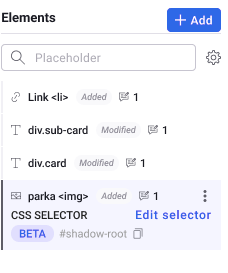
To use this feature, click the **cog** icon next to the element search bar in the Graphic editor.

Check **Added elements** and **Modified elements** under **Highlight in preview** to highlight elements that have been added or modified.
Visualize elements edited throughout the experiment lifecycle. Kameleoon labels modified or added elements as **Modified** or **Added** in the left panel.

# Website development - Best practices for A/B testing
Source: https://docs.kameleoon.com/user-manual/experimentation/web-experimentation/graphic-based-experiments/website-development-best-parctices-for-ab-testing
Follow website development best practices for HTML structure, code modularity, SPA support, and event management to optimize A/B testing.
Developing a website optimized for A/B testing campaigns requires consideration of several technical and structural elements. The following sections describe the key aspects.
## 1. Clean and semantic HTML structure
* **Proper use of HTML tags**: Use semantic tags (such as `
`, ``, ``, or ``) to improve content understanding and manipulation.
* **Unique identifiers**: Add clear and relevant IDs (`id="unique-id"`) or classes (`class="class-name"`) to elements for precise targeting.
* **Avoid unnecessary dynamic classes**: Avoid auto-generated classes unless they are meaningful (such as those from certain CSS frameworks).
* **Custom tags**: If you use dynamic classes, add non-dynamic attributes like `custom-id` to simplify element selection.
* **Explicit names**: Use clear and descriptive names for classes, IDs, and variables (such as `.cta-button` or `#main-header`) to ensure they are understandable.
## 2. Code modularity
* **Separation of concerns**: Keep HTML, CSS, and JavaScript well-separated to reduce complex dependencies. For JavaScript, expose complex logic to the `window` scope to allow reuse across different parts of the site. Exposing logic enables adding a product to the cart from a specific page or validating a form step efficiently.
* **Mutation Observers**: Use Mutation Observers to detect elements and monitor changes. Refer to the Kameleoon **`runWhenElementPresent`** API, used to detect elements rendered on the page [here](../../../../developer-docs/apis/activation-api-js/api-reference/api-reference#runwhenelementpresent).
* **Logs**: Use `console.log` as a preferred way to debug.
* **DataLayer (or equivalent object)**: Avoid changing values of the same layer of the dataLayer. If the required information is not yet available, wait to set the correct value directly, rather than updating an outdated value afterward. Refer to the Kameleoon **`runWhenConditionTrue`** API, used to detect when information is loaded on the page [here](../../../../developer-docs/apis/activation-api-js/api-reference/api-reference#runwhenconditiontrue).
* **DOM handling**: Avoid re-rendering the DOM once it has loaded. Re-rendering overwrites changes applied by Kameleoon and makes it difficult to detect when the page completes loading.
## 3. SPA (Single Page Application)
* **Cookies and LocalStorage (LS)**: Implement clear cookie or LS management to identify different steps of a form.
* **Events rendering**: To ensure that Kameleoon changes persist and are not overwritten, inform Kameleoon when the page or a specific element has finished rendering by using one of the following methods:
* Define a window variable, such as `window.pageLoadForKam = true`.
* Trigger an event on the page that Kameleoon can listen for, such as “pageLoaded” or “contentUpdated”: `window.addEventListener('pageLoaded', () => { runKameleoonVariationCode })`.
* Add a specific class or attribute to the `` tag or the target element.
* **DataLayer (or equivalent object)**: Update the **dataLayer** values after every URL change, including page transitions within the same URL (such as form steps). Instead of stacking new layers on each change, **remove the old dataLayer entries before adding new ones**. This removal ensures that Kameleoon retrieves the latest values, as it waits for the **dataLayer** definition before processing the data. If outdated values persist across pages, Kameleoon may execute before the **dataLayer** updates, leading to the retrieval of stale data from the previous page. Otherwise, refer to the “custom setup” section of the [Single Page App article](../advanced-experiment-types/set-up-experiment-single-page-app) to handle dataLayer information retrieval.
Refer to the guide on [**how to set up an experiment on a single-page app**](../advanced-experiment-types/set-up-experiment-single-page-app) for best practices.
## 4. Event management
* **Multiple triggers**: Allow for the manipulation of events such as `click`, `mousedown`, or `hover`.
# Manage your experiments
Source: https://docs.kameleoon.com/user-manual/experimentation/web-experimentation/manage-your-web-experiments/manage-your-experiments
Search, filter, sort, and perform actions on web experiments from the Experiments dashboard, including bulk operations and custom views.
## Access the Experiments Dashboard
To access the Experiments Dashboard from the App, click **Experiences** > **A/B Test**.

## Structure of the Dashboard

### Header
* Title of the current view
* Button to create a new experiment
### Search Bar
* Search tool
* Count of currently displayed experiments
### Experiment Cards and Columns
* Display experiment information
* Include Results and Finalize buttons
* Provide sorting functionality
* Offer a three-dot menu for experiment-specific actions
### Sidebar
* Filter options
* Customizable columns
* View selection
* Secondary actions linked to the three-dot menu
## Experiment information
Each experiment is represented by a card containing key information. Hover over the tooltip next to an experiment's name for detailed insights without accessing the editors or Results page.

## Find an experiment
For users with numerous experiments, a search bar, filter tool, and sorting tool enable efficient experiment discovery. The right-hand panel provides direct access to various filters, while column headers enable sorting. These features expedite the search process.
### Filter

You can filter your experiments according to several criteria:
* **Website:** Select associated website(s) and click **Apply** to filter experiments.
* **Type:** Choose experiment type (for example, Graphic A/B) and click **Apply** to filter.
* **Status:** Select experiment status (for example, diverted) and click **Apply** to filter.
* **Key Date:** Select a key date (last modification, status change, launch, creation) and click **Apply** to filter.
* **Tag:** Select associated tags and click **Apply** to filter experiments.
* **Goal:** Select associated goals and click **Apply** to filter experiments.
* **Segment:** Select associated segments and click **Apply** to filter experiments.
Kameleoon generates a unique URL with custom parameters when filters are applied, enabling sharing with team members. Click **Copy link to this filtered dashboard** to the right of the dashboard title to access the shareable link.

### Sort
The sorting option allows you to organize experiments based on several criteria:
* **Name:** Hover over **Name** and click the chevron to sort alphabetically or reverse alphabetically.
* **Type:** Hover over **Type** and click the chevron to rank experiments by type.
* **Status:** Hover over **Status** and click the chevron to sort experiments by status (**Online**, **Paused**, or **Draft**, for example).
* **Edited:** Hover over **Edited** and click the chevron to sort from newest to oldest edition date or vice versa.
* **Tags:** Hover over **Tags** and click the chevron to sort by tags alphabetically or reverse alphabetically.
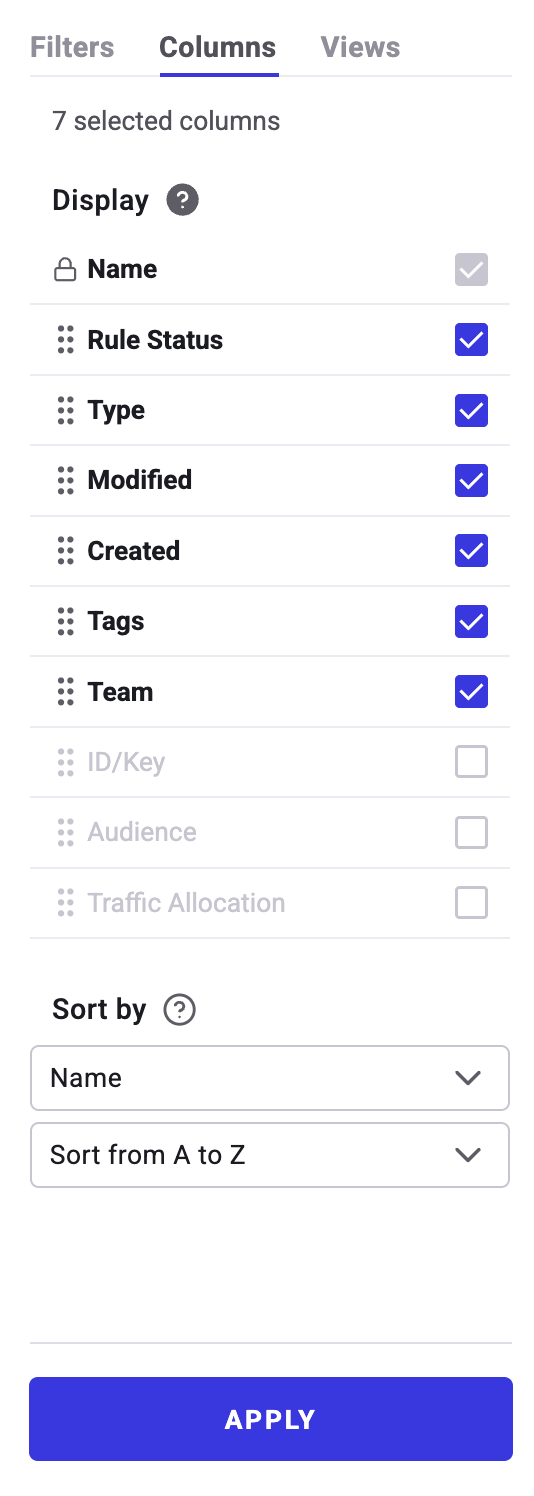
## Columns
Customize your dashboard layout by adding, removing, or rearranging columns to highlight important information.
Customize displayed information by selecting columns in the sidebar's **Columns** tab. Check desired columns to display them. Rearrange display order by dragging and dropping cards. Click **Reset** to restore the original column configuration.

### Sort by
Sort campaigns by:
* Name
* Type
* Status
* Edition date
* Tags
Additionally, you can save these configurations as a **View** for later use, and set it as your default dashboard view.
## Actions on an experiment
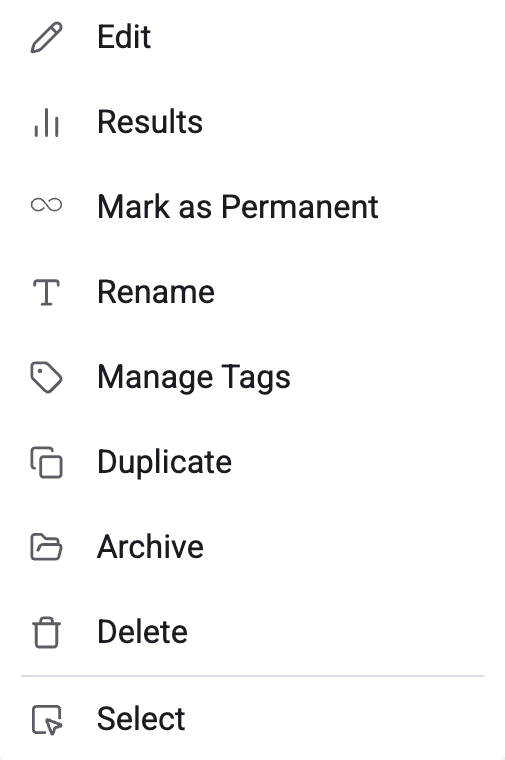
Click the three dots on the right of an experiment's card to access various actions based on experiment status.
### Experiment Actions
The three-dot menu provides various actions based on experiment status:
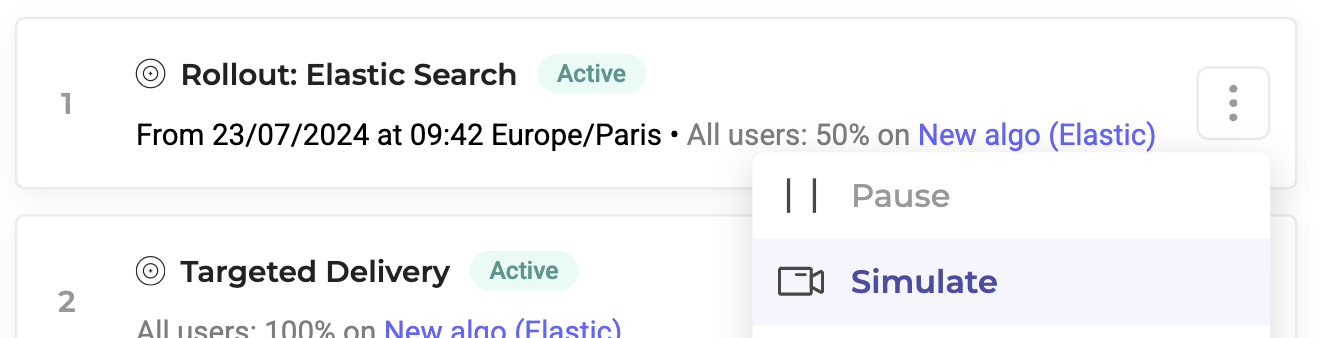
* **Pause:** Pauses an online experiment (status changes to **paused**). A confirmation notification appears.
* **Stop:** Stops an online experiment (status changes to **stopped**). A confirmation notification appears. Stopping allows deletion.
* **Delete:** Select the experiment, click the three dots menu, and choose **Delete**. Only stopped or draft experiments can be deleted.
* **Edit:** Accesses the Graphic or Code editor based on experiment type and status.
* **Simulate:** Opens the simulation panel on the website page.
**Additional Actions:**
* **Rename:** Opens the **Rename** sidebar. Click **Save** to confirm the new name.
* **Manage Tags:** Opens the **Manage tags** sidebar. Highlight existing tags, add new ones, and click **Save** to confirm.
* **Duplicate:** Creates a copy of the experiment. Click **Save** in the **Duplicate** sidebar to confirm. The new experiment appears in the Dashboard.
* **Archive** (Draft or Stopped experiments only): Moves the experiment to the [**Archived experiments** view](#archived-experiments).
* **Select:** Select multiple experiments for bulk actions (for example, archive and export). Click the three dots menu and choose **Select**.
**Grouped Actions (Multiple Selection):**
* **Select all/Deselect all:** Selects/deselects all experiments on the page.
* **Manage tags:** Applies tag management to all selected experiments.
* **Pause** (Online experiments only): Pauses all selected experiments.
* **Stop** (Online experiments only): Stops all selected experiments.
* **Archive** (Draft and Stopped experiments only): Archives all selected experiments.
* **Delete** (Draft and Stopped experiments only): Deletes all selected experiments.
* **Export:** Exports all selected experiments.
## Views
### Save Custom Dashboard Views
Create a view to save applied filters, displayed columns, and their order. For example, you can create a view displaying only online and diverted graphic experiments. Access and apply saved views from the sidebar's **Views** tab.
Kameleoon generates a unique URL with custom parameters, so you can share your view with team members. Click **Copy link to this view** to the right of the dashboard title.
You can set a view as default to load it automatically upon dashboard access.
Clicking the page subtitle shows applied filters in the sidebar. For example, clicking **My "Drafts" view** on the left side of the dashboard header displays and highlights applied filters in the sidebar.

### Archived experiments
Click the default archived view to view archived experiments. Only archived campaigns appear on the dashboard. View and restore archived experiments as needed.
Click the three-dots icon to simulate or permanently delete an archived experiment, or access its results if it was stopped.
## Edit an online or paused experiment
### From the finalization flow
Click the **Save** button in the [finalization flow](../configure-and-launch/finalizing-an-experiment). When you click **Save**, a Configuration summary opens.

To create a duplicate of the experiment, click **Duplicate**. To apply changes to the existing experiment, click **Re-configure**.
### From the Experiments dashboard
To edit an online or paused experiment from the Experiments dashboard, hover over the **pencil** icon on an experiment's card and click **Edit**. The finalization flow will open.

Modifying an online experiment will have consequences on results. We recommend duplicating it or creating a new experiment.
# Get started with prompt-based experimentation
Source: https://docs.kameleoon.com/user-manual/experimentation/web-experimentation/prompt-based-experiments/get-started
Learn the fundamentals of prompt-based experimentation (PBX) and how to set up your environment to start creating AI-generated experiments.
Prompt-based experimentation (PBX) is a fast and intuitive way to create experiments using natural language prompts and generative AI. Instead of coding or relying on a visual editor, simply describe the change you want to make. The AI then generates a measurable, targeted experiment that you can simulate and run directly on your website.
For more information on creating PBX experiments, see [Create a prompt-based experiment](./pbx-build/create-a-prompt-based-experiment). For help writing effective prompts, see [How to write effective prompts (dos and don'ts)](./pbx-build/how-to-write-effective-prompts-dos-and-donts).
Kameleoon offers a free trial of prompt-based experimentation so you can explore its capabilities before committing. For more information on available PBX plans, see [Prompt-based experimentation plans](./pbx-build/prompt-based-experimentation-plans).
## What is Prompt-Based Experimentation?
Prompt-based experimentation is a form of vibe experimentation. It provides a new way to create, configure, and analyze experiments using natural language prompts and generative AI.
Instead of relying on a visual editor or writing code, describe what you want to test and define your success criteria. The AI then generates a fully configured experiment that is both targeted and measurable.
PBX combines the flexibility of a visual editor with the creative power of generative AI. It handles advanced layout changes, generates new elements, and applies brand-oriented designs—often exceeding the capabilities of traditional visual editors. PBX works directly on your existing website, allowing you to optimize and iterate without building new products from scratch.
To learn more about how PBX works, including its LLMs and how to get the best results, see the [PBX FAQ](./prompt-based-experimentation-faq).
### Examples of what you can create
With prompt-based experimentation, you can:
* Add dynamic **Add to cart** buttons on product pages that align with your brand’s identity.
* Implement sticky headers or call-to-action bars consistent with your site’s design.
* Introduce persistent, personalized pop-ups and tooltips triggered by user behavior.
* Add infinite scroll to your website’s category pages.
* Generate quizzes, forms, pop-ups, banners, and surveys that accelerate the customer journey and increase user engagement.
## Generate test ideas with PBX Ideate
Kameleoon’s PBX Ideate analyzes your website to identify friction points and automatically generates optimization hypotheses. Developed in partnership with Conversion, a leading experimentation agency, this feature uses the **Lever Framework** to diagnose issues in five key areas:
* **Comprehension**: Evaluates how clearly users understand your offer.
* **Motivation**: Identifies what drives users to take action.
* **Trust**: Assesses the credibility and legitimacy of your site.
* **Cost**: Measures the perceived time, effort, and financial cost.
* **Usability**: Evaluates how easily users can navigate and interact with your site.
PBX Ideate transforms these observations into actionable test ideas with predicted impact scores. You can review these suggestions and launch experiments directly in the PBX editor.
To learn more about the logic behind these suggestions, see [What powers PBX Ideate?](./pbx-ideate/what-powers-pbx-ideate). To learn how to scan pages and review ideas, see [Generate test ideas](./pbx-ideate/generate-test-ideas).
## Benefits of prompt-based experimentation
* **Speed:** Build experiments in minutes instead of hours.
* **Accessibility:** Non-technical users create meaningful tests without coding.
* **Scalability:** Teams run more experiments and increase testing velocity without scaling developer resources linearly.
* **Quality:** PBX automatically generates code that is secure, responsive, and accessible.
* **Increased throughput and learnings:** More tests lead to more learnings. A faster feedback loop accelerates insights.
For more information on the value added by PBX, see [this FAQ entry](./prompt-based-experimentation-faq#how-does-pbx-differ-from-other-vibe-coding-tools).
### Before and after with PBX
| Dimension | Before PBX | After PBX |
| :-------------------------- | :------------------------ | :---------------------------------------------- |
| **Setup time** | Days or weeks of work. | Hours with PBX templates. |
| **Experiments per quarter** | 2–3 experiments. | 5–10x more experiments with the same resources. |
| **Stakeholders** | Technical teams. | Product, marketing, and design teams. |
| **Quality and consistency** | High risk of errors. | Standardized, validated implementations. |
| **Team focus** | Developer-heavy workload. | More time for ideation and analysis. |
| **Experimentation culture** | Limited to a few teams. | Organization-wide adoption. |
## Prerequisites
Before creating a prompt-based experiment, meet the following requirements:
* The Kameleoon PBX extension is only available on browsers that support the Chrome Web Store (for example, Chrome, Arc, Brave, Edge).
* **Install the Kameleoon PBX extension.**
1. Go to the [Chrome Web Store](https://chromewebstore.google.com/detail/kameleoon-prompt-testing/eppgaaffepbibmnbaoodmilbhnmphchp) and install the Kameleoon PBX extension.
2. Once installed, you can [create prompt-based experiments](./pbx-build/create-a-prompt-based-experiment) directly in your browser.
* **Install the Kameleoon script on your website:** [Implement the Kameleoon script](../../../../developer-docs/web-experimentation/implementation-and-deployment/standard-implementation) on the site where you want to simulate or run your experiment. Without the script, Kameleoon cannot execute or track experiments.
* **Check your Content Security Policy (CSP):** If your website restricts the loading of resources (scripts, images, media, CSS) via the CSP HTTP header, you must update your CSP to allow Kameleoon resources. Otherwise, PBX will not load. Kameleoon notifies you with a warning pop-up if you need to update your CSP. [Learn more about updating CSP for Kameleoon](../../../../developer-docs/web-experimentation/faq#easy-setup-with-wildcards).
* **Allow third-party cookies:** PBX uses a session cookie hosted on the Kameleoon domain for authentication. Ensure you disable the **Block third-party cookies** option in your browser settings. If the PBX editor repeatedly prompts you to log in, verify that your browser allows third-party cookies.
For more information on PBX limitations and compatible sites, see the [PBX FAQ](./prompt-based-experimentation-faq#does-prompt-based-experimentation-work-on-any-website-what-are-the-current-limitations).
### PBX extension capabilities
The Kameleoon PBX extension provides the necessary context for Kameleoon to understand your page's content, structure, and design. This allows the AI engine to generate variations autonomously while accounting for the specific context of the page.
With the extension installed, use the Kameleoon PBX editor directly on any page of your website to build variants with AI. If you use a compatible browser without the extension, Kameleoon prompts you to download it.
#### Data privacy and security
The extension does not collect or transmit personal or sensitive data from your website's visitors. When you build an experiment in the PBX editor, the extension captures and transmits all content visible on the page—including HTML structure, text, and screenshots—to the AI model. This data provides the necessary context for your prompt. While this ensures that Kameleoon sends no end-user data to the AI model, the model processes any information visible to you during the creation process.
For more information, see [How PBX protects personal or sensitive data](./prompt-based-experimentation-faq#how-does-pbx-protect-personal-or-sensitive-data).

# Best practices and safeguards
Source: https://docs.kameleoon.com/user-manual/experimentation/web-experimentation/prompt-based-experiments/pbx-build/best-practices-and-safeguards
Apply performance, data quality, and governance safeguards to scale prompt-based experimentation responsibly without compromising results.
Accelerating experimentation velocity requires care and balance. This article outlines some key safeguards to ensure that performance, data quality, and governance are never compromised.
## Performance
PBX accelerates experimentation by generating full experiences, even for SPAs and dynamic pages, from prompts using Kameleoon's best coding practices based on the Kameleoon API. Each experiment follows the **DRY principle** ("don't repeat yourself"), reusing common segments, triggers, and goals to reduce errors and ensure consistent quality.
As speed increases, more code runs on your pages, so page performance must be closely monitored. Key practices include:
* **Integrate winners quickly:** Once results are reliable, integrate winning variations into your site's source code promptly. This integration requires aligned developer resources and a workflow that matches the faster experimentation rhythm; otherwise, prolonged exposure to experimental code could degrade performance.
* **[Archive and cleanup:](../../../../../developer-docs/web-experimentation/best-practices/code-debt-cleanup)** Regularly archive or remove experiments that are no longer active. Establishing a monthly or bi-monthly routine following the steps listed [here](../../../../../developer-docs/web-experimentation/best-practices/code-debt-cleanup) is essential to maintain a stable runtime. **Limit the total number of segments and goals to 50 each, and avoid running experiments for more than three months** to keep experiments manageable, reduce complexity, and maintain consistent site performance.
* **[Monitor page performance:](../../../../../developer-docs/web-experimentation/troubleshooting/impact-on-your-websites-performance)** Keep tracking metrics, such as First Contentful Paint (FCP), Largest Contentful Paint (LCP), and Cumulative Layout Shift (CSL). Alerts or dashboards can help spot regressions early, ensuring experiments scale safely without slowing your site.
**Key takeaway:** Regularly clean up inactive experiments and anticipate integrating winning variations quickly to keep pages fast and experimentation scalable.
## Data and measurement
As experimentation volume grows, so does the complexity of analyzing data. With more experiments running simultaneously, teams face challenges, like overlapping audiences, tracking inconsistencies, and the risk of biased or conflicting results. To scale insights safely and efficiently while addressing these issues, follow these practices:
* **[Cross-campaign analysis:](https://www.kameleoon.com/blog/run-overlapping-tests-confidence-kameleoons-cross-campaign-analysis)** The Cross-campaign analysis feature lets you filter and break down test results based on exposure to other experiments. You can automatically detect interaction effects and safely interpret the results of overlapping campaigns.
* **[Set up alerts:](../../../../experiment-analytics/analyze-results/results-page/results-page-actions#alerts):** Receive real-time email notifications about key metrics to quickly identify anomalies. Create personalized criteria that triggers alerts when specific conditions are met.
* **Leverage AI analysis:** Use AI-powered [learnings](../../../../experiment-analytics/analyze-results/results-page-tabs/learnings-menu) directly from the Results page to continuously interpret your experiment's outcomes.
While PBX accelerates experiment ideation, creation, and rollout, you can use other AI tools to detect opportunities and deliver personalized experiences in real time, helping you maximize insights and revenue as experiment volume grows.
* **[Opportunity detection:](../../../../ai-opportunity-detection/get-started)** Identify winning variations in other segments automatically to maximize learnings across your audience.
* **[Predictive targeting:](../../../../ai-predictive-targeting/target-users-based-on-likelihood-to-convert)** Kameleoon's AI generates propensity scores to adapt and deliver personalized offers or content in real time based on visitors' behaviors, goal conversions, and triggered events, helping you anticipate intent and maximize revenue.
* **Traffic allocation with [contextual bandits](../../advanced-experiment-features/contextual-bandits):** Contextual bandits dynamically allocate traffic based on real-time user context, delivering faster insights and better outcomes. Each visitor is assigned to the variation predicted to perform best for them, ensuring dynamically tailored experiences.
**Key takeaway:** Combine AI insights, alerts, and cross-experiment checks to handle higher experiment volume while keeping data actionable and reliable.
## Governance and strategy
When using PBX, maintaining strategic oversight is critical to ensure quality and impact. Key practices include:
* **Prioritize high-impact tests:** Avoid running only "easy" or low-impact experiments for the sake of speed. Focus on tests that align with business objectives and drive meaningful results.
* **Manage user fatigue:** Limit concurrent experiments to prevent UX degradation caused by conflicting messages or page clutter.
* **Maintain experiment quality:** Don't let velocity compromise strong hypothesis building, thoughtful design, or reliable measurement.
**Key takeaway:** Establish a review team or lightweight approval workflow to balance speed with strategic oversight, keeping your experimentation program both scalable and impactful.
***
Kameleoon's PBX helps organizations scale testing responsibly, ensuring quality, data integrity, and strategic alignment. The result is a sophisticated, sustainable, and high-ROI experimentation culture.
# Contentsquare X PBX integration
Source: https://docs.kameleoon.com/user-manual/experimentation/web-experimentation/prompt-based-experiments/pbx-build/contentsquare-pbx-integration
Connect Contentsquare with Kameleoon PBX to turn behavioral insights from Zoning Analysis directly into prompt-based A/B experiments.
You can connect Contentsquare with Kameleoon's prompt-based experimentation (PBX) to turn behavioral insights into actionable A/B tests. This integration helps you generate impactful prompts directly from Contentsquare and generate variations in Kameleoon.
## Why use this integration?
Contentsquare provides a deep understanding of user behavior, while Kameleoon enables you to act on that data. By combining the two, you can:
* Identify opportunities for optimization with Contentsquare.
* Generate hypotheses and experiments without writing code.
* Save time by moving directly from insights to test execution.
## Setting up Contentsquare X PBX
To set up the Contentsquare integration for PBX, follow the guidelines in [this](../../../../integrations/as-a-destination/analytics/contentsquare) article.
For more details on setup and best practices, refer to [this Contentsquare article](https://support.contentsquare.com/hc/en-us/articles/40147042818193-Automated-A-B-Test-with-Kameleoon?mkt_tok=NjIxLUdEWC0wMjUAAAGd92u0vjAD5iDs2gKcRzCAp9XxJyQ8UT95gc_b3Dj1VZ3z_bWbniJI8TAr9qqLPM5cee0t3CXTKNdkY9XbYCEBzNjvO0su7rZA-VJNMnrA).
## Launching a PBX experiment from Contentsquare
1. In Contentsquare, navigate to the **Zoning Analysis** menu.

1. Under **Further analysis**, click **Design A/B test**. The **Design A/B test** panel opens.
2. Click the zone you'd like to optimize to display its name and enter the name into the text field.

4. Describe your hypothesis, name your test, and detail the visual changes you'd like to occur.

5. Click **Create A/B test**.
From there, you will be redirected to Kameleoon's PBX interface with your generated prompt.

Kameleoon automatically generates your variation. From here, you can configure and launch it like any other PBX experiment in Kameleoon.
***
In short, this integration allows you to move seamlessly from **insight (Contentsquare)** > **hypothesis (PBX)** > **live experiment (Kameleoon)**.
# Create a prompt-based experiment
Source: https://docs.kameleoon.com/user-manual/experimentation/web-experimentation/prompt-based-experiments/pbx-build/create-a-prompt-based-experiment
Learn how to create AI-powered experiments in minutes by writing natural language prompts.
You can create AI-powered experiments in minutes by writing a simple prompt—no coding needed.
For a guided tour of prompt-based experimentation in Kameleoon, click [here](https://kameleoon.navattic.com/dac08g2).
## Access the creation flow
1. In the Kameleoon app, go to **Experiences** > **A/B Test** > **New experiment**.
2. If you use the Starter or Trial plan, the prompt-based interface opens automatically.
3. If you use the Enterprise plan, a pop-up appears. Select **By Prompt**.
You cannot use the Graphic editor to edit a variant that PBX generates. For more information, see the [FAQ](../prompt-based-experimentation-faq#can-i-use-the-graphic-editor-on-a-variant-created-with-ai).
4. Enter the required information and click **Create**.
If you use PBX without the Kameleoon script installed, refer to the [PBX FAQ](../prompt-based-experimentation-faq#can-i-create-a-prompt-based-experiment-without-installing-the-kameleoon-script) for guidance.
## Configure your experiment
### 1. Define your prompt
In the prompt field, describe the modification you want to make using natural language. You can resize the prompt area by clicking and dragging the corner.
**Examples:**
* *“Update the product listing grid to display 2 products per row instead of 4.”*
* *“Change the default sorting option to ‘Price, low to high’.”*
By analyzing your website and existing visual assets, Kameleoon automatically detects and maps your brand identity, including your tone of voice, fonts, imagery, and color palette.
#### Use images and designs
To provide visual context or add specific assets (like banners or pop-ups), click **+** > **Add an image** or paste an image from your clipboard. You can attach up to 10 images in a single prompt for complete visual context.

PBX automatically detects how to use each image—no manual tagging required:
* **Asset:** PBX inserts the image file directly into the variation.
* **Mockup:** PBX uses the image as a reference to recreate the design with code.
To preview an uploaded image, click it in the prompt area. You can also click **Copy reference** to copy the image link.
You can also import Figma designs directly. For more information, see [Import designs from Figma](./import-designs-from-figma).
For details on prompt limitations, see the [PBX FAQ](../prompt-based-experimentation-faq#can-i-create-any-type-of-variant-with-prompts).
#### Select elements
Help the AI identify which elements to modify in the following ways:
* **Text description:** Describe the element in your prompt (for example, *"Move the product grid below the banner"*).
* **Selection box:** Click **+** > **Draw sketch** and outline the target element on the page. Use the toolbox to draw, erase, or delete your selection.
PBX can also navigate to other pages on your site or to external sites if your prompt requires it—for example, to reference a design element from another page, or to use another website as inspiration.
You cannot scroll or draw outside your current view when using the drawing tool. Use text descriptions for elements located lower on the page.
#### Configure AI Settings
Customize how the AI generates variants and interacts with your website. Click the **+** icon and select **AI Settings**. In the **Projects** sidebar, select the project you want to edit.
The AI Settings menu includes two tabs:
* **Master Prompt:** Define overarching instructions and context for the AI. For more information, refer to the [Master Prompts](./master-prompts) article.
* **Technical Settings:** Configure technical preferences for your project. You can adjust the following options:
* **Website adapts automatically to different screen sizes:** Enable this option for responsive websites. Disable it if your mobile version uses a separate URL or does not update on resize.
* **Enable support for dynamic websites (SPA, PWA...):** Enable this option to detect virtual URL changes and ensure URL targeting and data collection work correctly.
* **Custom attribute:** Set a custom attribute to allow Kameleoon to track every virtual URL change, enable URL targeting, and gather data, such as the number of page views.
* **Avoid dynamic IDs selectors:** Specify selectors to avoid.
Click **Save** to keep your changes, or click **Back to the editor** to return to the editor interface and discard any changes.
### 2. AI workflow
When you submit a prompt, PBX works through the change in real time. Each action the AI takes appears as it happens, along with its reasoning in plain language, so you can follow what PBX is doing at every step.
#### Real-time tracking and reasoning
As PBX generates your variation, you can see each step it takes and the thinking behind it. PBX highlights elements on the page as it processes your prompt, showing you exactly what the AI is targeting.
#### AI navigation
PBX can navigate to other pages on your site or to external sites when your prompt requires it. You can reference a feature or design element from a different page, or point the AI at another site to use as inspiration. You can request this directly in your prompt—for example, "Replicate the search filter layout from this travel booking site: `www.example.com/search`."
#### Interaction tools
At key points in the generation process, PBX pauses and presents one of the following interaction tools before continuing:
* **Highlight elements validation:** PBX highlights the element it intends to modify. Confirm the selection or redirect PBX to a different element.
* **Option picker:** PBX presents two or more design options for you to choose from. Select the option that best fits your intent.
* **Confirmation:** PBX summarizes the action it is about to take and asks you to confirm before it commits.
This see-understand-steer loop catches wrong turns early, reducing rework and dead-end generations.
#### Choose between variations
After generation, PBX presents several variation options for you to compare. Select the one that best matches your intent and click **Apply version**. If none of the options are right, continue prompting to refine the result or provide additional details.
The AI may also ask clarifying questions (for example, about image preferences or content types) to make sure the result matches what you have in mind.
#### Undo a prompt
Each prompt's output includes an **Undo** button. Click it to rewind your variation to the state it was in when that prompt completed, discarding all changes made by later prompts.
Use this when a follow-up prompt moves the variation in the wrong direction. Rather than starting over, click **Undo** on the prompt you want to return to and try a different approach from that point.
#### Create from sketches
Design components like pop-ups or overlays by drawing them directly on the page:
1. Click **+** > **Draw sketch**.
2. Draw your design.
3. Prompt the AI to build it (e.g., *"Build the popup based on my sketch"*).
Follow [best practices for writing prompts](./how-to-write-effective-prompts-dos-and-donts) to get the best results.
### 3. Review and adjust the generated code
Click the **Code** switch in the header to open the code panel. Click **`CSS`** or **`JS`** to view and edit the relevant code. Click **Edit code** to make changes.

If you prompt several times and generate multiple versions for a given variant, you can switch between those variants using the dropdown in the top-left of the code panel.
Once the AI generates content for your experiment, you can refine its output by editing the underlying code.
To refine a variant using prompts instead of code, see the [FAQ](../prompt-based-experimentation-faq#my-first-prompt-didnt-generate-the-right-output-can-i-submit-additional-prompts-to-fix-whats-incorrect).
### 4. Compare and simulate
Use the header buttons to switch between views:
* **Website display:** Preview the variant appearance.
* **Code:** View the technical implementation.
* **Compare:** Compare different variations side-by-side.

#### Preview on different devices
To see how your variant looks on different screen sizes, click the **mobile**, **tablet**, or **desktop** icons at the top of the page. Switching the device preview does not affect the generated code.
Click **Simulate** to test the experiment live on your website before launching.
#### Share your experiment

Click the **share icon** in the top-right to:
* **Copy link:** Share a direct link to the experiment.
* **Share on LinkedIn:** Post your experiment directly to your feed.
## Finalize the experiment
Once your variation is complete:
1. Click **Finalize**.
2. Set your goals, audience targeting, and traffic allocation.
3. Launch your experiment.
You are now ready to experiment faster than ever, with no code and no delay.
# How to write effective prompts
Source: https://docs.kameleoon.com/user-manual/experimentation/web-experimentation/prompt-based-experiments/pbx-build/how-to-write-effective-prompts-dos-and-donts
Write clear, specific, and actionable prompts for PBX by following context, precision, and simplicity principles to get the best AI-generated variations.
Prompt-based experimentation (PBX) uses AI to help you build and test ideas quickly. You do not need coding skills to create high-performing variations—you only need to know how to communicate your vision to the AI.
Think of the AI as a skilled collaborator. If you provide clear instructions and context, the AI can deliver precise results. Use this guide to learn the principles of effective prompting.
## What makes a good prompt?
To get the best results from the AI, focus on these three core principles.
### Context
Provide context on the goal of your change. Explaining why you want to test a particular idea helps the AI tailor its output to meet your objectives.
* **Good:** "Change the color of the CTA to blue to improve visibility for the user." ✅
* **Too vague:** "Make this CTA nicer." ❌
### Precision
Be specific about the change you want to make. Give an accurate visual description, including details like size, color, shape, position, and style.
* **Good:** "Add a white delivery truck icon next to the free shipping text to improve the click-through rate. The icon's height should match the text height." ✅
* **No clear goal:** "Change up the design." ❌
### Simplicity
Use simple, actionable terminology. Focus on clear instructions and stick to one request per prompt. Do not overcomplicate the prompt with technical jargon.
* **Good:** "Replace the white background with a top-to-bottom gradient from `#2b5d50` to `#dae995`." ✅
* **Too many instructions:** "Change the button color, add a promo image, and move the text." ❌
## Follow a clear prompt structure
Users succeed with PBX when their prompts follow a clear structure. Use these four steps for more complex requests:
1. **Define the change**
* State exactly what transformation you want to achieve.
2. **Specify visual and layout changes**
* Detail the visual changes for the target element, layout guidelines, and design elements. You can also reference mockups or design files here.
3. **Explain the behavior**
* Describe how the target element should respond to user actions.
4. **Set boundaries and limitations (optional)**
* Define technical limitations, responsive requirements, and what should not happen.
Use an LLM to refine complex prompts before you use them in Kameleoon. You can even provide the above prompt structure as a template for the LLM to follow.
## Examples in action
Review these examples to see how the prompt structure works in practice.
### The "compare hotels" prompt
This example provides a clear structure for a complex feature:
> "Build a 'Compare hotels' feature like the mockup. Add a 'Compare properties' toggle in the left sidebar to turn it on or off. When the toggle is on, show a 'Compare' checkbox on each property card in the bottom right. If at least one property is selected, show a sticky bottom tray with thumbnails, an 'X/5 selected' counter, and 'Cancel' and 'Compare' buttons. Clicking 'Compare' opens a simple modal showing the selected listing details. Limit selection to 5."


### Will this prompt work?
**Prompt:** "Replace the 'Show on map' block with a movable floating 'Map' button. Users should be able to drag it anywhere on the page. Clicking it should open the map view."
**Verdict:** ✅ **Yes.** It follows the recommended prompt structure and clearly describes the transformation.

**Prompt:** "Show a 15% discount for returning loyal customers."
**Verdict:** ❌ **No.** AI currently struggles to create new functionalities that involve dynamic data or backend logic.
**Prompt:** "Make the grid view the default view."
**Verdict:** ✅ **Yes.** If the grid view already exists on the page, the AI can change the default state.

## When in doubt...
If you are unsure how to phrase a prompt, keep these tips in mind:
* **Think big, but stay realistic:** AI cannot create new backend functionality. Focus on UI and UX changes.
* **Keep it simple:** Straightforward changes do not need complex prompts.
* **Treat AI like a teammate:** Write prompts as clearly as you would brief a developer.
You can also use the **Draw a sketch** feature to visually circle the area you want to update, the **Import a file** feature to provide a mockup for the AI to follow, [import designs directly from Figma](./import-designs-from-figma), or reference an external website as inspiration—for example, "Replicate the filter layout from this travel booking site: `www.example.com/search`."
# Import designs from Figma
Source: https://docs.kameleoon.com/user-manual/experimentation/web-experimentation/prompt-based-experiments/pbx-build/import-designs-from-figma
Import Figma frame designs directly into Kameleoon PBX to use as visual inputs for generating experiment variations without manual coding.
You can import Figma designs directly into Kameleoon to use in prompt-based experiments. This **Figma-to-prompt** integration lets you transform your Figma frames into functional website elements without manual coding. You can reference multiple Figma frames in a single prompt, and PBX generates variations that match each frame's layout and spacing pixel-perfectly, including design assets such as images, icons, and embedded media.
## Access the Figma integration
The Figma icon appears in the prompt area of the PBX interface. You can find it to the right of the **+** icon, which you use for sketch or mockup imports.

For more information about navigating the PBX interface, see [Create a prompt-based experiment](./create-a-prompt-based-experiment.md).
## Link your Figma account
The first time you link Kameleoon to Figma, you must authorize access.
1. Click the **Figma** icon in the prompt area or paste your Figma link into the prompt area.
2. In the pop-up, click **Sign in to Figma**.
3. In the new tab that opens, click **Allow access** to authorize the "PBX by Kameleoon" app.
## Insert a design in the prompt
To insert a design into your prompt, use a link to the specific Figma node you want PBX to use as an input.

1. In Figma, right-click the frame you want to import.
2. Select **Copy as** > **Copy link to selection**.
3. In the Kameleoon PBX interface, do one of the following:
* Paste the Figma link directly into the prompt area.
* Click the **Figma** icon, paste the link into the **Figma** pop-up, and click **Insert design**.
To include multiple frames in the same prompt, repeat this process for each additional frame. You can add up to 10 Figma files per prompt. All added frames appear in the chatbox.
You can hover over any added frame to see a preview, view information about the file, or click **Open in new tab** to open it in Figma.
PBX requires a link to a specific Figma node (such as a frame) rather than a general file URL.
PBX uses all inserted frames as visual inputs once you send your prompt. Click the **X** icon to remove a frame from the prompt.
## Important considerations
Keep the following requirements and limitations in mind when using the Figma integration:
* **File limit:** You can add a maximum of 10 Figma files per prompt.
* **Authentication:** You must be signed in to your Figma account and authorize Kameleoon to access your design files.
* **Rate limiting:** The Kameleoon Figma integration follows Figma's rate limits, which vary by subscription plan.
# Master Prompts
Source: https://docs.kameleoon.com/user-manual/experimentation/web-experimentation/prompt-based-experiments/pbx-build/master-prompts
Learn how to use Master Prompts to ensure consistency, quality, and governance across all AI-generated experiments in your project.
Use Master Prompts to ensure consistency, quality, and governance across all AI-generated experiments in a project. They serve as a global instruction set that PBX automatically and transparently integrates into every prompt.
## Why use Master Prompts?
* **Effortless consistency:** Establish a singular project-wide standard for brand voice, technical patterns, and data requirements.
* **Improved output velocity:** Reduce the need to repeat recurring instructions, which accelerates experimental cycles.
* **Project governance:** Automate compliance with accessibility, tracking, and architectural standards.
## How it works
The Master Prompt provides a background instruction layer at the project level. When you use PBX to generate an experiment or variation:
1. PBX automatically injects the Master Prompt into the request.
2. PBX combines the Master Prompt with your specific prompt and processes the combined input. This ensures the final output adheres to both your specific request and the global project constraints.
## Typical use cases
* **Brand consistency:** Enforce global rules for voice, tone, and visual styles (for example, standardizing CTA terminology and button behaviors).
* **Architectural alignment:**
* **Framework support:** Define global rules for interacting with specific frameworks (for example, React hooks or Vue components).
* **DOM handling:** Orchestrate complex DOM structures, including Web Components and Shadow DOM (for example, when to inject styles or how to handle slot positioning).
* **Governance and compliance:**
* **Standard enforcement:** Automatically require essential attributes for every generated element, such as accessibility tags (ARIA, alt text) or tracking parameters.
* **Resilience:** Set rules for handling dynamic rendering and re-rendering to ensure modifications persist.
* **Data and layout integrity:**
* **Layout detection:** Guide the AI to correctly identify real layout containers (for example, flex/grid nodes) rather than outer wrappers.
* **Structured output:** Mandate strict data formats or JSON schemas for configuration-driven elements.
## Configure a Master Prompt
To set up a Master Prompt for your project:
1. Open the [PBX editor](./create-a-prompt-based-experiment#access-the-creation-flow).
2. Click **+** > **AI Settings**.

3. Select your project from the **Projects** sidebar.
4. On the **Master Prompt** tab, enter your Master Prompt into the text box.

You can turn on **Allow users to skip the master prompt**. This option lets users ignore the Master Prompt, meaning PBX does not apply your global rules and constraints to their variations.
## Roles and permissions
PBX separates capabilities to ensure proper project governance and guardrails.
### Admin users
Admins manage the strategic direction of the AI's behavior within a project. Admins can:
* Access the **AI Settings** > **Master Prompt** interface for any project.
* Define the Master Prompt text and project-level toggle settings.
* Set whether individual users can "skip" the Master Prompt for specific sessions or prompts, or if PBX should strictly enforce it.
### Non-admin users
Users interact with PBX normally and see a visible Master Prompt indicator when PBX applies global rules.
* Users can view the active Master Prompt content to understand the constraints.
* If an admin permits it, users can bypass the Master Prompt for a specific prompt or session. They can re-attach it at any point.
## Best practices for admins
* **Keep it modular:** Focus on high-level constraints rather than micromanaging every detail. Let the user prompt handle specific session goals. If you notice users consistently overriding certain behaviors, consider formalizing those behaviors within the Master Prompt.
* **Avoid overlapping rules:** Ensure the Master Prompt does not contain conflicting instructions that might confuse the AI model.
* **Clarity is key:** Use concise, declarative language (for example, "Always use...") to ensure the highest adherence to your rules.
# PBX Configure
Source: https://docs.kameleoon.com/user-manual/experimentation/web-experimentation/prompt-based-experiments/pbx-build/pbx-configure
Set up targeting, triggers, traffic allocation, and goals for a prompt-based experiment, then launch it directly from the PBX builder.
After you generate a variation in the PBX builder, click **Prepare for launch** to enter PBX Configure. This article walks you through each configuration step and explains how to launch the experiment.
For help generating a variation, see [Create a prompt-based experiment](./create-a-prompt-based-experiment).
To open PBX Configure, click the **cog icon** in the PBX sidebar. To return to the prompting view, click the **pencil icon**.
## Configure targeting
In the targeting step, select who to expose to the experiment. Choose one of the following options:
* **All visitors**: Exposes every visitor to the experiment.
* **Specific segment**: Lets you choose an existing segment from your project.
* **Build your segment with AI**: Lets you describe your audience in natural language so PBX generates the targeting conditions.
To build a segment with AI, select **Build your segment with AI**, click **Apply**, and describe your intended audience. For example:
* Mobile users
* Returning visitors
* Users from the United States
* Visitors who viewed a product page
You can reference existing Kameleoon segments by name in your prompt. PBX checks for duplicates against existing assets in the project scope and reuses a matching asset by name rather than creating a new one.
A checkbox lets you save the created segment for future reuse across the project. Without saving, the segment is scoped to this experiment only.
If PBX cannot confidently interpret part of your prompt, it will ask for clarification before generating the segment.
## Configure triggers
In the trigger step, choose when to activate the experiment. Choose one of the following options:
* **When webpage is reached**: Activates the experiment when a visitor lands on the URL you specified during experiment creation. PBX pre-populates this URL.
* **When specific trigger occurs**: Lets you choose from existing triggers in your project.
* **Build your trigger with AI**: Lets you describe the activation condition in natural language.
To build a trigger with AI, select **Build your trigger with AI**, click **Apply**, and describe when to activate the experiment. For example:
* Visitors who spend more than 30 seconds on a product page
* Users who return to the website
* Visitors who scroll past the pricing section
PBX generates the trigger configuration based on your description.
You can reference existing Kameleoon triggers by name in your prompt. PBX checks for duplicates against existing assets in the project scope and reuses a matching asset by name rather than creating a new one.
A checkbox lets you save the created trigger for future reuse across the project. Without saving, the trigger is scoped to this experiment only.
If PBX cannot confidently interpret part of your prompt, it will ask for clarification before generating the trigger.
### Combine segment and trigger instructions in one prompt
When you provide a prompt that contains both audience and activation instructions, PBX identifies what belongs to the segment and what belongs to the trigger, then splits the prompt across both configurations. PBX handles this bifurcation regardless of which step (segment or trigger) you are currently in.
The following scenarios describe how PBX responds to different prompt inputs:
* **Your prompt contains a mix of segment and trigger conditions**: PBX walks you through the segment step first, then moves to the trigger step with each pre-filled based on your initial prompt. You do not need to re-enter your instructions.
* **Your prompt contains only conditions that belong to the other category**: For example, if you enter trigger conditions while in the segment step, PBX skips ahead directly to the correct step rather than requiring you to navigate there yourself.
* **Your segment is already defined, but a subsequent prompt in the trigger step affects the segment**: After you finalize the trigger, PBX returns you to the segment step so you can review and confirm the additional conditions it identified.
For example, if you enter the following prompt:
> *Target USA visitors who are browsing a page `/shop` on desktop, and who have not converted the Add to Cart goal.*
PBX assigns each condition to the correct configuration step:
* **Segment**: USA-based visitors on desktop devices.
* **Trigger**: Page URL contains `/shop`, and the visitor has not converted the Add to Cart goal.
Review both the segment and trigger configurations after PBX processes your prompt to confirm that each condition lands in the expected step.
## Configure traffic allocation
In the traffic allocation step, choose how PBX distributes visitors between the control and the variation. Choose one of the following allocation methods:
* **Manual**: Assigns a fixed percentage of traffic to each variation.
* **Multi-armed Bandit**: Allocates more traffic to better-performing variations automatically over time.
* **Contextual Bandit**: Allocates variations based on visitor attributes and real-time performance data, serving the most relevant variation to each visitor.
Use the **Exposed traffic** control to set the percentage of eligible visitors who participate in the experiment.
After you configure traffic allocation, click **Apply Traffic**.
## Configure goals
Goals determine how Kameleoon measures experiment performance. In the goals step, you can:
* Search for and select one or more existing goals from your project.
* Create a new goal manually by clicking **+ Create a new goal**. For detailed instructions, see [Create a goal](../../../../assets/goals/create-a-goal).
* Build a goal with AI by clicking **Create a goal with AI** and entering a description of the conversion event you want to track.
To build a goal with AI, click **Create a goal with AI**. A text box opens where you can describe the action you want to measure. Click **Send** to submit your prompt. For example:
* Visitors who click the Add to Cart button
* Visitors who reach the order confirmation page
* Visitors who submit the newsletter signup form
PBX generates the goal configuration based on your description. Review the generated goal before you apply it.
You can use the on-screen toolbar in the PBX preview zone to add visual context to your goal prompt.
The toolbar includes the following tools:
* **Rectangle select**: Click and drag to draw a box around page elements.
* **Element selector**: Click any element in the DOM to select it.
* **Undo**: Deselects the most recently selected or boxed element.
You can click and drag the toolbar to reposition it in the preview zone.
Goals are implemented as custom JavaScript. The goal contains the JS code generated and, once created, can be used in this experiment as well as in other experiments if needed.
You can reference existing Kameleoon goals by name in your prompt. PBX checks for duplicates against existing assets in the project scope and reuses a matching asset by name rather than creating a new one.
If PBX cannot confidently interpret part of your prompt, it will ask for clarification before generating the goal.
After you select your goals, click **Apply Goals**.
## Configure integrations
In the integrations step, select the integrations that receive experiment data. The available integrations depend on your project configuration.
Toggle on each integration you want to receive experiment data, then continue to the review step.
## Review the experiment configuration
PBX displays a full summary of your experiment configuration before launch.
Review each configured item. To make changes, click the relevant section to return to it.
When the configuration is correct, choose one of the following options:
* **Simulate**: Preview how the experiment behaves before you expose it to real visitors.
* **Schedule**: Set a future start date and time for the experiment.
* **Launch**: Start the experiment immediately.
## Launch the experiment
Click **Launch** to activate the experiment. PBX begins tracking performance in real time.
After launch, experiment data appears in reporting as visitors are exposed to the variation, and configured integrations begin receiving experiment information.
To view results, go to **Experiences** > **A/B Test**, open the experiment, and click **Results**.
# Prompt-based experimentation plans
Source: https://docs.kameleoon.com/user-manual/experimentation/web-experimentation/prompt-based-experiments/pbx-build/prompt-based-experimentation-plans
Compare PBX subscription plans—Free Trial, Starter, and Enterprise—to find the right credit allocation for your experimentation program.
Kameleoon's prompt-based experimentation (PBX) offers flexible subscription options to help teams experiment at scale. Whether you're just starting out or running advanced experimentation programs, there are plans that fit your needs.
## Credits explained
In PBX:
* **1 credit = 1 PBX Code version**
* **1 experiment = 1 to 2 credits** (varies depending on how well prompts are defined)
* Refer to [this](./how-to-write-effective-prompts-dos-and-donts) article for guidance on creating prompts.
See [how to write effective prompts](./how-to-write-effective-prompts-dos-and-donts) for guidance on optimizing credit use.
## Free Starter Trial
Get started with a 30-day free trial and explore the value of PBX.
* **Included credits:** 10 (enough for five to ten experiments)
* **Monthly tested users (MTU) limit:** Up to 5,000
* **Duration:** 30 days
* **Access:** Limited features only (refer to the [pricing plan](https://www.kameleoon.com/plans?__hstc=144970411.0a3868e758427178f51df92f485c4d2e.1757006534525.1758564223489.1758641937472.27&__hssc=144970411.2.1758641937472&__hsfp=1286964747) for an exhaustive list of features).
During the trial, you'll see banners in the platform showing you:
* Days remaining (30-day countdown)
* Remaining credits
* Approaching limits (for example, 90% usage or nearing expiration)
When the trial ends, you'll be redirected to the upgrade page to continue with a Starter or Enterprise plan.
## Starter plan
The Starter plan is designed for growing teams that want to scale experimentation with predictable monthly credits.
* **Available options:**
* 30 credits/month
* 100 credits/month
* 200 credits/month
* **Billing:** Monthly subscription paid by credit card.
* **Renewal:** Credits reset each month on the billing date. Unused credits do not roll over.
* **Flexibility:** Upgrade or switch to Enterprise at any time.
**Example:** A team with 30 credits/month can typically run 15-30 experiments, assuming each consumes 1-2 credits.
## Enterprise plan
The Enterprise plan is designed for large-scale experimentation programs and offers maximum flexibility.
All existing Enterprise customers have PBX enabled by default, giving them immediate access to prompt-based experimentation without setup or activation. Each Enterprise account includes 15 free credits to explore PBX. Once these credits are used, teams can request an upgrade directly within Kameleoon to continue experimenting.
Enterprise subscriptions are custom-bult based on each customer's needs. Available credit options include 360, 1200, 2400, or 3600 credits per year, or a custom credit amount tailored to your experimentation volume.
* **Credit allocation:** All credits are delivered upfront at the start of the subscription year and can be consumed at any pace.
* **Flexibility:**
* **Upgrade anytime** — pro-rate credits are added immediately based on the new plan and remaining time in the billing cycle.
* **Downgrade** — only possible at the next renewal date.
**Example:** A customer on a 1200-credit plan who upgrades mid-year to 2400 credits instantly receives pro-rated additional credits for the remainder of the subscription year.
## How far your credits go
| Monthly credits | Experiments |
| --------------- | ----------- |
| 30 | 15–30 |
| 100 | 50–100 |
| 200 | 100–200 |
| 300 | 150–300 |
## In-app banners and notifications
PBX alerts you when important thresholds are reached:
* 90% of credit usage
* Trial or subscription approaching expiration
* Credits fully consumed
* Failed payment (with access restrictions until resolved)
## Credit-based limitations
If no credits remain:
* Creating new PBX experiments is blocked (UI lock + contextual message).
* You will be unable to provide additional prompts in any PBX experiments.
# Generate test ideas
Source: https://docs.kameleoon.com/user-manual/experimentation/web-experimentation/prompt-based-experiments/pbx-ideate/generate-test-ideas
Learn how to use PBX Ideate to transform friction points into actionable hypotheses and test ideas with AI-generated variations.
PBX Ideate transforms identified friction points into specific, actionable optimization hypotheses and test ideas.
### Generate hypotheses
Kameleoon generates a hypothesis—a theory of change that explains how fixing the root cause improves user outcomes.
### Experiments and variations
Kameleoon generates up to eight test ideas for each page you analyze, categorized by hypothesis. You can implement these ideas directly in the PBX interface.
To prioritize your roadmap, review the Impact Score assigned to every idea. Confidence AI powers the Impact Score, which represents the likelihood of the test producing a meaningful conversion lift. Focus on high-impact opportunities first.
Each experiment suggests concrete variations for text, layout, or styling, allowing you to start testing immediately without designing from scratch.
## Scanned pages
Add specific URLs to the **Scanned pages** tab to generate test ideas.
1. Navigate to **Insights** > **Test Ideas**.
2. Click **Add pages**. The **Add pages to scan** pop-up opens.
3. Select the project for the page.
4. Enter the page URL.
5. Click the **+** icon > **Add pages**.
To check the status of pages across projects, click **View details**.
Hypothesis generation is not instant. Analysis takes approximately 10–15 minutes after you scan a page.
## View and manage test ideas
Access AI-generated test ideas directly within Kameleoon.
### Select pages for analysis
1. Sign in to Kameleoon and navigate to **Insights** > **Test Ideas**.
2. From the dropdown menu, select the website to analyze.
3. Add the specific URLs to analyze.
The AI analysis process is thorough and may take up to 15 minutes to complete.
### Analysis quotas and strategy
Analyze a maximum of 10 pages per project within a 30-day period. Kameleoon prevents new analyses for a specific URL until the 30-day period expires.
Because of this limit, select page categories rather than multiple similar pages.
* **Recommendation**: Analyze one representative URL for a category (for example, one product detail page) rather than 10 different product pages.
* **Logic**: Usability friction identified on one product page likely exists on all similar pages.
* **Targeting**: Although you analyze a single URL, apply the resulting experiment to all pages in that category (for example, targeting all product pages) using standard targeting conditions in PBX.
### Review suggestions
Expand a page to view the generated hypotheses and specific, actionable test ideas.

Each idea card displays:
* **Test name**: A concise title for the experiment.
* **Impact Score**: A predictive score (0-10) estimating the likelihood of this test producing a conversion lift. Confidence AI derives this score by analyzing thousands of historical test results to identify success patterns:
* **8-10 (High confidence)**: Strong evidence, proven patterns, and clear mechanisms.
* **5-7 (Moderate confidence)**: Reasonable hypothesis with partially supported patterns.
* **1-4 (Low confidence)**: Speculative mechanism or unsupported patterns.
### Analyze details
Review the logic behind a suggestion:
1. Click the **three dots** menu next to a specific test idea.
2. Select **See details**.
**OR**
* Click **See diagnosis**.
A pop-up panel displays details about the test. Kameleoon highlights the targeted element at the top of the panel.
#### Hypothesis

Under the **Hypothesis** dropdown, view:
* **Levers**: The Conversion Master Lever, Lever, and Sub-Lever that form the hypothesis' basis.
* **Insight**: A logical synthesis of why the change should work.
* **UX Observations**: Specific elements on your page that triggered the recommendation.
* **Best Practices**: Behavioral principles derived from academic research and successful test outcomes. These ensure recommendations ground themselves in real-world performance data.
Best practices include:
* **Attention Follows Visual Weight**: A universal perceptual law validated across hundreds of tests.
* **Explicitly Framing Reduces Interpretation Effort**: A mechanism-aligned pattern from clarity testing.
* **Primary CTAs Require Dominant Contrast**: A design heuristic with consistent positive results.
#### Test Idea

The **Test Idea** dropdown shows the specific variations proposed for that test idea. These variations represent concrete ways to implement the test idea (for example, changing the checkout flow to a single-page layout).
## Share test ideas
Share your projects via a Guest Mode link. Recipients can view the analysis even if they do not have a Kameleoon account.
1. Select the project you want to share.
2. Click **Share** in the top-right corner.
3. Click **Copy Link** to save the URL to your clipboard.

Each link is project-specific. Guests only have access to the selected project. To share a different project, switch projects in the dropdown menu and generate a new link.
## Launch an experiment
Implement promising ideas directly from the interface.
1. In the sidebar, select the variation to test.
2. Click **Create in PBX**.
If you have already created a variation, the CTA changes to **View in PBX**.
### How experiments are created
* **First variation**: The first time you click **Create in PBX** for a test idea, Kameleoon creates a new experiment containing the selected variation.
* **Additional variations**: To test multiple variations against each other, select a second variation from the list and click **Create in PBX** again. Kameleoon automatically adds the new variation to the existing experiment.
Review the targeted element and suggested prompt in the PBX interface. You can then finalize the design and launch the experiment.

# PBX Ideate freemium
Source: https://docs.kameleoon.com/user-manual/experimentation/web-experimentation/prompt-based-experiments/pbx-ideate/pbx-ideate-freemium
Overview of PBX Ideate plans, usage tracking, and the upgrade process.
PBX Ideate offers a freemium model. All Web Experimentation customers and PBX Build users automatically have access to the **Basic (Free)** tier. You can upgrade to the **Premium** plan as a paid add-on to unlock unlimited use.
## Basic (Free) plan
The Basic plan provides **12 successful analyses per year**. This quota is shared across all projects and users within your workspace. You can distribute these analyses across any number of pages (for example, six analyses each on two pages, or 12 analyses on a single page).
* **Credit consumption:** Kameleoon only deducts a credit when an analysis completes successfully (**DONE** status).
* **Failures and retries:** If an analysis fails (**ERROR** status), it does not consume a credit. You can retry the scan for free.
* **Deletions:** Deleting a page does not refund the credit used to analyze it.
## Premium plan
The Premium plan provides **unlimited analyses** with no annual quota or project limits.
***
## Track plan usage
Kameleoon displays your current usage in the **Plan usage** widget inside the **Scanned pages** tab.
* **Progress bar:** A stepped bar with 12 segments tracks your annual usage. The bar turns yellow at 9/12 and red when you reach the 12/12 limit.
* **Dynamic notifications:** Warning messages appear as you approach or hit your limit.
* **Service lockout:** When you reach 12/12 analyses, Kameleoon disables the **Add pages** button. You must upgrade to Premium to continue analyzing pages.

***
## Upgrade to Premium
To request an upgrade:
1. Click **Upgrade to Premium** in the Plan Usage widget.
2. Review the plan comparison modal.
3. Click the button to submit an upgrade request.

After you submit the request, a Customer Success Manager (CSM) will contact you to complete the process. No immediate payment is required.
# What powers PBX Ideate?
Source: https://docs.kameleoon.com/user-manual/experimentation/web-experimentation/prompt-based-experiments/pbx-ideate/what-powers-pbx-ideate
Discover how PBX Ideate analyzes your pages using a five-layer reasoning model and the Lever Framework to generate experiment hypotheses.
Kameleoon’s AI-powered PBX Ideate analyzes your website’s interface to identify friction points and automatically generates optimization hypotheses. It transforms raw interface observations into implementation-ready experiments, allowing you to launch tests faster and with higher confidence.
## Overview
Designed in partnership with Conversion by Gain, a leading experimentation agency, the PBX Ideate engine uses a hierarchical diagnostic structure to analyze your web pages. It mimics the reasoning of a CRO expert by scanning your site’s visual hierarchy, content, and layout.
Based on this analysis, the feature provides:
* **Friction identification**: Pinpoints specific usability or motivational barriers.
* **Root cause analysis**: Explains why a problem exists using behavioral psychology principles.
* **Experiment suggestions**: Proposes concrete A/B test ideas to improve performance.
* **Wireframe variations**: Generates specific design changes (copy, layout, styling) ready for implementation.
## How it works
The system performs the analysis in the background using a five-layer reasoning model, ensuring every suggestion is grounded in behavioral data rather than guesses.
### Analysis and problem detection
The system takes a snapshot of your page and maps every component (button, headers, text blocks). It then clusters observations to identify problems—high-level friction that negatively impacts user behavior.
### Root cause diagnosis
For every problem, the system identifies a root cause that explains the psychological mechanism behind the friction. It classifies issues using the Lever Framework developed by Conversion. This framework organizes friction into five master levers:
* **Comprehension**: Does the user understand the offer?
* **Motivation**: Does the user want to take action?
* **Trust**: Does the user believe the offer is legitimate?
* **Cost**: Is the perceived effort or price too high?
* **Usability**: Can the user interact with the interface easily?
### Lever Framework
Conversion's **Lever Framework** is a technical taxonomy designed to categorize UX features that influence user behavior. By standardizing these "levers," the framework enables data teams to isolate variables for more effective iteration, transfer behavioral insights across different experimentation programs, and generate structured datasets to train machine learning models for predicting experiment win rates.
For more information on the Lever Framework, see Conversion's dedicated [resource](https://conversion.com/framework/the-lever-framework/).
#### Cost
The **Cost Master Lever** classifies user-perceived downsides beyond financial value, defining "cost" as the total commitment required in exchange for product benefits. This hierarchy categorizes three primary friction points: monetary investment, the "soft costs" of time and effort, and the degree of flexibility available to the user to modify or bypass these anticipated commitments.
| Lever | Sub-Lever |
| ---------------------------------------------------------------------------------------------------------------------- | ----------------------------------------------------------------------------------------------------------------------------------------------------------------------------------------------------------------------------------------------------------------------------------------------------------------------------------------------------------- |
| **Financial cost**: How much money the user exchanges for the product. | **Known cost**: These are financial costs that users know they will have to incur to access a product. **Anticipated cost**: Refers to the longer-term financial costs of subscriptions or expected add-ons. **Relative value**: Tactics used to make one product seem to have better value by comparing it with another. |
| **Soft cost**: The time and effort costs dedicated to getting value from the product. | **Time cost**: The part of a soft-cost which refers to the amount of time which must be dedicated to the service to gain value from it. **Effort cost**: The part of a soft-cost which refers to how "hard" using the product will actually be for a user to benefit. |
| **Commitment**: How users contextualize the sense of commitment to the costs associated with a transaction or product. | |
#### Trust
The **Trust Master Lever** measures the user's perception of risk during website interaction. It evaluates three critical reliability factors: the foundational legitimacy of the platform, the credibility of product or service claims, and the perceived security of sensitive information processing.
| Lever | Sub-Lever |
| ---------------------------------------------------------------------------------------------------------------------------------------------------------- | ---------------------------------------------------------------------------------------------------------------------------------------------------------------------------------------------------------------------------------------------------------------------------------------------------------------------------------------------------------------------------------------------------------------------------------------------------------------------------------------------------------------------------------------------------------------------------------------------------------------------------------------------------------------------------------------------------------------------------------- |
| **Legitimacy**: A concern with whether or not the site is that of a real company, selling a real product or service. | **UI Quality**: Cues in the overall UI presentation which suggest to a user that a site is not legitimate. **Brand Recognition**: Whether and to what extent the user is familiar with the brand the site is representing. |
| **Credibility**: Concerned with how likely users are to believe the "motivational" claims made on a site, and how likely companies are to live up to them. | **Authority**: Appeals to known institutions, or authority figures as "endorsers" or a company or service, thereby "borrowing" credibility for the brand. **Customer Service**: How the prominence/availability of customer/prospective services and easy contact of the company are used to make the company seem competent and trustworthy. **Social Proof**: Appeals to a broader source of endorsement among a wider variety of individuals, usually people who will be considered representative of "typical" for the user. **Reassurances**: Information and promises about the process behind a product/service which are designed to demonstrate good intentions and competence. |
| **Security**: Refers to a user's level of comfort inputting sensitive information such as payment details on a site. | **Payment Security**: Refers to ways that sites can demonstrate to users that their information will be processed safely. **Personal Information Requests**: How requests for sensitive information are handled and presented to the user. |
#### Usability
The **Usability Master Lever** evaluates the friction-free progression of a user toward a conversion goal, mirroring the psychological concept of cognitive fluency. It focuses on optimizing five technical and psychological pillars: navigational clarity, the minimization of cognitive load and fatigue, effective product discovery, strategic attention allocation, and the consistent acknowledgment of user progress.
| Lever | Sub-Lever |
| ------------------------------------------------------------------------------------------------------------------------------------------------------------------------------ | -------------------------------------------------------------------------------------------------------------------------------------------------------------------------------------------------------------------------------------------------------------------------------------------------------------------------------------------------------------------------------------------------- |
| **User flow**: A user's sense of direction and location: do they understand where they are on the site/in the user journey and what they must do to progress? | **Location**: A user's sense of where they are in the user-flow/journey, answering the question "where is the user now?" **Direction**: About whether a user understands where they need to go next in the user journey to perform their desired action. |
| **Effort**: Refers to either a concern that an action or sequence will require a lot of exertion and focus, or an unpleasant feeling that something is already requiring this. | **Experienced effort**: The sense of how demanding it is to complete tasks and progress on a website. **Anticipated effort**: Effort that the user "forecasts" regarding how they will feel completing a task on a site. |
| **Choice**: Refers to how product options are arranged and made findable on a site. | **Findability**: The search paths and functionality available to a user to browse through product options. **Structure**: How product options are actually organized and presented on a page by default. **Recommendation**: These are recommendations and promotions/pushes or product/options by the site to the user based on user preferences and behaviors. |
| **Attention**: How the site guides users' attention to focus on useful/relevant elements, and away from elements distract from your goals. | **Distraction**: About elements on a page whcih are distracting users from a more important (conversion) task. **Engagement**: Ways to actively engage users with a particular element or task. |
| **Persistence**: About on-site mechanics that encourage users to continue trying to complete their desired action. | **Progress presentation**: About how users' progress is presented to them to demonstrate how far they've come in their journey. **Positive feedback**: Acknowledging when users take a desirable action on the site. |
#### Comprehension
The **Comprehension Master Lever** assesses the efficacy of information architecture and content delivery. It focuses on establishing user confidence through three layers of clarity: foundational industry/product knowledge, granular details of a specific item of interest, and the logistical transparency of the final transaction.
| Lever | Sub-Lever |
| ------------------------------------------------------------------------------------------------------------------------------------------ | ----------------------------------------------------------------------------------------------------------------------------------------------------------------------------------------------------------------------------------------------------------------------------------- |
| **Education**: Aimed at educating users on the industry generally, rather than on specific offerings of the provider. | **Educational Content**: Provides broader industry or conceptual knowledge to help users navigate the market and evaluate offerings. |
| **Product Understanding**: Content that seeks to inform the user about specific product offerings, and helps them make an informed choice. | **Product Information**: Using words explicitly to describe specifications of a product. **Product Depiction**: Implicit (imagery/video) used to help users understand a product. |
| **Transactional Understanding**: Content which seeks to inform the user and provide transparency around the terms of payment. | **Savings understanding**: Explains the explicit financial benefits of an offer, such as percentage discounts or total money saved. **Payment structure**: Details the terms and timing of payment, including installments, subscription cycles, or fees. |
#### Motivation
The **Motivation Master Lever** addresses the perceived value proposition and emotional "upside" of a product offering. It focuses on maximizing purchase intent by optimizing several psychological drivers: inspirational copy and imagery, social belonging, urgency, low-friction product trials, variety of selection, and the long-term engagement or "stickiness" of the user experience.
| Lever | Sub-Lever |
| ---------------------------------------------------------------------------------------------------------------------------------------------------------------------------------- | -------------------------------------------------------------------------------------------------------------------------------------------------------------------------------------------------------------------------------------------------------------------------------------------------------------------------------------------------------------------------------------------------------------------------- |
| **Value statement**: The explicit positive information included about products/services to persuade users that it's of interest to them. | **Value proposition**: The company's core offering: what is the single line which applies to the product or service being offered. **Benefits**: Specific "positive" features of the company or individual products and services offered, often framed as benefits to the user rather than functional features of the product, which may be found in the comprehension lever. |
| **Motivational depiction**: How a product or service use visual/implicit cues to convey value, as opposed to relying on explicit claims or experience with the product. | **Motivational imagery**: Using imagery to convey motivational messaging or positive/anticipatory emotional responses to the user. **Motivational video**: Using video to convey motivational messaging or positive/anticipatory emotional responses to the user. |
| **Preview access**: How users can be shown the upside of a product by actually using the product, or some limited part of the product (for example, a free trial, samples). | **Free Trial**: Allowing users to experience the quality of a product or service by accessing it in full for a limited time. **Limited Preview Content**: Allowing users to experience the quality of a product or service by offering some limited part of the service, possibly indefinitely. |
| **Obligation**: How users can be made to feel that they "ought" to purchase the product for some reason. | **Reciprocity**: Where users are offered some gesture (for example, discount, freebie) aimed at triggering the intuition to reciprocate the gesture by purchasing. **Altruism**: A direct appeal to moral obligation—it is about benefits to other people's well-being. |
| **Sociability**: When users are led to expect they are gaining a social benefit from the product. | **Community**: Trying to elicit the sense that using a product will give you access to some real or imagined community. **Exclusivity**: Trying to elicit the sense that using a product or service will give you an edge or superiority over the majority of people. |
| **Urgency**: How users are made to feel that they should complete their purchase within their current session, or else risk losing access to the product or paying a higher price. | **Availability**: Urgency based on the idea that failing to purchase quickly will mean missing out on the product entirely. **Price change**: Urgency based on the idea that failing to purchase quickly will lead to price increases and greater cost in the future. |
| **Product range**: How the products available can be presented to make them appear motivationally varied and extensive. | **New product**: Adding a new product or service to serve a product preference or option not currently catered for. **Variety**: Demonstrating the variety of product options available, whether explicit through copy ("Access thousands of movies and TV shows") or implicit (showing a background image of movie and TV show posters). |
| **Delivery**: Motivational content about how the user will receive the product (whether physical or virtual). | **Delivery Speed**: Informing users how quickly they can receive their product, emphasizing fast delivery speeds or short waits. **Delivery Ease**: Informing users of how easy it is to receive a product, or how discretion may be used upon delivery. |
| **Gamification**: Refers to creating a sense of excitement and engagement around continuing to use the product. | **Immersion**: Creating a sense that users are in a different environment from the one they are really in. **Progression**: Creating a sense that satisfying progress is being made through the "task" of completing the user's desired goals on the site. **Competition**: Creating a sense that users' level of performance with the product or service is superior to that of others. |
| **Humanization**: Presentation of a site/brand as human and friendly to the user. | **Friendly Language**: The use of a friendly or informal tone to elicit a sense in users that the company/product/service is personable and accessible. **Human Depictions**: The depiction of people as a means to make a company/product/service seem personable and accessible (friendly). |
| **Control**: Users feeling a positive sense that the product can be adapted to their preferences. | |
# Prompt-based experimentation FAQ
Source: https://docs.kameleoon.com/user-manual/experimentation/web-experimentation/prompt-based-experiments/prompt-based-experimentation-faq
Find answers to common questions about Kameleoon's prompt-based experimentation (PBX), AI models, and technical capabilities.
This article answers common questions about prompt-based experimentation (PBX).
PBX uses **GPT 5.5 medium** as its thinking model.
Yes, you can **edit code directly from the prompt-based interface**. When you save the code, Kameleoon automatically generates a new version of your variant.
No, you **cannot use the Graphic editor** on AI-generated variants. Although some edge cases might benefit from it, prompt-based experimentation handles all scenarios that the Graphic editor covers. To prevent conflicts, Kameleoon disables the visual tool for AI-generated experiments.
You can create **any variant that you manage with front-end code**. However, Kameleoon cannot generate code for prompts that require **backend logic or server-side changes**. A developer familiar with your backend system must handle such cases.
Yes, you can prompt changes across multiple pages. Navigate to your chosen pages and apply prompts directly. Kameleoon automatically combines the code into a single variation.
However, **test the complete experience using Simulation mode** to ensure that the code on different pages does not conflict.
Yes, **provided the page's DOM contains the HTML code for the hover-triggered element**. If JavaScript injects the element dynamically after the hover interaction, Kameleoon’s AI might not detect or modify it accurately.
For best results, verify that:
* The hover element exists in the initial HTML, even if hidden.
* The structure is stable and does not generate asynchronously.
After you create a variation on the first product page, navigate to the next product page. This action re-executes the AI-generated code.
Alternatively, use Simulation mode to test the experience across all relevant pages and ensure consistent behavior.
Technical users can use general-purpose AI coding tools to generate JavaScript, CSS, or HTML and paste it into a Kameleoon experiment. PBX targets experimentation specifically and differs from those tools in several important ways.
**PBX targets experimentation, not just code generation**
Building an A/B test differs from building a standard website feature. Experiment code must be cautious, non-disruptive, dynamic, performant, and reliable across different page states. Kameleoon trained and optimized PBX on thousands of experimentation scenarios, so it performs more like a developer who specializes in A/B testing than a generic coding assistant.
**PBX provides richer page context to the model**
With a direct Claude or Codex workflow, you must manually explain the page, the DOM, the expected change, the constraints, and the technical setup. PBX automatically provides much richer context, including site-level information, real-time DOM analysis, page screenshots for visual understanding, and direct Figma imports where relevant.
**PBX applies Kameleoon-specific experimentation logic**
PBX generates code that works with the [Kameleoon JavaScript API](../../../../developer-docs/apis/activation-api-js/api-reference/api-reference), including methods such as [`runWhenElementPresent()`](../../../../developer-docs/apis/activation-api-js/api-reference/api-reference#runwhenelementpresent) and [`enableDynamicRefresh()`](../../../../developer-docs/apis/activation-api-js/api-reference/api-reference#enabledynamicrefresh). These methods listen to DOM mutation observers and help manage complex dynamic websites, single-page applications (SPAs), DOM changes, rerendering behavior, and flicker. Code that a general-purpose assistant generates may work in some cases, but it typically requires more manual adaptation, QA, and maintenance to remain robust in an experimentation context.
**PBX guides you through a human-in-the-loop workflow**
PBX does more than generate code from a single prompt. The interface asks follow-up questions, guides you through design and implementation choices, and lets you validate at multiple steps before you launch a variation. This approach makes the experience well-suited to building experiments.
**PBX integrates into the full Kameleoon workflow**
A general-purpose AI workflow typically fragments the process across multiple steps: prompt creation, code generation, technical review, manual insertion into Kameleoon, troubleshooting, and then separate configuration of targeting, goals, launch, and analysis. PBX integrates directly into the experimentation workflow, making the process faster, safer, and more scalable for product, marketing, and technical teams.
### Supporting developer-led workflows
You do not have to choose between the two approaches. For technical teams that prefer to work with Claude, Codex, Cursor, or similar tools, the Kameleoon [MCP server](../../../../developer-docs/developer-tools/mcp-server) lets you connect those tools directly to Kameleoon and integrate them into your existing workflow.
**Summary:** A general-purpose AI tool requires more effort, more QA, more maintenance, and greater dependency on technical users—which ultimately increases costs. PBX provides a dedicated experimentation tool that makes the process easier, safer, and more scalable within Kameleoon.
Our AI explores many possible ways to fulfill your request, so it does not produce a fixed result. The same prompt can yield different outputs each time.
This occurs because of:
* **Controlled randomness:** The model varies its answers to avoid repetition and encourage creativity.
* **Prompt interpretation:** Minor context differences can prompt the model to focus on different details.
* **Training diversity:** The model draws on patterns from varied training datasets.
To get more consistent results, add constraints. Provide a mockup, design file, or define a [**Master Prompt**](./pbx-build/master-prompts) that sets overarching rules and brand context for all your generations.
You can use PBX on most websites, including single-page applications. Each time you submit a prompt, Kameleoon sends page context, such as HTML code or screenshots, to help the AI interpret the content. However, the AI might not properly handle context within iframes or a shadow DOM. If you frequently experience this issue, contact your Customer Success Manager.
The Kameleoon PBX extension supports Chromium-based browsers, including Google Chrome, Brave, Arc, and Microsoft Edge.
PBX excels at tasks such as:
* Text or content changes, including headlines, CTAs, and disclaimers.
* Style updates, like colors, fonts, and layout tweaks.
* Banners and content insertions.
* Simple interactive changes, including button repositioning, links, and modals.
You can also use PBX for multi-step flows, galleries, or custom interactive elements. For advanced cases, use a hybrid approach. First, let PBX generate the initial implementation, then refine it manually. This method combines the speed of automation with the precision of custom development.
PBX generates clean, secure, responsive, and accessible code. It often creates more robust solutions than manual coding, particularly for modern websites and single-page applications (SPAs). PBX follows QA best practices, such as cross-browser testing and visual checks.
The generated code also respects your project configurations:
* PBX applies SPA settings and custom attributes automatically.
* It honors exclusion rules.
These considerations ensure that generated code integrates smoothly with your setup and adheres to the rules for manually coded experiments.
Yes. You can prompt PBX to retrieve and use content from a different page within your website. Provide a link or describe the source page and element in your prompt, and PBX will incorporate that content into the generated variant.
Yes, you can use a design or mockup. Click the **+** icon > **Add an image** to upload your file. However, **a mockup alone is usually insufficient**. For best results, use your design alongside clear, detailed instructions.
Treat PBX like a developer: provide specific details for the best output.
**Example of a good prompt with a mockup:**
* Attach your mockup or design file.
* Describe the elements to change.
* Specify dimensions, colors, and spacing.
* Explain interactive behaviors.
* Note technical requirements.
PBX adopts your project's single-page application (SPA) settings. If you configured these settings (see [Set up an experiment on a single-page app](../advanced-experiment-types/set-up-experiment-single-page-app#native-setup)), PBX automatically uses:
* Your custom attributes.
* Your exclusion rules.
* Any other SPA-specific configurations.
Yes, you can refine the output with follow-up prompts, but keep prompt history in mind.
**What PBX remembers:**
* The code it most recently generated (used as context).
**What PBX doesn't remember:**
* Your previous prompt instructions.
* The full conversation history.
* Mockups or sketches added in earlier prompts.
**Why this matters:** Vague follow-up prompts like "Fix the issue with X and Y" might fail because PBX lacks full context.
**Best practices for follow-up prompts:**
* **Less effective:** "The arrow navigation doesn't work."
* **More effective:** "In the new carousel, the arrow navigation does not work as expected. Fix it using the code generated from my previous prompt. The arrows should appear on the left and right and advance one image per click."
Be specific in follow-up prompts:
* Identify the element or feature to fix.
* Describe the expected behavior.
* Reference the generated code explicitly.
* Include relevant technical details.
Yes. Click **+** > **Add an image** to upload your file.
When you upload or paste an image, PBX asks you to choose how to use it:
* **Asset:** PBX inserts the image file directly into your variation (for example, as a banner, background, or logo).
* **Mockup:** PBX uses the image as a visual reference to recreate the design using code, rather than inserting the image itself.
PBX keeps your data secure and meets industry standards, including those for regulated sectors.
PBX invokes the LLM only **when you create an experiment** from a webpage **you control**. This setup ensures that:
* PBX sends no end-user data to the LLM.
* The model processes only the page content visible to you as the creator, excluding site visitor data.
* PBX does not dynamically generate experiments for each user; it creates them once from your environment.
PBX will not access or transmit personal or confidential information unless you include it in the page or prompt. Avoid including such data.
Kameleoon continuously improves the PBX workflow to maintain high privacy and compliance standards.
No. You must wait for PBX to finish generating a variant before starting work on another.
This issue occurs on secure pages, such as logged-in areas, that block loading within an iframe. The PBX editor uses an iframe to safely edit webpages. Your site's security settings might block the iframe content, resulting in a white screen.
**How to fix it:**
Ask your development team to modify the "frame-busting" logic. The code must check if the frame's name is `kameleoon-pbx-preview`. If it matches, the logic should allow the page to load.
**Example code:**
```javascript theme={null}
if (window.self !== window.top && window.frameElement?.name !== 'kameleoon-pbx-preview') {Your existing redirect/blocking logic}
```
This capability is coming soon.
If you cannot log in, your browser likely blocks third-party cookies. PBX requires a session cookie from the Kameleoon domain for authentication.
You must enable third-party cookies to access PBX.
**To allow third-party cookies:**
1. Open your browser **Settings**.
2. Go to **Privacy & security** > **Third-party cookies**.
3. Select **Allow third-party cookies**.
Browsers often block third-party cookies in Private or Incognito modes automatically.
Ensure your browser allows these specific cookies:
* `refresh-token`
* `kameleoonSessionId`
* `access-token`
* `expiration-access`
Fewer than 20% of launched experiments yield positive results, often because teams test low-impact ideas or vague hypotheses. PBX Ideate provides prioritized, evidence-based hypotheses and converts them into precise prompts for PBX. For high-confidence recommendations, PBX Ideate achieves three times the accuracy of the industry benchmark, helping you prioritize your tests effectively.
PBX Ideate uses a taxonomy and semantic framework developed with Conversion by GAIN. It analyzes your website and uses data from tens of thousands of experiments to surface the ideas most likely to succeed.
PBX Ideate scores ideas based on potential impact using a model trained on over 20,000 experiments. This model provides 63% accuracy on high-confidence predictions, exceeding the industry average of about 20%.
Kameleoon prioritizes invited customers, but access is also open to invited partners. If you lack an invitation, you can join the waitlist. Kameleoon will add more spots gradually.
Yes. If accepted, Kameleoon creates your account and emails registration instructions so you can begin testing.
Participants must accept the beta program’s terms and conditions before receiving access. It requires no credit card.
Kameleoon grants 30-day access on a case-by-case basis. We will communicate updates regarding new features and general availability over time.
You do not need to install a script to generate ideas or use PBX for front-end experiences. However, to run these experiments live on your site, you must install [Kameleoon Web Experimentation](../../../get-started/web-experimentation-installation-guide.mdx/).
# Embed a saved view on your homepage
Source: https://docs.kameleoon.com/user-manual/get-started/embed-a-saved-view-on-your-homepage
Pin a saved dashboard view onto your homepage as a live table preview, so you can monitor the campaigns you care about without leaving the page.
The Embedded View block lets you bring a saved dashboard view (with its own filters and columns) directly onto your homepage. It shows a live table preview of that view, so you can keep an eye on the experiments, flags, or goals that matter to you without opening the full dashboard each time.

## Who it's for
Anyone who uses the Kameleoon homepage. The block is most useful if you regularly check a specific dashboard view, for example an "At risk experiments" A/B test view or a "Revenue drivers" personalization view, and want it surfaced on your landing page.
## What you can embed
You can embed a saved view from any of these source types:
| Source type | What it shows |
| --------------- | ---------------------------------------------- |
| A/B Tests | Saved views from the A/B Test dashboard |
| Personalization | Saved views from the Personalization dashboard |
| Feature Flags | Saved views from the Feature Flags dashboard |
| Segments | Saved segment views |
| Triggers | Saved trigger views |
| Goals | Saved goal views |
| Custom Data | Saved custom data views |
A view has to be saved on its dashboard before it can be embedded. If a source type has no saved views, its card shows `0 views` and there is nothing to select in step 2.
## Embed a view
Each Embedded View block starts empty, showing a dashed placeholder with a **+ Embed a saved view** prompt.
On the empty block, click **+ Embed a saved view**. The **Embed a saved view** modal opens.
In **step 1 of 2**, pick the type of saved view you want to embed (A/B Tests, Personalization, Feature Flags, Segments, Triggers, Goals, or Custom Data). Each card shows how many saved views are available for that type. Click **Continue**.
In **step 2 of 2**, select the saved view you want from the list. The view marked **Default** is the standard dashboard view. Use **Back** if you need to change the source type. When you have made your selection, click **Apply**.
The block now shows a preview of your chosen view: its name in the header and a table preview of the matching campaigns.
To close the modal without saving, use the close (×) icon in the top-right corner. Nothing is saved until you click **Apply**, so the block stays empty.
## What the block shows
Once configured, the block displays:
* **Header** with the source type and view name.
* **Table preview** of the campaigns in that view (a limited number of rows, scrollable if there are more).
* **View all** in the footer, which opens the full dashboard filtered to the same view.
An actions menu (the kebab icon in the top-right of the block) gives you:
* **Configure block** — change the embedded view (reopens the setup modal).
* **Delete block** — remove the block from your homepage.
## Date range behavior
Embedded View blocks do **not** follow the homepage date range selector (7D, 14D, 30D, 3M, 6M).
An embedded view always uses the date range saved with the view on its own dashboard. Changing the date range at the top of the homepage updates other blocks, but leaves your embedded views unchanged, so what you see always matches the saved view exactly.
## Empty and reset states
**The view has no matching campaigns.** If the saved view's filters return nothing, the block shows an inline message, for example *"No results match the filters set in the \[view name] view."* The view is still connected; there is simply nothing to display right now.
**The view was deleted from its dashboard.** If you (or the view's owner) delete the underlying saved view, the block returns to its empty state. Your block keeps its position and size on the homepage, so you can open **Configure block** and pick the default view or a different one. The block is never removed automatically.
## Notes
* Personalizing your homepage is per user. Your embedded views and layout are visible only to you.
* You can embed the same source type more than once, for example two different A/B test views side by side.
Adding, removing, and rearranging blocks freely across the homepage is planned for a later release. For now, use the block's actions menu to configure or remove an embedded view.
# Feature Experimentation installation guide
Source: https://docs.kameleoon.com/user-manual/get-started/feature-experimentation-installation-guide
Set up Kameleoon Feature Experimentation by creating a project, installing an SDK, and configuring feature flags for progressive rollouts and experiments.
Kameleoon’s Feature Experimentation capabilities enable you to manage feature rollouts, control access, and run experiments using feature flags across web and mobile applications.
This guide walks you through the basic steps of installing and configuring Kameleoon Feature Experimentation
## Create a project in Kameleoon
Before you begin, create a new project in your Kameleoon account. A project represents your web app, mobile app, or both—depending on whether you want to manage them under a single project. From the feature flag creation page, you can easily add any environments (like production, staging, or development) that you use in your development workflow.
Each project is assigned a **sitecode**—a unique identifier that is required to initialize the Kameleoon SDK.
If you’re running experiments across multiple platforms (web and mobile), you can use the same sitecode for all SDKs to share flags and avoid duplication.
Do not create a separate project for each environment (development, staging, production). Use a single project and add your environments within it instead. Creating separate projects per environment means you cannot share goals and targeting rules across your deployment pipeline. For details, see [Manage environments](../experimentation/feature-experimentation/configure-your-feature-flags/manage-environments).
## Install an SDK
Kameleoon provides a variety of SDKs for different environments:
* **Server-side SDKs:** Java, Node.js, Python, Go, PHP, C#, Ruby
* **Mobile SDKs:** Android, Flutter, iOS, React Native
* **Client-side SDKs:** JavaScript, React
* **Advanced SDK tools:** Edge toolkits, OpenFeature compatibility, SDK API (read more [here](../account-and-team-management/users-and-teams/api-credentials))
Select the SDK appropriate for your stack. You’ll find installation instructions in Kameleoon's [developer documentation](../../developer-docs).
To install an SDK, typically you will:
* Provide credentials (`client_id` and `client_secret`) via a configuration file available in server-side SDKs. To learn how to retrieve API credentials, refer to [this](../account-and-team-management/users-and-teams/api-credentials) article.
* Provide your project’s [sitecode](../faq#how-do-i-find-my-sitecode) for initialization.
* Specify the environment (for example, production, staging) in the SDK configuration to match your development workflow.
* Choose between polling and streaming modes, which determine how the SDK fetches flag updates, either by regularly checking for changes (polling) or receiving them in real time (streaming). Note that streaming is a premium option.
You should check the [SDK compatibility table](../../developer-docs/feature-experimentation/get-started/overview#supported-platforms) to see which features and methods are available for each SDK. Since Kameleoon regularly adds new features and support for additional languages, the minimum required version for certain features may vary by language. The compatibility table shows which features are supported per SDK and the version needed to implement them in your frontend or backend.
For a full version history, refer to the changelog in the SDK [GitHub repository](https://github.com/Kameleoon?tab=repositories). You should subscribe to email notifications to stay updated on new releases.
## Start using feature flags
With the SDK initialized, you can now:
* **Create feature flags** in the Kameleoon app.
* **Roll out features progressively** using targeting rules, percentage rollouts, or user attributes.
* **Run experiments** on feature flag variations and analyze their impact.
For more information on feature flags, refer to these articles:
* [Create a feature flag](../experimentation/feature-experimentation/create-and-manage-flags/create-a-feature-flag)
* [Manage your feature flags](../experimentation/feature-experimentation/create-and-manage-flags/manage-your-feature-flags)
* [Demo: Feature Experimentation](../../developer-docs/feature-experimentation/get-started/demo-feature-experimentation)
# Using the Homepage
Source: https://docs.kameleoon.com/user-manual/get-started/using-the-homepage
Use the Kameleoon Homepage to monitor campaign performance, track KPIs, view live and scheduled campaigns, and coordinate with your team.
The Homepage serves as the centralized command center for your experimentation activity. It allows you to monitor campaign performance, access key data, and coordinate with your team.
Use the Homepage to get a quick snapshot of your current projects, track financial or non-monetary goals, and navigate back to your most recent work.
## Global settings
Before analyzing your data, ensure you are viewing the correct timeframe and project scope.
### Select a timeframe
At the top of the page, use the time selector to define the period for your displayed data. You can choose from the following options:
* 7 days
* 14 days
* 30 days
* 3 months
* 6 months
### Customize your dashboard
Click **Customize** in the top right corner to configure your Homepage view. A pop-up window allows you to adjust the following settings:
* **Data settings:**
* **Site:** Select the specific site or project you want to view data for.
* **Goal:** Choose the primary goal used to calculate the Key Performance Indicators (KPIs) in the **Highlights** section. The KPIs displayed will vary depending on whether the selected goal is monetary (for example, revenue) or non-monetary (for example, conversions or retention).
* **Display blocks:**
* Toggle the **eye icon** next to any section name to hide or show that block on your homepage.
* Click **Apply** to save your changes.
## Dashboard sections
The Homepage is divided into several sections (blocks) that provide specific insights and shortcuts.
### Recently opened
Quickly resume your work without searching through the platform. This section lists the pages you visited most recently, including:
* Experiments
* Personalizations
* Feature flags
* Widgets
### Highlights

The Highlights section displays the main KPIs for your selected project. Depending on the goal you chose in the **Customize** menu, this provides a snapshot of your financial or non-monetary performance (such as revenue or conversion uplift).
The metrics displayed on the Homepage are not real-time. Data is updated daily and reflects activity up to the previous day.
### Launched campaigns
Track your historical activity with the Launched campaigns section. This area shows a timeline of the campaigns you have rolled out, helping you visualize the volume of experiments or flags deployed over time.
### Currently live
View a list of all campaigns that are currently active and impacting users. This section helps you understand exactly what is running on your site right now.
The table displays:
* **Name:** The name of the campaign.
* **Type:** Whether it is an A/B test, personalization, or feature flag.
* **Live since:** The duration the campaign has been active.
### Health Checks
The **Health Checks** block gives you an at-a-glance view of the experiments that need your attention, without opening each one individually. It surfaces the same [health checks](../experiment-analytics/analyze-results/results-page-tabs/health-menu) you'll find on an experiment's **Health** tab in the Results page, so you can spot data-quality issues across all your live experiments from a single place.
The block appears on your homepage alongside your other blocks (such as **Currently live** and **Launched campaigns**). It is scoped to the project currently selected on your homepage.

#### Reading the block
The block has two parts:
**Status summary** — Four counters at the top show the overall picture across all of your **live** experiments in the selected project:
* **Passed** — all checks are healthy.
* **Warning** — at least one check needs review.
* **Failed** — at least one check has failed.
* **Pending** — checks have not yet run (for example, a newly launched experiment).
**Campaign list** — Below the summary, the block lists only the live experiments that have at least one **Warning** or **Failed** check. Experiments where everything passed are not listed here — you can always see the full list of running experiments in the **Currently live** block. Each row shows the experiment name and its most severe check status (for example, *1 failed* or *2 warnings*). The most critical experiments appear first.
#### Viewing check details
Hover over the status of any experiment to open a tooltip showing the result of each individual health check for that experiment (such as Visit Tracking, Conversion Tracking, SRM, and Overlapping Exposure). For a full explanation of what each check means, see [Health checks on the Results page](/user-manual/experiment-analytics/analyze-results/results-page-tabs/health-menu).
The tooltip also displays a **Last update** timestamp for that experiment, so you know how recent the results are. This reflects the last time the checks were evaluated for that specific experiment; if it has not been evaluated individually yet, the most recent daily update is shown instead.
#### Opening the full diagnostics
To investigate an issue, click an experiment row or the **See all checks** link in the tooltip. This takes you straight to the **Health** tab of that experiment's Results page, where you'll find the full breakdown and recommended next steps.
#### When the block is empty
If none of your live experiments have a warning or failed check, the block shows:
> **No health check alerts**
>
> All your live experiments are running as expected.
The Health Checks block is available for A/B tests, Feature Flags, and Personalization experiments. It is not available on PBX plans.
### Targeted unique visitors

This chart visualizes the traffic your campaigns receive. It tracks the number of individual users exposed to a campaign or experiment over the selected timeframe.
A "unique visitor" is counted only once per session, even if they are exposed to the campaign multiple times.
### Scheduled campaigns
Anticipate upcoming work by viewing campaigns planned for a future launch. This section lists experiments and flags that are scheduled but not yet active.
### Team notes
Use the Team notes section to coordinate with your team, leave reminders, or provide context on ongoing work.
* This is a shared free-text area.
* Everyone with access to the project can view and edit these notes.
* Changes are saved automatically and shared across the team.
### Useful links
Access helpful resources quickly. This section contains shortcuts to official documentation and allows you to add custom links to frequently used pages or external resources.
Click the **+** icon to add a new link. To edit a link, click the **pencil** icon. To delete a link, click the **X** icon.
# Web Experimentation installation guide
Source: https://docs.kameleoon.com/user-manual/get-started/web-experimentation-installation-guide
Install and configure the Kameleoon script on your website, including project setup, domain configuration, consent settings, and flickering prevention.
This page includes step-by-step instructions for installing Kameleoon, including creating a project for your website, mobile app, or both, and configuring your project settings.
## Overview
Before launching experiments on your website or mobile app, you must install the Kameleoon script. This script, containing your unique project code, must be added to the `` tag of your source code.
If your package allows, you can manage multiple sites or apps from your Kameleoon account, which is useful for testing in staging or pre-production environments.
Several setup options are available. Their sequence follows this pattern:
```mermaid theme={null}
flowchart LR
TM[TAG MANAGER] --> YES
TM --> NO
YES --> A1[ASYNCHRONOUS]
YES --> A2[ASYNCHRONOUS WITH ANTI-FLICKER]
NO --> A3[ASYNCHRONOUS]
NO --> S[SYNCHRONOUS]
A1 & A2 & A3 & S -. "+" .-> AS
subgraph cross["IF CROSS-DOMAIN = YES"]
AS[ADDITIONAL SETUP]
end
style cross stroke-dasharray: 5 5
```
## Project configuration
In the [Kameleoon app](https://app.kameleoon.com/), you’ll see a list of your projects. By default, you’ll have a project card for the website or mobile app you entered when you signed up.
### Configuring an existing project
To modify a project’s settings:
1. Click **Setup** on the project’s card.
2. Review the project’s configuration and click **Modify setup**.
3. In the pop-in that appears, click **Modify** again to access your settings.
### Creating a new project
To create a new project:
1. Click **New project**.
2. Enter your site URL and, optionally, a name and description.
3. Click **Add**.
A new page will appear to guide you through installation.
Your ability to create additional projects depends on your Kameleoon package.
## Choose your implementation settings
When setting up a new project, you’ll be asked to choose implementation settings. For technical details, including how to install Kameleoon using a tag manager or implement custom script types, please refer to [this](../../developer-docs/web-experimentation/implementation-and-deployment/standard-implementation) article.
## Consent
Before installing the Kameleoon script on your website, ensure your setup complies with your organization's consent management policy.
If you use a Consent Management Platform (CMP), you can integrate it with Kameleoon to control when experiments and data collection are activated.
For details, refer to Kameleoon's [consent management article](../project-management/consent-management-policy).
## Domain configuration
You can define which domains and subdomains can load the Kameleoon script and access its features.
* Under **Domain configuration**, click **Add a domain/subdomain** to whitelist domains for cross-domain tracking.
* This lets you use Kameleoon’s Graphic editor and store/retrieve visitor data across domains.
* If you try to use Kameleoon on a domain not listed, loading will fail due to browser security policies (CORS).
### Cross-domain tracking
Cross-domain tracking lets you:
* Track the same visitor across different domains and subdomains (for example, `example.com` and `example.org`).
* Avoid reclassifying users as “new visitors” when they move between domains.
* Offer consistent personalization and experiment experiences across properties.
You should enable cross-domain tracking if you plan to unify session data across multiple domains.
## Authorizations
If you’re targeting subdomains, you must configure the following HTTP headers:
* [X-Frame-Options HTTP response](../faq#issue-refused-to-display-in-a-frame-because-it-set-x-frame-options-to-sameorigin)
* [Content Security Policy](../faq#issue-refused-to-load-the-script)
Learn more about Apple’s Intelligent Tracking Prevention (ITP), which restricts cross-site tracking in Safari, in this [ITP documentation](../../developer-docs/web-experimentation/technical-concepts/itp-management).
## Resource hosting
You can choose whether Kameleoon hosts its public resources or if you prefer to self-host them.
* Select an option from the dropdown menu in the setup page.
* If you choose **self-hosting**, provide the URL of your Content Delivery Network (CDN).
Learn more about resource hosting [here](../../developer-docs/web-experimentation/self-hosting/simple-self-hosting-and-on-premises-options).
## Install the Kameleoon script
After defining your site’s URL, Kameleoon generates a script for installation.
1. Copy the provided code snippet.
2. Paste it **immediately after the ``** tag in your site’s source code.
3. Save and upload your updated page(s) to your server.
4. Click **Validate** in Kameleoon.
For best results, install the script as early as possible in the page’s loading process.
If Kameleoon can’t detect the script, ensure it’s been correctly added. You can choose to skip verification if you’re confident the script is present.
## Preventing flickering
When a webpage loads, users may briefly see the original version before the variation is applied. This momentary flash is called the flicker effect or flickering. Flickering occurs when the variation's changes are delayed, creating a visible switch between the original and modified content. Flickering can affect user experience and experiment reliability, especially in A/B testing.
### Guidelines to avoid flickering
#### Implementation
Place the Kameleoon script as high as possible in the `` tag. Ensure the script loads in under one second, ideally below 500 ms. To check Kameleoon's loading time, use the **Network** tab in your browser's developer tools.

The most effective way of ensuring fast loading is installing Kameleoon directly in your HTML source code, rather than using a tag manager like Google Tag Manager.
Optionally, you can use the anti-flicker script as an additional layer of protection against flickering. For more information, refer to Kameleoon's [developer documentation](../../developer-docs/web-experimentation/technical-concepts/flicker-management-and-performance).
If you enable this option, you'll have several configurations to control how Kameleoon behaves if the timeout occurs. The timeout duration is configurable within the installed script and is set to 1,000 ms by default.
To explore the available options, refer to the screenshot below.

You can access the **Behavior if timeout occurs** dropdown by clicking **Admin** > **Configuration** > **General**.
If Kameleoon loads late, the page may be displayed before the variation code is applied. In that case, the optimizations described below will be ineffective.
#### Consent
If your consent policy is set to **consent required**, flickering may occur on the **first page view** when the visitor has not yet given their consent. This flickering happens if you choose to partially or completely block Kameleoon when consent is unknown.
To prevent flickering, you should not block Kameleoon, so experiments can be displayed before consent is given on the visitor's landing page. This approach is fully compliant with privacy regulations such as GDPR, CCPA, and other major frameworks in the UK, Canada, and the US, as no tracking or data storage (`cookies`/`localStorage`) occurs before consent is granted.
To explore available options, refer to the screenshot below.

To access the **Behavior when consent is unknown** dropdown, click **Admin** > **Configuration** > **Experiment**/**Personalization**.
#### Targeting
##### Use early-loading information
For the best performance, base targeting on data that is available immediately upon page load, such as:
* Page URL
* Browser type
* Device type
* `cookies`/`localStorage`
When possible, avoid targeting elements that load late, such as the **`dataLayer`** variables. Since these may load asynchronously, using them for targeting can delay variation execution. If a segment relies on a custom JS condition or custom data that itself depends on the `dataLayer`, flickering may occur as well.
To minimize flickering, ensure that any conditions used for targeting are resolved as early as possible in the page lifecycle.
To learn more about all targeting conditions in the Segment Builder, refer to [this](../assets/segments/create-a-segment) article.
#### Variation code
##### Use CSS instead of JavaScript for visual changes
Using CSS instead of JavaScript ensures faster and smoother rendering. CSS should be used for:
* Hiding or modifying elements
* Swapping blocks
* Changing styles or text
##### Optimize JavaScript execution with the Activation API
If JavaScript is necessary, use Kameleoon's [Activation API](../../developer-docs/apis/activation-api-js/api-reference/api-reference) to ensure variations are applied at the right moment:
* **`runWhenConditionTrue`:** Executes the code when a specific condition is met.
* **`runWhenElementPresent`:** Ensures that the variation displays as soon as the targeted element is loaded on the page. Using these methods avoids delays caused by elements that load asynchronously.
##### Handling single-page applications
If your experiment runs on a single-page application (SPA) or a dynamically updating page, special implementation steps are required. Follow [this](../experimentation/web-experimentation/advanced-experiment-types/set-up-experiment-single-page-app) guide on setting up an experiment on an SPA for best practices.
# User manual overview
Source: https://docs.kameleoon.com/user-manual/home/user-manual-overview
Deliver better digital experiences through experimentation, feature management, and personalization.
Welcome to Kameleoon. Use our unified platform to manage your product lifecycle, from early feature rollouts to advanced user targeting. Kameleoon streamlines testing and optimization with tools like Prompt-Based Experimentation (PBX), which uses AI to generate test variations from natural language commands.
Run experiments, control feature exposure, and personalize content across multiple platforms:
* **Web:** Use dedicated Web Experimentation (including PBX) or client-side SDKs, such as JavaScript or React.
* **Mobile apps:** Integrate via iOS, Android, React Native, and Flutter SDKs.
* **Backend environments:** Deploy on Node.js, Python, Java, .NET, and more.
***
## Core capabilities
Kameleoon blends experimentation, feature management, and rollouts into one platform.
Test ideas and measure their impact on any platform:
* Build experiments with natural language using [Kameleoon PBX](../experimentation/web-experimentation/prompt-based-experiments/pbx-build/create-a-prompt-based-experiment).
* Run feature experiments server-side or client-side with [Kameleoon Feature Experimentation](../experimentation/feature-experimentation/create-and-manage-flags/feature-experimentation-dashboard).
* Target audiences with precision.
* Access reliable, real-time results powered by our [multi-statistical engine](../experiment-analytics/statistical-methods/choosing-the-right-statistical-method-for-ab-testing) (including CUPED, Bayesian, and Sequential testing).
Deliver tailored experiences to specific users:
* Build [segments](../assets/segments/create-a-segment) using behavior, [data warehouses](../integrations/data-warehouses/target-your-imported-audiences), geolocation, or CRM data.
* Show personalized content in real time.
* Improve engagement without a full development cycle.
Release features progressively and reduce risk:
* Use [feature flags](../experimentation/feature-experimentation/create-and-manage-flags/create-a-feature-flag) to decouple deployment from release.
* Control feature visibility and timing.
* Customize [rollouts](../experimentation/feature-experimentation/using-the-rollout-planner/rules-and-targeting/add-a-new-rollout-rule) by environment, user traits, or custom rules.
***
## Built for collaboration
Kameleoon supports cross-functional teams in a unified workspace where goals and segments are shared:
* **Marketers** create and launch visual experiments independently.
* **Developers** implement SDKs, manage feature flags directly in code, and use the Kameleoon Code Editor to build frontend experiments with JavaScript or CSS.
* **Product teams** create feature experiments using feature variables and monitor their impact.
***
## Platform tools
Use Prompt-Based Experimentation (PBX) to build experiments with natural language prompts.
Build complex tests and control your software releases using feature flags.
Set up and launch personalization campaigns tailored to your audience segments.
Choose from over 40 widget templates or use AI to generate personalized widgets.
Analyze results with advanced filtering and Kameleoon's multi-statistical engine.
Open any page in Claude or ChatGPT with one click, or configure a persistent docs connection for Cursor and VS Code.
Discover Kameleoon's AI-powered prompt-based experimentation for free. **Get started today.**
***
## Essential workflows
Start building and managing your campaigns by referring to these core configuration guides.
Set up web and mobile apps and learn about SDK implementation.
Manage permissions with Kameleoon's powerful team management tools.
Learn how to create tests, including using AI prompts.
Target specific audience segments and set up triggers.
Track success by creating a variety of goals for your campaigns.
Leverage custom data to power advanced experimentation campaigns.
Connect Kameleoon with major CDPs and analytics solutions.
Utilize two-way integrations with BigQuery, Snowflake, and Databricks for targeting and reporting.
# Get started
Source: https://docs.kameleoon.com/user-manual/product-targeting-and-social-proofing/get-started
Implement product tracking methods in Kameleoon to enable social proofing and advanced product-based targeting for your campaigns.
Kameleoon’s **Product API** powers both [**social proofing messages**](./social-proofing) and [**advanced targeting conditions**](./product-targeting).
To fully leverage Kameleoon’s **social proofing** and **targeting** features, ensure you correctly implement the tracking methods described below. Once implemented, you can retrieve **product and transaction data** through the [`obtainProductInteractions()`](../../developer-docs/apis/activation-api-js/api-reference/api-reference#obtainproductinteractions) and [`obtainProductData()`](../../developer-docs/apis/activation-api-js/api-reference/api-reference#obtainproductdata) endpoints.
Counters are now available directly through [the Widget Studio](../assets/widgets/create-a-widget-with-the-widget-studio/create-a-widget) as [custom variables](../assets/widgets/create-a-widget-with-the-widget-studio/edit-your-widgets#insert-a-custom-data-into-an-element). Checkout [this documentation](./tracking-counters-in-widget-studio) to know more.
## trackProductView()
Use the `trackProductView()` method on **product pages** to track when a visitor views a product. Read more about the method [here](../../developer-docs/apis/activation-api-js/api-reference/api-reference#trackproductview).
Ensure you provide all necessary data for your social proofing setup. Only the data sent via the `trackProductView()` method can be retrieved later through the [`obtainProductData()`](../../developer-docs/apis/activation-api-js/api-reference/api-reference#obtainproductdata) endpoint.
***
## trackCategoryView()
Use the `trackCategoryView()` method on **category pages** to track when a visitor views a product category. Read more about the method [here](../../developer-docs/apis/activation-api-js/api-reference/api-reference#trackcategoryview).
Ensure the **category ID** used here matches the one sent with the `trackProductView()` method. Read more about the Category object [here](../../developer-docs/apis/activation-api-js/api-reference/api-reference#properties-of-the-category-object).
***
## trackAddToCart()
Use the `trackAddToCart()` method on **any page where a visitor can add a product to their cart**—for example, the home page, product page, category page, or cart page.
Read more about the `trackAddToCart()` method [here](../../developer-docs/apis/activation-api-js/api-reference/api-reference#trackaddtocart).
***
## trackTransaction()
Use the `trackTransaction()` method on any page displayed after a visitor completes a **purchase or transaction**. Read more about the method [here](../../developer-docs/apis/activation-api-js/api-reference/api-reference#tracktransaction).
# Product targeting
Source: https://docs.kameleoon.com/user-manual/product-targeting-and-social-proofing/product-targeting
Create product-based targeting rules in Kameleoon using price, visited product pages, and category conditions to reach the right visitors.
You can create **product based targeting** in Kameleoon using **Triggers**. Before proceeding, ensure you have correctly implemented **product tracking** as described in [Get Started](./get-started).
This page focuses on the **Visiting Behaviours → Product Pages** conditions of a trigger. To learn more about Triggers, see the [Triggers documentation](../assets/triggers/create-a-trigger).
***
## Overview
There are three main **dimensions** of product states you can use for targeting.
### Price of the displayed product page
Product data and history are retrieved based on **the consulted page** , the value is then stored in **SessionStorage**. It makes the compute of price changes for targeting.
Includes or excludes product pages where the price is **higher than**, **lower than** and **equal to** a certain amount or or **increased** and **decreased** during a period.
This comparison can be based on:
* A fixed price
* The price of a specific product
* The average price of a selected group of products

***
### Number of visited product pages
Visited products and category data are retrieved based on **the consulted page** , each products are then stored in **SessionStorage**.
Includes or excludes visitors based on:
* The **number** of product pages they visited
* The **category** of those products
* Their **price**

***
### Visited product pages
Includes or excludes visitors based on the **specific product pages** they have visited.

# Social proofing
Source: https://docs.kameleoon.com/user-manual/product-targeting-and-social-proofing/social-proofing
Build social proofing experiences using product interaction data, including stock alerts, popularity counters, discount highlights, and combined proof messages.
Use the **Kameleoon Activation API** with the [`obtainProductInteractions()`](../../developer-docs/apis/activation-api-js/api-reference/api-reference#obtainproductinteractions) and [`obtainProductData`](../../developer-docs/apis/activation-api-js/api-reference/api-reference#obtainproductdata) endpoints for powerful **social proofing implementations**. Refer to the [Get started](./get-started) article for more details.
Below are some of the **possible types of social proofing experiences** you can generate, based on the [tracking](../../developer-docs/apis/activation-api-js/api-reference/api-reference#api-response-3) and [product](../../developer-docs/apis/activation-api-js/api-reference/api-reference#product) data accessible with the `obtainProductInteractions()` and `ProductData()` endpoints.
***
## Urgency and scarcity messages
| Social proofing type | Example message | Key product fields used | Purpose | Endpoint used |
| ------------------------- | ---------------------------------------- | --------------------------------------------- | ------------------------------------------------------- | ------------------- |
| **Low stock alert** | “Only **2 left in stock** — order soon!” | `availableQuantity`, `available`, `leftovers` | Creates urgency to purchase before stock runs out. | `obtainProductData` |
| **Single item remaining** | “Last **one** available!” | `leftovers = one` | Reinforces scarcity for exclusive or trending products. | `obtainProductData` |
| **Limited quantities** | “Hurry, just a **few items** left!” | `leftovers = few` or `availableQuantity` | Encourages faster decision-making. | `obtainProductData` |
***
## Popularity and demand indicators
| Social proofing type | Example message | Key product fields used | Purpose | Endpoint used |
| ------------------------- | ------------------------------------------- | ----------------------- | ------------------------------------------------------ | --------------------------- |
| **Product views counter** | “**243 people** viewed this product today.” | `views` | Shows high demand to build FOMO (fear of missing out). | `obtainProductInteractions` |
| **Purchase counter** | “**57 people** bought this item this week.” | `boughtQuantities` | Indicates sales volume to boost credibility. | `obtainProductInteractions` |
## Price-based and promotional proofs
| Social proofing type | Example message | Key product fields used | Purpose | Endpoint used |
| ---------------------- | --------------------------------- | ----------------------------------- | ----------------------------- | ------------------- |
| **Discount highlight** | “Save **20%** today!” | `price`, `oldPrice` | Emphasizes savings. | `obtainProductData` |
| **Limited-time offer** | “This price ends in **2 hours**!” | `price`, `oldPrice`, time condition | Creates urgency around deals. | `obtainProductData` |
***
## Marketplace and multi-seller proofing
| Social proofing type | Example message | Key product fields used | Purpose | Endpoint used |
| ---------------------- | -------------------------------------- | ----------------------- | ---------------------------------------- | ------------------- |
| **Seller credibility** | “Sold by **Merchant123**, rated 4.9★.” | `merchantID` | Reinforces trust in third-party sellers. | `obtainProductData` |
***
### Combined proofs
You can combine multiple parameters to create **hybrid messages**, for example:
* “Only **2 left**—and **57 bought** this week!” → uses `availableQuantity` + `boughtQuantities`
* “**Trending** in **Laptops**—rated **4.7/5**!” → uses `categories` + `rating`
* “**Few left** in stock for the **Sony WH-1000XM5**!” → uses `brand` + `leftovers`
# Tracking counters in the Widget Studio
Source: https://docs.kameleoon.com/user-manual/product-targeting-and-social-proofing/tracking-counters-in-widget-studio
Add visits, transaction, and products-in-cart counters as dynamic variables in Widget Studio text elements to display real-time social proof data.
This tutorial explains how to use **tracking counters** (Visits counter, Transaction counter or Products in Cart counter) directly in the **Widget Studio**. These counters help increase user trust and engagement by displaying real-time activity data inside your widget text.
Be sure to implement [the relevant tracking](./get-started) in your code before using them in your widget.
## Available counters
The Widget Studio provides **three built-in counters** that you can use as **custom variables** in any text element:
* **Visits counter** – shows the number of visits
* **Transaction counter** – shows the number of transactions
* **Products in Cart counter** – shows how many products are currently in carts
The values of these counters are populated **dynamically** and update automatically.
## How to add a counter to your Widget
Follow these steps to insert a social proof counter into your text:
1. Open your widget in **the Widget Studio**.
2. Select the **text element** you want to edit.
3. In the text editor, click the **three dots menu** (three vertical dots) and select **Custom variables**.

4. Use the filter and type **`api`**.

5. Choose the counter you want to insert (Visits counter, Transaction counter or Products in Cart counter):
The selected counter will be added directly into your text.
## Counter Configuration Options
Each counter can be customized using the following settings:
### 1. Start Counting From
Define the initial value from which the counter starts counting.
### 2. Number Format
Choose how the number is displayed (for example, full number or abbreviated format).
### 3. Display Threshold
Set a minimum value for the counter to be displayed:
* **Display if more than *X* views**
* **Display if more than *X* transactions**
* **Display if more than *X* products in cart**
This allows you to hide the counter until it reaches a meaningful number.
# Activate and deploy a product collection on your website
Source: https://docs.kameleoon.com/user-manual/recommendations-and-merchandising/merchandising/activate-and-deploy-a-product-collection-on-your-website
Enable a product collection and deploy it on your website by embedding a snippet in your source code or creating a Kameleoon campaign.
[Once you've created your product collection](./create-and-manage-a-product-collection), you must make it visible on your site, which involves enabling the collection, copying the snippet, embedding it into your source code, or creating a campaign to manage its display.
## 1. Enable the product collection
Before deployment, ensure your collection is active:
1. Go to the **Product collections** dashboard.
2. Open the collection you want to deploy.
3. Click **Enable** in the top-right corner.
The status will switch to **Active**.
## 2. Copy the snippet
Each collection comes with a snippet that you must add to your website’s source code:
Click **Copy code** in the collection view.
A pop-in will display the snippet along with supported variables:
* **`data-collection-id`** *(required)*: Unique identifier for your collection.
* **`data-collection-locations`** *(optional)*: Needed if your product feed contains multiple locations.
* **`data-collection-callback`** *(optional)*: JS function for handling successful requests.
* **`data-collection-error`** *(optional)*: JS function for handling failed requests.
## 3. Deploy the product collection on your website
You can insert the product collection in your source code or create a Kameleoon campaign.
### Embed the snippet in your source code
Paste the copied snippet into the relevant section of your website’s source code. The snippet acts as a placeholder where the product collection will be displayed.
* Place the snippet in your page's **HTML body**, within the container where you want the collection to appear.
* Ensure your site loads Kameleoon correctly, so the collection is rendered dynamically.
### Create a campaign
Open the Code editor and add the product collection.
To learn how to use the Code editor, [refer to this article](../../experimentation/web-experimentation/code-based-experiments/using-the-code-editor).
# Analyze your product collection strategy's performance
Source: https://docs.kameleoon.com/user-manual/recommendations-and-merchandising/merchandising/analyze-your-product-recommendation-strategy-performance
Track the impact of your product collections using the reporting dashboard, which surfaces KPIs including impressions, CTR, conversions, and revenue.
Once your product collections are live on your website, you can track their impact through the reporting dashboard. This reporting page provides a set of KPIs that help you evaluate both engagement and business outcomes.
## Access the results
From the **Product collections** list, locate the collection you want to analyze.
Click the **Statistics** icon (chart symbol).

The **Overview** dashboard for the selected collection opens.
## Read the results
The **Overview** page displays:
* **Top summary metrics** (impressions, clicks, conversions, revenue)
* **Charts** showing performance trends over time (impressions, unique impressions, clicks, unique clicks, CTR, conversion).
* **Filter groups panel** on the right, listing the algorithms and filters used to build the collection.
Here is the available data:
| Name | Description |
| ------------------- | ------------------------------------------------------------------------------------------------------------------------------------------------- |
| Impressions | Total number of times the collection was displayed on your site. |
| Unique impressions | Number of distinct visitors who saw the collection at least once. |
| CTR | Ratio of unique impressions to unique clicks. |
| Clicks | Total number of clicks on products within the collection. |
| Unique clicks | Number of distinct visitors who clicked at least one product. |
| Added to cart | Number of products from the collection that were added to shopping carts. |
| Conversion | Percentage of unique clicks that led to a purchase. |
| Purchases | Number of transactions resulting from clicks on the collection. If a product is purchased multiple times in one order, it counts as one purchase. |
| Average order value | Average transaction value generated via the collection. Calculated as Revenue ÷ Purchases. |
| Revenue | Total sales revenue generated by products clicked in the collection. |
# Create and manage a product collection
Source: https://docs.kameleoon.com/user-manual/recommendations-and-merchandising/merchandising/create-and-manage-a-product-collection
Create curated product collections using algorithms and filters to highlight seasonal assortments, brands, or thematic selections on your website.
Kameleoon’s product collection feature allows you to curate, customize, and display specific groups of products on your website. You can use this feature to highlight seasonal assortments, promote particular brands, or create thematic selections to guide visitors through your product catalog.
## 1. Create and name the product collection
Kameleoon offers a dedicated interface to create product collections.
1. Click **Settings** > **Recommendations**.

2. Navigate to **Merchandising** > **Product collections**.
3. Click **Create**.
Enter a descriptive name for your collection. Choose a name that reflects the purpose or theme of the collection (for example, *Spring Essentials*, *Best Sellers*, *Brand Spotlight*).
You can also add a description to provide context for internal users.
## 2. Build groups of products with algorithms and filters

Kameleoon lets you define which products are included in a collection using flexible rules:
* **Algorithms**: Automatically generate product groups based on predefined ranking logic or personalization rules.
* **Filters**: Narrow the selection by selecting attributes such as:
* SKU
* Category
* Brand
* Price
* Barcode
* Discount
* Novelties
* Parameter value
Click **Add filter** to refine your selection.
Use a combination of algorithms and filters to ensure your collection remains relevant and dynamic.
You can also:
* **Set a product limit**: Set the number of products to display in this group.
* **Shuffle products**: Check this option if you want products to appear in random order for each visit.
## 3. Preview in real time
As you build your collection, the preview panel updates instantly, so you can:
* Verify that the right products are being included.
* Check the display order based on your chosen ranking rules.
* Spot any unexpected results before going live.
The color at the top of each product card matches its group color, making it easier to identify which products belong to each group in your product collection.
If needed, adjust your filters or algorithms until the preview matches your desired output.
Products may change over time as algorithm results update.
## 4. Save the collection
When you’re satisfied with your configuration, click **Save**.
Your collection will now appear in the **Product collections** dashboard, ready to be activated and deployed.
Once your collection is created and validated, you can proceed to [activate and deploy it on your website](./activate-and-deploy-a-product-collection-on-your-website) using templates, snippets, and Kameleoon campaign tools.
# FAQ
Source: https://docs.kameleoon.com/user-manual/recommendations-and-merchandising/recommendations-and-merchandising-faq
Find answers to common questions about product recommendations and merchandising features, including setup, algorithms, feed configuration, and limitations.
Product recommendation capabilities are a premium feature. Contact your Customer Success Manager to enable them on your Kameleoon account. Access the **Product recommendations** workspace by navigating to **Settings** > **Recommendations**.
A recommendation strategy defines how you select and filter products to display. When you create a strategy, enter a name and description, and define the maximum number of products to display in the block. After you save the strategy, configure its rules, templates, and design.
Click **Recommendations** > **Recommendation strategy**. Then, click your recommendation block > **Copy code** to generate your block's snippet. Paste it into your page's source code where you want the block to appear.
Alternatively, use Kameleoon's [Activation API](../../developer-docs/apis/activation-api-js/api-reference/api-reference#obtainrecommendedproducts) to serve product recommendations. The API uses the latest saved template version and returns a JSON object containing the recommended products and the template's HTML. The API response does not include CSS; you must apply styling to the output manually.
When implementing your block's code, include the `data-recommender-code` (product recommendation block ID) parameter. For blocks using algorithms like **Similar** and **They also buy this**, include the `data-recommender-item` parameter to specify the current product's ID.
If you notice a large discrepancy between your total inventory and the number of products available for recommendation by the **Popular** or **Trending** algorithms (labeled **Widgetable** products), these algorithms have strict data quality requirements.
For a product to be widgetable and eligible for recommendations, you must correctly set up and import all four critical fields:
* Price
* Name
* URL
* Picture (image URL must be valid and retrievable)
If any of these essential attributes are missing or incorrect (for example, a broken image URL), Kameleoon filters out the product, and it will not appear in the recommendation algorithm's results.
**How to troubleshoot missing images**
A common reason a product is not widgetable is that Kameleoon could not download the image during the catalog synchronization process.
**Top reasons images cannot be downloaded**
If your product has a valid image URL but still lacks a picture, your shop's server configuration might cause the issue:
* **Server overload:** Your shop's storage or server cannot handle the high volume of requests from Kameleoon's system. The system downloads images using **50 simultaneous** threads, which often causes timeout errors.
* **Security blocking:** Your firewall or anti-DDoS protection might block requests based on the user agent or IP address.
* **User agent:** Kameleoon downloads images using the user agent `Kameleoon Fetcher 2.0`. If downloads fail, allow this user agent in your server settings.
* **IP address:** Whitelist all Kameleoon cluster IPs to ensure uninterrupted access. View the list of [IPs here](./recommendations/import-your-product-catalog-feed#syncing-your-product-feed-using-an-xml-file).
**How to find problematic products**
Identify which products lack the required data fields by accessing your **Products Database**.
1. Click **Settings** > **Recommendations** > **Products** > **Data feed**.
2. Select **False** from the **Widgetable** dropdown.
3. Click any product to view its attributes. Kameleoon highlights the issue (for example, missing price or failed image retrieval) in the product's attribute list.
**Algorithm time window reminder**
When troubleshooting results, note that the **Trending** algorithm calculates recommendations based strictly on sales orders within your selected time window. The algorithm excludes sales older than this duration.
Customize the frequency and specific timing of your product data feed updates in **Store settings**.
No. Currently, product recommendations support **web** and **app** channels only. You cannot push dynamic recommendation widgets directly to email templates.
Yes, you can preview and simulate your product recommendations on your website using the **Widget Studio**.
To do this, create a widget that contains your product recommendation block, then [add it to your experiment](./recommendations/use-a-product-recommendation-block-in-a-campaign#use-a-product-recommendation-block-in-an-experiment). Once configured, use the [simulation feature](../assets/widgets/create-a-widget-with-the-widget-studio/simulate-your-widgets) in the Widget Studio to visualize the widget. Simulating allows you to verify both the design and the products the algorithm returns before launching.
Yes. You can apply sorting criteria to the products an algorithm returns. For example, you can sort the displayed results by top revenue to prioritize high-value items.
No. Regular expressions (regex) are not currently available for defining complex matching logic within recommendation rules.
No. The platform does not support Bring Your Own Algorithm (BYOA). Use the suite of built-in algorithms provided by Kameleoon.
While Kameleoon does not enforce a strict limit, requesting many products impacts algorithm performance and increases response times. Display fewer than 50 products per block. To display larger product sets, use [Collections](./merchandising/activate-and-deploy-a-product-collection-on-your-website).
No, some algorithms only work under specific conditions. For example, the **Similar** products algorithm, the **Products usually purchased with this item** algorithm, and the **Store recommendations** algorithm only work on product detail pages. The **Products usually viewed with this product** algorithm only works if the cart contains items.
Yes. You can use the product size as an HTML variable in your template, provided the size appears as a parameter in the data feed.
No. The Store Recommendations algorithm specifically requires the `accessories` field in your data feed. It does not recognize custom field names for manual product relationships.
To manually link products (for example, to display complementary items), map the related product IDs to the `accessories` field.
The algorithm displays only the products linked via the `accessories` tag. You can restrict these results further by applying standard filters to the recommendation block (for example, to exclude out-of-stock items from the manual list).
To use the **Currently on wishlist** algorithm, explicitly track when a user adds an item to their wishlist. The recommendation engine does not automatically detect these interactions without a specific API signal.
Implement the [`trackAddToWishList()` method from the Activation API](../../developer-docs/apis/activation-api-js/api-reference/api-reference#trackaddtowishlist). This method sends the necessary event data to Kameleoon, which populates the wishlist algorithm.
Supported attributes depend on your feed format. Note the following limitations regarding labels and stock data:
**Custom labels (`custom_label_0` - `custom_label_4`)**
* **Not supported**.
* The recommendation module does not import `custom_label` attributes from Google Merchant Center feeds. You cannot use these fields for filtering or display.
**Stock quantity (`stockquantity`)**
* **Google Merchant Feeds:** **Not supported**. The Google product data specification does not include a numerical stock count (only "availability" status). Therefore, you cannot import exact inventory numbers via Google CSV/XML.
* **Kameleoon XML:** **Supported**. To use exact stock counts, use the native Kameleoon XML format and populate the `stockquantity` field.
* **Viewing and using stock data:** If you import stock data via Kameleoon XML, the values appear in the **Data feed** overview. Use the `stockquantity` attribute to create filters (for example, `stockquantity > 5`).
Base your decision on your catalog size and technical infrastructure. Use the **XML import** method if your catalog contains fewer than 50,000 products and you lack a website data layer. Conversely, [use the **Product Recommendation API**](../../developer-docs/apis/product-recommendation-api-rest/tutorials/import-a-product-catalog-into-kameleoon-using-the-product-recommendation-api) if your catalog exceeds 50,000 products.
# Analyze your product recommendation strategy's performance
Source: https://docs.kameleoon.com/user-manual/recommendations-and-merchandising/recommendations/analyze-your-product-recommendation-strategy-performance
Measure recommendation block performance using the analytics dashboard, which tracks impressions, CTR, conversions, revenue, and sales rate over time.
This is a premium feature. Contact your Customer Success Manager to enable it on your Kameleoon account.
## Recommendation dashboard
Click **Analytics** > **Recommendations** in the product recommendation interface.
Here you'll find your recommendation blocks' performance over time. The attribution window is seven days. If users click a recommended item and purchase it within seven days, the purchase value is included in the revenue.
The dashboard consists of a bar chart and a table. The chart displays your block' performance. The period analyzed is 14 days by default, but you can change this frequency in the top right of the dashboard.
Hover your mouse over the bars of the chart to access detailed data for each block. Each column displays data for each block.
## Recommendation block performance
On your Recommender blocks dashboard, click a block's name to analyze its performance. The first open tab is **Performance**.
The period analyzed is 14 days by default, but you can change this frequency in the top right of the dashboard.
The page is divided between graphs and an **Overview** section.
### Overview
Here is the available data:
| Name | Description |
| ------------------- | ---------------------------------------------------------------------------------------------------------------------------------------------------------------------------------- |
| Impressions | Total number of block impressions (a visitor can see the block more than once). |
| Unique impressions | Unique impressions are equal to the number of unique visitors. |
| CTR | Percentage conversion rate from "Unique impressions" to "Unique clicks". |
| Clicks | Total number of clicks on products in the block. |
| Unique clicks | Unique clicks are equal to the number of unique visitors. |
| Added to cart | Total number of recommended products added to cart. |
| Conversion | Percentage conversion rate from “Unique clicks” to “Purchases”. |
| Purchases | The number of transactions made after navigating from the recommendation block to a product page. If a product is purchased twice in the same order, only one purchase is counted. |
| Average order value | Revenue divided by the number of purchases. |
| Revenue | Total revenue the block generates. |
### Graphs
Each graph displays an indicator for the selected period. Hover over the graph to see the indicator for each day of the selected period.
## Sales rate
The sales rate reflects a product’s value by considering sales and price margin (if this option is enabled in your store settings).
Sales rate is a metric of product sales, which is estimated based on the number of sales and price margin (if the parameter is enabled for a specific store). The minimum possible rating value is 1. This value is assigned to the product even if the sales rate is zero. This assignment is necessary for the product to be ranked in the system. The maximum value is 30,000. When calculating the sales rate, each parameter is multiplied by a “weight” coefficient. The number of sales plays a key role, and, therefore, the parameter's weight is 1. The trade margin weight coefficient is 0.8.
# Create and configure a recommendation strategy
Source: https://docs.kameleoon.com/user-manual/recommendations-and-merchandising/recommendations/configure-and-add-a-recommendation-block
Create a product recommendation strategy, configure its algorithms and rules, select a template, and publish the block to your website.
This is a premium feature. Contact your Customer Success Manager to enable it on your Kameleoon account.
To access the **Product Recommendations** workspace:
* Click **Settings** > **Recommendations**.
## Recommendation strategy
### Create a strategy

1. In the **Recommendations** menu, click **Recommendation strategy**.
2. Click **+ Add block** in the header to create a new strategy.

3. Enter a name and a description.
4. Define the maximum number of products to display in the block.
5. Click **Save**.
Once you've saved your strategy, you can configure its rules, templates, and design.
### Configure rules

Use the **Rules** section to define how your recommendation strategy selects and filters products.
You can configure:
* The strategy's title and description
* The algorithms, products in block, and tags
For example, you can use one algorithm if a product costs less than a certain amount, and another algorithm if it costs more.
After configuring your rules, click **Save** to apply your changes.
To learn how to configure advanced rules, see [Define advanced merchandising rules](./define-advanced-merchandising-rules).
#### Algorithms
Kameleoon algorithms determine which products appear in your recommendation block. You can select an algorithm, specify how many products it returns, and apply filters.
If you set a limit of 10 products in the algorithm and define 6 as the block limit, the block will display 6 products.
To see the list of available algorithms, refer to [Select an algorithm for your product recommendation block](./select-an-algorithm-for-your-product-recommendation-block).
### Select a template

In the **Template** section, you can quickly apply predefined setups to your project. You can define your own template by editing the default code in the editor using [Liquid Markup](https://liquidmarkup.org), or apply an existing template. To customize existing templates or create a new one, use the dedicated **[Templates](#manage-templates)** page.
You can also add UTM parameters to track the strategy's performance in your analytics platform.
### Publish your strategy
Once you're finished, click **Copy code** to get the generated snippet for your block. Paste it into your page’s source code where you want it to appear.
You can also use Kameleoon's [Activation API](../../../developer-docs/apis/activation-api-js/api-reference/api-reference#obtainrecommendedproducts) to serve product recommendations. The API automatically uses the latest version of your saved template.

When your block uses certain algorithms, you must include Kameleoon's predefined variables. For example, if you use the **Similar product** algorithm and want to display your block on all product pages, add the `data-recommender-item` variable to specify the current product's ID. The table below lists all available Kameleoon variables.
| Parameter | Mandatory | Description |
| ------------------------------- | ------------------------- | ------------------------------------------------------------------------------------------------------------------------------------- |
| `data-recommender-min` | No | The minimum number of products in the response for the block to appear. The block is hidden if there aren't enough products. |
| `data-recommender-code` | Yes | Product recommendation block ID |
| `data-recommender-item` | Yes (for some algorithms) | Current product's ID if the user is on the product card. Mandatory for blocks with the algorithms “Similar” and “They also buy this”. |
| `data-recommender-exclude` | No | A comma-separated list of product IDs that must be excluded from recommendations. |
| `data-recommender-search_query` | No | The current search term. Used in a block on a search results page. |
| `data-recommender-callback` | No | The name of the JS function where the API request's results will be passed if a custom product recommendation handler is required. |
| `data-recommender-error` | No | The name of the JS function that will be called if the product recommendation request fails. |
| `data-recommender-category` | No | Recommend products only from the specified category. |
| `data-recommender-categories` | No | Recommend products only from the specified categories (comma-separated list of category IDs). |
| `data-recommender-brands` | No | Recommend products only from specified brands (comma-separated list of brands). |
## Consent management
By default, product recommendations share the same consent settings as your A/B tests and personalizations—you cannot configure a separate consent policy for recommendations independently. You can contact your Customer Success Manager (CSM) to configure a distinct consent policy specifically for product recommendations.
### How configuration affects recommendations
The behavior of the recommendation engine depends on your account's consent requirements:
* **When consent is not required:** Kameleoon stores visitor data in cookies and transmits it to the recommendation module regardless of the visitor's consent status.
* **When consent is required:** The consent the visitor provides determines how Kameleoon manages their data:
* **Consent granted:** Kameleoon stores and transmits visitor data to provide personalized recommendations based on browsing history and behavior.
* **Consent not granted:** Kameleoon does not store visitor data in cookies. The recommendation algorithms only display products using logic or filters that do not require visitor data, such as general popularity or static global filters.
### Update your settings
Contact your CSM to enable a separate consent policy for product recommendations or to update your existing configuration.
## Manage templates

Use the **Templates** page to create and customize templates for your recommendation blocks.
1. In the **Recommendations** menu, click **Templates**.
2. Click **+ Add template**.
3. Enter a name for your template.
4. Edit the template's code to define the layout and information displayed (for example, product brand, image, or description).
5. Click **Save**.
You can create multiple templates, and use the same templates across strategies or assign a dedicated one to each strategy.
Templates use [Liquid Markup](http://liquidmarkup.org/).
## Customize design

In the **Recommendations** menu, click **Design** to customize your block's visual style. Click the **pencil** icon to access the editors. You can choose between:
* **Basic editor:** Customize visual elements through a simple interface.
* **CSS editor:** Write custom CSS for complete styling control.
# Define advanced merchandising rules
Source: https://docs.kameleoon.com/user-manual/recommendations-and-merchandising/recommendations/define-advanced-merchandising-rules
Build sophisticated merchandising logic by chaining algorithms, conditions, and filters to control which products appear in your recommendation blocks.
This is a premium feature. Contact your Customer Success Manager to enable it on your Kameleoon Account.
Kameleoon lets you define advanced merchandising rules that determine which products are recommended to your visitors. You can:
* Leverage built-in **algorithms** to select which products appear in your recommendation.
* Apply **conditions** to decide which algorithm should run.
* Apply **filters** to refine which products each algorithm returns.

At the top of the configuration screen, you can view the block's name, description, and the maximum number of products displayed in that block.
You can configure the block by:
* Changing the block's title.
* Combining algorithms and filters.
* Configuring complex scenarios
## Builder and rules overview
The merchandising rule builder lets you chain together **algorithms**, **conditions**, and **actions**.
Kameleoon evaluates rules from top to bottom. If there are not enough products matching the rules of one block, Kameleoon moves to the next block.
Click **+** to add a condition or action.

You then have three options:
* **Action** — perform an operation such as renaming the entire product recommendation block displayed in your app.
* **Condition** — define the logic that determines which algorithm runs.
* **Algorithm** — select a built-in recommendation algorithm and apply filters to it.

### Actions
* **Change block title** to rename the block.
* **Sort products** to sort the products returned by the algorithm based on different logic (for example, price, number of orders on those products, rating).
### Conditions versus filters
Conditions and filters serve different purposes.
| Concept | Purpose | Example |
| ------------- | ----------------------------------------------------- | ------------------------------------------------------------------------------------------------------------------------------- |
| **Condition** | Defines which algorithm runs based on a logical rule. | *If the current product's price is \$20, run Algorithm A; otherwise, run Algorithm B.* |
| **Filter** | Refines which products an algorithm returns. | *Apply the "Popular products" algorithm, but filter results to only show products from categories the user has purchased from.* |
#### Conditions
To add a condition:
1. Click the **+** icon > **Condition**.
2. Choose from the [available condition types](#available-conditions).
You can combine conditions with AND/OR.

Due to the "top to bottom" logic, a condition is applied to the next algorithm (the algorithm under the condition). For example, in the image below, if the product is more than \$100 and in the cart, the user will see other popular products. If not, the user will see similar products.

##### Available conditions
| Category | Condition | Description |
| ------------------------ | --------------------------------------------------- | ------------------------------------------------------------------- |
| **Product and category** | Are there any products in the cart? | Checks if the visitor has any products in their cart. |
| | Current cost of items in the cart | Evaluates the total value of the cart. |
| | Current product's price | Targets based on the price of the current product. |
| | Current product already in cart? | Checks if the current product is already in the visitor's cart. |
| | Current product ID | Matches a specific product ID. |
| | Current product's brand is | Matches the brand of the current product. |
| | Current category contains | Matches if the current category contains a keyword. |
| | Current category equals | Matches a specific category. |
| | Current product belongs to category | Matches a specific category. |
| | Have products in the cart from category | Checks if the visitor has added products from a given category. |
| | Have products in the cart from current category | Checks if the visitor has added products from the current category. |
| | Current product has the parameter | Targets products that contain a specific attribute or parameter. |
| **Actions** | User bought something within the period (in days) | Targets visitors who made a purchase within a defined period. |
| | How many times purchased during the selected period | Evaluates purchase frequency. |
| | Opened a product "out of stock" | Checks if the visitor viewed an out-of-stock product. |
| | Opened a product from the categories | Matches product views by category. |
| | Added a product from the categories to the cart | Targets based on cart additions from certain categories. |
| | Bought a product from the categories | Targets based on purchases in certain categories. |
| | Opened a product | Checks if the visitor opened any product page. |
| | Added specific product to cart | Targets based on a specific product added to cart. |
| | Bought a product | Checks if the visitor completed a purchase. |
| | Opened a product from the brand | Matches based on product views from a brand. |
| | Added a product from the brands | Targets based on cart additions from specific brands. |
| | Bought a product from the brand | Targets based on purchases from a brand. |
#### Filters
Filters refine which products an algorithm returns.
To add a filter:
1. Hover over an **algorithm** > click the **cogwheel icon**.
2. Select **Add filter**.
3. Choose your desired filter and configure its parameters.
You can apply multiple filters to a single algorithm.
##### Available filters
| Filter | Description |
| --------------------------------------------------------------------------- | --------------------------------------------------------------------- |
| Show products only from selected categories | Restrict results to chosen categories. |
| Don't show products from selected categories | Exclude specific categories. |
| Show only products from the category of the current product | Limit results to the current product's category. |
| Show from categories in which the user has viewed products | Display products from categories the visitor has viewed. |
| Show products from categories the user has added to cart | Include categories where the visitor added products to the cart. |
| Show products from categories the user purchased | Include categories where the visitor has purchased items. |
| Interacted with products | Show products the user has previously interacted with. |
| Don't show products from the wishlist | Exclude items marked as "wishlist." |
| Show only products that fill up the user's cart to a specified value | Recommend products that help reach a minimum cart value. |
| Show from categories from which the user has added products to the wishlist | Include categories tied to wishlist activity. |
| Show products that match a parameter value of the current product | Match attributes (for example, color or size) of the current product. |
| Show products matching the values of the selected parameter | Filter by shared parameter values across products. |
| Don't show products that match a parameter value of the current product | Exclude products sharing a parameter with the current one. |
| Show products that match the brand of the current product | Display items from the same brand. |
| Show products from the same department | Limit results to the same department. |
| Don't show selected products | Manually exclude specific products. |
| Show only products with price | Display only priced items. |
| Show products available in specified quantity | Filter by inventory level. |
| Show only statistically related products | Display products with strong statistical correlations. |
| Show products with a given margin | Filter based on profit margin. |
| Show only products of selected brands | Restrict results to chosen brands. |
| Don't show products of selected brands | Exclude specific brands. |
| Discount products | Include only discounted items. |
| Discount value | Set a threshold for discount percentage or value. |
| Skip niche algorithms | Omit niche-based logic. |
| Exclude products of the same group | Avoid recommending items from the same group. |
| Show products with only gender | Filter by gender-related attribute. |
| Show products marked as new arrivals | Include new arrival products. |
| Sort by rating | Order products by user rating. |
| Do not show from categories in which the user has viewed products | Exclude categories the visitor has viewed. |
| Do not show products from categories the user purchased | Exclude categories the visitor has purchased from. |
| Don't exclude previously purchased products | Include previously purchased products. |
| Don't exclude already in-cart products | Include products already in the visitor's cart. |
| Show products of selected merchants only | Limit results to selected merchants. |
| Don't show products of selected merchants | Exclude selected merchants. |
| Show products of merchants of the current product | Match merchant of the current product. |
| Show products that match the rating | Include products matching a specific rating. |
| Don't show products that match the rating | Exclude products with a given rating. |
| Do not show products from categories that the user added to cart | Exclude categories tied to cart additions. |
| By profit | Filter by profitability criteria. |
#### Example use case
You can combine conditions and filters to create sophisticated merchandising scenarios.
**Example:**
* **Condition:** If the current product costs more than \$100 → use the “Popular products” algorithm.
* **Filter (on Popular products):** Only show products from categories the user purchased from.
If the condition isn't met, Kameleoon moves to the next algorithm.
# Enable Kameleoon Search capabilities
Source: https://docs.kameleoon.com/user-manual/recommendations-and-merchandising/recommendations/enable-kameleoon-search-capabilities
Configure Kameleoon Instant Search and Full Search to deliver personalized, machine-learning-powered search results with typo tolerance, synonyms, and custom ranking.
Kameleoon Search is a powerful search solution that personalizes results using machine learning to provide product recommendations.
Personalize your search results by delivering the best-matched products for each visitor. Kameleoon Search offers two main capabilities:
* **Kameleoon Instant Search** delivers best-in-class user experiences from lightning fast search speeds to intuitive category navigation. Boost any search results with customized rules embedded in a drop-down search box.
* **Kameleoon Full Search** helps users discover products with powerful filtering functionalities and pre-built faceting options.
Kameleoon Search uses visitor behavior to boost products that are most relevant to the current visitor. Kameleoon Search also uses price margin and seasonality to boost the most profitable or in-demand products.
## Configure the feed for Kameleoon Search
To enable Kameleoon Search capabilities, you must include some additional product properties in your product feed:
* Kameleoon Instant Search uses the following information from your catalog feed:
* Element: **`yml_catalog` > `shop` > `offers` > `offer`**:
* (Required) `name`, `picture`, `url`, and `price` of the product
* (Optional) `barcode`: Lets the user search by product SKU.
* (Optional) `typePrefix`: Adds additional definition text about the product you sell. For example, “a bike for mountain biking.” Used by Kameleoon to provide more accurate search results.
* (Optional) `vendor` or `vendorCode`: Lets users search by manufacturer.
* (Optional) `model`: Lets users search by product model.
* (Optional) `tags`: You can add a maximum of five tags to your product feed to help users find your products by keywords.
* Element: **`yml_catalog` > `shop` > `categories`**:
* (Required) `name` and `url` of each category. Used to suggest product categories in the Instant search pop-in when searching for a product.

* The following data from your catalog feed are also required if you want to use Kameleoon Full Search capabilities to provide faceting and filtering on your result listing pages. By default, Kameleoon adds categories and brands as default filters:
* Element : **`yml_catalog` > `shop` > `offers` > `offer`**:
* (Optional) `param`: Contains the product attributes (for example, size, color) to use as filtering options.
* (Optional) `price_margin`: Use to boost products with the highest margin in returned results.
* (Optional) `locations`: Filter products that are not available at the visitor's location.

The Kameleoon Search engine supports multiple languages. It uses stemming algorithms (or "stemmers") to produce morphological variants of a root word. For example, if a user searches for “chocolate” on your website, items with the words “chocolates,” “chocolatey,” or “choco” are automatically linked to the root word “chocolate” and included in the results.

### Technical implementation of Kameleoon Instant Search
To integrate Kameleoon Instant Search, add the HTML class `KameleoonProducts-instant-search` to your existing search element in your source code (see example below).
` `
You must deactivate your current search engine, so it does not conflict with the Kameleoon search engine.
You can customize the default template stylesheet and information that the dropdown search box displays.
#### Query suggestions
Query suggestions help users find queries that are guaranteed to return results. Kameleoon automatically displays a list of possible queries that your users can choose from in the dropdown search box while they type their query into the search bar.
For example, when starting to type the word “sneakers”, the user may receive a suggestion to pick a more precise query, such as “sneakers asics” or “sneakers nike”, which would retrieve more specific results. Kameleoon refreshes query suggestions after each keystroke, so the user does not have to enter a full query. Query suggestions can be product categories or alternative queries.

You can customize the number of categories and suggestions in the **Search** > **Settings** page:
* **Input > Enable last queries**: Display suggestions from the user's previous searches when the user clicks on the search bar.
* **Input > Recent searches**: Display the products viewed after the previous search query.
* **Instant search > Categories limit**: Maximum number of suggested categories for a search query.
* **Common Settings > Category nesting level:** Set the category levels you want to be displayed. For example, if you have three category levels (Men > Sneakers > Running), and you only want to display the last category level (Running) in the search box, enter the value “3”.
* **Instant search > Brands limit**: Maximum number of suggested brands for a search query.
* **Suggestions > Suggestions limit**: Maximum number of suggested queries for a search query.
* **Instant search > Instant search products limit**: Maximum number of products returned (From 0 to 10).

#### Drop-down search box design
With Kameleoon, you can fully customize the look and feel of the dropdown search box:
* **Main components elements** **titles**: You can set values in the **Instant search widget titles** section of the **Search** > **Settings** page

* **Product information displayed in the search results**: You can configure your template in the **Search** > **Template instant search** page. This template supports [Liquid Markup](http://liquidmarkup.org/). You can use all fields available on the right to customize the search box.

* **Template stylesheet**: Design your block in the **Search** > **theme editor** page. You can choose between the easy-to-use basic editor and the powerful CSS editor.

### Technical implementation of Kameleoon Full Search
**Search result listing:**
`
`
**Faceting and filters:**
`
`
You can add the above class names to an existing block on your website.
You can enhance the result listing's customization by incorporating various available parameters within the product block:
* `data-search-limit`: This parameter determines the number of products to retrieve.
* `data-search-offset`: This parameter specifies a product's position within the dataset. By specifying it, you can retrieve a subset of products starting from the specified offset value. Typically, offset is used in conjunction with `data-search-limit`, which defines how many products to retrieve starting from the given offset.
* `data-search-category-names`: You can include an array of category IDs from the recommendation results.
* `data-search-callback`: This parameter is a callback function that executes once the recommendation data is returned.
* `data-search-error`: A callback function that executes when an error occurs.
* `data-search-sort-by`: This parameter lets you sort by various criteria, including popularity, price, discount, sales rate, or date.
* `data-search-order`: You can specify the sort direction as ascending (`asc`) or the default descending (`desc`).
* `data-search-locations`: Include an array of location IDs from the recommendation results.
* `data-search-price-min`: Request products that fall within a specific minimum price range.
* `data-search-price-max`: Request products that fall within a specific maximum price range.
* `data-search-filters`: This parameter takes an escaped JSON string with filter parameters. For example, you can use it to filter products based on criteria like Bluetooth compatibility or weight. For instance: `{"bluetooth":\["yes"],"weight":["1.6"]}`.
### Full search design
You can customize the default template and design of your search listing page following these steps:
* **Product information displayed in the search listing page**: You can configure a template in the **Search** > **Template full search** page. This template supports [Liquid Markup](http://liquidmarkup.org/). You can use all the available fields on the right to customize the search box.

* **Template stylesheet**: Design a block in the **Search** > **Theme editor** page. You can choose between the easy-to-use basic editor and the powerful CSS editor.
## Optimizing search results with advanced settings
Kameleoon offers many built-in configuration settings to control how the search engine functions and returns products. These settings are available out-of-the-box and don’t require any additional development from your team.
Here’s a review of the features that are particularly helpful for optimizing your search results.
### Typo tolerance
Kameleoon provides typo tolerance, which means users can still find the product they're looking for, even if they misspell it. You can configure how tolerant of typos you want the search engine to be.
Based on [Levenshtein distance](https://en.wikipedia.org/wiki/Levenshtein_distance), Kameleoon lets you choose the number of typos that might be fixed while typing a search request. Typo tolerance is on by default. You can change the typo tolerance behavior in the **Input** section of the **Search** > **Settings** tab.
In **Auto** mode, Kameleoon identifies how many typos can be fixed by taking into account the search length, but it cannot exceed two typos. If you want to disable typo correction, choose the value 0.
### Search relevance
By default, Kameleoon treats single-word queries differently from multi-word queries. When there’s a multi-word query, each word is considered a separate and unique key. For example, if the user enters the query "winter shoes", Kameleoon first returns all products that contain "winter shoes", followed by products with the attributes "winter" and "shoes". During summer, if the store has no winter shoes in stock, the results can contain entirely different products, some of which might be irrelevant.
When you activate the qualifying search option and search for "winter shoes", it will only return products labeled as "winter shoes" and nothing else. During summer, instead of random shoes, it will return empty results.
To change the default behavior and make multi-word queries behave similarly to single-word queries, turn the "Qualifying search" option **on** in the **Admin** area section of the **Search** > **Settings tab**.
### Synonyms
Synonyms tell the search engine about words that should be considered equal (for example, jacket is a synonym of both coat and parka). You can specify synonyms in the **Search** > **Synonyms** page. Typically, you will want to set synonym rules for queries that return few or no results.
Kameleoon doesn’t provide a built-in synonym dictionary because synonyms are very use-case dependent. However, Kameleoon helps you find synonyms by showing queries with no results in the **Failed search queries** of the **Search** > **Statistics** page. Click **+** in the synonym column and configure a synonym rule to help resolve the failed searches. You can also define a synonym when creating **query aliases**.

### Stop words
You can remove unnecessary words like “the”, “a”, “it”, or any word you believe should not be considered in the query used by visitors. For example, in the case of this query “some waterproof pants for motorcycle,” you may want to ignore the words “some” and “for” before executing the query, and therefore just search for “waterproof pants motorcycle”.
You can add stop words in the **Search** > **Stop words** page. You can also review popular queries in the **Search** > **Statistics** page to identify additional stop words. Click the **-** (remove) icon to remove a stop word.
### Search boosts
You can boost specific products, product categories, or brands to make them appear higher in search results. To do this, create boost queries from the **Search** > **Search boosts** page.
You can also schedule a boost for a limited time. For example, if you're running a one-week promotional offer on all Samsung TVs, you can boost all Samsung TVs whenever a user searches for "TV" for that week. You can add as many values as required (a list of products, brands, or categories) in the **boost type value** field and give a higher priority to some boost rules by increasing the **boost** value.
The **entry type** field lets you further customize boost rules. For example, if you create a boost for the query `sport shoes` and choose the **full** option, the boost only works if the user searches for `sport shoes`. If you choose **partial**, it also works for the queries `sport` and `shoes`.
### Search redirect
It can be useful to redirect users to dedicated landing pages when they search for products that are promoted in those pages. Kameleoon provides search redirect capabilities that you can use to create redirect rules from the **Search** > **Search redirect** page. You can also add multiple entries by uploading a CSV file.
### Embedding business logic to rank products in your search results
Customize products' ranking according to specific business needs. Enable or modify the following options in the **Search** > **Settings** > **Common settings** section:
* **Sales rate:** Rank products from lowest (0 to 50) to highest (50 to 100) in the search listing depending on their popularity. Kameleoon will take into account all visitors' interactions with your products (but mainly transactions) to rank products. To ignore a product's popularity in the ranking, set the value to 50.
Configure the timeframe used by Kameleoon in the **Settings** > **Store Settings** section.
* **Price margin pressure:** This option uses the product `` tag from your feed. It lets you rank products from lowest (0 to 50) to highest (50 to 100) in the search listing. The default value is set to 50 which means that the `price_margin` value for each product in your feed will not be taken into account.
* **Availability of stock:** Automatically filter out products with low stock. All out of stock items are automatically removed from search results.

# Import your product catalog feed
Source: https://docs.kameleoon.com/user-manual/recommendations-and-merchandising/recommendations/import-your-product-catalog-feed
Sync your product catalog into Kameleoon using an XML file, Google Merchant Feed, REST API, or Product API to power recommendation algorithms.
This is a premium feature. Contact your Customer Success Manager to enable it on your Kameleoon Account.
There are four easy methods for syncing your product catalog into Kameleoon:
1. With an **XML file** containing all required metadata for each of your products. Use this method if you don’t have a data layer and your catalog contains less than 50,000 products. You can easily choose the frequency Kameleoon should sync your catalog in the store settings page. You should perform an XML import once every 24-72 hours to update Kameleoon with your product stock.
2. With a **Google Merchant Feed URL**. Use this method if you have already uploaded your product in Google Merchant Center and if your catalog contains less than 50,000 products. Please contact your Kameleoon Customer Success Manager to enable this method. Follow [these steps](#step-2-sync-your-product-feed-file-with-kameleoon) to sync the Google Merchant with Kameleoon.
3. **Via Kameleoon's [REST API](../../../developer-docs/apis/product-recommendation-api-rest/all-endpoints/Import/import-product)**. Utilize Kameleoon's REST API for updating your catalog if you need regular updates, especially when dealing with products that quickly go out of stock due to limited availability.
4. **Via Kameleoon’s** [**Product API**](../../../developer-docs/apis/activation-api-js/api-reference/api-reference#trackproductview). You should use this method if you have a data layer that contains detailed information about your products and product categories. Working with Kameleoon's API requires that you have metadata available for products and categories from your product pages (for example, in a data layer) that Kameleoon can read and feed into our product recommendation algorithms.
Keep in mind that while the limitation (gzip compressed file) is set to 2GB, the larger your catalog, the longer it will take to process the feed, so opt for a synchronization of 6+ hours.
Kameleoon will automatically mark all products not present in the feed as out of stock. Thus, to enhance the feed processing speed and reduce its size, we recommend excluding out-of-stock products from your feed.
It's important to note that one drawback of the Product API method is that if products are not actively searched for or browsed by visitors, Kameleoon may not be aware of those products, and they may not be proposed in product recommendation blocks.
## Syncing your Product Feed using Kameleoon Product API
The Product API powers [Kameleoon's product recommendation algorithms](./configure-and-add-a-recommendation-block#rules) and social proofing messaging, such as [product impressions and purchases counters](../../../developer-docs/apis/activation-api-js/api-reference/api-reference#obtainproductinteractions) and [advanced targeting conditions](../../assets/segments/create-a-segment#visiting-behavior).
Once Kameleoon's Product API methods have been enabled on your website, Kameleoon will start sending product detail events whenever your visitors browse a product or category page, add a product to their carts, or make a purchase. It will also enable the collection of statistics about a given product (e.g., the number of times it was purchased or viewed in the last hour, or day) and power the creation of audience groups you can use in our segment builder using predefined product targeting criteria.
You'll need to add our Product page, Category page, Cart page, and Thank you page snippets to your source code to track interactions with your products and inform our Product Recommendations algorithm. You can also inject them by using [our Global custom script feature](../../project-management/manage-your-projects#configuration).
## trackProductView()
Use the `trackProductView()` method on **product pages** to track when a visitor views a product. Read more about the method [here](../../../developer-docs/apis/activation-api-js/api-reference/api-reference#trackproductview).
Ensure you provide all necessary data for your social proofing setup. Only the data sent via the `trackProductView()` method can be retrieved later through the [`obtainProductData()`](../../../developer-docs/apis/activation-api-js/api-reference/api-reference#obtainproductdata) endpoint.
## trackCategoryView()
Use the `trackCategoryView()` method on **category pages** to track when a visitor views a product category. Read more about the method [here](../../../developer-docs/apis/activation-api-js/api-reference/api-reference#trackcategoryview).
Ensure the **category ID** used here matches the one sent with the `trackProductView()` method. Read more about the Category object [here](../../../developer-docs/apis/activation-api-js/api-reference/api-reference#properties-of-the-category-object).
## trackAddToCart()
Use the `trackAddToCart()` method on **any page where a visitor can add a product to their cart**—for example, the home page, product page, category page, or cart page.
Read more about the `trackAddToCart()` method [here](../../../developer-docs/apis/activation-api-js/api-reference/api-reference#trackaddtocart).
## trackTransaction()
Use the `trackTransaction()` method on any page displayed after a visitor completes a **purchase or transaction**. Read more about the method [here](../../../developer-docs/apis/activation-api-js/api-reference/api-reference#tracktransaction).
Kameleoon syncs your whole product catalog every two hours and will automatically tag out of stock products as "unavailable" every 12 hours. A product is considered unavailable when the [`availableQuantity`](../../../developer-docs/apis/activation-api-js/api-reference/api-reference#product) attribute passed with the `addProductView` method is equal to zero, which ensures that Kameleoon's product recommendations only include products that are in stock. You can also set a product to be out of stock using [the `availableQuantity` attribute](../../../developer-docs/apis/activation-api-js/api-reference/api-reference#product) when using the `addProductView` method.
## Syncing your Product Feed using an XML file
Syncing your product catalog using an XML file includes the following steps:
1. Create an XML file with all the required metadata for each of your products, categories, and locations (for example, countries or locations where you operate and have different pricing, stock, or details for your products). The file must be available from a distant URL. Ensure that you host it in a secure area (for example, S3 bucket) that is accessible to Kameleoon.
2. Sync the XML file with Kameleoon and choose the update interval that suits your needs (for example, every hour, three hours, six hours)
3. Track your visitors’ events.
Multiple languages websites are not supported; you must create a separate [project](../../project-management/manage-your-projects) for each language and provide one feed for each.
Whitelist the following IP addresses to ensure a seamless image download process:
* `95.216.99.81/26`
* `95.216.99.220/26`
* `95.216.23.145/26`
* `95.216.10.183/26`
* `95.216.114.218/26`
* `95.217.32.105/26`
* `95.216.4.144/26`
* `95.216.102.29/26`
### Step 1: Creating your product feed
The product feed must include basic information about your catalog. Refer to the tables below for the mandatory attributes you must include.
```xml theme={null}
Adidas
.......
......
```
#### Element : yml\_catalog
| **Attribute** | **Mandatory** | **Description** |
| ------------- | ------------- | --------------------------------------------------------------------------- |
| `date` | Yes | Date of generation of the XML document. Format should be : YYYY-MM-DD hh:mm |
#### Element : yml\_catalog > shop
| **Element** | **Mandatory** | **Description** |
| ------------ | ------------- | ------------------------------------------------------------ |
| `categories` | Yes | List of store categories |
| `locations` | Yes | List of locations / countries where the store is represented |
| `offers` | Yes | List of store products |
#### Element : yml\_catalog > shop > categories
The **`categories`** element contains a list of category elements. Each product category you use to group or tag your products is described by a separate **`category`** element.
| **Attribute** | **Mandatory** | **Description** |
| ------------- | ------------- | ------------------------------------ |
| `id` | Yes | Category ID |
| `parentId` | No | Parent category ID |
| `url` | No | Link to category page |
| `alias` | No | The alias identifier of the category |
Example:
```xml theme={null}
Category level 1
Category level 1
Category level 2
Category level 3
```
#### Element : yml\_catalog > shop > locations
The **`locations`** element contains a list of your store locations. Each location is described by a separate **`location`** element.
You can use the following attributes for the element **`locations`**:
| **Attribute** | **Mandatory** | **Description** |
| ------------- | ------------- | --------------------------------------------------- |
| `id` | Yes | Location ID |
| `parentId` | No | Parent location ID |
| `type` | No | Location type. Available values: state, city, store |
| `name` | No | Location name |
Example:
```xml theme={null}
```
#### Element : yml\_catalog > shop > offers
The **`offers`** element contains your list of products. Each product is described by a separate **`offer`** element.
If all variants of one product are available from the same URL in your store, and there is no common identifier for product variants, Kameleoon will choose the cheapest product variant when recommending this product to your visitors. The availability flag in this case should fit into the following logic: if at least one product variant is in stock, then the product is considered in stock.
#### Element : yml\_catalog > shop > offers > offer
You can use the following attributes for the **`offer`** element:
| **Attribute** | **Mandatory** | **Description** |
| ------------- | ------------- | ------------------------------------------------------------------------------------------------------------------------------------------------------------------------------------------------------------------------------------------------------------------------- |
| `id` | Yes | Product ID / SKU / EAN |
| `group_id` | No | Product group ID. Required to combine product variants into one group. Kameleoon will choose the cheapest variant when recommending this product to visitors |
| `available` | Yes | Indication whether the product is in stock (‘true/false’). Kameleoon will automatically make all products that are not in the feed out of stock. Therefore, to speed up feed processing and reduce its size, do not adding products that are out of stock in your feed. |
| `leftovers` | No | Indication of how much inventory of a particular product is available. It can take one of the following values: one (the product is available in a single copy), few (the product is in limited quantities–up to 10 units), lot (available from 10+ units of the product) |
The **offer** element can take the following tags:
| **Element** | **Mandatory** | **Description** |
| ---------------- | ------------- | ----------------------------------------------------------------------------------------------------------------------------------------------------------------------------------------------------------------------------------------------------------------------------------------------------------------------------------------------------------------------------------------------- |
| `name` | Yes | Product Name |
| `picture` | Yes | Product main image |
| `price` | Yes | Base price of the product |
| `url` | Yes | URL to the product details page (starting with HTTP/HTTPS) |
| `categoryId` | Yes | Product category. If the product is associated with several categories, add as many `categoryId` elements as needed |
| `locations` | No | Required if the properties of the product (price, availability) are different depending on your locations. See table and example below |
| `accessories` | No | List of products that can be complementary or equivalent to the current product. It allows you to recommend products that can be used in combination with the current product (or in replacement of). It is usually needed for a fashion or auto store and this tag is only compatible with the [Store Recommendations](./select-an-algorithm-for-your-product-recommendation-block) algorithm. |
| `oldprice` | No | The previous price of the item. Used to show the product discounted price in product recommendation blocks. |
| `price_margin` | No | A weighting factor of the product price margin, between 0 and 100. Used to show products that have a higher margin in product recommendation blocks. |
| `barcode` | No | Product barcode or SKU. Used for Kameleoon's search algorithms. |
| `typePrefix` | No | Product type (for example, "mobile phone", "washing machine", "corner sofa"). Used for Kameleoon's search algorithms. |
| `vendor` | No | Manufacturer/brand |
| `vendorCode` | No | The manufacturer / brand's code. Used for Kameleoon's search algorithms. |
| `model` | No | Model and product name (for example, iPhone 17 128GB). Used for Kameleoon's search algorithms. |
| `seasonality` | No | Seasonality of goods. Allows you to recommend this product only some months of the year. Add as many elements as needed. See example below |
| `is_new` | No | Must be "1" if the product is new. Required if you use the algorithm “New arrivals” |
| `rating` | No | Product rating. Must take a value from zero to five. Must be zero if the product has no rating |
| `description` | No | Product description |
| `stock_quantity` | No | Indication of the product stock quantity |
| `tags` | No | Any additional information describing the product. Used for Kameleoon's search algorithms. You can add a maximum of five tags. See table and example below |
| `param` | No | Used to provide filtering options in the search listing page provided by Kameleoon. Add as many param elements as needed. See example below |
| `author` | No | Only required if you sell books online |
| `publisher` | No | Only required if you sell books online |
| `series` | No | Only required if you sell books online |
| `year` | No | Only required if you sell books online |
| `ISBN` | No | Only required if you sell books online |
Example:
```xml theme={null}
```
#### Element : yml\_catalog > shop > offers > offer > locations
The **`locations`** element contains a list of locations, and the availability and price of the current product in these locations. Each location is described by a separate element `location` within the **`offer`** tag.
You can use the following attributes for the **`locations`** element:
| **Attribute** | **Mandatory** | **Description** |
| ------------- | ------------- | ------------------------------------------------------------------------------------------------------------------------------------------------------------------------------------------ |
| `id` | Yes | ID of the location where the product is currently listed. Must be one ID from one of the **`locations`** elements in the Shop element (see section above). Add as many elements as needed. |
The product will only be considered available for purchase in the locations that are listed in the offer element. In all other unlisted locations, the product will be considered out of stock. You don’t need to add locations if your product is available in all locations, as Kameleoon will automatically consider the product in-stock in all of them.
The **`locations`** element can take the following tags (only required if the product has a different price/stock quantity in some of your locations).
| **Element** | **Mandatory** | **Description** |
| ---------------- | ------------- | ------------------------------------------------- |
| `price` | No | The price of the product in the listed location |
| `oldprice` | No | The previous price of the product in the location |
| `stock_quantity` | No | Product stock quantity in the location |
#### Element : yml\_catalog > shop > offers > offer > fashion
Use the fashion tag if you sell clothes products.
The **fashion** element can take the following tags:
| **Element** | **Mandatory** | **Description** |
| ----------- | ------------- | -------------------------------------------------------------------------------------------------------------------------------------- |
| `gender` | no | Product gender. Must be "f" (Female) or "m" (Male). |
| `type` | no | Product type. See table below for the allowed values. |
| `sizes` | no | Product's available sizes. See table below for the allowed values. |
| `color` | no | Product color. See example below. |
| `feature` | no | Product specificities. Use this element to indicate if the product is for adults or kids only. Must take the value "child" or "adult". |
Do not specify the **`gender`** element if it's irrelevant. The product will be labelled "unisex" and will have a lower recommendation priority than other products of the same gender.
The **`type`** element can take the following values:
| **Element value** **(gender)** | **Description** |
| ------------------------------ | -------------------------------------- |
| `shoe` | Shoes |
| `shirt` | Shirts, blouses, dresses |
| `tshirt` | T-shirts |
| `underwear` | Underwear |
| `trouser` | Pants, jeans, shorts, skirts, swimwear |
| `jacket` | Jackets, coats, fur coats |
| `blazer` | Jackets, vests, jumpers |
| `sock` | Socks |
| `belt` | Belts |
| `hat` | Hats |
| `glove` | Gloves |
Example:
```xml theme={null}
...
f
shoe
```
The **`type`** parameter is required when using the **`sizes`** parameter. You can add a list of available sizes by adding as many **`size`** tags as needed within the **`sizes`** element (see example below). If you have several **locations**, and the availability of product sizes is different across locations, insert a **`location`** tag with the list of available sizes in each **`size`** element (see example below).
| **Description** | **Example** |
| -------------------------------- | --------------- |
| European size | `e38` |
| International size | `M`, `L`, `u30` |
| UK size | `b6` |
| Height (for children's products) | `h89-95` |
| One size fits all | `null` |
Example:
```xml theme={null}
...
f
shoe
adult
e41
e42
e44
e48
...
m
jacket
```
One product can have multiple colors available. You can set a specific picture for a color by adding a **`picture`** attribute. Otherwise, the primary picture will be displayed.
Example:
```xml theme={null}
...
f
shirt
white
blue
```
#### Element : yml\_catalog > shop > offers > offer > auto
Use the **`auto`** tag if you sell auto parts and accessories. Kameleoon's algorithm is designed to automatically recognize a potential buyer with certain characteristics, like the brand and model of the car. It will be used to display parts and accessories in recommendation blocks that are only compatible with specific car brands and models.
The **`auto`** element contains a list of compatible cars. Each car brand and model is described by a separate **`compatibility`** element.
If the product is compatible with all cars, you do not need to add **`compatibility`** elements. If the product is compatible with all car models of a brand, you do not have to add the **`model`** attribute.
You can use the following attributes for the **`compatibility`** element:
| **Attribute** | **Mandatory** | **Description** |
| ------------- | ------------- | --------------- |
| `brand` | Yes | Car brand |
| `model` | No | Car model |
If the product is only compatible with a list of cars, you can also add a **`vds`** element for each compatible car. The **`vds`** contains the Vehicle Identification Number (VIN) that serves as the car's fingerprint.
Example:
```xml theme={null}
...
BP8AN5
BP8AN5
```
#### Element : yml\_catalog > shop > offers > offer > tags
The **`tags`** element contains a list of tags associated with the product. This is useful for improving Kameleoon’s search engine recommendation. Each value is described by a separate **`tag`** element.
| **Element** | **Mandatory** | **Description** |
| ----------- | ------------- | --------------- |
| `tag` | Yes | Tag value |
**You will find examples of XML files you can use as a template below:**
* XML product feed - example 1 (without locations elements):
```xml theme={null}
Adidas
Asics
Converse
Dr Martens
Flex
Sneakers
Shoes
https://kameleoon-store.myshopify.com/products/adidas-kids-stan-smith
50.99
90
45
270821163172
2708211
https://cdn.shopify.com/s/files/1/0564/9180/2788/products/7883dc186e15bf29dad696e1e989e914_grande.jpg?v=1622707556
ADIDAS | KID'S STAN SMITH
1
4
Adidas
The Stan Smith owned the tennis court in the '70s. Today it runs the streets with the same clean, classic style. These kids' shoes preserve the iconic look of the original, made in leather with punched 3-Stripes, heel and tongue logos and lightweight step-in cushioning.
300
Sneakers
Lean low top sneakers
Men sneakers
shoe
black
9
child
9
white
......
```
* XML product feed - example 2 (with locations elements):
```xml theme={null}
Adidas
Asics
Converse
Dr Martens
Flex
Sneakers
Shoes
https://kameleoon-store.myshopify.com/products/adidas-kids-stan-smith
50.99
90
270821163172
2708211
https://cdn.shopify.com/s/files/1/0564/9180/2788/products/7883dc186e15bf29dad696e1e989e914_grande.jpg?v=1622707556
ADIDAS | KID'S STAN SMITH
1
4
Adidas
The Stan Smith owned the tennis court in the '70s. Today it runs the streets with the same clean, classic style. These kids' shoes preserve the iconic look of the original, made in leather with punched 3-Stripes, heel and tongue logos and lightweight step-in cushioning.
300
Sneakers
Men
63
90
90
67378596415,673785964150821,673785964150,673785964150811
......
```
### Step 2: Sync your product feed file with Kameleoon
By default, the Kameleoon feed syncs with your XML file every 24 hours. However, you can change this setting if your product catalog updates more frequently. You can make adjustments in **Store settings**.

You can also schedule the import to start at a specific hour. Please contact your Kameleoon Customer Success Manager to enable this option.

### Step 3: Track visitors’ events
In addition to syncing your XML product feed, you must implement events to track product events, such as product view, add to cart, and transaction.
#### Product views
You must use the **`trackProductView`** method.
`Kameleoon.API.Products.trackProductView("ProductID/SKU/EAN");`
[Read the detailed instructions](../../../developer-docs/apis/activation-api-js/api-reference/api-reference#trackproductview)
#### trackAddToCart()
You must use the **`trackAddToCart()`** method whenever a product has been added to the visitor’s cart or when the visitor accesses the cart page.
`Kameleoon.API.Products.trackAddToCart("ProductID/SKU/EAN");`
[Read the detailed instructions](../../../developer-docs/apis/activation-api-js/api-reference/api-reference#trackaddtocart)
#### Transaction
```javascript theme={null}
Kameleoon.API.Products.trackTransaction([
{
"productID": "ProductID/SKU/EAN 1",
"quantity": 1
}
]);
```
[](../../../developer-docs/apis/activation-api-js/api-reference/api-reference#tracktransaction)[Read our detailed instructions](../../../developer-docs/apis/activation-api-js/api-reference/api-reference#tracktransaction)
## Validate your feed sync status
If you use Kameleoon's Product API, you can verify that your implementation was successful by using [the `obtainProductData` method](../../../developer-docs/apis/activation-api-js/api-reference/api-reference#obtainproductdata). This method allows you to easily QA your implementation in real-time and verify that Kameleoon collected your product attributes correctly.
You can visualize your product catalog by using the **Data feed** menu.

You can also access import logs directly from the **Imports log** menu to troubleshoot import issues.

You can then click any row to access the detailed import log.
# Manage recommendation strategies
Source: https://docs.kameleoon.com/user-manual/recommendations-and-merchandising/recommendations/manage-recommendation-strategies
View, activate, preview, and analyze all your product recommendation strategies from a central workspace with performance metrics and fill rate indicators.
Kameleoon lets you manage and analyze your product recommendation strategies in a central workspace. You can view key metrics, activate or deactivate strategies, and preview them before going live.
This is a premium feature. Contact your Customer Success Manager to enable it on your Kameleoon account.
## Access recommendation strategies
To access your strategies:
1. In the left sidebar, click **Settings** > **Recommendations**.
2. In the Product Recommendations workspace, go to **Recommendations** > **Recommendation strategy**. The page opens on the **In use** tab. If no strategies are live, the page displays an empty list.
3. Click **All blocks** to see all available recommendation strategies.
## Overview

The **All blocks** view shows an overview of your strategies, including:
* Name, description, and code — use the code when calling the API.
* Tags — filter strategies in the list.
* Status — displays **Paused**, **Not installed**, or **In use**.
* Kameleoon shows **Not installed** when it has not yet detected the strategy on your website.
* Click-through rate (CTR) — shows the ratio of clicks to views.
* Fill rate — indicates how effectively the strategy displays products.
* Green: The strategy consistently displays the maximum number of products you set (for example, 10/10).
* Yellow, Orange, Red: The strategy displays fewer products than intended, often because of restrictive rules. The color's intensity reflects how many products are missing.
## Performance

The **Performance** section shows how each recommendation strategy performs.
In this section, you can:
* Activate, deactivate, or preview a strategy.
* See the number of impressions (views), clicks, CTR (clicks per impression), conversions (clicks per purchase), products added to cart, purchases, and revenue.
You can export the list of products that users purchased after seeing a recommender block in an XLS file.
For more details, see [Analyze your product collection strategy's performance](../merchandising/analyze-your-product-recommendation-strategy-performance).
### Preview
You can preview your recommendation strategy before activating it. To use preview mode, ensure the strategy's `` code appears on your website. Copy the strategy's snippet first.
1. In the **Performance** section, click **Preview** in the toggle.

2. A pop-up appears with three options:

* **Enable:** Turns on preview mode and opens your website in a new tab with the preview parameter added to the URL.
* **Disable:** Turns off preview mode, and the strategy will no longer appear.
* **Copy link:** Copies a shareable preview URL for others to see the strategy.
When preview mode is active, you can see exactly how the strategy appears to users before going live.
## Edit your strategy
To edit your strategy, use the **Rules** and **Templates** sections. For more information, see [this article](./configure-and-add-a-recommendation-block).
# Select an algorithm for your product recommendation block
Source: https://docs.kameleoon.com/user-manual/recommendations-and-merchandising/recommendations/select-an-algorithm-for-your-product-recommendation-block
Choose from Kameleoon's built-in recommendation algorithms—such as Popular, Similar, Trending, and Recently Viewed—to control which products appear in your blocks.
Kameleoon algorithms determine which products are recommended.

Here is the list of available algorithms:
| Algorithm | Description |
| ------------------------------------------------------ | --------------------------------------------------------------------------------------------------------------------------------------------------------------------------------------------------------------------------------------------------------------------------------------------------------------------------------------------------------------------------------------------------------------------------------------- |
| Popular products | The algorithm returns products sorted by [sales rate](./analyze-your-product-recommendation-strategy-performance#sales-rate). |
| Similar products | This algorithm returns products from the same category while considering product characteristics provided by the API. The recommended products should be priced between 85% and 125% of the current product's price. If there aren’t enough products to populate the entire slider, the price range expands to 50%–150%. You can apply additional filters based on other product characteristics. *Only works on product detail pages.* |
| Products usually purchased with this product | This algorithm returns products often bought with the current product. The calculation period is one month for traffic above 300,000 visits per month and three months for traffic below 300,000 visits per month. *Only works on product detail pages.* |
| Interesting for you | This machine learning algorithm is based on the rule “visitors who bought the same products as you also bought these products”. |
| Trending products | This algorithm is similar to “Popular Products”, but the [sales rate](./analyze-your-product-recommendation-strategy-performance#sales-rate) is considered in a much shorter period (24 hours). Therefore, it represents the current trends and demand. The time frame (24h) can be edited in the settings. |
| Recently viewed | This algorithm returns products recently viewed by the user that they haven’t added to their cart. If the block is displayed on a product page, the product currently displayed is excluded from the selection. The calculation period is 14 days. |
| Products usually purchased with the same shopping cart | This algorithm is similar to “Products usually purchased with this product”, but it applies to all the products in the cart. The calculation period is one month for traffic extending 300,000 visits per months and three months for traffic below 300,000 visitors per month. |
| Product usually purchased after this search query | This algorithm analyzes search queries and results, considering what products users purchased who made the same search. This type of block is usually displayed on the search results page, but we recommend visually separating it from the search result itself. The calculation period is one week for traffic above 500,000 visits per month and two weeks for traffic below 500,000 visits per month. |
| Regular purchase | This algorithm calculates an item's frequency of purchase and forecasts the ideal time to display it to visitors. |
| New arrivals | This algorithm returns products marked as “new” in the product feed. |
| Exact products | This algorithm lets you select and display specific products. |
| Store recommendations | This algorithm displays products with the tag “accessories” in the feed. *Only works on product detail pages.* |
| Partially similar products | Similar to “Similar products”, this algorithm returns products with at least one common category/characteristic. |
| Previously added to cart | This algorithm returns products that the visitor previously added to their cart. The calculation period is 30 days. |
| Products usually viewed with this product | This algorithm returns products other users viewed after the current product. The calculation period is one day. *Only works if there are items in the cart.* |
| Next best product | This algorithm returns the best product to purchase after the current product. |
You can select an algorithm, set a quantity of product returned by the algorithm, and add filters.
If you set a limit of ten products, but the limit of products in the block is six, the block will display six products.
To learn how to configure advanced rules for your recommendation block, [read this article](./define-advanced-merchandising-rules).
## Algorithms at work
Below is a list of algorithms that **only** work under certain conditions. If the conditions are not met, the algorithm **will not work.**
### Only works on the product page
* **Similar products** algorithm (works as soon as product ID is available to use)
* **Products usually purchased with this item** algorithm
* **Store recommendations** algorithm
### Only works if there are items in the cart
* **Products usually viewed with this product** algorithm.
# Strategy settings
Source: https://docs.kameleoon.com/user-manual/recommendations-and-merchandising/recommendations/strategy-settings
Configure how Kameleoon prioritizes products in recommendation strategies using sales rate, visitor personalization, price margin, and trending timeframe settings.
You can define how Kameleoon prioritizes products in your recommendation strategy. You can choose from priority modes, depending on your business goals and available data.
To open your strategy settings, open the left sidebar and click **Recommendations** > **Strategy settings**.

## Priority by sales
This option prioritizes based on their [**sales rate**](./analyze-your-product-recommendation-strategy-performance#sales-rate). The sales rate measures how well a product converts when displayed in recommendations.
Moving this slider to the right increases the ranking of products with higher sales rates in recommendations.
## Priority by personalization
This option prioritizes products that match each visitor's preferences, based on industry-specific tags in your product feed (such as `auto`, `fashion`, or `books`).
Kameleoon boosts products that match the visitor’s behavior and interests when you use these tags.
For example, if a visitor frequently views or purchases men’s fashion items, Kameleoon ranks similar products first in recommendations when you set \*\*priority by personalization to high.
## Priority by external parameter
This option prioritizes products based on a custom external parameter defined in your product feed.
Specifically, Kameleoon uses the `
` tag to determine the priority level for each product.
The value for the `` tag must be between 0 and 100. Kameleoon ranks products with higher `` values higher in the recommendation list.
## Trending products timeframe
Select the sales period that determines your trending products. Pick a value from **1 hour** to **1 week**.
***
Click **Save** to save your changes.
# Use a product recommendation block in a campaign
Source: https://docs.kameleoon.com/user-manual/recommendations-and-merchandising/recommendations/use-a-product-recommendation-block-in-a-campaign
Associate a configured recommendation block with a Kameleoon experiment or personalization campaign using predefined recommendation widgets.
This is a premium feature. Contact your Customer Success Manager to enable it on your Kameleoon Account.
[Once you have created and configured a recommender block](./configure-and-add-a-recommendation-block), you can associate it with a Kameleoon campaign.
## Use a product recommendation block in an experiment
To associate a product recommendation block with an experiment, use one of the predefined recommendation widgets:
1. In the Graphic editor, open a variation's menu and click **Add an element**.
2. Select the Widget option.
3. Choose the recommendation template you created.
4. In the pop-up that opens, choose a product recommendation block and click **Next**.
Once your block has been associated, set up your experiment as usual and launch it.
## Use a product recommendation block in a personalization
To associate a product recommendation block with a personalization, you can use one of the predefined recommendation widgets:
1. On the personalization creation page, click **In your page content** or **Above your pages** to associate the recommendation widget with your campaign.
2. Click **Widgets**.
3. Choose the recommendation template you created.
4. In the pop-up that opens, choose a product recommendation block and click **Next**.
Once your block has been associated, set up your personalization as usual and launch it.
# Manage personalizations
Source: https://docs.kameleoon.com/user-manual/web-personalization/manage-personalizations
Search, filter, sort, and take actions on personalizations from the dashboard, including pausing, duplicating, archiving, and bulk operations.
## Access the Personalizations Dashboard
To access the Personalizations Dashboard in Kameleoon, click **Activate** > **Personalizations**.

## Dashboard structure

* **Header:** title of the current view; button to create a new personalization
* **Search bar:** search tool; number of personalizations currently displayed on the Dashboard
* **Cards and columns:** information about the personalizations; Results/Finalize buttons; sorting tool; three-dot menu (on the right) to apply actions to a personalization
* **Sidebar:** filters; columns; views; secondary actions linked to the three-dot menu
## Personalization information
A card represents each personalization. The card indicates the personalization's main information.
Hover over the tooltip to the right of a campaign's name to display additional information.
## Find a personalization
If you have created many personalizations, a search bar, a filtering tool, and a sorting tool help you find a particular personalization.
In the dashboard's right-hand panel, you can apply filters. To sort the data the dashboard displays, click the column headers.
### Filter
You can filter your personalizations according to several criteria:
* Website
* Type
* Status
* Tag
* Goal
* Segment
* Priority
* Author
* Key date
#### Website
You can filter your personalizations based on their associated websites.
Select the websites and click **Apply**.
#### Type
You can filter your personalizations based on their type:
* **Standard (BETA):** Personalizations created using the new personalization builder.
* **Legacy:** Personalizations created with the legacy editor.
* **AI:** Personalizations created using PBX.
Check the types and click **Apply**.
#### Status
You can filter your personalizations based on their status. For example, you can choose to display only online personalizations.
Check the status and click **Apply**.
#### Tag
You can filter your personalizations based on their associated tags.
Select the tags and click **Apply**.
#### Goal
You can filter your personalizations based on their goals.
Check the goals and click **Apply**.
#### Segment
You can filter your personalizations based on their associated segments.
Select the segments and click **Apply**.
#### Priority
You can filter your personalizations based on their priority.

Select a rank of priority and click **Apply**.
#### Author
You can filter your personalizations based on their author.
Check the author and click **Apply**.
#### Key date
You can filter your personalizations based on a specific key date: last modification, last status change, launching date (Go-live), or creation date.
Select a date and click **Apply**.
### Sort
The sorting option lets you sort your personalizations according to several criteria:
* Name
* Type
* Edited
* Author
* Priority
* Created
* Launched
#### Name
Hover over **Name**, then click the chevron to sort personalizations in alphabetical (or reverse alphabetical) order.
#### Type
Hover over **Linked to**, then click the chevron to sort personalizations based on their type.
#### Edited
Hover over **Edited**, then click the chevron to sort personalizations from newest edition date to oldest or vice versa.
#### Author
Hover over **Author**, then click the chevron to sort personalizations based on the name of their author in alphabetical (or reverse alphabetical) order.
#### Priority
Hover over **Priority**, then click the chevron to sort personalizations from highest priority to lowest or vice versa.
#### Created
Hover over **Created**, then click the chevron to sort personalizations from newest creation date to oldest or vice versa.
#### Launch date
Hover over **Launched**, then click the chevron to sort personalizations from newest launch date to oldest or vice versa.
## Columns
You can customize your dashboard's layout by adding, removing, or rearranging columns. In the sidebar's **Columns** tab, check a column to make it visible. To change the display order, drag and drop the cards and rearrange them as you like.
Click **Reset** to restore the original column configuration.

### Sort by
The sorting rule lets you choose the order in which the campaigns appear on your dashboard.
You can sort by:
* Name
* Type
* Status
* Last edition
* Team
* Tags
### Save as a View
You can [save these configurations as a **View**](../experimentation/web-experimentation/manage-your-web-experiments/manage-your-experiments#views) and re-apply it later. You can also make this view your dashboard's default view
## Actions on a personalization
Click the three-dots menu located to the right of each card to access a range of actions. The available actions depend on your personalization's status.

When your changes are complete, click **Validate**.
### Pause
You can pause an online personalization. Its status becomes **paused**.
A notification is displayed to confirm your action.
### Stop
You can stop an online personalization. Its status becomes **stopped**.
A notification is displayed to confirm your action.
Stopping a personalization allows you to delete it if necessary.
### Delete
Select a personalization, click the three-dots menu on the right side of the card, and click **Delete**.
You can only delete a stopped or draft personalization.
### Edit
You can edit your personalization. Kameleoon will redirect you to the personalization creation page.
### Rename
You can rename an existing personalization.
The **Rename** sidebar opens. Click **Save** to validate the renaming of the personalization.
### Manage tags
You can manage the tags associated with a personalization.
The **Manage tags** sidebar opens.
Tags associated with your personalization are highlighted in the list and on the personalization card. You can associate and create other tags, too.
To validate your choices, click **Save**.
### Duplicate
You can duplicate an existing personalization. This option saves you time if you want to create several similar personalizations.
The **Duplicate** sidebar opens. To validate a new personalization's creation, click **Save**. You can find the duplicated personalization in the dashboard.
### Archive
You can perform this action only on Draft or Stopped personalizations.
Once you've archived a personalization, it can only be retrieved from [the **Archived personalizations** view](./manage-personalizations#archived-personalizations).
### Multiple selection
You can select multiple personalizations at the same time and apply a common action to them. For example, it is possible to archive or export several personalizations at once.
Select a personalization, click the three-dots menu on the card's right side, and click **Select**.
The personalizations become selectable and the **Grouped actions** sidebar opens.
Several actions are possible:
* Select all/Unselect all
* Manage tags
* Pause *(Only available for Online personalizations)*
* Stop *(Only available for Online *personalizations*)*
* Archive *(Only available for Draft and Stopped personalizations)*
* Delete *(Only available for Draft and Stopped personalizations)*
* Export
## Views
Create a view to save your filters and find it in the **Views** tab.
For example, you can create a view displaying only classic, online, or planned personalizations.
Name your view and click **Save as view**.
Kameleoon generates a unique URL with custom parameters when you create a view. You can share this URL with other team members. Click **Copy link to this filtered dashboard** to copy the URL.
Set a view as the default view to see it as soon as the dashboard loads.
You can find all of your views in the **Views** tab. To set a view as default, click its **three-dots menu** > **Default**.
Clicking on the subtitle of your page gives you access to the filters applied in the sidebar. For example, you can click on **My "Classic online & planned" view** to display the view's filters in the sidebar.
### Archived personalizations
Kameleoon offers a view of your archived personalizations. The dashboard displays only archived campaigns in this view. You can view their details and restore them if you wish.
By clicking the three-dots menu, you can simulate or permanently delete the archived personalization, and access its results in the case of a stopped personalization.
# Set up and launch a personalization
Source: https://docs.kameleoon.com/user-manual/web-personalization/set-up-and-launch-a-personalization
Follow this step-by-step guide to configure, target, and launch personalizations using the Kameleoon Personalization builder.
**Content migration from legacy personalizations**
Kameleoon will migrate legacy personalization configurations to the new personalization content types as follows:
| Legacy configuration | New personalization content |
| -------------------- | ------------------------------------------------- |
| Code-based | Code Content |
| Widget | Widget Content |
| From experiment | Personalization Content of the corresponding type |
The migrated content type matches the original experiment type. You can further edit the content in the personalization.
## Access the Personalization builder
To create a new personalization:
1. Log in to the Kameleoon app.
2. Go to **Experiences** > **Personalization**.
3. Click **New personalization**.
***
## Step 1: Add content
In the first step, define the content you want to display to your visitors.

1. Click **Add content**.
2. Select one of the following methods to create your content.
* **Using prompt:** Opens the prompt-based experimentation (PBX) interface. You can design your content using AI-driven prompts. [Learn more about using PBX](../experimentation/web-experimentation/prompt-based-experiments/pbx-build/create-a-prompt-based-experiment).
* **With the graphic editor:** Opens the Graphic editor. You can design your content visually directly on your website. [Learn more about the Graphic editor](../experimentation/web-experimentation/graphic-based-experiments/getting-started-with-the-graphic-editor)
* **With the code editor:** Opens the Code editor. You can design your content using HTML, CSS, and JavaScript. [Learn more about the Code editor](../experimentation/web-experimentation/code-based-experiments/using-the-code-editor).
* **From an existing experiment:** Duplicate content from an existing experiment. After you import the content, it remains independent of the original experiment.
* If you select this option:
1. Select the desired experiment from the list.
2. Choose the content you want to use (cannot be the experiment's **Control** version).
3. Click **Select**.
* **Using widget:** Import or create a widget.
* If you select this option:
1. Enter the main page URL, where you want your widget to appear.
2. Choose a widget from you library or create a new widget. Creating a new widget will open the Widget Studio. [Learn more about the Widget Studio](/user-manual/assets/widgets/create-a-new-widget)
3. Define how your widget should be positioned on the page :
* Above the page : widget position is defined in the the Widget Studio.
* Inside the page : widget position position is defined relatively to the selected element. [Learn more about how kameleoon uses CSS selector](/user-manual/experimentation/web-experimentation/graphic-based-experiments/troubleshooting-the-graphic-editor#how-do-graphic-editors-work)
### Manage content
Once you add content, it appears in your content list. Kameleoon displays the source beneath the name (for example, **Created from PBX**).

* **Edit:** Click the **pencil icon** to reopen the editor associated with that content.
* **Options:** Click the **three dots** menu to **Rename**, **Preview**, **Duplicate**, or **Delete** the content.
***
## Step 2: Define targeting rules
Targeting rules determine who sees your personalization, where they see it, and when it appears. You can configure multiple targeting rules for a single personalization and define automatic rollback conditions.
### How Kameleoon evaluates targeting rules
Kameleoon evaluates targeting rules sequentially in the order they appear. A visitor sees only one rule per personalization evaluation.
For each targeting rule, Kameleoon follows this process:
1. **Evaluate targeting conditions:** The system verifies if the visitor meets the criteria defined in segments and triggers.
2. **Evaluate exposure eligibility:** If conditions are met, the system checks traffic allocation, display settings (capping), and scenarios.
3. **Determine exposure:**
* If the visitor qualifies, they see the assigned content and the evaluation stops.
* If the visitor does not qualify, the system proceeds to the next targeting rule.
To change the order of your targeting rules, click and drag the left side of a rule card.
To configure targeting, click the **Targeting rules** tab. Click the text field under **Rule name** to rename the rule.

### Segments
Define which segments of visitors are eligible for this rule.
* **All visitors:** Targets every visitor on your site.
* **Specific segment:** Select an existing segment from the dropdown or click **Create a new segment**.
* **Specific visitors:** Define targeting conditions for specific visitors without having to create a segment.
### Exposure and content
* **Exposure:** Use the slider or enter a number in the text field to define the percentage of your target audience that sees the personalization.
* **Select the content:** Use the dropdown to choose which specific content (created in [Step 1](#step-1-add-content)) displays for this rule.
### Triggers
Expand the **Triggers** section to define when the personalization activates.
* **Reach a webpage:** Trigger on a specific URL, URL fragments, or the entire site.
* **When a specific trigger occurs:** Select an existing trigger or create a new one.
* **When a combination of triggers occurs:** Combine multiple triggers using **If any** (OR) or **If all** (AND) logic.
### Scheduling (Optional)
Expand the **Scheduling** section to set a time frame for your personalization by setting a **Start on** and **End on** date.
### Display settings (Optional)
Expand **Display settings** to control frequency and capping.

#### Display limits
Restrict exposure frequency during the same visit, for the same visitor over time, or via consecutive display gaps.
#### Display thresholds
Pause the rule based on total exposed visitors, goal completion/failure, or specific conversion counts per visitor.
#### Prioritization
Use this setting to prioritize targeting rules across different personalization campaigns. If a visitor matches targeting conditions for rules in multiple campaigns, Kameleoon displays the rule with the highest priority value first.
Prioritization does not affect rules within the same campaign. Kameleoon evaluates rules within a single campaign based on their order in the list, from top to bottom.
To set the priority, enter a numeric value in the **Prioritization** field. A value of **1** represents the lowest priority.
### Scenarios
Scenarios decide **if** a visitor should see a personalization based on their exposure to **other** personalizations.

1. Click **Add a scenario**.
2. Configure the logic:
* **Action:** **Display** or **not display**.
* **Quantity (Scope):** **No other**, **At least one other**, or **All other**.
* **State:** **Displayed** or **Not displayed**.
* **Timeframe:** **On the same page**, **During the current visit**, etc.
### Rollback conditions
Kameleoon can automatically pause a rule if it performs poorly.
1. Click **Rollback conditions** at the bottom of the rule configuration pane.
2. Click **Add a condition** and define the performance threshold (e.g., Conversion rate lower than 60%).
3. Set the **Minimum visitors** required before the rollback triggers.

***
## Step 3: Configure reporting
### Goals
1. Navigate to the **Goals** menu.
2. Select the goal you want to track. [Learn more about goals](../assets/goals/create-a-goal).
### Integrations
1. Click **Integrations**.
2. Select the third-party analytics tools (e.g., GA4, Mixpanel) where you want to send data.
***
## Step 4: Configure general settings (Optional)
* **Simulation URL:** Change the default preview URL.
* **Tags & Description:** Add organizational tags and internal notes.
* **Custom script:** Add JavaScript that executes independently of targeting conditions.
* **Advanced settings:** Configure a custom **Attribution window**.
***
## Launch
1. Click **Save** to save your work.
2. Click **Simulate** to preview behavior.
3. Click **Launch** in the header to go live.
# Developer docs overview
Source: https://docs.kameleoon.com/developer-docs/home/developer-docs-overview
Navigate Kameleoon's developer documentation for web experimentation, feature management, SDKs, APIs, and privacy tools.
For help creating, configuring, and analyzing experiments in Kameleoon, refer to the [user manual](/user-manual/home/user-manual-overview) instead.
Kameleoon provides a unified platform that combines experimentation capabilities for both web and full-stack applications. The platform includes two main solutions:
* **Web Experimentation** includes the tools you need to run experiments on websites and web apps, such as prompt-based experimentation (PBX). This solution uses a Kameleoon JavaScript application file to deliver experiment changes and track events related to experiments and visitor behavior.
* **Feature Management and Experimentation** supports product and engineering teams that deploy and run experiments in backend systems or mobile applications. You can also use it to incorporate feature management and experimentation into your product development and release process. This solution uses Kameleoon SDKs or APIs.
You can use both Web and Feature solutions simultaneously in an approach called [**hybrid experimentation**](../feature-experimentation/get-started/hybrid-experimentation). This approach lets you run backend experiments while leveraging the Kameleoon JavaScript application file to automatically capture visitor behavior and conversions.
Kameleoon offers APIs and additional tools for integrating with your ecosystem, automating tasks, and ensuring flicker-free A/B experiments.
***
## Web Experimentation
Execute tests—including those utilizing AI-powered PBX—on copy, design, or full pages on your website, including single-page applications, all without affecting performance.
[**Start your PBX free trial**](https://login.kameleoon.com/app/sign-up-pbx) to begin optimizing your web experience today.
Learn about Kameleoon's script, A/B testing, and Web Experimentation features.
Use advanced Kameleoon features, such as cross-device history reconciliation and ITP management.
Use consent management features to adhere to regulatory requirements while responsibly managing data.
***
## Feature Management and Experimentation
Roll out new features with confidence, in real time, everywhere in your tech stack. Kameleoon provides more than a dozen SDKs.
[**Try a free demo**](../feature-experimentation/get-started/demo-feature-experimentation) to see feature management in action.
### Web SDKs
### Mobile SDKs
### Serverless edge compute starter kits
### Additional resources
Learn the basics of Feature Experimentation in Kameleoon SDKs and supported features and integrations.
Understand the fundamental technical concepts you need for a successful implementation.
If your web server implements caching, use Kameleoon's web server modules to ensure your A/B testing's reliability.
***
## APIs
Discover APIs to supercharge your experimentation.
[**Get started with APIs**](../apis/overview)
Use the Activation API (JavaScript) to implement A/B testing variations without flickering.
Use the Automation API (REST) to programmatically configure and manage your experiments.
Use the Data API (REST) to store, retrieve, and manage data on Kameleoon's remote servers.
Use the Product Recommendation API (REST) to make AI-driven product recommendations to your visitors.
***
## Additional Tools
Learn about Kameleoon's powerful analytics and data collection tools.
Integrate with your analytics solution (for example, Mixpanel, Amplitude, Snowplow, GA4, Segment).
Connect AI coding assistants to Kameleoon to automate implementation and feature management.
Open any page in Claude, ChatGPT, or Cursor, or configure a persistent docs MCP server for your development environment.
Understand what client-side and SDK data is collected for use in your experiments.
***
## Support
Join Kameleoon's [Slack Community](https://join.slack.com/t/kameleooncommunity/shared_invite/zt-1s6m8s09e-~yA1EUgn5pLWW_mrgf8TrQ) or contact [support@kameleoon.com](mailto:support@kameleoon.com) for questions about Kameleoon's features and the platform's latest updates.
# Overview
Source: https://docs.kameleoon.com/developer-docs/web-experimentation/overview
Run A/B/n and multivariate experiments on websites and web apps using Kameleoon's graphic editor, code editor, or AI-driven prompt-based experimentation (PBX).
This guide covers the various implementation options Kameleoon offers. While the implementation process is simple—typically involving the installation of a JavaScript tag in your page's HTML source code—understand a few key details. Specifically, know where to place tags, the trade-offs of different implementations, and when the browser loads and parses the Kameleoon application file. Correct configuration optimizes performance and ensures the platform functions correctly.
Review the implementation methods below to decide which best suits your requirements. To create a basic implementation of Kameleoon on your website, follow the [Simple implementation](./implementation-and-deployment/standard-implementation) guide.
After you select an implementation method, configure it for your Kameleoon project. Kameleoon automatically generates the appropriate installation tag based on your configuration. To configure your project, follow the steps in [this guide](/user-manual/project-management/manage-your-projects#add-a-new-project).
Join the [Slack Community](https://join.slack.com/t/kameleooncommunity/shared_invite/zt-1s6m8s09e-~yA1EUgn5pLWW_mrgf8TrQ) to ask questions about product features and access the latest updates.
## Installation tags and features
The following table outlines the implementation options, including the features and performance characteristics of each. Each row represents a different implementation option and indicates how the browser loads the Kameleoon JavaScript application file. The columns highlight factors such as performance, flickering, unified session data, and tag manager compatibility.
Later sections of this guide provide detailed explanations of these characteristics and code snippets to help you get started.
| Implementation method | [Flicker](#flicker) | [May block page loading](#may-block-page-loading) | [Prioritized script loading](#prioritized-script-loading) | [Affected by ITP](#affected-by-itp) | [Use with Tag manager](#use-with-tag-manager) |
| ------------------------------------------------------------------------------------------------------------------------------------- | ------------------- | ------------------------------------------------- | --------------------------------------------------------- | ----------------------------------- | --------------------------------------------- |
| [Asynchronous loading, with anti-flicker](./implementation-and-deployment/standard-implementation#asynchronous-tag-with-anti-flicker) | No | No | Yes | No | No |
| [Asynchronous loading](./implementation-and-deployment/standard-implementation#asynchronous-tag-without-anti-flicker) | Yes | No | Yes (if not installed via a tag manager) | No | Yes |
| [Synchronous loading](./implementation-and-deployment/standard-implementation#synchronous-tag) | No | Yes | Yes | No | No |
Note that all implementation methods support [unified session data across subdomains](./technical-concepts/unify-session-data-storage-across-subdomains).
## Characteristics and features
This section defines and explains the characteristics and features listed in the previous table.
### Flicker
Flicker (or the "flicker effect") is a common issue with JavaScript-based A/B testing solutions where the original page content briefly displays before the experiment variation loads. The **Flicker** column indicates if the installation method might cause this issue. For more information, see Kameleoon's [flicker management documentation](./technical-concepts/flicker-management-and-performance).
### May block page loading
**May block page loading** indicates whether your website's loading process stops if Kameleoon's Content Delivery Network (CDN) servers (or your own CDN/server hosting the Kameleoon file) become unresponsive. Only the `JavaScript file (synchronous loading)` method presents this risk. All other methods keep your website fully functional even if the hosting servers are unavailable.
### Prioritized script loading
When a browser loads an HTML page, it must download static resources (JavaScript files, CSS styles, Iframes, images) before using them. Browsers typically place these resources in a network queue and download them in a specific priority order.
Two critical factors influence this process:
* A browser must "discover" a resource before it can download it.
* Major browsers assign higher priority to statically included scripts than to scripts loaded dynamically via JavaScript.
For example, to ensure a JS file loads with higher priority, use this method:
```javascript theme={null}
```
Avoid this method:
```javascript theme={null}
```
While not explicitly documented by browser vendors, empirical evidence suggests that HTML parsers give higher priority to discovered resources than to resources added through dynamic DOM modification.
**Prioritized script loading** places the Kameleoon application file at the top of the browser's network queue, ensuring it loads faster than non-prioritized setups. You should use this option for Kameleoon. While it may slightly delay other resources, A/B testing is a critical feature that should load immediately, unlike analytics tools that can load later without affecting the page display. All current Kameleoon implementation methods provide prioritized script loading, except when you install Kameleoon via a tag manager.
### Affected by ITP
Apple's Intelligent Tracking Prevention (ITP) for Safari (desktop and mobile) prevents unwanted third-party tracking. Mozilla implemented similar technology in Firefox. ITP primarily blocks advertising trackers from tracking users across multiple websites.
Kameleoon offers a solution to ITP restrictions. Since version 2.3 (March 2020), this solution requires an additional configuration step. For more information, see the [ITP management article](./technical-concepts/itp-management).
### Use with Tag manager
**Use with Tag manager** indicates whether the implementation method supports a Tag Management System (TMS). Kameleoon works with all major TMS platforms. However, you should install Kameleoon directly into your page source code rather than using a TMS. Direct installation helps prevent the flicker effect, as explained in Kameleoon's [flicker management guide](./technical-concepts/flicker-management-and-performance).
### Tracking unified session data across subdomains
Kameleoon [unifies session data across subdomains](./technical-concepts/unify-session-data-storage-across-subdomains), linking user sessions across multiple subdomains into a single session. For example, if a visitor starts a session on `portal.myecommercesite.com` and continues to `transaction-engine.myecommercesite.com`, Kameleoon treats this as one continuous visit.
This feature ensures accurate data collection across your subdomains. Without unified session data, Kameleoon treats a visitor who moves to a different subdomain as a new visitor, resetting collected data (such as page views and time on site). This reset can lead to unexpected targeting results.
For example, suppose you have a personalization that triggers on the fourth page view. A visitor views three pages on your first website, then loads a fourth page on a different subdomain.
* **With unified session data:** The personalization triggers as expected.
* **Without unified session data:** The page view on the new domain counts as the first page view of a new visit, and the personalization does not trigger.
# Activity log
Source: https://docs.kameleoon.com/user-manual/account-and-team-management/organization-settings/activity-log
View and filter a chronological log of account events, including user changes, campaign actions, and login activity across your Kameleoon organization.
## Access the Activity page
To access your Kameleoon account activity, click **Admin** > **Activity**.
## Understand events
The Activity page consists of several blocks:
* a search bar to find one or more specific events
* the list of events on your account
* a filter bar
Activities related to your account are displayed in descending chronological order.
For some complex events, an arrow is available on the right of the line. Click to view details.
Here is the list of events that can be displayed on the page:
* Customer account creation
* Account login
* Addition of a new user
* Activation of a user
* Modification of a user
* Deactivation of a user
* Deactivation of several users
* Reactivation of a user
* Reactivation of several users
* Deletion of a user
* Deletion of several users
* Modification of the language
* Password reset
* Permissions
* Creation of a new campaign
* Modification of the configuration of a campaign
* Online activation of a campaign
## Filters
A filter bar allows you to filter events by:
* Project
* Key date
Select one or more filters and apply them.
# How Kameleoon tracks and counts unique users
Source: https://docs.kameleoon.com/user-manual/account-and-team-management/organization-settings/how-kameleoon-tracks-and-counts-unique-users
Understand the differences between Monthly Unique Users (MUU) and Monthly Tracked Users (MTU) measurement models and how Kameleoon calculates usage.
Kameleoon tracks your usage based on one of two measurement models, depending on your chosen pricing plan: **Monthly Unique Users (MUU)** or **Monthly Tracked Users (MTU)**.
Kameleoon features a native consent management system and only collects data from users who provide consent. [Learn more about Kameleoon’s consent management policy](../../project-management/consent-management-policy).
If your website experiences bot traffic, exclude it from your campaign results. [Learn how Kameleoon filters bot traffic](../../faq#how-does-kameleoon-filter-bot-traffic-from-my-results).
Kameleoon counts users only once, even if they participate in different experiments or feature flags across multiple devices.
## Measurement models
Kameleoon offers two primary measurement models. The main difference between them is whether you pay for your **potential traffic** or your **actual campaign engagement**.
### Monthly Unique Users (MUU)
The **MUU model** (standard for Enterprise plans) is based on the **total traffic** visiting your website or application.
* **How it works**: Kameleoon calculates your usage based on the average number of unique monthly visitors over a 12-month period. It counts a user as soon as they visit your site, regardless of whether they interact with an experiment.
* **Why choose it?**: It provides **cost predictability**. Because you pay based on total traffic, you can run unlimited experiments and allocate 100% of your traffic to them without additional costs.
* **Best for**: Teams that run many experiments or high-traffic tests and want to avoid worrying about "spending" a quota on every test.
### Monthly Tracked Users (MTU)
Kameleoon bases the **MTU model** (standard for Starter plans) on **campaign engagement**.
* **How it works**: Kameleoon only counts a user as an MTU when they **interact with an active campaign**, such as an experiment or a feature flag.
* **Why choose it?**: It provides **cost flexibility**. You only pay for the visitors you actually "touch" with your experiments. This model is ideal if you only test on specific visitor segments or low-traffic journeys.
* **The trade-off**: Pushing high-traffic experiments (like a 100% allocation to a winning variant) or experiencing traffic spikes in an experiment will consume your MTU quota faster.
* **Best for**: Brands with selective testing needs or those who want to scale their costs exactly with their testing activity.
### Model comparison at a glance
| Comparison | MUU Model (Total Exposure) | MTU Model (Engagement Based) |
| :-------------------- | :-------------------------------------------- | :----------------------------------------------- |
| **Who is counted?** | Every visitor to your site. | Only visitors in an experiment/flag. |
| **Predictability** | High; costs stay stable as you test more. | Variable; costs depend on your testing activity. |
| **Experiment limits** | Unlimited; no campaign or traffic caps. | Capped; limited by your monthly user quota. |
| **Traffic spikes** | Spikes in site traffic do not affect billing. | Spikes in experiment traffic can reach limits. |
| **Winning variants** | Pushing 100% traffic is "free." | Pushing 100% traffic costs more MTUs. |
## Web Experimentation
Kameleoon measures users based on cookies. A cookie is a file that the system places in a browser that contains an anonymous unique identifier, called the Kameleoon `visitorcode`, randomly assigned to a user. Kameleoon uses this ID to identify a browser. A `visitorcode` is stored for 365 days on the user's browser.
## Feature Experimentation
Refer to [this](../../../developer-docs/feature-experimentation/technical-reference/faq-global#when-does-the-sdk-send-a-tracking-request-for-analytics) FAQ in our developer documentation for more information on how Kameleoon counts and tracks unique users in Feature Experimentation.
## MTU details
**MTU** represents the number of unique visitors exposed to at least one Kameleoon experiment or feature flag within a calendar month.
Kameleoon uses the following logic to count MTUs:
* **De-duplication**: Kameleoon counts each visitor only once per calendar month, regardless of how many times they visit your site or how many experiments they trigger. For example, if a user participates in three different experiments in one month, they still only count as one MTU.
* **Visitor Identification**:
* **Anonymous visitors**: Kameleoon identifies anonymous visitors using a unique `visitorcode` stored in a browser cookie.
* **Identified visitors**: If you provide a custom unique ID (such as a login ID), Kameleoon can de-duplicate those users across different devices and browsers, ensuring they only count as one MTU.
* **Monthly Reset**: Your MTU count resets to zero at the beginning of each calendar month.
### View MTU counts
You can view your current MTU count on the **Organization page** (click **Admin** and select **Organization**).

### Threshold notifications
Kameleoon displays warning banners and sends email notifications when you reach the following thresholds:
* 90% of the MTU limit.
* 100% of the MTU limit.
* Three days after reaching 100% of the MTU limit.
The **Organization page** also reflects these thresholds.
### Reaching the limit
If you reach the MTU limit, Kameleoon grants a three-day grace period to request an upgrade. If you do not upgrade within that period, Kameleoon automatically pauses all active campaigns.
When Kameleoon pauses campaigns, the MTU count resets at the end of the monthly period, and paused campaigns automatically resume.
# Join the Kameleoon Beta Program
Source: https://docs.kameleoon.com/user-manual/account-and-team-management/organization-settings/join-beta-program
Enable the Kameleoon Beta Program as a Super Admin to get early access to experimental features before they are released to all users.
## Stay ahead with exclusive beta features
The **Kameleoon Beta Program** gives you early access to cutting-edge features designed to push the boundaries of experimentation and personalization. By joining the program, you get to test new tools before they are released, giving you a competitive edge while helping shape Kameleoon's future.
The Beta Program is available to all plans and can be enabled by Super Admin users within your organization.
## Enabling the Kameleoon Beta Program
If you’re a **Super Admin**, you can enable the Beta Program for your account in just a few clicks:
1. Click your profile icon > **Beta program**
2. Toggle **Enable Kameleoon Beta Program for all users** to **ON**.
3. Click **Save**.
A confirmation notification will appear, and a badge labeled **Enabled** will be displayed next to the Beta Program option in your profile menu.
By enabling the Beta Program, you agree to the [Beta Program Terms & Conditions](https://www.kameleoon.com/beta-features-terms-of-service) and acknowledge that beta features are still in development and may be unstable.
## Disabling the Kameleoon Beta Program
If you wish to opt out of the Beta Program:
1. Click your profile icon.
2. Select **Beta Program** in the dropdown.
3. Toggle **Enable Kameleoon Beta Program for all users** to **OFF**.
4. Click **Save**.
A confirmation notification will appear, and the **Enabled** badge will be removed from your profile menu.
## Important notes
* **Beta features are experimental.** While they offer powerful new capabilities, they may contain bugs or undergo changes before official release.
* **Your feedback matters.** As a Beta Program participant, your insights help refine features before they are rolled out to all users.
* **Available to all plans.** Any account, regardless of plan type, can opt in as long as they have a Super Admin to enable the Beta Program.
Be the first to explore the future of Kameleoon and gain access to state-of-the-art features designed for the next generation of experimentation!
# Organization page
Source: https://docs.kameleoon.com/user-manual/account-and-team-management/organization-settings/organization-page
View your plan details, monitor AI credit and MTU usage, and configure organization-wide security, data privacy, and user management settings.
The **Organization** page lets you view and manage key details about your Kameleoon account, including your plan, usage, and settings that apply to all users in your organization.
To access the page, click **Admin** in the left sidebar > **Organization**.
The **Organization** page has two tabs:
* **Overview:** View your plan details, available AI credits, and usage.
* **Settings:** Configure organization-wide preferences, such as security, data privacy, geolocation, and user management.
## Overview tab
The **Overview** tab summarizes your account information and usage.

### Account information
The left panel displays:
* **Plan:** Your current subscription plan.
* **Solutions:** The Kameleoon products included in your plan (for example, A/B testing or feature flags).
* **Organization:** The organization your account is associated with.
The right panel shows your **AI credits** for PBX, including how many credits you have left.
### Usage

The **Usage** section helps you monitor your organization's AI credit and service usage.
#### AI credits
The **AI credit usage** bar shows:
* The **percentage** of your total credits used
* The **number of credits used** out of your total (for example, 28 of 100).
#### Monthly tracked users
The **Monthly tracked users (MTUs)** bar shows:
* The **percentage** of your total MTUs used.
* The **number of MTUs used** out of your total (for example, 2,000 out of 10,000).
#### Usage table
Below the usage bars, the usage table lists:
| Column | Description |
| ----------- | -------------------------------------------------------------- |
| **Service** | The type of action or resource (for example, raw data exports) |
| **Current** | The number of units used |
| **Limit** | The total number of units available |
Use this table to track consumption and plan upgrades if you approach your limit.
## Settings tab

The **Settings** tab lets you define organization-wide preferences for your Kameleoon account. Depending on your role, you can manage settings that apply to all users in your organization.
Only **super admins** can change global organization settings.
### Geolocation
Under **Geolocation**, you can set your organization's **time zone**. Choose a time zone from the dropdown list. This setting ensures that reports, experiments, and activities display timestamps in your local time.
### Security
The **Security** section lets you enforce login and access policies for your organization. You can enable and customize the following options:
* **Block user accounts after failed login attempts:** Turn on the toggle to activate this feature, then enter the number of failed attempts allowed before a user's account is locked.
* **Automatic sign-out after inactivity:** Enable this option to sign users out of Kameleoon after **15 minutes** of inactivity.
* **Restrict access by IP address:** Turn on the toggle and enter the allowed IP addresses. Users attempting to log in from other IP addresses will be blocked.
* **Multi-factor authentication (MFA):** Require all users in your organization to use MFA for added security.
* **Mandatory password renewal:** Enforce password updates for all members of your organization. You can configure this as a one-time change or a recurring requirement.
* **Enable new device login alerts:** Turn on the toggle to send an email notification to any user who logs in from an unrecognized device. Use this to help users detect suspicious activity on their account.
### Data privacy
The **Data privacy** section lets you control how Kameleoon handles your experiment data.
* **AI-powered reporting:** Enable this option to let Kameleoon share experiment data with a third-party LLM provider, which generates AI-driven insights and recommendations to help interpret your experiment results.
### User management
The **User management** section lets you control how users organize and collaborate within Kameleoon.
* **Team creation and management:** Turn on the toggle to create and manage teams. Once enabled, team leads can add, edit, and manage users directly within their teams.
***
After updating any settings, click **Save changes** at the bottom of the page to apply your changes.
## Upgrade and support options
From the **Organization** page, you can manage your plan and access support options.
### Configure your plan
Click **Configure plan** in the top-right corner to view or request upgrades. You can:
* Select a new plan.
* Choose the number of **AI credits** you want per year (for PBX).
Click **Send request** to submit your upgrade.
### Additional actions

Click the **three-dots menu** next to **Configure plan** to:
* **Redeem a gift code:**
1. Click **Redeem a gift code**.
2. Enter your code.
3. Click **Redeem**.
* **Contact support:**
* Click **Contact support** to go to the contact page and send a message to the Kameleoon support team.
# Log in with Google
Source: https://docs.kameleoon.com/user-manual/account-and-team-management/security-and-authentication/log-in-with-google
Sign in to Kameleoon using your Google account via single sign-on, provided your Google email matches your Kameleoon account email.
You can use your Google account to log in your Kameleoon account.
A button on the login page is using Google SSO capabilities to log a user in the Kameleoon app.
To use the Google button, you need:
* A Google account
* A Kameleoon account **using the same email address as your Google account**
When you click **Continue with Google**, there are two possible outcomes.
**If you are already logged in your Google account**, clicking **Continue with Google** will log you in to your Kameleoon account.
**If you are not logged in your Google account**, you will be prompted to log in your Google account first.
# Log in with single sign-on
Source: https://docs.kameleoon.com/user-manual/account-and-team-management/security-and-authentication/log-in-with-single-sign-on-sso
Configure single sign-on (SSO) for Kameleoon using SAML 2.0, OpenID Connect, Okta, Microsoft Entra ID, or other supported identity providers.
This is a premium option. Contact your Customer Success Manager to enable it on your Kameleoon account.
Single sign-on (SSO) is a method for authenticating users where a single set of credentials can be used to log in to several applications.
When SSO is set up, you can sign in to your third-party IdP, then access Kameleoon app directly without a second sign-in.
Kameleoon lets you implement SSO through the following solutions :
* External identity providers that support the SAML 2.0 standard
* Open ID Connect
* Okta
* Microsoft Entra ID (formerly Azure AD)
* France Connect
* Google
* LinkedIn
* Twitter
* SalesForce
## Role definition
You can define roles in Kameleoon using attributes from your identity provider. There are three roles available: super admin, site admin, and common user.
Once the roles are configured on the identity provider (IdP) side, you must provide Kameleoon with the name of the attribute that will contain the role, and the values that correspond to the super admin, site admin, and common user roles.
When the roles are fully configured, there will be an additional check in the Kameleoon system to ensure the roles from the IdP match the roles in Kameleoon.
Configure roles with identical names in both Kameleoon and your IdP. Otherwise, users will get a 401 Unauthorized error when making requests.
## SAML 2.0
For this method, you must provide the Identity Provider metadata XML file.
Additionally, you must set the callback URL (`https://login.kameleoon.com/am/kameleoon/login/callback`) as an authorized URL on the identity provider’s side.
## Open ID Connect
For this method, you must provide the Client ID, Client Secret and OpenID Connect Well-Known Endpoint `/.well-known/openid-configuration` to get OpenID Provider Configuration.
Additionally, you must set the callback URL (`https://login.kameleoon.com/am/kameleoon/login/callback`) as an authorized URL on the identity provider’s side.
## Microsoft Entra ID (formerly Azure AD)
The Single Sign-On (SSO) integration with Microsoft Entra ID allows for a seamless and secure way for users to access the system. SSO can be implemented through two methods: native integration with Entra ID or by using SAML 2.0.
### Native integration
To set up the native integration with Entra ID, you must provide the tenant ID, client ID, and client secret. Additionally, you must set the callback URL (`https://login.kameleoon.com/am/kameleoon/login/callback`) as an authorized URL on the identity provider’s side.
### SAML 2.0
You can use SAML 2.0 for SSO integration with Microsoft Entra ID. You must provide the Identity Provider SAML 2.0 metadata XML file.
## Okta
### SAML 2.0
You can use SAML 2.0 for SSO integration with Okta.
1. Add a new application.
* Navigate to the Okta dashboard.
* Go to **Applications** and click **Create App Integration**.
* Select **SAML 2.0** as the sign-on method.
2. Configure your application.
* Enter you application's details.
* Specify the following in the SAML settings:
* Single sign-on URL (this is where Okta will send the SAML response): `https://login.kameleoon.com/am/kameleoon/login/callback`.
* Check the **Use this for Recipient and Destination URL** checkbox.
* Audience URI (SP Entity ID): `https://login.kameleoon.com`.
3. Finish the setup.
* Save the application after filling out the required fields.
* Save the metadata URL provided by Okta. We will need it to configure SSO on Kameleoon.
## Useful links
* [https://help.okta.com/en-us/content/topics/apps/apps\_apps.htm](https://help.okta.com/en-us/content/topics/apps/apps_apps.htm)
* [https://help.okta.com/en-us/content/topics/apps/apps\_app\_integration\_wizard\_saml.htm](https://help.okta.com/en-us/content/topics/apps/apps_app_integration_wizard_saml.htm)
# Enhance security with Multi-Factor Authentication
Source: https://docs.kameleoon.com/user-manual/account-and-team-management/security-and-authentication/multi-factor-authentication
Enable Multi-Factor Authentication (MFA) for all users in your Kameleoon organization to add an extra layer of login security.
This setup provides a straightforward yet effective way to protect your organization's information on Kameleoon, making it more challenging for unauthorized users to gain access.
## What is Multi-Factor Authentication?
Multi-Factor Authentication (MFA) is a security feature that adds an extra layer of protection to your account by requiring multiple forms of verification before granting access. Instead of relying solely on a password, MFA asks users to confirm their identity through a second step, usually involving a unique code. This process greatly reduces the risk of unauthorized access, even if a password is compromised.
By requiring a second verification, such as a code sent to an email or mobile device, MFA ensures that only authorized users can log in, thus safeguarding sensitive data and maintaining the integrity of the platform.
## How to enable MFA
In Kameleoon, a **Super Admin** can enable MFA for all users within the organization. Here’s a step-by-step guide on how to enable this setting:
1. Log in to Kameleoon and click **Admin** > **Organization** > **Settings**.
2. Click the toggle next to **Enable Multi-Factor Authentication (MFA) for all Users**.
3. Click **Save changes** to apply your changes.

Once MFA is enabled, all users in your organization will be prompted to complete an additional verification step each time they log in.
## Logging in with MFA enabled
When MFA is enabled, users will follow these steps each time they log in to Kameleoon:
1. **Enter email address and password**:
* Begin by logging in with your email address and password as usual.
2. **Enter the six-digit code**:
* After entering your password, you’ll receive a unique six-digit code via email. Enter this code on the login screen to complete the sign-in process.
# Profile and password
Source: https://docs.kameleoon.com/user-manual/account-and-team-management/security-and-authentication/profile-and-password
Update your personal information and password, and configure organization-wide password policies including forced renewal and maximum login attempts.
## Change your personal information
You can update your personal information and password at any point.
To change your personal information:
1. Log in to Kameleoon.
2. Click on your profile icon in the top right of the screen. A drop-down menu will appear.
3. Click **My profile** > **Edit** to change your personal information.
4. Enter your changes into the fields you want to edit.
5. Click **Next** > **Edit** to save your changes.
## Change your password
To change your password:
1. Log in to Kameleoon
2. Click on your profile icon in the top right of the screen. A drop-down menu will appear.
3. Click **My profile** > **Edit**
4. In the pop-in, click **Change my password**.

5. Type in your current password, then choose your new password.
6. Click **Save**.
Your CSM can activate enhanced security options. You can set up an SSO based on the SAML 2.0 standard.
## Organization page
You can change password settings and requirements in the **Organization** menu. To access the Organization page, click **Admin** > **Organization**.
### Activate forced password regeneration
This option helps you improve an account's security level. If you activate it, Kameleoon will ask you to regenerate your password. This regeneration applies to all users associated with the account: they will receive a message asking them to change their password. You can schedule this change periodically.
To activate forced password regeneration:
1. Click the **Settings** tab.
2. Click the switch beside **Enable recurring or one-time password mandatory renewal** and set it to **on**.
3. Choose the frequency of password regeneration **or** select the date for a one-time password renewal.
4. Click **Save changes** to save your changes.
If you don't have access to this option, it is because of [your user rights](../users-and-teams/manage-your-users#user-permissions-for-feature-experimentation).
### Set a maximum number of password attempts
This option helps you improve an account's security. By activating this setting, you can set the maximum number of authorized attempts users are allowed when entering a password to sign in to your Kameleoon account.
To set a maximum number of password attempts:
1. Click the **Settings** tab.
2. Click the switch beside **Block the user after a number of wrong attempts** and set it to **on**.
3. Select the number of wrong attempts permitted.
4. Click **Save changes** to save your changes.
If you don't have access to this option, it is because of [your user rights](../users-and-teams/manage-your-users#user-permissions-for-feature-experimentation).
# API Credentials
Source: https://docs.kameleoon.com/user-manual/account-and-team-management/users-and-teams/api-credentials
Retrieve or generate your client_id and client_secret to authenticate calls to Kameleoon's APIs and server-side SDKs.
## What are API Credentials?
API Credentials, specifically the `client_id` and `client_secret` are used to authenticate calls to Kameleoon's APIs (Automation and Data). They are also used in server-side SDKs with our Feature Experimentation solution for authentication to the Kameleoon service.
The authentication is linked to a Kameleoon User Account.
To learn more about how to use API Credentials with the Automation API, please refer to [this](../../../developer-docs/apis/automation-api-rest/get-started/get-started#client-credentials-flow) article.
## Retrieve API Credentials
To retrieve your API Credentials, click your profile icon > **My profile**.
Click **See my API credentials** (or **Generate my API credentials** if you don't have any yet) under your name and email address.

You can copy your `client_id` and/or `client_secret` using the copy function at the end of the line.

Click **Generate a new Client-Secret key** to generate a new Client-Secret key.
You will also need your Client-Secret when integrating with [third-party integrations](../../integrations/integrations-overview) such as Mixpanel, Segment, Contentsquare, and Amplitude.
# Create and manage teams
Source: https://docs.kameleoon.com/user-manual/account-and-team-management/users-and-teams/create-and-manage-teams
Create and manage teams in Kameleoon to organize users, assign consistent permissions, and streamline collaboration across projects.
Kameleoon provides a flexible method for **Super Admins** to organize users into teams, manage permissions, and ensure streamlined collaboration across projects.
The process for creating and managing teams begins when the Super Admin enables the feature in the **Organization** menu. Once enabled, the Super Admin can access the **Teams** page, where they can create, edit, delete teams, and add users to teams. Additionally, users can be assigned to a team during their creation or editing process via the **Users page**.
## Limitations
* Only the Super Admin can create, edit, or remove teams.
* A user can only belong to one team at a time.
## Feature activation
To enable teams, click **Admin** > **Organization** > **Settings**.
There, you will find an option labeled **Enable team creation and management**. Switch the toggle to **on**.
## Teams page

Super Admins can manage teams from the **Teams page**. This page provides an overview of all teams.
Each team entry includes:
* An **Edit** button to modify team details.
* A **three-dots menu**, with the following options:
* **Manage team members:** Opens a side panel where you can add or remove users.
* **See users lists:** Redirects to the **Users page**, filtered by the selected team.
* **Rename:** Opens a side panel to rename the team.
* **Delete:** Opens a confirmation pop-in to permanently delete the team.
A search bar is available to help you find teams by name.
Sidebar filters let you filter teams by projects, users, and tags.
### New team creation
The **New team** button opens a pop-in for creating teams with two steps:
1. Enter the team's name, select the associated project, and click **Next**.
2. Set the permissions for the selected projects and click **Save**.
### Team roles and permissions
When adding users to a team, Kameleoon automatically applies a predefined set of roles and permissions based on the team’s configuration. These roles and permissions ensure all team members have consistent rights within the team and across the associated projects.
* **New users** added to a team will automatically inherit the roles and permissions assigned to the team, saving time for the Super Admin.
* If an **existing user** with set permissions is added to a team, their current rights are preserved, and the rights from the team are applied on top of their existing permissions.
## Users page
The **Users page** includes an additional **Team** column to display the team each user belongs to.
In each user's **three-dots** menu, the **Assign team** option opens a pop-up where the Super Admin can edit the user’s team and permissions using the team’s predefined template.
# Manage your users
Source: https://docs.kameleoon.com/user-manual/account-and-team-management/users-and-teams/manage-your-users
Create, edit, activate, deactivate, and delete user accounts in Kameleoon, and configure project and account permissions for each user.
For more information on managing your users, view the Team management video tutorial in [our academy](https://academy.kameleoon.com/get-to-know-the-kameleoon-app/162448?utm_source=user_manual\&utm_medium=online)
## Access the Users page
To access the Users page, click **Admin** > **Users**. Available actions will depend on your user role. Learn more about roles [here](./user-roles).
## Create a new user
Only Admin and Super Admin can create new user accounts and configure their rights.

To create a new user:
1. Click the **Create** button in the top right of the **Team** page. A pop-in will open.
2. In the pop-in, fill in the email address of the user you want to create.
3. Click **Next**.
Depending on your profile (Super Admin or Admin), the following steps, which involve assigning rights to the user, differ.
### Define project permissions
For each project, you can assign the user one or several roles:
* Super Admin
* Admin
* Production
* Technical
* Marketing
Check the roles you want to give the user on each of the projects installed on the account.
Check the boxes next to each project to give access to the user, then click **Next**.
#### Are you an Admin?
You can only configure user permissions for projects that you administer.
### Define account permissions

Unlike the **Project permissions** tab which details the rights for each project registered on the account, this tab concerns the overall management of the account and associated users.
As a Super Admin, when you create or edit a user, you have access to the **Account permissions** tab.
In this tab, you can choose to set the user as Super Admin: this user will then have the same rights as you on the account.
Switch the toggle from **OFF** to **ON** and confirm. A pop-in confirms the creation of the account and a welcome email is sent to the user. This email contains an activation link (valid for 24 hours) letting them complete their profile and access the platform.
#### Are you an Admin?
This option is only available for Super Admin users.
## Create and activate a user profile

Regardless of your role in Kameleoon, when a Super Admin or Admin adds you as a new user, you will receive an email that lets you log in and enter your profile information. Your profile page will then include both this information and the authorizations granted to you by the Super Admin or the Admin.
If a Super Admin wants to speed up the process and/or gain control over creating your profile, they can [force your account's initialization](./manage-your-users#force-a-user-accounts-activation).
### Information of your profile
Click the activation link received by email and fill in the information to complete your profile.

Your password must contain at least eight characters, including one lowercase, one uppercase, and one number. It can not contain your name, first name or company name.
To add a profile picture:
1. Click **Upload profile photo**.
2. Select the file you want to add.
3. Click **Save** when you have added all required information.
### Access to your profile
Your profile page includes the main information related to your account, especially the permissions associated with it. To access your profile:
1. Click your profile icon. A drop-down menu appears.
2. Click **My profile**.
### Edit your profile
To edit your profile:
1. Click **Edit**. A pop-in opens.
2. Edit your name, email, profile photo, and permissions.

## Force a user account's activation

A Super Admin has the option to force the initialization of an account by completing the user's profile. This option saves time and gives Super Admins more control over account creation and validation. When a Super Admin forces a user account's activation, the account has the status **activated** and is immediately usable.
To force a user account's activation:
1. Go to the **Team** page.
2. Click the **three-dots menu** on the right side of a user's card.
3. Click **Force activation**.

#### Are you an Admin?
Only Super Admins can force the validation of a user account.
## Edit a user account
As an Admin or Super Admin, you can make changes to user accounts that other roles cannot.

### Deactivated accounts
If a user has not confirmed their account through the email activation link, their account status is **not activated**.
To edit a deactivated account, click **Edit**. A pop-in will appear.
You can edit the user's email address, project authorizations, and account-related authorizations. You can find options in the **Project permissions** and **Account permissions** tabs.
#### Are you an Admin?
* You can only edit deactivated user accounts you created.
* You can only configure rights for projects that you administer.
### Activated accounts
An account status is set to **activated** once a user has confirmed their account via an email link.
To edit a user account, click **Edit**. A pop-in will appear.
You can change the user information (first name, last name, email address), [the permissions linked to projects](./manage-your-users#define-project-permissions), and [account permissions](./manage-your-users#define-account-permissions).
#### Are you an Admin?
* If the user's account is already activated, you can only change their authorizations for projects you administer.
* You cannot deactivate or delete the account.
## Regenerate password
Kameleoon will ask users to regenerate their passwords when you enable this option. Regeneration applies to all users associated with the account. You can schedule this change or administer it immediately.

To enable password regeneration:
1. Click **Admin** > **Organization** > **Settings**.
2. Click the switch beside **Enable recurring or one-time mandatory password renewal**, and choose its frequency or a specific date.
3. Click **Save changes**.

#### Are you an Admin?
Only Super Admin profiles can enable password regeneration.
## Deactivate/reactivate a user account

As a Super Admin, you can temporarily deactivate a user account and reactivate it when necessary. A user cannot access Kameleoon while their account is suspended.
To deactivate an account:
1. Open the **Team** page.
2. Click the **three-dots** menu at the end of a user's card. A drop-down menu opens.
3. Click **Deactivate** > **Continue** to validate the deactivation.

Deactivated accounts are marked with a padlock in front of the user's name. The reactivation command is available in the three dots menu.

#### Are you a Super Admin?
If you are a Super Admin and the only active account, you cannot deactivate your account.
#### Are you an Admin?
Only Super Admin profiles can deactivate or reactivate a user account.
## Delete a user account

Deleting an account is permanent: it has to be recreated to access to Kameleoon again. To delete a user's account:
1. Click the **three-dots** menu at the right of a user's card. A drop-down menu opens.
2. Click **Delete**.
3. Confirm your choice in the pop-in to validate the deletion.

#### Do you want to delete your account as a Super Admin?
You cannot delete your account as a Super Admin.
#### Are you an Admin?
Only Super Admin profiles can delete a user account.
## Overview of user rights
The following is a table detailing the different rights associated with different user profiles:

# User roles
Source: https://docs.kameleoon.com/user-manual/account-and-team-management/users-and-teams/user-roles
Understand Kameleoon's role-based permission system, including what each role (Super Admin, Admin, Technical, Marketing, Production) can view and modify.
Kameleoon uses roles to control what each user can view or modify within a project. You assign roles per user and per project—if a user has multiple roles, Kameleoon merges their permissions and grants the combined access.
For example:
* **Marketing + Production** → a user can manage campaigns and launch them.
* **Technical + Marketing + Production** → a user can create campaigns, configure advanced options, integrate tools, and launch campaigns.
## Roles
| Role | Description |
| --------------- | ---------------------------------------------------- |
| 🛡️ Super Admin | Manages account-level administration and user access |
| ⚙️ Admin | Manages project configuration and integrations |
| 🧑💻 Technical | Handles technical setup and integrations |
| 📈 Marketing | Creates and manages experiments and personalizations |
| 🚀 Production | Launches campaigns and manages production rollout |
***
## Account administration permissions
These permissions apply to account and project management, including users, teams, projects, activity logs, and integrations.
| Permission | 🛡️ Super Admin | ⚙️ Admin | 🧑💻 Technical | 📈 Marketing | 🚀 Production |
| ----------------------------------------------- | --------------- | -------- | --------------- | ------------ | ------------- |
| Create, deactivate, reactivate, or delete users | ✅ | ❌ | ❌ | ❌ | ❌ |
| Configure user rights | ✅ | ❌ | ❌ | ❌ | ❌ |
| Add users | ❌ | ✅ | ❌ | ❌ | ❌ |
| Access the **Teams** page | ❌ | ✅ | ✅ | ✅ | ✅ |
| Edit a project | ❌ | ✅ | ✅ | ❌ | ❌ |
| Access the **Project** page | ❌ | ❌ | ❌ | ✅ | ✅ |
| Access the **Activity** page | ❌ | ❌ | ❌ | ✅ | ❌ |
| Manage integrations | ❌ | ✅ | ✅ | ❌ | ❌ |
***
## Shared permissions
These permissions apply to both Web Experimentation and Feature Experimentation.
| Permission | ⚙️ Admin | 🧑💻 Technical | 📈 Marketing | 🚀 Production |
| ------------------------ | -------- | --------------- | ------------ | ------------- |
| Manage advanced tools | ✅ | ✅ | ✅ | ❌ |
| Access audience insights | ❌ | ❌ | ✅ | ❌ |
| Manage goals | ❌ | ❌ | ✅ | ❌ |
| Manage segments | ❌ | ❌ | ✅ | ❌ |
***
## Web Experimentation permissions
These permissions apply only to Web Experimentation.
| Permission | ⚙️ Admin | 🧑💻 Technical | 📈 Marketing | 🚀 Production |
| ------------------------ | -------- | --------------- | ------------ | ------------- |
| Manage widgets | ✅ | ✅ | ✅ | ✅ |
| Manage integrations | ✅ | ✅ | ❌ | ❌ |
| Manage experiments | ❌ | ❌ | ✅ | ✅ |
| Manage personalizations | ❌ | ❌ | ✅ | ✅ |
| Launch an experiment | ❌ | ❌ | ❌ | ✅ |
| Launch a personalization | ❌ | ❌ | ❌ | ✅ |
***
## Feature Experimentation permissions
These permissions apply only to Feature Experimentation.
| Permission | ⚙️ Admin | 🧑💻 Technical | 📈 Marketing | 🚀 Production |
| ------------------------------------------------------------------------------------------------------------- | -------- | --------------- | ------------ | ------------- |
| View all configurations (environments, flags, variables, variations, goals, and Rollout Planner) | ✅ | ✅ | ✅ | ✅ |
| Manage flag configurations (create or delete flags; manage variables, variations, goals, and Rollout Planner) | ✅ | ✅ | ❌ | ✅ |
| Manage flag integrations | ✅ | ✅ | ✅ | ✅ |
| Toggle flags on/off | ✅ | ❌ | ❌ | ✅ |
| Edit environments | ✅ | ❌ | ❌ | ❌ |
| Access the feature flag dashboard | ❌ | ❌ | ✅ | ❌ |
# AI Assist
Source: https://docs.kameleoon.com/user-manual/ai-assist
Use KAI, Kameleoon's AI-powered assistant, to analyze experiment results, get documentation answers, and receive data-driven recommendations securely.
AI Assist (KAI) is an AI-powered assistant designed to help users interact more efficiently with our A/B testing platform. It provides quick, relevant answers to questions about our tool. KAI leverages the most relevant documentation and your A/B test data to provide responses that help you make informed decisions.
## How KAI works
KAI is integrated directly into Kameleoon's user interface and can respond to a variety of queries related to our Web and Feature Experimentation platform. The assistant's responses are generated using a large language model (LLM) provided by OpenAI. KAI is designed to use only the content we provide to generate responses, ensuring answers are relevant and accurate.
To access KAI, click the **sparkle** icon in the top-right corner > **Ask a question**.
## Step-by-step process
* **Understanding the query**: When a user asks a question, KAI first analyzes the type of information needed.
* **Fetching relevant documents**: KAI identifies whether the question pertains to our tool's documentation. If the question is about the usage of our tool, KAI fetches the most relevant documents from two main sources:
* **Developer documentation**: Technical guides, API references, and coding examples for developers.
* **User documentation**: Simplified explanations, use cases, and best practices for non-developers.
* **Handling user data queries**: If the question pertains to user-specific data, such as A/B test results, KAI identifies the need for specific data retrieval. KAI makes a secure API call using JSON Web Token (JWT) authentication to fetch the data associated with the user's account. This call ensures that KAI only accesses data for which the user has permissions. The following data types are used to provide detailed responses related to A/B test results:
* **Experiment metadata**: Contains general information about the experiment, such as its name, the website it was run on, its duration, objectives, and the segment it was targeting.
* **Goal metadata**: Provides details on the different objectives included in the experiment, mainly their names and types.
* **Segment metadata**: Holds information about the visitors who participated in the experiment, including the conditions that visitors had to meet to be targeted by the experiment.
* **Experiment data**: This data provides a comprehensive summary of the experiment's results. It includes various metrics used for health checks, such as Sample Ration Mismatch (SRM), and offers insights into the performance of the experiment's variations.
* **Generating a response**: Once the relevant documentation or data is retrieved, the information is sent to the LLM to formulate a response. The model strictly uses the provided content, ensuring that responses are relevant to your queries about our platform and your data.
## Data privacy and security
We take privacy and security very seriously. Here's how we ensure that your data is protected:
* **Documentation data**: KAI only uses our company's publicly available documentation to answer questions. It does not access any external data sources beyond our controlled environment.
* **User data access**: When a query involves user-specific data, KAI uses secure API call with JWT authentication. This means:
* KAI can only access data tied to the authenticated user, preventing access to any other users' data.
* Each data request is logged and monitored to ensure compliance with our security policies.
* **Data minimization**: The assistant only accesses the minimum necessary data required to answer your question.
## Limitations
* **Scope of responses**: KAI is limited to responding to questions related to our product: it cannot answer questions unrelated to our services, tools, or your specific experiment data.
* **Accuracy of information**: While KAI strives to provide accurate and relevant responses, the quality of answers depends on the available documentation and data. We continuously update our documentation to improve response accuracy.
## Common concerns
### Will KAI access my data without permission?
No, KAI will only access data it has permission to view. It uses secure methods to ensure that data retrieval is compliant with our privacy policies.
### Can KAI access data from other users?
No. Due to the use of JWT authentication, KAI can only access data associated with your account. It cannot view or retrieve data from other users.
### Is my experiment data safe when using KAI?
Yes, your data is safe. Although experiment data is shared with OpenAI when requesting takeaways for a specific experiment, it consists of aggregated data with no personal identifiers linked to your visitors. If you still have concerns, please contact us to disable KAI.
## Use cases
You may want to use KAI for various reasons, whether you need it to run a basic analysis of your test's results, identify the key metrics of your experiment, explain unexpected results, or have it recommend potential next steps.
Here are some example prompts to get you started:
* Summarize the key findings of this experiment.
* Which of the attached goals should we prioritize in evaluating the experiment's effectiveness?
* How do you explain the test's observed results?
* What could be a follow-up experiment?
Looking for more? Feel free to read [this](https://www.kameleoon.com/blog/how-write-ai-prompts-ab-testing-teams) article that offers over 50 prompts.
## Contact us
If you have further questions or concerns about KAI, please reach out to our support team at [support@kameleoon.com](mailto:support@kameleoon.com). We are here to ensure your experience with KAI is secure, efficient, and valuable.
# Audiences — Key metrics
Source: https://docs.kameleoon.com/user-manual/ai-opportunity-detection/audiences-key-metrics
Track high-level experiment program performance metrics including conversion rate, total revenue, additional revenue generated, and revenue per visitor.
Kameleoon's **Audiences** feature helps you understand and analyze the performance of your experiment program through key metrics and your main segments. With Audiences, you have access to essential metrics and advanced segmentation tools to refine your insights. This powerful tool allows you to make data-driven decisions and improve the performance of your campaigns.
This article explores the **key metrics** available through the Audiences page and how to interpret and leverage them effectively.
## Overview of the Audiences page
Before accessing metrics, you must configure Audiences. Refer to [this](./get-started) article to get started.
To access the Audiences page, click **Insight** > **Audiences**. This page helps you:
* View your experiment program's performance over the past 12 months.
* Analyze and compare the behavior of audience segments.
* Track high-level metrics, such as revenue, visits, and conversion data.
The data on this page is computed daily—so you’re always accessing the most up-to-date information about your audience.
The Audiences page is divided into the following sections:
* Header
* Key data
* Audience segmentation graph
* Audience segmentation table
If you have installed Kameleoon on multiple projects, you can navigate between them using the dropdown menu in the top-right corner of the page.
You can also switch between **Visit** or **Visitor** views to change the scope of analysis. The default scope is **Visitor**.
## Key metrics
The **Key data** block provides a high-level summary of your website's performance, based on your primary goal. These metrics are calculated using all campaigns that were active during the selected period and configured to track your main audience goal. Campaigns must meet a minimum number of visits to be included in these calculations.
Revenue figures are computed under the assumption that there were no interferences between campaigns. The winning variation is whichever generated the most revenue per visit.
### Conversion rate
The average conversion rate among the visits included in the audience. It represents the percentage of visits or visitors that result in a conversion based on your configured goal.
### Visitors/visits
Total number of **visits** or **unique visitors** analyzed depending on the selected scope.
### Total revenue
Total revenue generated from all visits during the selected period.
### Additional revenue generated
The additional income generated by the winning variations of your experiments compared to their original variations.
**Formula:**

### Additional revenue potential
The total revenue that could have been generated if 100% of each campaign’s traffic had been allocated to its winning variation.
**Formula:**

### Revenue per visitor
The average revenue each visitor (or visit) generates.
**Formula:**

# Audiences — Segment analysis
Source: https://docs.kameleoon.com/user-manual/ai-opportunity-detection/audiences-segment-analysis
Analyze audience segment performance using bar charts and detailed tables, with filtering and customization options to compare conversion rates and revenue across segments.
Kameleoon’s **Audiences** feature enables in-depth analysis of your main segments and measures the impact of experiments and personalization campaigns on those segments. This article explains how to explore segment analysis, interpret its key components, and refine your insights using filters and customization options.
## What you'll find in the segment analysis section
The segment analysis section of the Audiences page presents data through three main components:
* A **bar chart** that visualizes the performance and size of each segment.
* A **segmentation table** that provides detailed statistics about each segment.
* A **filtering side panel** to narrow down the data you’re analyzing.
The segment analysis view enables data-driven comparisons of different audience segments based on metrics such as visit volume, conversion rate, average cart value, and revenue.
### Scope selection
At the top of the page, you can choose between analyzing data by **Visitor** or **Visit** using the dropdown menu. This lets you adjust how metrics are calculated across segments.
You must add the segments you want to track during the Audiences setup to ensure they appear here. For more information, see our Getting started with Audiences and Segment builder articles.
### Which segments are displayed?
The segments shown in this section are:
* The segments you selected during Audiences configuration, in the **Select the segments you want to track with Audiences** section of the **Configure Audiences** menu.

* The segments you included manually when creating them by selecting **Use this segment in Audiences**.

* Predictive segments, which automatically appear if you have the AI Predictive Targeting add-on and use AI Predictive Targeting conditions such as Likelihood to convert.
You must have at least one predictive segment or one included segment for any data to appear on this page.
While audience segments are defined and tracked within the Kameleoon UI as described above, for **Feature Experimentation** (SDK-based experiments), accurately tracking audience assignment requires an explicit action in your code.
Developers must call the `evaluateAudiences()` method. This method triggers a re-evaluation of the visitor against all defined audience segments based on the visitor data that is known by the SDK at the time `evaluateAudiences()` is called. `evaluateAudiences()` should be called after all relevant visitor data has been set or updated, and just before getting a feature variation or checking a feature flag.
## Segment chart

The **Analysis of my audience section** features a bar chart that provides a visual overview of your selected audience segments.
### Chart axes and indicators
* **X-axis:** Segment names
* **Y-axis (left):** Segment size (number of visits)
* **Y-axis (right):** Conversion rate
### Chart interaction
* Hover over the bars to view the exact number of visits for a segment.
* Hover over the circles to see the exact conversion rate.
### Favorite segments
Toggle the **ON/OFF** switch to show only your favorite segments. Favorites appear with a colored bar for size and a circle for conversion rate.
### Chart parameters
Use the dropdown menus above the chart to change what the axes represent:
* **Main axis (bars):**
* Segment size (default)
* Average cart
* Overall revenue
* **Secondary axis (circles):**
* Conversion rate (default)
* Average cart
* Overall revenue
* None (to disable the secondary axis)
Use the **Period** dropdown above the chart to modify the date range.
## Segmentation table

Below the chart, a table called **Key figures** displays detailed metrics for each segment. Each bar in the chart corresponds to a row in the table.
### Default view
Displays the eight most impactful segments based on your selected audience and time period. Use the search bar to locate a specific segment quickly.
### Table columns
You can customize which data columns appear using the cog icon:
| Column | Description |
| ------------------------- | --------------------------------------------------------- |
| Visits | Number of visits for the segment and % of total audience. |
| Visits evolution | How visits have changed over time. |
| Conversion rate | % of visits that converted. |
| Conversion rate evolution | How conversion rate has changed over time. |
| Average cart | Average cart value for the segment. |
| Average cart evolution | Cart value trends over time. |
| Overall revenue | Revenue generated by the segment. |
| Overall revenue evolution | Revenue trends over time. |
| Conversion discrepancy | Difference from the overall conversion rate. |
### Customize the table
Click the **cog** icon to open column settings. Drag and drop to rearrange columns and add or remove data points. Click the arrows next to a column order to sort in ascending or descending order.
### Filtering
A filtering side panel allows you to refine the audience data displayed in both the chart and the table.
#### Available filters
You can limit your analysis to visits that:
* Converted on a specific goal
* Were exposed to web experiment
* Were exposed to a personalization campaign
* Belong to a specific segment
* Fulfill a targeting condition
After selecting a filter type, choose specific items such as goals, experiments, personalizations, segments, or targeting conditions. Click **Reset** to clear all applied filters.
### Actions
Click the **three-dots menu** associated with a segment to access secondary actions:
* See more details on this segment
* Add to favorites
* Create a personalization
#### Segment identity card
Click the **three-dots menu** associated with any segment in the **Key figures** table and click **See more details on this segment** to access the segment’s identity card.

The Segment identity card page lets you view detailed information about the segments displayed on the Audiences page.

You can use this page to:
* Fully monitor a segment’s performance over time.
* Learn more about a segment’s behavior.
* Find potential sub-segments that could be useful for your business.
##### Header
The header of the Segment identity card page provides key actions and period selection:
* **Segment name and favorite:** If the segment has not been added to your favorites, the **star** icon next to the segment’s name is empty; if it has, the star is full. To add or remove a segment from your favorites list, click the star.
* **Date range:** By default, the audience analysis displayed on the page corresponds to the previous day’s traffic. Click the dropdown menu to display the results for the last week, two weeks, month, or six months. You can also apply a custom date range. This selection affects all data presented on the page.
* **Create a personalization:** Click **Create a personalization** to open the personalization creation page. An **Audiences** tag is automatically associated with the personalization, and the segment from which you have just configured the personalization is filled in by default as the exposed segment.
* **Actions menu:** Click the **three-dots menu** to access actions such as **Export to PDF**, **Share URL**, and **Print**—the same options the Audiences page provides.
##### Key information
Several pieces of information about the segment are gathered here, presented in the form of three gauges:
* **Number of visits:** Hover over to display the total number of visits made by visitors included in the segment, and the ratio they represent in relation to the total audience. Visually, the data is also represented by the ratio between the blue zone (number of visits included in the segment) and the gauge (total number of visits).
* **Conversion rate:** The conversion rate is shown in the same way as the segment size (maximum is 100%). Below the gauge is the conversion rate for all visits, for comparison.
* **Gain generated:** This gauge represents the revenue generated by the visitors included in the segment compared to the revenue generated by all visitors. When you hover over the gauge, the percentage represented by the segment appears.
##### Key information graphs
Three graphs show the evolution of key information over time:
* Evolution of the segment size (**Number of visits**).
* Evolution of the generated revenue (**Overall revenue**).
* Evolution of the conversion rate (**Conversion rate**).
For more clarity, the colors used in these graphs are the same as those in the **Key information** section. Navigate between the tabs to view the three curves. When you hover over a curve, data appears. Zoom, zoom out, and free zoom tools allow you to focus on certain parts of the graph.
##### Other key data
Below the graphs, you'll find other important data:
* The average cart amount.
* The average cart amount evolution compared to the previous period.
* The revenue per visit.
* The evolution of the revenue per visit compared to the previous period.
The data displayed depends on the period you have selected in the header. Evolution can be positive, negative, or neutral.
##### Segment details

This section shows some key segment data, broken down by targeting condition. You can also uncover sub-segments, which may have an atypical behavior in terms of conversion (which overperform or underperform). For example, a segment that has a low conversion rate but clearly outperforms on mobile visits.
* **Columns:** Click to display the cog icon to display the settings menu. You can select which columns to display and change their associated data:
* **Visits:** The number of visits involved and their ratio to the total number of visits in the segment.
* **Visits evolution:** The percentage change in the number of visits between P (current period) and P-1 (previous period).
* **Conversion rate:** The conversion rate associated with the segment in question, and the number of visits converted in this segment.
* **Conversion rate evolution:** The percentage of change in conversion rate between P and P-1.
* **Conversion discrepancy:** The difference between the conversion on this segment and the overall conversion.
* **Overall revenue:** The revenue and the percentage of revenue associated with the targeted population compared to the total revenue of the segment.
* **Criteria:** Click **Criteria** > **+Add criteria** to create new criteria for the table.
* Only visitors who fulfill the selected criteria will be counted in the table’s data.
# Get started
Source: https://docs.kameleoon.com/user-manual/ai-opportunity-detection/get-started
Set up AI Opportunity Detection and Audiences to automatically surface high-performing audience subsegments from inconclusive experiment results.
Kameleoon’s **AI Opportunity Detection** feature automatically analyzes your experiment results to uncover audience segments where variations are having a significant positive (or negative) impact, even when overall results are neutral or underperforming.
In addition to detecting uplift opportunities, Kameleoon provides a dedicated **Audiences** page that details global metrics on the success of your experiment program. This page includes advanced tools to analyze segment performance and measure the impact of your experiments in greater detail.
## What is an opportunity?
An **opportunity** is a subsegment of your original targeting segment that shows both:
* **A significant relative size**.
* **A statistically reliable improvement** over the control variation.
By revealing these segments, Kameleoon helps you maximize your experiment’s impact and uncover new targeting or personalization strategies.
## How it works
When an experiment’s main KPI is inconclusive, AI Opportunity Detection automatically analyzes all segments that have been added to Audiences Explorer to detect areas of uplift. This analysis covers every inconclusive experiment, allowing you to quickly find hidden opportunities.
Kameleoon checks all segments that:
* Were created or modified in the last 90 days.
* Do **not** start with `[DEV]`, `[TEST]`, or `[QA]`.
* Do **not** use page URLs in their targeting conditions.
When opportunities are found, a pop-in appears at the bottom of the Results page. Click the pop-in to view full details about the opportunity.
Multiple opportunities can be identified in a single web experiment.
## Acting on an opportunity
Once an opportunity is detected, Kameleoon recommends duplicating your experiment to specifically target the identified subsegment.
Click **Duplicate experiment** to create a copy of your original test with the new audience automatically applied, allowing you to validate the opportunity and potentially roll it out as a tailored experience.
## Extending AI Opportunity Detection with Audiences
To fully leverage the power of AI Opportunity Detection, it’s important to configure Audiences properly. Audiences provide detailed insights and advanced segmentation that help the AI identify the best-performing visitor groups and opportunities.
The next section guides you through configuring Audiences in your project, so you can get the most out of these advanced capabilities.
### Configuring Audiences on a project
In the Kameleoon app, click **Insights** > **Audiences** in the left-hand menu.
The **Audiences** page opens. If you haven't configured Audiences on your project, the page does not present any data.

Click **Configure**. The **Configure Audiences** page opens.

To set up an audience, you must:
1. **Select the site.**
* Choose the website on which you want to configure the Audience.
2. **Define the website typology.**
* Indicate the type of your website by selecting one of the following options:
* **E-commerce**
* **Media**
* **Other**
3. **Set the primary goal.**
* Define your primary goal, which should correspond to your project's main conversion action.
* For example, the primary goal is a purchase for an e-commerce project.
4. **Define the conversion value.**
* Specify the conversion value linked to your primary goal.
* For **e-commerce** projects, select the goal associated with the cart amount.
* For **media** or **other** projects, manually define the estimated monetary gain (in US dollars) generated by a visitor when the primary goal is completed.
5. **Select segments to track.**
* Choose the audience segments you want to monitor in your analysis.
6. **Create the Audience.**
* Click **Create** to finalize the Audience configuration.
Audiences is now configured for your project, and key metrics will be computed and displayed daily.
# Enable AI Predictive Targeting on a goal
Source: https://docs.kameleoon.com/user-manual/ai-predictive-targeting/enable-ai-predictive-targeting-on-a-goal
Enable AI Predictive Targeting on a goal to train a machine learning model that predicts each visitor's likelihood of converting.
AI Predictive Targeting is an add-on available in both Web Experimentation and Feature Experimentation. Contact your Customer Success Manager for details.
Enable AI Predictive Targeting on your goals to train a machine learning model that predicts how likely your visitors are to convert. By linking these predictions to key customer journey milestones—such as product views or cart abandonments—you can target visitors with tailored campaigns based on their real-time propensity scores.
This article guides you through enabling AI Predictive Targeting for new or existing goals, selecting the right triggers for your audience, and tracking the initial learning phase of your model.
## Enable AI Predictive Targeting on an existing goal
1. Click **Settings** > **Goals**.
2. Find the goal you want to update and click **Edit**.
3. Click **Advanced settings**.
4. Toggle **Use this goal with AI Predictive Targeting** to **On**.
5. Select the trigger at which AI Predictive Targeting will make probability predictions.
6. Click **Save**.
## Enable AI Predictive Targeting when creating a new goal
1. Click **Settings** > **Goals**.
2. Click **New goal**.
3. Enter the required goal details and click **Next**.
4. Click **Advanced settings**.
5. Toggle **Use this goal with AI Predictive Targeting** to **On**.
6. Click **Save**.
## How to choose the right trigger
A trigger is the customer action, event, or journey moment that activates a prediction. Don't select a trigger arbitrarily or only because the event is technically available. A good trigger represents a meaningful step in the customer journey where you have a decision to make: whether to engage, personalize, recommend, retain, incentivize, or let the user continue without intervention.
Examples of meaningful triggers include:
* A user views a product page
* A user adds an item to cart
* A user abandons a checkout
* A user completes a purchase
* A user shows signs of churn risk
* A user reaches a loyalty milestone
* A user returns after a period of inactivity
In practice, map your triggers to your customer journey. Most brands already define key journey stages such as discovery, consideration, purchase, onboarding, retention, loyalty, and reactivation. Propensity scores are most useful when you generate and interpret them at these moments.
A "high likelihood to convert" score is not meaningful in isolation. It becomes actionable when you attach it to a specific journey step, for example, after a product view, after cart abandonment, or before a renewal date. The same score can lead to different actions depending on the journey stage.
Kameleoon groups visitors into five score buckets, each representing roughly 20% of the eligible audience:
* **Very low**
* **Low**
* **Moderate**
* **High**
* **Very high**
A **high** or **very high** score may indicate that the visitor only needs a light nudge, or no incentive at all. A **low** or **very low** score may indicate that the visitor needs a stronger message, a different on-site experience, a better-timed interaction, or an incentive. In some cases, it may also mean the visitor should not be targeted at all because the expected impact is too low.
You cannot define the right action for each score level universally: validate it through experimentation. Test which on-site experience works best for each journey stage and propensity bucket, then refine your triggers and decisioning strategy based on observed performance.
### Example: on-site personalization after cart abandonment
A retailer wants to use propensity scoring to optimize the on-site experience for visitors who abandoned their cart.
The trigger should not simply be "show a personalization every time we have a score." Instead, the trigger should be the meaningful journey moment: a visitor adds items to cart, does not complete checkout, and returns to the site within a defined period.
At that point, the propensity score informs the best on-site action:
* **Very high / High propensity to purchase:** show a light in-page reminder of the saved cart, or no incentive at all.
* **Moderate propensity to purchase:** show contextual reassurance, such as social proof, product reviews, or shipping benefits.
* **Low / Very low propensity to purchase:** test a stronger on-site experience, such as an incentive banner, an alternative product recommendation, or a different layout for the cart page.
Over time, test these on-site experiences and learn which strategy performs best at each score bucket.
## Learning phase
After you enable AI Predictive Targeting, Kameleoon begins a learning phase before predictions are available. The model requires:
* **7 days** of data
* **100,000 visits**
Both conditions must be met. For example, if your site receives 100,000 visits in a single day, the model still needs a full week of data. If your site receives 50,000 visits per week, training takes two weeks.
Once training completes, the model activates on day 7 (D+7) and predictions become available on day 8 (D+8), after one day of prediction data has accumulated.
After activation, the model keeps learning: Kameleoon retrains it every 10 minutes as it collects new data points and analyzes more visits and conversions. To learn more, see [How often the model and scores update](overview#how-often-the-model-and-scores-update).
Model quality depends on traffic volume, conversion rate, **and** the absolute number of conversions collected within your triggers. Traffic alone is not enough: if a goal receives a lot of visits but only a handful of conversions, the AI will not see enough conversion patterns to learn a reliable predictive signal.
To check whether a goal has enough conversion volume, open the **Goals** dashboard and hover over the goal. Kameleoon displays the number of conversions collected over the last 24 hours. Use this number as a quick health check before relying on the goal for AI Predictive Targeting.
Aim for a reasonable audience size **and** a meaningful, sustained number of conversions to get the best predictions.
## AI model status badges
Goals with AI Predictive Targeting enabled display a status badge on the Goals dashboard.
| Badge | Color | Meaning |
| --------------- | ------ | ---------------------------------------------------------------------------------------- |
| **AI Learning** | Blue | The model is collecting data and has not yet met the 7-day and 100,000-visit thresholds. |
| **AI Active** | Green | Predictions are available, and the model evaluates visitors in real time. |
| **AI Alert** | Orange | Training is taking longer than expected, typically due to low traffic. |
Hover over an **AI Learning** badge to see a tooltip showing the estimated time and visitors required for AI Predictive Targeting to activate.
## Next step
After the model reaches **AI Active** status, [create a segment using the Likelihood to convert condition](target-users-based-on-likelihood-to-convert) to target visitors by their predicted conversion probability.
# AI Predictive Targeting
Source: https://docs.kameleoon.com/user-manual/ai-predictive-targeting/overview
Use machine learning to estimate each visitor's likelihood of converting and target them by their propensity score in real time.
AI Predictive Targeting is an add-on available in both Web Experimentation and Feature Experimentation. Contact your Customer Success Manager for details.
When you target all visitors the same way, you treat someone who is very likely to convert the same as someone who is unlikely to, which makes it harder to decide when to intervene, what message to show, and how strong an incentive (if any) to offer.
AI Predictive Targeting solves this by training a machine learning model that estimates each visitor's likelihood of converting for a specific goal. Once training completes, you can use the **Likelihood to convert** condition in segments to target visitors by their predicted conversion probability and tailor your campaign accordingly.
## How the model works
Kameleoon's machine learning model estimates each visitor's expected conversion probability from three categories of data points. The examples in each category are not exhaustive: the model takes into account most of the data points Kameleoon collects. For the full inventory, see [List of collected data](/developer-docs/privacy-and-compliance/data-collection-backend#list-of-collected-data).
### Previous sessions
Data points from the visitor's past sessions, including:
* Number of sessions
* Average time between sessions
* Number of visited pages
* Number of clicks
### Static data points
Data points that describe the visitor's context, including:
* Browser
* Operating system
* Landing page
* Referrer
* Time since last session
### Dynamic data points
Data points that Kameleoon derives from the visitor's behavior during the current session, including:
* Number of pages visited
* Number of clicks
* Time spent on the website
### How often the model and scores update
The model is not static. Kameleoon retrains it every 10 minutes as it collects new data points and analyzes more visits and conversions. Kameleoon also rebuilds the `engine.js` application file every hour to deploy the latest model, unless one of your own changes (for example, updating a campaign) has already triggered a rebuild.
Each visitor's score updates in real time: Kameleoon recalculates it at every measured trigger, such as a step in the customer journey.
#### Use with Feature Experimentation SDKs
When you retrieve visitor data through a Feature Experimentation SDK, set `kcs` to `true` in your `getRemoteVisitorData` call. Without this flag, Kameleoon does not return the Kameleoon Conversion Score (KCS), and the **Likelihood to convert** condition has no score to evaluate.
For the full parameter reference, see [getRemoteVisitorData](/developer-docs/sdks/web-sdks/js-sdk#getremotevisitordata) in the SDK documentation. The `kcs` parameter is available in all Kameleoon SDKs.
## Enrich the model with your own data
You can improve prediction accuracy by supplying your own business data. When you create a custom data point, enable **Use this custom data as input for AI Predictive Targeting** to make it available to the model.
The model only accepts **Number** and **Boolean** custom data types. Avoid adding sensitive data such as dates, timestamps, or unique visitor identifiers (for example, email addresses or account numbers), as these values are unsuitable for predictive models. Also avoid custom data that is highly targeted, for example, data specific to individual visitors or very small segments.
For setup instructions, see [Create custom data](/user-manual/assets/custom-data/create-custom-data#use-this-custom-data-as-input-for-ai-predictive-targeting).
## Set up AI Predictive Targeting
Choose a conversion goal and activate AI Predictive Targeting to start the model's learning phase. Select a trigger that represents a meaningful moment in your customer journey, such as a product page view, cart addition, or checkout abandonment. [Enable AI Predictive Targeting on a goal](/user-manual/ai-predictive-targeting/enable-ai-predictive-targeting-on-a-goal)
The model requires **7 days** of data and **100,000 visits**, and both conditions must be met. Once training completes, the goal badge changes from **AI Learning** to **AI Active**, and predictions become available the following day. To learn what each badge means, see [AI model status badges](/user-manual/ai-predictive-targeting/enable-ai-predictive-targeting-on-a-goal#ai-model-status-badges).
Use the **Likelihood to convert** condition to create a segment that targets visitors by their predicted conversion probability. Kameleoon groups visitors into five score buckets: Very low, Low, Moderate, High, and Very high. [Use AI Predictive Targeting in a segment](/user-manual/ai-predictive-targeting/target-users-based-on-likelihood-to-convert)
You can also apply the **Likelihood to convert** condition directly to an experiment through [quick targeting](/user-manual/experimentation/web-experimentation/configure-and-launch/define-your-experiments-targeting#target-specific-visitors), without creating a reusable segment.
Add the segment to a web experiment, personalization, or feature experiment to deliver the right experience to each visitor based on their propensity to convert.
# Use AI Predictive Targeting in a segment
Source: https://docs.kameleoon.com/user-manual/ai-predictive-targeting/target-users-based-on-likelihood-to-convert
Use AI Predictive Targeting to create segments that target visitors based on their real-time predicted probability of converting for a specific goal.
AI Predictive Targeting is an add-on available in both Web Experimentation and Feature Experimentation. Contact your Customer Success Manager for details.
Kameleoon AI Predictive Targeting uses machine learning to calculate propensity scores in real time, so you can target visitors based on their likelihood to convert for a specific goal.
## Prerequisites
Before you can use the **Likelihood to convert** condition in a segment, you must:
1. Enable AI Predictive Targeting on at least one goal. See [Enable AI Predictive Targeting on a goal](enable-ai-predictive-targeting-on-a-goal).
2. Have at least one [trigger](../assets/triggers/create-a-trigger) configured. For guidance on picking a meaningful trigger, see [How to choose the right trigger](enable-ai-predictive-targeting-on-a-goal#how-to-choose-the-right-trigger).
3. Wait for the AI model to complete its learning phase (7 days and 100,000 visits by default).
## Create or edit a segment with Likelihood to convert
1. Click **Settings** > **Segments**.
2. Click **New segment** to create a segment, or click **Edit** on an existing segment.
3. In the segment builder, expand the **Conversions** section.
4. Click **Likelihood to convert**.

5. Select a likelihood range. You can choose one of the predefined buckets (**Very low**, **Low**, **Moderate**, **High**, or **Very high**), each representing roughly 20% of the eligible audience. Alternatively, select **Personalized** to define a custom range between **0** and **100**. A score of **0** indicates the lowest predicted conversion probability relative to other visitors, and a score of **100** indicates the highest.
6. Choose the goal on which you enabled AI Predictive Targeting.
7. Choose the trigger to associate with the prediction.
8. Click **Save** to confirm.
You can also apply the **Likelihood to convert** condition directly to an experiment through [quick targeting](../experimentation/web-experimentation/configure-and-launch/define-your-experiments-targeting#target-specific-visitors), without creating a reusable segment.
## AI model status badges
Every segment that uses the **Likelihood to convert** condition displays a status badge, so you can monitor the AI model's progress at a glance.
| Badge | Color | Meaning |
| --------------- | ------ | ----------------------------------------------------------------------------------------------------------------------------------------------------------------------------------------------------------------- |
| **AI Learning** | Blue | The model is collecting data. By default, it requires 7 days and 100,000 visits to complete training. During this phase, the AI condition is inactive, and the segment falls back to its other active conditions. |
| **AI Active** | Green | The model is operational and evaluates visitors in real time. |
| **AI Alert** | Orange | The learning phase is taking longer than expected, usually due to low traffic. |
### View learning progress
Hover over the **AI Learning** badge to see a tooltip with the exact training progress:
* **Time:** X of 7 days elapsed
* **Traffic:** X of 100,000 visits collected

While the model is in the **AI Learning** state, the Likelihood to convert condition is inactive. The segment targets visitors using only its other active conditions.
## Monitor AI Predictive Targeting status from the Experiments dashboard
You can check an AI model's status without leaving the Experiments dashboard:
1. Hover over the information icon associated with an experiment.
2. In the pane that opens, hover over the **sparkles** icon next to the segment.
3. A tooltip displays the current AI status for that segment.

## Use the segment in a campaign
After the AI model reaches **AI Active** status, add your segment to:
* A [web experiment](../experimentation/web-experimentation/prompt-based-experiments/pbx-build/create-a-prompt-based-experiment)
* A [personalization](../web-personalization/set-up-and-launch-a-personalization) campaign
* A [feature experiment](../experimentation/feature-experimentation/create-and-manage-flags/create-a-feature-flag)
# Create a key page
Source: https://docs.kameleoon.com/user-manual/assets/advanced-targeting-tools/create-a-key-page
Create a key page to target visitors who access specific URLs on your website and use it as a targeting condition in segments.
Use a **key page** to target users who visit specific pages on your website.
## Create a new key page
To create a new key page:
1. Click **Settings** > **Advanced targeting tools**.
2. Click **New tool** at the top right of the page.
3. Click **Key page**.
4. Select your project(s), name your key page, and indicate the URL visitors must visit to be targeted.
5. Click **Create**.

## Define a key page as targeting condition
To add a key page to a new segment:
1. Navigate to the **Conditions** tab.
2. Select the **Key pages** condition in the **Pages viewed** tab.
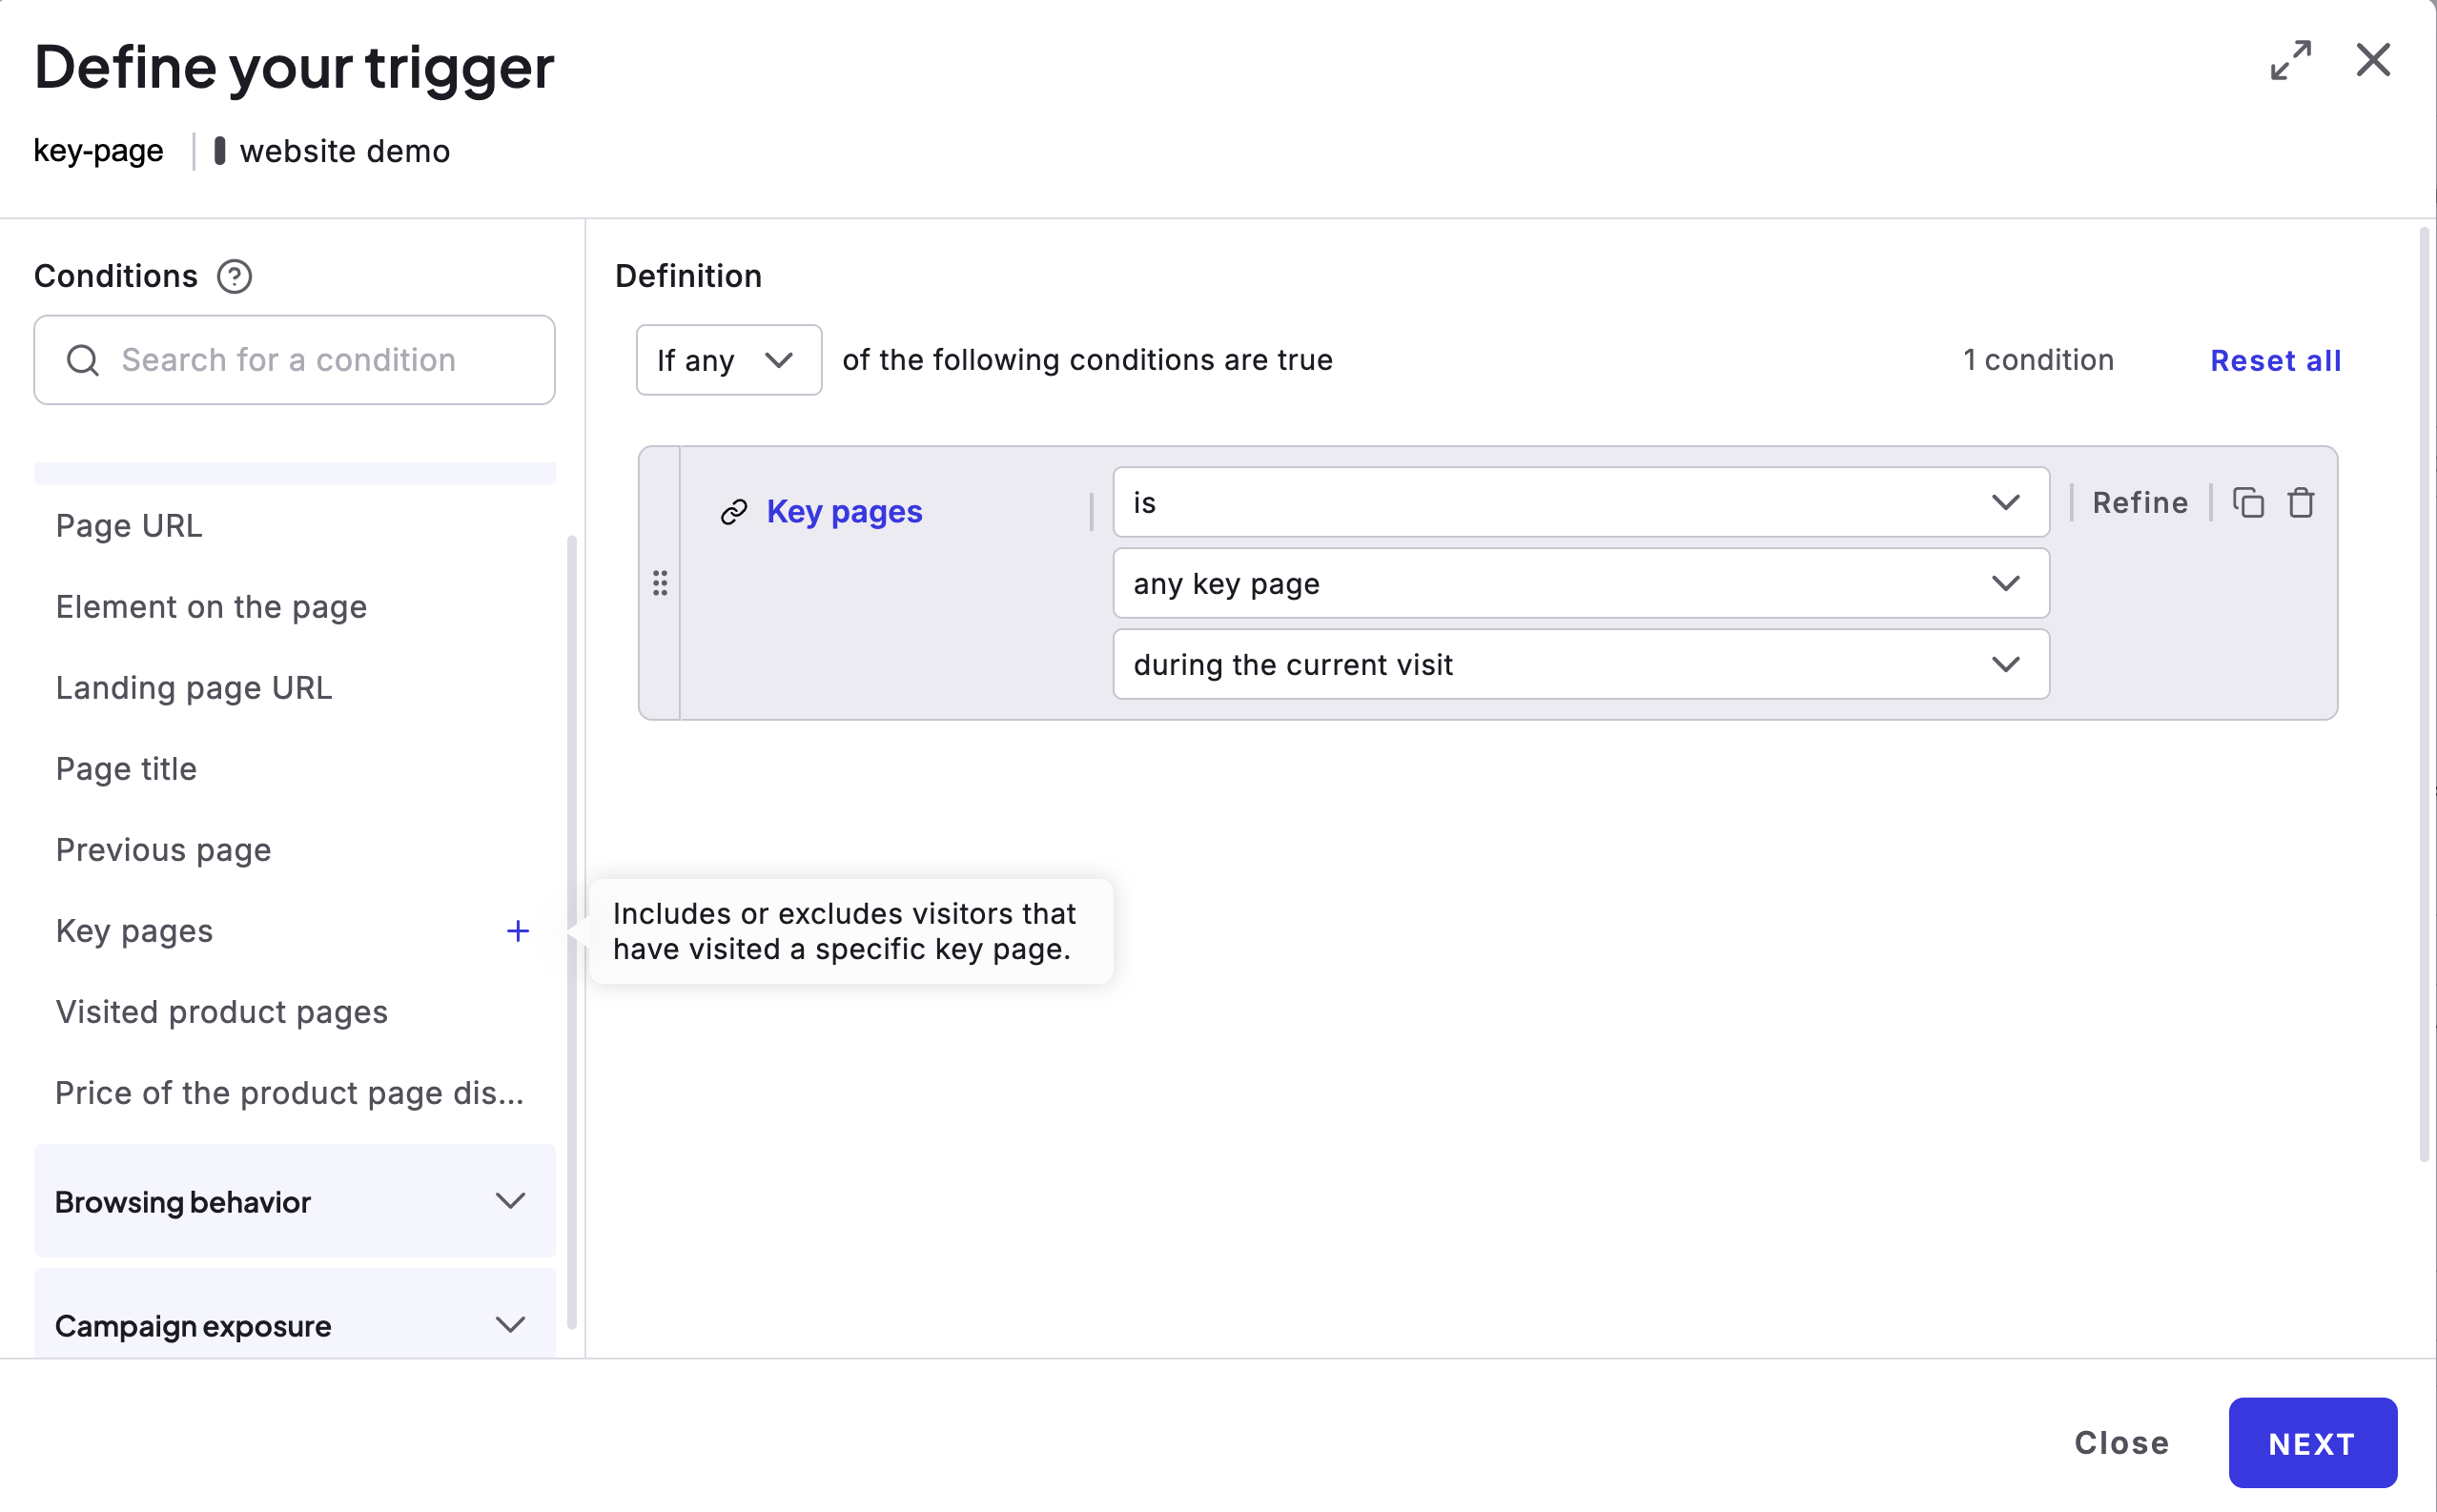
3. Select the key page in the dropdown menu and include or exclude visitors meeting the key page's criteria.
# Create an acquisition channel
Source: https://docs.kameleoon.com/user-manual/assets/advanced-targeting-tools/create-an-acquisition-channel
Create custom acquisition channels to target visitors based on their traffic source, then use them as segment conditions or result filters.
You can target visitors using acquisition channels. Kameleoon automatically creates five default channels:
* Bing
* Baidu
* Google
* Yahoo
* Google Ads
## Create a new acquisition channel
To create a new acquisition channel:
1. Click **Settings** > **Advanced targeting tools**.
2. Click **New tool** in the top right of the page.
3. Click **Acquisition channel**.
4. Select your project(s), name your acquisition channel, and select an acquisition method in the dropdown menu:
* Referrer URL
* URL of current page
* JavaScript

### Referrer URL (regular expression)
Indicate the URL the user must come from to be targeted.
### URL of the current page (regular expression)
Indicate the URL the user must visit to be targeted.
### JavaScript
Indicate the JavaScript assessing the visitor’s acquisition channel.
Example:
```javascript theme={null}
(function(){
if (/user-manual/param=123/.test(window.location.search) ) {
return true
}
})();
```
### Additional information about acquisition channels
The acquisition channel is checked after each page view and stored for the visit's duration. Each new visit will have its own acquisition channel. If multiple acquisition channels are used across different visits (for example, visit 1 = SEA, visit 2 = Direct, and visit 3 = SEA), the visitor will accumulate two visits for SEA and one visit for Direct in the Results page when displaying by visit. The Results page will display one visitor for SEA and one visitor for Direct in the visitor view. A visit or visitor can have several acquisition channels assigned at the same time. Matches are recorded in the page event.
## Add an acquisition method
You can add acquisition methods to define your acquisition channel more precisely.
Select the method and fill in the corresponding field.

Multiple acquisition methods are linked with **and** or **or** booleans. **And** limits the scope (visitor must fulfill all conditions), while **or** broadens the scope (visitors must fulfill one condition).
Click the **X** to delete an acquisition method from your acquisition channel.
## Define an acquisition channel as targeting condition
To add an acquisition channel to a new segment:
1. Select the **Acquisition channel** condition in the **Acquisition** tab.
2. In the dropdown menu, select the created channels and include / exclude the visitors meeting the acquisition channel criteria.
## Use an acquisition channel as a filter/breakdown on the results page
### Filter
Click **Filters** > **Acquisition channels** in the display settings at the top of the Results page to filter data according to the channels you specified.
In the display settings at the top of the results page, click **Filters** > **Acquisition channels** to filter the data on the page according to the channel(s) you have specified.
### Breakdown
In the charts at the bottom of the Results page, click **Breakdown** > **Acquisition channels** to break down data according to acquisition channels.
You can apply this breakdown to all goals by checking the corresponding box below the dropdown list.
When you break down results by acquisition channel, two system-generated entries may appear:
* **RESTART**: Kameleoon assigns this label to sessions with no referrer. Sessions without a referrer typically occur when a visitor's session became inactive while the browser tab remained open and the visitor then returned to the page.
* **DELETED**: Kameleoon assigns this label to visits that were associated with an acquisition channel that has since been deleted. Because the original channel no longer exists, Kameleoon cannot match the visit to a named channel.
# Manage advanced targeting tools
Source: https://docs.kameleoon.com/user-manual/assets/advanced-targeting-tools/manage-advanced-targeting-tools
Access, create, and edit advanced targeting tools—acquisition channels and key pages—to refine visitor segmentation in your experiments.
Advanced tools improve your visitor segmentation by adding conditions to new segments.
Use criteria, like acquisition channels and key pages, to fine-tune your visitor segmentation.
Advanced tools are only available in Premium accounts. If you want to upgrade you package, please [contact us](https://www.kameleoon.com/en/contact).
## Access advanced tools
To access advanced tools:
* Click **Configure** > **Advances tools**.
You can create two types of advanced tools:
* Acquisition channels
* Key pages
## Create a new advanced tool
To create a new advanced element:
1. Click **New tool** in the upper right-hand corner of the page. A pop-in will appear.
2. Choose the type of advanced tool you want to create.
The pop-in now shows your tool's setup options.
## Edit an advanced tool
To edit an advanced tool:
1. Open the **Advanced tools dashboard**.
2. Click **Edit** at the end of a tool's card.
3. Click the **three-dots menu** to:
* edit a tool's parameters
* duplicate the element
* delete it

You can't delete an element if it is being used in a live experiment. An icon will appear in the bottom left-hand corner of the confirmation pop-in indicating which experiments are using which elements.
[How to create an acquisition channel](./create-an-acquisition-channel)
# Create custom data
Source: https://docs.kameleoon.com/user-manual/assets/custom-data/create-custom-data
Create custom data to target and segment visitors using your own data sources, such as CRM attributes, tag manager variables, or JavaScript.
Creating custom data enables you to target visitors according to data already available, like user account information.
All of your custom data is available on the **Custom** **data** page in the **Configure** menu of the App where you can create and [manage custom data](./manage-custom-data).
## Create new custom data
To create new custom data:
1. Click **Settings** > **Custom data**
2. Click **New custom data** in the top right of the page.
You must fill in several fields to set up custom data.
### Structure of the creation pop-in
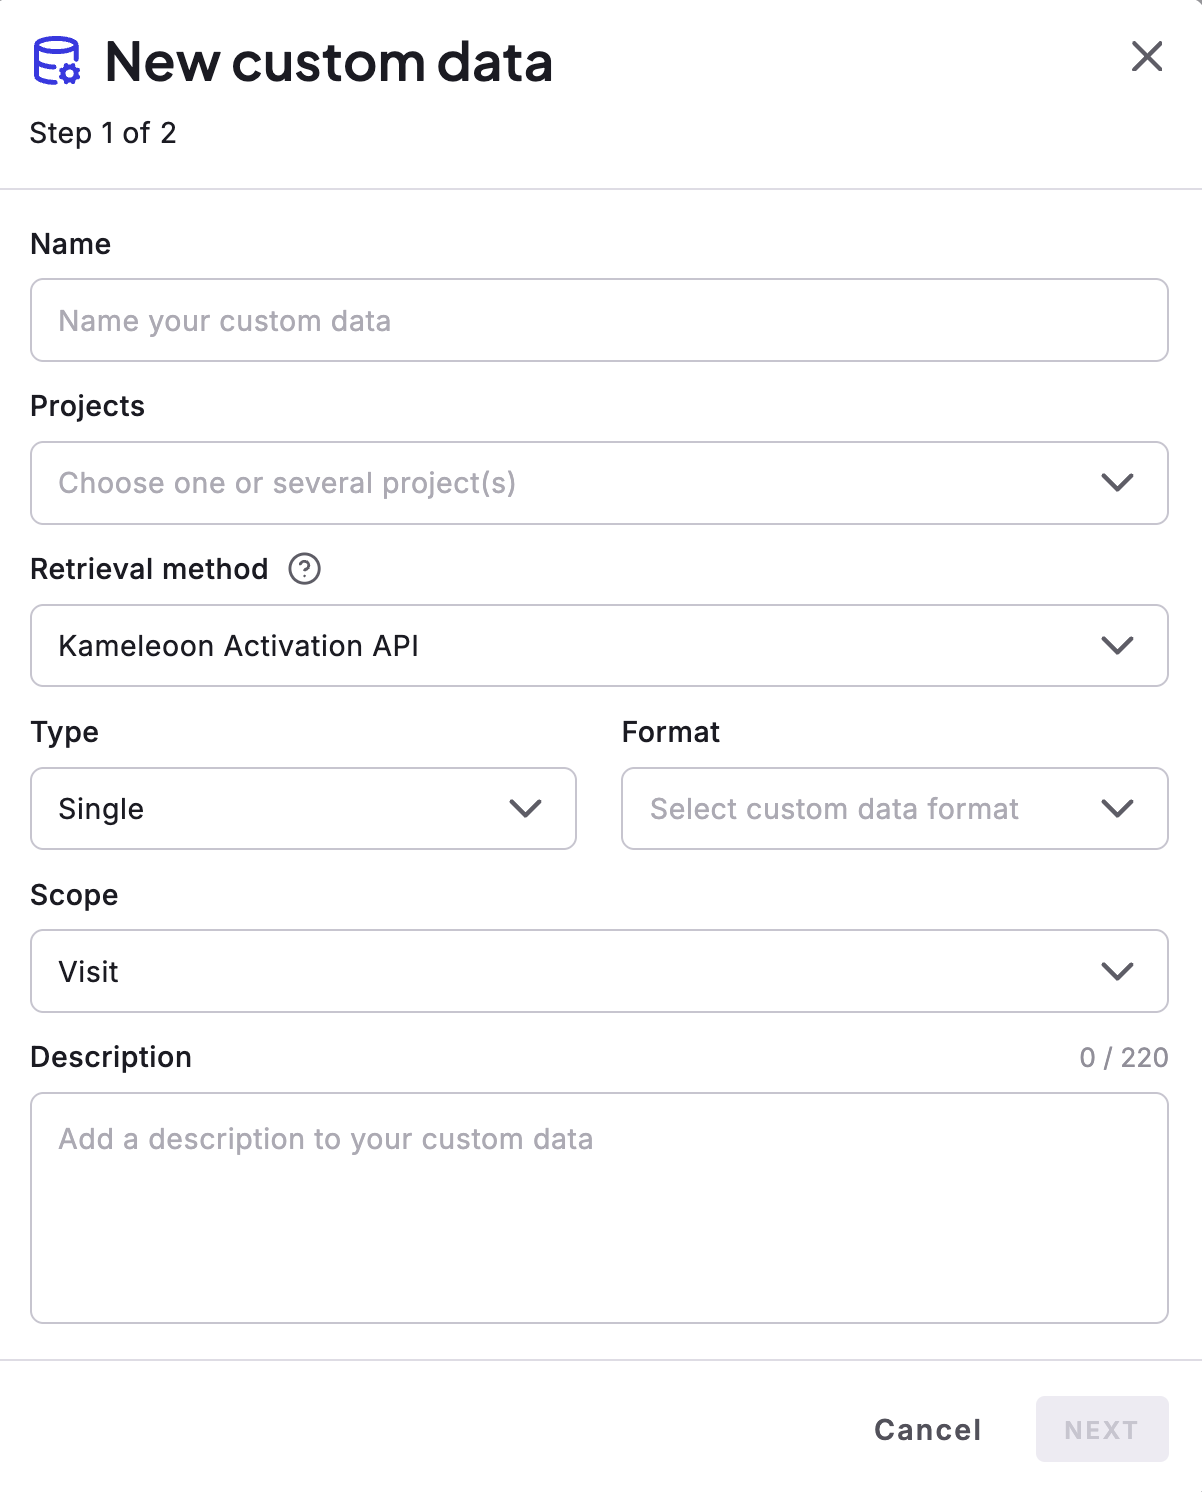
1. Name the new custom data.
2. Select a project.
3. Tell Kameleoon how to retrieve custom data.
### Custom data name
Give your custom data an easily identifiable name.
If several websites are selected, you must ensure that custom data is being pulled from all sites.
You can have a maximum of 255 active custom data.
### Value retrieval
#### Retrieval method
Choose the custom data's value retrieval method in the dropdown menu.
The main tag management tools are:
* GTM data layer (`dataLayer`)
* Commanders Act data layer (`tc_vars`)
* Tealium (`utag.data` & `utag_data`)
For these tag managers, you must indicate the name of the variable you want to retrieve.
**If you choose to use GTM `dataLayer`**, proceed as follows to retrieve values:
* If the key is in level 1 of the `dataLayer`, enter `name` in the **Variable Name** field.
* If the key is in level 2 of the `dataLayer`, enter `properties.countryCode` in the **Variable Name** field.
**If you choose to use a custom JavaScript code** to retrieve the value you need, check the code and be careful if you're using scripts.
When you're setting up custom data, your code should return an object with two keys: `value`, with the value you want to provide for this custom data, and (optionally) `override`, with a boolean value (false by default). Kameleoon runs the code again: every 100 ms for the first three seconds after the first invocation, then every three seconds.
Here is an example:
```javascript theme={null}
if (! window.myObject) return null;
// custom data will not be set, but code will run later again
if (window.myObject) return {"value": window.myObject.x, "overwrite": true};
// returning a value and setting the custom data
if (window.someObject.value == 3) return {"value": null}
// stopping the periodic execution of the code, without setting the custom data
```
**If the Kameleoon Activation API option is selected**, your website must make regular calls to the [Kameleoon Activation API](../../../developer-docs/apis/activation-api-js/api-reference/api-reference#kameleoon-api-data).
**If you use Kameleoon Feature Experimentation and one of our SDKs**, you need to use the [Kameleoon SDK method](../../../developer-docs/sdks/web-sdks/js-sdk).
#### Type
Select the format of the data to be retrieved in the dropdown menu.
The data type can be:
* single (example: `127`)
* list (example: `126, 127, 128`; `shoes, dress, coat`)
* count list of (example: `shoes: 3, dress: 1, coat: 1`)
* string (example: `woman dress`)
* boolean (example: `female = "true/false"`)
* number (example: `cart amount = "127"`)
#### Scope
Select your custom data's scope in the dropdown menu:
* **Page:** For each new page, Kameleoon resets data value. For example, cart amount.
* **Visit:** The value of the data is reset at each new visit by the visitor. For example, geolocation.
* **Visitor:** The unit of data relates to the visitor and not to the visit. For example, female = true.
### Options
Click **Next** to access available options for your custom data.
#### Use this data only locally for targeting purposes
If your custom data is used solely for targeting, you don't need to store it on the server. In this scenario, you should use the `LocalData` API, which helps conserve server space by not counting towards the limit of 255 active custom data points. However, please note that custom data managed via the `LocalData` API cannot be used for reporting on the Results page.
If you choose to store custom data on the server, be cautious not to save sensitive information. Also, be aware that the value of any custom data sent to the server is limited to 1,000 characters.
#### Use this custom data as input for AI Predictive Targeting
If [AI Predictive Targeting](../../ai-predictive-targeting/overview) is enabled on your project, you can choose whether to include this custom data as an input for the predictive model. Custom data that has **Use this data only locally for targeting purposes** enabled cannot be used as model input, because Kameleoon does not send local data to the server. Do not activate this option if the custom data is highly targeted (for example, specific to individual visitors or very small segments).
The model only accepts **Number** and **Boolean** custom data types. Avoid adding sensitive data such as dates, timestamps, or unique visitor identifiers (like email addresses or customer account numbers), as these elements are unsuitable for predictive models.
#### Use this custom data as a unique identifier for cross-device history reconciliation
When activated, Kameleoon treats this custom data as a unique identifier for your visitors, which will be used to map several Kameleoon visits to a unique user. Learn more [here](../../../developer-docs/cross-device-experimentation).
#### Save the values for the targeting condition associated with the custom data point
This option allows you to define a specific list of values that will then be available for this custom data in the segment builder.
In the **New custom data** pop-in (first page of the creation flow), click **Paste a sample code** to get a code example.
Your code must synchronously return a JavaScript array of objects. Each object in this array should represent a possible value for the custom data and must include:
* A `value` key, containing the actual data (its type must match the custom data's defined type).
* A `label` key, providing a string description for that value.
Example:
```javascript theme={null}
return [{value:'q2f6hsbzpf', label:'First segment'},
{value:'8ney4225y65a', label:'Other segment'},
{value:'3h6vjtz26b', label:'Loyal users'}];
```
If the format is incorrect, an error message will appear when you click **Next**.
Once you've entered your JavaScript, click **Next** > **Create**.
To learn how to use custom data values in the segment builder, refer to [this](../segments/create-a-segment) article.
## Define a custom data as targeting condition
To add a custom data to a new segment:
1. Select your desired data in the **Custom data** tab of the Conditions column.
2. In the dropdown menu, determine the custom data's required value for a user to be targeted.
3. Include/exclude visitors meeting the custom data condition.
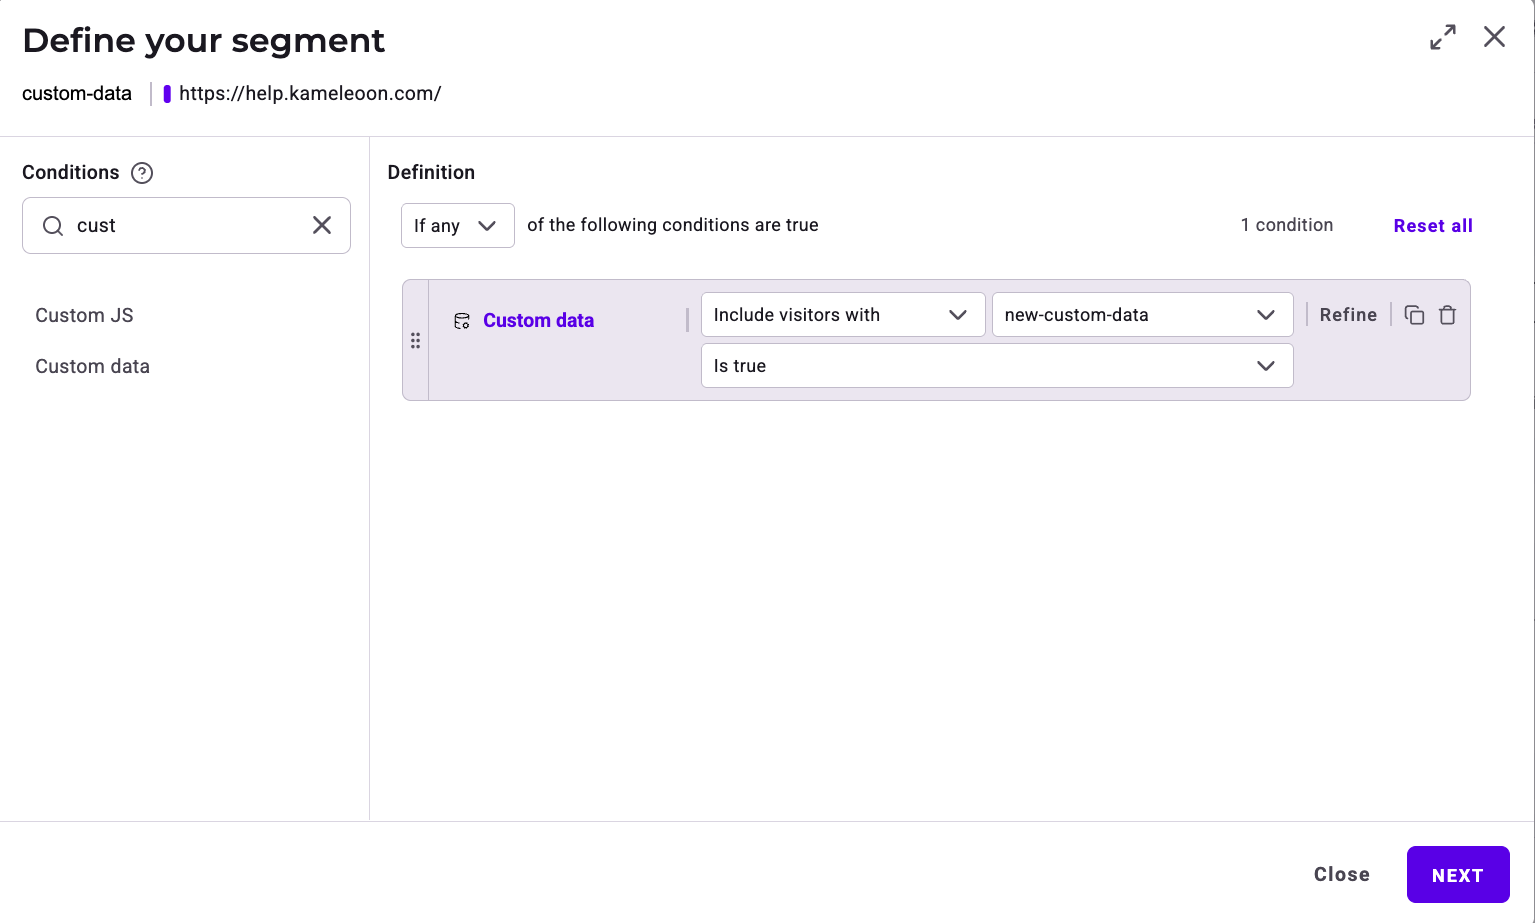
Depending on the type of custom data, the targeting condition's configuration changes (“is true/is false”, “contains”, “is equal to”).
## Filter/breakdown by custom data on the results page
On an experiment's results page, you can filter or breakdown the results according to a custom data associated with the experiment.
[More about custom data in our developer documentation](../../../developer-docs/custom-data)
# Manage custom data
Source: https://docs.kameleoon.com/user-manual/assets/custom-data/manage-custom-data
Find, edit, duplicate, and delete custom data from the Kameleoon Custom data dashboard using search, filter, and sort tools.
## Access the Custom data page
To access the **Custom data** page in Kameleoon, click **Settings** > **Custom data**
## Manage your custom data
Each custom data has a card that displays its information.
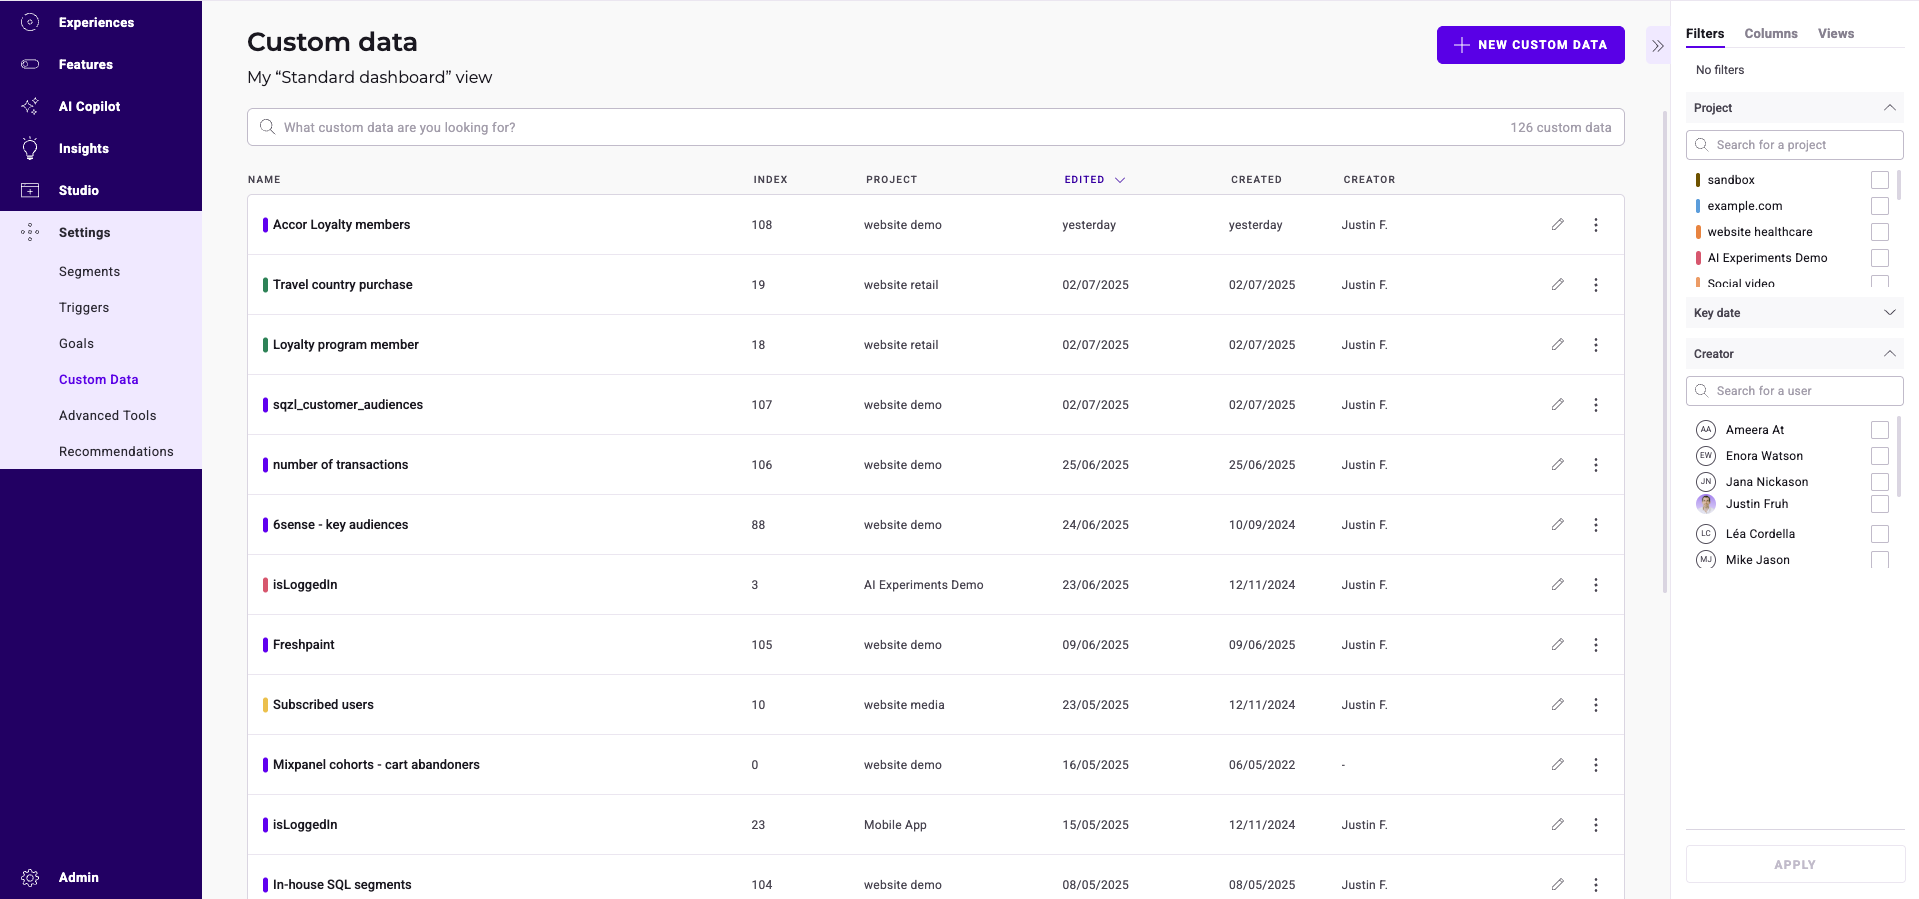
### Find a custom data's index
Each custom data has a numeric **index** assigned by Kameleoon when it is created. The index uniquely identifies a custom data and is required when you reference it from code, including:
* The `CustomDataNameOrIndex` argument of `setCustomData()` in the [Activation API](../../../developer-docs/apis/activation-api-js/api-reference/api-reference#setcustomdata).
* The keys of the `metadata` object passed to `processConversion()` and `triggerGoal()` (for example, `{ 5: "Amex Credit Card" }` references the custom data with index `5`).
* SDK methods that accept a custom data index.
To view the index of a custom data:
1. Click **Settings** > **Custom data**.
2. Locate the custom data in the list. The numeric value next to its name (in the **INDEX** column) is the index used in code.
You can also sort custom data by index — see [Sort custom data](#sort-custom-data) below.
### Find a custom data
A search bar, a filter tool, and a sorting tool help you find a particular custom data.
#### Filter custom data
You can filter the displayed custom data based on several criteria:
* Project
* Key date
* Creator
##### Project
You can filter the displayed custom data based on the projects they are associated with.
Select the projects and click **Apply**.
##### Key date
You can filter the displayed custom data based on a key date: last modification or creation date.
Select a date and click **Apply**.
##### Creator
You can filter the displayed custom data based on their author.
Check the authors and click **Apply**.
#### Sort custom data
The sorting option allows you to sort your custom data based on several criteria:
* Name
* Index
* Project
* Edition date
* Creation date
* Creator
##### Name
Hover over **Name** and click the chevron to sort custom data in alphabetical (or reverse alphabetical) order.
##### Index
Hover over **linked to** and click the chevron to rank the custom data based on their index.
##### Project
Hover over **Project** and click the chevron to organize projects in alphabetical (or reverse alphabetical) order.
##### Edition date
Hover over **Edited** and click the chevron to sort custom data from newest edition to oldest or vice versa.
##### Creation date
Hover over **Created** and click the chevron to sort custom data from newest creation to oldest or vice versa.
##### Creator
Hover over **Creator** and click the chevron to sort custom data in alphabetical (or reverse alphabetical) order of their creator's name.
### Edit a custom data
To edit an existing custom data:
1. Locate the custom data's card.
2. Click **Edit** on the custom data card. A pop-in window opens.
3. Enter your changes in the pop-in.
Click **Next** > **Save** to save your changes when they're complete.
### Duplicate a custom data
You can duplicate an existing custom data. To duplicate custom data:
1. Select a custom data.
2. Click the **three-dots menu**.
3. Click **Duplicate**. The Duplicate sidebar opens.
4. Click **Save** to validate the duplication.
### Delete a custom data
To delete custom data:
1. Select a custom data
2. Click the **three-dots** menu > **Delete**.
### Multiple selection
You can select multiple custom data at the same time and apply a common action to them. To select multiple custom data:
1. Select a custom data.
2. Click the **three-dots menu**.
3. Click **Select**. The custom data becomes selectable and the **Grouped actions** sidebar opens.
Two actions are possible:
* **Select all**
* **Deselect all**
To select all custom data, check the **box** next to **Select all**. To deselect all, click the **box** again.
# Create a goal
Source: https://docs.kameleoon.com/user-manual/assets/goals/create-a-goal
Create and configure goals to track conversions in your experiments, choosing from click tracking, scroll tracking, page access, time spent, and more.
*Visit our academy for a [video tutorial](https://academy.kameleoon.com/how-to-plan-your-first-experiment/162248) on setting up goals.*
Without goals, an experiment can only tell you which variation each visitor saw—not whether any variation actually improved your site's performance. A goal defines what counts as a conversion, so Kameleoon can measure whether your campaign is achieving the outcome you care about. To start measuring, link your experiment to one or more goals.
All goals you create in Kameleoon are available on the **Goals** page in the **Settings** menu.
## Access the Goals page
To access your goals, click **Settings** > **Goals**.
By default, the **Retention rate** goal is included for all sites associated with your Kameleoon account. This goal records the number of visitors who open at least one other page after the landing page.
## Create a new goal
To create a new goal, go to **Configure** > **Goals** in the left-hand menu.
Click **New goal**. In the pop-in, enter a name for your goal, select the associated site, and choose a type.
You can choose from seven types of goals:
* Click tracking
* Scroll tracking
* Access to a page
* Custom goal
* Time spent
* Number of pages viewed
* Retention rate
If you have protected your website using an iframe, the creation of a goal in the app may not be possible.
### Click tracking
Visitors achieve the **Click tracking** goal by clicking a specific element on your website.
To set up this goal, select **Click tracking** from the drop-down menu and click **Next**. The window expands to display the setup options.

Enter the URL you want to use to select your target element. Then, click the element you want to track or enter its CSS selector.
Kameleoon tracks clicks on the selected element across your entire website. The page you use to configure the tracker does not limit where the goal can convert. If multiple pages feature elements with the same CSS selector, Kameleoon records a conversion whenever a visitor clicks any of those elements. To track clicks on an element on a specific page only, you must use a CSS selector unique to that page.
Once you choose an element, an orange pointer appears, confirming that click tracking is active. You can apply click tracking to multiple elements.
The number of selected click trackings is indicated above the window.
You can also switch to navigation mode to browse your pages.
If your website is protected from being shown in an iframe (the X-Frame-Options header is used in the server settings), your URL won't be displayed in this pop-in, and you can't add click tracking. You must change your server settings and add an exception for the `kameleoon.com` domain and subdomains.
To access advanced setup options, click [**Advanced settings**](#advanced-settings) in the bottom left-hand corner of the pop-in.
Click **Create** to create your goal.
### Scroll tracking
Scroll tracking lets you determine the percentage of visitors who scroll to a specified section of your page.
To set up this goal, choose **Scroll tracking** in the drop-down menu of the pop-in and click **Next**. The pop-in now shows the setup options for the goal.
Enter the URL of the page where you want to apply scroll tracking.

If your website is protected from being shown in an iframe (the X-Frame-Options header is used in the server settings), your URL won't be displayed in this pop-in, and you can't add click tracking. You must change your server settings and add an exception for the `kameleoon.com` domain and subdomains.
The limit between the shaded and non-shaded area determines the scroll tracking level. To meet the goal, the visitor must scroll down to the shaded part of the page.
There are three different ways to define scroll tracking depth:
* **A precise percentage**: The percentage is applied to the entire website. The percentage is defined relative to the top of the page: 0% places the level at the very top, 50% in the middle, and 100% at the very bottom of the page.
* **A height in pixels**: Zero pixels corresponds to the very top of the page. The lower you set the level on your page, the higher the pixel count. The maximum height in pixels correlates with the page size.
* **The selected element**: Visualize the elements of your page by hovering over them and clicking on the element of your choice. The level will be positioned directly below the selected element.
If you choose a percentage or a height in pixels to determine the scroll tracking level, you can move it by dragging it to the position of your choice.
To access advanced setup options, click [**Advanced settings**](#advanced-settings) in the bottom left-hand corner of the pop-in.
### Access to a page
The **Access to a page** goal is met when the visitor accesses the page you defined.
To set up this goal, choose **Access to a page** in the drop-down menu of the pop-in and click **Next**.
The pop-in shows the setup options for the goal.

Enter the page the visitor must visit to reach the goal.
There are three options:
* Choose **contains** to target all the pages sharing the same URL fragment.
* Choose **matches exactly** to target only the page with the exact URL you entered.
* Choose **matches the regular expression** to target a URL and its variations according to the regular expressions you are using. For help creating regular expressions, see [Regular expressions](../segments/regular-expressions).
URL fragments and regular expressions are case-sensitive.
**Example:**
Your product page URLs are typically structured like this: `https://www.mysite.com/products/product-1`
Here's how to apply your **Access to a page** goal for different scenarios:
* **To a specific product page:**
* Select **matches exactly** and enter the full, precise URL. For example: `https://www.mysite.com/products/product-1`
* **To all product pages:**
* Select **contains** and type in `/products/`. Your goal will then apply to all pages that include the `/products/` fragment in their URL.
* **For URLs with common variations (for example, "product" vs. "products"):**
* If your product page URLs sometimes contain "product" instead of "products", use a regular expression. For instance, `https://www.mysite.com/products*` will match URLs containing either "products" or "product" at that point.
To access advanced setup options, click [**Advanced settings**](#advanced-settings) in the bottom left-hand corner of the pop-in.
### Ratio Metrics
For more information on creating a Ratio Metrics goal, refer to the [Ratio Metrics](../../experiment-analytics/analyze-results/data-and-metrics/ratio-metrics#creating-a-ratio-metric) article.
### Custom goal
To set up a custom goal, select **Custom goal** in the **Type** drop-down and click **Next**.
The pop-in shows the available setup options.

#### Option 1: Using a front-end event triggered by our JS Activation API
Choose this option if the conversion event happens **in the user's browser (client-side)**.
* **How it works:** Kameleoon provides a specific function (`Kameleoon.API.Goals.processConversion(ID)`, where `ID` is your goal's unique identifier) that you insert into your JavaScript code. When the user performs the action you are tracking, your code executes this function to send the conversion signal directly to the Kameleoon platform.
The goal's ID will be generated once the goal is created.
Click the **Copy** icon to copy the event code and implement it in your JavaScript (or pass it along to your development team for implementation). For more information on the `processConversion()` method, see [this article](../../../developer-docs/apis/activation-api-js/api-reference/api-reference#processconversion).
#### Option 2: Using a back-end event via SDK (e.g., Node JS)
Choose this option if the conversion event happens **on your server (backend)**. This method is necessary for tracking actions that do not rely on the user's browser session (for example, successful payment processing).
**How it works:** The Kameleoon server-side SDK uses a specific method (`trackConversion()`) to communicate the conversion event directly from your server to the Kameleoon platform.
Click the **Copy** icon to copy the SDK event code and pass it to your backend development team for implementation.
**Code example:**
```typescript theme={null}
trackConversion({visitorCode, goalId})
```
* **`visitorCode`** is the visitor's unique identifier you want to target.
* **`goalId`** is the goal's unique identifier.
The goal's ID will be generated once the goal is created.
For more information on the `trackConversion()` method, see [this article](../../../developer-docs/sdks/web-sdks/nodejs-sdk#trackconversion).
#### Option 3: Using custom JavaScript code
Choose this option if you need to run specific JavaScript logic to determine when to trigger the goal. Custom JavaScript is the most flexible option and is useful if you need to dynamically calculate revenue or capture additional metadata before sending the conversion signal.
* **How it works:** The code you enter in the text field runs automatically once your site is ready. Within that code, use the `triggerGoal()` method to fire a conversion. You can also optionally pass revenue and metadata parameters.
Enter your custom JavaScript code directly into the provided text field.
| Function | Description | Example code |
| -------------------------------- | -------------------------------------------------- | ---------------------------------- |
| `triggerGoal()` | Triggers a conversion with no parameters. | `triggerGoal();` |
| `triggerGoal(revenue)` | Triggers a conversion with a revenue value. | `triggerGoal(49.99);` |
| `triggerGoal(revenue, metadata)` | Triggers a conversion with revenue and extra data. | `triggerGoal(49.99, {5: "Gold"});` |
For more information on using custom JavaScript code for custom goals, see Kameleoon's [developer documentation.](../../../developer-docs/apis/activation-api-js/api-reference/api-reference#triggergoal-custom-code-for-custom-goal)
***
Alternatively, if you are initiating a conversion from a tag management system (for example, Google Tag Manager), you should use the [Kameleoon Command Queue](../../../developer-docs/apis/activation-api-js/api-reference/command-queue), which allows you to delay the command's execution until the Kameleoon engine finishes loading.
In Google Tag Manager, go to **GTM** > **Tags** > **New** > **Tag Configuration** > **Custom HTML** > insert the following code:
```html theme={null}
```
Then, select the trigger that will send the goal conversion call to Kameleoon.
For more information about `Kameleoon.API.Goals`, see the [API reference](../../../developer-docs/apis/activation-api-js/api-reference/api-reference#kameleoonapigoals).
To access advanced setup options, click [**Advanced settings**](#advanced-settings) in the bottom left-hand corner of the pop-in.
### Time spent
This goal is met when the visitor spends a certain amount of time on your site.
To set up this goal, choose **Time spent** in the drop-down menu of the pop-in and click **Next**.
The pop-in shows the setup options for the goal.

Enter the time the visitor must spend on your website to meet the goal. Choose a limit:
* **more than**: The visitor must spend at least a given time on the page
* **exactly**: The time spent must match exactly
* **less than**: The time spent must not exceed a given duration
Enter a value and select a unit from the drop-down menu: seconds, minutes, or hours.
To access advanced setup options, click [**Advanced settings**](#advanced-settings) in the bottom left-hand corner of the pop-in.
### Number of pages viewed
This goal is met if the visitor has viewed a certain number of pages.
To set up this goal, choose **Number of pages viewed** in the drop-down menu of the pop-in and click **Next**.
The pop-in shows the setup options for the goal.

Enter the number of pages the visitor must view to reach the goal. You can choose from an exact number, a minimum, or a maximum.
To access advanced setup options, click [**Advanced settings**](#advanced-settings) in the bottom left-hand corner of the pop-in.
### Retention rate
This goal is one of the default settings for all new websites in your account. The retention rate records the number of visitors who clicked at least once on their landing page.
To set up this goal, choose **Retention rate** in the drop-down menu of the pop-in and click **Next**.
The pop-in shows the setup options for the goal.

The goal is already configured. Enter a name and, optionally, a description.
To access advanced setup options, click [**Advanced settings**](#advanced-settings) in the bottom left-hand corner of the pop-in.
## Advanced settings
Click **Advanced settings** in the bottom left corner of the pop-in to access advanced setup options.

The pop-in contains several sections.

### Use this goal with AI Predictive Targeting
Enable this option to use predictive targeting for your goal. In real time, machine learning identifies patterns that affect the goal and estimates each visitor's conversion probability, so you can target visitors based on their likelihood to convert.
Select which triggers you wish to make predictions at for this goal. [More about triggers](../triggers/create-a-trigger)
### Send to external tools
This section lets you send a conversion event to selected external tools when Kameleoon triggers this goal. This option is only available for Google Analytics 4, Universal Analytics, Mixpanel, and Segment.
You can send the following types of goals to external tools:
* Click tracking
* Scroll tracking
* Access to a page
* Custom goal
* Time spent
* Number of pages viewed
* Retention rate
The code below defines the available goal types:
```javascript theme={null}
const enum GoalType {
CLICK = "CLICK",
CUSTOM = "CUSTOM",
SCROLL = "SCROLL",
PAGE_VIEWS = "PAGE_VIEWS",
URL = "URL",
TIME_SPENT = "TIME_SPENT",
RETENTION_RATE = "RETENTION_RATE",
}
```
**Google Analytics 4**
Once the integration is set up in Kameleoon, goal conversions are sent to GA4 automatically. No additional GA4 configuration is required to receive them.
Each goal conversion appears in GA4 as an event with the same name as your Kameleoon goal. For example, if your goal is called `Purchase complete`, it appears in GA4 as a `Purchase complete` event. Each event includes the following parameters:
* `type` — the goal type (for example, `CLICK` or `CUSTOM`)
* `id` — the Kameleoon goal ID
* `source` — always `Kameleoon`
* `revenue` — only included when you pass a revenue value with the conversion
You don't need to manually create these as Custom Events in GA4 for Kameleoon to send them. However, if you want to mark them as GA4 conversions or create audiences from them, you must configure those manually in GA4 after the data starts arriving.
**Google Tag Manager:** If your site uses GTM, Kameleoon pushes goal events into the `dataLayer` rather than sending them directly to GA4. You must configure a GTM tag and trigger to forward those events to GA4. The `dataLayer` is also a useful place to verify that goal events are firing correctly before checking GA4 reports. For setup instructions, see [Google Tag Manager](../../integrations/as-a-destination/analytics/google-analytics-4/google-tag-manager).
### Display this goal only for specific campaigns
This section lets you control which campaigns track a goal. By default, all your goals are active in every experiment. To exclude a goal from specific campaigns, specify which campaigns should not track the goal.
The drop-down menu includes three criteria to limit the application range of this goal:
* Name of the campaign: check the boxes next to the experiments you want to apply this goal to;
* Type of campaign: select the type of experiment you want to apply the goal to (clicking on **Experiment** makes the goal available for all experiments on the website the goal applies to; same thing for **Personalization**);
* Tags: by selecting a tag, the goal is applied only to the campaigns linked to this tag.
### Handle outliers
*This option is only available for Custom goals.*
[More about Winsorization at Kameleoon](../../experiment-analytics/statistical-methods/winsorization)
### Metadata
#### What is metadata?
Metadata are additional properties attached to a goal conversion. They let you filter or breakdown your results by specific values (for example, payment method, delivery type).
For example, if you want to track how many "Purchase" conversions happened with each payment type, you can use metadata to capture that value.
#### Using metadata
To use metadata:
1. Define a custom data. For more information, see [Create custom data](../custom-data/create-custom-data).
2. Link the custom data as metadata when creating or editing a goal by selecting it from the drop-down.
Custom data with the option **Use this data only locally for targeting purposes** will not be considered, as it is not sent to our servers.
# Create a goal conversion from GTM
Source: https://docs.kameleoon.com/user-manual/assets/goals/create-a-goal-conversion-tag-from-gtm
Create Kameleoon goal conversion tags in Google Tag Manager to track events, revenue, and metadata without modifying your site's code directly.
If you manage your site's tracking through Google Tag Manager, you can fire Kameleoon goal conversions directly from GTM tags, without modifying your site's code. This is useful when your development workflow runs through GTM, or when you want to keep all conversion tracking centralized in one place. This article covers how to create a basic conversion tag, a tag that records revenue, and a tag that passes metadata alongside the conversion.
## Create a tag
1. Click **New**.
2. Name your tag (for example, "Kameleoon - add to cart", "Kameleoon - transaction").
3. Select **Custom HTML** in **Tag Configuration**, and insert this code:
```javascript theme={null}
;
```
* You must replace `123456` with the Kameleoon goal ID.
4. Select an existing trigger or create a new one (depending on the `dataLayer` format).
## Create a tag with revenue
To create a tag with revenue:
1. Click **New**.
2. Name your tag.
3. Select **Custom HTML** in **Tag Configuration**, and insert this code:
```javascript theme={null}
```
`123456` is the Kameleoon goal ID, and `{{TransactionRevenue}}` is a variable with revenue attached to the conversion.
4. Select an existing trigger or create a new one (depending on the `dataLayer` format).
## Create a tag with metadata
The example below adds a payment method and order ID as metadata to the goal conversion. To create a tag with metadata:
1. Click **New**.
2. Name your tag.
3. Select **Custom HTML** in **Tag Configuration**, and insert this code:
```javascript theme={null}
```
* **`123456`** is the Kameleoon goal ID.
* **`{{ TransactionRevenue }}`** is a variable with revenue attached to the conversion.
* **`{{ paymentMethod}}`** is a variable with the payment method attached to the conversion, and **`0`** is the index of the custom data where the variable will be added.
* **`{{ orderID }}`** is a variable with the order ID attached to the conversion, and **`1`** is the index of the custom data where the variable will be added.
4. Select an existing trigger or create a new one (depending on the `dataLayer` format).
# Manage goals
Source: https://docs.kameleoon.com/user-manual/assets/goals/manage-goals
Find, edit, duplicate, delete, and bulk-manage goals from the Kameleoon Goals dashboard using filters, sort options, and grouped actions.
As your experimentation program grows, goals accumulate across experiments and sites. Without a central place to manage them, updating or finding a goal requires opening each experiment individually. The Goals page lets you find, edit, duplicate, delete, and bulk-manage all your goals from one view.
## Access the Goals page
Click **Settings** > **Goals** to open the Goals page.
## Manage your goals
Each goal appears as a card on the Goals page.

The **Engagement** goal is included by default for all sites associated with your Kameleoon account. It records the number of visitors who open at least one other page after your landing page.
### Find a goal
Use the **search bar**, **filter tool**, and **sorting tool** to locate a specific goal.
#### Filter goals
To filter goals, select one or more criteria, then click **Apply**:
* **Project**: show goals associated with specific websites.
* **Type**: show goals of a specific type (for example, custom goals only).
* **Status**: show goals by status—Active or Inactive.
* **Tag**: show goals with specific tags.
* **Key date**: show goals by last modification or creation date.
* **Creator**: show goals created by specific users.
* **Tracking AI**: show goals that use tracking AI.
#### Sort goals
To sort goals, hover over a column header and click the chevron to toggle ascending or descending order. You can sort by:
* **Name**: alphabetical order.
* **Linked to**: campaign type.
* **Edited**: edition date.
* **ID**: goal ID.
* **Created**: creation date.
* **Website**: associated website, alphabetically.
### Edit a goal
To edit an existing goal:
1. Find the goal's card.
2. Click **Edit**. A pop-in opens where you can make changes.
Editing a goal that is configured on a running, paused, or planned experiment changes how Kameleoon measures your conversions, making results analysis more complex. Stop and duplicate the experiment before editing any of its goals.
3. Click **Validate** to save your changes.
### Duplicate a goal
To duplicate a goal:
1. Find the goal's card and click the **three-dots menu** on the right.
2. Click **Duplicate**. The Duplicate sidebar opens.
3. Click **Continue** to confirm the duplication.
### Delete a goal
To delete a goal:
1. Find the goal's card and click the **three-dots menu** on the right.
2. Click **Delete**.
### Select multiple goals
You can select multiple goals and apply a bulk action to all of them at once.
To enter multi-select mode:
1. Click the **three-dots menu** on any goal's card.
2. Click **Select**. The goals become selectable and the **Grouped actions** sidebar opens.
To select or deselect all goals on the page, click **Options**, then **Select all** or **Deselect all**.
The following bulk actions are available in the **Grouped actions** sidebar:
* **Activate**: activate all selected goals.
* **Disable**: disable all selected goals.
* **Manage tags**: apply or remove tags across selected goals.
* **Export**: export selected goals as **PDF** or **Excel**. Set export options if needed, then click **Export Dashboard**.
# Retention, bounce, and exit rates
Source: https://docs.kameleoon.com/user-manual/assets/goals/retention-bounce-and-exit-rates
Understand how Kameleoon measures retention and bounce rates and how these metrics compare to engagement and bounce rates in Google Analytics 4.
If you use Kameleoon alongside Google Analytics 4, you may notice that their retention and bounce rate numbers don't match. This happens because the two platforms define these metrics differently: Kameleoon measures whether a visitor clicked on their landing page, while GA4 measures session engagement across a broader set of criteria.
Understanding this difference is important before you interpret experiment results or compare data across tools. This article explains how each platform calculates retention and bounce rates, what those numbers mean in practice, and how to track bounce rate in Kameleoon. It also covers the exit rate, which exists in GA4 but has no equivalent in Kameleoon.
## Retention rate
In Kameleoon, the retention rate measures **how many visitors and visits make a click on the first page they land on**. It is the **opposite of the bounce rate**. Kameleoon provides this as a pre-created goal, so you only need to attach it to an experiment to start tracking conversions.
Use this goal only for experiments running on landing pages. Otherwise, the goal may trigger before the visitor is targeted, which prevents the test from recording the conversion. Tests only record post-targeting conversions.
**Kameleoon example:**

The page's retention rate above is higher for the variations compared to the original version. In the screenshot above, approximately 55% of visits included at least one click on their landing page, which is also the targeted page (the click occurred after the targeting).
GA4 defines the engagement rate as the **percentage of sessions that lasted more than 10 seconds, had conversion events, or included more than one page view**. It measures engagement **at the session level**, meaning that if a user interacts with a second page or triggers an event, GA4 considers the session engaged. The engagement rate is useful for analytics, providing insights into engagement across any page of the entire site.
**GA4 example:**

The site's engagement rate above is the percentage of engaged sessions compared to the total sessions. In the above screenshot, email led to 1,356 engaged sessions out of 1,630 total, equating to an engagement rate of 83.19%.
See the [GA4 documentation](https://support.google.com/analytics/answer/12195621?hl=en) for more information on how to improve the retention rate.
## Bounce rate
The bounce rate measures **how many visitors and visits leave the site without making any click on the page**. This metric is the **opposite of the retention rate**.
You can add the code below to the **Kameleoon Global Script** to track conversions when visitors bounce (when they leave the page without clicking). This script runs on **all pages**, meaning the script records a bounce on the **last page the visitor viewed**. To track the **bounce rate for a specific page**, simply wrap the code in an `if` statement that checks the page URL.
```javascript theme={null}
// set the right GOAL_ID below
if(document.location.href.includes('cart')) {
Kameleoon.API.Goals.processConversion(GOAL_ID)
const handleBounceConversion = () => {
Kameleoon.API.Goals.cancelConversion(GOAL_ID)
document.removeEventListener('click', handleBounceConversion)
}
Kameleoon.API.Utils.addEventListener(document, 'click', handleBounceConversion)
}
```
**Kameleoon example:**

The page's bounce rate above is lower for the variations compared to the original version (which is set as the winning variation since it has a higher conversion rate). In the screenshot, about 45% of visits did not make any clicks on their landing page. Note that, in this example, the code only tracks the bounce goal on the landing page.
GA4 defines the bounce rate as the **percentage of sessions that lasted less than 10 seconds, had no conversion events, or included only one page view**. It measures bounce **at the session level**, meaning that if a user interacts with a second page or triggers an event, GA4 does not consider the session a bounce. The bounce rate is useful for analytics, providing insights into engagement across any page of the entire site.
**GA4 example:**

GA4 doesn't have a standard bounce rate report. You'll need to customize individual reports in order to see it.
Bounce rate is the percentage of sessions that aren't engaged. In the case above, that would be 16.81% (because you can subtract the 83.19% of engaged sessions from 100%).
See the [GA4 documentation](https://support.google.com/analytics/answer/12195621?hl=en) for more information on how to improve the bounce rate.
## Exit rate
In GA4, for a given page, the exit rate is the ratio of sessions where that page was the last page viewed to the total number of sessions that included that page.
**GA4 example:**
* Session 1: page A → page B → page C
* Session 2: page A
* Session 3: page A → page C
* Session 4: page B → page C → page A → page B
The exit rate for page C is **66%**, as it was the last page viewed in 2 sessions (sessions 1 and 3) out of 3 sessions that included that page (sessions 1, 3, and 4).
See more info in [GA4 documentation](https://support.google.com/analytics/answer/11080047?hl=en).
Kameleoon cannot record the exit rate, because its data structure is based on visits and visitors rather than page views.
# Revenue goal
Source: https://docs.kameleoon.com/user-manual/assets/goals/revenue-goal
Set up accurate revenue goal tracking in Kameleoon using tag managers, global scripts, or SDKs, with guidance on currency, format, and deduplication.
Setting up a revenue goal in Kameleoon is straightforward, but it requires careful configuration to ensure everything works correctly. Every website has its own structure, purchase flow, tracking setup, and edge cases, so there's no one-size-fits-all solution. Without proper configuration, you risk missing key data points, double-counting transactions, or misinterpreting performance.
The recommendations below cover the most common challenges Kameleoon users encounter and offer flexible solutions you can adapt to your setup.
## Implementation method
Kameleoon supports multiple integration methods to track revenue goals effectively, depending on your experimentation type and technical setup. The sections below cover the recommended approaches for both Web Experimentation (WE) and Feature Experimentation (FE), including support for offline conversions via the Kameleoon Data API.
### Web Experimentation
* **Using a tag manager:** Implement the [`kameleoonQueue`](../../../developer-docs/apis/activation-api-js/api-reference/command-queue#syntax), which ensures that conversion events trigger in sync with your analytics platform, maintaining data consistency across tools and improving your site's performance. For a detailed implementation guide in Google Tag Manager, refer to [this comprehensive guide](../../integrations/as-a-destination/analytics/google-analytics-4/google-tag-manager) and the configuration steps below to set up the revenue goal.
* **[Using the global custom script:](../../project-management/manage-your-projects#global-script)** If `kameleoonQueue` isn't compatible with your setup, you can manually implement the revenue goal using the Activation API within the global custom script in the Kameleoon app.
### Feature Experimentation
If you're using one of [Kameleoon's SDKs](../../../developer-docs/feature-experimentation/get-started/overview), you can track revenue goals using the [`trackConversion()`](../../../developer-docs/sdks/web-sdks/nodejs-sdk#trackconversion) method. Refer to the steps below to properly configure the revenue goal based on your SDK environment.
### Data API
*(Applicable for both WE and FE)*
For offline conversions, such as purchases completed over the phone or in-store, you can use the [Kameleoon Data API](../../../developer-docs/apis/data-api-rest/tutorials/processing-offline-goal-conversions-in-experiments#sending-offline-goal-conversion) to process offline goal conversions. This method is best when the conversion event occurs outside the user's online journey but still must be tracked and attributed within your Kameleoon experiments.
## Configuration
### Scope
Before setting up your revenue goal, check whether the transaction confirmation always occurs on a single, consistent page. In some setups—especially those involving mobile apps, embedded checkouts, or third-party payment providers—the confirmation might appear in a web view or on a separate domain. Install Kameleoon on **all** relevant pages or views where confirmation may appear. This ensures Kameleoon reliably tracks conversions and captures all revenue data. If a user can complete a transaction across multiple URLs (due to variations in query parameters or different payment flows, for example), add **all relevant URLs** in Kameleoon's settings so that no conversions are missed.
### Transaction goal (access the confirmation page)
Set a goal for accessing the confirmation page without a revenue amount. This goal helps you identify missing conversions for the revenue goal—delays in loading the revenue amount on the page (in the DOM, `dataLayer`, or a similar object) are a common cause of missed conversions. To set up a transaction goal in WE, choose between two goal types:
* **Access to a page:** Set the URL in the goal's configuration. Depending on the URL's structure, use either **URL contains** or **Matches the regular expression** to account for variations in the URL (different paths or query parameters, for example). Avoid **Corresponds exactly to**, as the URL will likely include parameters that vary.
When using the **Access to a page** goal type, if visitors can reload the confirmation page without being redirected (to the homepage, for example), the goal may trigger again. In this case, use the **converted visits** metric rather than **all conversions** on the Results page to avoid overcounting.
* **Custom goal:** This goal type prevents the goal from converting again if the confirmation page reloads. Implement a custom goal in the global custom script and use a `sessionStorage` check to prevent duplicate conversions (see the example code below). This approach is recommended because you can reuse the same code to trigger the revenue goal, which improves performance by eliminating the need for a native **Access to a page** goal.
```javascript theme={null}
if (
document.location.href.includes("/confirmation/") &&
!window.sessionStorage.getItem("kameleoonGoalConverted")
) {
// Set an item in sessionStorage to prevent a second conversion if the page is reloaded
window.sessionStorage.setItem("kameleoonGoalConverted", "true");
// Convert the transaction goal, replace the ID below
Kameleoon.API.Goals.processConversion(355733);
} else if (!document.location.href.includes("confirmation")) {
// Remove the item from sessionStorage to allow conversion for a new transaction
window.sessionStorage.removeItem("kameleoonGoalConverted");
}
```
### Revenue format
Ensure the revenue amount is properly formatted and validated before processing:
* Replace commas (`,`) with periods (`.`) for decimal consistency.
* Remove any spaces (can be present in amounts over 1,000).
* Strip out currency symbols (such as `$`).
* Convert the cleaned string into a numeric data type for accurate calculations.
For example:
```javascript theme={null}
let revenue = parseFloat(revenue.replace(",", ".").replace(/user-manual/[^0-9.]/g, "").replace(/user-manual/\s+/g, ""));
```
### Currencies
A website may support multiple currencies. Compare conversion values expressed in the same currency to avoid misleading results or incorrect analyses. Verify that the currency used in your tracking and reporting is consistent across all conversions.
You can trigger a goal for each currency and/or use Kameleoon's conversion web service. The endpoint is provided below—ensure all arguments passed are valid.
```
;
```
Never convert the same goal using amounts in different currencies. You must either create a separate goal for each currency, or unify them by setting up a global goal using the web service endpoint above. This service converts all amounts into a single currency of your choice.
See the complete code example at the end of this article for a detailed implementation of the currency conversion web service.
### Order ID
Add a [custom data](../custom-data/create-custom-data) to store the order ID and use it as [metadata](./create-a-goal#metadata) for the revenue goal. This links each conversion to the order ID, making it easier to match transactions with your analytics tool and investigate data discrepancies.
Configure the custom data using the screenshot below as a reference. Adjust the format depending on whether the order ID on your site is a number or a string.
To associate the **OrderID** custom data with your revenue goal:
1. In the goal creation flow, enter your goal's information and select **Custom goal** as the goal type.
2. Click **Next** > **Advanced settings**.
3. Toggle **Collect metadata, associating goals to custom data**.
4. Select **OrderID** from the dropdown.

See the complete code sample below for how to set the custom data value.
## Complete example
*This example is for WE and can be used as a reference for implementation in FE.*
Now that you've reviewed each key element—scope, transaction logic, revenue format, currency handling, and order ID tracking—you're ready to bring everything together.
Below is a complete example of how to implement the revenue goal using the global custom script in Kameleoon.
```javascript theme={null}
// Amount conversion using Kameleoon's currency conversion web service
const convertCurrency = async (revenue, inputCurr, outputCurr) => {
if (revenue == 0) return 0;
const response = await fetch(
`https://customers.kameleoon.com/kameleoon/currencies/convert?inputCurr=${inputCurr}&outputCurr=${outputCurr}&amount=${revenue}`,
{
method: 'GET',
headers: {
'Content-Type': 'text/plain',
},
}
);
return response.json();
};
// Logic to:
// - Convert the transaction goal
// - Convert a goal for each currency
// - Convert the global revenue goal
// - Set the orderID custom data
// repalce all goal IDs in the code
if (document.location.href.includes("/confirmation/") && !window.sessionStorage.getItem("kameleoonGoalConverted")) {
Kameleoon.API.Goals.processConversion(355733); // Transaction goal
sessionStorage.setItem("kameleoonGoalConverted", "true");
let revenueLayer;
Kameleoon.API.Core.runWhenConditionTrue(() => {
revenueLayer = window.dataLayer?.find(layer => layer.ecommerce?.purchase?.actionField?.revenue);
return revenueLayer;
}, () => {
let revenue = parseFloat(revenueLayer.ecommerce.purchase.actionField.revenue);
const inputCurr = revenueLayer.ecommerce.purchase.actionField.inputCurrency;
const orderID = revenueLayer.ecommerce.purchase.actionField.orderID;
if (!isNaN(revenue)) {
revenue = revenue.toString().replace(",", ".").replace(/user-manual/[^0-9.]/g, "").replace(/user-manual/\s+/g, "");
// Currency-specific revenue goals
switch (inputCurr) {
case 'GBP':
Kameleoon.API.Goals.processConversion(355641, revenue);
break;
case 'USD':
Kameleoon.API.Goals.processConversion(355643, revenue);
break;
case 'EUR':
Kameleoon.API.Goals.processConversion(355642, revenue);
break;
default:
Kameleoon.API.Goals.processConversion(355649); // Other currencies (no revenue passed)
}
// Global revenue goal in output currency (you can use ISO 4217 codes for each country)
const outputCurr = "USD";
convertCurrency(revenue, inputCurr, outputCurr).then((convertedRevenue) => {
// The custom data must be set before the goal is converted
Kameleoon.API.Data.setCustomData("orderID", orderID);
Kameleoon.API.Goals.processConversion(353518, convertedRevenue);
}).catch((error) => {
// Create a Custom Data to store potential errors for debugging
Kameleoon.API.Data.setCustomData("[KAM] - currency webservice error", `error: ${error.toString()}; revenue: ${revenue}; inputCurr ${inputCurr}; outputCurr ${outputCurr}`);
console.error("Error in currency conversion:", error);
});
}
});
} else if (!document.location.href.includes("/confirmation/")) {
sessionStorage.removeItem("kameleoonGoalConverted");
}
```
Below is a screenshot of the `dataLayer` structure on the confirmation page for reference.

Setting up a reliable revenue goal in Kameleoon requires careful alignment with your site's structure, `dataLayer` setup, and currency formats. By following the guidelines above, whether through a tag manager or global custom script, you can ensure accurate tracking, reduce discrepancies with your analytics tools, and gain more meaningful insights from your experiments. Test thoroughly and validate your implementation to maintain data integrity.
# Set up a goal campaign
Source: https://docs.kameleoon.com/user-manual/assets/goals/set-up-a-goal-campaign
Apply a goal to an experiment or personalization to start tracking conversions and measuring campaign performance.
Creating a goal makes it available in Kameleoon, but goals don't track conversions on their own. You must link each goal to the specific experiments or personalizations where you want to measure performance. Until you do, those campaigns have no way to record whether a visitor converted.
## Create a new goal
[Read this article to learn how to create a new goal](./create-a-goal).
## Set up a goal in an experiment
To apply a goal to an experiment:
1. Go to the **Goals** section on the editor's finalization page. The list of existing goals appears.
2. Select the goal you created.

3. Click **Next**.
## Set up a goal in a personalization
To add a goal to a personalization:
1. [Open your desired personalization or create a new one](../../web-personalization/set-up-and-launch-a-personalization).
2. Open the **Goals** section in the finalization flow. The list of existing goals appears.
3. Select an existing goal.

# Edit an image
Source: https://docs.kameleoon.com/user-manual/assets/images/edit-an-image
Resize, crop, draw, add shapes, and apply filters to images directly in the Kameleoon Media library Image editor.
The Kameleoon Media library includes a robust Image editor that lets you modify images directly within the platform. This article will help you access and use the editor.
## Access the Image editor
* **During upload:** After uploading a new image, the editor will open automatically, letting you make adjustments before saving the image to your library.
* **From the Media library:** To edit an existing image in the library, hover over an image and click the three-dots menu. Select **Edit Image** from the dropdown menu. The Image editor opens.

## Structure of the Image editor

* **The top toolbar** includes options to:
* Resize
* Crop
* Flip
* **The left toolbar** provides more in-depth editing tools, such as:
* Frame
* Draw
* Shapes
* Filters
* **In the top right** of the Image editor, you can expand the pop-up, undo your changes, reapply them, or swap the current image for another without leaving the editor.
## Edit image content
Use the toolbar to make changes to your image. You can resize, crop, add shapes, or apply filters.
### Frame
Here, you can resize, crop, or flip your image.
#### Resize
To resize your image, click **Resize**. Enter the desired dimensions or use the slider to adjust the image's size.
#### Crop
Select **Crop** if you need to trip your image's edges. You can choose a preset dimension or freely select the crop area.
#### Flip
Use the **Flip** tool to flip your image horizontally or vertically.
### Draw
Use **Draw** to draw on your images. Select the brush size and color to personalize your drawing.
### Shapes
Insert shapes using the **Shapes** tool. You can adjust the size, color, and position of the shapes as needed.
### Filters
Apply filters to your image using **Filters**. You can also adjust your image's brightness, noise, or threshold by clicking **Adjustments**.
## Edit image details
You can edit metadata such as the image name, tags, or description by clicking **Edit Image Details** at the bottom of the editor.
## Save or discard changes
* **Save image**: Click **Save image** to save your changes and return to the Media library.
* **Discard changes**: Close the editor without saving to discard your changes.
# Manage your images
Source: https://docs.kameleoon.com/user-manual/assets/images/manage-your-images
Search, filter, sort, and perform actions on images in the Kameleoon Media library, including editing, tagging, duplicating, and deleting.
The Kameleoon Media library offers a variety of tools to help you manage your images. This article covers using the search and filter options, accessing image-specific actions, and customizing your library view.
## Searching and filtering images
* **Search bar:** Located at the top of the Media library, the search bar lets you find images by entering a keyword or file name.
* **Filters:** On the Media library's right side, you can filter images by file type (for example, JPEG, PNG, GIF, WEBP, SVG). Select a file type, then click **Apply** to update the displayed images.
## Image display options
The Image Library provides two display options:
* **Grid view (default view):** Displays images in a thumbnail format.
* **List view:** Displays images in a list format with additional details, such as modification date, creator, and tags.
Switch between views by clicking their icons in the upper-right corner.

## Sorting images
Click the **Sort** icon to change the images' display order. You can sort images by:
* **Modification date** (newest or oldest first)
* **Upload date** (newest or oldest first)
* **Alphabetical order** (A to Z or Z to A)

## Managing individual images
Click an image's **three-dots** menu to access available secondary actions:
* **Edit image:** Opens the selected image in the Image editor.
* **See image details:** Displays the image’s metadata, including size, format, dimensions, creator, creation date, and modification date. You can also copy the image link or edit the image's name, alt text, and description.
* **Manage tags:** Tags help organize images, making them easier to find when searching. Click **Add a tag** in the **Image details** panel to assign tags to the image.
* **Download image:** Allows you to download a copy of the image to your device.
* **Duplicate image:** Creates a copy of the image within the library.
* **Select multiple images:** Enables grouped actions by selecting multiple images.
* **Delete:** Permanently removes the image from the library.
# Upload an image
Source: https://docs.kameleoon.com/user-manual/assets/images/upload-an-image
Access the Kameleoon Media library and upload images from your computer or via URL to use in your campaigns.
The Kameleoon Media library lets you upload and manage images used in your campaigns. This article will help you access the Media library, understand its structure, and upload new images.
## Accessing the Media library
To access the Media library, click **Studio** > **Media library**.
## Image Library structure

In the Media library, you'll find:
* **Search bar:** At the top of the page, you can search for images by name.
* **Filter options:** Filters on the right let you refine images by file type.
* **Image display:** Images are displayed in a grid view by default. You can toggle between grid and list view for easier navigation.
* **Add an image button:** Upload new images using this button.
* **Image details and options:** Hover over any image to access details and options.
## Uploading a new image
1. Click **Add an image**.
2. Choose a project to associate the image with in the dropdown > click **Continue**.
3. Choose an upload method:
* **Upload from computer:** Select an image file from your computer.
* **Upload via URL**: Prove the URL of the image you want to use.
The following file formats are accepted: PNG, JPG, GIF, SVG, and WebP, with a maximum file size of 3 MB.
4. After selecting an image, the **Image editor** will open, letting you edit your image (for example, resize, crop, add shapes).
5. Click **Save Image** to add it to the Image Library.
Images you add to your library are automatically removed after 12 months if they're not associated with an active campaign or widget.
# Create a segment
Source: https://docs.kameleoon.com/user-manual/assets/segments/create-a-segment
Learn how to use the Kameleoon Segment Builder to define and target visitor groups based on their characteristics and behavior.
*For a video tutorial on targeting segments, visit [the Kameleoon Academy](https://academy.kameleoon.com/how-to-plan-your-first-experiment/162036?utm_source=user_manual\&utm_medium=online).*
Use segments to target your visitors. You can create, modify, and duplicate segments with the Kameleoon Segment Builder.
## Access the Segment Builder
### From the app
To access the Segment Builder in the Kameleoon app, click **Settings** > **Segments**.

Click **New segment**. Kameleoon opens the segment creation pop-in.
### From the A/B finalization flow
You can create a new segment directly from the A/B test finalization flow. This opens the segment creation pop-in.
## Create a new segment
### Types of segmentation
Kameleoon manages two types of segmentation:
* ***A posteriori* segmentation** occurs after the test. *A posteriori* segmentation only shows if a variation's performance has increased in a given segment. Kameleoon does not manage this type of segmentation. Your web analytics solution (for example, Google Analytics, KISSmetrics, or AT Internet) usually handles it.
* ***A priori* segmentation** targets a specific fragment of your traffic because the test only applies to this segment. For instance, if you have a website with international users, you might want to run an experiment for only users in France. Similarly, you could test an offer that only displays to a specific segment (for example, first-time visitors). Kameleoon manages this type of segmentation.
### Enter segment information
Fill in:
* Your segment's name.
* The site for which you are creating this segment.
* The type of campaign for which you are creating this segment:
* **Web experiment/Personalization**
* **Feature flag/SDK experiment**
* **All experiment types**
The available conditions in the next step depend on the campaign type you choose.

You can also add a description, tags, or choose to use the segment in [Audiences](../../ai-opportunity-detection/audiences-segment-analysis).
You can update your segment information in the final step of the creation process within the recap panel.
### Select and set a condition
To add a condition, drag and drop a condition from the left-hand list to the field on the right.

The pop-in shows the condition's settings after you drag and drop it. Configure the condition as needed.
### Delete a condition
Click the **X** icon to delete a condition.
### Narrow or add a new condition
To add a new condition when you've already selected a condition, two options are available:
* **Narrow an existing condition:** Further specifies a condition, similar to using mathematical parentheses: (Condition A and Condition B) and Condition C.
* **Add a new condition:** Adds a condition at the same level: Condition A and Condition B and Condition C.
For more information, refer to the [FAQ](../../faq).
#### Quickly add conditions
You can quickly add multiple conditions of the same type by clicking the small **+** icon on the right side of the condition. This feature is available for conditions frequently used in large numbers.

When you add multiple identical conditions, Kameleoon links them with an **OR** operator. The dropdown menu updates to **is including any of** or **is not including any of**.

Once you add multiple identical conditions, you can delete them individually.
### Use logical links between conditions
Create effective targeting segments by combining various conditions to define your audience. The use of the logical operators AND/OR is crucial in this process. Additionally, understanding the distinction between “include” and “exclude” conditions is essential for accurate segment configuration.
#### Logical operators: AND vs. OR
**AND Operator:** Use the AND operator (select **If all** from the dropdown) when you want the visitor to meet all specified conditions to include them in your segment. This operator narrows your target audience to those who meet all defined criteria.
* **Example:** If you set an AND condition for "New Visitors" AND "On Mobile", Kameleoon only includes visitors who are both new to your site and accessing it via a mobile device.
**OR Operator:** Use the OR operator (select **If any** from the dropdown) when you want the visitor to meet any one of the specified conditions to include them in your segment. This operator broadens your target audience.
* **Example:** If you set an OR condition for "New Visitors" OR "On Mobile", Kameleoon includes visitors who are either new to your site or accessing it via a mobile device.
Kameleoon prioritizes AND over OR.
### Is versus Is not conditions
**Is condition:** Select an **Is** condition to include visitors who meet specific criteria in your target segment.
* **True:** Visitor possesses the characteristic (for example, desktop device type is true).
* **False:** Visitor does not possess the characteristic (for example, desktop device type is false).
**Is not condition:** Specify an **Is not** condition to exclude visitors who meet specific criteria from your target segment.
* **True:** Visitor does not possess the characteristic (for example, desktop device type is false, meaning the device type is **not** desktop, so they are included).
* **False:** Visitor possesses the characteristic (for example, desktop device type is true, meaning the device type **is** desktop, so they are excluded).
### Practical examples and common pitfalls
* **Including New Visitors on Smartphone:**
* **Condition 1:** New Visitor (Is)
* **Condition 2:** On Smartphone (Is)
* **Logical link:** AND
* **Outcome:** Kameleoon includes only new visitors accessing the site on mobile devices.

* **Excluding Returning Visitors on Desktop:**
* **Condition 1:** New Visitors (Is)
* **Condition 2:** On Desktop (Is not)
* **Logical link:** AND
* **Outcome:** Kameleoon excludes returning visitors on desktop.

* **Including Visitors from Specific Acquisition Channels:**
* **Condition 1:** Acquisition Channel is SEO (Is not)
* **Condition 2:** Acquisition Channel is SEA (Is)
* **Logical Link:** AND
* **Outcome:** Kameleoon includes only visitors arriving via SEA campaigns (excluding SEO).

* **Excluding Checkout Process Pages:**
* **Condition 1:** URL contains /cart (Is not)
* **Condition 2:** URL contains /login (Is not)
* **Condition 3:** URL contains /payment (Is not)
* **Logical Link:** OR
* **Outcome:** Kameleoon excludes pages related to the checkout process.
If you are not sure if you configured everything correctly, [use the simulation panel](../../experimentation/web-experimentation/configure-and-launch/simulate-a-campaign).
## Review and save
After you click **Next**, a summary panel opens on the right. Review the settings and definition.
* **Settings:** Displays the segment name, project, campaign type, description, tags, and if the segment is used in an audience. Click the **pencil** icon to edit any of these settings, then click **Save changes**.
* **Definition:** Displays your segment's definition. You can view a visual summary under the **Block Summary** tab or a text-based summary under the **Written Summary** tab.
Click **Create segment** to finish.
### Targeting conditions
Kameleoon offers targeting conditions to include or exclude specific visitor types.
The targeting conditions offered in the Segment Builder depend on the chosen campaign type.
#### Visitor characteristics
* **Device type:** includes or excludes visitors based on their device (tablet, smartphone, computer). You can also find this feature in the personalization creation flow.
* **Browser:** includes or excludes visitors based on their web browser. You can specify the browser version or target versions that are newer or older to other versions.
* **Geolocation:** includes or excludes visitors according to geolocation data (country, state, city).
* **Kameleoon segment:** This condition lets you include or exclude visitors based on their segment. You can import an existing segment into the Segment Builder. Its targeting conditions will then be associated with the new segment you're creating. For example, suppose you import the Kameleoon segment Returning visitors on mobile that you created and often use as a base. You adapt it to a specific campaign by adding the **Goal converted** condition, and you create this new segment.
* **Note:** The conditions that make up the imported segment cannot be modified: the segment is considered as a whole. When you use the same segment as a base in several segments associated with active campaigns, any change will have an impact on all relevant campaigns. Therefore, be careful when modifying your core segment. You can only nest segments one level deep. It's not possible to add a segment that already contains a Kameleoon segment inside another one. You can use the **Kameleoon Segment** condition several times to combine multiple segments.
* **Visitor IP Address:** includes or excludes visitors based on their IP address.
* **New or returning:** includes only new visitors (first visit) or those returning to your website.
* **Screen resolution:** includes or excludes visitors based on the size of their screen (in pixels).
* **Operating system:** includes or excludes visitors based on their operating system (for example, Windows MacOS).
* **Browser language:** includes or excludes visitors based on the language set in their browser.
* **Ad blocker:** includes or excludes visitors using an ad blocker.
#### Campaign exposure
* **Web experiment:** includes or excludes visitors who have been exposed to a specific experiment and have seen a specific variation or any of the variations (including the original). The condition considers the current visit or the previous ones. The selected experiment can be Online, Paused or Stopped.
* **Personalization:** includes or excludes visitors who have been exposed to a specific personalization. The condition considers the current visit or the previous ones. The selected personalization can be Online, Paused or Stopped.
* **Feature Flag:** includes or excludes visitors who have been exposed to a specific feature flag.
* **Exclusive Campaign:** excludes visitors already taking part in an experiment, a personalization, or both. This means that:
* If a visitor has already been exposed to another campaign (in the current or a previous visit), this visitor won't be eligible for your current experiment.
* A visitor can be targeted by other experiments that do not have the **Exclusive campaign** condition, even if they are currently part of an exclusive campaign. In other words, this condition doesn't prevent participation in other experiments. It allows visitors to participate in experiments that don't have the same exclusivity requirement.
If one of your campaigns or variations is used as a targeting condition in a segment, it cannot be deleted.
#### Conversions
* **Converted goal:** includes or excludes visitors based on whether they converted on a certain goal during the current visit or during previous visits.
* **Likelihood to convert:** Kameleoon's machine-learning algorithms predict each visitor's purchase or engagement intention in real-time. You can use this condition to automatically trigger personalization campaigns. For more information, refer to the [AI Predictive Targeting documentation](../../ai-predictive-targeting/target-users-based-on-likelihood-to-convert).
#### Technical
* **Custom JS:** Define a custom JavaScript function that returns true or false to determine whether Kameleoon includes a visitor in an experiment. There are three available options:
* **Run the condition in loop until it returns True, False or Timeout:** The function executes as soon as possible and continues running until a decision is made. It runs every 75 milliseconds before DOM Ready, then every 250 milliseconds after DOM Ready. To stop the execution, return `true` to target the visitor or return `false` to exclude them. For example:
```javascript theme={null}
if (window.dataLayer && window.dataLayer.some(layer => layer.pageType === "homepage")) return true; if (window.dataLayer && window.dataLayer.some(layer => layer.pageType !== "homepage")) return false;
```
* **Wait until the page has loaded:** The condition is only checked after DOM Ready, executing every 250 milliseconds until a decision is made. To stop the execution, return `true` to target the visitor or return `false` to exclude them. If `undefined` is returned, the function keeps running in a loop at the defined intervals.
* **Run the condition asynchronously:** Use this option when waiting for a response from an API or external service before determining whether a visitor should be included. Instead of returning a value, call `setTargeting(true)` or `setTargeting(false)`. For example:
```javascript theme={null}
const userId = localStorage.getItem("user\_id");
if (!userId) {
setTargeting(false);
return;
}
const apiUrl = `https://api.example.com/check-segment?userId=${userId}`;
fetch(apiUrl, { method: "GET", headers: { "Content-Type": "application/json" } })
.then(response => response.json())
.then(data => {
setTargeting(data?.isInSegment === true);
})
.catch(() => {
setTargeting(false);
});
```
* **Custom data:** This set of conditions lets you include or exclude visits based on custom data. For more information, see [this](../advanced-targeting-tools/manage-advanced-targeting-tools) article on advanced targeting tools. If you set values when creating your custom data, you can select them in the Segment Builder. Choose **is among the values** in the dropdown and check the values.
* **Browser cookie:** includes or excludes visitors based on the presence of a cookie in their browser and, if possible, its value.
* **SDK Type:** includes or excludes visitors based on the SDK type used.
* **App version:** includes or excludes visitors based on the version of the application.
#### Acquisition
* **Landing page URL:** includes or excludes visitors based on the URL of their landing page.
* **Traffic type:** includes or excludes visitor based on the website they came from, such as a search engine, an email link, or another referring website.
* The **traffic type** condition depends on either the landing page URL or the referrer URL:
* **Emailing** if the landing page URL contains the pattern `utm_medium=email or utm_medium=newsletter`.
* **Search engine (advertising, SEM)** if the landing page URL is from a Google domain and has `aclk` as path, **or** has the parameter `aclk` in the query.
* **Search engine (organic, SEO)** if the referrer URL contains `google`, `bing`, `yahoo`, `yandex`, or `baidu`.
* **Direct** if the referrer URL is empty (`null`).
* **Referrer sites (affiliation)** if you have a landing page URL and a referrer URL that does not contain `google`, `bing`, `yahoo`, `yandex`, or `baidu`.
* **Referring website URL:** includes or excludes visitors based on the referring URL.
* **Acquisition channel:** includes or excludes visitors based on the marketing or referral source that brought them to your website.
# Manage targeting segments
Source: https://docs.kameleoon.com/user-manual/assets/segments/manage-targeting-segments
Find, filter, sort, edit, duplicate, and delete targeting segments from the Kameleoon Segments dashboard.
## Access the Segments page
To access the Segments page in Kameleoon:
* Click **Configure** > **Segments** in the left sidebar.
## Manage your segments
Each segment is represented by a card that indicates its main information.
### Find a segment
A **search bar**, a **filter tool**, and a **sorting tool** help you find a particular segment.
#### Filter segments
You can filter the displayed segments based on several criteria:
* Project
* Tag
* Campaign type
* Linked to
* Key date
* Creator
* Characteristics
* Goal
##### Website
You can filter the displayed segments based on the websites with which they are associated.
Check the websites and click **Apply**.
##### Campaign type
*This filter is only available for Web experimentation + Feature experimentation customers.*
You can filter the displayed segments based on the type of campaign with which they are associated.
Here are the conditions for these filter criteria:
* **Feature flag/SDK experiment:** Segments containing the Visitor code condition or the Feature experimentation conditions and are not used in any experiment or personalization.
* **All experiment type:** Segments that are used in a Feature experiment and contain conditions common to both Feature and Web experimentation.
* **Web experiment/Personalization:** All other segments.
##### Linked to
You can filter the displayed segments based on whether they're associated with a campaign.
##### Tag
You can filter the displayed segments based on the tags with which they are associated.
Select or search for a tag. The segments with which these tags are associated will be displayed on the page. You can also check or uncheck all tags.
Click **Apply**.
##### Key date
You can filter the displayed segments based on the key date with which they are associated: last modification or creation date.
Select a date then click **Apply**.
##### Creator
You can filter the displayed segments based on their creator.
Check a creator then click **Apply**.
#### Characteristics
You can display segments used in Audiences.
Check a filter then click **Apply**.
#### Sort segments
The sorting option lets you sort your segments according to several criteria:
* Name
* Linked to (Campaign)
* Edition date
* Segment ID
* Creation date
* Website
##### Name
Hover over **Name** and click the chevron to sort segments in alphabetical (or reverse alphabetical) order.
##### Linked to
Hover over **linked to** and click the chevron to rank segments based on campaign type.
##### Edition date
Hover over **Edited** and click the chevron to sort segments from newest edition to oldest or vice versa.
##### Segment ID
Hover over **ID** and click the chevron to sort segment IDs in ascending or descending order
##### Creation date
Hover over **Created** and click the chevron to sort segments from newest creation to oldest or vice versa.
##### Website
Hover over **Website** and click the chevron to organize segments based on the website on which they are configured in alphabetical (or reverse alphabetical) order.
### Columns
Click **Columns** to edit which columns appear in the Segments table. Uncheck a box to remove the associated column from the table. Select your sorting criteria under **Sort by**. Click **Apply** to apply your changes.
Click **Save as view** to save your selection as a view. You can then select the view from the **Views** menu.
### Edit a segment
To edit an existing segment:
1. Navigate to a segment's card.
2. Click **Edit**. A pop-up opens.
3. Make your changes in the **Segment Builder**.
4. Click **Edit** to save your changes once they're complete.
### Duplicate a segment
To duplicate a segment:
1. Click the **three-dots menu** on the right side of a segment's card.
2. Click **Duplicate**. The **Duplicate** sidebar opens.
3. Click **Save** to validate the segment's duplication.
### Delete a segment
To delete a segment:
1. Click the **three dots menu** on the right side of a segment's card.
2. Click **Delete**.
### Multiple selection
You can select multiple segments at the same time and apply a common action to them. For example, you can delete several segments simultaneously.
To select multiple segments:
1. Click the **three dots menu** on the right side of a segment's card.
2. Click **Select**. The segments become selectable and the **Grouped actions** sidebar opens.
Several actions are possible:
#### Select all/deselect all
To select all segments, check the box next to **Select all**. To deselect all segments, click the **checkbox** again.
The actions you perform are applied to all selected segments.
#### Manage tags
In the **Grouped actions** sidebar, click **Manage tags**.
#### Export segments
In the **Grouped actions** sidebar, click **Export**.
Select a format: PDF or Excel. Set the export options if needed. Then, click **Export Dashboard**. Only the checked segments will be in the file.
# Regular expressions
Source: https://docs.kameleoon.com/user-manual/assets/segments/regular-expressions
Use regular expressions to target URLs with precise pattern matching in Kameleoon targeting conditions.
Kameleoon lets you target URLs using regular expressions.
Here is a detailed list of the most used regular expressions:
* `.` = Replace one character with another in your regular expression. For example, the expression `Kamele.on` will target URLs containing `Kameleoon`, `Kamele0n`, `Kamele8on`, etc.
* `*` = Delete the previous character or add the same character after. For example, the expression `Kameleoo*n`, will target URLs containing `Kameleon`, `Kameleoon`, `Kameleooon`, etc.
* `?` = Delete or leave the previous character. For example, `Kameleoo?n` will target URLs containing `Kameleon` and `Kameleoon`.
* `+` = Add the previous character once or several times. For example, `Kameleo+n` will target URLs containing `Kameleoon` and `Kameleoooon`.
* `|` = Target several chains of characters. It is like an "Or" operator. For example, `Kameleoon|Chameleoon` will target `Kameleoon` or `Chameleoon`.
* `^` = Targets the chain's beginning. `^Kameleoon` will target URLs starting with `Kameleoon`.
* `$` = Targets the chain's end. `Kameleoon$` will target URLs ending with `Kameleoon`.
* `()` = Creates groups of several elements. This regular expression is usually combined with `|`. For example, `Kameleoon (AB Testing|Conversion) Tool` will target `Kameleoon AB Testing Tool` or `Kameleoon Conversion Tool`.
* `[]` = Will target each character inside the `[]`. For example, `/Kameleoon/[234]` will target `Kameleoon 2`, `Kameleoon 3` and `Kameleoon 4`.
* `-` = `/kameleoon/[2-9]` will target every page from `Kameleoon 2` to `Kameleoon 9`.
* `{}` = Defines character instance limits. For example, `Kameleo{2,4}n` will target URLs containing `Kameleoon`, `Kameleooon`, or `Kameleoooon`.
If your character chain contains a special character (for example, `,`, `.`, `*`), add a backslash \ before it.
These expressions are case-sensitive.
Here are some examples of regular expressions:
* `^.{10}$` = targets URLs containing exactly 10 characters.
* `general\.(html|php)$` = targets URLs ending with either `general.php` or `general.html`.
* `/fr/` = targets URLs containing `/fr/`.
* `/annexes/.*d{3}` = targets URLs containing the fragment `/annexes/` and a three-digit number.
* `/annexes/.*d{2}.*test.html$` = targets URLs containing the fragment `/annexes/`, a two-digit number, and ending with `test.html`.
# Set up a segment in a campaign
Source: https://docs.kameleoon.com/user-manual/assets/segments/set-up-a-segment-in-a-campaign
Associate a targeting segment with an experiment or personalization to control which visitors are included in your campaign.
## Create a new segment
[To learn how to create a segment, read this article](./create-a-segment)
## Set up a segment in an experiment
In the finalization panel, select **Target a segment** in the **Targeting** step.
In the list of existing segments, select the segment you created.

Hover over the **information** icon to display the segment's targeting conditions.

Click the **X** icon to dissociate the segment from the experiment.
To associate a segment, you can also select **Target specific visitors** in the **Targeting** step. Select the segment and connectors you need. Using this option allows you to create quickly targeting conditions without re-creating a segment.
Click **Next**—this segment is associated with your experiment.
## Set up a segment in a personalization
Once a segment has been created, you must associate it with a personalization.
In the **Targeting** step, click **Target a segment** in the **Segments** panel. Then, click the segment you want to target.

The segment your experiment is targeting displays at the top of the page. Proceed with [finalization](../../experimentation/web-experimentation/configure-and-launch/finalizing-an-experiment) normally.
# Create a theme
Source: https://docs.kameleoon.com/user-manual/assets/themes/create-a-theme
Build a standardized design system in the Theme Builder by defining brand colors, fonts, and reusable components for your team's widgets.
Creating a theme lets you define a standardized design system for your team. You can set specific colors, upload brand fonts, and pre-build components directly in the Theme Builder.
## Create a new theme
1. Go to **Studio** > **Themes** in the left sidebar.
2. Click **Add a theme**.
3. Enter a name for the theme and select the **Project(s)** it will affect.
4. (Optional) Add a description and tags.
5. Click **Next** to open the **Theme Builder**.
### Define colors

Use the **Colors** section to define the palette available to users.
To restrict users to specific brand colors, toggle **Define theme colors** to **ON**.
* **Add a color:** Enter a hex code or click the **+** icon. You can select a color from the gradient, adjust opacity, or use the eyedropper tool to sample from your screen.
* **Manage colors:** Drag and drop colors to reorder them. Click the **trash** icon to remove a color.
If you add a component to the theme while **Define theme colors** is **ON**, that component's default colors are automatically added to your theme colors list.
Colors added here are available under **Theme Colors** in the Widget Studio.
#### Modifying locked colors
If a color is currently used by a component in your theme, you cannot delete it. However, you can edit the color. When you modify a color, the change automatically applies to every component in the theme that uses that color.
### Add fonts

In the **Fonts** section, determine which distinct typography users can access. Check a font from the list to include it in your theme. Use the search bar to search for a specific font.
You must select at least one font to add components to your theme. If you remove a font that is currently in use, the system defaults to the first font in your list.
To add a font:

1. Click **+ Add font**.
2. Select your font source:
* **From your website:** Enter the Font Family name.
* **Link to a font file:** Enter the Font Family name and the URL to the file.
* **Embed code:** Enter the Font Family name and the import code.
3. Click **Preview & add**.
4. Select the font weights you want to include.
5. Click **Add**.
### Add and manage components
The **Components** section allows you to pre-configure elements (like buttons, images, or forms) for your team and define which components are allowed in the theme. You can add the same component type multiple times to create variations—for example, a distinct "Submit" button and a "Cancel" button.
#### Add a component
1. Click **+ Add** next to **Components**.
2. Search for a component or browse categories in the left sidebar.
3. Select the components you want to include.
4. Click **Add components**.
#### Edit and lock components
Once a component is added to your list, click the **secondary actions** (three dots) menu to manage it:

* **Rename:** Give the component a descriptive name (for example, "Primary CTA").
* **Edit:** Open the component editor to adjust styles using [Widget Studio tools](../widgets/create-a-widget-with-the-widget-studio/edit-your-widgets).
* **Lock:** Restrict editing permissions for this component. Alternatively, click the **lock** icon next to the **Secondary actions** menu to lock a component.
* **When locked:** Users can only modify the content (text/images), position, and size. They cannot design elements like colors or borders.
* **When unlocked:** Users have full control to change the design.
## Activate your theme
When you finish configuring your theme, click **Activate** in the top right corner. The theme is now available for use in your experiments and personalizations.
To deactivate a theme later, click the status dropdown (**Active**) and select **Deactivate**, or use the Themes dashboard.
# Manage themes
Source: https://docs.kameleoon.com/user-manual/assets/themes/manage-themes
Search, sort, filter, and configure theme usage settings to enforce brand guidelines across projects in the Widget Studio.
Themes allow you to enforce brand guidelines across your projects. By defining specific colors, fonts, and reusable components, you ensure that all widgets created in the Widget Studio remain consistent with your brand identity.
This article explains how to access, organize, and configure usage settings for your themes.
## Access the Themes dashboard
To access the Themes dashboard, click **Studio** > **Themes** in the left sidebar.
From the dashboard, you can organize your view:

* **Search:** Use the search bar to find a specific theme by name.
* **Sort:** Click the **Sort** icon to order themes by **Modification date** (newest to oldest or oldest to newest) or alphabetically (**A to Z**, **Z to A**).
* **View:** Switch between Block view (grid) and List view using the icons next to the sort options.
* **Filter:** Open the **Filters** sidebar to refine the list by **Project** or **Status** (Active/Inactive). Click **Apply** to update the list.

## Configure theme usage and defaults
Administrators can control how strict theme usage is for each project. You can require users to apply a theme or allow them to create widgets without one.
1. On the **Themes** dashboard, click the **settings** (cog wheel) icon.
2. In the **Theme Usage & Default Themes** panel, locate the project you want to configure.
3. Select the usage mode:
* **Optional:** Users can choose whether to apply a theme when creating widgets.
* **Mandatory:** Users must select a theme to create a widget.
4. (Optional) Select a **Default Theme**. This theme will be pre-selected for users creating new widgets in this project.
5. Click **Save**.

## Edit and manage existing themes
Each theme card provides quick access to management actions:
* **Edit:** Click the **Pencil** icon to open the Theme Builder and modify colors, fonts, or components.
* **Secondary actions:** Click the **secondary actions** (three dots) menu to:
* **Preview theme:** View how the theme appears.
* **Rename theme:** Change the internal display name.
* **Manage tags:** Add or remove tags for organization.
* **Duplicate theme:** Create a copy of the theme.
* **Activate/Deactivate:** Toggle the theme's availability.
* **Delete:** Permanently remove the theme.
# Create a trigger
Source: https://docs.kameleoon.com/user-manual/assets/triggers/create-a-trigger
Learn how to use the Kameleoon Trigger Builder to define when and where an experiment or personalization should activate based on real-time visitor behavior.
A **trigger** defines the specific conditions visitors must meet for an experiment or personalization to activate. Use triggers to target visitors based on their real-time behavior or visit characteristics.
## Access the Trigger Builder
To start creating a new trigger:
1. In the left sidebar, click **Settings** > **Triggers**.
2. Click **New trigger**.
3. In the **New Trigger** window, enter a name for your trigger.
4. Select the **Project** you want to associate with this trigger.
5. (Optional) Add a description and tags to help organize your triggers.
6. Click **Next**.
## Define conditions
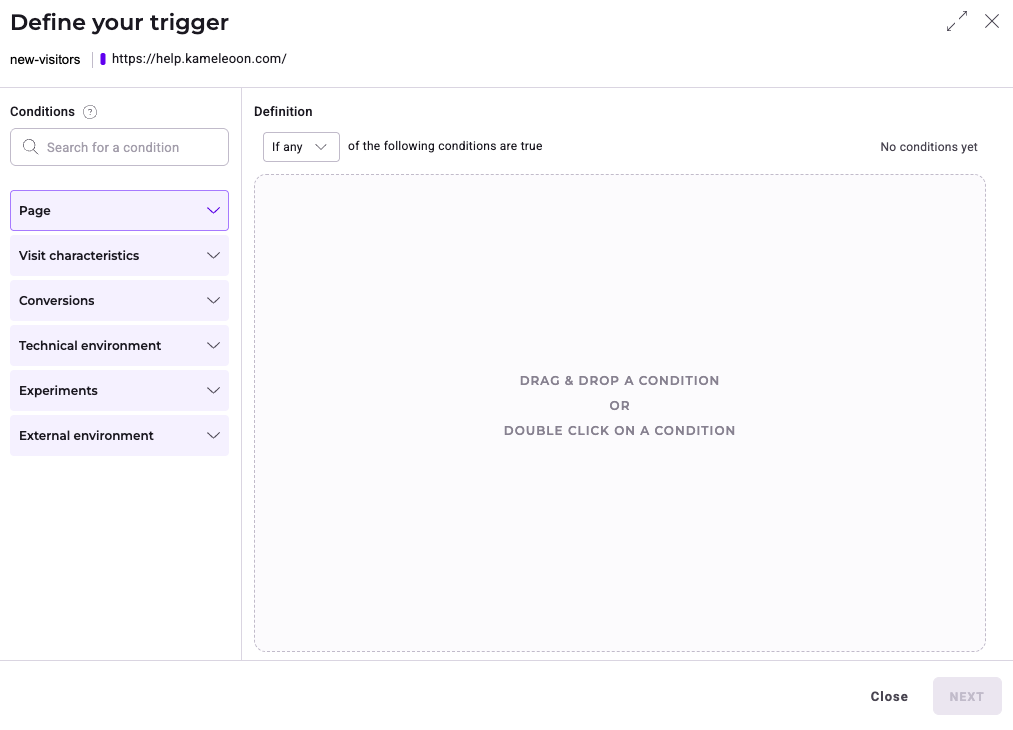
The Trigger Builder is where you define your trigger's logic. Select conditions from the sidebar and configure how they relate to one another.
1. **Select a condition:** In the left sidebar, scroll through the list or use the search bar to find a condition (for example, **Number of visits**). Click the condition to add it to the builder.
2. **Configure the condition:** Enter the relevant values for the condition (for example, **3 visits**).
3. **Add more conditions:** To add another layer of targeting, click **Refine** on an existing condition or select a new condition from the sidebar.
### Manage logic (AND/OR)
When you use multiple conditions, define how they work together using the dropdown menu at the top of the Trigger Builder or [condition group](#create-complex-groups):
* **If all (AND):** Kameleoon fires the trigger only if the visitor meets **every** condition in the group.
* **If any (OR):** Kameleoon fires the trigger if the visitor meets **at least one** of the conditions in the group.
### Create complex groups
Group conditions together to create advanced logic (nested conditions).
* **Reorder:** Click and drag a condition to move it up or down in the list.
* **Nest (Group):** Click and drag one condition on top of another to combine them into a subgroup with its own independent logic (**If any**/**If all**).
* For example, you can create a condition that targets visitors who have visited the site three times today **AND** viewed a certain product page at least once.
### Copy or delete conditions
* **Copy:** Click the **Copy** icon to clone a condition.
* **Delete:** Click the **X** icon to remove a condition.
#### Quickly add conditions
You can quickly add multiple conditions of the same type by clicking the small **+** icon on the right side of the condition. This feature is available for conditions frequently used in large numbers.

When you add multiple identical conditions, Kameleoon links them with an **OR** operator. The dropdown menu updates to **is including any of** or **is not including any of**.

Once you add multiple identical conditions, you can delete them individually.
***
When you are satisfied with your conditions, click **Next**.
## Review and save
After you click **Next**, a summary panel opens on the right. Review the settings and definition.
* **Settings:** Displays the trigger name, project, campaign type, description, and tags. Click the **pencil** icon to edit any of these settings, then click **Save changes**.
* **Definition:** Displays your trigger's definition. You can view a visual summary under the **Block Summary** tab or a text-based summary under the **Written Summary** tab.
Click **Create trigger** to finish.
***
After you save your trigger, it becomes available for use in experiments and personalizations.
## Conditions
This section provides a comprehensive list of available conditions and their functions.
### Page
* **Page URL:** includes or excludes visitors based on their current page URL.
* **Element on the page:** includes or excludes visits based on the presence of an element on the page. The condition performs a `querySelectorAll` loop **until the DOM ready event. After that, the condition returns `false`.**
* **Landing Page URL:** includes or excludes visitors based on the URL of the page where their visit started.
* **Page Title:** includes or excludes visitors based on their current page title.
* **Previous page:** includes or excludes visitors based on the URL of their previous page.
* **Key pages:** includes or excludes visitors who have visited specific pages that you defined as key pages.
* **Visited product pages:** includes or excludes visitors based on which/how many product pages they visited.
* **Price of the product page displayed:** includes or excludes visitors based on the price of the product they're currently viewing.
### Browsing behavior
* **Elapsed time since page loaded:** includes or excludes visitors based on the time since the page loaded.
* **Website exit:** includes or excludes visitors whose cursor has left the browser window. Use the Website exit condition to display retention-focused content, such as a discount offer or an email sign-up form, before a visitor navigates away. For a step-by-step example, see [Create an exit intent widget](../widgets/create-a-widget-with-the-widget-studio/create-an-exit-intent-widget).
* **Number of pages viewed:** includes or excludes visitors who have seen a certain number of pages.
* **Total number of visits:** includes or excludes visitors based on the total number of their visits.
* **Number of visits by page:** includes or excludes visitors based on their number of visits to a specific page.
* **Number of visits today:** includes or excludes visitors based on their number of visits today.
* **Number of visited product pages:** includes or excludes visitors based on how many product pages they have visited.
* **Elapsed time:** includes or excludes visitors based on the time elapsed during the session.
* **Elapsed time since first visit:** includes or excludes visitors based on the time since their first visit.
* **Elapsed time since last visit:** includes or excludes visitors based on the time since their last visit.
* **Elapsed time since session became active:** includes or excludes visitors based on the time since the beginning of the session.
### Campaign exposure
* **Web Experiment:** includes or excludes visitors who have been exposed to a specific experiment and have seen a **specific variation** OR **any of the variations** (original included). The condition considers current or previous visits. The selected experiment can be **Online**, **Paused**, or **Stopped**.
* **Personalization:** includes or excludes visitors who have been exposed to a specific personalization. The condition considers current or previous visits. The selected personalization can be **Online**, **Paused**, or **Stopped**.
* **Feature Flag:** includes or excludes visitors who have been exposed to a specific feature flag and have seen **any of the variations**, **On**, or **Off**, and have been assigned to **any variation** or a **specific variation**.
* **Exclusive Campaign:** excludes visitors already participating in an experiment, a personalization, or both, meaning that:
* If a visitor has already been exposed to another campaign (in a current or previous visit), Kameleoon will not target them in the current experiment.
* A visitor can be targeted by other experiments that do not have the **Exclusive campaign** condition, even if they are currently part of an exclusive campaign. In other words, this condition doesn't prevent participation in other experiments. It lets visitors participate in experiments that don't have the same exclusivity requirement.
Kameleoon prevents the deletion of campaigns or variations used as targeting conditions in a segment.
### Conversions
* **Converted goal:** includes or excludes visitors based on whether they converted on a certain goal during the current visit or during previous visits.
### Technical
* **Custom JS:** Define a custom JavaScript function that returns `true` or `false`. If the result is `true`, Kameleoon includes the visitor in the experiment. This function can be evaluated each time the page is displayed, or asynchronously.
* **Check condition immediately or when the page has loaded:** If `undefined` is returned, the code will retry execution every 75 ms for the first 3 seconds, then every 250 ms.
* **Run the condition asynchronously:** Kameleoon evaluates your JavaScript for each experiment.
* If you use the asynchronous condition, the callback function is `setTargeting`. Replace it in the code with `setTargeting(true)` or `setTargeting(false)`.
* **Custom data:** includes or excludes visitors based on specific custom data. To use this condition, you must first [create custom data](../custom-data/create-custom-data).
* **Custom event:** starts a personalization only when a specific event has been triggered. To trigger an event, use the [`Kameleoon.API.Events.trigger(eventName)`](../../../developer-docs/apis/activation-api-js/api-reference/api-reference#trigger) method.
* **Browser cookie:** includes or excludes visitors based on a cookie's presence in their browser and its value.
* **Explicit trigger:** explicitly triggers a campaign using the Kameleoon Activation API. Use explicit triggers for campaigns you implement with a modern JS framework (for example, React, Vue, Angular).
* **Kameleoon trigger:** includes or excludes visitors based on whether they fired another trigger.
### Acquisition
* **Traffic type:** includes or excludes visitors from specific sources (for example, search engine, emailing, website tributary).
* **Referring Website URL:** includes or excludes visitors based on the referring URL.
* **Acquisition channel:** includes or excludes visitors based on their acquisition channel.
### External environment
* **Day / Night:** includes or excludes visits during the day or night.
* **Weekday:** includes or excludes visitors on a specific day of the week.
* **Timeslot:** includes or excludes visitors within a given time period.
* **Date range:** includes or excludes visitors to the website during a given date range.
* **Sky condition:** includes or excludes visitors based on the weather in their location.
* **Temperature:** includes or excludes visitors based on their location's temperature.
# Manage your targeting triggers
Source: https://docs.kameleoon.com/user-manual/assets/triggers/manage-your-targeting-triggers
Find, filter, sort, edit, duplicate, and delete targeting triggers from the Kameleoon Triggers page.
## Access the Triggers page
To access the **Trigger** page, click **Configure** > **Triggers**.
## Manage your triggers
Each trigger is represented by a card that indicates its main information.

### Find a trigger
A search bar, a filter tool, and a sorting tool help you find a particular trigger.
#### Filter triggers
You can filter the displayed triggers based on several criteria:
* Project
* Linked to
* Tag
* Key date
* Creator
* Characteristics
* Goal

##### Project
You can filter the displayed triggers based on the projects with which they are associated. Check the projects and click **Apply**.
##### Campaign type
*This filter is only available for Web experimentation + Feature experimentation customers.*
You can filter the displayed triggers based on the type of campaign with which they are associated.
You can select from the following campaign types:
* **Feature flag / SDK experiment**: Triggers containing the “Visitor code” condition or the Feature experimentation conditions that are not used in any experiment or personalization.
* **All experiment types:** Triggers that are used in a Feature experiment and containing conditions common to both Feature experimentation and Web experimentation.
* **Web experiment / Personalization:** All other segments.
##### Linked to
You can filter the displayed triggers based on whether they are associated with a campaign.
##### Tag
You can filter the triggers based on the tags with which they are associated.
Select or search for a tag. The triggers with which these tags are associated will be displayed on the page. You can also check or uncheck all tags. Then, click **Apply**.
##### Key date
You can filter the displayed triggers based on the key date with which they are associated: last modification or creation date.
Select a date and click **Apply**.
##### Creator
You can filter the displayed triggers based on their creator. Check the creators and click **Apply**.
##### Characteristics
You can display triggers used in Audiences or with AI Predictive targeting. Check the filter and click **Apply**.
#### Sort triggers
You can sort triggers based on several criteria:
* Name
* Linked to (Campaign)
* Edition date
* Segment ID
* Creation date
* Project
##### Name
Hover over **Name** and click the chevron to sort triggers in alphabetical (or reverse alphabetical) order.
##### Linked to
Hover over **linked to** and click the chevron to rank triggers based on the campaign type.
##### Edition date
Hover over **Edited** and click the chevron to sort triggers from newest edition to oldest or vice versa.
##### Segment ID
Hover over **ID** and click the chevron to sort the triggers' IDs in ascending or descending order.
##### Creation date
Hover over **Created** and click the chevron to sort triggers from newest creation date to oldest or vice versa.
##### Project
Hover over **Project** and click the chevron to sort triggers based on the website on which they are configured in alphabetical (or reverse alphabetical) order.
### Edit a trigger
To edit a trigger:
1. Navigate to the trigger's card.
2. Click the **pencil** icon. The Trigger Builder opens.
3. Make your changes and click **Save** to save them.
### Duplicate a trigger
To duplicate a trigger:
1. Navigate to the trigger's card.
2. Click the **three-dots menu** > **Duplicate**. The **Duplicate** sidebar opens.
3. Click **Save** to validate your trigger's creation.
### Delete a trigger
1. Navigate to the trigger's card.
2. Click the **three-dots menu** > **Delete**.
### Multiple selection
You can select multiple triggers at the same time and apply a common action to them. For example, it is possible to delete several triggers simultaneously. To apply multiple actions to triggers:
1. Navigate to a trigger's card.
2. Click the **three-dots menu** > **Select**.
Triggers become selectable and the **Grouped actions** sidebar opens.

Several actions are available.
#### Select/deselect all
To select all triggers, click the **checkbox** next to **Select all**. Click the **checkbox** again to deselect all triggers.
#### Manage tags
Click **Manage tags** in the **Grouped actions** sidebar.
# Set up a trigger in a campaign
Source: https://docs.kameleoon.com/user-manual/assets/triggers/set-up-a-trigger-in-a-campaign
Add a trigger condition to an experiment to control when your campaign activates based on visitor events.
## Create a new trigger
Read [this article](./create-a-trigger) to learn how to create a trigger.
## Set up a trigger in an experiment
For more information on defining segments and triggers, refer to [this](../../experimentation/web-experimentation/configure-and-launch/define-your-experiments-targeting) article.
To set up a trigger in an experiment:
1. Click **Targeting** > **Target specific visitors** in the Graphic editor's finalization panel.

2. Select **Trigger** from the list of conditions.

3. Select the event with which you want to associate your trigger.

4. Click **Next** to associate the trigger with your experiment.
Click the **X** icon to dissociate a trigger from the experiment. You can add multiple conditions to your experiments.
# Create a new widget
Source: https://docs.kameleoon.com/user-manual/assets/widgets/create-a-new-widget
Start building a new widget in Kameleoon using the Widget Studio, the code editor, or PBX.
To create a new widget in [Kameleoon](https://login.kameleoon.com/app):
* Click **Studio** > **Widgets** > **New widget**.
You can choose to create a widget using code or the Widget Studio. Select an option and click **Start**.
* [Learn how to create a widget from code](./create-a-widget-from-code/creating-a-widget-from-code)
* [Learn how to create a widget using the Widget Studio](./create-a-widget-with-the-widget-studio/create-a-widget)
* [Learn how to create a widget using PBX](../widgets/pbx-widgets)
# Creating a widget from code
Source: https://docs.kameleoon.com/user-manual/assets/widgets/create-a-widget-from-code/creating-a-widget-from-code
Learn how to build highly customizable widget templates by coding them directly in the Kameleoon platform.
Create highly customizable widget templates by coding them directly in the Kameleoon platform.
Use one of our ready-to-use widgets or ask your developer for help if you are not comfortable coding.
## Create a new template
Follow these steps to create a new widget template with code:
1. Click **Studio** > **Widgets** > **New widget**.
2. Select **Using code**.
3. Name your template, associate a website, and optionally write a description and add tags.
4. Click **Create**.
## The template editor
The template editor contains three distinct areas.
### Left panel
The top-left corner displays your template's title. Hover over the title and click the **pencil icon** to rename the template.
Access two essential steps for creating your template in this panel:
* **Code to run**
* **Configuration form**
### Content zone

Enter your template's code in this area.
## Code the template
Use the central content area to code your widget template. This code generates the widget on your website's page. The editor provides three tabs for different code types:
* **JS** (JavaScript)
* **CSS**
* **HTML**
By default, the **JS** tab is active. Write your code in the blank area.
To validate your template, enter at least 10 characters in the **JS** tab. JavaScript is sufficient to create your template, but you can also add HTML or CSS.
Use this default CSS to format elements, such as lists and text fields, according to the Kameleoon stylesheet:
```css theme={null}
@import url('https://fonts.googleapis.com/css2?family=Montserrat:wght@300;400;500;700&display=swap');
body * {
font-family: "Montserrat";
font-size: 12px;
}
fieldset {
border: none;
border-bottom: 1px solid #dedede;
}
label {
display: block;
font-size: 12px;
margin-bottom: 5px;
}
input, select, textarea {
display: block;
padding: 8px 12px;
width: 100%;
border-radius: 4px;
border: 1px solid #eeeeee;
outline: none;
font: 400 12px "Roboto", sans-serif;
color: #333333;
background: white;
-webkit-transition: border-color 0.25s ease;
-o-transition: border-color 0.25s ease;
transition: border-color 0.25s ease;
}
input:hover, select:hover, textarea:hover,
input:focus, select:focus, textarea:focus {
border-color: #c6c6c6;
}
textarea {
resize: vertical;
}
input[type="checkbox"] {
display: inline-block;
width: auto;
position: relative;
top: 1px;
}
input[type="checkbox"] + label {
display: inline-block;
}
```
After writing the code, click **Configuration form** in the left panel to move to the user interface step.
### Special case: variables
To use a field (a variable) specified by the user in your widget, add the `templateData` attribute to the corresponding field in the **User Interface** tab.
**Example:**
`input id="message" type="text" templateData="messageContent" placeholder="Type your message"`
To retrieve the variable, use `UserData` in the **Code to run** tab.
**Example:**
`var userInput = UserData.messageContent;`
`alert(userInput);`
## Create the configuration form

Use the **Configuration form** tab to build the user interface that team members use to set up your widget. Only the **HTML** and **CSS** tabs are available in this section.
### HTML tab
Enter the HTML code for your configuration form in the **HTML** tab. Users interact with this form to set up their template and create a widget.
Every field in the form must include an attribute with the following syntax: `templateData="[NameOfYourChoice]"`.
### CSS tab
Styles that you add in the **CSS** tab apply to the user interface form. This step is optional.
***
To finalize your template, click **Activate** in the top-right corner of the editor page.
If you enter fewer than 10 characters in the JavaScript field, **Activate** is unavailable.
## Manage created templates
After you create a template, it appears as a card on the **Widgets** dashboard.
## Use the widget in an experiment
To associate a code widget with an experiment:
1. Open or create an experiment using the **Graphic editor**.
2. In the left sidebar, click **Add** next to **Elements**.
3. In the **Add element** sidebar that opens, click **Widgets**.
4. Select your custom widget from the list and configure it.
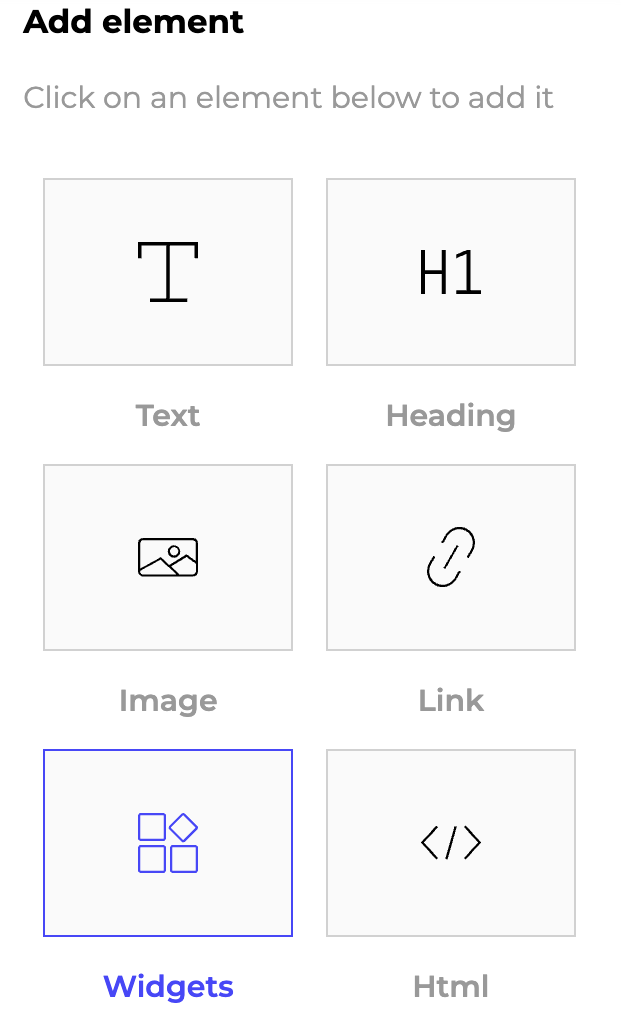
# Add a slider to a widget
Source: https://docs.kameleoon.com/user-manual/assets/widgets/create-a-widget-with-the-widget-studio/add-a-slider-to-your-widget
Add a slider element to your widget, edit slides, set position, and customize transition animations and autoplay behavior.
You can add sliders to your widgets to make them more dynamic.
In this article, you will learn how to:
* Add a slider
* Edit a slider
* Position a slider
* Customize the transitions between slides
## Add a slider
To add a slider:
1. Click **Add element** in the left sidebar.
2. In the list, unfold the **Media** section.
3. Click **Slider**. A new panel opens where you can edit the slider.
## Edit a slider
Sliders contain three slides by default, but you can add more. Click **Add new slide**.

Click **Edit** to edit the slider.
## Position your slider
You can position your slider wherever you want in your widget.

## Customize the transitions between your slides
You can customize the transitions between your slides.
Click **Slider Animation** and adjust speed, choose your transition effect, and enable touch moves.

Activate **Autoplay** if you want your slides to change automatically.
You can also edit previous or next arrows and pagination.

# Add a wheel of fortune to your widget
Source: https://docs.kameleoon.com/user-manual/assets/widgets/create-a-widget-with-the-widget-studio/add-a-wheel-of-fortune-to-your-widget
Add and configure a wheel of fortune element in the Widget Studio to boost visitor engagement with customizable slices, chances, and spin animations.
Add a wheel of fortune widget to your website to encourage user participation and boost engagement.
## Add the wheel of fortune element
1. In the Widget Studio, navigate to the left sidebar.
2. Scroll down to the **Media** section.
3. Click **Wheel of Fortune** to add it to your widget.

Once you add the wheel of fortune, a settings panel will appear on the left.
Adjust the position (x and y coordinates), width (W), and height (H) as needed.
## Ensure Devices synchronization

Ensure the **[Devices synchronization](./responsive-widgets#devices-synchronization)** option is set to ensure consistent behavior across different devices.
## Customize wheel settings
In **Wheel Settings**, set the wheel's number of slices.

Click **Add new slice** to add new slices.
You can choose to let users play multiple times.
## Customize slices
Click on a slice to edit its content. Set the content type to **Text** and enter the desired text for each slice. Adjust the background color and other style settings as needed.
## Set wheel chances and animations
Under **Wheel Chances**, configure the probability for each slice to be selected.

Set the spin animation settings under **Spin Wheel Animation** to customize how the wheel spins and stops.

## Configure the play button and arrow
Click **Wheel button** to customize the "play" button.
You can enter any text you'd like. You can also edit the background color.
Customize the arrow button by selecting **Wheel Arrow** from the content list.
## Edit the states of the element
Select the **States** tab to find additional properties that let you edit the style of the wheel's states (Hover, Active, Disabled).
## Final adjustments and preview
Review all settings and adjustments.
Preview your widget to ensure your wheel of fortune is functioning as intended.
## Save and activate
Click **Save** to save your widget.
**Activate** the widget to use the wheel of fortune in your campaigns.
# Animate your widgets
Source: https://docs.kameleoon.com/user-manual/assets/widgets/create-a-widget-with-the-widget-studio/animate-your-widget
Add entrance and exit animations to your widget from over 50 available effects, including bouncing, fading, zooming, and sliding animations.
You can add entrance and exit animations to your widget in the **Animations** section.

About 50 different effects are available, which are divided into major categories:
* Attention seekers
* Back entrances/exits
* Bouncing entrances/exits
* Fading entrances/exits
* Flip entrances/exits
* Rotating entrances/exits
* Special entrances/exits
* Zooming entrances/exits
* Sliding entrances/exits

Click **Pre-visualize** to see a preview of the animation effect.

# Associate events and actions with your widget
Source: https://docs.kameleoon.com/user-manual/assets/widgets/create-a-widget-with-the-widget-studio/associate-events-and-actions-with-your-widget
Learn how to define interactive behaviors for your widgets by connecting event triggers with automated actions in the Kameleoon Widget Studio.
Define how and when your widget behaves by associating events and actions. Events are triggers that detect specific visitor behaviors or page states, while actions are the responses that Kameleoon executes when those events occur.
For example, you can create a multi-step pop-in flow where submitting an email address in the first pop-in (Event) triggers the display of a second "thank you" pop-in (Action).
## Access the Events section
To manage your widget's triggers and responses, open the Widget Studio and click **Events** in the left sidebar.

## Manage events
Events determine when Kameleoon performs an action.
### Create an event
To create a new event:

1. Click **Add event**.
2. Select the type of event you want to create from the list and click **Next**.
3. Define the conditions for your event and click **Save**.
### Edit or delete an event
To manage existing events:
* **Edit:** Right-click the event or click the three-dots menu and select **Edit**.
* **Delete:** Right-click the event or click the three-dots menu and select **Delete**.

### Event types
Kameleoon offers several event types to trigger actions:
| Event Type | Description |
| :-------------------- | :------------------------------------------------------------------------------------ |
| **Click** | Triggers when a visitor clicks a specific element. |
| **URL** | Triggers when the page URL contains a specific value or matches a regular expression. |
| **Display** | Triggers based on the widget's appearance (before or after it appears). |
| **Survey** | Triggers when a visitor inputs a certain survey or form value. |
| **Language** | Triggers based on the language of the displayed text. |
| **Custom data value** | Triggers when a specific custom data value meets defined conditions. |
| **Device** | Triggers when the visitor uses a specific device type. |
## Manage actions
Actions are the specific tasks Kameleoon performs once an event is triggered.
### Create an action
To add an action to an event:

1. Locate the event in the **Events** sidebar.
2. Click **Add action** directly beneath the event.
3. Select the action type and configure its settings.
### Edit or delete an action
Manage actions using the same interface as events. Right-click an action or use the three-dots menu to edit or delete it.
### Action types
You can choose from various action types to customize your widget's behavior:
| Action Type | Description |
| :------------------ | :----------------------------------------------------------------- |
| **Elements** | Shows or hides specific elements within the widget. |
| **Kameleoon goals** | Triggers or cancels specific Kameleoon goals. |
| **Kameleoon data** | Sets custom data values. |
| **Kameleoon event** | Triggers custom events for segment targeting. |
| **Request** | Sends data to a specific URL via GET or POST requests. |
| **URL** | Redirects the visitor to a specified URL, optionally in a new tab. |
| **JavaScript** | Executes custom JavaScript code. |
| **Survey/Form** | Enables or disables surveys and forms based on the trigger event. |
| **Browser storage** | Sets values in local storage, session storage, or cookies. |
# Create a product recommendation block
Source: https://docs.kameleoon.com/user-manual/assets/widgets/create-a-widget-with-the-widget-studio/create-a-product-recommendation-block
Add, configure, and style a product recommendation block in your widget to display personalized product suggestions.
In this article, you will learn how to:
* Add a recommendation block
* Edit a recommendation block
* Position a recommendation block
## Add a recommendation block
To add a recommendation block:
1. Click **Add element** in the left sidebar.
2. In the list, click **Product recommendation** > **Product recommendation**.

3. Click **General** > **Block** and select the block you'd like to add to your widget.

In **Settings**, you can set the minimum number of products needed to display the recommendation block. You can also specify how to obtain the product ID from the product page where the widget is displayed. This setting is mandatory if you're using the algorithms “Similar products” or “Products usually purchased with this product” in your recommendation block.
## Edit a recommendation block
Click **Design** to edit your block's size and position. You can also edit its CSS. Click the enlarge icon to open the custom code section.

Click **Block** to customize additional settings like background color, border properties, or shadow effects. You can also create a hover state for the block.
# Create a Widget
Source: https://docs.kameleoon.com/user-manual/assets/widgets/create-a-widget-with-the-widget-studio/create-a-widget
Create a new widget in the Widget Studio by selecting a template and content type such as banner, NPS, survey, or countdown.
To view a video tutorial about the Widget Studio, visit [our academy](https://academy.kameleoon.com/get-started-with-web-experimentation/164461?utm_source=user_manual\&utm_medium=online)
To create a widget:
1. Click **Studio** > **Widgets** > **New widget**.
2. Select **Using the editor** > **Start**. If you prefer to create a widget from code, view [this article](../create-a-widget-from-code/creating-a-widget-from-code#how-to-create-a-new-template).
3. Enter the required information in the pop-in.
4. Click **Create**.
## Select a template

Select a template for your widget. You can search for a specific template, apply filters, and access your custom or favorite templates. You can also import a widget from another account by clicking **Create from JSON file** in the upper-right corner.
### Content types
There are several content types to choose from:
* **Banner:** Add a banner to your page.
* **Emailing/Newsletter:** Improve return rates by incentivizing visitors with a pop-in.
* **Countdown/Timer:** Create urgency for better conversions.
* **Slider**: Create carousels to animate your website.
* **NPS:** See what your visitors think using an NPS widget.
* **Feedback/Survey:** Ask visitors for their opinions or information about their experience.
* **Social:** Allow users to access your social media accounts.
Both the timer and the countdown create a sense of urgency, but the first is in hours, while the second is in days. Use the timer for short-term offers (for instance, limited-time free shipping), and the countdown for long-term offers (for instance, a week-long sale).
# Create an exit intent widget
Source: https://docs.kameleoon.com/user-manual/assets/widgets/create-a-widget-with-the-widget-studio/create-an-exit-intent-widget
Use PBX to generate a popup widget that appears when visitors are about to leave your site, then connect it to the Website exit trigger in a personalization campaign.
An exit intent widget appears when a visitor's cursor moves toward the top of the browser window, signaling that they are about to navigate away. Use exit intent widgets to present last-moment offers, collect email addresses, or surface helpful content before a visitor leaves your site.
## Before you begin
If you are new to PBX or the Personalization builder, review [Create a widget with PBX](../pbx-widgets) and [Set up and launch a personalization](../../../web-personalization/set-up-and-launch-a-personalization) before continuing.
## Step 1: Build the widget
Describe your exit intent popup in a text prompt and let PBX generate it.
1. Go to **Studio** > **Widgets** > **New widget**.
2. Select **Using a prompt**.
3. Enter a name for your widget and click **Create**.
4. In the prompt field, describe your popup. For example:
```text theme={null}
Create a centered modal popup for an exit intent offer.
- Content: Headline, short description with a discount offer, email input field, CTA button, and a "No thanks" link
- Style: Modern ecommerce design, rounded elements, dark CTA button, close button in the top-right corner
- Behavior: Close when clicking "No thanks" or the close button
```
5. Review the generated widget and refine it with follow-up prompts, such as "Make the CTA button larger" or "Change the headline font."
6. When you are satisfied with the result, save the widget.

For more guidance on writing effective prompts, see [Create a widget with PBX](../pbx-widgets).
PBX widgets do not support legacy personalization. Contact your Customer Success Manager if you need access to the new personalization builder.
To build the widget with the drag-and-drop editor instead, select **Using the editor** in step 2. See [Create a widget](./create-a-widget) for instructions.
## Step 2: Create a personalization
Create the personalization campaign that will display your widget.
1. Go to **Experiences** > **Personalization**.
2. Click **New personalization**.
The step for adding your widget to the personalization content is not yet available. Full instructions for this step will appear here once the **Using widget** option is activated.
## Step 3: Set up the Website exit trigger
Configure the personalization to activate when a visitor's cursor leaves the browser window.

1. Click the **Targeting rules** tab and expand the **Triggers** section.
2. Select **When a specific trigger occurs**.
3. Click **Create a new trigger**, or select an existing Website exit trigger from the dropdown.
4. In the Trigger Builder:
1. Enter a name for your trigger, such as "Website exit—all pages."
2. Select your project and click **Next**.
3. In the conditions panel, select **Website exit** under **Browsing behavior**.
4. Click **Next**, review the trigger summary, and click **Create trigger**.
5. Select the trigger you created from the dropdown.
The personalization now activates when a targeted visitor's cursor leaves the browser window.
## Step 4: Limit display frequency
Prevent the popup from appearing repeatedly by restricting how often it displays.
1. Expand **Display settings**.
2. Under **Display limits**, set the per-visit display limit to **1**.
Visitors then see the popup only once per session.
## Step 5: Launch
1. Click **Save**.
2. Click **Simulate** to preview the personalization in your browser.
3. Click **Launch** to go live.
## Next steps
* [Create a widget with PBX](../pbx-widgets): explore advanced prompt techniques, goal tracking, and Google Sheets integration.
* [A/B test your widgets](../use-widgets-in-your-campaigns/ab-test-your-widgets): run experiments to find the most effective exit intent message.
* [Set up and launch a personalization](../../../web-personalization/set-up-and-launch-a-personalization): configure advanced display settings, scheduling, and rollback conditions.
# Add a survey element to your widget
Source: https://docs.kameleoon.com/user-manual/assets/widgets/create-a-widget-with-the-widget-studio/create-csat-nps-and-surveys/add-a-survey-element-to-your-widget
Build NPS, CSAT, and feedback surveys in the Widget Studio using survey elements like buttons, scales, multiple choice, and short or long answer fields.
In the Widget Studio, you can build fully functional surveys (for example, NPS, CSAT, satisfaction forms, product feedback) using a set of dedicated **Survey elements**. Each element comes with its own customization.
The Survey element suite allows you to:
* Build structured, branded NPS and CSAT widgets.
* Collect qualitative and quantitative feedback.
* Apply detailed validation rules.
* Export or route responses flexibly.
Survey data can be collected **either in Kameleoon** (exportable in .csv format), or **sent to an external service** via an HTTP request.
## Survey elements
Survey elements are listed under the **Survey** section in the **Add element** panel.

* **Button:** Required to trigger the survey submission.
* **Short answer:** Collects short textual input from users.
* **Long answer:** Ideal for longer, open-ended feedback.
* **Multiple choice:** Includes support for checkboxes, single or multiple selection, optional "Other" field, and answer randomization.
* **NPS:** Gathers Net Promoter Score data with optional follow-up questions.
* **Scale:** Renders a scale using numbers or emojis.
Each element is configurable using dedicated settings and styling options in the Widget Studio.
## Settings
### Button

#### General settings
* **Button text:**
* Enter your button's text in the text field.
* Use the buttons above the text field to:
* Edit your text with AI.
* Access styling options.
* Edit your text's font.
* Change your text's alignment.
* Edit your text's color.
* Add an emoji.
* Click the **three-dots menu** to:
* Remove formatting.
* Expand the text editor.
* **Style:** Change the button's background type and color.
* **Animation:** Select an entrance or exit animation for your button.
#### Advanced Settings
In **Advanced Settings**, you can define:
* **Default state:** Whether the button will appear by default.
If you select **Disabled** and previously activated **Make required** on any survey, the button will automatically become enabled once users respond to all required elements on the same screen.
* **Redirection URL:** The URL that users who click the button will be redirected to.
* **Open in new tab:** Toggle whether the redirection URL will open in a new tab.
#### Design
There are two tabs in the **Design** menu: **General** and **Style**.
##### General
In the **General tab**, you can define:
* **Alignment:** Change the button's alignment.
* **Reposition and resize:** You can position your button on the **X** and **Y** axes or define its width and height in pixels or percentage.
* Click **Activate translate settings** to access translation options. You can translate your button from its current X or Y axis position by a defined amount in pixels or percentage.
* **Devices Synchronization:** Select a device and define how the button will be synchronized with other devices.
* **Fully synchronized:** All the button's properties will be synchronized with the master device.
* **Partially synchronized:** All the button's properties will be synchronized with the master device, unless a property changes on another device.
* **No synchronization:** None of the button's properties will be synchronized with the master device. You must define the button's properties on this device separately.
* **Hide:** The button won't be visible on the device.
* **Padding:** Add padding between the button's borders and its text.
* **CSS And Classes:** Add CSS and classes to style your button.
##### Style
In the **Style** tab, you can define:
* **State:** Can be **Enabled**, **Hover**, or **Disabled**.
* **Text:** Determine the text's line height and apply any desired transformations.
* **Background:** Change the button's background type or color.
* **Border:** Add a border around all sides of the button or a custom border.
* **Shadow:** Add a shadow and edit its color or position.
### Short Answer and Long Answer

#### General Settings
* **Label/Question:** The main prompt/question.
* **Placeholder (optional):** Text displayed before user input; disappears as soon as the user starts typing.
* **Pre-filled value (optional):** Inserts a predefined response into the field.
* **Default state:** Determines whether the field is enabled or disabled on load.
#### Advanced Settings
* **Label position:** Position the label above or below the input field.
* **Character limit:** Maximum number of characters allowed.
* **Make required:** Forces users to answer a certain question before submitting. A `*` is automatically appended to the label. Enabling **Make required** reveals the **Validation rule** section, allowing you to define additional input constraints.
* **Validation rule:**
| Rule type | Description |
| ---------------- | ----------------------------------------------------- |
| **Not empty** | The input must not be blank. |
| **Alphanumeric** | Accepts only letters and numbers. |
| **Length** | Define min/max character count. |
| **Regex** | Apply a custom regular expression for format control. |
* **Error message:** Custom message shown when validation fails. The style of the error message can be configured in **Design** > **Answers** by selecting the **Invalid state**.
### Multiple Choice

#### General Settings
* **Question:** The question text displayed above the answers.
* **Answers:** Add, remove, or reorder the answer choices. Click **Add an answer** to create more options.
#### Advanced Settings
* **Multiple selection:** Allow users to select more than one answer. If disabled, only one answer can be checked.
* **Add "Other":** Adds an open-ended text input labeled "Other" so users can write a custom answer.
* **Randomize answers:** Randomly shuffles the order of the listed answers for each user to reduce selection bias.
* **Make required:** If enabled, users must select at least one response to submit the survey. A `*` is automatically appended after the question label (same style as **Question** in the **Design** tab).
### Scale

#### General Settings
* **Scale type:** Emojis, Stars, Hearts, or Numbers.
* **Scale item count:** Number of values on the scale (for example, 1-5).
* **Question:** The main prompt.
#### Scale Labels
* **Label position:** Choose to show labels above, below, or not to display them.
* You can customize labels for each scale item.
#### Advanced Settings
**Make required:** Mandatory response before submission.
### NPS

#### Question structure
* The wording of the NPS question is partially fixed due to standardization. Only portions of the question can be edited. To change the language, go to the **Translation** tab and set a default language.
#### Fields
* **How likely are you to recommend (X) to (Y)?**
* You can edit the product/service and target fields.
* **Follow-up question (optional):**
* Can be shown to **All users**, or only to:
* Promoters (score 9-10)
* Passives (score 7-8)
* Detractors (score 0-6)
* Allows conditional follow-up content.
* **Make required:** Only the **initial NPS score** can be marked as required. The follow-up question is always options.
# Create conditional logic in your surveys
Source: https://docs.kameleoon.com/user-manual/assets/widgets/create-a-widget-with-the-widget-studio/create-csat-nps-and-surveys/create-conditional-logic-in-your-surveys
Show or hide survey elements and screens based on visitor responses by setting up conditional logic events in the Widget Studio.
You can trigger specific actions based on the values provided by your visitors when they interact with your survey. Conditional logic allows you to show or hide survey elements or screens depending on each user’s input.
## Show or hide an element based on a visitor's survey response
You can configure elements or screens to appear (or disappear) based on what users select or type in your survey elements. For example, if a visitor selects a specific answer in a multiple choice question, a Long Answer field may appear to ask for more details.
To do this, you create:
* **Element 1**, visible by default.
* **Element 2**, hidden by default.
* A conditional rule in the **Events** section to display Element 2 if a specific value is selected in Element 1.
### Example use case
Suppose you've built a multi-step NPS survey and want to customize the experience based on the user's score. For example, if a user give a score from 0 to 6 (a Detractor), you might want to display a follow-up question asking for more feedback. If the score is 7 to 10 (a Passive or Promoter), you can skip straight to a thank-you message.
In the following example, the survey consists of two screens:
* **Screen 1:** The NPS score question (0-10).
* **Screen 1 (Detractors only):** An open text field asking for the main reason behind the score.
* **Screen 2:** A confirmation screen ("Thank you for your feedback!).
#### Step 1: Set up your survey screens
In the Widget Studio, create both screens:
* Screen 1 with the NPS element
* Screen 2 with a confirmation message


Ensure Screen 1 is the default screen.
#### Step 2: Ask a follow-up question to Detractors
1. Select the NPS element.
2. In the **Settings** tab, under **Follow-up question**, select **Detractors**

#### Step 3: Add a conditional logic event for Passives and Promoters
1. Go to the **Events** panel and click **Add event**.
2. Select **Survey/Form** as the trigger.

3. Choose **By element survey/form value**.

4. Click **Select an element** > **NPS**.
5. Under **Selected value**, choose **Passives** and **Promoters**.

6. Then, define the action. Click **Add action** > **Show element**.

7. Select **Thank you screen**.

8. Define a second action: **Hide element** > **Screen 1**.
This setup means that Screen 2 will appear if the visitor selects a score between 7 and 10, ensuring a smooth transition from feedback to the thank-you screen.
#### Step 4: Simulate your widget
Here's what the final logic looks like:
1. Screen 1 is always shown first.
2. If the score is between 0 and 6, the follow-up question is shown.
3. When the visitor clicks **Submit** on Screen 1, they reach Screen 2.
4. For scores of 7 and higher, the follow-up question is skipped and users go straight to Screen 2.
This logic helps you gather more detailed insights from detractors while keeping the experience frictionless for other users.
# Send survey responses to Google Sheets
Source: https://docs.kameleoon.com/user-manual/assets/widgets/create-a-widget-with-the-widget-studio/create-csat-nps-and-surveys/send-survey-responses-to-google-sheets
Configure a Google Apps Script and Widget Studio survey settings to automatically send survey responses to a Google Sheet via HTTP POST.
If you want to collect responses from your widget in Kameleoon and export them to CSV, refer to [this](./survey-data-export) article.
In this article, you'll learn:
* How to configure your Google Sheet to receive survey data.
* How to set up the **Survey Settings** tab in the **Widget Studio** to send responses to Google Sheets.
## Configure your Google Sheet
1. Go to [Google Sheets](https://sheets.google.com/) and create a new spreadsheet.
2. Name the tab **Sheet 1** (which is the **default**).
3. In the first row, define the columns as follows:

**Details:**
* **Column A** > Enter **Date**. This cell will be automatically populate with the data and time of each submission.
* **From Column B onward** > Enter the name of each survey or form element added to your widget.
You can find an element's name in the elements tree in the **Content** tab of the **Design** section.

When you select an element (for example, a scale), its name appears at the top of the editing sidebar.

Let's use this widget as an example:

This widget has two survey elements. So, in the first row of the Google Sheet, we should enter:
* **Column A:** Date
* **Column B:** Scale
* **Column C:** Long Answer
4. Add a Google App Script

* Click **Extensions** > **App Script**. A new Google Script opens. Rename it (for example, **My form data**).
* Replace all code with the following:
```javascript theme={null}
const sheetName = 'Sheet1'
const scriptProp = PropertiesService.getScriptProperties()
function initialSetup () {
const activeSpreadsheet = SpreadsheetApp.getActiveSpreadsheet()
scriptProp.setProperty('key', activeSpreadsheet.getId())
}
function doPost (e) {
const lock = LockService.getScriptLock()
lock.tryLock(10000)
try {
const doc = SpreadsheetApp.openById(scriptProp.getProperty('key'))
const sheet = doc.getSheetByName(sheetName)
const headers = sheet.getRange(1, 1, 1, sheet.getLastColumn()).getValues()[0]
const nextRow = sheet.getLastRow() + 1
const newRow = headers.map(function(header) {
return header === 'Date' ? new Date() : e.parameter[header]})
sheet.getRange(nextRow, 1, 1, newRow.length).setValues([newRow])
return ContentService .createTextOutput(JSON.stringify({ 'result': 'success', 'row': nextRow })) .setMimeType(ContentService.MimeType.JSON)
}
catch (e) {
return ContentService
.createTextOutput(JSON.stringify({ 'result': 'error', 'error': e }))
.setMimeType(ContentService.MimeType.JSON)
}
finally {
lock.releaseLock()
}
}
```
If for any reason you can't name your tab "Sheet 1", change the first line of the script, and replace "Sheet 1" with your tab's actual name.
When you're done, your script should look like this:

1. Click **Save project to Drive** (to the left of **Run**).
2. In the dropdown to the right of **Debug**, select **`initialSetup`** (it should be selected by default).
3. Click **Run**.
You might see a pop-in asking for permissions. Click **Review permission** and continue to the next screen.
Because Google has not reviewed the script, a warning message may appear. Click **Go to Mailing List (unsafe)** to set up the correct permissions to update your form.

Once the correct permissions are given to the script, you should see the following output in the script editor console:

In the left menu, click **Triggers** to add a trigger for the script/

Then, click **Add trigger**.
In the window that appears, select the following options:
* **Choose which function to run:** `doPost`
* **Choose which deployment should run**: `Head`
* **Select event source:** `From spreadsheet`
* **Select event type:** `On form submit`

Click **Save**.
Click **Deploy** > **New deployment**.

Click the **cog** icon next to **Select type** > **Web app**.
In the form that appears, select the following options:
* **Description:** `My Form Data` (This can be anything you want; just make it descriptive.)
* **Web app > Execute as:** `Me`
* **Web app > Who has access:** `Anyone`
Click **Deploy**.
**Who has access: `Anyone`** is mandatory for the correct transmission of results.

Copy the URL.
## Configure Survey Settings in the Widget Studio
1. In the **Survey Settings** tab, select the button that users will click to submit their response.
2. Under **How are responses collected?**, choose **HTTP Request (external)**.
* **Request Name:** Give your request a name (for example, Send data to my Google Sheet).
* **Method:** Select **`POST`**.
* **Action URL:** Paste the URL generated by your Google Apps Script.
3. Save your configuration.
## Test your setup
1. **Preview** your widget.
2. Fill out the survey and **Submit**.
3. Go back to your Google Sheet.
You should now see a new row with your response.
# Survey data export
Source: https://docs.kameleoon.com/user-manual/assets/widgets/create-a-widget-with-the-widget-studio/create-csat-nps-and-surveys/survey-data-export
Learn how to configure survey submission behavior, collect responses via CSV or HTTP requests, and manage survey data in Kameleoon.
# Survey data export
In addition to customizing individual survey elements, Kameleoon provides global settings that define how your survey behaves and how responses are handled. The **Survey Settings** tab appears automatically in the Widget Studio when you add at least one survey element to your widget. Use **Survey Settings** to configure how and when Kameleoon submits survey responses and where it collects them.
## Survey Settings tab

When at least one survey element is present in your widget, a new **Survey Settings** tab appears in the sidebar. It includes:
### Submission trigger
Define **when** Kameleoon submits the survey:
* **Button click:**
* Select one **Button** element from your widget.
* Only one button can act as the submission trigger.
* **When the widget is closed:**
* Kameleoon automatically sends responses when the user closes the widget.
* **When an answer is selected:**
* Kameleoon sends responses as soon as a user selects an answer.
* This option is only available if the widget contains one of the following elements:
* Multiple Choice
* NPS
* Scale
Select the applicable trigger element, such as a button or a specific answer type, to enable the submission process.
### Response collection
Select the destination for your survey responses.
#### Kameleoon (CSV)
* Store and export survey responses directly from your Kameleoon account.
* To retrieve the responses:
1. Link the widget to an active campaign.
2. Open the **Widgets** section.
3. Click the **three-dot** menu on the widget card.
4. Select **Export survey data (.csv)**.
* The CSV includes:
* Response timestamps
* Visitor code
* Answers per question
* Campaign and variation details
#### HTTP request (external)
Send survey responses to a third-party system or your own server.
| Setting | Description |
| ---------------- | ---------------------------------------------------------------- |
| **Request name** | Internal identifier used to track request success or failure. |
| **Method** | HTTP method (`GET` or `POST`). |
| **Action URL** | Destination URL where the data is sent. |
| **Headers** | Optional custom headers (for example, API keys or content type). |
Use HTTP requests to integrate survey submissions into your CRM, support platform, or analytics pipeline.
## Conditional logic
Survey elements support conditional logic, which lets you display a question only if a specific answer is selected.
To learn how to configure conditional rules, see [Create conditional logic in your surveys](./create-conditional-logic-in-your-surveys).
# Add conditional logic to your forms
Source: https://docs.kameleoon.com/user-manual/assets/widgets/create-a-widget-with-the-widget-studio/create-forms/add-conditional-logic-to-your-forms
Trigger show and hide actions on form elements based on visitor input by configuring events in the Widget Studio.
You can trigger specific actions based on the values visitors provide when they fill in a form.
## Show/hide an element based on visitors' values
You can show or hide an element depending on the values visitors enter in forms. For example, if a visitor select a specific checkbox, a text field may appear for visitors to explain their choice in more detail.
## Use case example
Suppose you create a select box and want to display a second one based on the visitor's selected option.
In the first select box's settings section, indicate two options:
* Latest products
* Blog updates

For visitors who choose **Latest products**, add a second select box (hidden by default) that includes:
* All products
* Clothes
* Shoes

In the Widget Studio's **Events** section, you must create a specific event to display the second select box. To create this event:
1. Navigate to the **Events** section of the Widget Studio.
2. Select **Form** > **By element form value** in the next screen.
3. Select your first select box element.
4. Choose the value you wish to associate with this event (for example, **Latest products**).
5. Navigate to the **Add action** menu.
6. Select **Elements**.
7. Choose the second select box you created.
The result of this event's configuration is as follows:

Here's the impact of this conditional logic at the widget display level:

# Add rules to your form fields
Source: https://docs.kameleoon.com/user-manual/assets/widgets/create-a-widget-with-the-widget-studio/create-forms/add-rules-to-your-form-fields
Set required fields and validation rules on form inputs to ensure visitors submit data in the correct format before the form is sent.
You can set rules for an element. Rules ensure you collect the correct form data in the correct format.
## Required option
You can set up mandatory fields in your form widgets. If information has not been filled in by the visitor, the field will be invalid.
If users do not fill in information in a mandatory field:
* Your element will switch to the **invalid** state.
* If you have added a **FormErrorMessage** element to your form, the element will become visible.

All element types belonging to the **Form** category can be made mandatory. If the element is a toggle, the visitor must switch it ON. If the element is a checkbox, the user must check it. If the element is an input field, the user cannot leave it empty.
### Use case example
Let's say you want to make all elements mandatory: the email address input, two dropdowns for selecting a newsletter category, and a toggle for accepting the Terms & Conditions.
Select each of these elements and switch the **Required** toggle to ON.
## Validation rules
### Validation rules triggered on form submission
In all that follows, we assume the following prerequisite: you created an event defining what happens when a visitor clicks the submit button and the associated action sends an HTTP Request.
You can set validation rules to check that fields are valid before submission. Validation rules only concern **Input** and **Textarea** elements.
For example, if a text input contains information in the wrong format, the form cannot be sent. You can set up an error message to ask the visitor to correct their input.
You can set one of these options:
* not empty
* only alphanumeric
* number
* email
* URL
* Text
* Length
* Regular expression
By default, validation will only take place when a visitor clicks the submit button.
However, you can create an Event to check the field when a visitor stops interacting with it.
#### FormErrorMessage
The **FormErrorMessage** element displays a message when an error is reported during validation.
To display a specific error message on an element in your form, you must use a **Text** element and associate it with an event.
### Addition of events to check the validity of your fields when losing focus
You can set validation rules to check that fields are valid when losing focus. Validation rules only concern **Input** and **Textarea** elements.
For example, if a text input contains information in the wrong format, an error message can be sent to the visitor to ask them to correct their input.
To set up this validation rule:
1. Navigate to an element's **Input settings**.
2. Select a **Validation rule** from the list.
3. Add a **Text** element containing the error message.
4. Place the error message next to the relevant input field.
5. Hide the error message, so it only appears when the input's value is in the wrong format.
6. Navigate to the Widget Studio's **Events** section.
7. Add a **Form** event.
8. Click **By element form value**.
9. Select a **Validation rule** in the dropdown menu.
10. Click **Add action**.
11. Select **Show element** and choose your text element.

When losing focus, the value of the element will be checked, and if it does not match your validation rule, the error message will appear in the widget.
You can also add a specific event to ensure the error message does not appear in your widget by default, but only when an error is detected when losing focus.

# Build success and error screens
Source: https://docs.kameleoon.com/user-manual/assets/widgets/create-a-widget-with-the-widget-studio/create-forms/build-success-and-error-screens
Design additional widget screens and configure HTTP response events to display success or error messages after form submission.
Once you have designed your form widget's elements, established rules, and set up data transmission, you can create additional screens to inform your visitors about the success or failure of sending the form.

## Design your screen
To design your screen:
1. Click the name of your widget in the top left of the Widget Studio.
2. Double-click **Add screen** to create a validation screen or an error screen.
3. Design your screen as you wish.
## Configure Events
After creating your screens, you must set up events to display the appropriate screen based on whether the visitor's data submission succeeds or fails.
To set up events:
1. Click **Event** > **Add event**.
2. Select **HTTP Response**.

The HTTP Response event only appears if you've added an HTTP Request action. If you haven't, you must define what happens when a user submits the form by setting a trigger and adding an HTTP request action to send the form data to the specified URL.
3. Select **On success** or **On error** depending on the screen you want to display.
4. Select the name of the request linked to your HTTP Response in the **Response Name** menu.
We now need to specify what happens when your event is triggered. To do this:
1. Click **Add action** > **Elements** > **Show element**.
2. Select either **Success screen** or **Failure screen** depending on the screen you want to display.

Your event is created. When the request is successful, the success screen will be displayed. If an error is detected, the error screen will be displayed.

# Design your form
Source: https://docs.kameleoon.com/user-manual/assets/widgets/create-a-widget-with-the-widget-studio/create-forms/design-your-form
Add and configure form elements like inputs, dropdowns, toggles, and checkboxes in the Widget Studio to build customized data collection forms.
Once you have created your widget in the Widget Studio, it's time to add elements to build your form.
## Form elements available
Click the left menu to add an element.
Scroll down to find the **Form** section. Several element types are available. You can mix and match to create personalized and interactive forms.
* **Button**: A button whose characteristics you can edit
* **Input**: A fully customizable text input that can collect **string** data from your visitors.
* **Date**: A field to request a date from your visitor. Click it to open a date picker panel.
* **Time**: A field to request a time from your visitor. Click it to open a time selection panel.
* **Toggle**: A toggle to which you can add two possible states (for example, **ON** and **OFF**).
* **Checkbox**: A checkbox to which you can add a Text element.
* **RadioButton**: A radio button to which you can add a Text element.
* **Select**: A fully customizable dropdown where you can fill in different selectable options.
* **Textarea**: A fully customizable text box containing a placeholder.
* **Range input**: A fully editable slider allowing visitors to select a value within a specific range.
* **Hidden input**: An invisible form field used to store metadata submitted with the form but not displayed to the user.
* **FormErrorMessage**: A text field displaying a specific message in case of an error on the form.
Start by adding elements in the **Desktop** view, which is the default configuration. Then, you can adapt your design to another device if needed (mobile/tablet). Changes made to another device remain specific to that device and will not impact the others.
## Designing your form
When you select an element, two tabs appear at the top of the editing menu: **General** and **States**.

### General tab
Select this tab to edit your element's properties. Here, you will find your element's core properties (that are not specific to a particular state, such as hover).
You can modify different characteristics depending on the element type, like position, padding, and animation.
#### Use case example
Let's say you want to create a newsletter registration form. You can start from one of the **Newsletter** templates available in the Widget Studio. You can personalize this base by adding two dropdowns and a toggle. To create this form:
1. Click **Add an element**.
2. Choose the **Select** type in the forms section.
3. Click **Add option** to add an option to the list. For our example, we'll add the option **Latest products**.

Let's say you want a second option that appears when a visitor selects **Latest products**. To do this:
1. Click **Add an element**.
2. Choose the **Select** type in the forms section.
3. In the left menu, hide the second dropdown. You will have to [configure an event](../associate-events-and-actions-with-your-widget) to make it appear.

4. Add a **Toggle** element to ask each visitor to accept the **Terms & conditions** before sending the form.
5. Add a **Button** element.
You must then configure the information's verification and the data's sending.
You can also [set rules for an element](./add-rules-to-your-form-fields): is this a mandatory field? Should we check the field's content before validating?
### States tab
The **States** tab lets you edit the styles of an element's states (hover, active, and disabled).

All states are editable, but states' editable properties depend on the selected element.
# Introduction to forms
Source: https://docs.kameleoon.com/user-manual/assets/widgets/create-a-widget-with-the-widget-studio/create-forms/introduction-to-forms
Create and display fully customized forms on your website using the Kameleoon Widget Studio to collect and validate visitor data.
You can create and display fully customized forms on your website using the Kameleoon Widget Studio.
## Use case example
Let's say you want to encourage visitors to subscribe to your newsletter. Your goal is to collect email addresses and provide visitors with personalized offers.

The widget must collect data, check if the data is in the right format, send it to the right destination, and react accordingly.
To do this, you will create a widget containing a form with several elements:
* an **Email address** field
* two selection dropdowns, including conditional logic
* a toggle to accept the Terms & Conditions
* a screen for successful data sending
* a screen for failed data sending
First, you need to [create a new widget](../create-a-widget).
Then, you can follow [these](./design-your-form) steps to create your form on our Widget Studio.
# Edit your widgets
Source: https://docs.kameleoon.com/user-manual/assets/widgets/create-a-widget-with-the-widget-studio/edit-your-widgets
Add, design, resize, move, and animate elements in the Widget Studio, and insert custom data or fonts to build personalized widget experiences.
## Add an element
In the **Add element** section, click an element type to add it to your widget.
Several elements are available.
### Typography
* Heading
* Text
* Link
### Survey
* Button
* Short Answer
* Long Answer
* Multiple Choice
* NPS
* Scale
* Hidden input
### Media
* iFrame
* Image
* Video
* HTML
* Slider
* Countdown
* Click-to-copy
* Progress bar
* Step Progress bar
* QR Code
* Wheel of fortune
### Layout
* Block
* Close button
* Shape
* Tooltip
### Form
* Input
* Date
* Time
* Toggle
* Checkbox
* Radio button
* Select
* Text area
* Range input
* Error message
The layer stack reflects the position of the elements in the foreground or background.
## Design an element
You can design your widget's elements in the **Content** section.

### Select an element
Click an element to select it, or click its name in the hierarchy panel on the left.
### Hover over an element
Hovering over an element in the left panel will display secondary actions. Click the **+** icon to add an element below the selected element. Click the **three-dots** menu to edit, rename, duplicate, hide, or delete the element.

If an event is associated with one of your elements, you can't delete the element. You must delete the event first.
#### Duplicate
You can duplicate an element on the same screen, or duplicate an element from one screen to another.
### Click on an element
Click an element to access its settings.
You can use AI to edit or generate your text.

To add a link, highlight a word, group of words, or a whole block of text.
To modify the URL associated with text, you can create a click event and associate a **URL** action with it.
You can also add emojis to your headings, text, and links.
### Upload your own font
You can add your own font to your widget.
1. Click the **T** icon in the text editor, then click **+ Add a font**.

2. In the font import settings, choose your **Font Source:**
* **From your website:** Select this option if the font is already hosted on the same website as the widget.
* **Link to a font file:** Provide the direct URL to the font file (for example `.woff`, `.woff2`, or `.tiff`).
* **Embed code:** Insert the CSS code to import the font using `@import` or `@font-face` (from services like Google Fonts or Adobe Fonts). When pasting Google Fonts, only copy the code from `@import` to ``.
3. Specify the **Font Family**.
4. Click **Preview & Add** to instantly see how the font will look with your text.

You can also adjust the preview text and toggle italic display. You can select one or several font weights. Click **Add** to confirm.
Once saved, your font will appear in the **Font family** dropdown. You can apply the font to any text element and preview it in real time.
### Use custom colors
With the eyedropper in the color picker panel, you can pick any color on the screen and use it in an element.

### Insert dynamic texts & links
You can insert generated text or link parameters based on the value of a form input/API/custom data.
### Resize an element
You can resize your elements in the preview window (on the right). Position your cursor on an element's edge, then click and drag to edit its dimensions.
You can also modify these dimensions in the left panel.
#### Auto-resize text and heading

This option automatically adjusts the element's size, so it expands or shrinks to fit the text content.
#### Smart guides
Smart guides help you align and position elements both vertically and horizontally while editing your widget.
#### Constrain proportions
Once your element is resized, you can lock its dimensions.
To constrain an element's proportions:
1. Select an element in the left panel.
2. Hover over the element and click the **padlock**.
## Edit an element's states
When you select an element, two tabs appear at the top of the editing menu: **General** and **States**.
Select the **States** tab to find additional properties that let you edit the element's states (Hover, Active, Disable).

For example, you can personalize a heading element's hover appearance depending on its state.

When you select the **States** tab, your widget's preview will switch to its default state if you click the **General** tab. You can choose the element's default state in the **General** tab.
## Move an element
Drag and drop an element in the preview to move it.
## Rotate an element
If you want to rotate an element, select it, and enter the desired rotation angle in the rotation parameter located in the left panel.
## Edit an image in the Image Editor
To edit an image in the Image Editor:
1. Navigate to the image you want to edit.
2. Select **Open in Image Editor**. The Image Editor will open.
3. Apply your desired edits.

Four tabs are available in this editor:
* Frame
* Draw
* Shapes
* Filters
In the top right of the Image Editor, you can zoom in and out, undo your changes, reapply them, or change the image you're editing.
### Frame
Here, you can resize, crop, or flip your image.

#### Resize
To resize your image:
1. Click the **Resize** tool.
2. Enter the desired dimensions or use the slider to adjust the image's size.
#### Crop
If you need to trim the edges of your image:
1. Click the **Crop** tool.
2. Choose a preset dimension or select the crop area.
#### Flip
You can flip your image horizontally or vertically using the **Flip** tool.
### Draw
Use the **Draw** tool to draw on your image. Select the brush size and color to customize your drawing.

### Shapes
Insert shapes, like circles, squares, or arrows, with the **Shapes** tool. You can adjust the shape's size, color, and position.
### Filters
Enhance your image with filters by selecting the **Filters** option. You can adjust your image's brightness, noise, and threshold.

## Edit the HTML of a text element
You can select any text element in your widget and edit it in HTML.

## Animate an element
You can animate a widget's element.
When an element is selected, you can activate two parameters (**Entrance animation** and **Exit animation**).

You must choose an animation effect, duration, and a delay (optional). Click **Pre-visualize** to preview your animation.
## Insert a custom data into an element
You can use custom data in your widget to create better personalization opportunities. With this option, you can insert a dynamic value in any text field.
To insert a dynamic value in a text field:
1. Select a text element and click **custom data** in the left panel.

2. Select a data source (a custom data you already created). You can attribute a default value to your custom data. This default value will be displayed if your custom data's value is undefined or null.
3. Click **Validate**.
You can then simulate how the custom data will display in production.
# Export a widget
Source: https://docs.kameleoon.com/user-manual/assets/widgets/create-a-widget-with-the-widget-studio/export-a-widget
Export a widget as a JSON file and import it into another Kameleoon account's Widget Studio.
You can export a graphic widget as a `.json` file from one account and import it into another account's Widget Studio.
To export a widget:
1. Click **Studio** > **Widgets**
2. Navigate to a widget and click the **three-dots menu** > **Export to `.json`**.
3. Open the Widget Studio to create a new widget.
4. Choose **Create from `.json` file**.

Importing a widget will copy all of its configuration except recommendation blocks, visit counters, custom data, and events and actions linked to goals/events created in the original account.
# Add an HTML block to your widget
Source: https://docs.kameleoon.com/user-manual/assets/widgets/create-a-widget-with-the-widget-studio/insert-html-code-in-your-widget/add-an-html-block-to-your-widget
Insert an HTML element into your widget, add custom HTML code, and position the block using CSS or the wrapper container option.
In this article, you will learn how to:
* Add an HTML element
* Edit HTML code
* Position your HTML element
## Add an HTML element
1. Click **Add element** in the left sidebar.
* Click the **+** icon if you've selected the **Design** menu.
2. Click **Media** > **HTML**.

## Edit HTML code

1. Add your HTML code in the **HTML Content** section.
2. Click the enlarge icon in the upper right corner of the code editor to open the editor in full-screen.
If you have added custom CSS or JS in the **Custom Code** section, you can add this code to your HTML code.
For example, in the **Custom Code** section, you can add the following custom CSS code:
```css theme={null}
.demo {
background-color: red !important;
}
```
Then, apply this class an element in your HTML code (here, the `` tag):
`My title `
The right preview zone will be updated.

## Position your HTML element
Your HTML code is not positioned in your widget by default. However, you can position it wherever you want, using CSS positioning properties, like margin and padding.
Check **Enable wrapper container** to position your HTML block in the right preview area like any other element.

# Widget Studio custom code editor
Source: https://docs.kameleoon.com/user-manual/assets/widgets/create-a-widget-with-the-widget-studio/insert-html-code-in-your-widget/widget-studio-custom-code-editor
Write custom CSS and JavaScript in the Widget Studio code editor to apply styles to widget elements and run scripts on demand.
You can create custom CSS or JS code in the Widget Studio and apply your custom styles to any widget element or run your scripts on command.
In this article, you will learn how to:
* Add custom CSS
* Apply your CSS code to widget elements
* Add JS code
* Change code view

## Example use case
A common use case of custom code is applying the same style to widget elements multiple times, rather than manually setting up style properties on each element. If you're a non-technical user, ask one of your developers to create predefined CSS classes for you.
## Add custom CSS code
1. Click **Custom code** in the left menu. The page opens with the **Custom CSS** option selected.
2. Add your CSS code in the code editor.
## Apply CSS code to widget elements
1. Open the **Design** section.
2. Select an element. This element will be styled according to one of the classes you created in the code editor.
3. Scroll down and unfold the **Css and classes** section.
4. Add your class's name in the **Element ClassName** field, or in **Container ClassName** if you want to apply this class to the parent element.
Your selected element styled according to your custom code will not appear in the right preview area. You must click the **camera icon** to see your changes.
## Add JS code
Adding JS code lets you run custom script on demand in your widget.
1. Click **Custom code** in the left sidebar.
2. Click **Custom JS**.
3. Add your JS code in the code editor.
To check your script's execution, click the **camera icon**.
## Change code view
If you're working with both CSS and JS code, you may want to read both codes at the same time. To add multiple code editors:
1. Click the **Add Panel** icon in the upper right corner above the code editor.
2. Manually resize each panel to suit your needs.
To close a panel, click the **X** to the right of the code bookmark (JS or CSS).
# Responsive widgets
Source: https://docs.kameleoon.com/user-manual/assets/widgets/create-a-widget-with-the-widget-studio/responsive-widgets
Optimize your widget's layout for mobile, tablet, and desktop by customizing elements per device and configuring synchronization rules.
You can make your widget adaptable to your visitors' devices using the Kameleoon Widget Studio. Your widget is automatically responsive, but you can make changes to optimize user experience.
By default, elements use percentages instead of pixels (px) for more flexible layouts. Decimal values are supported for percentage sizing, and default templates automatically apply percentages for element sizing. Additionally, pop-up and banner elements support viewport width (vw) and viewport height (vw) units for true responsiveness.
## Switch between devices
At the top of the Widget Studio, you can preview your widget on different devices (mobile, tablet, desktop) to ensure it's displaying correctly.

You can make changes to any of these views.
## Edit the view on a device
You can customize your widget's elements based on the device it is displayed on. Customize your widget by device to optimize visitors' viewing experience.
### Desktop priority
Add all elements to the **Desktop** view, which is the default configuration.

You can adapt your design to another device if needed (mobile/tablet). Changes made to another device remain specific to that device and will not affect the others.
### Edit an element on a specific device
To edit an element on a specific device, click one of the device icons at the top of the page, then edit the element.

### Hide an element on a specific device
To hide an element on a specific device:
1. Select the element you'd like to hide.
2. Click the **three-dots menu**.
3. Click a device icon to hide the element.

## Devices synchronization
With devices synchronization, you can designate a **leader device** for each element, and determine how the element's settings should be synchronized between the leader device and the other devices. You must choose a synchronization rule for all **follower devices**.
In each element's **General** tab, you will find a section called **Devices synchronization**.

When you open this section, there is a **Leader device** label with three clickable icons: mobile, tablet, and desktop. By default, the leader device selected is desktop, but you can select another leader device. The settings applied on a leader device will be replicated on all other devices that are fully or partially synchronized with it.
You can select the synchronization option using the dropdown menu. By default, the synchronization rule you apply to each device is **Partially synchronized**.
The status of a device can be:
* **Fully synchronized:** properties, position, size & states of the element are synchronized with the leader device.
* **Partially synchronized:** all styles will be inherited from the leader device until one of the styles changes on a device.
* **No synchronization:** none of the element's settings are synchronized with the leader device.
* **Hide:** the element is not visible on the device.
## Set up a "Device" type event
You can also configure an event to customize the display of your widget's elements depending on device. To add a Device type event:
1. Click **+ Add event** > **Device**.
2. Select your conditions.
3. Click **Add action** > **Elements**.

You can now choose to show or hide a specific element.

If you previously hid an element on a specific device (in the three-dots menu), it is indicated by icons in the pop-in.
# Save and activate your widgets
Source: https://docs.kameleoon.com/user-manual/assets/widgets/create-a-widget-with-the-widget-studio/save-and-activate-your-widgets
Save your work in the Widget Studio and activate your widget to make it available for use in Kameleoon campaigns.
You must activate a widget to use it in a campaign.
## Save
Your changes are automatically saved after the 30-second countdown.

You can also click **Save** to manually save any recent changes made in the Widget Studio. You will receive a notification when your widget has been saved.

Beneath the **Save** button, the duration since your last save is indicated. Once saved, you can leave the Widget Studio whenever you want and resume where you left off.
## Activate
When your widgets are ready, click **Activate** to use them in your campaigns. You widget's status will change to **Active**.
Inactive widgets are considered unfinished and cannot be associated with a campaign. If your widget is already activated, the button will read **Update**.

If you want to deactivate the widget, click **Active** > **Deactivate**.
# Simulate your widgets
Source: https://docs.kameleoon.com/user-manual/assets/widgets/create-a-widget-with-the-widget-studio/simulate-your-widgets
Preview and test your widget in real conditions before activating it by running a simulation directly from the Widget Studio.
We recommend simulating your widget before activating and associating it with one of your Kameleoon campaigns.
Click **Simulate** in the header of the Widget Studio to simulate your widget.

You can check the changes made to your widget and verify its settings (if events have been set up, for example).
## Settings
You can choose to position your widget **fixed in-page** or **above the page**. This selection affects which settings will be available
### Fixed in-page

* **Position:** If you select **Fixed in-page**, your widget will appear fixed, among the page's content.
* **Anchor element:** Enter the CSS of the element used as a reference for your widget's position.
* **Anchor position:** Select the widget's position relative to the anchor element: **Before**, **Replace**, or **After**.
* **Devices:** Choose the devices on which the widget will appear.
* **Code output:**
* **JS & CSS:** The widget is inserted into the main DOM with JavaScript and its styles are applied using regular CSS.
* This option is best for widgets that should blend with your site's design or use cases where you would like to restyle or adapt the widget.
* **JS with Shadow DOM:** The widget is injected with JavaScript, but its HTML and CSS live inside a [Shadow DOM](../../../experimentation/web-experimentation/advanced-experiment-features/using-shadow-dom-elements-in-the-graphic-editor) (an isolated subtree of the DOM).
* This option is best for complex, self-contained widgets that must behave the same everywhere or scenarios where stability is more important than customization.
* Your widget will essentially be protected (in the Shadow DOM) from external CSS or other styling rules.
### Above the page

* **Position:** If you select **Above the page**, your widget will appear above your page's content.
* * **Devices:** Choose the devices on which the widget will appear.
* **Code output:**
* **JS & CSS:** The widget is inserted into the main DOM with JavaScript and its styles are applied using regular CSS.
* This option is best for widgets that should blend with your site's design or use cases where you would like to restyle or adapt the widget.
* **JS with Shadow DOM:** The widget is injected with JavaScript, but its HTML and CSS live inside a [Shadow DOM](../../../experimentation/web-experimentation/advanced-experiment-features/using-shadow-dom-elements-in-the-graphic-editor) (an isolated subtree of the DOM).
* This option is best for complex, self-contained widgets that must behave the same everywhere or scenarios where stability is more important than customization.
* Your widget will essentially be protected (in the Shadow DOM) from external CSS or other styling rules.
## Launch the simulation
Click **Simulate** to launch the simulation on the URL you entered when creating your widget. You can test your widget in real conditions and verify its behavior (for example, ensure animations work correctly if they were set).
# Translate your widgets
Source: https://docs.kameleoon.com/user-manual/assets/widgets/create-a-widget-with-the-widget-studio/translate-your-widgets
Enable translation management in the Widget Studio to display your widget content in multiple languages based on visitor browser settings.
Translation management lets you use multiple languages in your widget.
## Activate the translation management
To activate the translation feature:
1. Click **Translations** in the Widget Studio.
2. Check **Use translations**.
You will see a list of languages that you can include in your widget.
## Select your language(s)
Check the box next to a language to make it available for translation.

If you want to remove a language, uncheck its box.
In the main panel on the right, you will find tabs for each language you've activated. Each tab contains editable fields with the source text on the left and space for the translated text on the right.

You will find device icons at the bottom right of the language boxes. To change text formatting on a particular device, switch devices in the top bar.
## Add a new language
To add a new language:
1. Click **+new language**.
2. Enter the language's name.
3. Select the appropriate language code from the dropdown list. This code should match the international standard language code for the language you are adding.
4. Click **Apply** to save the language to your list.

## Set a default language
To set a default language:
1. Click the drop-down menu under **Default language**.
2. Select the language you want to use by default in your widget.

## Test the languages on your widget
You should test your widget after setup to verify that all languages are correctly displayed and functional.
Go to the **Design** section of the Widget Studio. At the top, you can switch languages.

## Associate an event
You can associate an event to make your widget's language match the language of a visitor's browser. To associate an event:
1. Navigate to the **Events** section.
2. Click **Translation** in the **Add event** pop-in.
3. Click **Visitor's browser** and select a language.
4. Validate and associate an action to your event.
5. Select **Translation**.
6. Select **Widget's locale** and indicate the same language.
7. Validate the creation of your event.
If your visitor's browser is in English, your widget text will appear in English, too.


You must create an event for each language you have configured.
# Widget Studio plans
Source: https://docs.kameleoon.com/user-manual/assets/widgets/create-a-widget-with-the-widget-studio/widget-studio-plans
Compare Essential and Premium plans for Kameleoon Widget Studio and learn how to upgrade your account.
Feature availability in the Widget Studio depends on your plan (Essential or Premium).
**The Essential plan** provides tools to create simple widgets, including starter templates, basic elements, graphic editing, positioning, and responsive design. This plan limits each widget to two events.
**The Premium plan** includes everything in the Essential plan plus exclusive features for building sophisticated widgets. This plan includes support for multiple screens and states, 30 advanced elements, animations with 50 effects, translation management, an integrated image editor, and access to exclusive templates. The Premium plan supports unlimited events.
| Features | ESSENTIAL PLAN | PREMIUM PLAN |
| ---------------------------------------------- | -------------- | ------------ |
| **TEMPLATES** | | |
| | 11 | 57 |
| **ELEMENTS** | | |
| Heading | ✔ | ✔ |
| Text | ✔ | ✔ |
| Link | ✔ | ✔ |
| Scrolling Text | | ✔ |
| Iframe | | ✔ |
| Image | ✔ | ✔ |
| Video | ✔ | ✔ |
| HTML | | ✔ |
| Slider | | ✔ |
| Progress bar | | ✔ |
| Step Progress bar | | ✔ |
| Countdown | | ✔ |
| Block | ✔ | ✔ |
| Shapes | | ✔ |
| Close | ✔ | ✔ |
| Button | ✔ | ✔ |
| Click-to-copy | | ✔ |
| Input | | ✔ |
| Date | | ✔ |
| Time | | ✔ |
| Toggle | | ✔ |
| Tooltip | | ✔ |
| Checkbox | | ✔ |
| Radio button | | ✔ |
| Select | | ✔ |
| Text area | | ✔ |
| Error message | | ✔ |
| Range | | ✔ |
| Hidden input | | ✔ |
| QR code element | | ✔ |
| Wheel of fortune | | ✔ |
| Scratch card | | ✔ |
| **EDITION** | | |
| Smart guides | ✔ | ✔ |
| Multiple screens | | ✔ |
| States definition (hover, focus...) | | ✔ |
| Device synchronization | | ✔ |
| Hide element on specific device | | ✔ |
| Custom fonts | | ✔ |
| Emojis in text | ✔ | ✔ |
| Variable in texts based on users' input fields | | ✔ |
| Dynamic links | | ✔ |
| Edit text in HTML | ✔ | ✔ |
| Eyedropper | ✔ | ✔ |
| Duplicate elements in other screens | | ✔ |
| **AI TOOLS** | | |
| AI Content Assistant | | ✔ |
| AI Widget Generator | | ✔ |
| AI Translation | | ✔ |
| **TECHNICAL** | | |
| Elements custom code | ✔ | ✔ |
| Custom code | | ✔ |
| View widget code | | ✔ |
| Storage of values in browser storage | | ✔ |
| **ADVANCED FEATURES** | | |
| Animations | | ✔ |
| Add events | Limited to two | Unlimited |
| Translation | | ✔ |
| Image editor | | ✔ |
| Export/import widgets between accounts | | ✔ |
| Collect responses | | ✔ |
| Export responses (.csv) | | ✔ |
## Upgrade to the Premium plan
To upgrade from the Essential plan to the Premium plan, submit an upgrade request from your Kameleoon account. A Customer Success Manager will contact you to discuss your needs and provide pricing for the Premium plan.
If you do not have the authority to request an upgrade, contact your manager or the appropriate person in your organization to initiate the request.
After billing, Kameleoon upgrades your account to Premium and grants access to the additional features. The upgrade process typically takes several days. Contact your Customer Success Manager for questions or assistance during the upgrade.
# Widget Studio structure
Source: https://docs.kameleoon.com/user-manual/assets/widgets/create-a-widget-with-the-widget-studio/widget-studio-structure
Explore the Widget Studio interface, including the header controls, sidebar sections, screen management, and device preview options.
The Kameleoon Widget Studio is composed of a header, a sidebar with five tabs, and a central area where you can preview your widget's customization.
## Screen dropdown

### Add a screen
You can add as many screens as you need.

For example:
* Screen 1: Newsletter pop-in
* Screen 2: Thank-you pop-in
### Set a screen by default
When you have created several screens, the first screen created (at the top of the dropdown list) is automatically designated as the **default screen**. The default screen is what a visitor sees first when exposed to your widget.

You can change the default screen by clicking the **three-dots** menu and checking **Define as default screen**.

### Delete a screen
To delete a screen, click the **three-dots** menu > **Delete a screen**.

### Duplicate a screen
To duplicate a screen, click on the duplicate icon.

The design, animations, and associated events will also be duplicated.
## Zoom

Zoom widget content in or out.
## Device selection

Select the devices on which your widget will display.
## Undo/Redo

Undo (left arrow) or redo (right arrow) the last action you performed on the widget.
## Simulate

Simulates the widget in real conditions (useful if events have been added).
## Save

Save the widget without activating it. The widget will appear on the **Widgets** dashboard with the status **Disabled** and cannot be used in a campaign.
## Activate

Activate the widget to use it in a campaign. The widget will appear on the **Widgets** dashboard with the status **Activated**.
## Sidebar
The left bar has five distinct sections:
* Add element
* Content (displayed by default)
* Translations
* Animations
* Events and actions
* Custom code
### Add element

Here, you can add an element to your widget.
To learn how to add an element to a widget, [read this article](./edit-your-widgets).
### Content

Here, you can edit your widget's content.
To learn how to edit a widget's content, [read this article](./edit-your-widgets).
### Translations

Here, you can configure the widget in multiple languages.
### Animations

Here, you can add entrance and/or exit animations to your widget.
To learn how to add an animation to your widget, [read this article](./animate-your-widget).
### Events and actions

Here, you can associate events and actions to your widget.
To learn how to associate events and actions to your widget, [read this article](./associate-events-and-actions-with-your-widget).
### Custom code

Here, you can create custom CSS or JS code in the Widget Studio, apply custom styles to any widget element, and run your custom scripts on demand.
# Manage your widgets
Source: https://docs.kameleoon.com/user-manual/assets/widgets/manage-your-widgets
Access the Widgets dashboard to search, filter, edit, duplicate, simulate, activate, and delete your Kameleoon widgets.
## Access the Widgets dashboard
To access the **Widgets** dashboard, click **Studio** > **Widgets**.
## Structure of the Widgets dashboard
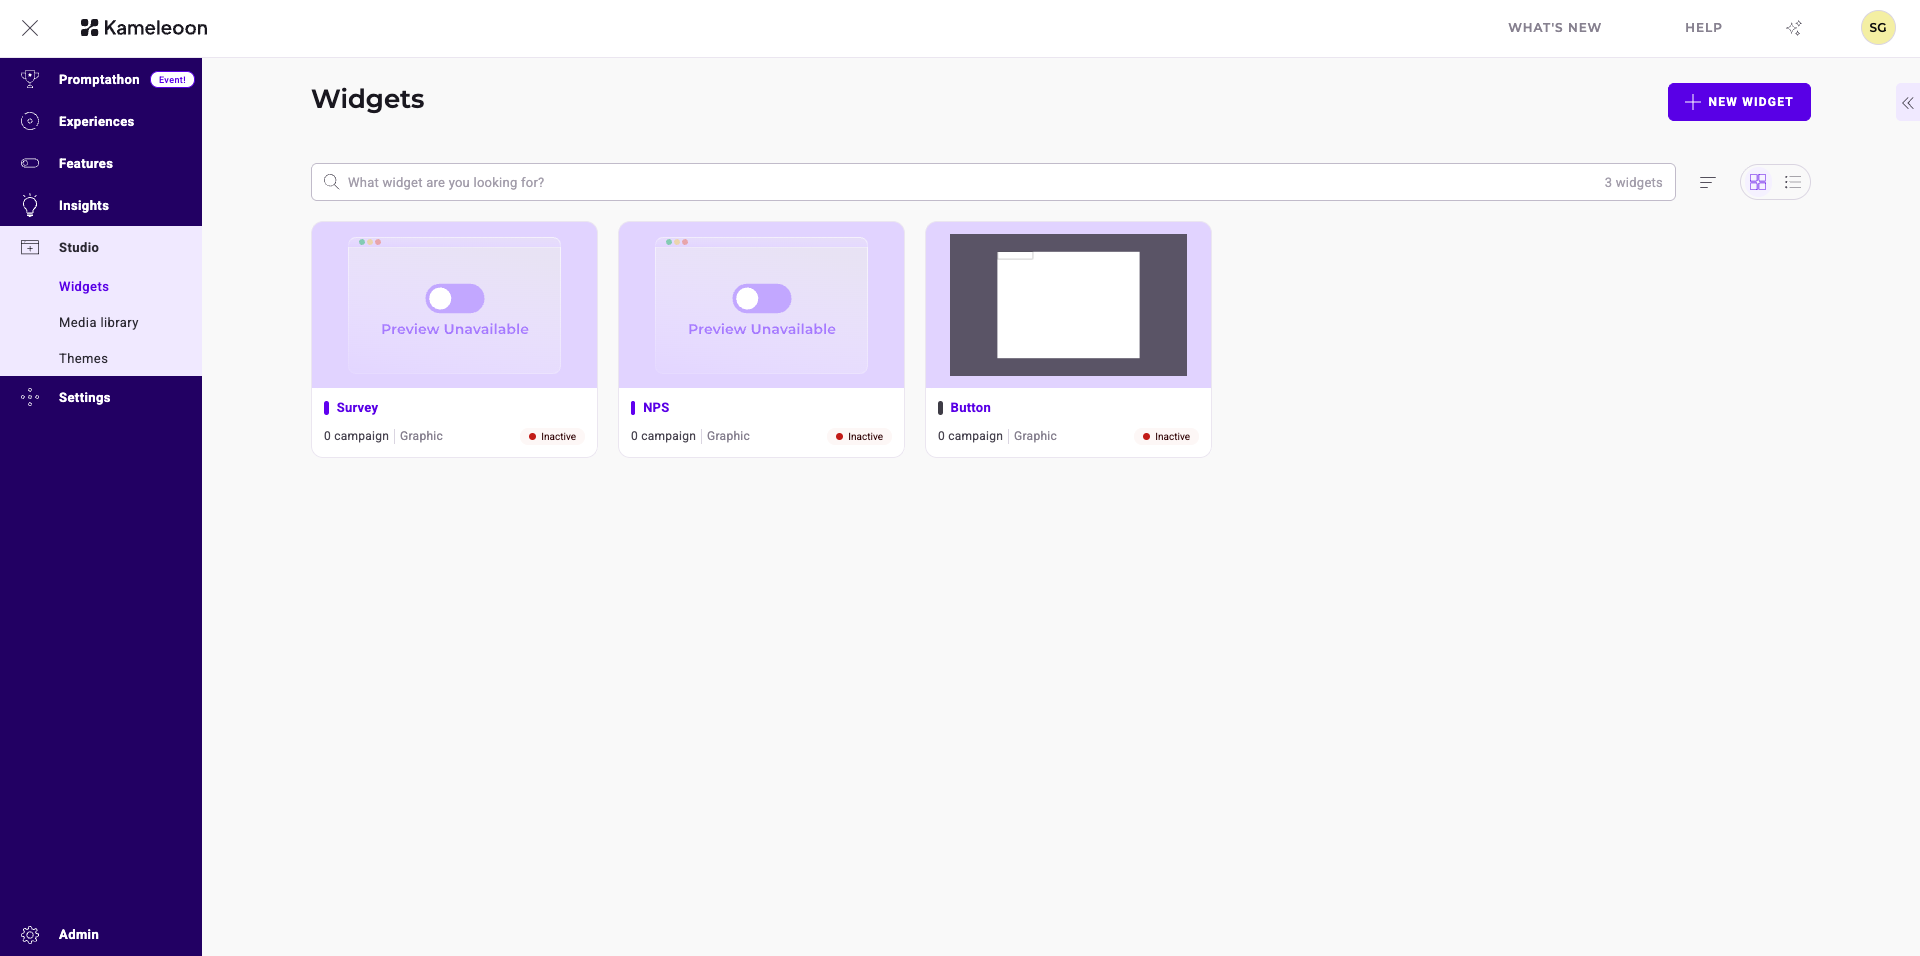
* **Header:** Contains the **New widget** button.
* **Search bar:** Searches for widgets and displays the total count of created widgets.
* **Display options:** Switches the layout between **Card view** and **List view**. Sorts widgets by modification date or alphabetically.
* **Cards:** Display widget details, such as status. Each card includes an **Edit** button and a **More actions** menu to manage the widget.
* **Sidebar:** Filters results, customizes columns, and manages saved views.
## Widget information
Each widget is represented by a card that indicates its main information.
Hover over the tooltip to the right of a widget's name to access detailed information about the widget.
## Dashboard sidebar
### Filter
You can filter your widgets based on several criteria:
* Project
* Widget type
* Status
* Linked to
* Tag
* Creator
Select the filters and click **Apply**. Click **Save as view** to save your configuration as a [view](#views).
### Columns
#### Display
Select which columns you'd like to display on the dashboard table. Click the **checkbox** associated with a column to select or deselect it. Click **Apply** to apply your changes.
#### Sort by
Select the criteria by which to sort your widgets and the associated sorting rule (for example, newest to oldest, alphabetical, ascending number of tags).
### Views
Select which view you'd like to apply to the dashboard. To change the default view, click a view's **three-dots** menu > **Default**.
## Edit a widget
Click the **pencil** icon to edit a widget. Depending on how you set up the widget, you will be redirected to the Code editor or the Widget Studio.
## Secondary actions
Click the **three-dots menu** on a widget's card to access the available actions. The actions depend on your widget's status.

### Simulate
You can simulate a widget and preview it in a production-like context on the URL entered when the widget was created, without needing to associate the widget with an experiment. A sidebar appears with settings to define before launching the simulation.
### Rename
You can rename a widget.
Click **Save** to validate the widget's renaming.
### Manage tags
You can manage the tags associated with a widget.
Tags associated with your widget are highlighted in the **Manage tags** sidebar and widget card. You can associate tags and create new ones. Click **Save** to validate your choices.
### Duplicate
You can duplicate a widget.
Click **Save** to validate the widget's duplication. You can find the new widget in the Dashboard.
### View code
You can view a widget's code.
You can change which devices the widget displays on and its position on the page. Click **View code** again to view the widget's JS and CSS code, copy the code, or expand the window.
### Export to .json
Download your widget as a `.json` file.
### Activate/Deactivate
You must activate a widget to use it in a campaign.
A widget's status is indicated on its card. If its card is white, the widget is activated. If its card is gray, the widget is deactivated.
If you deactivate a widget, you can't use it in your campaigns.
### Delete
You can delete a widget.
Confirm your choice in the pop-in to validate the widget's deletion.
# Create a widget with PBX
Source: https://docs.kameleoon.com/user-manual/assets/widgets/pbx-widgets
Learn how to use PBX, an AI-powered UI generator, to build widgets using natural language prompts.
# Create a widget with PBX
**PBX Widgets** is an AI-powered UI generator that helps you create widgets for your experiments and personalizations created in the new personalization builder. Instead of manually writing HTML, CSS, and JavaScript, you describe the widget in natural language, and PBX generates the component automatically.
This approach enables marketers, product managers, and CRO specialists to build UI components quickly without technical expertise.
Typical widgets created with PBX include:
* Newsletter subscription popups
* Promotional banners
* Exit-intent offers
* Lead capture forms
* Product recommendation panels
* Survey or feedback modals
PBX widgets are not compatible with legacy personalization. You can ask your CSM to get access to the new personalization if needed.
## Create a widget
Follow these steps to generate and refine a widget using PBX.
### 1. Open PBX
To start generating a widget in the Kameleoon interface:
1. Go to **Studio** > **Widgets**.
2. Click **New widget**.
3. Select **Using a prompt**.
4. Enter the required information in the pop-in menu.
5. Click **Create**.
### 2. Write a prompt
Describe the widget you want to build in the prompt field. PBX uses this description to generate the widget UI automatically.
**Example prompt:**
```text theme={null}
Create a centered modal popup widget.
- Layout: Two columns with an image placeholder on the left and a subscription form on the right.
- Content:
- Title: Join an Exclusive Community
- Description: Subscribe for exclusive discounts and get 15% off your next purchase.
- Form: Email input field with placeholder "Enter your email address"
- CTA button: Subscribe now
- Secondary link: No thanks
- Style:
- Modern ecommerce design
- Rounded UI elements
- Light beige background
- Dark CTA button
- Behavior:
- Display after 5 seconds
- Close button in top right corner
- Close popup when clicking "No thanks"
- Tracking: Track a goal called "Newsletter Signup" when the CTA button is clicked.
- Image: Use the following image in the image placeholder on the left: [https://www.whereyourimagelives.com](https://www.whereyourimagelives.com)
```

### 3. Preview and iterate
The fastest way to reach your desired result is to use a prompt-iteration workflow. Review the generated widget and refine it by writing follow-up prompts, such as:
* "Make the CTA button larger"
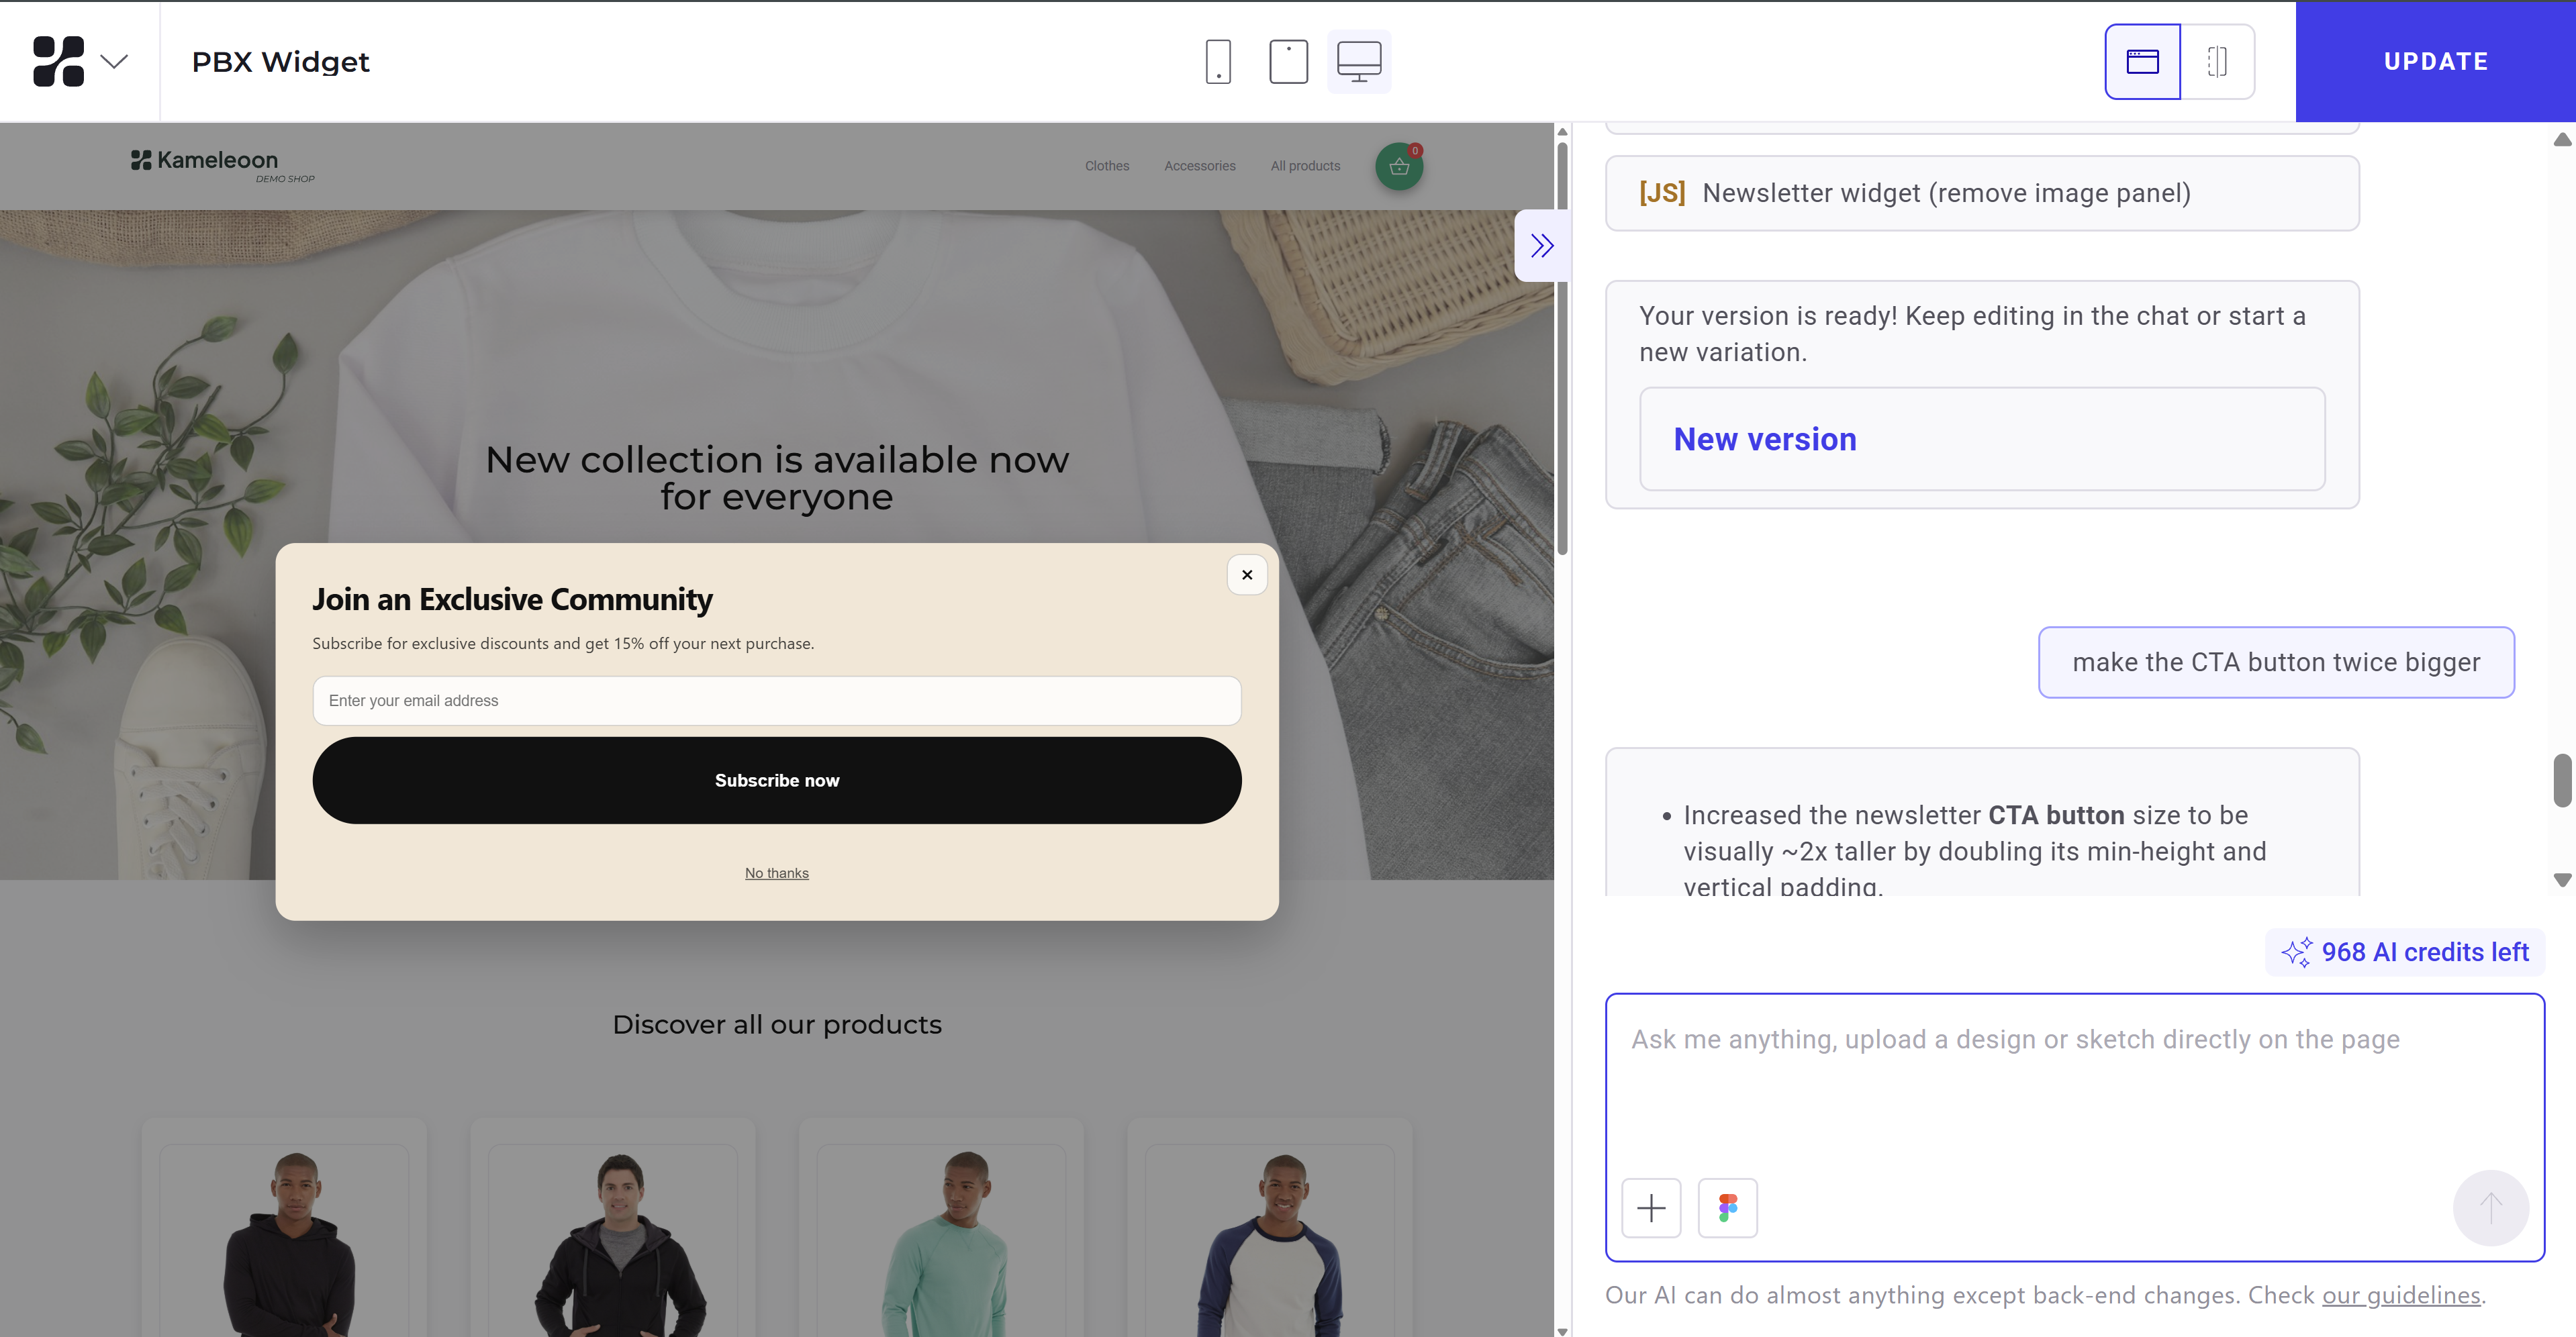
* "Change the background color to a darker beige"

* "Make the popup appear after 3 seconds"
### 4. Add goals
Track user interactions—such as email submissions, button clicks, form completions, or widget displays—by adding goals to your prompt.
You must configure the goals in [**Settings**](../goals/create-a-goal) before you can track them in a PBX widget.
**Example prompts for goals:**
* Newsletter signup: `Track a goal called "Newsletter Signup" when the user clicks the Subscribe button.`
* CTA click: `Track a goal when the CTA button is clicked. Goal name: Promo CTA Click`
* Widget engagement: `Track a goal when the popup is displayed. Goal name: Widget Viewed`
## Send widget responses to Google Sheets (Optional)
You can configure a PBX widget to [send survey and form responses directly to Google Sheets](./create-a-widget-with-the-widget-studio/create-csat-nps-and-surveys/send-survey-responses-to-google-sheets). You must first configure your Google Sheet as described in [this guide](./create-a-widget-with-the-widget-studio/create-csat-nps-and-surveys/send-survey-responses-to-google-sheets).
When writing the prompt to connect your widget to Google Sheets, follow these guidelines:
1. **Define a clear submission trigger:** Specify which element triggers the request. The trigger is typically the main CTA button (for example, `SubmitButton`).
2. **Use an external HTTP POST request:** Set the method to **POST** and include your Google Apps Script Web App URL.
3. **Provide the Web App URL explicitly:** Always include the full URL (for example, `https://script.google.com/macros/s/XXXXXXXX/exec`). PBX cannot infer or generate this automatically.
4. **List all elements to send:** Explicitly name every field (for example, `email`, `rating`, `comment`).
Do not rely on implicit behavior. PBX requires exact field names.
5. **Match parameter names exactly:** Ensure the names match exactly across your widget element names, the request payload, and the Google Sheets column headers.
**Example prompt for Google Sheets integration:**
```text id="example_pbx_google_sheets" theme={null}
Add a system to send widget form data to a Google Sheet using an HTTP request.
- Submission trigger: Use the button named "SubmitButton"
- Request configuration:
- Request name: SendToGoogleSheets
- Method: POST
- Action URL: https://script.google.com/macros/s/AKfycbxxxxxxx/exec
- Data to send: Send the values of the following elements as parameters:
- email
- rating
- comment
- Payload rules:
- Each parameter key must exactly match the element name
- Keys must also match the column headers in the Google Sheet
- Behavior:
- Trigger the request when the SubmitButton is clicked
- After successful submission, display a confirmation message: "Thank you for your response"
- Optionally handle errors if the request fails
```
## Write effective prompts
Well-written prompts significantly improve the quality of the generated widget.
### Use a clear structure
The best prompts follow a logical structure:
```text theme={null}
- Widget type
- Layout
- Content
- Style
- Behavior
```
**Example:**
```text theme={null}
Create a modal popup widget.
- Layout: Two columns with an image on the left and a form on the right.
- Content:
- Title: Join our community
- Description: Get 15% off your first order
- Email field
- CTA button: Subscribe now
- Style:
- Modern ecommerce design
- Rounded buttons
- Dark beige background
- Behavior:
- Display after 5 seconds
- Close button in top right corner
- Image: Use the following image in the image placeholder on the left: https://www.whereyourimagelives.com
```
### Be specific
Specific prompts produce more accurate layouts and styles.
**Bad prompt:**
`Create a popup for a newsletter`
**Better prompt:**
`Create a centered modal popup for newsletter subscription with a modern ecommerce design. Include an email input field and a large CTA button offering 15% off.`
### Define UI elements explicitly
Always specify the elements you need, such as titles, buttons, inputs, secondary links, icons, or images.
**Example:**
```text theme={null}
Add:
- Email input field
- Large CTA button
- Small legal disclaimer text
- "No thanks" link below the button
```
### Describe behavior
PBX can generate widget logic if you specify it.
**Examples:**
* `Show popup after 5 seconds`
* `Close popup when clicking outside`
* `Close popup when clicking "No thanks"`
### Iterate instead of rewriting
Rather than rewriting the entire prompt, refine your widget step-by-step. Iterative prompting improves results efficiently.
**Examples:**
* `Make the CTA button darker`
* `Increase padding inside the popup`
* `Add rounded corners to the input field`
# A/B test your widget
Source: https://docs.kameleoon.com/user-manual/assets/widgets/use-widgets-in-your-campaigns/ab-test-your-widgets
Add an activated widget to a variation in the Graphic Editor to include it in an A/B experiment.
You can test your widgets by creating an experiment in the Graphic editor. Before adding a widget to your experiment, you'll have to create and activate it in the Widget Studio. Note that you can't edit widgets using the Graphic editor. You can only edit widgets in the Widget Studio.
## Add a widget to a variation via the Graphic Editor
To add a widget to a variation in the Graphic editor:
1. Open the **Variation** menu in the Graphic editor.
2. Click **New element** and select **Widgets**. The Widgets Dashboard opens.
3. Select the widget you want to add to your experiment. A column opens on the right.
4. Select the devices on which you want to display your widget.
5. Set your widget's position on the page.
6. Select the output for the widget's code (JS with shadow DOM or JS and CSS).
7. Click **Add**.

You will be redirected to your experiment in the A/B Graphic Editor.
## Delete a widget from a variation
If you want to delete a widget previously associated with a variation, you have to remove it from the CSS code.
To do this:
1. Open the **Variation** menu.
2. Click **CSS**.
3. Delete the code linked to the widget in the pop-in that opens.
4. Save your changes.

# Associate a widget with a campaign
Source: https://docs.kameleoon.com/user-manual/assets/widgets/use-widgets-in-your-campaigns/associate-a-widget-with-a-campaign
Link an activated widget to an experiment or personalization campaign to display it to targeted visitors.
You must [create](../create-a-widget-with-the-widget-studio/create-a-widget) and activate a widget before you can associate it with a campaign.
To avoid incompatibility between the widget’s CSS and the one used on your website, you can activate the **Generate the code of all graphic widgets using JS with shadow DOM** option in your project's Configuration page.
If you activate this option, widgets already used in a campaign will automatically update when the campaign status changes. If you use CSS class names from your website in your widgets, styles may not apply correctly.

## Associate a widget with an experiment
To learn how to add a widget to an experiment in the A/B Graphic editor, read [this article](./ab-test-your-widgets).
## Associate a widget with a personalization
To learn how to add a widget to a personalization, read [this article](./ab-test-your-widgets#add-a-widget-to-a-variation-via-the-graphic-editor).
If you make changes to an active widget, all linked campaigns will be updated with the widget's latest version.
# Associate a widget with a personalization
Source: https://docs.kameleoon.com/user-manual/assets/widgets/use-widgets-in-your-campaigns/associate-a-widget-with-a-personalization
Select and configure an active widget to display within a personalization campaign, choosing its page position and code output method.
To associate a widget with a personalization:
1. Open the personalization creation page.
2. Choose your personalization's type: **In your page content** or **Above your pages**.
3. Click **Widgets** > **Choose a widget**. The **Add a widget** page will open.

4. Select an active widget to add to your campaign.
5. Select the output for the widget's code in the right-hand sidebar.
* Using JS with shadow DOM will isolate the widget's CSS from your website's CSS.
* If you use CSS class names from your website in your widgets, styles may not apply correctly.
6. Confirm your selection.
You will be redirected to your campaign. Continue setting up your widget [as usual](../../../web-personalization/set-up-and-launch-a-personalization).
**What happens to old widgets used in online personalizations?**
Old widgets (created before the Widget Studio) are obsolete—you can't use them in online campaigns anymore. Each widget has a corresponding JS and CSS code that Kameleoon will extract and add permanently to the JS and CSS sections located on each personalization type.
# Analyze a feature experiment's results
Source: https://docs.kameleoon.com/user-manual/experiment-analytics/analyze-results/advanced-analysis/analyze-a-feature-experiments-results
Access and interpret Overview and Reports tabs for feature experiments created under a feature flag in the Rollout Planner.
The Rollout Planner includes a section for feature experiments created under a feature flag.
Once you have added at least one rule, click **Reporting** > **Results**.

There are two tabs:
* **Overview:** This view shows reporting data from the last 24 hours. You can choose from a variety of time intervals (1, 12, and 24 hours), and filter by **Total Evaluations** or **Visitors Evaluated**.

* **Reports**: Shows a list of the feature delivery and experiment rules you've created. Click any to view in-depth reporting. To access reports for your rules, you must assign at least one [goal](../../experimentation/feature-experimentation/track-your-feature-experiments/create-goals-for-feature-flags) to your feature.

You can also access rules' reporting pages using the three-dots menu in a rule's card.

Kameleoon tracks your feature’s performance data based on the [goals](../../experimentation/feature-experimentation/track-your-feature-experiments/create-goals-for-feature-flags) you identified when creating your test. You must have at least one goal to access your rules' Results page.
[This article](../results-page/results-page-structure) can help you learn how to navigate the Results page.
# Cross-Campaign Analysis
Source: https://docs.kameleoon.com/user-manual/experiment-analytics/analyze-results/advanced-analysis/cross-experiment-analysis-interaction-detection
Filter or break down experiment results by visitors exposed to other experiments, features, or personalizations to detect interactions and measure combined campaign effects.
When you run multiple experiments, features, and personalizations concurrently, visitors often encounter more than one campaign at the same time. Their behavior reflects the combined effect of every campaign they encountered, not just your experiment. Without a way to separate these effects, you cannot tell whether your results reflect your variation's true performance or interference from another campaign.
Cross-Campaign Analysis lets you **filter** or **break down** your experiment's results based on which other campaigns visitors encountered. Use it to isolate your experiment from outside influence, detect interference between campaigns, and measure synergies when campaigns work well together.
## Filter experiment results
1. On the Results page of your experiment, open the **Filter audience** dropdown in the **Audience** tab (located in the right-hand side panel).
2. Click **Add filter**.
3. Select an option to filter your results:
* **Exposed experiments**
* **Exposed personalizations**
* **Exposed features**
4. Choose whether to **Include** (only show visitors exposed to these) or **Exclude** (only show visitors *not* exposed to these).
5. Select the specific items you want to include or exclude:
* **Experiments:** Click the checkbox next to the experiment's name to include the experiment and **all** its variations. Alternatively, click the checkboxes for specific variations if you only want to include a subset.
* **Personalizations:** Select the specific personalizations.
* **Features:** Select the specific features.
## Break down experiment results
Breakdowns segment your experiment's results into groups based on visitors' exposure to other campaigns, so you can compare performance within your experiment based on external exposure.
1. On the Results page of your experiment, open the **Breakdown audience** dropdown in the **Audience** tab (located in the right-hand side panel).
2. Click **Add breakdown**.
3. Select an option to break down your results:
* **Cross experiments**
* **Cross features**
* **Cross personalizations**
4. Select which experiments, features, or personalizations you want to use to segment your results.
## Interpretation and benefits
Use Cross-Campaign Analysis to answer critical questions about your platform's holistic performance:
* **Identify interference:** Determine whether a low-performing personalization running simultaneously is negatively affecting a high-performing experiment's results.
* **Validate feature interactions:** See how a new feature flag affects the conversion rate of an unrelated experiment to confirm your releases are stable.
* **Measure synergies:** Confirm whether two specific variations or campaigns deliver a greater uplift when combined than when run separately.
# Personalization — Audience types
Source: https://docs.kameleoon.com/user-manual/experiment-analytics/analyze-results/advanced-analysis/personalization-audience-types
Understand the distinction between targeted, exposed, and non-targeted visitors in personalization campaigns and why targeted visitors may not always be exposed.
There are no variations for personalizations; instead, there are audience types. Kameleoon distinguishes between:
* Targeted visitors who correspond to criteria defined in the targeting.
* Exposed visitors who correspond to the criteria defined in the targeting and the exposure parameters.
* Non-targeted visitors who do not correspond to the criteria.
Targeted visitors are not always exposed to personalizations. There can be several reasons for this:
* They are part of the "control" group that compare the behavior of exposed and non-exposed targeted visits.
* They are limited by capping, which lets you limit exposure to your personalization to manage marketing pressure on your visitors.
* They are limited by prioritization.
* They are exposed to another personalization.
# Takeaways
Source: https://docs.kameleoon.com/user-manual/experiment-analytics/analyze-results/advanced-analysis/takeaways-menu
Review AI-generated insights and experiment results across all stopped and paused experiments from a single consolidated view.
The **Takeaways** page consolidates experiment results and AI-generated insights in one place. Insights are powered by **PBX Analyze**, Kameleoon's AI engine that surfaces insights and recommendations for your experiments. Use it to review outcomes across experiments and collaborate with your team without navigating individual results pages.
## Access Takeaways
Click **Insights** > **Takeaways**.

## Included experiments
An experiment appears in Takeaways only when it meets the following criteria:
* **Status**: The experiment is **Stopped**, or **Paused** for 45 days or more.
* **Traffic and conversions**: The experiment has at least 100 visits and 20 conversions globally and a defined reference variation.
* **Variations**: At least two variations have collected data.
## Search, sort, and filter experiments
### Search
Use the search bar at the top of the page to find experiments by name or keyword.
### Sort
Click the sort dropdown to order experiments by:
* **Biggest uplift**: Experiments with the highest positive uplift appear first.
* **Lowest uplift**: Experiments with the lowest uplift appear first.
* **Most recent**: Most recently modified experiments appear first.
* **Least recent**: Oldest experiments appear first.
### Favorites
Click **Favorites** to display only the experiments you have marked as favorites.
### Filters
Click **Filters** to open the filter sidebar and refine the experiment list by:
* Project
* Result (Win, Loss, or Inconclusive)
* Creator
* Goal
* Segment
* Experiment type
* Key date (last modification, last status change, or creation)
#### Key date filter
After selecting a key date filter, click **Click to choose a date**. A calendar view opens where you can configure the date range using one of the following options:
* **Fixed date range**: Specify a start and end date.
* **Since date**: Show experiments from a specific date to today.
* **Last date**: Show experiments within a defined period of recent days.
Enter dates directly in the text field, or select them from the calendar.

## Experiment cards
Each experiment card displays key information at a glance:
* Target
* The segment or audience targeted by the experiment.
* Primary goal
* Total revenue
* Result (Win, Loss, or Inconclusive)
* Primary goal uplift
* Revenue uplift
* AI insights
### Experiment results
Kameleoon assigns each experiment one of three result statuses based on statistical reliability:
* **Win**: The variation outperformed the control and reached the reliability threshold.
* **Loss**: The variation underperformed the control and reached the reliability threshold.
* **Inconclusive**: The results did not reach the required reliability threshold. The experiment did not generate enough statistical evidence to confirm whether the variation had a positive or negative impact.
Kameleoon computes all results relative to the experiment's reference variation. By default, the reference variation is the **Original**.
Takeaways does not display **Primary goal uplift** or **Revenue uplift** for **Inconclusive** experiments. If revenue tracking is enabled, Takeaways still shows **Total revenue**.
### AI insights
Each experiment card includes insights generated by **PBX Analyze**, Kameleoon's AI engine. These insights highlight changes in key metrics such as conversion rate, revenue, and quantity, indicate statistical reliability where relevant, and surface notable trends or unexpected outcomes.
### Add an image to a card
You can add a custom image to any experiment card to make it easier to identify at a glance.

To add or replace a card image:
1. Click the image area on the left side of the experiment card. The **Image preview** opens.
2. Click **Upload from computer** to select a file from your device, or **Upload via URL** to enter an image URL.
3. Optionally, use the **Resize**, **Crop**, or **Flip** tools to adjust the image.
4. Click **Save**.
### Card actions
Click the **three-dots menu** on an experiment card to:
* **Results**: Open the experiment's [Results page](/user-manual/experiment-analytics/analyze-results/results-page/access-the-results-page).
* **Add to favorites**: Mark the experiment as a favorite.
## Experiment details
Click an experiment card to open a detailed view. Detailed results for the experiment appear beneath **Insights**.

### Campaign overview
Click **Campaign Overview** to expand a section with additional experiment metadata:
* Duration
* Target
* Primary goal
* Result
* Primary goal uplift
* Status
* Type
* Creator
### Navigation
Use the arrow buttons at the top of the detailed view to navigate to the previous or next experiment.
### Detailed view actions
In the detailed view, you can:
* Click **Open the Results page** to navigate to the experiment's full [Results page](/user-manual/experiment-analytics/analyze-results/results-page/access-the-results-page).
* Click the **three-dots menu** > **Results** to open the Results page.
* Click the **three-dots menu** > **Add to favorites** to mark the experiment as a favorite.
### Comments
Use the **Comments** section to collaborate with your team on experiment results. To add a comment:
1. Click **Add** to open the comment text field.
2. Enter your comment. Use **@** to mention a teammate.
3. Click **Save** to post the comment.
# Data collection and reporting
Source: https://docs.kameleoon.com/user-manual/experiment-analytics/analyze-results/data-and-metrics/data-collection-and-reporting
Understand how Kameleoon collects tracking data, when that data appears in the Results page, and which tool to use for real-time QA versus analyzed reporting.
Kameleoon separates two distinct operations: **data collection** and **data reporting**. Data collection is near-instant. Reporting is visit-based and is not a real-time view.
Understanding the distinction prevents a common mistake: using the Results page as a QA tool. The Results page shows analyzed visit data, not a live feed of incoming events. Use [Live events](/user-manual/experiment-analytics/analyze-results/data-and-metrics/live-events) to confirm that tracking is working.
## How Kameleoon collects data
The collection method depends on your implementation type.
### Web experimentation
For web implementations, Kameleoon collects data through the `engine.js` script running in the visitor's browser. When a visitor loads a page, the engine:
1. Initializes the visitor and evaluates which experiments and personalizations apply.
2. Assigns the visitor to a variation.
3. Sends tracking events—such as page views, experiment exposures, scroll activity, and goal conversions—to the Kameleoon Data API.
The engine batches outgoing requests and processes the queue approximately every 500 ms. On page unload, the engine forces immediate transmission so in-flight events are not lost.
### SDK implementations
For server-side and mobile implementations, Kameleoon collects data through SDK tracking calls. The SDK evaluates flags locally and sends tracking requests to the Data API in batches. The default flush interval is 1 second. You can also trigger an immediate flush with the `flush` method.
### Warehouse and offline conversions
If you import conversions from a data warehouse, Kameleoon accepts events through the Data API. A successful API response confirms that Kameleoon received the payload—not that the events are visible in reporting yet. Warehouse-pulled conversions go through an additional processing step before they appear in results. See [Warehouse-delayed conversions](#warehouse-delayed-conversions) for details.
## Data processing and reporting latency
Two separate timings determine when data becomes available.
| Stage | Timing |
| ---------------------- | ---------------------------------------------------- |
| Event ingestion | Near real-time (within seconds of the tracking call) |
| Reporting availability | After the visit ends |
Events appear in **Live events** almost immediately after the tracking call fires. They do not appear on the Results page until Kameleoon has processed the completed visit.
## What "ended visit" means
The Results page reports on visits, not individual events. A visit ends when Kameleoon receives no new activity from the visitor for **30 minutes**.
Closing a browser tab often causes a visit to end, but closing the tab is not the formal condition. A visit ends based on inactivity, not browser state.
**Practical implication:** If you trigger a goal conversion and then immediately check the Results page, the visit is likely still active and the conversion does not appear yet. Wait until the visit ends—or use Live events to confirm the event fired in real time.
For Feature Experimentation implementations, allow 30–60 minutes after triggering a goal before expecting data on the Results page.
## Use Live events for QA, not the Results page
| Goal | Tool to use |
| ----------------------------------------------------------- | --------------------------------------------------------------------------------------------- |
| Confirm that an event fired | [Live events](/user-manual/experiment-analytics/analyze-results/data-and-metrics/live-events) |
| Verify that an experiment assigned a visitor to a variation | [Live events](/user-manual/experiment-analytics/analyze-results/data-and-metrics/live-events) |
| Debug conversion tracking | [Live events](/user-manual/experiment-analytics/analyze-results/data-and-metrics/live-events) |
| Analyze experiment results | Results page |
| Review statistical significance and conversion rates | Results page |
**Live events** is the correct tool for real-time QA. The **Results page** is for analyzed, visit-based outcomes after experiments have run.
## Warehouse-delayed conversions
Conversions imported from a data warehouse follow a different processing timeline than web or SDK events. After Kameleoon accepts the payload through the Data API, a separate process merges those events into experiment reporting. Same-day visibility is not guaranteed for warehouse-imported conversions. Contact your Customer Success Manager for details on expected reporting timelines for your warehouse integration.
## Further reading
* [Live events](/user-manual/experiment-analytics/analyze-results/data-and-metrics/live-events)
* [Results page glossary](/user-manual/experiment-analytics/analyze-results/results-page/results-page-glossary)
* [How Kameleoon counts conversions](/user-manual/experiment-analytics/analyze-results/data-and-metrics/how-kameleoon-counts-conversions)
* [How Kameleoon counts sessions and visitors](/user-manual/experiment-analytics/analyze-results/data-and-metrics/how-kameleoon-counts-sessions-and-visitors)
# Goal metadata
Source: https://docs.kameleoon.com/user-manual/experiment-analytics/analyze-results/data-and-metrics/goal-metadata
Filter and break down conversion data by goal metadata to gain granular insights into experiment results on the Results page.
Goal metadata lets you filter and break down conversion data by goal metadata. This feature provides more granular insights into test results and improves analysis on the Results page.
## Filtering conversions
You can filter conversions based on metadata attached to a goal.
1. Navigate to the **Results page**.
2. Open the **Metrics** menu.
3. Click **Add filters**.
4. Select a **goal** from the first selector and the **metadata** attached to that goal from the second selector.
5. Choose a **match type**:
* **Corresponds exactly to** (default)
* **Exists**
6. **If** you select **corresponds exactly to**, enter a value in the text field. The text field disappears if you select **exists**.

7. Click **Apply**.
The metadata filter is unique because it applies conditions to conversions, while other filters apply to visits or visitors.
The **Converted visits** column updates based on the selected metadata. The **Visits** column remains unfiltered.
After you apply the filter, you will see **(Goal name) enriched with (Metadata)** in the **Audience** sidebar under the **Filter** section.
## Breaking down conversions by goal metadata
You can break down converted visits by goal metadata in the sections that provide detailed per-goal or per-variation views (available in the [**Metrics** menu](../results-page-tabs/metrics-menu)). These views display the number of conversions per metadata value, so you can analyze performance differences across groups.
### View per goal
1. Navigate to the **Metrics** menu and select **view metrics per goal**.
2. Click **Add breakdown**.
3. Select a **goal** from the first selector and the **metadata** attached to that goal from the second selector.
4. Click **Apply**.
### View per variation
1. Navigate to the **Metrics** menu and select **view metrics per variation**.
2. Click **Add breakdown**.
3. Select a **goal** from the first selector and the **metadata** attached to that goal from the second selector.
4. Click **Apply**.
***
Once applied, the **Converted visits** column splits into sub-rows, each representing a metadata value. For each value, the table shows the number of conversions associated with that value out of all visits. The **Visits** column displays dashes to emphasize conversion count.

You can also limit how many metadata values appear by adjusting the **Limit of values displayed** selector.

***
By filtering and breaking down conversions with goal metadata, you can isolate the impact of specific variables and gain a more detailed view of your experiment's performance. The breakdown shows the improvement rate calculated only from visits where the selected metadata exists, rather than from all visits.
# How Kameleoon counts conversions
Source: https://docs.kameleoon.com/user-manual/experiment-analytics/analyze-results/data-and-metrics/how-kameleoon-counts-conversions
Understand the Kameleoon visitor data model and how attribution windows track conversions across multiple sessions.
## Kameleoon visitor data model
Campaign influence often extends beyond the limited framework of a single targeted session.
With the Kameleoon visitor data model, you can follow this influence over several successive sessions. When Kameleoon displays a variation to a user, it attributes all conversions from that user to the variation while the campaign remains online.
**Example:** You launch an A/B experiment on a landing page. This experiment generates many conversions, but these conversions take place during non-targeted visits. Variation B reduces the bounce rate from 80% to 40%. However, your sales cycle requires an additional visit to trigger the transaction. The system does not target the second visit because it does not involve the landing page. Yet, your experiment might have had a decisive impact on your visitors. With the Kameleoon data model, variation B includes these transactions, and the results page identifies it as the winner. This model accounts for the possibility that some conversions take longer than others.

## Attribution window
Campaign influence is not unlimited. After a certain period, you can reasonably consider that user behavior is no longer linked to the assigned variation. Kameleoon calls this period the window of influence or the attribution window.
### Definition
The attribution window defines the period during which Kameleoon attributes visitor conversions and transactions to a given variation. By default, Kameleoon sets this window to seven days.
For example, if a visitor sees a variation on Monday, the attribution window opens the moment they enter the experiment. If that visitor completes a transaction on Wednesday but the experiment does not target them again, Kameleoon still counts the transaction in the variation results. At the end of the seven days, the window closes and Kameleoon considers subsequent conversions independent of the variation.
Attribution window limits depend on your sales cycle and business model. These limits can also differ between campaigns. You can define these limits (in hours or days) and adapt them to each situation.
### Set up the attribution window
Set your attribution window limits on the **Configuration** page.
1. Click **Admin** > **Projects** > **Configuration** on your site card.
2. Locate the attribution window at the bottom of the **General** tab.

When you launch a campaign (experiment or personalization), Kameleoon uses the attribution window value you entered for the project throughout the campaign. You cannot modify the window for an active campaign; if you modify the project-level attribution window, the change does not impact online campaigns.
If you set the attribution window to 0 days and 0 hours, Kameleoon only counts conversions for targeted visits.
If a campaign status changes from **Online** to **Paused**, the window originally assigned remains unchanged to guarantee consistent results.
Locate the attribution window associated with a campaign on your Dashboards (in the tooltip containing campaign information) and on the results page.
Kameleoon's product recommendations module only counts conversions for targeted visits. Kameleoon does not currently plan to offer extended window attribution for product recommendations. To request this feature, contact your Customer Success Manager.
### Results page
Locate the attribution window associated with your campaigns in the **Key information** section on the right side of the results page.

#### Filter and breakdown
On the results page, filters and breakdowns apply per visit. If you apply a breakdown, the results table for each goal lists all possible unit values and indicates the number of visitors who validated that value at least once during the attribution window.
For example, consider a visitor who makes three visits on different browsers: the first two on Chrome and the next on Firefox. With a breakdown by browser, this visitor appears in both the **Chrome** and **Firefox** rows of the table.

#### Change the date range
Temporal filtering functions differently with attribution windows. When you choose a different time range, the selected range might not include the day the experiment started. If this happens, the selected timeframe can include visitors previously targeted by the experiment, even if the system did not target them during the selected period. Consequently, the number of visitors can exceed the number of visits.
## Custom attribution window
The custom attribution window lets you define experiment-specific attribution windows for greater flexibility in tracking conversions.
The custom attribution window default value initially matches the project attribution window. If you update the project-level attribution window, new experiments automatically reflect this change. You can customize the attribution window by specifying a duration of up to 45 days and 23 hours. The total duration cannot exceed 45 days.
### Use the custom attribution window
1. Navigate to the **Finalization** panel.
2. Click **General settings** > **Advanced settings**.
3. Adjust the days and hours fields using your keyboard or the up/down arrows.
If the attribution window exceeds 45 days, a warning message appears and Kameleoon restores the previous valid configuration.
### Usage constraints
Modify the custom attribution window only when the experiment has one of the following statuses:
* **Draft**
* **Planned** (with no recorded data)
You cannot change the custom attribution window for experiments with the following statuses:
* **Online**, **Paused**, **Stopped**, or **Planned** (with data already recorded).
Stopping or pausing an experiment also stops or pauses its influence.
## Further reading
For more details on the Kameleoon statistic engine, read the [Kameleoon Statistical paper](https://storage.googleapis.com/kameleoon-storage-documentation/user-manual/pdf/statistics-at-kameleoon.pdf).
# How Kameleoon counts sessions and visitors
Source: https://docs.kameleoon.com/user-manual/experiment-analytics/analyze-results/data-and-metrics/how-kameleoon-counts-sessions-and-visitors
Understand the difference between a session and a visitor in Kameleoon, and how Kameleoon identifies and tracks each across web and server-side experimentation.
## Visitors and sessions
In Kameleoon, a **visitor** is a unique person (or device), and a **session** is one continuous period of activity from that visitor. One visitor can have many sessions over time.
The distinction matters when you read experiment results: visitor counts tell you how many distinct people saw a variation, while session counts tell you how many times those people were active while the experiment was running.
## What counts as a session
Kameleoon uses a 30-minute inactivity window to define the boundary between sessions. When a visitor has no activity for more than 30 minutes, their next action starts a new session.
**Example:** A visitor views a product page at 10:00, then returns at 10:20 to view a second page—both actions belong to the same session. If the same visitor returns at 10:35 instead, that second visit starts a new session.
The default 30-minute session duration is configurable for server-side Feature Experimentation SDKs. Contact your Customer Success Manager or refer to the [technical considerations reference](/developer-docs/feature-experimentation/technical-reference/technical-considerations#server-side-sdks) for details.
## How Kameleoon identifies visitors
### Web Experimentation
On web, Kameleoon identifies each visitor using a unique visitor code stored as a cookie in their browser. When a visitor arrives at your site:
* If the cookie already exists, Kameleoon recognizes them as a returning visitor and maintains continuity with their previous sessions.
* If no cookie exists, Kameleoon generates a new visitor code and stores it. The cookie remains active for 365 days.
### Feature Experimentation
For server-side SDK integrations, you pass the visitor identifier—such as a user ID or session token—directly when calling SDK methods. Kameleoon keeps visitor and session data in memory for the duration of the active session (30 minutes of inactivity by default).
The SDK automatically records and sends tracking data to Kameleoon when you use tracking-enabled SDK methods. Data is batched on a short, configurable interval so no manual action is typically needed.
For a full breakdown of which SDK method calls trigger tracking requests, see the [Feature Experimentation SDK FAQ](/developer-docs/feature-experimentation/technical-reference/faq-global#when-does-the-sdk-send-a-tracking-request-for-analytics).
## Hybrid experimentation
When you run experiments that span both web and server-side environments, Kameleoon can recognize the same visitor in both. The visitor code from the browser cookie is shared with the server-side SDK, so the same person is counted consistently regardless of which side of your application they interact with. See [Hybrid experimentation](/developer-docs/feature-experimentation/get-started/hybrid-experimentation) for setup details.
## Further reading
* [Data collection and reporting](/user-manual/experiment-analytics/analyze-results/data-and-metrics/data-collection-and-reporting)
* [How Kameleoon counts conversions](/user-manual/experiment-analytics/analyze-results/data-and-metrics/how-kameleoon-counts-conversions)
* [How Kameleoon tracks and counts unique users](/user-manual/account-and-team-management/organization-settings/how-kameleoon-tracks-and-counts-unique-users)
# Live events
Source: https://docs.kameleoon.com/user-manual/experiment-analytics/analyze-results/data-and-metrics/live-events
Monitor and inspect incoming user events in real time over a rolling 14-day window to debug experiments and verify conversion tracking.
## Overview
The **Live events** page lets you monitor and inspect incoming user events on your website in real time (over a rolling 14-day window). Whether you’re troubleshooting experiment exposures or verifying conversions, this tool gives you instant visibility into what’s happening in your A/B testing setup.
Accessible under **Insights > Live events**, this page displays events with key metadata and supports filtering, searching, and deep inspection through detailed event views.

* **Project selector** (dropdown)
* **Event table**: Displays timestamped logs with the following columns:
* **Date and time**
* **Event type** (for example, CONVERSION or EXPERIMENT)
* **User ID**
* **Event properties** (as raw JSON snippet)
* **Refresh button**: Manually update the list with the latest events
* **Last update timestamp**: Shows when the data was last fetched
By default, this table displays events from the past 14 days and updates automatically in real time. Events appear in reverse chronological order.
## Refreshing data
Click the **Refresh** button (top right) to manually reload data. Use it when you expect new events and want to force an update.

## Filtering events
Use the filters sidebar to narrow the event list by time range or event type.
### Time range
Select a preset window or define a custom range:
* **Last hour**
* **Last 24 hours**
* **Last 7 days**
* **Custom**: Click **Click to choose a date**, then select from three options:
* **Fixed**: Set a specific start and end date.
* **Since**: Show all events since a specific date.
* **Last**: Show events from the last N days, hours, or minutes.
### Event type
Filter by one or more of the following event types:
* **Conversion**
* **Custom data**
* **Experiment**
* **Personalization**
## Use cases
* **Debugging**: Identify issues in real time by searching for user IDs or goal IDs
* **QA Testing**: Validate that experiments and conversions are firing correctly
* **Monitoring**: Watch traffic as it happens during key campaigns or rollout.
Live events is the right tool for confirming that an event fired. The results page is visit-based and does not update in real time—a visit must end (30 minutes of inactivity) before data appears there. See [Data collection and reporting](/user-manual/experiment-analytics/analyze-results/data-and-metrics/data-collection-and-reporting) for a full explanation.
# Ratio Metrics
Source: https://docs.kameleoon.com/user-manual/experiment-analytics/analyze-results/data-and-metrics/ratio-metrics
Create goals that divide one metric by another to measure efficiency indicators like revenue per conversion or conversion rate across your experiments.
Ratio Metrics let you create goals that compare two existing metrics by dividing one by the other. This feature helps you measure relationships and efficiency indicators, such as:
* Conversion rate (Conversions / Visits)
* Revenue per conversion (Revenue / Conversions)
* Cost per result (Revenue / Conversions)
These insights give you a clearer picture of your experiment’s performance.
## Creating a Ratio Metric
You can create a Ratio Metric in the goal creation flow.
1. In the Kameleoon app, click **Settings** > **Goals** > **New goal**.
2. Select **Ratio** as the goal type.
3. Click **Next**.
4. Choose an existing goal as the numerator.
5. Choose another goal as the denominator.
6. Define the property used for calculation.
7. Click **Next** > **Create**.

Once created, the Ratio Metric behaves like any other goal in your project.
## Viewing Ratio Metrics in Results
Ratio Metrics are fully integrated into the Results page. They display consistently across tables and charts, whether you are viewing by goal or variation.
### In Results tables
* A dedicated **Ratio Value** column shows your metric (changes from **Conversion Rate**).
* Values are displayed with the correct decimal precision.
* When applicable, revenue columns are hidden for clarity.

### With filters and breakdowns
* Applying filters will automatically recalculate Ratio Metrics based on the filtered set of visits.
* You can break down Ratio Metrics by attributes (device or location, for example) to compare efficiency across segments.
## Exporting Ratio Metrics
Ratio Metrics are included in both **XLSX** and **raw data exports**, allowing you to continue your analysis outside Kameleoon.
## Additional features
* **Hover tooltips:** When you hover over a Ratio Metric's name, you'll see its formula and component metrics.

* **Reliability charts:** You can view cumulated reliability charts for Ratio Metrics when they are selected as main or secondary goals.
## Example use cases
* **Marketing efficiency:** Compare campaign conversions per visit.
* **Revenue insights:** Track average revenue per user or conversion.
* **Optimization impact:** Measure whether changes at one step of the user journey (for example, increasing visits or conversions on Goal A) affect the efficiency of another outcome (for example, revenue from Goal B).
# Activity menu
Source: https://docs.kameleoon.com/user-manual/experiment-analytics/analyze-results/results-page-tabs/activity-menu
View a chronological log of all changes made to your experiment, including who made each change and when it occurred.

The **Activity** menu provides a detailed timeline of all actions you've performed on your experiment, offering a clear record of its evolution. This menu logs any edits or updates made and provides details on what changes were implemented and when they occurred.
Events in the Activity menu are organized chronologically, with the most recent events displayed at the top of the list.
At the top of each section, a search bar is available to help you locate specific events in your experiment.
* **Left column (DateTime):** Displays the date and time of each event.
* **User information:** Next to each event icon, bold text identifies the user who made the change. Below the user’s name, a description explains what the change involved.
* **Right column (Event Type):** Indicates the type of update that occurred.
# Learnings menu
Source: https://docs.kameleoon.com/user-manual/experiment-analytics/analyze-results/results-page-tabs/learnings-menu
Get an AI-generated summary of your experiment results, including key insights and actionable recommendations, without writing a prompt.
The **Learnings** tab provides a summary of your experiment results, generated by Kameleoon’s AI (KAI).
This feature is available for all experiments in the Results page.

This feature is especially useful if you:
* Want a quick, ready-to-use analysis
* Need to review the results after some time
* Are not familiar with statistical methods or prompt-writing
If you want more detailed answers or control over the analysis, you can still use **Analyze with AI Assist**.
## What is AI Summary?
AI Summary is a short, written analysis of your experiment results. It helps you understand what happened in your test and what to do next, without needing to ask KAI or write a prompt.
## Where can I find it?
Go to your experiment Results page and click on the **Learnings** tab.
You will see the AI Summary divided into two parts:
* **Insights**: A recap of key metric changes and statistical reliability.
* **Recommendations**: Next steps based on the data.
## How does it work?
* Kameleoon generates the summary automatically when you open the tab.
* The summary updates every 24 hours for ongoing experiments.
* You can manually refresh it at any time (up to 10 times per day).
* If the experiment is paused or stopped, the latest summary is saved.
## What method is used?
Kameleoon uses a pre-defined prompt and statistical settings.
The analysis is based on:
* Sequential testing
* All converted visitors
* Default reference variation
* Whole date range
Hover over the tooltip next to AI Summary to view these default settings.
# Bayesian
Source: https://docs.kameleoon.com/user-manual/experiment-analytics/statistical-methods/bayesian
Learn about the Bayesian statistical method in Kameleoon and how it calculates probability to beat the original and result reliability.
## About the Bayesian method
The Bayesian approach considers the parameters you want to estimate as unknown constants. Kameleoon models each parameter as a random variable. The method takes its name from Bayes' rule and enables you to compute quantities unavailable in the Frequentist framework.
Bayes' rule combines experiment results with any available prior information; however, A/B testing uses non-informative priors. By choosing the a priori distribution, you can leverage the posterior distribution to compute values such as the probability that a variant improves upon the original.
## Access Bayesian results
When you click **Results** on the dashboard, Kameleoon displays the classic Results page by default.
To access results generated by Bayesian statistics:
1. Click the **Actions** menu at the top right of the page.
2. Select **Enable Bayesian**.

You cannot access the Bayesian results page if you divert 100% of traffic to the original or if the experiment has zero visitors.
## The Bayesian results page
The structure of the Bayesian reporting page is similar to the classic results page. However, some elements differ:
* New indicators appear, such as the probability of beating the original variation and result reliability according to Bayes.
* Several graphs do not appear on the page, and the page displays only the conversion rate.
## Definitions
### Probability to beat the original
This value represents the probability that a variation will outperform the original page with a higher conversion rate for a given goal.
If you allocate 0% of traffic to the original, the variations receive 100% of the traffic and do not compete with the original. In this case, the indicator becomes the **Probability of being the winning variation**.
### Bayesian continuous metrics
When you hover over non-binomial metrics (such as Revenue per visit/visitor or Average cart value), an overlay appears.

* **Improvement rate:** This value indicates the rate of improvement for the metric. It appears in green if positive and red if negative, alongside a credible interval.
* **Probability to win over reference:** This value shows the probability that the variation will outperform the control variation. It appears in green if it is higher than the reliability threshold set in the configuration; otherwise, it appears in red.
* **Credible Interval Table:** The min and max values define the bounds of the credible interval around the improvement rate. There is a 95% chance for the improvement rate to fall between these values. The values appear in green if positive and red if negative.
## Result differences
Both statistical methods produce equivalent results, but they do not guarantee perfect similarity. You might observe differences between certain rates. In some cases, different variations might be declared winners in the same experiment.
Ensure confidence levels reach their maximum in both methods before comparing data. If they are at maximum and doubt remains, use the results from the classic method.
## Further reading
For more details on the Kameleoon statistic engine, read the [Kameleoon Statistical paper](https://storage.googleapis.com/kameleoon-storage-documentation/user-manual/pdf/statistics-at-kameleoon.pdf).
# Choosing the right statistical method for A/B testing
Source: https://docs.kameleoon.com/user-manual/experiment-analytics/statistical-methods/choosing-the-right-statistical-method-for-ab-testing
Compare Frequentist, Bayesian, and Sequential testing approaches to select the statistical method that best fits your team's experimentation goals and risk tolerance.
## Introduction
Making decisions with a controlled level of risk is the heart of A/B testing. However, statistical methods like "Frequentist" or "Bayesian" can be confusing. This article will help you choose the right tool to use for your A/B tests.
## Main available paths
When interpreting your A/B test results, you can use the Frequentist, Bayesian, and sequential approaches. Each approach carries its own set of advantages and disadvantages, and employs distinct methodologies.
### Fixed Sample Frequentist
The Fixed Sample Frequentist method creates a rigid framework, allowing you to ensure you outline your hypothesis clearly before launching a test. If you stick to the restrictions you created without making any changes based on initial results, you'll get optimal control over statistical risk.
#### Pros
* Maximal statistical power.
* Most spread method when it comes to randomized controlled trials.
#### Cons
* Very rigid.
#### Target
Mature experimentation teams who understand the risk they take when they don't follow the method by the book.
### Bayesian
The Bayesian method offers more flexibility by incorporating existing knowledge into the analysis through prior probabilities. This approach is best when there's ample prior data available to calculate a posteriori probability.
#### Pros
* Allows you to leverage your knowledge.
* Gives you access to key data based on estimated distribution.
#### Cons
* Can lead you in the wrong direction if prior data is incorrect.
#### Target
Experimentation teams that are used to working with Bayesian techniques. This method is geared toward advanced users who have an understanding of Bayesian methods and probability distribution.
### Sequential
Sequential testing addresses the challenge of premature experiment termination due to interim results that deviate from expectations. Unlike traditional fixed-sample-size tests, sequential testing allows for dynamic decision-making based on accumulating data. While this flexibility offers the advantage of potentially reaching conclusions sooner, it may result in a less precise effect size estimate.
#### Pros
* Very flexible with no need to estimate sample size.
* Provides valid confidence interval at any point during the experiment's runtime.
#### Cons
* Lower statistical power.
#### Target
Fast moving teams that feel pressured by the rigidity of the fixed sample framework and are ready to trade some statistical power for more flexibility.
To optimize experimentation, consider combining sequential and fixed sample size methodologies. Employing sequential testing allows for early termination based on significant results, while fixed sample sizes provide statistical rigor. By setting thresholds for early stopping and validating findings with traditional methods, you can accelerate insights without compromising reliability.
## Other tools
### Multiple testing correction
To maximize the efficiency of experimentation, consider testing multiple variations simultaneously. This approach can accelerate the overall pace of experimentation. However, to maintain statistical integrity, implement appropriate correction methods to mitigate the risk of false positive results.
### CUPED
CUPED is a proven method for reducing required sample size in experiments. By leveraging pre-experiment data, CUPED improves statistical power and accelerates experimentation. To maximize its benefits, consider combining CUPED with traditional fixed sample size methodologies. This hybrid approach enables early detection of significant results while maintaining statistical power. CUPED is most effective in the following circumstances:
* Your experiment includes returning visitors.
* You've ran many experiments in Kameleoon
* There is a correlation between the goal conversions before the start of the experiment and during the live experiment.
## Further reading
If you would like more details on how Kameleoon's statistic engine works, you can [read our Statistical paper](https://storage.googleapis.com/kameleoon-storage-documentation/user-manual/pdf/statistics-at-kameleoon.pdf).
# CUPED
Source: https://docs.kameleoon.com/user-manual/experiment-analytics/statistical-methods/cuped
Learn how Controlled-experiment Using Pre-Experiment Data (CUPED) accelerates reliable results by leveraging existing visitor data.
Controlled-experiment Using Pre-Experiment Data (CUPED) uses data from existing visitors to accelerate reliable experimentation and personalization results.
## Key benefits
Use CUPED to make data-driven decisions faster and with more confidence. CUPED provides better estimates for variation effects and reduces the risk of false-positive results for tests with limited data.
## When to use CUPED
CUPED is most effective when:
1. You have collected goal data for at least two weeks prior to the experiment launch.
2. A correlation exists between goal conversions before and during the experiment.
Consider your experiment goals before enabling CUPED. Activate CUPED for the main metrics of your site, such as transactions.
## Enable CUPED
To enable CUPED:
1. Navigate to the **Data** tab in the right-hand sidebar.

2. Under **Advanced settings**, click the **toggle** next to **CUPED**.

3. Click the **dropdown menu**, then select the goals for which you want to enable CUPED.
4. Click **Apply**.
Data loading might take longer than the classic algorithm. Limit CUPED to your key goals to maintain performance.
The page data changes based on the selected goals. If you select your primary goal, the main results block displays CUPED-adjusted data and is labeled **CUPED enabled**.

Similarly, the results tables for each goal update based on the enabled CUPED settings.

The results columns display three primary differences:
* **Conversion rate** becomes **Conversion rate adjusted**
* **Improvement rate** becomes **Improvement rate adjusted**
* **Reliability** becomes **Reliability adjusted**

Apply filter-based breakdowns to results data only if you disable CUPED. When you click **Breakdown** on a table, you must confirm you want to disable CUPED. You can reactivate CUPED after removing the breakdown filter.
CUPED effectiveness increases over time. As you use Kameleoon, the algorithm leverages more experiment data to improve accuracy.
## Manage CUPED
To modify your CUPED configuration:
1. Open the **Actions** menu.
2. Select **Manage CUPED**.

Select or deselect goals in the pop-up window, then click **Validate**.
## Disable CUPED
To revert to the classic statistical method:
1. Open the **Actions** menu.
2. Select **Manage CUPED**.

Deselect the goals in the pop-up window and click **Validate**. CUPED no longer applies to your results.
Once you enable CUPED, rely on its results consistently. Switching between original and CUPED-adjusted results to find more favorable outcomes increases the risk of overestimating lift and encountering false positives.
For more information on CUPED, read the [Kameleoon statistical paper](https://storage.googleapis.com/kameleoon-storage-documentation/user-manual/pdf/statistics-at-kameleoon.pdf).
# Sample Ratio Mismatch
Source: https://docs.kameleoon.com/user-manual/experiment-analytics/statistical-methods/sample-ratio-mismatch
Learn how to detect and troubleshoot Sample Ratio Mismatch (SRM) to ensure the integrity of your experiment results.
## What is Sample Ratio Mismatch
A Sample Ratio Mismatch (SRM) occurs when the actual distribution of test subjects across experiment variations does not align with the intended distribution. This means a variant receives significantly more or less traffic than expected. SRM causes unequal traffic distribution across variations, regardless of whether you split traffic evenly.
**Example:** You launch a campaign with 50% traffic allocation for the original and 50% for the variation. If the data shows 50,000 visitors for the original and 48,900 for the variation, the Kameleoon native in-app SRM detection test flags the results as positive for Sample Ratio Mismatch.
Kameleoon detects SRM by running a [Chi-Square Goodness of Fit test](https://en.wikipedia.org/wiki/Goodness_of_fit) to determine whether a variable aligns with a specified distribution. Kameleoon uses a threshold of 0.001 for the p-value; an experiment tests positive for SRM if the p-value falls below this threshold.

*Kameleoon native in-app SRM detection alert on the Results page*
## Why is SRM relevant?
SRM indicates a bias in the experiment traffic assignment mechanism. This bias can invalidate experiment results because it violates the core hypotheses that underpin A/B test statistical computations.
This problem is especially relevant for sites with high traffic, where even small discrepancies can significantly impact results and lead to poor decision-making. Kameleoon in-app SRM alerting enables decisions based on statistical tests rather than intuition.
## What to do when an experiment is positive for SRM
You do not need to immediately disregard experiment results when you detect an SRM. If you identify the origin of the SRM and the discrepancy disappears after you filter out problematic visitors, you can still draw valid conclusions.
SRM commonly occurs when a browser classifies a visitor incorrectly due to variation code incompatibility. Consequently, the visitor sees the reference instead of the variation, and the system fails to collect exposure data. To troubleshoot this issue:
1. Open the experiment **Results** page. Pause the experiment first to prevent further biased data collection.
2. Scroll to a goal and click **Breakdown**.
3. Apply a breakdown filter to all goals.
4. In the breakdown reports, check whether the breakdown variable impacts traffic allocation. Check for **Device type**, **Browser**, **Operating system**, and any available custom data. If the reports show the discrepancy, you have identified the variable responsible for the SRM. If not, continue applying breakdown filters until you identify the cause.
5. Apply a filter to the experiment results to exclude visitors impacted by the incorrect allocation. With filtered results, you can determine the winning variation.
After you address the underlying cause of the SRM, you can relaunch the experiment.
## What causes SRM?
Root causes of SRM vary between experiments, organizations, and users. Use the following checklist to troubleshoot an experiment that is positive for SRM:
* **Check unique identifiers:** Ensure you use a strong unique identifier for visitors. By default, Kameleoon uses a unique visitor ID (Kameleoon `visitorCode`). Kameleoon hashes this code in the [assignment algorithm](https://storage.googleapis.com/kameleoon-storage-documentation/user-manual/pdf/statistics-at-kameleoon.pdf) to randomly select a variation. If you do not use the default visitor code or custom data to map a user ID, the ID must consist of at least 16 random characters (lowercase letters and numerals).
* **Verify execution delays:** Ensure no delays affect variation execution. For example, a variation might redirect to a page where Kameleoon is not installed.
* **Review custom assignment scripts:** Determine if the experiment uses [custom variation assignment](../../../developer-docs/apis/activation-api-js/tutorials/managing-a-variations-allocation-according-to-specific-criteria) scripts. These scripts bypass the standard assignment algorithm and can cause SRM.
* **Check configuration changes:** Updating test deviation, deleting a variation, or reallocating traffic can trigger an SRM flag.
Identify the origin of the mismatch to prevent it in future experiments. Analyze SRM-positive experiments with different breakdown filters to identify the root cause quickly. For more potential causes, see this [taxonomy of causes](https://www.lukasvermeer.nl/srm/docs/causes/).
## How frequent is SRM?
The SRM test is a powerful tool because it detects a broad range of potential issues. Because this range is wide, tests might return positive results more often than expected. On average, 4.5% of experiments launched on Kameleoon test positive for SRM.
Microsoft shared the following insights about [SRM](https://www.microsoft.com/en-us/research/group/experimentation-platform-exp/articles/diagnosing-sample-ratio-mismatch-in-a-b-testing/) in September 2020:
"Recent research contributions from companies such as LinkedIn and Yahoo, as well as our own research confirm that SRMs happen relatively frequently... At LinkedIn, about 10% of their zoomed-in A/B tests... used to suffer from this bias. At Microsoft, a recent analysis showed that about 6% of A/B tests have an SRM."
# Statistical significance
Source: https://docs.kameleoon.com/user-manual/experiment-analytics/statistical-methods/statistical-significance
Understand how Kameleoon calculates statistical significance and reliability scores, and learn how to interpret and improve your experiment results.
## What is statistical significance ?
### Hypothesis testing
When you launch an experiment in Kameleoon, you want to know if the variation you are proofing is actually improving a certain metric compared to your original site. When you frame this in statistical terms, you are making a hypothesis which you will then try to refute by observing data.
To help you decide, Kameleoon uses the frequentist statistical framework, which helps assess how likely the data observed is if the “null” hypothesis is true. This probability is computed by the “p-value”..
### Statistical significance and reliability
An experiment is statistically significant if the sample data Kameleoon collects is sufficiently inconsistent with the data Kameleoon should have observed under the null hypothesis.
To help you assess if an experiment result is statistically significant, Kameleoon provides the experiment's reliability, which is calculated as:
**"reliability" = 1 - "p-value"**
### Example
Let's take the example below:
* Reference variation: 142,000 unique visitors tested, 3.52% conversion rate (5,000 sales)
* Variation 1: 216,000 unique visitors tested, 3.64% conversion rate (1,850 sales)
In this example, we are testing if variation 1 is more efficient than the reference variation. We are trying to reject the null hypothesis, which is that the reference is equally or less efficient than the variation. We feel confident in incorrectly rejecting the null hypothesis only 5% of the time, so we set our significance level at 0.05.
We notice that variation 1 is more efficient than the reference variation, and the reliability is 96%: the outcome of the experiment is statistically significant at our significance level 5%.
## Checking statistical significance
If you are using Google Analytics or Kameleoon as a reporting tool, Kameleoon will automatically calculate your experiment’s statistical significance, allowing you to check if one variation of your experiment is more or less effective than the reference.
### Reliability
The Results page lets you check your campaign’s performance. There are multiple ways to check reliability.
#### Primary goal
Your variation’s reliability rate relative to the primary goal is listed in the **Primary goal** section of the **Overview** menu.

Here, the reliability rate for both variations is **>99%**.
#### Charts
You can view a visual representation of reliability rate over time in the **Charts** section of the **Overview** menu.

You can select which variations are displayed using the dropdown menu (all variations are selected by default). You can also choose to view data by **Day**, **Week**, or **Month**. Hover over the chart to view more reliability rate data.
#### Metrics
Reliability rates are displayed in the **Metrics** menu. Click **Goals** or **Variations** to view reliability rate by goal or variation.

## What can you do if sufficient reliability is not achieved?
If your reliability rate is stable but insufficient, there may be a couple of issues. Among them:
* The traffic on the page is not sufficient.
* The difference between the original's performance and the variation's is too small to draw conclusions (for example, the modification you have made has a very small impact on the behavior of your visitors).
However, you can draw conclusions for your website from a reliability rate stabilized at 75%. If the traffic on the page is not sufficient, your reliability rate will probably not reach 95%. But the Kameleoon results page offers a wide variety of data and indicators that will help you understand your audience.
You can change the minimum reliability rate required for Kameleoon to consider that a variation is winning. To do so, click **Admin** > **Sites** in the Kameleoon App. In the tab dedicated to Experiments, you can modify this minimum reliability rate.

# Winsorization
Source: https://docs.kameleoon.com/user-manual/experiment-analytics/statistical-methods/winsorization
Apply Winsorization to limit the impact of outliers on A/B test results and improve the accuracy of revenue and conversion metrics.
## What is Winsorization?
Winsorization is a statistical technique used to limit extreme values in data to reduce the impact of outliers by using percentiles of your data. Outliers are data points that significantly differ from other observations and can skew the results of your A/B tests. By Winsorizing your data, you can ensure that your results are more robust and reliable.
## Why Winsorization Matters in A/B Testing
In A/B testing, we compare two or more variations to determine which performs better. Outliers can distort the true performance of these variations, leading to misleading conclusions. By applying Winsorization, we mitigate the effect of these extreme values, providing you with more accurate and actionable insights.
**Winsorization is particularly useful when:**
* Your data contains extreme values that are not errors but are still significantly different from other observations.
* You are looking for a simple and effective method to handle outliers without resorting to more complex techniques.
* You need to maintain a balance between data integrity and managing outliers effectively.
## Risks and good practices with Winsorization
While Winsorization is a valuable tool, it is not without its risks:
* **Loss of data integrity:** Excessive Winsorization can lead to a significant alteration of your data, potentially masking important variations and patterns.
* **Over-simplification:** By modifying outliers, you may oversimplify your data, which can result in an incomplete understanding of your dataset.
* **Bias introduction:** Inappropriate Winsorization thresholds can introduce bias, skewing your results and leading to incorrect conclusions. If you do not ensure symmetry around the mean (5th and 95th percentile), you might alter the mean.
To mitigate these risks, follow these best practices:
* **Understand your data:** Before applying Winsorization, thoroughly understand the nature and distribution of your data. Understanding your data helps you set appropriate thresholds for identifying outliers.
* **Set appropriate thresholds:** Use industry standards or data-specific insights to set your Winsorization thresholds. Common thresholds include the top and bottom 0.1% up to 5% of your data, but these should be adjusted based on your specific use case.
* **Evaluate impact:** After applying Winsorization, evaluate its impact on your data and test results. Compare the Winsorized data with the original to ensure that important information is not lost.
* **Document your process:** Keep a detailed record of your Winsorization process, including the rationale for chosen thresholds and the impact on your data. This transparency aids in reproducibility and understanding.
## How to implement Winsorization in Kameleoon
### 1. Create a custom goal
First, you need to [create a custom goal](../../assets/goals/create-a-goal#create-a-new-goal) to which you want to apply Winsorization.
### 2. Set limits
Next, you need to set limits to replace the outliers. For example, if you're using 95% Winsorization, any data points below the 2.5th percentile are set to the value at the 2.5th percentile, and any data points above the 97.5th percentile are set to the value at the 97.5th percentile.
These bounds can be found in the **Advanced Settings** of your custom goal. The Winsorization method will be applied to your Revenue if it exists.

Kameleoon will apply the Winsorization method to your custom goal and identify the outliers in your data.
### 3. Read your results
Once Winsorization is applied to your goal, you can read your adjusted results in the different results pages containing this goal. The goal container will then have a badge telling you that outliers are handled on this goal. Hovering on the badge will display the parameters you have set.

## Example of impact
Consider an A/B test comparing two landing pages (A and B). Without Winsorization, a few high-value outliers (for example, purchases made by a few very high-spending users) could make one page appear significantly more effective, even if the typical user behavior does not support this conclusion.
* **Original data (Metric: Revenue per user):**
* Page A: \[10, 12, 14, 15, 16, 18, 100]
* Page B: \[11, 13, 15, 15, 17, 19, 110]
* **Winsorized data:**
* Page A: \[10, 12, 14, 15, 16, 18, 18]
* Page B: \[11, 13, 15, 15, 17, 19, 19]
In this example, the extreme values (100 and 110) are capped, providing a more accurate comparison of typical user revenue between the two pages.
## Technical considerations
* When you first apply this method to your custom goal, we will compute and store the values corresponding to the percentiles you have set and use it in results pages to adapt your data.
* The percentile values used for clipping the outliers are updated once a day at 2:00 a.m. Note that these values will be re-evaluated instantly if you change the thresholds in the goal settings.
* Note that the raw data is not changed. You can still find your raw data when requesting a raw export.
# Data discrepancies
Source: https://docs.kameleoon.com/user-manual/experiment-analytics/troubleshooting/data-discrepancies
Identify and resolve common causes of visit, visitor, and conversion count differences between Kameleoon and your analytics platform.
## Visits/Visitors discrepancies
### How visits and visitors are counted
Kameleoon measures unique visitors based on cookies and local storage. A cookie is a file placed on a browser that contains an anonymous identifier called the Kameleoon visitor code. It is stored in the user's browser for 365 days.
Each time the same visitor lands on your site, a new visit is created by Kameleoon and ends as soon as no new activity event (for example, page view, scroll, clicks) has been registered by Kameleoon over the last 30 minutes: Kameleoon creates a new visit after 30 minutes of inactivity.
Ensure the number of visitors and visits are counted the same way in your analytics platform.
### Bot filtering
Kameleoon offers built-in bot filtering, which may differ from your analytics platform. Kameleoon uses the IAB/ABC International Spiders and Bots List to detect events that must be filtered. The list is a key resource to minimize non-human traffic being counted in Kameleoon's web analytics. Additionally, a Kameleoon visit can be automatically rejected if it is detected as an outlier (bot, troll, tracker bug), which is the case if one of the following conditions is met during a visit:
* Visit lasts longer than 120 minutes.
* The number of events (such as conversions, clicks, targeting, product page views) is greater than 10,000.
### Browser compatibility
Kameleoon does not run on Internet Explorer: visits from Internet Explorer users will be excluded form your experiment reports. Also note that Kameleoon only maintains full compatibility with the last three versions of any browser, meaning some visits may not appear in your reports.
### IP exclusion
In most analytics platforms, you can add IP filtering rules, which let you exclude certain IP ranges from showing up in your campaign results. You should have the same filters in the Kameleoon. You can set them up from each project's [**Configuration** page](../../project-management/manage-your-projects).
### Ad/Content blockers
Many visitors use ad blockers to block trackers and advertisers. Some ad blockers can also block client-side trackers, such as analytics events, including Kameleoon client-side events. So, if a significant portion of your visitors use ad blockers, it's likely the number of visits will vary between Kameleoon and your analytics platform. Some analytics platforms offer "on premise" tracking request URLs that allow them to avoid being blocked by ad blockers. Note that Kameleoon offers the same [capabilities](../../../developer-docs/web-experimentation/faq#does-kameleoon-offer-on-premise-tracking-request-urls). Contact your Customer Success Manager for assistance.
If you believe a large portion of your visitors are using ad blockers, you should send an event to your analytics platform when Kameleoon loads, so you have a better understanding of how many visitors are using ad blockers. To do so, use Kameleoon's [Activation API events](../../../developer-docs/apis/activation-api-js/api-reference/activation-api-events#kameleoon-loaded) to send an event to your analytics platform when Kameleoon loads.
### Loading timing/implementation differences
You should implement the Kameleoon snippet in the `` section of your source code to prevent any flickering from occurring in your experiments. This setup also means that Kameleoon will be one of the first tags to run, so we will send activity events as soon as possible. However, best practices for analytics platforms are often different—most will be loaded in the `body` section or after the page has fully loaded. This difference means Kameleoon sends events before most analytics platforms and will be counting more visits and visitors. Visitors may bounce, lose internet connection, or click back. Your analytics platform won't count these visitors, but Kameleoon will.
### Analytics platform may be installed on different number of pages than Kameleoon
This issue is a common cause for data discrepancies, especially if you want to run an experiment that is targeting **the entire site**.
When you select this targeting, Kameleoon executes your experiment's code on all pages where the Kameleoon snippet is present. Essentially, there's no specific targeting at all, which could cause differences in your analytic platform's reporting. For instance, if the same Kameleoon snippet has also been installed in your staging environment, your experiment will run there, while your analytics platform likely will not receive any visits from this environment. You can identify if this is the discrepancy's cause by breaking down your data by **Visited page URL**. You will see the main URLs where the experiment has run, so you can identify URLs where Kameleoon should not have loaded (such as other environments and webviews on mobile apps).
To avoid this type of discrepancy:
* Always run an A/A test on a small part of your website to ensure you fully master the scope of your experiment.
* If you must make targeting adjustments to an A/A test, never do it on the same experiment. Stop that one, and run another A/A test to verify that the issue was corrected by receiving fresh data.
## Events discrepancies
If you have discrepancies in the number of visits or visitors, it's likely you'll have the same discrepancies for a given event (click tracking, scroll tracking, transaction, or total revenue). So, you should first look at why you have visit or visitor discrepancies.
However, if you have similar visit or visitor numbers but different conversions, below are some guidelines to ensure your events conversions can be compared to Kameleoon results.
### Event tracking configuration
You should first check how the event is configured and tracked with your developers and the Kameleoon support team.
Additionally, if you used the Graphic editor to configure your click tracking, ensure the CSS selector attached to you click tracking is correct. When there is no ID associated with the selected element, Kameleoon selects the element according to its (unique) hierarchical position on the page by creating a hierarchical path from one of the parent blocks containing an HTML ID. So, a data discrepancy may arise from a default CSS selector that is not measuring the correct event conversions. Refer to [this](../../experimentation/web-experimentation/graphic-based-experiments/troubleshooting-the-graphic-editor#how-do-graphic-editors-work) article to learn more.
If you have been using our [Activation API](../../../developer-docs/apis/activation-api-js/api-reference/api-reference#processconversion) to track custom conversions, ensure the API function is called after Kameleoon has loaded on your page. You should use the [Kameleoon Command Queue](../../../developer-docs/web-experimentation/best-practices/best-practices-for-ab-testing#kameleoon-command-queue), which allows delayed command execution. Instead of calling the Activation API via the `Kameleoon.API` JavaScript object, you pass commands and functions to another JavaScript object, `kameleoonQueue`. If the Kameleoon engine is already loaded, the commands/functions will be instantly executed; otherwise, they will be queued and executed once the engine is ready, ensuring Kameleoon receives all conversion events.
Essentially, make sure your events track the same things the same way to match data between Kameleoon and your analytics platform.
### Event conversions count
In Kameleoon, you can look at converted visits or all conversions. The default view on the reporting page is **converted visits**, meaning that even if a visitor clicked three times on an element, Kameleoon only counts one converted visit. If you want to compare the total number of conversions, switch to the **all conversions** view.
### Event conversions attribution
The attribution window lets you control how visitor conversions are attributed to an experiment by allowing you to define the period of time during which visitors' conversions and transactions are attributed to a variation.
In Kameleoon, visitors' conversions only count toward an experiment when the visit has been targeted by the experiment or during the attribution window, meaning:
* Conversions occurring in subsequent, non-targeted visits are not accounted for in our report unless they happen within the attribution window's timeframe.
* If a conversion event occurs before the targeting decision, it won't be counted in our report, unless the visit was already under the experiment's influence.
In most analytics platforms, it's likely that conversions will continue being counted even if visitors no longer meet the targeting conditions. So, Kameleoon's Results page may show lower total conversions that your analytics platform for the same event.
If you want to learn more about how Kameleoon counts conversions, refer to [this](../analyze-results/data-and-metrics/how-kameleoon-counts-conversions) article.
# Understanding visit count mismatches in capped experiments
Source: https://docs.kameleoon.com/user-manual/experiment-analytics/troubleshooting/visit-count-mismatch
Understand why display limits (capping) cause uneven visit counts between variations and why unique visitor count is the reliable metric for evaluating experiment balance.
When you use display limits (capping) in your feature flags or experiments, the total number of **visits** recorded for your variations often appears uneven compared to the Original version.
If you notice that the Original version has significantly more visits than the Variation, this behavior is expected and does not indicate a failure in your experiment setup, such as a [Sample Ratio Mismatch (SRM)](../statistical-methods/sample-ratio-mismatch).
Use this guide to understand exactly why capping creates this difference in visit counts and why you should focus on the unique visitor count instead.
## The effect of display limits on experiment data
In advanced setups, a display limit is often achieved by dynamically adding a user to an exclusion segment after they have seen the variation once, which is commonly done by setting a custom data or local storage value for the visitor.
You can also configure [display limits in the Code editor](../../experimentation/web-experimentation/code-based-experiments/using-the-code-editor#add-a-display-limit) for experiments and set similar [capping limits for Personalizations](../../web-personalization/set-up-and-launch-a-personalization#capping).
### Example: Pop-up display limits and visit counts
Suppose you configure an experiment where the **Variation** displays a marketing pop-up, but the **Original** does not. To prevent annoying users, you use a display limit to show the pop-up only once per month.
This configuration often causes a discrepancy in the total number of visits (sessions) recorded, even though the number of unique visitors remains balanced.
#### Original: No display limit triggers
When Kameleoon allocates a visitor to the **Original** version:
* The pop-up never displays.
* Because the pop-up never displays, the once-per-month limit never activates.
* The system tracks this visitor on every subsequent page view or return visit.
**Result:** The Original records a high number of total visits because nothing restricts the tracking.
#### Variation: Display limit applies
When Kameleoon allocates a visitor to the **Variation**:
* On the first visit, the visitor sees the pop-up.
* The system records that the display limit (1/1) has been reached.
* On the next visit, the display limit prevents the pop-up from showing. Depending on your configuration, the system may stop counting these subsequent visits as part of the active experiment exposure.
#### The visit count disparity
This scenario creates a balanced split at the **unique visitor level**, but a significant imbalance at the **total visit level**.
* **Original:** One visitor might generate 10 visits.
* **Variation:** One visitor might generate only one tracked visit.
| Metric | Original (no pop-up) | Variation (pop-up capped at one) |
| ------------------- | ----------------------------------------- | -------------------------------- |
| **Unique visitors** | 500 | 500 |
| **Total visits** | **High** (targeted on every return visit) | **Low** (targeted only once) |
#### This is not a Sample Ratio Mismatch
It is common to suspect a setup error when you see a large difference in visit counts. However, if the unique visitor count is equal, this is **not** a [Sample Ratio Mismatch (SRM)](../statistical-methods/sample-ratio-mismatch).
* **What is SRM?** SRM is a statistical error where the initial allocation of **unique visitors** does not match your configured split (50/50, for example). SRM usually indicates a tracking or technical issue.
* **What is happening here?** The **display limit** is working as intended. It caps the exposure of the Variation, which naturally reduces the total visit count for that variation. The Original remains uncapped because it has no element to limit.
Always confirm your experiment split by looking at the number of **unique visitors**. If the unique visitor count is balanced according to your configuration, your experiment is running correctly.
# FAQ
Source: https://docs.kameleoon.com/user-manual/faq
Frequently asked questions about using Kameleoon.
## Getting started and general
### Supported web browsers
Kameleoon does not support some older browsers. If a visitor uses an unsupported browser, they see the original page instead of the experiment. This does not negatively affect experiment results.
The Kameleoon script supports:
* Chrome
* Firefox
* Microsoft Edge
* Opera
* Safari
Kameleoon ensures compatibility with the last three versions of each browser.
### Browsers supported by the Graphic editor
The Graphic editor supports:
* Chrome
* Firefox
* Microsoft Edge
* Opera
* Safari
Kameleoon ensures compatibility with the last three versions of each browser.
### Compatibility with responsive design websites
You can create experiments for responsive websites using advanced editing features. The main challenges typically involve resizing and repositioning content blocks.
Since pages display based on resolution or device, exercise caution when moving elements. Heat maps are unavailable for these pages because they lack a fixed frame.
Kameleoon provides advanced tools to help you move elements and avoid layout issues.
The impact on SEO depends on your experiment setup.
### Identify and address SEO impact
* Ensure correct installation to avoid performance issues.
* Assign equal traffic percentages to variations.
* Avoid running experiments for more than two months. Prolonged experiments might be interpreted by bots as inconsistent content.
* Monitor performance using the Kameleoon Chrome extension and Lighthouse.
* Avoid significant alterations to page elements that affect SEO.
### Redirection guidelines
* Do not redirect 100% of traffic to a new URL.
* Define a canonical URL in the HTML for both pages, pointing to the version you want search engines to index.
* Ensure your HTML does not use a `noindex` tag.
* Use the native variation redirection or `Kameleoon.API.Core.processRedirect("newURL")`. Do not use `document.location.href`.
Kameleoon redirections are JavaScript-based and temporary.
### Avoid Black Hat SEO practices
* **Cloaking:** Do not show different content to bots and visitors.
* **Duplicate content:** Ensure redirect pages are not identical to the original without canonical tags.
* **Sneaky redirects:** Do not redirect visitors to unexpected URLs.
* **Hidden text:** Do not use text visible only to search engines.
Kameleoon automatically filters bot traffic. See [How does Kameleoon filter bot traffic from results?](#how-does-kameleoon-filter-bot-traffic-from-my-results).
Kameleoon and its interface are available in English, French, and German.
The app uses your browser's language by default. If your browser language is unavailable, the app defaults to English.
### In the Kameleoon app
To change the language in the Kameleoon app:
1. Click your profile icon in the top-right corner > **Language**.
2. Choose your language and click **Confirm**.

### Why disable the script?
* You want to minimize page load times when not using Kameleoon.
* You do not use Kameleoon continuously.
### Disable the script
1. Go to your project **Configuration** page (**Admin** > **Projects** > **Configuration**).
2. Click **Actions** > **Disable** in the top-right corner.
3. Click **Confirm**.
You can re-enable the script using the same process.
### Disable the script on a specific URL
To prevent Kameleoon from loading on a specific page, add `?kameleoonDisabled=true` to the end of the URL.
### In the Kameleoon app
In the left sidebar of the Kameleoon app, click **Admin** > **Project**. Your sitecode appears on your project card.

### In the Chrome extension
You can also find your sitecode on the dashboard of the Kameleoon Debug Assistant Chrome extension.
Click the **+** icon to add inserts to customize your dashboard. Add the **Site Code** insert.

Kameleoon is available in English, French, and German. The app uses your browser language by default, but you can change it manually.
For more information, see [How do I change the app's language?](#how-do-i-change-the-apps-language).
## Experiment setup and methodology
You can edit any aspect of an online experiment; however, we recommend against it.
Any changes disrupt the interpretation of your results and make them less reliable.
To make changes while maintaining result integrity:
1. Stop the experiment (optional).
2. Duplicate the experiment.
3. Edit the duplicate.
4. Launch the new experiment.
These steps ensure your results remain reliable.
The duration of an A/B experiment depends on the type of experiment and its traffic.
In rare cases, you might quickly see the effectiveness of an experiment if the first visitors to a variation convert immediately.
Often, the conversion rate does not change significantly right after launch. If you run your experiment long enough for many visitors to see the variation, the results become significant.
If you use Google Analytics or Kameleoon's internal reporting tool, Kameleoon automatically measures statistical significance based on your set goals. For more information, see [Statistical significance](./experiment-analytics/statistical-methods/statistical-significance).
You can also estimate the experiment duration during the finalization stage. To learn more, see [Estimating experiment duration](./experimentation/web-experimentation/configure-and-launch/finalizing-an-experiment#estimate-an-experiment-s-duration).
A/B testing derives its primary data from website traffic. Keep these numbers in mind:
* **Below 10,000 monthly visitors:** Effective A/B tests are difficult to perform, except for specific use cases like landing pages.
* **From 10,000 to 200,000 monthly visitors:** A/B testing is possible, but experiments often take more time to yield results.
* **From 200,000 to 1 million monthly visitors:** Your traffic is sufficient for A/B testing. You might still encounter difficulties with less-visited pages, such as those at the end of a conversion funnel.
* **Above 1 million monthly visitors:** Traffic is rarely an issue.
### A/B experiment
An A/B experiment allows you to create variations of one or several pages. For example, an A/N experiment can measure the performance of product page A versus product page B.
In an A/B experiment, you should only change one element per page (such as the text on an "Add to cart" button) to determine its impact on the conversion rate. If you change multiple elements, you cannot isolate the impact of individual modifications.
### Multivariate test (MVT)
A multivariate test (MVT) lets you change several elements on a page and analyze which combination leads to the most conversions. For example, you can test multiple versions of an "Add to cart" button with different colors and text to find the most effective combination.
To create an MVT, see [Setting up multivariate tests](./experimentation/web-experimentation/advanced-experiment-types/setting-up-multivariate-tests).
## Editor and tools
PBX widgets and AI-generated widgets have different editing requirements:
* **PBX widgets:** Use natural language to create these widgets. You can only edit them within the PBX interface. You cannot open or edit PBX widgets in the Widget Studio.
* **AI-generated widgets (Widget Studio):** When you use the "Create with AI" feature in the Widget Studio, Kameleoon uses standard Widget Studio elements. You can edit these widgets manually in the Widget Studio. You cannot open or edit these widgets in PBX.
You can disable the Kameleoon editor shortcut in the app.
### Disable the shortcut
1. Click **Admin** > **Projects**.
2. Click **Configuration** on your project card.
3. Click **Experiment**.
4. Toggle the **Editor launching** switch to **OFF**.
5. Click **Save**.
### Launch Kameleoon without the shortcut
After you disable the shortcut, add `?kameleoon=true` to your URL. For example: `https://www.website.com/?kameleoon=true`.
To install the extension, see the [Kameleoon Debug Assistant in the Chrome Web Store](https://chromewebstore.google.com/detail/kameleoon-debug-assistant/nimncjjomfcjmfnghgaopccmdggjfoam). For detailed instructions, see [Kameleoon Chrome extension](../developer-docs/developer-tools/kameleoon-debug-assistant-extension).
Click the **parent selector** icon, then use the drop-down list to select an element.
When you select an element, click the ellipsis (**...**) on the left of the hierarchy panel. A list appears containing:
* **The selected element**, highlighted in green.
* **The child elements**, located above the selected element in the list.
* **The parent elements**, located below the selected element in the list.

## Segmentation and targeting
Kameleoon targets visitors based on geolocation data with the following average accuracy:
* **Country:** 99.8% accurate
* **Region:** 80% accurate
* **Town:** 68% accurate within a 50-kilometer radius
Note the following:
* Accuracy varies by country and device type.
* IP geolocation is more accurate for broadband addresses than for cellular networks (mobile devices).
* Geolocation for IPv6 addresses might be less accurate as fewer countries support it.
For more information on setting up conditions, see [Create a segment](./assets/segments/create-a-segment#select-and-set-a-condition).
To learn how to set condition weights, see [Create a segment](./assets/segments/create-a-segment#determine-a-conditions-weight).
When you create a segment, you can use **AND** or **OR** to define conditions.
### Definitions
* **AND:** Condition A **and** condition B must both be met to activate the personalization.
* **OR:** Only one condition must be met (either A **or** B) to activate the personalization.
The **Narrow this condition** option functions like mathematical parentheses.
### Examples
* **Condition A and Condition B:** Both conditions must be met.
* **Condition A and Condition B and Condition C:** All three conditions must be met.
* **Condition A or Condition B:** At least one condition must be met.
* **Condition A or Condition B or Condition C:** At least one condition must be met.
* **Condition A and (Condition B or Condition C):** Condition A and at least one of the other two conditions must be met.
* **(Condition A and Condition B) or Condition C:** Both A and B must be met, or only C must be met.
## Technical and security
Kameleoon experiments and personalizations use a [first-party cookie](./account-and-team-management/organization-settings/how-kameleoon-tracks-and-counts-unique-users). They remain functional even if you disable third-party cookies.
By storing a unique visitor ID in a first-party cookie, Kameleoon ensures each visitor consistently sees the same variation. This provides accurate results and a seamless user experience.
See the [complete list of data collected by Kameleoon](../developer-docs/privacy-and-compliance/data-collection-client-side).
Ad blockers can affect Kameleoon in two ways.
### Impact on Kameleoon tools
Ad blockers can interfere with tools like the Kameleoon app, PBX, and editors. They may block assets such as CSS, images, or SDK scripts, which prevents the platform from functioning correctly.
To avoid these issues:
* **Allow Kameleoon domains:** Either disable your ad blocker or add `kameleoon.com` and `kameleoon.io` as authorized domains. This ensures you can access all features and provides a smooth experience for you and your visitors.
* **Check browser settings:** Some browsers, such as Brave or Safari, include native blockers that can interfere with Kameleoon.
### Impact on launched experiments
Ad blockers can affect the Kameleoon production environment, including the engine, client-side SDKs, and tracking requests. Visitors might not see experiments if the browser blocks requests to Kameleoon domains.
To avoid these issues:
* **Use a custom domain:** A custom domain helps bypass ad-blocker detection and ensures your experiments display correctly. Learn more about [enabling a custom domain](../developer-docs/feature-experimentation/technical-reference/faq-global#how-do-ad-blockers-affect-kameleoon).
1. Click **Settings** > **Custom data** > **New custom data**.
2. Follow the setup steps and click **Next**.
3. Toggle **Use this custom data as a unique identifier for cross-device matching** to **ON**.
4. Click **Create**.
To access the full Kameleoon experience, disable your ad blocker or allow Kameleoon domains in your settings before using the app (`app.kameleoon.com`) or tools like the PBX editor.
### Allow Kameleoon in your ad-blocker extension
Most ad-blocker extensions (such as AdBlock, AdBlock Plus, or uBlock Origin) follow a similar process:
1. Navigate to the Kameleoon platform or the site where you run your experiment.
2. Click the ad-blocker icon in your browser toolbar.
3. Select an option like **Don't run on this domain**, **Disable on this site**, or **Pause on this site**.
4. Confirm your selection.
To ensure full functionality, you must also add `kameleoon.com` and `kameleoon.io` as authorized domains. This allows Kameleoon scripts and resources to load correctly.
### Check your browser's built-in ad blocker
Some browsers include native ad-blocking features. Check your browser settings:
* **Chrome/Edge:** Go to **Settings** > **Privacy and security** > **Site settings** and check content blocking options.
* **Brave:** Click the **Brave Shields** icon in the address bar and adjust blocking settings.
* **Safari:** Go to **Settings** > **Websites** > **Content Blockers** and manage blocking for specific sites.
* **Opera:** Check **Settings** > **Privacy & Security** for built-in ad-blocking options.
If issues persist, contact [Kameleoon support](https://www.kameleoon.com/contact).
Kameleoon uses pure JavaScript and does not require jQuery. It does not conflict with jQuery if you use it on your website.
However, Kameleoon uses the [Sizzle](http://sizzlejs.com/) library, which is the CSS selector engine used by jQuery. You can use Sizzle when creating your experiments.
When a visitor lands on your website, their browser downloads the site code and the Kameleoon script. Page load time depends on the code length and external resources. Caching improves performance on subsequent visits by storing static resources in the browser cache.
While caching improves user experience, it can delay new experiments for returning visitors who have an older version of the script in their cache.
To resolve this, the Kameleoon script includes a **Cache Expiration (TTL: Time-to-live)** flag. This instructs the browser to download a new version of the script every 1.5 hours.
Some mobile browsers might ignore the TTL settings to optimize performance, depending on the browser policy.
The flicker effect (or flickering) occurs when the original page displays briefly before the variation loads.
### Why it happens
Flickering happens due to the time the JavaScript engine takes to process the page. Since the browser modifies elements based on the JavaScript code from the testing tool, the variation might load last if the Kameleoon script loads after the page content.
### How to avoid flickering
The Kameleoon engine minimizes flickering; however, we recommend integrating the Kameleoon JavaScript code as high as possible in the HTML ``. This ensures Kameleoon loads first.
For more information, see [Preventing flickering](./get-started/web-experimentation-installation-guide#preventing-flickering).
## Analytics and results
Bots are automated software applications that can bias your campaign results by inflating traffic and conversion metrics. Removing bot traffic is essential for data accuracy.
Kameleoon uses two methods to exclude bots:
1. **IAB/ABC International Spiders and Bots List:** Kameleoon identifies and excludes known bots from analytics.
2. **Proprietary algorithms:** Kameleoon automatically filters visits that it considers outliers (such as trolls or tracker bugs). A visit is marked as an outlier if it meets at least one of these conditions:
* More than 10,000 events.
* Lasts longer than two hours.
Server-side experiments are more vulnerable to bot traffic. You must pass the user agent to Kameleoon for filtering. Refer to the SDK documentation for implementation details. Client-side SDKs automatically include the [user agent](../developer-docs/sdks/web-sdks/nodejs-sdk#useragent).
### Activate bot filtering
1. Click **Admin** > **Projects**.
2. Go to the project **Configuration** page.
3. In **Advanced settings**, toggle **Enable bot filtering** to **ON**.
It is normal for capped variations to have fewer total visits than the original.
Capping prevents a unique visitor from seeing a variation after reaching a limit (such as one visit), while the original version continues to target them on every subsequent visit.
### Is this a Sample Ratio Mismatch (SRM)?
No. This discrepancy does not indicate a faulty split or an SRM. The distribution of **unique visitors** remains correct.
For a detailed explanation, see [Visit count mismatch](./experiment-analytics/troubleshooting/visit-count-mismatch).
## Troubleshooting
It is highly unlikely that Kameleoon will conflict with other scripts.
Kameleoon uses pure JavaScript and does not require jQuery, avoiding conflicts with sites using jQuery. It operates independently of server-side languages and avoids global JavaScript variables to minimize incompatibility risks.
If changes do not appear after launch, follow these recommendations.
There is a delay of up to ten minutes for experiments to go online.
### Check the script update
Kameleoon updates the script when you launch an experiment. If your browser cache holds an old version, you will not see changes. To verify the version, open the browser console and enter `Kameleoon.API.experiments.getAll()`. This lists all running experiments.
If your experiment is missing, clear your cache. See the [Developer documentation](../developer-docs/apis/activation-api-js/api-reference/api-reference#getall).
### Check for the reference variation
You might be assigned to the reference variation. You can force a specific variation to display for testing.
### Check targeting criteria
You might not meet the experiment's targeting criteria. Use `Kameleoon.API.experiments.getAll()` in the console to check. If the experiment is missing, verify your targeting settings. See the [Developer documentation](../developer-docs/apis/activation-api-js/api-reference/api-reference#getactive).
We recommend using the simulation panel to check your setup. See [Simulating a campaign](./experimentation/web-experimentation/configure-and-launch/simulate-a-campaign).
This issue occurs if you enable **Cross-Domain tracking**, which requires your main domain to host a static iframe.
### How the Kameleoon iframe works
The iframe ensures data consistency across subdomains by reading and writing to `localStorage` on the host domain. This allows Kameleoon to track the same visitor without additional server calls.
For more details, see [Unifying session data across subdomains](../developer-docs/web-experimentation/technical-concepts/unify-session-data-storage-across-subdomains).
We secure the iframe using three measures:
1. **Restricted access:** Only domains in the `allowedDomains` variable can request the iframe.
2. **Sitecode verification:** Only the specified sitecode can request the iframe.
3. **Prefixed storage:** Kameleoon only accesses entries prefixed with `kameleoon`.
Kameleoon collects non-personal data. See the [list of collected data](../developer-docs/privacy-and-compliance/data-collection-backend#list-of-collected-data). You can manage consent via our [APIs](../developer-docs/privacy-and-compliance/consent-management).
### Resolve the display issue
The `X-Frame-Options` header prevents browsers from rendering pages in frames to avoid click-jacking. For more information, see the [Mozilla documentation](https://developer.mozilla.org/en-US/docs/Web/HTTP/Headers/X-Frame-Options).
To enable cross-domain tracking, you must not set the `X-Frame-Options` header. You can secure the iframe by providing a restricted list of domains in the hosted iframe file.
You might see an error stating that the script `https://xxxxxx.kameleoon.eu/kameleoon.js` violates your [Content Security Policy (CSP)](https://developer.mozilla.org/en-US/docs/Web/HTTP/CSP).
### Fix the issue
If your site restricts resources via CSP headers, update your policy to allow Kameleoon resources. See the full list of [Kameleoon domains to allow](../developer-docs/web-experimentation/faq#what-are-the-kameleoon-domains-that-i-need-to-whitelist).
If you cannot log in to the platform, Graphic editor, or PBX, your browser might be blocking third-party cookies. Kameleoon requires a session cookie to authenticate your account.
To resolve this, allow third-party cookies:
1. Open browser **Settings**.
2. Go to **Privacy & security** > **Third-party cookies**.
3. Select **Allow third-party cookies**.
Browsers often block third-party cookies in Incognito or Private mode.
Ensure your browser allows these specific cookies:
* `refresh-token`
* `kameleoonSessionId`
* `access-token`
* `expiration-access`
You might notice discrepancies between Kameleoon and third-party tools regarding [split URL experiment](./experimentation/web-experimentation/advanced-experiment-types/url-redirection-split-test) traffic.
Reasons for these discrepancies include:
* **Kameleoon script missing on variation B:** You must install the Kameleoon snippet on the new page (URL B) to track visits and conversions correctly. If the script is missing, Kameleoon might still show some data from tracking calls sent just before redirection.
* **Bounce rate metrics:** Kameleoon sends tracking data either before or after redirection. High bounce rates can cause discrepancies between tools.
* **Consent policy:** If your policy is set to **Required**, follow the [URL redirection and consent guidelines](./experimentation/web-experimentation/advanced-experiment-types/url-redirection-split-test#url-redirection-and-consent-policy) for accurate metrics.
# Consent management
Source: https://docs.kameleoon.com/user-manual/project-management/consent-management-policy
Configure Kameleoon's consent management policy to comply with GDPR and CCPA, including behavior settings for when consent is unknown or refused.

Processing personal data is generally prohibited, unless it is expressly allowed by law, or the data subject has consented to the processing: this is legal consent.
Kameleoon provides flexible options to define the level of consent management required by your website, in compliance with the latest privacy legislation updates ([GDPR](https://gdpr-info.eu/), [CCPA](https://oag.ca.gov/privacy/ccpa)).
## How to choose your consent management policy
### For web experiments / feature experiments / hybrid experiments
The level of consent required depends on the applicable legislation. You should have either the **CONSENT NOT REQUIRED** or **CONSENT REQUIRED** option enabled.
Kameleoon complies with applicable regulations (as outlined in the GDPR guidelines available at [https://gdpr.eu/cookies](https://gdpr.eu/cookies)) and we recommend the following approach:
* Targeted or progressive delivery rules primarily serve purposes related to release management and technical functionality. As a result, we recommend they be exempt from Consent Management and that Kameleoon should fall under the category of “Strictly Necessary Cookies”, meaning that Kameleoon will trigger these types of rules even when no consent has been collected. Kameleoon ensures that the data collected for these feature flags is limited to technical information, including exposure events such as rule and variation names and goal conversion events. It is also important to note that when using Kameleoon SDKs, a first-party cookie may be stored, containing a randomly assigned ID. This ID is used to uniquely identify a visitor’s browser or device. If you prefer not to use it, our SDK lets you set your own ID. However, it is your responsibility to ensure that this ID remains consistent, as it will be used to display the same variation of a feature flag throughout the user’s session on your web app.
* For feature experiments, Kameleoon will display a variation of an experiment, but no data tracking will occur until consent is given, ensuring complete privacy and a non-intrusive user-experience. However, if the user has not provided consent, they may see different variations of a given feature flag across multiple pages.
These guidelines serve as recommendations, but we strongly advise consulting your Data Protection Officer (DPO), as the final decision regarding GDPR compliance rests with the customer’s DPO, who is accountable for ensuring regulatory adherence.
### For web personalizations
You should always enable the **CONSENT REQUIRED** option.
**However, these choices depend on your use of Kameleoon. Your Customer Success Manager is there to help you choose the policy that best suits your website.**
### For product recommendations
By default, product recommendations share the same consent settings as your A/B tests and personalizations. To configure a separate consent policy for product recommendations, contact your Customer Success Manager (CSM). For more information, see [Consent management](/user-manual/recommendations-and-merchandising/recommendations/configure-and-add-a-recommendation-block#consent-management) in the product recommendations documentation.
**However, these choices depend on your use of Kameleoon. Your Customer Success Manager is there to help you choose the policy that best suits your website.**
## How to define your consent management policy
The consent management policy settings are accessible in the Kameleoon app's **Admin** > **Projects** menu.
You can set up the fields relating to consent management in each of the two blocks (**Experiment** and **Personalization**). You can define the settings separately for each of the Experiment (web or feature experiments) and Personalization options.

Use the three dropdown options to define the following:
* The consent management policy.
* The behavior of Kameleoon when consent is unknown (only required for web experiments and personalizations).
* The behavior of Kameleoon on opt-out (only required for web experiments and personalizations).
### Consent policy
*Whether consent is required*

#### Consent not required
Select this option if you are not subject to the GDPR or similar privacy regulations. If you select this option, all experiments will run and data will be collected without consent.
#### Consent required
Select this option if you are subject to GDPR or similar privacy regulations.
If you choose this option, obtaining visitor consent before initiating any data collection is mandatory. Kameleoon provides JavaScript methods, namely [`enableLegalConsent()`](../../developer-docs/apis/activation-api-js/api-reference/api-reference#enablelegalconsent)' and [`disableLegalConsent()`](../../developer-docs/apis/activation-api-js/api-reference/api-reference#disablelegalconsent), as well as the [`setLegalConsent()`](../../developer-docs/sdks/web-sdks/js-sdk#setlegalconsent) method. These methods should be utilized after obtaining legal consent from the visitor to activate or deactivate Kameleoon on both the front-end and server-side.
Kameleoon delays tracking requests for data associated with experiment rules until explicit consent is obtained from the visitor, provided that the consent is given during the current session. This approach ensures that no data tracking occurs for experiments until the visitor has given their consent. For feature flags, delayed data will be sent to Kameleoon with the next following request when calling one of these methods: `isFeatureFlagActive()`, `getFeatureVariationKey()`, `getFeatureVariable()`, or `trackConversion()`. You can also trigger immediate data transmission by calling the `flush()` method.
The PHP SDK does not support delayed requests due to technical constraints: the PHP SDK does not persist between requests. Each request creates a new SDK instance that destroys itself as soon as it receives a response, preventing Kameleoon from keeping requests that have been stored before consent is provided in memory.
#### Important technical considerations
* When using Kameleoon in [Hybrid mode](../../developer-docs/feature-experimentation/get-started/hybrid-experimentation), ensure that both the JavaScript Activation API and SDK methods are called after collecting consent to ensure Kameleoon collects user events that come from both the Kameleoon Application File and SDK.
* As Kameleoon is restricted from storing the `visitorCode` key in a cookie, it is crucial to ensure that the `visitorCode` key the SDK generates for all first requests is shared with the Kameleoon engine running client-side. Sharing with the client-side Kameleoon engine is necessary to ensure proper tracking for new visitors for whom consent has not yet been obtained. We recommend incorporating the following code into the page's source code when the user is bucketed with a variant of the experiment. This code snippet facilitates the passing of the `visitorCode` key to the Kameleoon engine, enabling accurate tracking for new visitors once consent is provided client-side. If this step is not implemented, the Kameleoon engine will generate a new `visitorCode`, potentially resulting in a new variant being provided upon the second page load.
```javascript theme={null}
window.kameleoonQueue.push({
level: "IMMEDIATE",
command: () => Kameleoon.API.Visitor.setVisitorCode("") // Replace with the visitorCode generated by the Kameleoon SDK.
});
```
Consent information is in sync between the Kameleoon Engine (application file kameleoon.js) and the JS SDK. This synchronization means that once consent is set in either the Engine or the SDK, it's automatically set for both. This feature eliminates the need for manual consent handling and ensures that SDKs operate in compliance with user preferences.
### Behavior when consent is unknown
**This section only applies to web experiments and personalizations.**

*Kameleoon's behavior when consent has not yet been granted*
For web experiments and personalizations, you can choose from three options.
#### Completely block Kameleoon
Kameleoon will not run at all, and no data will be collected or sent to an analytics platform until consent has been given.
#### Partially block Kameleoon
Kameleoon will only trigger web experiments with a **Technical** tag: no data will be collected or sent to an analytics platform until consent has been given.
**How to tag a campaign as Technical?**
If the second option is selected, the **Technical** tag must be added to each web experiment you would like to run. There are several possibilities for this:
When creating an experiment or a personalization, associate the **Technical** tag with it.

For existing experiments and personalizations, navigate to the Experiments dashboard, and click the **three-dots** menu on its card > **Manage tags**. In the field that opens on the right, enter **Technical**.
#### Do not block Kameleoon (don’t write/send anything)
Experiments will be run, but no data will be collected without consent.
### Behavior on opt-out
**This section only applies to web experiments and personalizations.**

*Kameleoon's behavior when the visitor refuses consent*
For web experiments and personalizations, you can choose between two options.
#### Partially block Kameleoon
The visitor sees only one variation of the campaigns tagged as **Technical**: no data is collected.
#### Completely block Kameleoon
In this case, no campaign is run, and no data is collected by Kameleoon.
# Manage your projects
Source: https://docs.kameleoon.com/user-manual/project-management/manage-your-projects
Create, configure, and manage Kameleoon projects for websites and mobile apps, including installation settings, domain configuration, and advanced options.
You can manage your sites/mobile apps in the [Projects](https://app.kameleoon.com/project/dashboard) page of Kameleoon’s **Admin** section.
## Projects page
To access the Projects page:
1. Log in to your [Kameleoon account](https://app.kameleoon.com/).
2. Click **Admin** > **Projects**.
### Name your sites
You can assign a name to your site. To name a site:
1. Click the three-dots menu in the top right of the page.
2. Click **Name your sites**. A sidebar will open.
3. Enter a name for the site and save.

### Search, filter, sort
A search bar, filtering, and sorting tools are available.
You can filter projects by status (Kameleoon enabled/disabled) or by script (script installed/not installed).

You can also sort projects by name, date added, status, or number of associated experiments. You can switch between ascending and descending order by clicking the arrows to the right.

### Information and actions on a project
#### Information
Three sections of information are accessible from your project's identification card.

* **Setup:** This page lets you install the Kameleoon script in your project.
* **Configuration:** This page gives access to [advanced configuration options](./manage-your-projects#advanced-configuration-options).
* **Indicators:** This page displays the indicators measured in your project.
You will also find the number of experiments and personalizations created on the site or mobile app.
When you move the mouse over a card, an action bar appears.
#### Actions
##### Disable
You can disable a project.

##### Remove
You can remove a project from your Kameleoon account.
This action is not available if you only have one project.

##### Edit

Once you have identified the project you want to edit, click **Edit** or **Configuration**.
##### Disable/Enable
In the top right of the **Configuration** page, you'll find an **Actions** menu. Click to access the available actions.

If Kameleoon is enabled on your project, the **Disable** action is displayed. If Kameleoon is disabled, the action is **Enable**.
When you disable Kameleoon, a pop-in will appear asking you to confirm your choice. If you confirm, all experiments and personalizations on your website or mobile app will be deactivated. They will automatically resume once Kameleoon is re-enabled.
Upon disabling, the Kameleoon Application File (kameleoon.js) will be almost entirely stripped of its content, although the Kameleoon object will remain defined. Some methods within the Activation API may not function correctly in this state, particularly those in the Experiments, Feature Flags, and Personalizations objects. If you are calling Activation API methods outside Kameleoon, we strongly recommend using the Kameleoon CommandQueue to prevent any errors on your website. Additionally, please note that disabling Kameleoon does not instantly stop your web campaigns. Since our script may be cached by the browser, returning visitors who have already downloaded a previous version will continue to use it until their browser cache expires.
You can also remove your project.
## Add a new project
You can set up as many projects in your account as you wish. A project can be a website, a mobile app, or any environment (for example, staging, production) you use internally.
To add a new project:
1. [Log in to your Kameleoon account](https://app.kameleoon.com/).
2. Click **Admin** > **Projects**.
3. Click **New project**. A pop-in opens.

4. Indicate if you want to use Kameleoon for a site (JavaScript snippet or SDK) or for a mobile app (SDK).
5. Enter your project URL and, optionally, a name and description for your new project in the pop-in that appears.
If you associate a name with your project, Kameleoon will use it across the platform, as opposed to its URL.
6. Click **Add**.
## Implement Kameleoon on a site using a JavaScript snippet
Choose this method if you want to create:
* personalizations
* graphic experiments
* MVTs
* CSS/JS experiments
### Script Type
Kameleoon is compatible with all major tag management systems; however, we strongly recommend that you **don’t** install Kameleoon using a tag manager, as it will increase the likelihood of experiencing flickering in your campaigns. (Learn more about flickering [here](../../developer-docs/web-experimentation/technical-concepts/flicker-management-and-performance)). Therefore, when you configure your script type, we recommend choosing **No** from the drop-down.
If you choose **No**, you must select your installation tag next. We recommend selecting the **Asynchronous loading with anti-flickering** option.

### Domain Configuration
Under Domain configuration, you can add domains and subdomains for cross-domain tracking.
Kameleoon uses local storage to track session data that can be used in campaign targeting. This option is important if you have several domains, as it allows native cross-domain tracking by unifying session data on all of your domains. This list also controls which domains can read/write visitor data stored in the local storage of your main domain for cross-domain tracking.
In simple terms, cross-domain tracking makes it possible to track visitors on different subdomains (for example, `example.com` and `payment.example.com`). We recommend enabling cross-domain tracking because it lets you track visitors for all of your domains. With cross-domain tracking, your visitors **will not be considered new visitors** when they navigate across your domains and subdomains, and their experiences will be consistent across your digital properties. However, cross-domain tracking is only required if you intend to use session data across all your domains for advanced behavioral targeting purposes, as it lets Kameleoon read data stored in the local storage.
Note that, by default, you can only use your main domain and its subdomains (`*.example.com`) in the graphic editor. If you want to whitelist additional domains, you should add them by clicking on **Add a domain/subdomain**.

### Resource Hosting
You can host the application file yourself, or Kameleoon can host it. If you choose to self-host Kameleoon public resources (**Yes** in the drop-down), you must enter your Content Delivery Network's (CDN) URL.

When you’re done with your implementation settings, click **Continue**.

### Install Kameleoon
When you defined your project’s URL in the configuration process, Kameleoon created a script to install on your project, which you can access on this page. Copy this code snippet and paste it immediately after the `` tag in your web page’s source code.

After adding the code snippet to your project's `` tag, click **Validate**.
You’ll have to repeat these steps for each project you set up. It’s important that you don’t reuse the same code snippet, because Kameleoon’s reporting tools and goals are specific to a single project, and you must track your projects’ performances separately. For further information about reporting tools and goals, read our article [Reporting tools and goals](../integrations/integrations-overview).
## Implement Kameleoon on a site or a web app using a web SDK
You can create all campaign types with this method.

If you want to install Kameleoon on a site or web app using an SDK, [refer to this documentation](../../developer-docs/feature-experimentation/get-started/overview#client-side-or-mobile-sdks).
## Implement Kameleoon on a mobile app using a mobile SDK
Choose this method if you want to create:
* feature flags
* SDK experiments
You cannot create other campaign types on a project added with this method.

If you want to install Kameleoon on a mobile app using an SDK, [refer this documentation](../../developer-docs/feature-experimentation/get-started/overview#client-side-or-mobile-sdks).
## Advanced configuration options
The following page is displayed:

It consists of a header, a menu bar and four scrollable sections:
* General
* Experiment
* Personalization
* Audience
### Header
The header indicates the project's name.
The **Actions** menu in the top right gives you access to two different actions. Click to scroll down.

#### Enable/Disable Kameleoon
If Kameleoon is enabled on your project, the option is **Disable Kameleoon**. If it's off, the option is **Enable Kameleoon**.
If you choose to disable Kameleoon, a confirmation pop-in will open and ask you to confirm your choice. Your experiments and personalizations will no longer be visible in your project. Your campaigns will resume if you reactivate Kameleoon.
#### Remove project
When you click this option, a confirmation pop-in appears. You will have to re-install the project if you change your mind.
### Menu bar

You will find four options here:
* **Installation**
* **Configuration**
* **Indicators**
* **View all projects**.
### Setup

Here, you can access the installation page linked to your project.
### Configuration
#### General

##### Site's name (optional)
You can assign your site a unique name. This name will be used instead of the URL everywhere on the platform.
##### Project description
You can add a description of your project here.
##### Behavior if timeout occurs
You can redefine Kameleoon's behavior when the script exceeds its usual loading time. By default, Kameleoon will eventually launch with a flicker effect.
The available options are:
* Start Kameleoon (with flicker effect).
* Disable Kameleoon for this page.
* Disable Kameleoon for the whole visit.
##### Cross-domain support
You can add authorized domain URLs.
By default, any domain will be authorized to load your Kameleoon script and access the Kameleoon data associated with a user on your website or mobile app (such as defined custom data), which can be a security risk. For each added domain, all its subdomains are automatically included.
##### Global script
Global script is a JavaScript snippet injected at the global level of a site (or project) in Kameleoon. To access a project's global script, click **Admin** > **Settings** > **Configuration** > **General**. Scroll down to find the global script.
**In simple terms, the global script:**
* Runs on every page where the Kameleoon tag is loaded, before all experiments, personalizations, segments, and triggers.
* Defines variables, helper functions, or tracking code that should be available across all experiments in the project.
* Acts as a central location to manage shared code and avoid duplication.
**Typical use cases include:**
* Defining global variables (for example, values from the `dataLayer`, device type).
* Creating reusable utility functions (for example, date formatting, logging).
* Converting custom goals (for example, revenue, add to cart) and setting custom data.
* Triggering events for targeting.
* Handling consent logic.
**Best practices:**
* Keep the lightweight and optimized to avoid performance issues.
* Document the contents of your global script—it affects the entire project.
**Recommended structure:**
```javascript theme={null}
console.log('[Script Last Update]', new Date(Kameleoon.Internals.configuration.scriptProduceTime).toLocaleString());
class GlobalScript {
handleConsent() {
} // end of handleConsent
triggerEvents() {
} // end of triggerEvents
convertGoalsAndSetCDs() {
} //end of convertGoalsAndSetCDs
configExternalTools() {
} // end of configExternalTools
init() {
this.handleConsent();
this.triggerEvents();
this.convertGoalsAndSetCDs();
this.configExternalTools();
}
}; //end globalScript
const globalScript = new GlobalScript();
globalScript.init();
```
##### Attribution window
Here, you can set your attribution window's duration.
The attribution window defines the period of time during which a visitor's conversions and revenue are attributed to a given variation. By default, it is set to seven days. [Learn more about attribution windows](../experiment-analytics/analyze-results/data-and-metrics/how-kameleoon-counts-conversions#attribution-window)
##### Currency
By default, currency settings are determined by the country associated with your account. However, you have the option to manually manage currency on a project-by-project basis. To change your project's currency, select your desired currency from the dropdown menu.
##### Advanced settings
* **Enable support for dynamic websites**: Using this option is recommended if your website is a web application (Single Page App or Progressive Web App, for instance) with virtual URLs. This option lets Kameleoon see every virtual URL change and allows URL targeting to work as usual. Learn more [here](../experimentation/web-experimentation/advanced-experiment-types/set-up-experiment-single-page-app) and [here](../../developer-docs/apis/activation-api-js/api-reference/api-reference#enablesinglepagesupport).
* **Use the # symbol in all Kameleoon URL parameters (instead of "?"**):\*\* Some Kameleoon features (simulation links, graphic editor) require additional parameters to be added to your website URLs. By default, those parameters are appended at the end of the URL after a `?` symbol. Some websites are incompatible with this syntax, while others are incompatible with the `#` symbol. Check this option to switch to a `#` symbol if you notice issues with the default behavior. Please note that this only concerns URLs changed while you (or another authorized user) operate Kameleoon. Kameleoon never changes URLs for your visitors.
* **Generate the code of all graphic widgets using JS with shadow DOM:** Using JS with shadow DOM will isolate the widgets’ CSS from the one used on your website to avoid incompatibility. If you activate this option, widgets already used in a campaign will automatically update when the campaign status changes. If you use CSS class names from your website in your widgets, styles may not apply correctly.
* **Exclude IP addresses from the results of your tests:** If you activate this option, visitors associated with the IP addresses entered will no longer be counted in the results pages of the tests you run on this website.
* You should use this option primarily for excluding your office IP address or any other internal IPs that may interfere with accurate test results. As the exclusion is performed client-side, you shouldn't include personal IP addresses in the exclusion list.
* **Responsive website:** Indicates whether your website automatically adapts to different screen sizes. Disable this option if your site uses a separate mobile version that does not appear when resizing the browser window. When disabled, Prompt-Based Experimentation (PBX) refreshes the preview when you switch device sizes to ensure the correct version displays. This setting applies to all projects but only affects PBX.
#### Experiment

##### Consent policy
[To learn more about setting up legal consent, read our article on the subject](./consent-management-policy).
##### Behavior when consent is unknown
[To learn more about setting up legal consent, read our article on the subject](./consent-management-policy).
##### Behavior on opt-out
[To learn more about setting up legal consent, read our article on the subject](./consent-management-policy).
##### Editor launching
This option lets you access the Kameleoon editor using the keyboard shortcut **Shift + F2**. By default, the option is **ON**. To disable it, click the button to switch it to **OFF**.
##### Result reporting
Enable (**ON**) or disable (**OFF**) results reporting with this option.
##### Variation selection script
A variation selection script is a script that forces a variation's display based on specific rules. Enter the complete script code here to use it with Kameleoon.
##### Necessary reliability for the determination of a winning variation
By changing this percentage, you can set the threshold above which a variation is winning (for instance, a 95% necessary reliability means that you are comfortable with a maximum of 5% false-positive results).
Variations that have a lower reliability than the set rate cannot be presented as winning variations in your results, regardless of their conversions. Reliability score impacts the results presented by Kameleoon; we therefore recommend you change this setting sparingly.
#### Personalization

##### Consent policy
[To learn more about setting up legal consent, read our article on the subject](./consent-management-policy).
##### Behavior when consent is unknown
[To learn more about setting up legal consent, read our article on the subject](./consent-management-policy).
##### Behavior on opt-out
[To learn more about setting up legal consent, read our article on the subject](./consent-management-policy).
##### Exclude visitors
You can define a visitor rate that won't be exposed to your personalizations. We advise you to keep a sample population not exposed to determine your personalizations' efficiency.
[To learn more about control groups](https://www.kameleoon.com/en/personalization#:~:text=specific%20customer%20journey.-,Analyze%20your%20performance,-Once%20you%E2%80%99ve%20launched)
##### Advanced options
By default, Kameleoon allows the display of more than one similar personalization on a page (for example, two pop-ins or two images inserted in the same place). You can, however, prevent simultaneous display by switching the **OFF** button to **ON**.
Once your changes are complete, click **Save** to save your settings.
If you want to reset the project's default options, click **Reset**.

### Indicators

This page displays the indicators measured on your project.
You can build your goals according to the metrics you measure for this project. We recommend you configure many metrics, so you can target your visitors more accurately. For example, if the **Dwell time** metric is measured, you can set the goal **The visitor spent more than 5 minutes on the page**.
Disabling indicators will stop their tracking and render related goals and targeting options inactive.
# Create a new account
Source: https://docs.kameleoon.com/api-reference/account/create-a-new-account
/automation.api.json post /accounts
Create new account
# Delete an account
Source: https://docs.kameleoon.com/api-reference/account/delete-an-account
/automation.api.json delete /accounts/{accountId}
Delete an account
# Get all accounts
Source: https://docs.kameleoon.com/api-reference/account/get-all-accounts
/automation.api.json get /accounts
Get a list of all accounts. For more information on `paramsIO` refer to the [Get started article](../../developer-docs/apis/automation-api-rest/get-started/get-started). For practical use cases of `paramsIO`, see the [Using paramsIO tutorial](../../developer-docs/apis/automation-api-rest/tutorials/paramsio-use-cases).
# Get an account
Source: https://docs.kameleoon.com/api-reference/account/get-an-account
/automation.api.json get /accounts/{accountId}
Get an account with a given id. To use optionalFields check out [this guide](../../developer-docs/apis/automation-api-rest/tutorials/using-optional-fields-in-queries).
# Partially update a account
Source: https://docs.kameleoon.com/api-reference/account/partially-update-a-account
/automation.api.json patch /accounts/{accountId}
Update several fields of a account
# Create a new custom data
Source: https://docs.kameleoon.com/api-reference/customdata/create-a-new-custom-data
/automation.api.json post /custom-datas
Create a new custom data with given parameters
# Delete custom data
Source: https://docs.kameleoon.com/api-reference/customdata/delete-custom-data
/automation.api.json delete /custom-datas/{customDataId}
Delete custom data belonging to this given Id
# Get a custom data
Source: https://docs.kameleoon.com/api-reference/customdata/get-a-custom-data
/automation.api.json get /custom-datas/{customDataId}
Get custom data with the given id. To use optionalFields check out [this guide](../../developer-docs/apis/automation-api-rest/tutorials/using-optional-fields-in-queries).
# Get all custom data
Source: https://docs.kameleoon.com/api-reference/customdata/get-all-custom-data
/automation.api.json get /custom-datas
Get a list of all custom data. For more information on `paramsIO` refer to the [Get started article](../../developer-docs/apis/automation-api-rest/get-started/get-started), and see the [Using paramsIO tutorial](../../developer-docs/apis/automation-api-rest/tutorials/paramsio-use-cases) for practical use cases. To use optionalFields check out [this guide](../../developer-docs/apis/automation-api-rest/tutorials/using-optional-fields-in-queries).
# Partially update the custom data
Source: https://docs.kameleoon.com/api-reference/customdata/partially-update-the-custom-data
/automation.api.json patch /custom-datas/{customDataId}
Update several fields of the custom data. To use optionalFields check out [this guide](../../developer-docs/apis/automation-api-rest/tutorials/using-optional-fields-in-queries).
# Update custom data
Source: https://docs.kameleoon.com/api-reference/customdata/update-custom-data
/automation.api.json put /custom-datas/{customDataId}
Update the custom data belonging to this Id
# Get all experiments
Source: https://docs.kameleoon.com/api-reference/experiment/get-all-experiments
/automation.api.json get /experiments
Get a list of all experiments. For more information on `paramsIO` refer to the [Get started article](../../developer-docs/apis/automation-api-rest/get-started/get-started), and see the [Using paramsIO tutorial](../../developer-docs/apis/automation-api-rest/tutorials/paramsio-use-cases) for practical use cases. To use optionalFields check out [this guide](../../developer-docs/apis/automation-api-rest/tutorials/using-optional-fields-in-queries).
# Create a new feature flag configuration
Source: https://docs.kameleoon.com/api-reference/featureflag/create-a-new-feature-flag-configuration
/automation.api.json post /feature-flags
Create new feature flag configurations with given parameters.
# Delete a feature flag configuration
Source: https://docs.kameleoon.com/api-reference/featureflag/delete-a-feature-flag-configuration
/automation.api.json delete /feature-flags/{siteCode}/{featureKey}
Delete a feature flag configuration.
# Duplicate a feature flag configuration
Source: https://docs.kameleoon.com/api-reference/featureflag/duplicate-a-feature-flag-configuration
/automation.api.json post /feature-flags/{siteCode}/{featureKey}/duplicate
Duplicate a feature flag configuration with given parameters.
# Get a feature flag configuration
Source: https://docs.kameleoon.com/api-reference/featureflag/get-a-feature-flag-configuration
/automation.api.json get /feature-flags/{siteCode}/{featureKey}
Get a feature flag configuration belonging to the given site code and feature key. To use optionalFields check out [this guide](..../../developer-docs/apis/automation-api-rest/tutorials/using-optional-fields-in-queries).
# Get all feature flags
Source: https://docs.kameleoon.com/api-reference/featureflag/get-all-feature-flags
/automation.api.json get /feature-flags
Get a list of all feature flags. For more information on `requestParameters` (called `paramsIO` elsewhere) refer to the [Get started article](../../developer-docs/apis/automation-api-rest/get-started/get-started), and see the [Using paramsIO tutorial](../../developer-docs/apis/automation-api-rest/tutorials/paramsio-use-cases) for practical use cases. To use optionalFields check out [this guide](..../../developer-docs/apis/automation-api-rest/tutorials/using-optional-fields-in-queries).
# Get feature activity logs
Source: https://docs.kameleoon.com/api-reference/featureflag/get-feature-activity-logs
/automation.api.json get /feature-flags/activity-logs
Get a list of feature activity logs
# Request feature flag's results
Source: https://docs.kameleoon.com/api-reference/featureflag/request-feature-flags-results
/automation.api.json post /feature-flags/{featureFlagId}/results
Send a request to generate the report for the results of the given feature flag
# Search feature flags
Source: https://docs.kameleoon.com/api-reference/featureflag/search-feature-flags
/automation.api.json post /feature-flags/search
Search for a list of feature flag configurations. To use optionalFields check out [this guide](..../../developer-docs/apis/automation-api-rest/tutorials/using-optional-fields-in-queries).
# Share feature flag results
Source: https://docs.kameleoon.com/api-reference/featureflag/share-feature-flag-results
/automation.api.json post /feature-flags/{experimentId}/results/share
Create shared request for viewing feature flag's result page without authorization. Learn how to share your results in [this tutorial](..../..../../developer-docs/apis/automation-api-rest/tutorials/experiments/retrieving-experiment-results-using-the-automation-api).
# Update a feature flag configuration
Source: https://docs.kameleoon.com/api-reference/featureflag/update-a-feature-flag-configuration
/automation.api.json patch /feature-flags/{siteCode}/{featureKey}
Update the feature flag (using JSON Merge for patch) for the given site code and feature key.
# Update a feature flag configuration for a specific environment
Source: https://docs.kameleoon.com/api-reference/featureflag/update-a-feature-flag-configuration-for-a-specific-environment
/automation.api.json patch /feature-flags/{siteCode}/{featureKey}/{environmentKey}
Updates the configuration of a feature flag using a JSON Merge Patch for the specified site code, feature key, and environment key.
Note: If you need to modify an element within an array, the entire array — including all its fields — must be provided, as partial updates to array elements are not supported.
# Update a single rule by id
Source: https://docs.kameleoon.com/api-reference/featureflag/update-a-single-rule-by-id
/automation.api.json patch /feature-flags/rules/{ruleId}
Updates a single rollout rule using JSON Merge Patch by its rule id.
Note: If you need to modify an element within an array, the entire array — including all its fields — must be provided, as partial updates to array elements are not supported.
# Create new site
Source: https://docs.kameleoon.com/api-reference/site/create-new-site
/automation.api.json post /sites
Create new site with given parameters
# Delete site
Source: https://docs.kameleoon.com/api-reference/site/delete-site
/automation.api.json delete /sites/{siteId}
Delete site with given id
# Get a hash code of the contents of the original application file
Source: https://docs.kameleoon.com/api-reference/site/get-a-hash-code-of-the-contents-of-the-original-application-file
/automation.api.json patch /sites/{siteCode}/hash
Get the hashCode generated from the content of the original application file
# Get a site
Source: https://docs.kameleoon.com/api-reference/site/get-a-site
/automation.api.json get /sites/{siteId}
Get site belonging to the given id. To use optionalFields check out [this guide](../../developer-docs/apis/automation-api-rest/tutorials/using-optional-fields-in-queries).
# Get a site by code
Source: https://docs.kameleoon.com/api-reference/site/get-a-site-by-code
/automation.api.json get /sites/byCode/{siteCode}
Get one site with given site code. To use optionalFields check out [this guide](../../developer-docs/apis/automation-api-rest/tutorials/using-optional-fields-in-queries).
# Get all sites
Source: https://docs.kameleoon.com/api-reference/site/get-all-sites
/automation.api.json get /sites
Get a list of all sites. For more information on `paramsIO` refer to the [Get started article](../../developer-docs/apis/automation-api-rest/get-started/get-started), and see the [Using paramsIO tutorial](../../developer-docs/apis/automation-api-rest/tutorials/paramsio-use-cases) for practical use cases. To use optionalFields check out [this guide](../../developer-docs/apis/automation-api-rest/tutorials/using-optional-fields-in-queries).
# Partially update site, when only information that is passed is updated
Source: https://docs.kameleoon.com/api-reference/site/partially-update-site-when-only-information-that-is-passed-is-updated
/automation.api.json patch /sites/{siteId}
Update several fields of site
# Update site
Source: https://docs.kameleoon.com/api-reference/site/update-site
/automation.api.json put /sites/{siteId}
Update site with given id
# Activation API events
Source: https://docs.kameleoon.com/developer-docs/apis/activation-api-js/api-reference/activation-api-events
Reference for custom DOM events fired by the Kameleoon JavaScript engine, including experiment, personalization, and conversion lifecycle events.
In addition to the methods and data structures provided by the **Activation API**, the JavaScript engine fires custom DOM events. These events serve as excellent entry points to customize Kameleoon's behavior and extend the platform. For example, listen for the **Kameleoon::ExperimentTriggered** event to receive notification when an experiment triggers.
The following list details the currently implemented events. If the current Activation API lacks a required event, contact technical support to request an improvement. New events can be added to suit specific requirements.
Since there is only one thread of execution in a JavaScript environment, events triggered in a continuous synchronous block of execution are received simultaneously. Callback listeners execute after the complete Kameleoon code block finishes, rather than the exact moment the code triggers the event. For example, `Kameleoon::Loaded` and `Kameleoon::Started` can be received simultaneously if local storage load is implemented synchronously (the typical case, except in a cross-domain setup when the current URL is not on the main domain). `Kameleoon::Started` and `Kameleoon::ExperimentTriggered` are also simultaneous for experiments where targeting can be evaluated immediately.
## List of events
### Kameleoon::Loaded
```javascript theme={null}
window.addEventListener('Kameleoon::Loaded', function (event) {
var loadTime = event.detail.loadTime;
var timeout = event.detail.timeout;
});
```
This event is fired when the Kameleoon application file finishes loading and the engine code is available for execution in the browser. The event triggers at the beginning of the setup process. Subsequent events (detailed below) trigger as the initialization reaches specific steps.
##### Data available in the event
| Name | Type | Description |
| -------- | ------- | ---------------------------------------------------------------------------------------------------------- |
| loadTime | Number | Time of the completed loading of the Kameleoon application file (UTC format - ms since 1st January, 1970). |
| timeout | Boolean | true if a timeout occured during the (asynchronous) load of the Kameleoon application file. |
### Kameleoon::Aborted
```javascript theme={null}
window.addEventListener('Kameleoon::Aborted', function (event) {
var reason = event.detail.reason;
});
```
This event triggers when the Kameleoon engine stops execution on the current page. This event indicates that Kameleoon is inactive for the current visitor and page. The event provides the reason for abortion:
* BROWSER: The browser is not supported.
* PRERENDER: This is a prerender request (e.g., Chrome optimization), not a webpage viewed by a human. Kameleoon does not run to avoid false statistics.
* STORAGE: Technical prerequisites for normal operations, such as Local Storage writes, cannot be met.
* TIMEOUT: File loading time exceeded the allowed amount, and the configuration requires abortion.
* DISABLED: Kameleoon was disabled via the back-office application. All front-end Kameleoon loads immediately abort when this status is active.
* PARAMETER: A special parameter in the URL (e.g., `kameleoonDisabled=true`) causes the engine to stop execution for debugging or verification.
* SCRIPT: A custom abort script returned true for the current load.
##### Data available in the event
| Name | Type | Description |
| ------ | ------ | ------------------------------- |
| reason | String | Reason / cause of the abortion. |
### Kameleoon::Started
```javascript theme={null}
window.addEventListener('Kameleoon::Started', function (event) {
var newVisitor = event.detail.newVisitorCode;
});
```
This event is fired when the Kameleoon engine completes its main initialization. At this stage, the engine has loaded local storage data and executed the global script, custom data acquisition code, and delayed commands via the [Command Queue](./command-queue). Following this event, Kameleoon activation and tracking loops start. Experiments and personalizations trigger (if targeting conditions match), and data collection begins.
Activation API methods are available. `Kameleoon.API` is readable, though some data (such as geolocation data obtained via subsequent asynchronous calls) may be unavailable. The event data indicates if initialization generated a new `visitorCode`.
##### Data available in the event
| Name | Type | Description |
| -------------- | ------- | ------------------------------------------------------------------------------------------------------------------------- |
| newVisitorCode | Boolean | true if a new (random) visitorCode has been generated for this visitor (unknown / new visitor for Kameleoon), else false. |
### Kameleoon::DataGathered
```javascript theme={null}
window.addEventListener('Kameleoon::DataGathered', function (event) {
// At this point, we're guaranteed that the object will be present and correct.
var currentLocation = Kameleoon.API.CurrentVisit.geolocation;
});
```
This event triggers when the Kameleoon engine completes data gathering. As collection often involves remote calls or asynchronous methods, this event triggers after those processes finish.
The Activation API is fully usable once this event triggers. All API fields contain correct values.
Kameleoon often performs remote calls only at the beginning of a visit, so this event triggers later on the first page view and almost immediately on subsequent views. While reading Activation API data early may work on subsequent views, data presence and accuracy are not guaranteed. Listening for this event before performing read operations (especially for visit data such as geolocation or weather) is highly highly recommended.
### Kameleoon::RemoteSynchronizationPerformed
```javascript theme={null}
window.addEventListener('Kameleoon::RemoteSynchronizationPerformed', function (event) {
var allVisits = event.detail.visits;
});
```
This event triggers when the Kameleoon engine completes a Server Synchronization Call (SSC) initiated by the `Kameleoon.API.Data.performRemoteSynchronization()` method. This occurs during cross-device history reconciliation, Intelligent Tracking Prevention, or custom data updates.
[Read more about SSCs here.](./api-reference#performremotesynchronization)
##### Data available in the event
| Name | Type | Description |
| ---------------- | ------- | -------------------------------------------------------------------------------------------------------------------------------------- |
| visits | Array | List of [Visit objects](./api-reference#visit) corresponding to this visitor, returned by the Data API. |
| currentVisitOnly | Boolean | true if `Kameleoon.API.Data.performRemoteSynchronization()` was called with the **currentVisitOnly** argument set to true, else false. |
### Kameleoon::LegalConsentUpdated
```javascript theme={null}
window.addEventListener('Kameleoon::LegalConsentUpdated', function (event) {
var legalConsentUpdate = event.detail.legalConsentUpdate;
});
```
This event fires whenever the [legal consent](../../../privacy-and-compliance/consent-management) status changes for the current visitor. Changes include acceptance (`Kameleoon.API.Core.enableLegalConsent()`) or denial (`Kameleoon.API.Core.disableLegalConsent()`) for the AB Testing or Personalization modules. Access the updated status via `Kameleoon.API.Visitor.experimentLegalConsent` or `Kameleoon.API.Visitor.personalizationLegalConsent`; the event object contains the update details.
##### Data available in the event
| Name | Type | Description |
| ------------------ | ------ | -------------------------------------------------------------------------------------------------------------------------------------------------------------------------------------------------------------------------------------------------------------------------------------------------------------------------------------- |
| legalConsentUpdate | Object | Update that was just processed. It follows the format \{"AB\_TESTING": true\|false, "PERSONALIZATION": true\|false}. So this could be equal to \{"AB\_TESTING": false} if we just registered a denial only for the AB Testing module, or to \{"AB\_TESTING": true, "PERSONALIZATION": true} if an acceptance occured for both modules. |
### Kameleoon::ExperimentTriggered
```javascript theme={null}
window.addEventListener('Kameleoon::ExperimentTriggered', function (event) {
var experiment = event.detail.experiment;
var experimentId = experiment.id;
});
```
This event triggers when an experiment triggers (i.e., when the visitor matches the target segment). Extra options, such as traffic exclusion or capping, may allow a visitor to trigger an experiment without activating it (see the next event). If the experiment triggers on multiple pages, the event fires each time.
##### Data available in the event
| Name | Type | Description |
| ---------- | ------ | ----------------------------------------------- |
| experiment | Object | [Experiment object](./api-reference#experiment) |
### Kameleoon::ExperimentActivated
```javascript theme={null}
window.addEventListener('Kameleoon::ExperimentActivated', function (event) {
var experiment = event.detail.experiment;
var experimentId = experiment.id;
var associatedVariationId = experiment.associatedVariation.id;
});
```
This event triggers when an experiment activates (i.e., when the visitor counts toward experiment results). Activation occurs when an experiment triggers and all exposition conditions match. If activation occurs on multiple pages, the event fires each time.
##### Data available in the event
| Name | Type | Description |
| ---------- | ------ | ----------------------------------------------- |
| experiment | Object | [Experiment object](./api-reference#experiment) |
### Kameleoon::PersonalizationTriggered
```javascript theme={null}
window.addEventListener('Kameleoon::PersonalizationTriggered', function (event) {
var personalization = event.detail.personalization;
var personalizationId = personalization.id;
});
```
This event triggers when a personalization triggers (i.e., when the visitor matches the target segment). Extra exposition options, such as capping, may prevent the personalization action (e.g., banner or pop-in display). In this scenario, the personalization does not activate (see the next event). If the personalization triggers on multiple pages, the event fires each time.
##### Data available in the event
| Name | Type | Description |
| --------------- | ------ | --------------------------------------------------------- |
| personalization | Object | [Personalization object](./api-reference#personalization) |
### Kameleoon::PersonalizationActivated
```javascript theme={null}
window.addEventListener('Kameleoon::PersonalizationActivated', function (event) {
var personalization = event.detail.personalization;
var personalizationId = personalization.id;
var associatedVariationId = personalization.associatedVariation.id;
});
```
This event triggers when a personalization activates (i.e., when the personalization displays on the page). Activation occurs when a personalization triggers and all exposition conditions match. If activation occurs on multiple pages, the event fires each time.
##### Data available in the event
| Name | Type | Description |
| --------------- | ------ | --------------------------------------------------------- |
| personalization | Object | [Personalization object](./api-reference#personalization) |
### Kameleoon::CustomDataSet
```javascript theme={null}
window.addEventListener('Kameleoon::CustomDataSet', function (event) {
var customDataName = event.detail.name;
var customDataValue = event.detail.value;
});
```
This event fires whenever custom data is set (i.e., when its value is provided). This event fires regardless of the acquisition method (Data Layer integration, Activation API, Data API, or Custom JS code).
##### Data available in the event
| Name | Type | Description |
| ----- | ------ | ---------------------------------------------------------------------------------- |
| name | String | Name of the custom data. |
| value | Any | Value of the custom data. Its type depends on the defined type of the custom data. |
### Kameleoon::ConversionTriggered
```javascript theme={null}
window.addEventListener('Kameleoon::ConversionTriggered', function (event) {
var goal = event.detail.goal;
});
```
This event triggers when a conversion triggers (i.e., when a goal is reached).
##### Data available in the event
| Name | Type | Description |
| ---- | ------ | ----------------------------------- |
| goal | Object | [Goal object](./api-reference#goal) |
### Kameleoon::SegmentTriggered
```javascript theme={null}
window.addEventListener('Kameleoon::SegmentTriggered', function (event) {
var segment = event.detail.segment;
});
```
This event triggers when an active segment triggers (i.e., when a visitor matches all targeting segment conditions). A segment is active if it is associated with a running experiment, personalization, or the Audiences tool. Kameleoon considers all other segments inactive.
##### Data available in the event
| Name | Type | Description |
| ------- | ------ | ----------------------------------------- |
| segment | Object | [Segment object](./api-reference#segment) |
### Kameleoon::ConversionScoreComputed
```javascript theme={null}
window.addEventListener('Kameleoon::ConversionScoreComputed', function (event) {
var kcs = event.detail.kcs;
var segmentId = event.detail.targetSegment.id;
});
```
This event triggers when a segment defined as a key moment triggers. At this point, machine learning algorithms compute and provide a Kameleoon Conversion Score (KCS).
##### Data available in the event
| Name | Type | Description |
| ------------- | ------ | --------------------------------------------------------------------------------------------------- |
| kcs | Number | KCS (Kameleoon Conversion Score), an integer from 0 to 100. |
| targetSegment | Object | [Segment object](./api-reference#segment) corresponding to the key moment when the KCS is computed. |
# API reference
Source: https://docs.kameleoon.com/developer-docs/apis/activation-api-js/api-reference/api-reference
Reference documentation for the Kameleoon JavaScript Activation API methods.
## Kameleoon.API.Core
This module contains functions for implementing front-end A/B testing variations without flickering. Use these methods in the prescribed order for optimal results. The module also includes engine initialization methods, including those for privacy laws and legal consent collection.
Before you call the Activation API JavaScript object, verify that the Kameleoon Engine has loaded. Use the Kameleoon Command Queue for delayed command execution when you send tracking data, trigger experiments, or update visitor attributes. If the engine is loaded, passed commands and functions execute immediately; otherwise, they enter a queue for later execution. For more information, refer to the [Command queue](./command-queue) documentation.
### enableLegalConsent
```javascript theme={null}
var agreedButton = Kameleoon.API.Utils.querySelectorAll("#agreed")[0];
Kameleoon.API.Utils.addEventListener(agreedButton, "mousedown", function (event) {
Kameleoon.API.Core.enableLegalConsent();
});
```
Call the `enableLegalConsent()` method after you obtain legal consent from the visitor to activate Kameleoon. This method activates Kameleoon's normal operation mode. For more information, refer to the [Consent management](../../../privacy-and-compliance/consent-management) article.
##### Arguments
| Name | Type | Description |
| ------ | ------ | --------------------------------------------------------------------------------------------------------------------------------------------------------------------------------------------------------------------------------------------------------------------------------------------------------------------------------------------------------------------------------------------------------------------------------------------------------------------------------- |
| module | String | Name of the module to enable: "PRODUCT\_RECOMMENDATION", "AB\_TESTING", "PERSONALIZATION", or "BOTH". For example, `PRODUCT_RECOMMENDATION` executes the entry point **exclusively** with product recommendation capabilities. `AB_TESTING` enables A/B testing **and** product recommendation (unless the custom option to differentiate consent is active). `OTH` enables all capabilities. If omitted, the method activates legal consent for all modules (`BOTH`) by default. |
A custom option is also available that allows separate management of Product Recommendation consent. When this option is active, explicitly call `enableLegalConsent("PRODUCT_RECOMMENDATION")` to activate the module. Contact the Customer Success Manager to enable this feature.
### disableLegalConsent
```javascript theme={null}
var disableButton = Kameleoon.API.Utils.querySelectorAll("#disable")[0];
Kameleoon.API.Utils.addEventListener(disableButton, "mousedown", function (event) {
Kameleoon.API.Core.disableLegalConsent();
});
```
Call the `disableLegalConsent()` method when a visitor declines the use of Kameleoon. This method disables normal operation mode. For more information, refer to the [Consent management article](../../../privacy-and-compliance/consent-management).
##### Arguments
| Name | Type | Description |
| ------ | ------ | --------------------------------------------------------------------------------------------------------------------------------------------------- |
| module | String | Name of the module to disable: "AB\_TESTING", "PERSONALIZATION", or "BOTH". If omitted, the method disables legal consent for all modules (`BOTH`). |
A custom option is also available that allows separate management of Product Recommendation consent. When this option is active, explicitly call `disableLegalConsent("PRODUCT_RECOMMENDATION")` to disable the module. Contact the Customer Success Manager to enable this feature.
### enableSinglePageSupport
```javascript theme={null}
if (location.href.indexOf("mySPAWebsitePart") != -1) {
Kameleoon.API.Core.enableSinglePageSupport();
}
```
The `enableSinglePageSupport()` method reloads the Kameleoon engine when the active URL changes, regardless of browser page loads. Use this method for Single Page Applications (SPAs) with multiple URLs and a single initial load. Kameleoon treats each URL change as a new page, enabling URL targeting and accurate tracking of metrics like page views.
Kameleoon will also automatically remove all elements that have been added on the page that use HTML IDs that begin with "kameleoonElement" or "kameleoonStyleSheet" when the SPA reloads.
### enableDynamicRefresh
```javascript theme={null}
if (location.href.indexOf("cart") != -1) {
Kameleoon.API.Core.enableDynamicRefresh();
}
```
The `enableDynamicRefresh()` method detects element changes and reapplies Graphic Editor modifications. This method supports SPAs that dynamically modify the DOM without URL changes or page reloads, preventing dynamic updates from removing experiments. Refer to `enableSinglePageSupport()` for other SPA types.
### getConfiguration
```javascript theme={null}
var configuration = Kameleoon.API.Core.getConfiguration();
if (configuration.siteCode == "abcde12345") {
document.cookie = "MyMainSite=true;";
} else if (configuration.siteCode == "12345abcdef") {
document.cookie = "MySubSite=true;";
}
```
The `getConfiguration()` method returns a reference to the Configuration object, which contains global constant values for the site's Kameleoon configuration.
##### Return value
| Name | Type | Description |
| ------------- | ------ | --------------------- |
| configuration | Object | Configuration object. |
### load
```javascript theme={null}
var href = location.href;
var intervalId = Kameleoon.API.Utils.setInterval(function () {
if (location.href != href) {
Kameleoon.API.Core.load();
}
}, 2000);
```
The `load()` method initializes the Kameleoon engine. While initialization typically occurs automatically during application file loading, you might need to make manual calls. The example demonstrates how to implement reloads after each URL change, similar to `enableSinglePageSupport()`.
Kameleoon will also automatically remove all elements that have been added on the page that use HTML IDs that begin with "kameleoonElement" or "kameleoonStyleSheet" when the SPA reloads.
### processRedirect
```javascript theme={null}
var experiment = Kameleoon.API.Experiments.getByName("RedirectExperiment");
if (experiment.associatedVariation.id == 123456) {
Kameleoon.API.Core.processRedirect("https://www.mywebsite.com?variation=A");
}
```
The `processRedirect()` method redirects the browser to another URL, typically for split A/B experiments. Use this method instead of `window.location.href = redirectionURL;` to ensure accurate background tracking.
If the redirection URL is on a domain other than the base URL and the Kameleoon installation omits [unified session data](../../../web-experimentation/technical-concepts/unify-session-data-storage-across-subdomains), the engine adds a `kameleoonRedirect-{experimentID}` parameter to the target URL to ensure accurate tracking.
##### Arguments
| Name | Type | Description |
| -------------- | ------ | --------------------------------------------- |
| redirectionURL | String | URL for redirection. This field is mandatory. |
### runWhenConditionTrue
```javascript theme={null}
Kameleoon.API.Core.runWhenConditionTrue(function () {
return typeof jQuery != "undefined";
}, function () {
jQuery("#bloc-2345").text("Mon nouveau texte");
}, 200);
```
The `runWhenConditionTrue()` method executes the callback function when the `conditionFunction` returns true. The method uses a polling mechanism, which might cause flickering. Use `runWhenElementPresent()` instead for improved performance. Refer to the [`runWhenElementPresent()` description](#runwhenelementpresent) for details.
##### Arguments
| Name | Type | Description |
| ----------------- | -------- | ------------------------------------------------------------------------------------------------------------------------------------------------------------------------------------------------------------------------------------------------------------ |
| conditionFunction | Function | JavaScript function returning **true** or **false**. This field is mandatory. |
| callback | Function | JavaScript function executing when the **conditionFunction** returns **true**. This field is mandatory. |
| pollingInterval | Number | The engine executes the **conditionFunction** periodically at this interval. When `runWhenElementPresent()` is unavailable, a lower **pollingInterval** reduces flickering but increases CPU usage. If omitted, the method defaults to **200 milliseconds**. |
### runWhenElementPresent
```javascript theme={null}
// With mutation observers management.
Kameleoon.API.Core.runWhenElementPresent("#bloc-2345", function (elements) {
elements[0].innerText = "My new Text";
});
// With multiple CSS selectors. Executes if any one of the elements is present.
Kameleoon.API.Core.runWhenElementPresent("#bloc-567, .cta-button, #bloc-789", function (elements) {
elements[0].innerText = "More new text";
});
// Without mutation observers management, Kameleoon polls every 200ms to check if the element is on the page.
Kameleoon.API.Core.runWhenElementPresent("#MyPopup.showed", function (elements) {
Kameleoon.API.Events.trigger("popup displayed");
}, 200);
// With mutation observers management and Single Page App support, Kameleoon applies modifications whenever new elements are added to the DOM or when there is a dynamic refresh of the Single Page App that removes previous modifications.
Kameleoon.API.Core.runWhenElementPresent(".product-button", function (elements) {
elements.forEach(element => {
element.innerText = "Add To Cart";
});
}, null, true);
```
The `runWhenElementPresent()` method executes the callback function when a specific element appears in the DOM. This method uses mutation observers to power antiflickering technology. Identify the key elements for a variation and call `runWhenElementPresent()` with the element as the first argument and the implementation code as the callback. This ensures that modifications execute as soon as the element appears, before the browser initiates a display refresh cycle.
To act on multiple elements, call `runWhenElementPresent()` separately for each element rather than targeting only the expected final element. A single call may result in flickering if a refresh cycle occurs between the appearance of different elements.
Providing this value **disables** Mutation Observers and Anti-Flickering, reverting to legacy polling. Use this argument only in specific cases, such as complex selector queries with high CPU impact.
##### Arguments
| Name | Type | Description |
| ---------------- | -------- | ---------------------------------------------------------------------------------------------------------------------------------------------------------------------------------------------------------------------------------------------------------------------------------------------------- |
| selector | String | CSS selector of the element. To specify multiple CSS selectors, provide a single comma-separated string. The callback executes when one or more elements exist. This field is mandatory. |
| callback | Function | JavaScript function to execute when the element appears in the DOM. This field is mandatory. |
| pollingInterval | Number | Providing this value disables Mutation Observers and reverts the engine to legacy polling, which may cause flickering. This field is optional. |
| isDynamicElement | Boolean | When active, Kameleoon tracks the selector if not immediately found at page load and executes the callback as elements appear. The callback triggers again for each new element matching the selector. This setting supports dynamic menus, infinite scrolling, and pop-ups. This field is optional. |
### runWhenShadowRootElementPresent
```javascript theme={null}
const wrapper = document.querySelector(".shadow-wrapper");
const shadow = wrapper.attachShadow({ mode: "open" });
const span = document.createElement("span");
span.classList.add("selector-inside-wrapper");
span.textContent = "I'm in the shadow DOM";
shadow.appendChild(span);
Kameleoon.API.Core.runWhenShadowRootElementPresent('.shadow-wrapper', '.selector-inside-wrapper', (elements) => {
elements[0].innerText = "New text"
});
```
The `runWhenShadowRootElementPresent()` method executes the **callback** function when a specific element appears in a shadow DOM set to `mode: open`.
#### Arguments
| Name | Type | Description |
| ------------------------- | -------- | --------------------------------------------------------------------------------------------------------------------------------------------------------------------------------------------------------------------------------------------------------------- |
| parentSelector | String | CSS selector for the parent element. This field is mandatory. |
| shadowRootElementSelector | String | CSS selector inside the shadow DOM. This field is mandatory. |
| callback | Function | JavaScript function to execute when the element appears in the shadow DOM. This field is mandatory. |
| isDynamicElement | Boolean | When active, Kameleoon tracks the selector if not immediately found and executes the callback as elements appear. The callback triggers again for each new element matching the selector. This setting supports dynamic menus, infinite scrolling, and pop-ups. |
## Kameleoon.API.Goals
This module manages goal triggering and conversion data, including purchase confirmations and revenue registration.
### cancelConversion
```javascript theme={null}
var buttons = Kameleoon.API.Utils.querySelectorAll(".btnRemoveFromCart");
buttons.forEach(function (button) {
Kameleoon.API.Utils.addEventListener(button, "mousedown", function (event) {
Kameleoon.API.Goals.cancelConversion(event.target.id);
});
});
```
The `cancelConversion()` method cancels a conversion that you triggered during the current visit. This method cannot cancel conversions from previous visits.
##### Arguments
| Name | Type | Description |
| ------------ | ---------------- | -------------------------------------------------------------------------------- |
| goalNameOrID | String or Number | Name or ID of the goal as defined in the Kameleoon App. This field is mandatory. |
### processConversion
Before implementing the processConversion, review the [Custom Code for Custom Goal](#triggergoal-custom-code-for-custom-goal) feature, which simplifies customization by removing the requirement for a goal ID.
```javascript theme={null}
//Conversion for "Add to cart" goal (goal id 123456)
Kameleoon.API.Core.runWhenElementPresent("#buyButton", ([buyButton]) => {
Kameleoon.API.Utils.addEventListener(buyButton, "click", () => {
Kameleoon.API.Goals.processConversion(123456); //Add to cart
});
});
//Conversion for "Add to cart" goal (goal id 123456) with optional revenue argument
Kameleoon.API.Core.runWhenElementPresent("#buyButton", ([buyButton]) => {
Kameleoon.API.Utils.addEventListener(buyButton, "click", () => {
Kameleoon.API.Goals.processConversion(123456, 19.99); //Add to cart
});
});
```
The `processConversion()` method triggers a conversion. Metadata must be [configured in the Kameleoon App](/user-manual/assets/goals/create-a-goal#metadata) before setting them with `processConversion()`.
If you initiate conversions from a Tag Management System, such as Google Tag Manager, use the [Kameleoon Command Queue](./command-queue) to delay execution until the engine loads. The engine processes queued commands in order after initialization. Example:
```javascript theme={null}
window.kameleoonQueue = window.kameleoonQueue || [];
kameleoonQueue.push(['Kameleoon.API.Goals.processConversion', 'GOAL_ID']);
```
##### Arguments
| Name | Type | Description |
| ------------ | ---------------- | --------------------------------------------------------------------------------------------------------------------------------------------------------------------------------------------------------------------------------------------------------------------------------------------------------------------------------------------------------------------------------------------------------------------------- |
| goalNameOrID | String or Number | Name or ID of the goal as defined in the Kameleoon App. Goal names must be unique. This field is mandatory. |
| revenue | Number | Transaction amount. Providing this value enables Kameleoon to track purchase metrics, such as revenue and average cart amount. This field is optional. |
| metadata | Object | Sets specific values for custom data defined as goal metadata in the Kameleoon App. [Must be defined beforehand in the Kameleoon App](/user-manual/assets/goals/create-a-goal#metadata). The object keys are the **custom data indexes** (numeric values found in the `INDEX` column of the [Custom data dashboard](/user-manual/assets/custom-data/manage-custom-data#find-a-custom-datas-index)). This field is optional. |
Metadata values are accessible through [raw data exports](/user-manual/experiment-analytics/analyze-results/results-page/results-page-actions#Export) and [the results page](/user-manual/experiment-analytics/analyze-results/data-and-metrics/goal-metadata).
If you provide the `metadata` parameter, Kameleoon uses those values for the current conversion instead of the values you previously collected through `setCustomData()`. If you omit the parameter, Kameleoon uses the last tracked `customData` values before the conversion in the same visit.
Kameleoon only considers the metadata values you pass directly to the `processConversion()` method; it ignores previously set custom data. In the following example, the conversion associates only with the provided metadata (for example, index 5 with 'Amex Credit Card').
```javascript theme={null}
Kameleoon.API.Data.setCustomData(5, 'Credit Card');
Kameleoon.API.Data.setCustomData(9, 'Express Delivery');
Kameleoon.API.Goals.processConversion("GoalIDorName", revenue, {
5: ["Amex Credit Card", "PayPal"], // PaymentMode Custom Data
4: 1234567, // OrderID CustomData
3: "1q2w3e4r" // PayPalID CustomData
})
```
### triggerGoal (Custom Code for Custom Goal)
To trigger **custom goals**, inject custom code by creating a new goal and adding the code to the **Trigger my goal** panel.

The `triggerGoal()` function triggers the goal from the code panel without requiring a goal ID.
```javascript theme={null}
//No params
triggerGoal();
//With revenue
triggerGoal(49.99);
//With revenue and metadata
triggerGoal(49.99, {5: "Gold"});
```
##### Arguments
| Name | Type | Description |
| -------- | ------ | ---------------------------------------------------------------------------------------------------------------------------------------------------------------------------------------------------------------------------------------------------------------------------------------------------------------------- |
| revenue | Number | Transaction amount. Providing this value enables Kameleoon to track purchase metrics, such as revenue and average cart amount. This field is optional. |
| metadata | Object | Sets specific values for custom data defined as goal metadata in the Kameleoon App. The object keys are the **custom data indexes** (numeric values found in the `INDEX` column of the [Custom data dashboard](/user-manual/assets/custom-data/manage-custom-data#find-a-custom-datas-index)). This field is optional. |
Metadata values are accessible through [raw data exports](/user-manual/experiment-analytics/analyze-results/results-page/results-page-actions#Export) and [the results page](/user-manual/experiment-analytics/analyze-results/data-and-metrics/goal-metadata).
If you provide the `metadata` parameter, Kameleoon uses those values for the current conversion instead of the values you previously collected through `setCustomData()`. If you omit the parameter, Kameleoon uses the last tracked `customData` values before the conversion in the same visit.
Kameleoon only considers the metadata values you pass directly to the `triggerGoal()` method; it ignores previously set custom data. In the following example, the conversion associates only with the provided metadata (for example, index 5 with 'Amex Credit Card').
```javascript theme={null}
Kameleoon.API.Data.setCustomData(5, 'Credit Card');
Kameleoon.API.Data.setCustomData(9, 'Express Delivery');
triggerGoal( revenue, {
5: ["Amex Credit Card", "PayPal"], // PaymentMode Custom Data
4: 1234567 // OrderID CustomData,
3: "1q2w3e4r" // PayPalID CustomData
})
```
## Kameleoon.API.Data
This module provides methods to set **custom data** for tracking customer or visit characteristics. It also includes data management methods to retrieve and write data in Kameleoon's unified LocalStorage.
### readLocalData
```javascript theme={null}
var userId = Kameleoon.API.Data.readLocalData("myUserId");
if (userId) {
Kameleoon.API.Data.retrieveDataFromRemoteSource(userId, function (data) {
console.log(data.returningVisitor);
});
}
```
The `readLocalData()` method reads local data you previously stored through `writeLocalData()`. The engine retrieves this data from unified Local Storage, which bypasses standard storage limitations.
##### Arguments
| Name | Type | Description |
| ---- | ------ | ----------------------------------------------------- |
| key | String | Key of the data to retrieve. This field is mandatory. |
##### Return value
| Name | Type | Description |
| ----- | ------ | ------------------ |
| value | String | Value of the data. |
### performRemoteSynchronization
```javascript theme={null}
Kameleoon.API.Data.performRemoteSynchronization("customDataName", "customDataValue", false);
```
The `performRemoteSynchronization()` method triggers a Server Synchronization Call (SSC) to the Data API. This call retrieves visit history stored on Kameleoon backend servers for the current visitor and writes it to LocalStorage. This ensures that the data is accessible through the Activation API and available for targeting. This method typically runs automatically for cross-device reconciliation or Safari ITP; it does not require manual invocation.
##### Arguments
| Name | Type | Description |
| ---------------- | ------- | --------------------------------------------------------------------------------------------------------------------------------------------------------------------------------------------------------------------------- |
| key | String | Key of the custom data serving as the mapping identifier (e.g., account ID or email). If omitted, the method uses the default identifier configured for cross-device reconciliation in the Kameleoon App. |
| value | String | Current visitor identifier value used for the Data API call. If omitted, the method uses the current value of the custom data provided in the first argument. |
| currentVisitOnly | Boolean | When active, the SSC requests data only for the current visit. Use this optimization to refresh custom data values acquired via the Data API or Server-to-Server integration. If omitted, the method defaults to **false**. |
### resetCustomData
```javascript theme={null}
Kameleoon.API.Data.resetCustomData("MyCustomDataName");
```
The `resetCustomData()` method resets a custom data value.
##### Arguments
| Name | Type | Description |
| ---- | ------ | --------------------------------------------------------------------------------- |
| name | String | Name of the custom data as defined in the Kameleoon App. This field is mandatory. |
### retrieveDataFromRemoteSource
```javascript theme={null}
if (location.href.indexOf("loginPage") != -1) {
Kameleoon.API.Core.runWhenConditionTrue(function () {
return typeof dataLayer != null;
}, function () {
dataLayer.forEach(function (map) {
if (map.userId) {
Kameleoon.API.Data.retrieveDataFromRemoteSource(userId, function (data) {
Kameleoon.API.Data.setCustomData("known_user", data.knownUser);
});
}
});
}, 200);
}
```
The `retrieveDataFromRemoteSource()` method retrieves data stored on a remote Kameleoon server with the specified **key**. This method supports retrieving data previously stored through the Data API. Use this for quick storage and retrieval of large data volumes for visitors.
This asynchronous mechanism requires a **callback** function when the server call completes.
##### Arguments
| Name | Type | Description |
| -------- | -------- | --------------------------------------------------------------------------------------------------------------------------------- |
| key | String | The lookup key. This field is mandatory. |
| callback | Function | Function called when data has been retrieved. It is called with a \**data* argument that is a JS Object. This field is mandatory. |
### setCustomData
```javascript theme={null}
// Single Type Custom Data
Kameleoon.API.Data.setCustomData("mySingleCustomDataName", "myNewValue"); --> "myNewValue"
// List Type Custom Data
Kameleoon.API.Data.setCustomData("myListCustomDataName", "myFirstValue"); --> ["myFirstValue"]
Kameleoon.API.Data.setCustomData("myListCustomDataName", "mySecondValue"); --> ["myFirstValue", "mySecondValue"]
Kameleoon.API.Data.setCustomData("myListCustomDataName", ["myThirdValue", "myFourthValue"]); --> ["myFirstValue", "mySecondValue", "myThirdValue", "myFourthValue"]
Kameleoon.API.Data.setCustomData("myListCustomDataName", ["myThirdValue", "myFourthValue"], true); --> ["myThirdValue", "myFourthValue"]
// Count List Type Custom Data
Kameleoon.API.Data.setCustomData("myCountListCustomDataName", "myFirstValue"); --> {value: 'myFirstValue', count: 1}
Kameleoon.API.Data.setCustomData("myCountListCustomDataName", "myFirstValue"); --> {value: 'myFirstValue', count: 2}
Kameleoon.API.Data.setCustomData("myCountListCustomDataName", "mySecondValue"); --> --> {value: 'myFirstValue', count: 2}, {value: 'mySecondValue', count: 1}
```
The `setCustomData()` method sets a custom data value.
##### Arguments
| Name | Type | Description |
| --------------------- | ------------------------------ | ------------------------------------------------------------------------------------------------------------------------------------------------------------------------------------------------------------------------------------------------------------------------------------------------------------------------------------------------------------------ |
| CustomDataNameOrIndex | String or Number | Name or Index of the custom data as defined in the Kameleoon App. (the index appears in the 'INDEX' column of the Custom Data dashboard). This field is mandatory. |
| value | String, Number, Boolean, Array | Value of the custom data. The argument provided should match the type declared for this custom data in the Kameleoon app. This field is mandatory. **Please be aware that `setCustomData()` accepts String, Number, and Boolean when the `Type` is set to `Single`. If the `Type` is set to `List` or `Count List`, it will accept an array of String or Number.** |
| overwrite | Boolean | **Optional boolean**. When `true`, the new value overwrites existing custom data. When `false` or omitted: **Lists/Count Lists** append values (all values appear in reports); **Single types** overwrite (only the latest value appears); **Page-scoped Custom Data** (all types) append values. |
### writeLocalData
```javascript theme={null}
Kameleoon.API.Data.writeLocalData("myData", "myDataValue", true);
```
The `writeLocalData()` method records local data in the visitor's browser for later retrieval through `readLocalData()`. The engine stores this as unified session data in Local Storage, bypassing standard storage limitations. Data becomes available immediately for retrieval in the same tab through RAM caching, while the physical write occurs asynchronously.
##### Arguments
| Name | Type | Description |
| ---------- | ------- | ----------------------------------------------------------------------------------------------------------------------------------------------------------- |
| key | String | Key (name) of the data to write. This field is mandatory. |
| value | String | Value of the data to write. This field is mandatory. |
| persistent | Boolean | Toggle data persistence. Non-persistent data expires after 1 hour, while persistent data remains for 30 days. If omitted, the method defaults to **false**. |
## Kameleoon.API.Events
This module triggers custom events for experiment and personalization targeting. Review the [Activation API events documentation](./activation-api-events) for standard DOM events.
### trigger
```javascript theme={null}
Kameleoon.API.Events.trigger("myTriggerEventName");
```
The `trigger()` method triggers a custom event for targeting segments.
##### Arguments
| Name | Type | Description |
| --------- | ------ | ------------------------------------------------------ |
| eventName | String | Name of the event to trigger. This field is mandatory. |
## Kameleoon.API.Tracking
This module integrates Kameleoon results with third-party tracking and analytics platforms, such as Adobe Analytics (Omniture).
### processOmniture
```javascript theme={null}
function s_doPlugins(s) {
/* Kameleoon Integration */
window.kameleoonQueue = window.kameleoonQueue || [];
kameleoonQueue.push(['Tracking.processOmniture', s]);
window.kameleoonOmnitureCallSent = true;
// Add your other doPlugins code below
}
s.doPlugins = s_doPlugins;
```
Kameleoon provides a native integration with Adobe Analytics (Omniture). Follow the example to modify the file containing the `s_doPlugins()` code. Complete these steps within the function:
* Add a call to `Kameleoon.API.Tracking.processOmniture()`.
* Set the `window.kameleoonOmnitureCallSent` global variable to `true` to track initial call transmission. Although you can set this variable elsewhere, you should set it within `s_doPlugins()`.
The integration minimizes the number of Adobe Analytics hits to help you manage costs. Kameleoon sends an additional hit only if an experiment or personalization triggers after the main tracking call. This results from asynchronous loading (in which Kameleoon loads after the analytics code) or "late" triggers, such as those that occur after page load, for example button clicks.
If Kameleoon loads first and identifies active experiments at page load, the global tracking call includes all additional data.
##### Arguments
| Name | Type | Description |
| -------------- | ------ | -------------------------------------------------------------------------------------------------------------------------------------------------------------------------------------------------------------------------------- |
| omnitureObject | Object | Reference to your Omniture object. Usually, the global "s" variable (**window\.s**) represents the Omniture object. It is also passed as an argument (named "s" as well) to the `s_doPlugins()` method. This field is mandatory. |
## Kameleoon.API.Products
This module provides access to the product catalog. Use it to register product views or purchases, add products to a cart, retrieve recommendations, or obtain product statistics, such as hourly or daily view and purchase counts.
This module is available when subscribed to the Product Recommendation module or Product Targeting add-on.
### obtainRecommendedProducts
```javascript theme={null}
Kameleoon.API.Products.obtainRecommendedProducts(
"1a2b3c4d",
{
item: 123500,
exclude: [3, 14, 159, 26535],
category: 146,
search_query: "To be or not to be",
limit: 15,
brands: ["Alas", "poor", "Yorick", 'kameleooner'],
categories: [1, 146, 123500]
},
function (response) {
// the functionality of rendering a block of product recommendations
},
function (error) {
// when something went wrong
}
);
```
The `obtainRecommendedProducts()` method retrieves recommended products computed by the specified algorithm through an asynchronous server call.
This method requires correct product tracking, such as `trackProductView()` or `trackCategoryView()`, to return meaningful results.
##### Arguments
| Name | Type | Description |
| --------------- | -------- | -------------------------------------------------------------------------------------------------------------------------------------------------- |
| code | String | Unique code of the recommendation block. |
| params | Object | [Parameters to control the data returned by the recommendation platform.](#parameters-to-control-the-data-returned-by-the-recommendation-platform) |
| successCallback | Function | Callback function receiving the API response object. This field is mandatory. |
| errorCallback | Function | Callback function executing if an error occurs. This field is optional. |
#### Parameters to control the data returned by the recommendation platform
| Name | Type | Description |
| --------------- | ------ | --------------------------------------------------------------------------------------------------------------------------------------------- |
| item | String | ID of the current product. Mandatory for "Similar" and "They also bought this product" algorithms. |
| exclude | Array | Comma-separated list of product identifiers for exclusion. |
| extended | Number | When "1", the method returns full product details. If omitted, it returns only product IDs. |
| category | Number | Mandatory for algorithms on category pages. Limits recommendations to the specified category. |
| categories | Array | This field is optional. If used, it returns recommended products only from the specified categories (a comma-separated list of category IDs). |
| brands | Array | This field is optional. If used, it returns recommended products only from specified brands (a comma-separated list of brands). |
| locations | Array | This field is optional. If used, it returns recommended products available in the listed locations (a comma-separated list of location IDs). |
| limit | Number | This field is optional. Maximum number of recommended products. |
| exclude\_brands | Number | This field is optional. A comma-separated list of brands that must be excluded from the recommendation. |
#### API response
The callback function receives the API response object with the following values.
| Name | Type | Description |
| -------- | ------ | ------------------------------------------------------------------------------------------------------------ |
| html | String | The block HTML code. Customize the HTML template in the Kameleoon personal account. |
| title | String | The block title. Corresponds to the value of the "Action" element in the block rules. |
| products | Array | A list of product IDs. |
| id | Number | Unique block identifier. Corresponds to the block ID in the list of blocks in the Kameleoon personal account |
### trackAddToCart
```javascript theme={null}
var buyButton = Kameleoon.API.Utils.querySelectorAll("#buyButton")[0];
Kameleoon.API.Utils.addEventListener(buyButton, "mousedown", function () {
Kameleoon.API.Products.trackAddToCart("myProductId", 19.99, 1, {
stock: true,
recommended_code: 'some-unique-code' //see the arguments table for more information
recommended_by: 'dynamic'//see the arguments table for more information
});
});
```
The `trackAddToCart()` method triggers when a visitor adds a product to the shopping cart.
##### Arguments
| Name | Type | Description |
| ---------- | ------ | ----------------------------------------------------------------------------------------------------------------------------------------------------------------------------------------------------------------------------------------------------- |
| productID | String | Unique product identifier. This field is mandatory. |
| unitPrice | Number | Price for a single unit of the product referenced by **productID**. This field is optional; if not specified, the default price of the product from the imported product feed will be used. |
| amount | Number | Total quantity of the product after the cart update. Use non-incremental values. For example, if the cart contains two items with the same `productID` and you add another, specify 3. If you remove two items from a cart containing 20, specify 18. |
| parameters | Object | [Parameters for the recommendation platform.](#parameters-for-the-recommendation-platform) This field is optional. |
#### Parameters for the recommendation platform
| Name | Type | Description |
| ----------------- | ------- | ------------------------------------------------------------------------------------------------------------------- |
| recommended\_by | String | For SPAs or pop-ups, set this value to "dynamic". This field is mandatory in specific scenarios. |
| recommended\_code | String | For SPAs or pop-ups, provide the unique widget code found in the "data-recommender-code" attribute in your account. |
| stock | Boolean | Product availability. This value overrides data from product feeds or catalog imports. This field is optional. |
### trackAddToWishList
```javascript theme={null}
Kameleoon.API.Products.trackAddToWishList("myProductId"); // to add to wish list
Kameleoon.API.Products.trackAddToWishList("myProductId", -1); // to remove from wish list
```
The `trackAddToWishList()` method executes when a visitor adds or removes a product from the wish list or favorites.
| Name | Type | Description |
| --------- | ------ | ----------------------------------------------------------------------------------------------------------------- |
| productId | String | Unique identifier of the product added to the wishlist. This field is mandatory. |
| quantity | Number | Quantity to update. Use negative values (e.g., -1) to indicate removal. If omitted, the method defaults to **1**. |
### trackCategoryView
```javascript theme={null}
if (location.href.indexOf("productPage") != -1) {
Kameleoon.API.Core.runWhenConditionTrue(function () {
return typeof dataLayer != null;
}, function () {
dataLayer.forEach(function (map) {
if (map.categoryID) {
Kameleoon.API.Products.trackCategoryView(5);
}
});
}, 200);
}
```
The `trackCategoryView()` method executes for each category page view during a session.
##### Arguments
| Name | Type | Description |
| ---------- | ------ | ---------------------------------------------------- |
| categoryID | String | Unique category identifier. This field is mandatory. |
### trackProductView
```javascript theme={null}
Kameleoon.API.Products.trackProductView("myProductID", {
"name": "productName",
"categories": [{
"id": "13",
"name": "productCategory",
"parent": null,
"url": "website.com/category/2"
}],
"imageURL": "https://www.mywebsite/productImage.jpg",
"price": 19.99,
"oldPrice": 23.99,
"accessories": ['productID1', 'productID2'],
"available": true,
"availableQuantity": 15,
"brand": "productBrand",
"groupId": "groupID1",
"sku": "productSKU",
"description": "This is a short description",
"rating": 4,
"model": "phone 14 128GB",
"leftovers": "one",
"tags": ["shirt", "red"],
"typePrefix": "mobile phone",
"seasonality": [1, 2, 3, 10, 11, 12],
"priceMargin": 100,
"isChild": false,
"isNew": false,
"isFashion": true,
"auto": {
"vds": ["BP8AN5", "HH5820"],
"compatibility": [
{
"brand": "BMW"
},
{
"brand": "Mini", "model": "Cooper S"
}
]
},
"fashion": {
"gender": "f",
"type": "shoe",
"sizes": ["37", "42"],
"feature": "adult",
"colors": [
{
"color": "red"
},
{
"color": "green", "picture": "https://example.com/items/395532-green.jpg"
}
]
},
"params": [
{
"name": "connectivity",
"value": ["bluetooth", "wi-fi"]
},
{
"name": "lengths",
"value": ["4", "6", "8"],
"unit": "cm"
}
]
});
```
The `trackProductView()` method executes for each product view during a session. This method allows Kameleoon to build an automated product catalog without an XML feed integration, which simplifies the setup of product recommendation projects.
##### Arguments
| Name | Type | Description |
| ----------- | ------ | ---------------------------------------------------------------------------------------------------------------------- |
| productID | String | Product identifier. This can be any unique identifier for this particular product. This field is mandatory. |
| productData | Object | [Product object](#product). This field is mandatory for importing product feeds via the Product Recommendation add-on. |
### trackSearchQuery
```javascript theme={null}
Kameleoon.API.Products.trackSearchQuery("Example search request");
```
The `trackSearchQuery()` method records user search queries.
##### Arguments
| Name | Type | Description |
| ------------- | ------ | ------------------------------------------------ |
| search\_query | String | The search query value. This field is mandatory. |
### trackTransaction
```javascript theme={null}
Kameleoon.API.Products.trackTransaction(
[
{
"productID": "myProductID1",
"quantity": 4
},
{
"productID": "myProductID4564",
"quantity": 1
}
],
{
"order": "N318",
"order_price": 29999
}
);
```
The `trackTransaction()` method executes when a transaction or purchase occurs.
##### Arguments
| Name | Type | Description |
| -------- | ------ | ----------------------------------------------------------------------------------------------------------------------------- |
| products | Array | List of objects containing the `productID` and `quantity` for each product in the transaction. This field is mandatory. |
| params | Object | [Additional parameters for the recommendation platform.](#additional-parameters-for-tracktransaction) This field is optional. |
##### Additional parameters for trackTransaction
| Name | Type | Description |
| --------------- | ------- | ---------------------------------------------------------------------------------------------------------------------------------------------------------------------------------- |
| order | string | Store order number. If you omit this, the engine uses an internal numbering system, which prevents order status synchronization. Refer to the parameter descriptions below. |
| order\_price | Number | Final order cost, including discounts, bonuses, and additional services. If you omit this, the engine calculates the cost from the product database without discounts or services. |
| email | string | Customer email. |
| phone | string | Customer phone number. |
| promocode | string | Transaction promo code. |
| order\_cash | number | Cash payment amount. |
| order\_bonuses | number | Bonus payment amount. |
| order\_delivery | number | Delivery fee. |
| order\_discount | number | Order discount amount. |
| delivery\_type | string | Delivery method. |
| payment\_type | string | Payment type (e.g., "cash", "card", "wire"). |
| tax\_free | boolean | Tax-free status. |
### obtainInstantSearchProducts
```javascript theme={null}
Kameleoon.API.Products.obtainInstantSearchProducts(
{
search_query: "To be or not to be"
},
function (response) {
// the functionality to render a block from instant search
},
function (error) {
// to handle when something goes wrong
}
);
```
The `obtainInstantSearchProducts()` method retrieves personalized instant search results from Kameleoon Search through an asynchronous server call.
##### Arguments
| Name | Type | Description |
| --------------- | -------- | ----------------------------------------------------------------------------- |
| search\_query | String | User-provided search query. This field is mandatory. |
| successCallback | Function | Callback function receiving the API response object. This field is mandatory. |
| errorCallback | Function | Callback function executing if an error occurs. This field is optional. |
#### API response
The callback function receives the API response object with the following values.
| Name | Type | Description |
| ------------------------ | ------ | -------------------------------------------------------------------------------------------------------------------------------------------------------------------------------------------------------------------------------------------------------------------------------------------------------------------------------------------------------------------------------------------------------------------------------------------------------------------------------------------------------------------------------------------------------------------------------------------------------------------------------------------------------------------------------------------------------------------------------------------------------------------------------------------------------------------------------------------------------------------------------------------------------------------------------------------------------------------------------------------------------------------------------------------------------------------------------------------------------------------------------------------------------------------------------------------------------------------------------------------------------------------------------------------------------------------------------------------------------------------------------------------------------------------------------------------------------------------------------------------------------------------------------------------------------------------------------------------------------------------------------------------------------------------------------------------------------------------------------------------------------- |
| search\_query | String | Search query |
| categories | Array | Array with information about categories. Each object has the following properties:id – category id (string) name – category name (string) url – category url (string) count – count of products in category (number) |
| filters | Array | Array with information about filters. Each object has the following properties: filter – filter object. Has the following properties: count – total count of products whith this parameters (number) values – array of values (object). Has the following properties: value – value label. (string) count – cont of products whith this parameter (number) |
| html | String | HTML-code of the block with products. The template is customized in the Kameleoon personal account. |
| price\_range | Object | Min and max price of products. Has the following properties:min – min price (number) max – max price (number) |
| products | Array | Array with information about products. Each object has the following properties:description – product description (string) url – absolute product URL (string) url\_handle – relative product URL (string) picture – product's picture URL in the Kameleoon storage (string) name – product name (string) price – product price (number / int) price\_full – product price (number / float) price\_formatted – product price with currency (string) price\_full\_formatted – product price with currency (string) image\_url - absolute product's picture URL in the Kameleoon storage (string) image\_url\_handle - relative product's picture URL in the Kameleoon storage (string) image\_url\_resized - product image resizes url (array) currency – product currency (string, corresponds to the currency of the personal account in Kameleoon, or a custom value specified in the shop settings in the personal account) id – product ID (string) old\_price – product old price (number / int, default - 0) old\_price\_full – product old price (number / float) old\_price\_formatted – product old price with currency (string) old\_price\_full\_formatted – product old price with currency (string) Additional properties. If a parameter "extended" is passed in the request categories – product categories (array). Has the following properties:id – category id (string) name – category name (string) parent\_id – parent category id (string) url - category url category\_ids - product categories ids (array). |
| search\_query\_redirects | array | Array with information about redirects. Each object has the following properties:query – search query (string) redirect\_link – Url for redirect (string) deep\_link – Url for mobile apps (string) |
| products\_tota | Number | Total number of products |
### obtainFullSearchProducts
```javascript theme={null}
Kameleoon.API.Products.obtainFullSearchProducts(
{
search_query: "To be or not to be",
limit: 15,
brands: ["Alas", "poor", "Yorick"],
categories: [1, 146, 100500],
filters: { key: ["value"], key: ["value"] },
sort_by: "price",
order: "asc"
},
function (response) {
// the functionality to render a block from full search
},
function (error) {
// when something went wrong
}
);
```
Use the `obtainFullSearchProducts()` method to retrieve full search results from the Kameleoon Search solution with filtering options.
##### Arguments
| Name | Type | Description |
| --------------- | -------- | ---------------------------------------------------------------------------------------------------------------------------------------- |
| search\_query | Object | User-provided search query and optional filter parameters. Review the filtering parameters in the next section. This field is mandatory. |
| successCallback | Function | Callback function receiving the API response object. This field is mandatory. |
| errorCallback | Function | Callback function executing if an error occurs. This field is optional. |
##### Parameters to filter results
| Name | Type | Description |
| ------------------- | ------- | ------------------------------------------------------------------------------------------------------------------------------------------------------------- |
| search\_query | String | Search query. This field is mandatory. |
| limit | Number | Limit of results. This field is optional. |
| offset | Number | Offset of results. This field is optional. |
| category\_limit | Number | How many categories for sidebar filter to return. This field is optional. |
| categories | Array | Comma separated list of categories to filter. This field is optional. |
| extended | Number | Set to `true` for full search results. |
| sort\_by | String | Sort by parameter: `popular`, `price`, `discount`, `sales_rate`, `date`. This field is optional. |
| order | String | Sort direction: asc or desc (default). This field is optional. |
| locations | Array | Comma separated list of locations IDs. This field is optional. |
| brands | Array | Comma separated list of brands to filter. This field is optional. |
| filters | String | Optional escaped JSON string with filter parameters. For example: `{"bluetooth":["yes"],"offers":["15% cashback"],"weight":["1.6"]}`. This field is optional. |
| price\_min | Number | Min price. This field is optional. |
| price\_max | Number | Max price. This field is optional. |
| colors false | Array | Comma separated list of colors. This field is optional. |
| fashion\_sizes | Array | Comma separated list of sizes. This field is optional. |
| exclude | Array | Comma separated list of products IDs to exclude from search results. This field is optional. |
| email | String | It's only for S2S integration, when service doesn't have user's session. Mobile SDK doesn't use it. This field is optional. |
| no\_clarification | Boolean | Disables clarified search. Defaults to **false**. Do not use this parameter unless instructed by Kameleoon support. |
| merchants | Array | Comma separated list of merchants. This field is optional. |
| filters\_search\_by | String | Available options for filter: `name`, `quantity`, `popularity`. This field is optional. |
#### API response
The callback function receives the API response object with the following values.
| Name | Type | Description |
| --------------- | ------ | ------------------------------------------------------------------------------------------------------------------------------------------------------------------------------------------------------------------------------------------------------------------------------------------------------------------------------------------------------------------------------------------------------------------------------------------------------------------------------------------------------------------------------------------------------------------------------------------------------------------------------------------------------------------------------------------------------------------------------------------------------------------------------------------------------------------------------------------------------------------------------------------------------------------------------------------------------------------------------------------------------------------------------------------------------------------------------------------------------------------------------------------------------------------------------------------------------------------------------------------------------------------------------------ |
| brands | Array | Array with information about brands. Each object has the following properties:name – brand name (string) picture – brand picture (string) |
| categories | Array | Array with information about categories. Each object has the following properties:alias – category alias (string) id – category id (string) name – category name (string) parent – parent category id (string) url – category url (string) |
| filters | Array | Array with information about filters. Each object has the following properties:filter – filter object. Has the following properties:count – total count of products whith this parameters (number) values – array of values (object). Has the following properties: \* value – value label. (string), count – cont of products whith this parameter (number) |
| html | String | HTML-code of the block with products. The template is customized in the Kameleoon personal account. |
| price\_range | Object | Min and max price of products. Has the following properties:min – min price (number) max – max price (number) |
| products | Array | Array with information about products. Each object has the following properties:brand – product brand (string) currency – product currency (string, corresponds to the currency of the personal account in Kameleoon, or a custom value specified in the shop settings in the personal account) id – product ID (string) is\_new – product property (boolean, default - null) name – product name (string) old\_price – product old price (string, default - 0) picture – product's picture URL in the Kameleoon storage (string) price – product price (number) price\_formatted – product price with currency (string) url – product URL (string) Additional properties if a parameter "extended" is passed in the request:barcode – product barcode (string) categories – product categories (array). Has the following properties:id – category id (string) name – category name (string) parent – parent category id (string) params – array with information about params. Each object has the following properties:key – param name (string) values – array of values (array) |
| products\_total | Number | Total count of products |
| search\_query | String | Search query typed by the user. |
### obtainProductInteractions
```javascript theme={null}
Kameleoon.API.Products.obtainProductInteractions("123456", product => {
console.log("product", product); // {123456: {views: 1, cartQuantities: 0, boughtQuantities: 0}}
});
Kameleoon.API.Products.obtainProductInteractions(["123456", "654321"], products => {
console.log("products", products);
});
Kameleoon.API.Products.obtainProductInteractions(
"123456",
callback,
new Date().getTime() - 1000 * 60 * 60 * 24, // timeBegin
new Date().getTime() // timeEnd
);
```
The `obtainProductInteractions()` method retrieves interaction metrics for products tracked via `trackProductView()`, `trackTransaction()`, or `trackAddToCart()`.
##### Arguments
| Name | Type | Description |
| --------- | -------- | ---------------------------------------------------------------------- |
| eans | Array | Product IDs (as Strings). This field is mandatory. |
| callback | Function | Callback function receiving the product data. This field is mandatory. |
| timeBegin | Number | Start of the date range (UNIX milliseconds timestamp). |
| timeEnd | Number | End of the date range (UNIX milliseconds timestamp). |
##### API Response
| Name | Type | Description |
| ---------------- | ------- | --------------------------------------------------------------------------------------------------- |
| eans | Array | Unique identifier of the product. Each product ID maps to an object containing interaction metrics. |
| views | integer | Number of times the product has been viewed. |
| cartQuantities | integer | Total number of times the product has been added to visitors’ carts. |
| boughtQuantities | integer | Total number of times the product has been purchased. |
### obtainProductData
```javascript theme={null}
Kameleoon.API.Products.obtainProductData("123456", product => {
console.log("product", product);
});
Kameleoon.API.Products.obtainProductData(["123456", "654321"], products => {
console.log("products", products);
});
Kameleoon.API.Products.obtainProductData("123456", callback, {
name: true,
categoryId: true
}); // {123456: {name: '', categoryId: '' }}
```
The `obtainProductData()` method retrieves product information for items sent via `trackProductView()`.
##### Arguments
| Name | Type | Description |
| ---------- | -------- | ----------------------------------------------------------------------------- |
| eans | Array | Product IDs (as Strings). This field is mandatory. |
| callback | Function | Callback function receiving the product data. This field is mandatory. |
| parameters | Object | Optional parameters to retrieve specific fields. Defaults to `{ all: true }`. |
##### API Response
| Name | Type | Description |
| ----------- | ------ | ------------------------------------------------------------------------------------------------------ |
| eans | Array | Unique identifier of the product. Each product ID maps to an object containing interaction metrics. |
| productData | Object | [Product object](#product). The same object sent by `trackProductView` will be recieved in this field. |
### obtainRecommendedCollections
```javascript theme={null}
Kameleoon.API.Products.obtainRecommendedCollections("123456", collections => {
/* The functionality of rendering a product collection block */
console.log("collections", collections);
}, error => {
/* Error handling logic if something goes wrong */
});
```
The `obtainRecommendedCollections()` method retrieves products from the specified collection.
##### Arguments
| Name | Type | Description |
| --------------- | -------- | ------------------------------------------------------------------------------ |
| collectionId | String | Product collection ID, available in the Product Collections dashboard section. |
| successCallback | Function | Callback function receiving the API response object. This field is mandatory. |
| errorCallback | Function | Callback function executing if an error occurs. This field is optional. |
#### API response
##### Products
API returns an array of objects. Each object in the `products` array contains the following:
| **Parameter** | **Type** | **Description** |
| ---------------------- | ---------------- | ------------------------------------------------------------- |
| name | String | Name of the product |
| url | String (URL) | URL of the product page |
| description | String | Description of the product |
| category\_ids | Array of Strings | List of category IDs the product belongs to |
| brand | String | Brand of the product |
| fashion\_feature | String | Fashion feature (e.g., `"adult"`) |
| fashion\_gender | String | Intended gender for the product |
| sales\_rate | Integer | Product's sales rate |
| relative\_sales\_rate | Float | Sales rate relative to other products |
| picture | String (URL) | URL of the main product image |
| categories | Array of Objects | List of category objects (system-defined structure) |
| price\_formatted | String | Formatted product price (e.g., `$29.99`) |
| price\_full\_formatted | String | Formatted full/original price |
| price | Float | Current product price |
| price\_full | Float | Original/full price before any discounts |
| image\_url | String (URL) | URL of the resized product image |
| image\_url\_handle | String (URL) | Processed image URL (handle-based) |
| image\_url\_resized | String (URL) | Resized image URL |
| url\_handle | String | URL handle used to access the product within the collection |
| currency | String | Currency code used for the product price (e.g., `USD`, `EUR`) |
| id | String | Product ID (numeric or string depending on system) |
| html | String (HTML) | The HTML template selected when the collection was created |
## Kameleoon.API.Experiments
This module provides methods to access live experiments.
This module is only available with Kameleoon Web Experimentation solution.
### assignVariation
```javascript theme={null}
var experimentID = 2468;
var variationID;
if (Kameleoon.API.CurrentVisit.device.type == "Desktop") {
variationID = 123456;
} else if (Kameleoon.API.CurrentVisit.device.type == "Tablet") {
variationID = 654321;
} else {
variationID = 987654;
}
Kameleoon.API.Experiments.assignVariation(experimentID, variationID);
```
The `assignVariation()` method forces the association of a specific variation for an experiment, which overrides the standard allocation algorithm. If you call this before the experiment triggers, the engine pre-allocates the variation for later activation. If the experiment has already triggered, set the **override** argument to **true** to replace the existing association.
##### Arguments
| Name | Type | Description |
| ------------ | ------- | -------------------------------------------------------------------------------------------------------------------------------------------- |
| experimentID | Number | ID of the experiment. This field is mandatory. |
| variationID | Number | ID of the variation. This field is mandatory. |
| override | Boolean | When **true**, the engine replaces any existing variation association with the provided value. If omitted, the method defaults to **false**. |
### block
```javascript theme={null}
// The experiment will be blocked for the current page
Kameleoon.API.Experiments.block(12345);
// The experiment will be blocked for the whole visit
Kameleoon.API.Experiments.block(54321, true);
```
The `block()` method prevents an experiment from triggering or activating, including manual calls through `trigger()`. The block applies to the current page by default until the next `Kameleoon.API.Core.load()`. Set the **visit** argument to **true** to block the experiment for the entire visit.
##### Arguments
| Name | Type | Description |
| ------------ | ------- | -------------------------------------------------------------------------------------------------------------------------------------------------- |
| experimentID | Number | ID of the experiment. This field is mandatory. |
| visit | Boolean | When **true**, the engine blocks the experiment for the entire visit. If omitted, the block applies only to the current page (default: **false**). |
### getAll
```javascript theme={null}
Kameleoon.API.Experiments.getAll().forEach(function (experiment) {
if (experiment.id == 123456 && experiment.active) {
console.log(experiment.name);
}
});
```
The `getAll()` method returns all live experiments (running, not draft/paused/stopped).
##### Return value
| Name | Type | Description |
| ----------- | ----- | ------------------------------------------ |
| experiments | Array | List of [Experiment objects](#experiment). |
### getActive
```javascript theme={null}
if (Kameleoon.API.Experiments.getActive().length == 0) {
Kameleoon.API.Events.trigger("No Experiments Events");
}
```
The `getActive()` method returns active experiments for the current visit and page. An experiment is active if its variation code has executed in the current session context. To retrieve experiments that you activated on other URLs during the visit, use `getActivatedInVisit()`.
##### Return value
| Name | Type | Description |
| ----------- | ----- | ------------------------------------------ |
| experiments | Array | List of [Experiment objects](#experiment). |
### getById
```javascript theme={null}
var experiment = Kameleoon.API.Experiments.getById(123456);
if (experiment && experiment.active) {
console.log(experiment.name);
}
```
The `getById()` method returns the experiment for the specified ID.
##### Arguments
| Name | Type | Description |
| ---- | ------ | ---------------------------------------------- |
| id | Number | ID of the experiment. This field is mandatory. |
##### Return value
| Name | Type | Description |
| ---------- | ------ | --------------------------------- |
| experiment | Object | [Experiment object](#experiment). |
### getByName
```javascript theme={null}
var experiment = Kameleoon.API.Experiments.getByName("MyExperimentName");
if (experiment && experiment.active) {
console.log(experiment.id);
}
```
The `getByName()` method returns the experiment for the specified name.
##### Arguments
| Name | Type | Description |
| ---- | ------ | ------------------------------------------------ |
| name | String | Name of the experiment. This field is mandatory. |
##### Return value
| Name | Type | Description |
| ---------- | ------ | ---------------------------------- |
| experiment | Object | [Experiment objects](#experiment). |
### getTriggeredInVisit
```javascript theme={null}
Kameleoon.API.Experiments.getTriggeredInVisit().forEach(function (experiment) {
if (experiment.id == 123456) {
console.log(experiment.name);
}
});
```
The `getTriggeredInVisit()` method returns all experiments triggered during the current visit.
##### Return value
| Name | Type | Description |
| ----------- | ----- | ------------------------------------------ |
| experiments | Array | List of [Experiment objects](#experiment). |
### getActivatedInVisit
```javascript theme={null}
Kameleoon.API.Experiments.getActivatedInVisit().forEach(function (experiment) {
if (experiment.id == 123456) {
console.log(experiment.name);
}
});
```
The `getActivatedInVisit()` method returns all experiments activated during the current visit.
##### Return value
| Name | Type | Description |
| ----------- | ----- | ------------------------------------------ |
| experiments | Array | List of [Experiment objects](#experiment). |
### trigger
```javascript theme={null}
let experimentID = 123456;
Kameleoon.API.Experiments.trigger(experimentID, true);
```
The `trigger()` method forces an experiment to trigger, bypassing targeting segment conditions. This action initiates the experiment but might not activate it.
##### Arguments
| Name | Type | Description |
| ------------ | ------- | --------------------------------------------------------------------------------------------------------------------------------------------------------------------------------------------------------------------------------- |
| experimentID | Number | ID of the experiment. This field is mandatory. |
| trackingOnly | Boolean | Set to **true** for hybrid experiments (backend implementation with frontend tracking) to perform only tracking actions without executing variation assets (JS, CSS, redirections). If omitted, the method defaults to **false**. |
## Kameleoon.API.Personalizations
This module provides methods to access live personalizations.
### disable
```javascript theme={null}
let personalizationID = 12345;
Kameleoon.API.Personalizations.disable(personalizationID);
```
The `disable()` method marks a personalization as disabled. Use this for interactive elements like pop-ins. When a user closes the element, call `disable()` to update the personalization status. Kameleoon automatically implements this call for native, non-custom interface elements.
##### Arguments
| Name | Type | Description |
| ---- | ------ | --------------------------------------------------- |
| id | Number | Id of the personalization. This field is mandatory. |
### getActive
```javascript theme={null}
if (Kameleoon.API.Personalizations.getActive().length == 0) {
Kameleoon.API.Events.trigger("No Personalizations Events");
}
```
The `getActive()` method returns active personalizations for the current visit and page. A personalization is active if its variation code has executed and the associated action remains visible. To retrieve personalizations that triggered on other URLs or that are now closed, such as pop-ins, use `getTriggeredInVisit()`.
##### Return value
| Name | Type | Description |
| ---------------- | ----- | ---------------------------------------------------- |
| personalizations | Array | List of [Personalization objects](#personalization). |
### getAll
```javascript theme={null}
Kameleoon.API.Personalizations.getAll().forEach(function (personalization) {
if (personalization.id == 123456 && personalization.active) {
console.log(personalization.name);
}
});
```
The `getAll()` method returns all live personalizations (running, not draft/paused/stopped).
##### Return value
| Name | Type | Description |
| ---------------- | ----- | ---------------------------------------------------- |
| personalizations | Array | List of [Personalization objects](#personalization). |
### getById
```javascript theme={null}
var personalization = Kameleoon.API.Personalizations.getById(123456);
if (personalization && personalization.active) {
console.log(personalization.name);
}
```
The `getById()` method returns the personalization for the specified ID.
##### Arguments
| Name | Type | Description |
| ---- | ------ | --------------------------------------------------- |
| id | Number | Id of the personalization. This field is mandatory. |
##### Return value
| Name | Type | Description |
| --------------- | ------ | ------------------------------------------- |
| personalization | Object | [Personalization object](#personalization). |
### getByName
```javascript theme={null}
var personalization = Kameleoon.API.Personalizations.getByName("MyPersonalizationName");
if (personalization && personalization.active) {
console.log(personalization.id);
}
```
The `getByName()` method returns the personalization for the specified name.
##### Arguments
| Name | Type | Description |
| ---- | ------ | ----------------------------------------------------- |
| name | String | Name of the personalization. This field is mandatory. |
##### Return value
| Name | Type | Description |
| --------------- | ------ | ------------------------------------------- |
| personalization | Object | [Personalization object](#personalization). |
### getTriggeredInVisit
```javascript theme={null}
Kameleoon.API.Personalizations.getTriggeredInVisit().forEach(function (personalization) {
if (personalization.id == 123456) {
console.log(personalization.name);
}
});
```
The `getTriggeredInVisit()` method returns all personalizations triggered during the current visit.
##### Return value
| Name | Type | Description |
| ---------------- | ----- | --------------------------------------------------- |
| personalizations | Array | List of [Personalization object](#personalization). |
### getActivatedInVisit
```javascript theme={null}
Kameleoon.API.Personalizations.getActivatedInVisit().forEach(function (personalization) {
if (personalization.id == 123456) {
console.log(personalization.name);
}
});
```
The `getActivatedInVisit()` method returns all personalizations activated during the current visit.
##### Return value
| Name | Type | Description |
| ---------------- | ----- | --------------------------------------------------- |
| personalizations | Array | List of [Personalization object](#personalization). |
### trigger
```javascript theme={null}
let personalizationID = 123456;
Kameleoon.API.Personalizations.trigger(personalizationID, true);
```
The `trigger()` method forces a personalization to trigger, bypassing targeting segment conditions. This action initiates the personalization but might not activate it.
##### Arguments
| Name | Type | Description |
| ----------------- | ------- | ------------------------------------------------------------------------------------------------------------------------------------------------------------------------------------------------------------------------------------- |
| personalizationID | Number | ID of the personalization. This field is mandatory. |
| trackingOnly | Boolean | Set to **true** for external personalizations (targeting or tracking managed by Kameleoon) to perform only tracking actions without executing variation assets (JS, CSS, redirections). If omitted, the method defaults to **false**. |
## Kameleoon.API.Variations
This module provides methods to manage variations.
### execute
```javascript theme={null}
if (Kameleoon.API.Utils.querySelectorAll("#KameleoonPopin").length == 0) {
Kameleoon.API.Experiments.getById(123456).variations.forEach(function (variation) {
if (variation.name == "MyVariation") {
Kameleoon.API.Variations.execute(variation.id);
}
});
}
```
The `execute()` method executes JavaScript and applies CSS for the specified variation ID.
## Kameleoon.API.Segments
This module provides methods to manage segments and targeting.
### getAll
```javascript theme={null}
let segments = Kameleoon.API.Segments.getAll();
```
The `getAll()` method returns all live segments, including those associated with experiments, personalizations, or Audience tracking.
##### Return value
| Name | Type | Description |
| -------- | ----- | ------------------------------------ |
| segments | Array | List of [Segment objects](#segment). |
### getById
```javascript theme={null}
let segment = Kameleoon.API.Segments.getById(123456);
```
The `getById()` method returns the segment for the specified ID.
##### Arguments
| Name | Type | Description |
| ---- | ------ | ------------------------------------------- |
| id | Number | ID of the segment. This field is mandatory. |
##### Return value
| Name | Type | Description |
| ------- | ------ | --------------------------- |
| segment | Object | [Segment object](#segment). |
### getByName
```javascript theme={null}
let segment = Kameleoon.API.Segments.getByName("My segment");
```
The `getByName()` method returns the segment for the specified name.
##### Arguments
| Name | Type | Description |
| ---- | ------ | --------------------------------------------- |
| name | String | Name of the segment. This field is mandatory. |
##### Return value
| Name | Type | Description |
| ------- | ------ | --------------------------- |
| segment | Object | [Segment object](#segment). |
### reevaluate
```javascript theme={null}
Kameleoon.API.Utils.addEventListener(document.body, "mouseleave", function (event) {
if (event.clientY < 0) {
Kameleoon.API.Segments.reevaluate(123456);
}
});
```
The `reevaluate()` method forces an immediate re-evaluation of the targeting conditions for the specified segment. Evaluation typically occurs at page load, resulting in statuses of **true**, **false**, or **undefined**. This method restarts the evaluation process as if the engine just initialized.
##### Arguments
| Name | Type | Description |
| ---- | ------ | ------------------------------------------- |
| id | Number | ID of the segment. This field is mandatory. |
### trigger
```javascript theme={null}
Kameleoon.API.Segments.trigger(12345);
```
The `trigger()` method forces a segment trigger for the current visitor and bypasses targeting conditions.
##### Arguments
| Name | Type | Description |
| ---- | ------ | ------------------------------------------- |
| id | Number | ID of the segment. This field is mandatory. |
## Kameleoon.API.Triggers
This module provides methods to manage triggers and targeting.
### getAll
```javascript theme={null}
let triggers = Kameleoon.API.Triggers.getAll();
```
The `getAll()` method returns all live triggers, including those associated with experiments, personalizations, or Audience tracking.
##### Return value
| Name | Type | Description |
| -------- | ----- | ------------------------------------ |
| triggers | Array | List of [Trigger objects](#trigger). |
### getById
```javascript theme={null}
let trigger = Kameleoon.API.Triggers.getById(123456);
```
The `getById()` method returns the trigger for the specified ID.
##### Arguments
| Name | Type | Description |
| ---- | ------ | ------------------------------------------- |
| id | Number | ID of the trigger. This field is mandatory. |
##### Return value
| Name | Type | Description |
| ------- | ------ | --------------------------- |
| trigger | Object | [Trigger object](#trigger). |
### getByName
```javascript theme={null}
let trigger = Kameleoon.API.Triggers.getByName("My trigger");
```
The `getByName()` method returns the trigger for the specified name.
##### Arguments
| Name | Type | Description |
| ---- | ------ | --------------------------------------------- |
| name | String | Name of the trigger. This field is mandatory. |
##### Return value
| Name | Type | Description |
| ------- | ------ | --------------------------- |
| trigger | Object | [Trigger object](#trigger). |
### reevaluate
```javascript theme={null}
Kameleoon.API.Utils.addEventListener(document.body, "mouseleave", function (event) {
if (event.clientY < 0) {
Kameleoon.API.Triggers.reevaluate(123456);
}
});
```
The `reevaluate()` method forces an immediate re-evaluation of the targeting conditions for the specified trigger. Evaluation typically occurs at page load, resulting in statuses of **true**, **false**, or **undefined**. This method restarts the evaluation process as if the engine just initialized.
##### Arguments
| Name | Type | Description |
| ---- | ------ | ------------------------------------------- |
| id | Number | ID of the trigger. This field is mandatory. |
### trigger
```javascript theme={null}
Kameleoon.API.Triggers.trigger(12345);
```
The `trigger()` method forces a trigger to fire for the current visitor and bypasses targeting conditions.
##### Arguments
| Name | Type | Description |
| ---- | ------ | ------------------------------------------- |
| id | Number | ID of the trigger. This field is mandatory. |
## Kameleoon.API.Utils
This module provides utility methods for common operations.
### addEventListener
```javascript theme={null}
var popin = document.createElement("div");
popin.id = "kameleoonPopin";
popin.innerHTML = " ";
document.body.appendChild(popin);
Kameleoon.API.Utils.addEventListener(popin, "mousedown", function (event) {
document.body.removeChild(popin);
});
```
The `addEventListener()` method attaches an event handler to the specified element.
Kameleoon resets all event listeners created via this API during engine reloads. Use this method to add listeners in SPAs to ensure proper cleanup.
##### Arguments
| Name | Type | Description |
| --------- | -------- | --------------------------------------------------------------------- |
| element | Object | Target element for the listener. This field is mandatory. |
| eventType | String | Event name. This field is mandatory. |
| callback | Function | Function to execute when the event triggers. This field is mandatory. |
### addUniversalClickListener
```javascript theme={null}
let btn = document.querySelector("#MyButton");
Kameleoon.API.Utils.addUniversalClickListener(btn, function (event) {
let goalID = 1234;
Kameleoon.API.Goals.processConversion(goalID);
});
```
The `addUniversalClickListener()` method attaches a click handler that listens for mouse clicks on desktop and touchdown events on mobile devices and tablets. For mobile devices, a touchdown occurs if the engine detects a `touchstart` event followed by a `touchend` event without an intermediate `touchmove`.
Kameleoon resets all listeners created via this API during engine reloads, facilitating cleanup in SPAs.
On desktop devices, right-clicks trigger this method (e.g., when opening a link in a new tab).
##### Arguments
| Name | Type | Description |
| -------- | -------- | --------------------------------------------------------------------------- |
| element | Object | Target element for the listener. This field is mandatory. |
| callback | Function | Function to execute when the click event triggers. This field is mandatory. |
### clearInterval
```javascript theme={null}
var myInterval = Kameleoon.API.Utils.setInterval(function () {
if (window.dataLayer != null) {
Kameleoon.API.Utils.clearInterval(myInterval);
}
}, 1000);
```
The `clearInterval()` method clears a timer you set through `setInterval()`.
##### Arguments
| Name | Type | Description |
| ---------- | ------ | ------------------------------------------------------------------------- |
| intervalId | Number | Timer ID returned by the `setInterval()` method. This field is mandatory. |
### clearTimeout
```javascript theme={null}
var myTimeout = Kameleoon.API.Utils.setTimeout(function () {
var popin = document.createElement("div");
popin.id = "kameleoonPopin";
popin.innerHTML = " ";
document.body.appendChild(popin);
}, 5000);
Kameleoon.API.Utils.addEventListener(document.body, "mousedown", function () {
Kameleoon.API.Utils.clearTimeout(myTimeout);
});
```
The `clearTimeout()` method clears a timer you set through `setTimeout()`.
##### Arguments
| Name | Type | Description |
| --------- | ------ | ------------------------------------ |
| timeoutId | Number | Timer ID returned by `setTimeout()`. |
### computeHash
```javascript theme={null}
var emailId = Kameleoon.API.Utils.createHash("myemail@mail.com");
Kameleoon.API.Data.setCustomData("VisitorEmail", emailId);
```
The `computeHash()` method computes a hash from a string. Use this to process unique data without manipulating sensitive personal information directly.
##### Arguments
| Name | Type | Description |
| ------ | ------ | ------------------------------------------------- |
| string | String | The source string from which to compute the hash. |
##### Return value
| Name | Type | Description |
| ---- | ------ | -------------------------------------------------------------------------------------------------------------------------------------------------------------------- |
| hash | String | Resulting hash. The algorithm used is the same as the [implementation of `hashCode()` for java.lang.String](https://www.w3schools.com/java/ref_string_hashcode.asp). |
### getURLParameters
```javascript theme={null}
var parameters = Kameleoon.API.Utils.getURLParameters();
if (parameters.productID != null) {
Kameleoon.API.Events.trigger("ProductPage");
}
```
The `getURLParameters()` method parses the current URL and returns all detected parameters. This method supports both search (?) and hash (#) parameters.
##### Return value
| Name | Type | Description |
| ---------- | ------ | ------------------------------------------------------------------- |
| parameters | Object | Object with parameter names as keys and parameter values as values. |
### performRequest
```javascript theme={null}
Kameleoon.API.Utils.performRequest(
"https://www.my_web_server_url.com",
function () {
if (this.readyState == 4 && this.status == 200) {
eval(this.responseText);
}
},
function() {
console.log("Request cancelled");
},
2000
);
```
The `performRequest()` method initiates a call to a remote web server.
##### Arguments
| Name | Type | Description |
| ----------------- | -------- | ----------------------------------------------------------------------------------------------------------------------------------------------------------------------------------------------------------------------------------------------------------------------------------------------------------------------------------------------------------------------------------------------------------------------------------------------------------------------------------------------------------------------------------------------------------------------------- |
| url | String | The URL of the remote server. This field is mandatory. |
| readyStateHandler | Function | A callback function that will be executed when a reply is received from the server. The event argument is passed to this function ([load event](https://developer.mozilla.org/en-US/docs/Web/API/XMLHttpRequest/load_event)) and the underlying XMLHttpRequest object is bound to the callback. So all [properties from XMLHttpRequest](https://developer.mozilla.org/en-US/docs/Web/API/XMLHttpRequest#Properties) are available inside the callback via **this**. This field is optional. |
| errorHandler | Function | A callback function that will be called in case an error occurs. The event argument is passed to this function ([error event](https://developer.mozilla.org/en-US/docs/Web/API/XMLHttpRequestEventTarget/onerror) or [timeout event](https://developer.mozilla.org/en-US/docs/Web/API/XMLHttpRequest/timeout)) and the underlying XMLHttpRequest object is bound to the callback. So all [properties from XMLHttpRequest](https://developer.mozilla.org/en-US/docs/Web/API/XMLHttpRequest#Properties) are available inside the callback via **this**. This field is optional. |
| timeout | Number | Wait time in milliseconds before cancelling the request. Defaults to 5000 milliseconds. |
### querySelectorAll
```javascript theme={null}
var foundElements = Kameleoon.API.Utils.querySelectorAll(".kameleoonClassName");
foundElements.forEach(function (element) {
element.style.display = "none";
});
```
The `querySelectorAll()` method returns all document elements matching the specified CSS selectors as a static `NodeList` object.
This method supports selectors with **:contains** and **:eq**.
##### Arguments
| Name | Type | Description |
| -------- | ------ | --------------------------------------------------- |
| selector | String | One or more CSS selectors. This field is mandatory. |
##### Return value
| Name | Type | Description |
| -------- | ----- | ------------------------------------ |
| elements | Array | List of elements matching the query. |
### setInterval
```javascript theme={null}
var countdown = 10;
var timer = document.createElement("div");
timer.innerHTML = countdown.toString();
document.body.appendChild(timer);
var myInterval = Kameleoon.API.Utils.setInterval(function () {
countdown--;
timer.innerHTML = countdown.toString();
if (countdown == 0) {
Kameleoon.API.Utils.clearInterval(myInterval);
}
}, 1000);
```
The `setInterval()` method executes a function or expression at the specified interval in milliseconds.
Kameleoon resets all intervals created via this API during engine reloads. Use this method in SPAs to ensure proper cleanup.
##### Arguments
| Name | Type | Description |
| ------------ | -------- | -------------------------------------------------------------------------------- |
| function | Function | JavaScript function that will be executed periodically. This field is mandatory. |
| milliseconds | Number | Interval duration in milliseconds. Defaults to 200 milliseconds. |
##### Return value
| Name | Type | Description |
| ---------- | ------ | ---------------------------------------- |
| intervalId | Number | Timer ID for use with `clearInterval()`. |
### setTimeout
```javascript theme={null}
var myTimeout = Kameleoon.API.Utils.setTimeout(function () {
Kameleoon.API.Events.Trigger("5 seconds elapsed");
}, 5000);
```
The `setTimeout()` method executes a function or expression after the specified number of milliseconds.
Kameleoon resets all timeouts created via this API during engine reloads. Use this method in SPAs to ensure proper cleanup.
##### Arguments
| Name | Type | Description |
| ------------ | -------- | -------------------------------------------------------------------------------------- |
| function | Function | JavaScript function that will be executed periodically. This field is mandatory. |
| milliseconds | Number | Wait time in milliseconds before executing the function. Defaults to 200 milliseconds. |
##### Return value
| Name | Type | Description |
| --------- | ------ | --------------------------------------- |
| timeoutId | Number | Timer ID for use with `clearTimeout()`. |
## Kameleoon.API.Visitor
This module provides a shortcut to obtain a reference to the current [Visitor object](#visitor). The Activation API contains a single, unique Visitor object. This module also allows you to override the visitor code.
### setVisitorCode
```javascript theme={null}
// Setting up the Kameleoon VisitorCode Override
// Initialize the KameleoonQueue if it doesn't exist
window.kameleoonQueue = window.kameleoonQueue || [];
// Push the command to set the VisitorCode with your own ID
window.kameleoonQueue.push({
level: "IMMEDIATE",
command: () => Kameleoon.API.Visitor.setVisitorCode("")
});
```
The `setVisitorCode()` method overrides the Kameleoon VisitorCode, which is a unique identifier randomly generated for every visitor. Ensure that your ID is unique and does not exceed 255 characters.
Call this method as early as possible, specifically before Kameleoon triggers any experiments. If you update the VisitorCode after the engine assigns a variation, the engine reassigns the variation.
## Kameleoon.API.CurrentVisit
This module provides a shortcut to obtain a reference to the current, in-progress [Visit object](#visit). It references the same object as `Kameleoon.API.Visitor.visits[Kameleoon.API.Visitor.visits.length - 1]`.
## Configuration
A Configuration object holds global constant values related to the current configuration of Kameleoon on this site.
### Properties
| Name | Type | Description |
| ----------------- | ------- | ------------------------------------------------------------------------------------------------------------------------------------------------------------------------------------------------------------------------------------------------------------------------------------- |
| siteCode | String | The unique site code corresponding to the Kameleoon application file installed on the website. It is a string of 10 random characters (lower case letters and numerals). |
| singlePageSupport | Boolean | Set to **true** if Single Page Support is configured. Configuration occurs globally via the Kameleoon app or via `Kameleoon.API.Core.enableSinglePageSupport()`. Single Page Support ensures URL changes trigger `Kameleoon.API.Core.load()` without requiring a browser page reload. |
| goals | Array | List of [Goal objects](#goal) representing all the active (configured) goals for this site. |
| generationTime | Number | Time of the last generation of the Kameleoon application file (UTC format - ms since 1st January, 1970). |
## Visitor
A Visitor object contains visitor-scoped data independent of specific visits. This object includes a list of all [Visit objects](#visit) for the visitor.
### Properties
| Name | Type | Description |
| --------------------------- | ------- | ---------------------------------------------------------------------------------------------------------------------------------------------------------------------------------------------------------------------------------------------------------------- |
| code | String | The randomly generated visitor code. Unless a custom value has been specifically set on the server (via a Kameleoon server-side SDK), it is a string of 16 random characters (lower case letters and numerals). |
| numberOfVisits | Number | Total visits for the visitor. This value may exceed `visits.length`, as the Activation API retains only the latest 25 visits. |
| firstVisitStartDate | Number | Start date (UNIX milliseconds) for the first visit. This value may not align with `visits[0].startDate`, as the Activation API retains only the latest 25 visits. |
| visits | Array | List of all the [Visit objects](#visit) made by this visitor on your website, with a maximum of 25 visits. If this visitor made more than 25 visits, only the latest 25 are available via this property. |
| currentVisit | Object | [Visit object](#visit) corresponding to the current, in-progress visit. This is a reference to the same object as **Kameleoon.API.CurrentVisit**. |
| previousVisit | Object | [Visit object](#visit) corresponding to the previous visit. If there was no previous visit (that is, the current visit is the first one), this property is **null**. |
| customData | Object | Map of all custom data with a **VISITOR** scope. The keys of the map are the defined custom data names. This map only includes custom data that you defined in the Kameleoon app with a **VISITOR** scope. You can access other custom data from a Visit object. |
| experimentLegalConsent | Boolean | When **true**, the engine obtained legal consent (or it is not required) for the visitor to activate experiments. This property is **null** if the visitor has not given or declined consent. |
| personalizationLegalConsent | Boolean | When **true**, the engine obtained legal consent (or it is not required) for the visitor to activate personalizations. This property is **null** if the visitor has not given or declined consent. |
## Visit
A Visit object represents a single visit and contains real-time information that Kameleoon gathers. Data points include visit context (device, location), observed behavior (duration, page views), and Kameleoon operations, such as triggered experiments or personalizations.
### Properties
| Name | Type | Description |
| ---------------------------- | ------ | ---------------------------------------------------------------------------------------------------------------------------------------------------------------------------------------------------------------------------------------------------------------------------------------- |
| index | Number | Index of the visit. The first visit of a given visitor has an index of 0. Because the Activation API retains only the latest 25 visits, `Kameleoon.API.Visitor.visits[0].index` might not equal 0. |
| startDate | Number | Date (UTC format - ms since 1st January, 1970) of the start of the visit. |
| duration | Number | Duration of this visit in ms. If this visit is the current visit, this value is always up to date (it is recomputed each time it is accessed). |
| pageViews | Number | Number of pages viewed during the visit. In SPAs, calling `Kameleoon.API.Core.load()` increments this number. URL changes automatically trigger this call if Single Page Support is enabled. |
| locale | String | The locale of the visitor's browser. |
| device | Object | [Device object](#device) corresponding to the visitor's device for this visit. |
| geolocation | Object | [Geolocation object](#geolocation) corresponding to the visitor's location for this visit. |
| weather | Object | [Weather object](#weather) corresponding to the visitor's weather for this visit. |
| activatedExperiments | Array | List of [ExperimentActivation objects](#experimentactivation), corresponding to all the experiments that were activated on this visit. |
| activatedPersonalizations | Array | List of [PersonalizationActivation objects](#personalizationactivation), corresponding to all the personalizations that were activated on this visit. |
| conversions | Object | Map of conversions performed on this visit. The keys of the map are the defined goal IDs. The values are Objects with two keys: **count** (number of times this goal was converted for this visit) and **revenue** (total revenue of this goal for this visit). |
| customData | Object | Map of all custom data with a **PAGE** or **VISIT** scope. The keys of the map are the defined custom data names. This map only includes custom data that you defined in the Kameleoon app with a **PAGE** or **VISIT** scope. You can access other custom data from the Visitor object. |
| currentProduct | Object | [Product object](#product) corresponding to the product displayed on the current product page. If the visitor is currently not on a product page, this property is **null**. |
| products | Array | List of [Product objects](#product), corresponding to all the product pages that were seen on this visit (including the **currentProduct** if applicable). |
| acquisitionChannel | String | Name of the acquisition channel for the visit. The list of acquisition channels, along with their characteristics (mainly how they can be inferred, for instance by URL parameter), are defined using the Kameleoon app. |
| landingPageURL | String | URL of the first page of the visit, usually called the landing page. |
| initialConversionPredictions | Object | Map of Kameleoon Conversion Scores (KCS). The keys of the map are the defined key moment names. The values range from 0 to 100, representing the KCS for the designated key moment. (Note: Kameleoon recently changed "key moment" to "triggers" in the Kameleoon app.) |
The `kameleoonConversionScores` property is only available with the AI Predictive Targeting add-on.
## Device
A Device object contains data about the device for a given visit.
### Properties
| Name | Type | Description |
| -------------- | ------- | ----------------------------------------------------------------------------------------------------------------------------------------------------------------------------------------------------------------------------------------------------------------------------------------------------------------------------------------------------------------------------------------------------------------------------------------------------------------------------------------------------------------------------------------------------------------------------------- |
| browser | String | Name of the browser. Possible values are: **Chrome**, **Chromium**, **Firefox**, **Safari**, **Microsoft Edge**, **Internet Explorer**, **Opera**, **Android**, **iPhone**, **iPad**, **iPod**, **Samsung Internet for Android**, **Opera Coast**, **Yandex Browser**, **UC Browser**, **Maxthon**, **Epiphany**, **Puffin**, **Sleipnir**, **K-Meleon**, **Windows Phone**, **Vivaldi**, **Sailfish**, **SeaMonkey**, **Amazon Silk**, **PhantomJS**, **SlimerJS**, **BlackBerry**, **WebOS**, **Bada**, **Tizen**, **QupZilla**, **Googlebot**, **Blink**, **Gecko**, **Webkit**. |
| browserVersion | String | Version of the browser. |
| os | String | Name of the OS. Possible values are: **Windows**, **Mac**, **Linux**, **Android**, **iOS**, **Chrome OS**, **Windows Phone**. |
| type | String | Type of the device. Possible values are: **Desktop**, **Tablet**, **Phone**. |
| screenHeight | Number | Height of the device's screen (in pixels). |
| screenWidth | String | Width of the device's screen (in pixels). |
| windowHeight | Number | Height of the browser's window (in pixels). |
| windowWidth | String | Width of the browser's window (in pixels). |
| adBlocker | Boolean | Boolean equal to **true** if this device has an active ad blocker, else to **false**. |
| timeZone | String | Time zone of the browser. The value is a string (for example, "Europe/Paris") that corresponds to the [TZ database of time zones.](https://en.wikipedia.org/wiki/List_of_tz_database_time_zones) |
## Geolocation
A Geolocation object contains data about the physical location of the visitor for a given visit.
### Properties
| Name | Type | Description |
| ---------- | ------ | -------------------------------------------------------- |
| country | String | Country name, in English. |
| region | String | Name of the region, in the country's preferred language. |
| city | String | Name of the city, in the country's preferred language. |
| postalCode | String | Postal code. |
| latitude | Number | Latitude (in degrees). |
| longitude | Number | Longitude (in degrees). |
## Weather
A Weather object contains data about the weather conditions occurring at the time of the visit.
### Properties
| Name | Type | Description |
| -------------------- | ------ | -------------------------------------------------------------------------------------------------------------------------------------------------------- |
| temperature | String | Temperature in Kelvin. |
| humidity | String | Humidity in percentage (from 0 to 100). |
| pressure | String | Atmospheric pressure in hPa. |
| windSpeed | String | Wind speed in meters/sec. |
| cloudiness | Number | Cloudiness in percentage (from 0 to 100). |
| sunrise | Number | Time of sunrise (UTC format - ms since 1st January, 1970). |
| sunset | Number | Time of sunset (UTC format - ms since 1st January, 1970). |
| conditionCode | Number | Weather condition ID code. [Full reference list is available here.](https://openweathermap.org/weather-conditions) |
| conditionDescription | String | Weather condition description that matches the `conditionCode`. For example, a `conditionCode` of **800** has a `conditionDescription` of **clear sky**. |
## Experiment
An Experiment object represents a Kameleoon A/B test. Core properties include the segment and associated variations. Variations contain the JavaScript and CSS code that implements the changes.
### Properties
| Name | Type | Description |
| -------------------------------- | ------- | ----------------------------------------------------------------------------------------------------------------------------------------------------------------------------------------------------------------------------------------------------------------------------------------------------------------------------------------------------------------------------------------------------------------------------------------------------------------- |
| id | Number | ID of the experiment. |
| name | String | Name of the experiment. |
| dateLaunched | Number | Time of first launch of the experiment (UTC format - ms since 1st January, 1970). |
| dateModified | Number | Time of last modification of the experiment (UTC format - ms since 1st January, 1970). |
| targetSegment | Object | [Segment object](#segment) associated with the experiment. |
| variations | Array | List of [Variation objects](#variation) for this experiment. |
| trafficDeviation | Object | Map of current experiment traffic deviation. Keys are variation IDs (ID **0** is the reference). Values are percentages (0-100). The sum may not equal 100 if a portion of traffic is unallocated. |
| untrackedTrafficReallocationTime | Number | Time of the last reallocation performed for untracked traffic (UTC format - ms since 1st January, 1970). If a reallocation was never performed, the value will be **null**. |
| goals | Array | List of [Goal objects](#goal) tracked for the experiment. |
| mainGoal | Object | [Goal object](#goal) representing the main goal of the experiment. |
| triggered | Boolean | Boolean equal to **true** if the experiment was triggered on the page, else to **false**. |
| active | Boolean | Boolean equal to **true** if the experiment is currently active on the page, else to **false**. |
| triggeredInVisit | Boolean | Boolean equal to **true** if the experiment was triggered in the current visit, else to **false**. This means that the visit fulfilled the experiment's segment conditions at some point. |
| activatedInVisit | Boolean | When **true**, the engine activated the experiment during the current visit. A triggered experiment does not guarantee activation; factors like traffic exclusion or capping can prevent activation. |
| nonExpositionReason | String | If the engine triggered but did not activate the experiment, this field represents the reason. Possible values: `EXPERIMENT_EXCLUSION` (the visitor belongs to the population excluded from the experiment, that is, they are not counted towards results) and `VISITOR_CAPPING` (the visitor reached a capping limit that prevents activation). This property is available if the engine triggered the experiment on the current page and `active` is **false**. |
| associatedVariation | Object | [Variation object](#variation) associated with the experiment for the given visitor. If the experiment is not yet activated, this will usually be **null**, except if a pre-allocation was performed. |
| redirectProcessed | Boolean | When **true**, a URL redirection occurred for this experiment on the previous page. This property is set through [processRedirect()](#processredirect) or manual configuration. In JavaScript-based integrations, redirects can cancel further code execution; check this property to resend network requests on the landing page if necessary. |
## Personalization
A Personalization object represents a Kameleoon personalization action for a specific segment. Core properties include the segment and the associated single variation. The Variation object contains the JavaScript and CSS code that implements the personalization action.
### Properties
| Name | Type | Description |
| ------------------- | ------- | ------------------------------------------------------------------------------------------------------------------------------------------------------------------------------------------------------------------------------------------------------------------------------------------------------------------------------------------ |
| id | Number | ID of the personalization. |
| name | String | Name of the personalization. |
| dateLaunched | Number | Time of first launch of the personalization (UTC format - ms since 1st January, 1970). |
| dateModified | Number | Time of last modification of the personalization (UTC format - ms since 1st January, 1970). |
| targetSegment | Object | [Segment object](#segment) associated with the personalization. |
| goals | Array | List of [Goal objects](#goal) tracked for the personalization. |
| mainGoal | Object | [Goal object](#goal) representing the main goal of the personalization. |
| triggered | Boolean | When **true**, the personalization triggered on the page. |
| active | Boolean | When **true**, the personalization is active (displayed) on the page. |
| triggeredInVisit | Boolean | When **true**, the personalization triggered during the current visit. This indicates that the visit fulfilled the personalization's segment conditions. |
| activatedInVisit | Boolean | When **true**, the engine displayed the personalization's action during the current visit. Triggering a personalization does not guarantee that the engine displays the action; for example, capping options or control group membership can prevent display. |
| nonExpositionReason | String | Reason for non-exposition if triggered but not displayed. Possible values: `GLOBAL_EXCLUSION`, `PERSONALIZATION_EXCLUSION`, `PRIORITY`, `SCHEDULE`, `PERSONALIZATION_CAPPING`, `VISITOR_CAPPING`, `SCENARIO`, and `SIMULATION`. This property is available if the personalization triggered on the current page and `active` is **false**. |
| associatedVariation | Object | Associated [Variation object](#variation). This property always references a valid object for personalizations. |
## ExperimentActivation
An `ExperimentActivation` object represents an experiment activated during a specific visit. Because visits can be historical, the associated experiment might have stopped. In such cases, the engine does not inject experiment metadata (name, launch date, segment) into the application file, which makes it unavailable through the API. However, IDs remaining available.
### Properties
| Name | Type | Description |
| --------------------- | ------ | -------------------------------------------------------------------------------------------------------------------------------------------- |
| experimentID | Number | ID of the experiment. |
| associatedVariationID | Number | ID of the associated variation. If the associated variation is the reference (control), the ID is equal to 0. |
| associatedVariation | Object | Associated [Variation object](#variation). This property is **null** if the experiment or variation is no longer active (stopped or paused). |
| times | Array | List of activation times for this experiment on this visit (UTC format - ms since 1st January, 1970). |
## PersonalizationActivation
A `PersonalizationActivation` object represents a personalization activated during a specific visit. As with experiments, metadata is unavailable if the personalization has stopped, although IDs remain accessible.
### Properties
| Name | Type | Description |
| --------------------- | ------ | ------------------------------------------------------------------------------------------------------------------------------------------------- |
| personalizationID | Number | ID of the personalization. |
| associatedVariationID | Number | ID of the associated variation. |
| personalization | Object | Associated [Personalization object](#personalization). This property is **null** if the personalization is no longer active (stopped or paused). |
| associatedVariation | Object | Associated [Variation object](#variation). This property is **null** if the personalization or variation is no longer active (stopped or paused). |
| times | Array | List of activation times for this personalization on this visit (UTC format - ms since 1st January, 1970). |
## Variation
A `Variation` object represents a component of an `Experiment`. An A/B test contains multiple variations, such as an A/B test with one variation plus reference or an A/B/C test with two plus reference. Personalizations associate with a single [Variation object](#variation).
During variation code execution, the `this` keyword references the corresponding `Variation` object. Use this reference to navigate the object hierarchy (for example, through the `associatedCampaign` property).
### Properties
| Name | Type | Description |
| -------------------- | ------ | ------------------------------------------------------------------------------------------------------------------------------------------------------------------------------- |
| id | Number | Unique id of the variation. If the variation represents the reference (control), the ID is equal to **0**. |
| name | String | Name of the variation. If the variation represents the reference (control), the name is equal to "Reference". |
| associatedCampaign | Object | The [Experiment](#experiment) or [Personalization](#personalization) object linked to this variation. |
| instantiatedTemplate | Object | [Instantiated template object](#template) from which this variation was built, if applicable. If the variation was not built from a template, this property is **null**. |
| reallocationTime | Number | Time of the last traffic reallocation performed for the variation (UTC format - ms since 1st January, 1970). If a reallocation was never performed, the value will be **null**. |
## Template
A `Template` object represents an instantiated Widget template. Use templates to generate variations from a common codebase through the Kameleoon app interface. A `Template` object contains predefined fields and their values for the associated variation.
### Properties
| Name | Type | Description |
| ------------ | ------ | ------------------------------------------------------------------------------------------------------------------------------------------------------------------------------------------------------------------------------------------------------------------------------------------------------------------------------------------------------------------ |
| name | String | Name of the base template. |
| customFields | Object | Map corresponding to the template data. The keys are the names of the fields defined in the base template. The values are the instantiated values that you entered for the associated variation. For example, if you created a template with a single text field "currentDiscount", `customFields` could equal `{"currentDiscount": "-10% on all orders today!"}`. |
## Goal
A `Goal` object represents a Key Performance Indicator (KPI) defined in the Kameleoon app.
### Properties
| Name | Type | Description |
| ---- | ------ | ----------------------------------------------------------------------------------------------------- |
| id | Number | ID of the goal. |
| name | String | Name of the goal. |
| type | String | Type of the goal. Possible values are: **CLICK**, **SCROLL**, **URL**, **ENGAGEMENT** and **CUSTOM**. |
## Segment
A `Segment` object contains criteria that a visit must fulfill to belong to the segment. On the Kameleoon platform, segments include constant conditions, such as age or location, and triggering conditions, such as time on page or cart contents.
### Properties
| Name | Type | Description |
| ---- | ------ | -------------------- |
| id | Number | ID of the segment. |
| name | String | Name of the segment. |
## Trigger
A Trigger object contains criteria that a visit must fulfill to fire the trigger. On the Kameleoon platform, triggers include constant conditions, such as age or location, and triggering conditions, such as time on page or cart contents.
### Properties
| Name | Type | Description |
| ---- | ------ | -------------------- |
| id | Number | ID of the trigger. |
| name | String | Name of the trigger. |
## Product
A `Product` object describes items in a catalog. Most properties are optional and might be **null**.
### Properties
| Name | Type | Required | Description |
| ----------------- | ------- | -------- | ----------------------------------------------------------------------------------------------------------------------------------------------------------------------------------- |
| id | String | True | Unique ID of the product. |
| name | String | False | Name of the product. |
| sku | String | False | Stock Keeping Unit (SKU) of the product. |
| categories | Array | False | List of [Category objects](#category) |
| imageURL | String | False | The URL of the main image for this product. |
| price | Number | False | The current price of the product. |
| oldPrice | Number | False | The original price of the product, usually before discounts or promotions. |
| brand | String | False | Name of the product's brand. |
| description | String | False | Textual description of the product. |
| available | Boolean | False | Indication whether the product is in stock. |
| availableQuantity | Number | False | Current stock of the product. |
| rating | Number | False | Rating (usually from 0 to 5, but can be any number) attributed to the product. |
| tags | Array | False | List of tags (as Strings) for this product. |
| typePrefix | String | False | Product type, such as "mobile phone" or "washing machine". Used by search algorithms. |
| merchantID | String | False | Seller / merchant ID of this product if your website operates a marketplace. |
| groupId | String | False | Use this field to combine product variants into one group. |
| model | String | False | Model of the product. |
| leftovers | String | False | Inventory for a particular product. Use one of the following values: `one` (one copy available), `few` (limited quantities, up to 10 units), or `lot` (10 or more units available). |
| priceMargin | Number | False | A weighting factor of the product price margin, between 0 and 100. |
| isFashion | Boolean | False | Set to `true` for clothing products. |
| isChild | Boolean | False | Use this field if child product. |
| isNew | Boolean | False | Use this field if new product. |
| accessories | Array | False | Array of product IDs that can be complementary or equivalent to the current product. |
| seasonality | Array | False | Array of integers (months: 1-12). |
| params | Array | False | List of [Param objects](#param) |
| fashion | Object | False | [Fashion object](#fashion) |
| auto | Object | False | [Auto object](#auto) |
## Category
### Properties
| Name | Type | Required | Description |
| ------ | ------ | -------- | --------------------------------- |
| id | String | True | Unique ID of the category. |
| name | String | False | Name of the category. |
| parent | String | False | Unique ID of the parent category. |
| url | String | False | The URL of the category. |
## Param
An optional generic field that allows you to upload custom information about a product that does not fit in other fields.
For example, this information could be the membership status required to buy a product or departure and return dates for a travel circuit.
### Properties
| Name | Type | Required | Description |
| ----- | ------ | -------- | -------------------------------------------------------------------------------------------------- |
| name | String | True | Name of the param. |
| value | Array | True | List of value (as Strings). |
| unit | String | False | Use two-character abbreviations for SI units, such as cm (centimeters), wt (watts), or gr (grams). |
## Fashion
An optional generic field that allows you to upload custom information about the product.
### Properties
| Name | Type | Description |
| ------- | ------ | ------------------------------------------------------------------------------------------------------------------------------------- |
| gender | String | Must be “f” (Female) or “m” (Male). |
| type | String | Product type. Possible values: `shoe`, `shirt`, `tshirt`, `underwear`, `trouser`, `jacket`, `blazer`, `sock`, `belt`, `hat`, `glove`. |
| feature | String | Use this field to indicate if the product is for adults or kids only. Must take the value “child” or “adult”. |
| colors | Array | List of [Color objects](#color). |
## Color
### Properties
| Name | Type | Description |
| ------- | ------ | ----------------------- |
| color | String | Product colors. |
| picture | String | The URL of the picture. |
## Auto
An optional generic field that allows you to upload custom information about the product.
### Properties
| Name | Type | Description |
| ------------- | ----- | -------------------------------------------------------------------------------------------------- |
| vds | Array | Array that contains the Vehicle Identification Numbers (VIN) that serves as the car’s fingerprint. |
| compatibility | Array | Contains a list of [Compatible objects](#compatible) |
## Compatible
### Properties
| Name | Type | Required | Description |
| ----- | ------ | -------- | --------------- |
| brand | String | True | Car brand name. |
| model | String | False | Car model name. |
# Command Queue
Source: https://docs.kameleoon.com/developer-docs/apis/activation-api-js/api-reference/command-queue
Use the Kameleoon Command Queue to safely execute Activation API commands before or after the engine loads, without timing conflicts.
The Kameleoon platform offers a JavaScript-based [Activation API](./api-reference) for retrieving data (such as visitor geolocation) and modifying engine behavior (such as manual variation assignment).
However, developers must ensure the Kameleoon Engine loads before accessing the Activation API. This requirement complicates embedding JavaScript code directly in HTML files.
The Kameleoon Command Queue provides delayed command execution, similar to Google Analytics. Instead of calling the Activation API via the `Kameleoon.API` object, pass commands and functions to the `kameleoonQueue` object. The engine executes these commands immediately if loaded; otherwise, it queues them for execution when ready.
## Usage and description of the Command Queue Object
To use the `kameleoonQueue` object, execute the following initialization code first. The [Kameleoon installation tag](../../../web-experimentation/implementation-and-deployment/standard-implementation) typically includes this code at the top of the HTML file, after the opening `` tag. In this case, no further action is required. However, if using a custom setup (for example, loading Kameleoon via a Tag Manager), initialize the queue before adding custom code.
```js theme={null}
window.kameleoonQueue = window.kameleoonQueue || [];
```
While the Kameleoon application file loads, `kameleoonQueue` acts as a standard JavaScript array that accepts commands via the `push()` method. After loading, the engine processes the array and executes commands in order. The engine then replaces the array with a custom object whose `push()` method executes commands immediately.
### Syntax
Pass either an array or an anonymous function to the `push()` method.
```js theme={null}
kameleoonQueue.push(['Kameleoon.API.Events.trigger', 'myCustomEvent']);
kameleoonQueue.push(['Events.trigger', 'anotherEvent']);
```
When passing an array, the first object represents the Kameleoon API method name (as a string), and subsequent objects represent the method arguments.
Use either the full method name (e.g., `Kameleoon.API.Core.enableLegalConsent`) or the short name (e.g., `Core.enableLegalConsent`). Additional arguments are optional.
Pass an anonymous function directly as an argument. Kameleoon uses the function as a callback when ready for processing.
```js theme={null}
kameleoonQueue.push(function() {
const experimentID = 1;
const variationID = 3;
Kameleoon.API.Experiments.assignVariation(experimentID, variationID);
});
```
The command queue also works within HTML code, as shown in the example below. Initialize `kameleoonQueue` before the browser encounters the targeted HTML element to ensure click tracking, even if the engine has not loaded.
```html theme={null}
Action Button with Kameleoon goalID = 42
```
By default, Kameleoon executes queued commands when the configuration (campaigns, goals, segments, etc.) is ready and after the [global custom script](/user-manual/project-management/manage-your-projects#Configuration) runs.
Use the `level: "IMMEDIATE"` argument when pushing a command to execute it immediately, without waiting for configuration processing. This is useful for code required before Kameleoon instantiates functions.
Here's an example of how to use the `level: "IMMEDIATE"` argument:
```js theme={null}
function callback = () => {
{... any code to run before Kameleoon triggers any campaign code}
};
window.kameleoonQueue.push({
level: "IMMEDIATE",
command: callback
});
```
In this example, the `callback` function executes immediately, regardless of configuration processing.
Use the `level: "IMMEDIATE"` argument to override internal Kameleoon functions. Standard function redefinition fails if the engine loads and executes the original version first. The `IMMEDIATE` level ensures the custom function executes before the engine loads its own version.
# A/B testing on modern frontend frameworks
Source: https://docs.kameleoon.com/developer-docs/apis/activation-api-js/tutorials/ab-testing-on-modern-frontend-frameworks
Run A/B experiments in React, Angular, and Vue applications by triggering experiments programmatically with the Kameleoon Activation API.
Use [client-side SDKs](../../../feature-experimentation/get-started/overview#selecting-a-javascript-sdk) corresponding to the preferred framework to run experiments or feature flags. If the [Feature Experimentation](https://www.kameleoon.com/en/platform/feature-experimentation) module is unavailable or if SDK installation is not desired, follow the workaround described in this article to run experiments using the [Activation API](../api-reference/api-reference).
## Context
Modern JavaScript client-side frameworks (React, Angular, Vue, etc.) manage the DOM tree and elements (often implementing a virtual DOM). This internal management makes implementing client-side tests difficult outside of the specific framework because DOM manipulations conflict with framework behavior. External modifications to elements or logic are often overwritten.
Workarounds exist for these issues, such as using DOM Mutation Observers, but external code must handle these carefully. Rather than using an intrusive external approach, implement variations directly in the existing React, Angular, or Vue codebase and trigger experiments programmatically. This logic mirrors SDK usage—the Kameleoon frontend engine serves as the equivalent of the [JavaScript SDK](../../../sdks/web-sdks/js-sdk).
Techniques described in this article require redeploying the JS source code to launch experiments or personalizations. While this approach simplifies coding, it lacks the flexibility of standard Kameleoon methodologies that allow launches without IT deployments. A developer with repository access must perform the implementation.
External implementation of JS experiments (via Kameleoon's injected code) or a combination of both approaches remains possible.
To use the Activation API methods presented here, install Kameleoon in the client-side application following [this documentation](../../../web-experimentation/implementation-and-deployment/standard-implementation).
The installation process matches that of a standard website—add an external JavaScript application file containing the Kameleoon engine and the Activation API.
Verify Kameleoon is fully loaded before running application code that triggers experiments by listening for the [Kameleoon::Started](../api-reference/activation-api-events#kameleoonstarted) event. Alternatively, load the Kameleoon script [synchronously](../../../web-experimentation/implementation-and-deployment/standard-implementation#synchronous-tag) in the HTML loader page before the framework code.
## Creation and configuration of the experiment
The steps match those of standard A/B experiments (variation creation, goal selection, and analytics integration). Note the following requirements:
* Create an experiment using the code editor.
* Select the [Explicit trigger](/user-manual/assets/segments/create-a-segment#Technical) targeting condition to trigger the experiment manually via the API.
Note the experiment and variation IDs for use in the code.
Leave the JS code for variations empty in most cases. However, including JSON data in variations is useful for retrieving parameters in application code; these parameters can be updated in the Kameleoon interface without requiring further redeployments.
## Sample Code to trigger an experiment
The code sample below demonstrates how to trigger an experiment and obtain the associated variation for the current user. `Kameleoon.API.Experiments.getAll()` does not include experiments that are not launched via the interface. This setup allows for preparing code deployments and launching experiments independently—typically, IT teams plan deployments while product owners schedule launches.
```js theme={null}
var variationID;
// Make sure Kameleoon is loaded and active at this point
var experiment = Kameleoon.API.Experiments.getById(75253);
/*
The experiment is not currently live (not launched yet, or paused).
The default behavior should take place.
*/
if (!experiment) {
variationID = 0;
} else {
Kameleoon.API.Experiments.trigger(experiment.id, false);
/*
The experiment is not activated, which usually means the user has not been
assigned a variation (part of the traffic was not assigned to any variation),
or capping requirements are not met. Again, the default behavior should happen.
*/
if (!experiment.associatedVariation) {
variationID = 0;
} else {
variationID = experiment.associatedVariation.id;
/*
Illustration of the JSON parameterization technique - the additionalParameters
variable will now be equal to the JSON content we set in Kameleoon's back-office.
*/
var additionalParameters = Kameleoon.API.Variations.execute(variationID);
}
}
// This code implements the changes related to the experiment
if (0 == variationID) {
// Default / reference number of products to display
recommendedProductsNumber = 5;
} else if (148382 == variationID) {
// Variation updating the number of recommended products to 10
recommendedProductsNumber = 10;
} else if (187791 == variationID) {
// Variation updating the number of recommended products to 8
recommendedProductsNumber = 8;
}
```
Configure JS variation code in the Kameleoon interface as follows to retrieve variation-dependent JSON data in the application:
```js theme={null}
return {timeout: 500, errorMessage: "Something went wrong", productIDs: [536, 892]};
```
# Custom analytics integration
Source: https://docs.kameleoon.com/developer-docs/apis/activation-api-js/tutorials/custom-analytics-integration
Set up custom analytics integrations for Kameleoon Web Experimentation experiments with Mixpanel, Amplitude, Snowplow, GA4, Segment, and other platforms.
If you use a platform that doesn't have an official Kameleoon integration, you can build your own integration using the **Custom Analytics bridge** feature. Follow the guidelines in the [user manual](/user-manual/integrations/as-a-destination/analytics/custom-analytics-integration) to create a custom integration.
Alternatively, you can listen to [custom DOM events](../api-reference/activation-api-events) fired by the Kameleoon JavaScript engine and send experiment or personalization events to the tool of your choice. Follow these steps:
* Obtain a list of all [active experiments or personalizations](../api-reference/activation-api-events#kameleoonexperimentactivated) on the page, then loop over the list and perform a given action, such as sending the experiment and variation IDs to your analytics platform using their API.
* Because the code can load and execute either before or after Kameleoon experiments trigger and activate, check the current active experiments at the start of your code AND stay informed of any new experiments that activate later.
Since experiments can activate at any time (such as only after the user has clicked on a specific button), never assume that your code has all the required information about the active Kameleoon experiments at any given moment when running. Always set up an event listener (as shown in the sample code below) to receive alerts about new experiments activated in the future.
## Sample code
```
var processExperimentForMyTargetPlatform = function(experiment){ // Here you should implement your own logic, depending on the APIs of your target platform // It can be something similar to: myTargetPlatform.addExternalData({"experimentId": experiment.id, "experimentName": experiment.name, "variationId": experiment.associatedVariation.id, "variationName": experiment.associatedVariation.name});}// Loop over the experiments; apply the same logic for personalizations as wellKameleoon.API.Experiments.getActive().forEach(processExperimentForMyTargetPlatform);window.addEventListener("Kameleoon::ExperimentActivated", function(event) { processExperimentForMyTargetPlatform(event.detail.experiment);});
```
With this sample implementation, the data could be passed to your target platform several times for a single experiment if the experiment is active on multiple pages. Every page where the experiment is active results in the invocation of the `processExperimentForMyTargetPlatform()` function. You can improve the sample code to remember every experiment already processed, restricting the data passing to a single use. This approach typically removes unnecessary extra server calls to your target platform.
# Managing a variation's allocation according to specific criteria
Source: https://docs.kameleoon.com/developer-docs/apis/activation-api-js/tutorials/managing-a-variations-allocation-according-to-specific-criteria
Override Kameleoon's default variation assignment algorithm to allocate variations based on custom JavaScript criteria such as predefined variables.
Kameleoon randomly allocates a variation to a visitor by default. The [statistical paper](https://storage.googleapis.com/kameleoon-storage-documentation/user-manual/pdf/statistics-at-kameleoon.pdf) explains the assignment algorithm logic in the "Kameleoon's assignation algorithm" section. The default function follows:
```
function (experiment)
{
var registeredVariationId;
var deviationRandom = experiment.obtainVariationAssignmentRandomNumber();
var total = 0.0;
for (var i = 0, l = experiment.variations.length; i < l; ++i)
{
total += experiment.variations[i].deviation;
if (deviationRandom <= total)
{
registeredVariationId = experiment.variations[i].id;
break;
}
}
return registeredVariationId ? registeredVariationId : "none";
}
```
Overload this function to change how Kameleoon selects and displays variations. For example, selecting a variation based on a JavaScript variable is often beneficial:
```
function(experiment)
{
if(experiment.id == "ID TEST"){ //code for the experiment you would like a specific behavior. It has to be adapted to your use case
if(typeof versionTest != "undefined") { //versionTest variable has to be available before loading Kameleoon. Otherwise it will not work.
if(versionTest == 1)
return 81103; //ID of the variation 1
else if(versionTest == 2)
return 81104; //ID of the variation 2
else if(versionTest == 3)
return 81105; //ID of the variation 3
else if(versionTest == 4) //ID of the variation 4
return 81106;
}
}
else{ //default behavior is applied for all other experiments
var registeredVariationId;
var deviationRandom = experiment.obtainVariationAssignmentRandomNumber();
var total = 0.0;
for (var i = 0, l = experiment.variations.length; i < l; ++i)
{
total += experiment.variations[i].deviation;
if (deviationRandom <= total)
{
registeredVariationId = experiment.variations[i].id;
break;
}
}
return registeredVariationId ? registeredVariationId : "none";
}
}
```
Add the custom code to the account:
1. Use the left menu to go to **Admin** > **Projects**.
2. Click **Configuration** on the website card.

3. Click **Experiment**.

4. Add the script in the **Variation selection script** field.

# Managing a variation's allocation according to a user ID
Source: https://docs.kameleoon.com/developer-docs/apis/activation-api-js/tutorials/managing-a-variations-allocation-according-to-user-id
Override Kameleoon's default variation assignment to deliver consistent variations to authenticated users across devices using a unique user ID.
Kameleoon randomly allocates a variation to a visitor by default. The [statistical paper](https://storage.googleapis.com/kameleoon-storage-documentation/user-manual/pdf/statistics-at-kameleoon.pdf) explains the assignment algorithm logic in the "Kameleoon's assignation algorithm" section. The default function follows:
```
function (experiment)
{
var registeredVariationId;
var deviationRandom = experiment.obtainVariationAssignmentRandomNumber();
var total = 0.0;
for (var i = 0, l = experiment.variations.length; i < l; ++i)
{
total += experiment.variations[i].deviation;
if (deviationRandom <= total)
{
registeredVariationId = experiment.variations[i].id;
break;
}
}
return registeredVariationId != null ? registeredVariationId : "none";
}
```
Overwrite the default function to change how Kameleoon selects and displays variations. Secure websites can use this to show consistent variations to connected users across platforms and devices:
```
function(experiment)
{
var memberId = window.member_id.toString(); //CODE to update with your variable that contains the unique identifier. It has to be available before calling the Kameleoon snippet
memberId = memberId + experiment.id.toString();
var hash = 0;
for (i = 0; i < memberId.length; ++i)
{
char = memberId.charCodeAt(i);
hash = ((hash << 5) - hash) + char;
hash = hash & hash;
}
hash = (Math.abs(hash) * 9301 + 49297) % 233280;
var deviationRandom = hash / 233280;
var total = 0.0;
for (var i = 0, l = experiment.variations.length; i < l; ++i)
{
total += experiment.variations[i].deviation;
if (deviationRandom <= total)
{
chosenVariationId = experiment.variations[i].id;
break;
}
}
return registeredVariationId != null ? registeredVariationId : "none";
}
```
Add the custom code to the account's advanced options:
1. Log in to the [Kameleoon account](https://login.kameleoon.com/app).
2. Click **Admin** > **Projects**.
3. Click **Configuration** on the website card.

4. Add the script above in the **Variation selection script** field.

# Get started
Source: https://docs.kameleoon.com/developer-docs/apis/automation-api-rest/get-started/get-started
Learn how to authenticate and start using the Kameleoon Automation API.
The **Automation API** is a REST-compliant service that lets you programmatically perform most actions available in the Kameleoon web interface. Use the Automation API to build custom software that interacts with the Kameleoon platform and its core features.
For example, you can use the Automation API to:
* Connect Kameleoon with Git repositories to manage variation code.
* Design custom dashboards populated with real-time experiment results.
* Automate the creation of goals and segments across multiple projects.
Kameleoon might change endpoints and parameters in new versions of the Automation API. Subscribe to updates on the [Kameleoon changelog](https://changelog.kameleoon.com/en/) for notifications about planned changes.
The Automation API does not support high request volumes. Limit calls to **12 times per minute** per account or user. Do not use the Automation API for high-frequency tracking of every website visitor. For larger request volumes, use the [Data API](../../data-api-rest/overview).
Contact the Kameleoon team to request an enhancement to the Automation API. We appreciate your feedback and can quickly add existing UI features to the API.
## Tutorials
### Create an experiment
This tutorial provides step-by-step instructions for performing key tasks on the Kameleoon platform. You will learn how to:
* [Create a new experiment](../tutorials/experiments/create-a-new-experiment)
* [Push and modify JavaScript code in a variation](../tutorials/experiments/add-and-edit-javascript-in-the-variant-of-your-new-experiment)
* [Create a new segment](../tutorials/experiments/create-a-segment-to-target-visitors-by-page-url)
* [Create a new goal](../tutorials/experiments/create-a-new-goal-for-an-experiment)
* [Update and launch an experiment](../tutorials/experiments/add-a-goal-and-segment-to-your-experiment-before-launching)
### Retrieve experiment results
After you launch an experiment, it generates results that provide insights to determine the best-performing variation. Learn how to request results and identify the winning variation in the [Retrieving Experiments Results](../tutorials/experiments/retrieving-experiment-results-using-the-automation-api) tutorial.
## Authentication
The Automation API uses the OAuth 2.0 framework for authorization. Kameleoon supports two primary flows depending on your use case:
* **Client Credentials Flow**: Use this flow if you are a Kameleoon customer using the API for internal purposes. This flow allows you to programmatically manage your own account and web properties.
* **Authorization Code Flow**: Use this flow if you are a technology partner integrating an application with Kameleoon. This flow allows you to securely access data on behalf of other Kameleoon users.
### Client Credentials flow
The Client Credentials flow is the simplest authentication method. To use this flow, exchange your client credentials for an access token.
You can find your `client_id` and `client_secret` on the Kameleoon platform. Navigate to **Account > My profile** and click **See my API credentials**.
#### 1. Obtain an access token
Send a POST request to the token endpoint with your credentials.
```bash curl theme={null}
curl -X POST "https://api.kameleoon.com/oauth/token" \
-H "Content-Type: application/x-www-form-urlencoded" \
-d "grant_type=client_credentials" \
-d "client_id=YOUR_CLIENT_ID" \
-d "client_secret=YOUR_CLIENT_SECRET"
```
The authorization server responds with a JSON object containing the `access_token`:
```json theme={null}
{
"access_token": "eyJhbGciOiJIUzUxMiIsInR5cCI6IkpXVCJ9..."
}
```
#### 2. Access the API
Include the access token as a Bearer token in the `Authorization` HTTP header of your requests.
```bash curl theme={null}
curl -H "Authorization: Bearer " \
-H "Content-Type: application/json" \
"https://api.kameleoon.com/experiments"
```
* Access tokens remain valid for **2 hours** by default.
* The Client Credentials flow does not use refresh tokens.
* You must use **HTTPS** for all API requests. Requests made over plain HTTP will fail.
### Authorization Code flow
The Authorization Code flow allows third-party developers to integrate their applications with Kameleoon data. You must obtain explicit permission from a user to access their account resources.
Contact your Kameleoon Technical Account Manager to request an OAuth application. You must provide a redirect URL for your application. Kameleoon will then provide a `client_id` and `client_secret`.
#### 1. Redirect the user for authorization
Redirect users from your application to the authorization URL:
```https theme={null}
https://api.kameleoon.com/oauth/authorize?client_id=my-application-name&response_type=code&redirect_uri=https://application.company.com/
```
After the user grants permission, Kameleoon redirects the user to your application URL with an authorization code:
```https theme={null}
https://application.company.com/?code=AUTHORIZATION_CODE
```
#### 2. Obtain access and refresh tokens
Exchange the authorization code for tokens. Base64 encode the `client_id:client_secret` string and include it in the `Authorization: Basic` header.
```bash curl theme={null}
curl -X POST "https://api.kameleoon.com/oauth/token" \
-H "Content-Type: application/x-www-form-urlencoded" \
-H "Authorization: Basic " \
-d "grant_type=authorization_code" \
-d "code=AUTHORIZATION_CODE" \
-d "redirect_uri=https://application.company.com/"
```
The response contains both access and refresh tokens:
```json theme={null}
{
"access_token": "...",
"refresh_token": "..."
}
```
#### 3. Refresh an expired token
To obtain a new access token without re-authorizing the user:
```bash curl theme={null}
curl -X POST "https://api.kameleoon.com/oauth/token" \
-H "Content-Type: application/x-www-form-urlencoded" \
-H "Authorization: Basic " \
-d "grant_type=refresh_token" \
-d "refresh_token=YOUR_REFRESH_TOKEN"
```
## Rate limiting
Rate limiting for the Automation API occurs per user access token. Kameleoon uses two rate-limiting windows:
* **10-second interval**: Up to 50 requests.
* **1-hour interval**: Up to 1,000 requests.
If you exceed these limits, the API returns an `HTTP 429 Too Many Requests` error. To minimize rate limiting:
* **Implement caching**: Store API responses locally and avoid calling the API on every page load.
* **Use the Data API**: If your application requires real-time tracking at scale, use the [Data API](../../data-api-rest/overview).
## HTTP status codes
| Code | Status | Description |
| :--- | :---------------- | :------------------------------------------------------------------------------------------ |
| 200 | OK | The request was successful. |
| 201 | Created | The resource was successfully created. |
| 400 | Bad Request | The request body is invalid. Ensure the `Content-Type: application/json` header is present. |
| 401 | Unauthorized | The API token is missing or malformed. |
| 403 | Forbidden | You lack required permissions or the token is revoked. |
| 429 | Too Many Requests | You exceeded the rate limit. |
| 5xx | Server Error | An internal error occurred. Contact Kameleoon support if the issue persists. |
## Query parameters
For endpoints that retrieve multiple objects, use query parameters to paginate, filter, or sort data.
### Pagination
Queries return **20 items per page** by default (maximum 200). Use `perPage=-1` to retrieve the maximum limit.
| Parameter | Type | Description |
| :-------- | :------ | :------------------------------------ |
| `page` | integer | The page number to retrieve. |
| `perPage` | integer | Items per page (default 20, max 200). |
| `filter` | array | Filtering parameters. |
| `sort` | array | Sorting parameters. |
### Filtering
You must percent-encode filters when sending them in a URL.
**Example**: `filter=[{"field":"name","operator":"EQUAL","parameters":["Test"]}]`
| Field | Type | Description |
| :----------- | :----- | :-------------------------------------------------------------------------------------- |
| `field` | string | The field to filter by. |
| `operator` | enum | Options include: `EQUAL`, `NOT_EQUAL`, `LESS`, `GREATER`, `LIKE`, `IN`, `IS_NULL`, etc. |
| `parameters` | array | The specific values to match. |
### Sorting
| Field | Type | Description |
| :---------- | :----- | :---------------------------------------- |
| `field` | string | The field to sort by. |
| `direction` | enum | `ASC` (ascending) or `DESC` (descending). |
# Kameleoon application file integrity
Source: https://docs.kameleoon.com/developer-docs/apis/automation-api-rest/get-started/kameloon-application-file-integrity
Verify the integrity of the Kameleoon application file by generating and comparing hash codes using the Automation API.
## Introduction
The Automation API allows you to verify the integrity of the Kameleoon application file loaded on your website. By performing this check, you can ensure that the application file has not been altered and can be safely utilized on your site.
The integrity verification process involves generating a hash code based on the contents of the application file and then comparing it to the hash code of the file being integrated into your website. In every instance, both hash codes should match.
This document will guide you in implementing this health check, ensuring the application file remains secure from tampering.
Please note that our API generates only a **hashCode**. It is up to you to decide how to use the generated hash for securing the Kameleoon application file.
## Sample implementation of the integrity check
To obtain the hash code of the original Kameleoon application file, you need to call our [Automation API](./get-started). First, you'll have to gain access to the Automation API using OAuth 2.0 and reference the relevant [documentation](./get-started#client-credentials-flow).
As shown in the example below, after you make a request to the [API endpoint to retrieve the hash code](/api-reference/site/retrieve-file-hash-code), you can compare this with the hash code you calculate on your end to ensure that the file has not been tampered with in any way.
```javascript theme={null}
const axios = require("axios");
const crypto = require("crypto");
const API_SSX_URL = "https://api.kameleoon.com";
const SITE_CODE = "SITE_CODE";
const HASH_TYPE = "SHA256";
const CLIENT_ID = "CLIENT_ID";
const CLIENT_SECRET = "CLIENT_SECRET";
async function obtainAuthToken() {
const response = await axios({
url: `${API_SSX_URL}/oauth/token`,
method: "POST",
headers: {
"Content-type": "application/x-www-form-urlencoded"
},
data: `grant_type=client_credentials&client_id=${CLIENT_ID}&client_secret=${CLIENT_SECRET}`
});
return response.data.access_token;
}
async function obtainHash() {
const token = await obtainAuthToken();
const hashCodeResponse = await axios({
url: `${API_SSX_URL}/sites/${SITE_CODE}/hash`,
method: "PATCH",
headers: {
Authorization: "Bearer " + token,
"Content-type": "application/json"
},
data: `{"hashType": "${HASH_TYPE}"}`
});
return hashCodeResponse.data.hashCode; // { hashCode: 'hashCode', hashType: "SHA256" }
}
`kameleoon.js` is deprecated and has been replaced by `engine.js` in all Kameleoon implementation snippets. `kameleoon.js` will no longer be supported after **June 1st, 2026**. After this date, any campaigns on websites still referencing `kameleoon.js` will stop functioning. We strongly recommend updating your implementation snippet accordingly.
// function to compare the hash code
async function checkHash() {
const scriptResponse = await axios({
url: `https://${SITE_CODE}.kameleoon.io/engine.js?t=${new Date().getTime()}`,
method: "GET"
});
const hashCodeFromAPI = await obtainHash();
const hashCode = crypto.createHash(HASH_TYPE).update(scriptResponse.data).digest("hex");
return hashCodeFromAPI === hashCode;
}
checkHash();
```
```php theme={null}
access_token;
$hashRequest = curl_init($API_SSX_URL . "/sites/" . $SITE_CODE . "/hash");
curl_setopt($hashRequest, CURLOPT_CUSTOMREQUEST, 'PATCH');
curl_setopt($hashRequest, CURLOPT_RETURNTRANSFER, 1);
curl_setopt($hashRequest, CURLOPT_POSTFIELDS, json_encode(array(
'hashType' => $HASH_TYPE
)));
curl_setopt($hashRequest, CURLOPT_HTTPHEADER, array(
'Content-Type: application/json',
'Authorization: Bearer ' . $token
));
$hashOutput = curl_exec($hashRequest);
curl_close($hashRequest);
$hash = json_decode($hashRequest)->hashCode;
// Some method to compare the hash code
checkHash($hash);
```
We do not continuously verify the Kameleoon application files hosted on our CDN for each customer. Instead, we allow our customers to determine how verification of the application files should be conducted, along with the actions to take in the event of mismatching hash codes, based on their specific requirements. Generally, a safe practice would be to promptly remove the application file link from your website if a mismatch is detected.
The domain for your Kameleoon scripts may differ between projects. Depending on when your projects were created, they may be hosted on either `kameleoon.eu` or `kameleoon.io`. Be sure to use the domain that is displayed in your project within the Kameleoon App.
# Overview
Source: https://docs.kameleoon.com/developer-docs/apis/overview
Overview of Kameleoon's Activation, Automation, Data, and Product Recommendation APIs, including their purposes and links to documentation.
The Kameleoon platform offers multiple APIs that customers can use for various purposes. These APIs enable you to conduct front-end A/B experiments, integrate Kameleoon into your digital ecosystem by fetching and sending data, automate specific tasks such as programmatically creating or updating an experiment, and import or update your product catalog if you use the Product Recommendation and Search Personalization add-ons.
Kameleoon has four main groups of APIs:
* the [Activation API](#the-activation-api) (JavaScript API),
* the [Automation API](#the-automation-api) (REST API),
* the [Data API](#the-data-api) (REST API),
* and the [Product Recommendation API](#the-product-recommendation-api) (REST API).
This article provides a high-level overview of these APIs, helping developers quickly identify the API they need and navigate to the relevant documentation.
## The Activation API
The **Activation API** is a JavaScript API that comes with the Kameleoon application file, `engine.js` (previously named `kameleoon.js`), which is installed on your website if you use Kameleoon Web Experimentation or Kameleoon in [Hybrid mode](../feature-experimentation/targeting-and-segmentation/native-segmentation#hybrid-experimentation-mode) for Feature Experimentation. This API allows you to call its methods directly through JavaScript and access various data structures. Additionally, it provides the **Kameleoon Conversion Score (KCS)**—our real-time, customer-centric propensity score—available with our [AI Predictive Targeting](https://kameleoon.com/en/platform/personalization) add-on.
This API serves several purposes:
* Provides [methods](/developer-docs/apis/activation-api-js/api-reference/api-reference#runwhenelementpresent) to implement front-end A/B testing variations without flickering. These methods are crucial for ensuring the proper functioning of the Kameleoon platform and leveraging its Anti-Flickering technology. All front-end developers working with Kameleoon should be familiar with them.
* Provides tracking [methods](/developer-docs/apis/activation-api-js/api-reference/api-reference#processconversion) to send data to Kameleoon, such as conversion data or visitor/[customer characteristics](/developer-docs/apis/activation-api-js/api-reference/api-reference#setcustomdata). These methods function similarly to those provided by analytics solutions like Google Analytics. You can call them directly via embedded JavaScript in your HTML pages or through a Tag Manager such as Google Tag Manager (GTM). We also recommend reading our documentation on the [Kameleoon CommandQueue](./activation-api-js/api-reference/command-queue).
* Provides [methods](/developer-docs/apis/activation-api-js/api-reference/api-reference#kameleoonapiproducts) to track product-related events, such as product views and purchases, adding products to the cart, obtaining automatic product recommendations, and retrieving product-specific statistics for social proof and urgency use cases.
* Provides useful [real-time information](/developer-docs/apis/activation-api-js/api-reference/api-reference#visit) gathered by Kameleoon. For example, you can track a visitor's page views, with data stored and accessible across all previous visits. You can also determine how long a visitor stayed on your website during their first visit, even if they are currently on their fifth visit.
* Provides [entry points](/developer-docs/apis/activation-api-js/api-reference/api-reference#assignvariation) to override Kameleoon's default assignment bucketing logic. For instance, when a visitor is assigned to an A/B experiment for the first time, their variation is randomly determined. With the API, you can [override this assignment](./activation-api-js/tutorials/managing-a-variations-allocation-according-to-specific-criteria) and register the visitor into a specific variation.
As the Activation API is entirely JavaScript-based, scalability is not a concern. Nearly all of its methods (except those requiring a server call, such as [product catalog-related functions](/developer-docs/apis/activation-api-js/api-reference/api-reference#obtainproductinteractions)) execute synchronously and return immediately. No authentication is required for this API, and standard browser architecture and security protocols ensure that visitors can only access their own data (stored in Local Storage) and not data from other visitors.
[The Activation API is fully documented here](/developer-docs/apis/activation-api-js/api-reference/api-reference). You can also find a separate guide on [custom JavaScript Kameleoon Events](./activation-api-js/api-reference/activation-api-events).
## The Automation API
The **Automation API** is a REST API that enables you to trigger and perform nearly every action available through our Kameleoon App programmatically. This allows you to develop your own software to interact with our platform and leverage all its features and capabilities.
For example, some of our clients have used this API to integrate Kameleoon with their Git repositories, enabling them to manage Kameleoon variation code directly within their version control system. You can also design a custom dashboard and [retrieve experiment](./automation-api-rest/tutorials/experiments/retrieving-experiment-results-using-the-automation-api) results directly from Kameleoon. This API is easy to use, making it effortless to build custom systems that operate or interface with Kameleoon.
This API follows REST principles, allowing you to call it using any REST-capable framework in any language (Java, C#, NodeJS, Python, etc.). We adhere to REST conventions, ensuring that any developer familiar with them will find it easy to use. The API is not intended for extensive usage. It should only be called a dozen times per minute per customer/user account on our systems. It is not scalable to millions of calls per minute and should not be invoked for every visitor on your website. If you require high-volume data access, refer to the [Data API](#the-data-api) for more information.
We offer a VS Code extension that utilizes our Automation API. For more information, please refer to our [documentation](../developer-tools/vs-code-extension).
[The Automation API is fully documented here](./automation-api-rest/get-started/get-started).
## The Data API
The **Data API** is a REST API that enables the retrieval and writing of data stored on remote servers rather than locally on the visitor's browser. Unlike the **Activation API**, where data is instantly available on the browser side, this API is designed for communication with external data sources, remote servers, or DMPs. However, unlike the **Automation API**, it can handle millions of calls per minute, making it suitable for requests on a per-visitor basis.
For example, the Data API is used for [Cross-Device History Reconciliation](../cross-device-experimentation), a powerful Kameleoon feature that automatically synchronizes a Unique Visitor's complete action history across all their devices. If a visitor browses your website twice on their smartphone and later returns on their desktop computer, we will correctly report this as their third visit in the Activation API data layer. Behind the scenes, our servers make a call to the Data API to ensure data synchronization.
Another common use case is registering "late transactions" that cannot be sent directly via the Activation API. For example, if your business sells travel packages and the final transaction or confirmation occurs in person at a physical outlet rather than online, you can use this API to record those transactions—something that would be impossible with a web/JavaScript-based API.
The Data API is a REST-compliant API, meaning it can be called using any REST-capable framework in any language, such as Java, C#, NodeJS, or Python. We adhere to REST conventions, ensuring that developers familiar with them will find it straightforward to use.
[The **Data API** is fully documented here](./data-api-rest/overview).
## The Product Recommendation API
The **Product Recommendation API** is a RESTful API that enables efficient management of your product catalog and facilitates the retrieval of personalized product and search recommendations. This API is particularly beneficial for clients who wish to handle recommendation logic within their own backend systems or mobile applications.
This API serves several purposes:
#### Product Catalog management
The following endpoints should be used to import and update your product catalog:
* [Import Categories](./product-recommendation-api-rest/all-endpoints/Import/import-categories) – Upload your product categories into Kameleoon.
* [Import Products](./product-recommendation-api-rest/all-endpoints/Import/import-product) – Add or update products in your catalog.
* [Update Available Products](./product-recommendation-api-rest/all-endpoints/Import/update-products) – Synchronize real-time product availability.
* [Remove Products](./product-recommendation-api-rest/all-endpoints/Import/update-products) – deletes products from Kameleoon.
#### Product and Search Recommendations
* [Get Product Recommendations](./product-recommendation-api-rest/all-endpoints/Recommend/get-recommend) – Obtain personalized product suggestions based on visitor behavior.
* [Get Search Recommendations](./product-recommendation-api-rest/all-endpoints/Search/get-search) – Fetch search recommendations tailored to user queries.
# Cross-device experimentation
Source: https://docs.kameleoon.com/developer-docs/cross-device-experimentation
Track and unify visitor data across multiple devices in Kameleoon using reliable user IDs and cross-device experimentation tools.
A customer’s journey is rarely confined to a single device. From smartphones to tablets to desktop computers, users regularly switch between devices.
Cross-device experimentation addresses this challenge. While bridging the gap between devices is a nuanced challenge, and no solution is perfect, the right tools—like reliable user IDs and thoughtful data practices—unlock insights into visitors’ experiences across all touchpoints.
## What Kameleoon's cross-device experimentation can do
* **Ensure variation consistency:** Logged-in users will always see the same variation in an experiment, no matter what device they use.
* **Enable unified targeting:** Consider all visits and actions from a single user, regardless of the device.
* **Provide accurate reporting:** Accurately count unique users across devices to better understand their behavior.
## Critical points and practical insights
* Cross-device tracking relies heavily on identifying users. If a user stays anonymous across devices, merging their data is impossible. No system can bypass this limitation.
* A reliable user ID (like one tied to a login) is essential for linking data across devices. Without a reliable ID, merging browsing histories or actions isn’t feasible.
* Actions taken in an anonymous state (for example, browsing without logging in) can’t be tied to an identified user until a login occurs. Once logged in, a user’s history merges—but only moving forward.
* However, note that for Web Expermimentation, once the custom data is provided, Kameleoon can retrieve it for all subsequent visits on the same device, even if the user has not yet logged in. This retrieval happens because the data is stored in local storage, which does not occur in feature experimentation.
* While cross-device experimentation works for many use cases, it won’t fit every experiment. Cross-device experimentation depends on your tech stack, user customer journeys, and goals.
## Understanding identity boundaries
In the context of cross-device experimentation, identity boundaries refer to how Kameleoon recognizes and handles users across different sessions, devices, and states of identification. These boundaries are crucial in determining whether Kameleoon can link user data across experiences.
Kameleoon primarily distinguishes between two types of user identities:
* **Anonymous users:** These are users who haven’t logged in and are identified by a temporary device-based identifier (`visitorCode`). Anonymous identifiers are unique to the device and browser and do not persist across devices.
* **Identified users:** These are users who log in, providing consistent and unique identifiers (like a user ID). This identifier is tied to the individual user, allowing Kameleoon to merge their actions and history across devices and sessions.
## Activating cross-device history reconciliation
To use cross-device history reconciliation, create a new Kameleoon [custom data](/user-manual/assets/custom-data/create-custom-data) entry and activate the [Use this custom data as a unique identifier for cross-device matching](/user-manual/assets/custom-data/create-custom-data#Options) option. When activated, Kameleoon treats this custom data as a unique identifier for visitors, which maps several Kameleoon visits to a unique user. You also need to set the custom data value with a unique identifier, such as a user ID, using one of the acquisition methods, like the SDK `addData()` method or the [Activation API](./apis/activation-api-js/api-reference/api-reference#setcustomdata).
If the option is inactive for your custom data, it indicates that you may already have an active custom data set up as a unique identifier. This restriction applies because you can only have one custom data of this type per project.
Incorrect configuration can impact cross-device history reconciliation and other Kameleoon operations, such as targeting and bucketing. It's important to avoid assigning a constant value, such as `0`, to all visitors, as Kameleoon will interpret them as identical unique visitors.
## Cross-device history reconciliation for variation allocation consistency
The goal of cross-device history reconciliation for variation allocation is to ensure that visitors assigned to an experiment consistently see the same variation, regardless of the device they use to access the website.
However, it's important to acknowledge that maintaining this consistency can be challenging in certain scenarios. For example, if a user visits the website on their initial device, logs in, and triggers an experiment, Kameleoon may assign variation V1. If the same user then visits the website on another device and triggers the same experiment before logging in, the system might assign variation V2. This inconsistency occurs because the system has not yet recognized the user across devices. Kameleoon intentionally does not override the variation allocation during a single visit to avoid disrupting the user experience.
To mitigate this issue and ensure consistency, identify visitors promptly throughout their website journey. Identifying visitors early when they access the website from different devices ensures they are consistently assigned the same variation. This approach allows Kameleoon to provide a seamless and coherent testing experience.
### Kameleoon Web Experimentation
The Kameleoon Web Experimentation solution primarily utilizes client-side storage mechanisms to manage variation allocation (bucketing). Users' variation allocation is initially stored in local storage when they participate in an experiment. This storage ensures that a user consistently sees the same variation on the same device, even if the customer updates the traffic allocation of the experiment.
Rebucketing only occurs if explicitly requested, either by disabling a variation previously assigned to a user or forcing the reallocation of the experiment's traffic.
If the same user logs in on a different device, Kameleoon retrieves the previously assigned variation information from the backend. If the same experiment is triggered after this step, Kameleoon assigns the user the same variation. This synchronization ensures that a variation is consistently applied across devices without reassigning a new variation through bucketing.
### Cross-device experimentation for feature experimentation
Feature experimentation occurs in environments where data is stored in memory for the duration of a session (which defaults to [30 minutes](./feature-experimentation/technical-reference/technical-considerations#data-storage), thus making it an unreliable storage for expirable variation allocation). SDKs dynamically resolve variations during runtime, introducing unique complexities for cross-device consistency.
#### Role of SDKs
SDKs are essential for feature experimentation as they:
* Dynamically resolve variation allocations based on user identity (`visitorCode`, which is randomly generated by the SDK, or your own user ID) when targeting occurs.
* Use identity resolution to retrieve previously collected data across different devices, ensuring consistent variation assignment as the user switches devices.
#### Challenges and considerations
* **No local storage:** Unlike Kameleoon Web Experimentation, variations are not stored persistently; they are recalculated during runtime based on user identity.
* **Anonymous sessions:** Ensuring consistency when users begin as anonymous and later log in can be complex.
* **Cross-device identity resolution:** Accurately attributing experiment variations across devices depends on robust identity resolution.
### Examples of use cases
The following use cases represent the most common scenarios encountered when implementing cross-device experimentation. These examples highlight typical challenges and solutions for ensuring consistent user experiences and accurate variation attribution across multiple devices.
#### Use case 1 (same device)
In the first session, an anonymous user is targeted by an experiment and then logs in. In the second session, the visitor is logged in and is targeted by the same experiment.
* **Web experimentation:** The variation remains consistent with the variation allocated during the initial session because Kameleoon retrieves the previously assigned variation from local storage.
* **Feature experimentation:** If you have associated the anonymous visitor ID with the user ID using [custom data](#activating-cross-device-history-reconciliation), the same variation will be returned when `getVariation()` is called with either the anonymous ID or the user ID. However, a new variation will be allocated if `getVariation()` is called when the user ID is used in the method, and no mapping exists between the user ID and the anonymous ID.
#### Use case 2 (same device)
A user logs in and is targeted by an experiment during a session. In a subsequent session, the user is logged out, becomes anonymous, and is targeted by the same experiment.
* **Web experimentation:** The variation remains consistent with the variation allocated during the initial session because Kameleoon retrieves the previously assigned variation from local storage, ensuring continuity across sessions.
* **Feature experimentation:**
* If, during session 1, the user moved from an anonymous state (`anonymous1`) to an identified state (`userId`) and the anonymous ID was mapped to the user ID, in session 2, Kameleoon will reuse `anonymous1` to bucket the user with the same variation.
* However, if no anonymous state was managed in session 1 (by calling the `getVisitorCode()` method), a new `visitorCode` (`anonymous2`) will be generated for session 2, resulting in a new variation allocation.
#### Use case 3 (different devices)
An anonymous user logs in on one device and is targeted by an experiment during the same session. In a later session on a different device, the user starts anonymously, gets targeted by the same experiment, and logs in.
* **Web experimentation:** In this scenario, the user may receive two different variations because Kameleoon does not recognize the user on the second device when making a targeting decision. The variation allocation on the second device occurs before the user logs in, resulting in a lack of synchronization between devices.
* **Feature experimentation:** Like web experimentation, the user may receive two different variations because Kameleoon does not recognize the user on the second device when making a targeting decision. In this case, the variation allocation on the second device occurs before the user logs in, meaning there is no synchronization between devices.
#### Use case 4 (different devices)
An anonymous user logs in on the first device and is targeted by an experiment. Later, on a second device, the user logs in before being targeted by the same experiment.
* **Web experimentation:** The variation remains consistent across devices. Since the user logs in before the experiment is reevaluated, the system aligns the variation with the variation allocated on the first device.
* **Feature experimentation:** Kameleoon determines the variation allocation based on the mapping of the user ID to the most recent anonymous ID generated for the visitor.
* On **Device 1**, an anonymous visitor (`anonymous1`) is evaluated for the experiment and receives a variation (`var1`). Upon login, Kameleoon creates a mapping between `userId` and `anonymous1`.
* On **Device 2**, if the session begins directly with the `userId` (with no call to `getVisitorCode()` generating an anonymous ID), calling `getRemoteVisitorData(userId)` allows Kameleoon to retrieve the mapping for the most recent anonymous visitor. (`anonymous1`). Consequently, when you call `getRemoteVisitorData()` and `getVariation()` for the experiment, the user will receive the variation (`var1`) assigned to `anonymous1`. However, if the session starts in an anonymous state, a new variation may be allocated since bucketing will use the newly generated bucketing key.
#### Use case 5 (different devices)
An anonymous user is targeted by an experiment on one device and logs in. On a second device, the user logs in and is targeted by the same experiment.
* **Web experimentation:** The variation remains consistent across devices. Once the user logs in, the system can attribute the same variation to the user.
* **Feature experimentation:** The variation remains consistent only if you call `getRemoteVisitorData()`. Without this call, the system may not associate the two sessions, potentially leading to different variation attribution across devices.
## Cross-device history reconciliation for targeting
Kameleoon automatically downloads a list of visits from other devices and stores this information in the current device's storage when a new session begins and custom data is set with a value. However, if the custom data is empty, reconciliation won't be performed at the start of the session. Reconciliation is triggered only when the custom data is passed, and targeting is re-evaluated for all active experiments and personalizations. Typically, this occurs when a user logs in to your site and provides their user ID, email, or other unique identifier.
It's important to note that once the custom data is provided, Kameleoon can retrieve it for all subsequent visits on the same device, even if the user has not yet logged in. Reconciliation occurs at the start of each subsequent visit, ensuring consistent tracking and targeting capabilities.
To maintain a coherent unified data history for a visitor, it's recommended to provide the custom data value as early as possible during their journey on your website. Kameleoon cannot retrieve this history until the custom data is set up.
### Data affected by cross-device history reconciliation
The history reconciliation feature adds the list of all previous visits that are not yet known to the current device. This includes typical information such as
* Number of visits and page views
* Session duration
* Acquisition channels and referrers
* Custom data (note: custom data provided in other sessions with a visitor scope will merge into the current session).
You can use targeting segments as usual, and they will function as expected. For example, a targeting condition based on the number of previous visits will accurately consider all visits, as will a condition based on the duration of the previous visit
A maximum of **25** visits can be available for cross-device reconciliation, with a [3-month retention policy](./privacy-and-compliance/data-collection-backend#data-retention-policy) applying to the retrievable data.
## Cross-device history reconciliation for analytics
History reconciliation impacts only the **visitor** view in Kameleoon reporting; the **visit** view remains unaffected. In the visitor model, instead of grouping multiple sessions into a single visitor record using the standard Kameleoon **visitorCode** value (which is only possible for returning visitors on the same device), the system merges them based on the custom data value. If the custom data is empty or not provided, the visitorCode value is used instead. This approach ensures that unique visitor metrics remain accurate, even if the user is not yet identified in the customer system (though this logic applies only to returning visitors on the same device).
As a result, the visitor view correctly displays metrics across all devices for identified users. For example, a single customer with three sessions on two different devices counts as a single visitor. Without history reconciliation, the same customer counts as two distinct visitors (one per device).
In some cases, a user may experience multiple variations of an experiment due to a change in the bucketing ID, either in different sessions or the same session. Reporting and analytics consider such cases as follows:
* **Visit view** In the visit view, Kameleoon counts each session separately for the variation the user interacted with.
* Example:
* If a user is exposed to Variation A during one session and Variation B during another session, the counts would be:
* **Variation A:** 1 session
* **Variation B:** 1 session
* **Visitor view** In the visitor view, Kameleoon groups data by unique visitor codes (or mapping ID), counting each visitor only once per variation.
* Example:
* If a user is exposed to Variation A in one session and Variation B in another, the counts would be:
* **Variation A:** 1 visitor
* **Variation B:** 1 visitor
* **Single session with multiple variations** When a user interacts with multiple variations in one session, Kameleoon only counts the last variation they engaged with.
### Using custom data for session merging
Using custom data as a unique identifier for session merging is only possible for sessions saved after Kameleoon has identified which custom data to use. Therefore, Kameleoon highly recommends selecting custom data during the initial installation and configuration to avoid changing it later.
For instance, if Kameleoon runs for one month without enabling cross-device history reconciliation, and then it is activated in the second month, a single user who visited twice (once in each month) counts as two different visitors. This discrepancy occurs because session merging in the first month uses the visitorCode as the key, whereas in the second month, it uses the custom data with a different value, even if the user logged in on both visits using the same device.
Any modifications to the custom data setup responsible for history reconciliation will temporarily affect visitor-based metrics accuracy as the majority of visitors log in, depending on how often they return to the site and authenticate themselves.
# Custom data
Source: https://docs.kameleoon.com/developer-docs/custom-data
Configure and use custom data in Kameleoon to target visitors based on attributes and analyze experiment results with data breakdowns.
Custom data is one of the most powerful features in Kameleoon. Custom data allows any data type association with each visitor and is used for two purposes:
1. To generate targeting segments based on visitor data, including creating advanced segments for experiments and personalizations. Examples of custom data include age, previous purchases, current cart amount, and favorite category. Typically, custom data is closely tied to the specificities of a business. For example, if you operate a marketplace website, you can create custom data that indicates whether a visitor is primarily a "buyer" or a "seller."
2. To provide advanced analysis reports by breaking down results according to custom data, as well as filtering experiment and personalization reports using any stored data value.
Custom data can be of the following types: single, list, or counted list with a string, boolean, or number format and the scope of page, visit, or visitor.
This article serves as a general guide for learning more about custom data and how to use it effectively. If you're interested in creating custom data within the Kameleoon platform, you can refer to the following [user guide](/user-manual/assets/custom-data/create-custom-data).
## Technical Overview
Once a custom data value is set, it is stored locally on the server or on the user's device, depending on whether a server-side SDK or a client-side SDK is used, including the application file (engine.js), rather than retrieving it from a remote Kameleoon server. This storage means that data can be retrieved in subsequent page views of the same visit or in future visits. When Kameleoon is loaded, any custom data that has been written will be automatically available for use later, either through the Activation API or the SDKs.
If Kameleoon Web Experimentation is used, the LocalStorage implementation is unified, meaning that user journeys spanning multiple subdomains are automatically handled by Kameleoon, as long as implementation guidelines for [unified session data across subdomains](./web-experimentation/technical-concepts/unify-session-data-storage-across-subdomains) are followed. Kameleoon also saves and loads custom data and handles complex issues, such as concurrent access from multiple tabs on the same website.
Any value set for custom data can also be sent to Kameleoon data collection servers as part of the standard tracking process, which serves three purposes:
1. The data is available for reporting purposes and can be used to filter or break down visit or visitor data by specific attributes (for example, number of visits or visitors per profile type), or to analyze data (for example, conversions by payment type). Linking custom data to a goal as metadata is required to filter or break down conversion data based on metadata value.
When custom data is set as goal metadata, Kameleoon automatically uses the most recently tracked value of the custom data in reporting for each goal conversion. You can manually set the custom data's value by using the `metadata` parameter of the `processConversion` method of the [Activation API](./apis/activation-api-js/api-reference/api-reference#processconversion), or the `trackConversion` method of the SDK.
2. The data can be used as input for machine learning algorithms for [AI Predictive Targeting](/user-manual/ai-predictive-targeting/target-users-based-on-likelihood-to-convert) and Contextual Bandit experiments.
3. The data is stored on backend servers and can be retrieved using the [Data API](/api-reference/visit/get-visitor-data).
The latest version (2.3) of Intelligent Tracking Prevention (ITP) restrictions on Safari browsers clear the LocalStorage after seven days, meaning that if a returning visitor comes back after seven days, additional synchronization server calls to retrieve the content of custom data cannot be avoided in Safari. However, Kameleoon optimizes these calls and only makes them if necessary (for example, if the seven day period has elapsed). For more information about the solution, refer to the [ITP management](./web-experimentation/technical-concepts/itp-management) article.
## Core technical concepts: Scope of custom data
The **scope** of custom data is crucial as it determines how the value behaves for targeting and how it's stored and displayed in reporting. Custom data's configuration depends on your implementation type: **Web Experimentation** or **Feature Experimentation (SDKs)**—and how and when you expect to use the custom data.
### Scope for targeting
How custom data behaves for targeting differs significantly between Web and Feature Experimentation.
#### Web Experimentation (engine.js)
For **Web Experimentation**, targeting is typically evaluated once on the page based on the custom data's value. It won't be reevaluated if the custom data's value changes on the same page. The custom data's scope dictates its lifespan for targeting:
* **Page:** The custom data's value resets after each page view.
* **Use case:** Target users who browse (or are on) a specific page type (product pages, for example).
* **Visit:** The custom data's value resets after each visit. The custom data will retain its last value when a user navigates from page to page within the same visit.
* **Use case:** Target a visitor who signed up for a newsletter during their current visit.
* **Visitor:** The custom data's value won't reset. It will retain its last value across multiple visits from the same visitor.
* **Use case:** Target a visitor who has made purchases on the site three times historically.
If there is a risk that a custom data value may be obtained after Kameleoon's initialization and the associated first targeting execution, set the scope to **`PAGE`**. If the scope isn't set to **`PAGE`**, the current custom data value may be "late" and cause targeting issues, especially when running an experiment targeting visitors that move to a product page after browsing a category page, obtaining a new value after only a few seconds. With a **`PAGE`** scope, this issue won't occur.
#### Feature Experimentation (SDKs)
With **SDKs** for Feature Experimentation, there's **no concept of a "page"** in terms of scope. Custom data values are passed explicitly at the time of evaluation. Here, the scope primarily defines how the custom data is stored on Kameleoon's servers and which value is automatically retrieved (for example, by using `getRemoteVisitorData()`).
By default, the API retrieves only `VISITOR`-scoped values. These values are attached to the visitor and used during evaluation.
### Reporting and display of custom data
How custom data appears in your reports also depends on your experimentation type, the custom data's type and scope, whether the optional `overwrite` parameter was used with `setCustomData()`.
#### Default logic (when overwrite parameter is false or omitted)
##### For Web Experimentation (Results page)
On the Results page for Web Experimentation, all custom data types can have multiple values on the same page and during the same visit. The following rules apply for displaying these values:
* **Single type & page scope:** All values set during a visit will be displayed on the Results page to break down visits. If a value is set once or multiple times, it results in the same display (for example, the visit is tagged with that value).
* **Use case:** Break down visits according to the categories of pages viewed.
* **Single type & visit scope:** The Results page will only display the **last** value set during the visit to break down visits.
* **Use case:** Break down visits by user membership type.
* **Single type & visitor scope:** If you use the Visitor view on the Results page and break down by custom data, Kameleoon shows all values received for that custom data for the visitor, which covers all previous visits exposed to or influenced by the experiment, within the selected timeframe.
* **Use case:** Break down visitors according to the number of purchases they've made on the site across all visits.
* **All combinations for types/scopes (list, countList/page, visit, visitor):** Any values assigned during the visit will be shown on the Results page for a detailed breakdown of the visits. If a value is assigned to a visit, whether once or repeatedly, it will be displayed consistently, tagging the visit with that value.
* **Use case:** Break down visits according to all the newsletters a user signed up for, the navigation menu links clicked, or filters selected on a category page.
##### For Feature Experimentation (SDKs)
For Feature Experimentation, custom data reporting operates differently due to the nature of SDK environments, which typically don't have a "page" concept like web browsers.
* The **Page** scope does not apply for reporting purposes in Feature Experimentation, because SDKs often run in server-side or mobile environments where a distinct "page load" event, which would trigger a data reset, doesn't inherently exist.
* For any given custom data, Kameleoon will only keep and report the last value received during a visit. This approach is efficient and relevant for environments where the most recent state of a user's attributes within a continuous session is generally what matters for feature decisions.
* The **Visit** and **Visitor** scopes behave as expected for reporting, allowing for breakdowns by the last value within a visit or across multiple visits for a visitor, respectively.
#### Overriding default behavior with the overwrite parameter
The `overwrite` (optional `boolean`) parameter of the `setCustomData()` method lets you explicitly control how custom data values are stored and, consequently, how they appear in reports.
* **When `overwrite` is `true`:** The new value provided to `setCustomData()` will **always replace** any existing values for that custom data key **within the current session/visit**, regardless of its type (Single, List, Count List) or scope (Page, Visit, Visitor), meaning that only the most recently set value will be available for targeting and reporting.
* **When `overwrite` is `false` or omitted:** The **default logic** as described in the sections above will apply.
You can use custom data as metadata when setting up a goal, allowing the custom data's value to be attached to each conversion for reporting and analysis purposes. For more information on creating a goal, refer to the [Create a new goal](/user-manual/assets/goals/create-a-goal) article.
By default, custom data are attributes related to users; however, if you'd like to use custom data as properties of a conversion, you can use metadata.
## Retrieval methods
Kameleoon offers various integrations out of the box, which are detailed below.
### Data layers
These methods retrieve the custom data's value from a given variable in the data layer for Google Tag Manager, Tealium, or Commander's Act. Specify the variable's name in the data layer, and Kameleoon automatically completes the integration as soon as the data layer loads on the page.
Kameleoon supports several levels of hierarchy and array variables in the data layer. For example, you can fetch a value from `product.category.name`, `cart["amount"]` or `purchases[3]`.
Kameleoon can set the custom data value only after the data layer is available on your page, which can take several seconds (depending on when you load your tag manager). If you use the custom data as a targeting condition in an A/B test, a noticeable flicker effect can occur.
### Activation API
Use the [Activation API](./apis/activation-api-js/api-reference/api-reference#setcustomdata) to set custom data values on the browser (client-side environment). Locate a particular DOM element on the page and use its content as the custom data value. For example, obtain the current cart amount value if it is displayed on the web page and fill the corresponding custom data accordingly.
The Activation API method `setCustomData()` includes a parameter called `overwriteIfCollection`. For more details on this method, refer to the Activation API [documentation](./apis/activation-api-js/api-reference/api-reference).
The `Kameleoon.API.Data.setCustomData()` method always overwrites previous existing values for the custom data, except if the type is a List or Counted List, and the third argument is **false**, in which case, it adds to the existing list.
### Custom JavaScript code
This option lets you write ad hoc custom JavaScript code. The main rule to follow when setting a custom data is that your code should return an object with two keys: `value` with the value you want to provide for this custom data and (optionally) `override` with a boolean value (**false** by default).
If no value is available yet but will be obtained later on the page, do not return any value (returning null or undefined is also acceptable). The system executes the code again (every 100 ms for the first **three seconds** after the first invocation, then every **three seconds**). By convention, returning `{"value": null}` will not set the custom data but will stop the regular execution.
The first execution takes place before the Kameleoon targeting system is triggered, providing the chance to set up custom data before targeting executes.
Avoid using this retrieval method if possible. Write JavaScript code in a different location, such as Tag Manager, an external script file, or inline script code in the HTML code, and then use the Activation API retrieval method to set the custom data.
### SDK method
For **Feature Experimentation (SDKs)**, custom data values are **acquired and sent to Kameleoon solely via SDK methods**, meaning they are explicitly passed through SDK integration (for example, using methods like `addData()` or `setCustomData()` depending on the specific SDK).
For more details regarding using custom data in SDKs, refer to the [using visit history](./feature-experimentation/targeting-and-segmentation/native-segmentation) article.
### Data API / Server to Server integration
If looking to set up a server-to-server integration, the [Data API](./apis/data-api-rest/overview) is the recommended approach. Using the Data API involves implementing a REST call to Kameleoon servers, specifying the custom data name and value and the **`visitorCode`**.
## Advanced Options
### Use this data only locally for targeting purposes
Enabling this option allows the custom data value to be stored locally on the user's device or on the server if using one of the server-side SDKs. Since this data will not be stored on Kameleoon servers, it cannot be used for analytics in reporting. This feature can be beneficial for privacy or legal reasons. Some customers may require that sensitive data is not stored outside their systems, but still wish to personalize the visitor's experience based on that data.
### Use this custom data as input for AI Predictive Targeting
Enabling this option allows machine learning algorithms to use this custom data as an input. Only **Number** and **Boolean** custom data types are accepted. This feature is only available with a subscription to the [AI Predictive Targeting](/user-manual/ai-predictive-targeting/overview) add-on.
### Use this custom data as a unique identifier for cross-device history reconciliation
When activated, Kameleoon treats this custom data as a unique identifier for your visitors, which will be used to map several Kameleoon visits to a unique user for cross-device experimentation. Learn more about this feature in the [Cross-device experimentation](./cross-device-experimentation) article.
## Using Custom Data
### Targeting condition for segments
The Kameleoon segment builder will automatically add targeting conditions for any custom data that you define. The process is automatic, and if the value of the custom data corresponds to your condition, this particular visitor will be included in the segment.
### Via the Activation API
You can obtain a custom data's current value via `Kameleoon.API.CurrentVisit.customData` (**PAGE** or **VISIT** scopes) or `Kameleoon.API.Visitor.customData` (**VISITOR** scope).
### Via the SDKs
The `getRemoteVisitorData()` method retrieves all custom data collected during the current visitor's previous visit. For more details, refer to the [using visit history](./feature-experimentation/targeting-and-segmentation/native-segmentation) article.
### Analytical Purposes
Any custom data (except those marked as local only) can be used as a filter or a breakdown option in experiment or personalization result pages. This information is also available in reports produced by the raw data export tool, and complex queries including custom data can be performed (with a dedicated Kameleoon data cluster).
For a breakdown using custom data of type String, the results will include up to **50** of the most frequently used values for that data.
For a breakdown with a Number type custom data, the results will also be broken down with a maximum of **50** possible values. In the case of numerical custom data, this limit does not always make sense.
When custom data is linked to a goal as metadata, values are currently accessible only through a Raw Export. An update to the reporting page—expected later in Q2—will allow metadata use as filters directly in the results.
## Advanced Settings
### Implement a custom select box component for the targeting condition associated with this custom data
This feature simplifies the selection of custom data values in targeting conditions by presenting them in a select box instead of a plain text field, making it much easier for end-users to choose the appropriate value for targeting. There are two important points to consider:
* Raw values can be associated with descriptive labels.
* The labels and values are obtained dynamically when the targeting condition interface is displayed.
This feature is especially useful for integrating with third-party data providers, like DMPs or CRMs. For example, if the custom data represents an external segment from a DMP, the user can select "Loyal customers" instead of the internal ID, which is usually a complex string of characters like "8ney4225y65a". The list of defined segments in the DMP is always up-to-date on Kameleoon's interface, so this feature handles the synchronization automatically.
The labels associated with custom data are only visible to users who have access to the Kameleoon platform. They are not included in the JavaScript application file, so website visitors cannot view them. The process is hidden from the user.
To implement this feature for a specific custom data, you must provide JavaScript code that will return an array of objects representing the possible values along with their labels **synchronously**. The array must meet the following requirements:
* All elements in the array should be JavaScript objects.
* These objects should have two keys: a **value** key (containing the actual possible value for the custom data), and a **label** key (representing the textual description for this particular value).
* The content type for the **value** key should correspond to the custom data's actual type. For the **label** key, you should provide a string as content.
See the code sample below for an example of how this feature can be used in practice. In this example, a remote call is made to a third-party server (usually a DMP or similar platform) that provides the list of available segments defined on the platform. It's important to note that this code is only used to build the selection interface for the Kameleoon end-user.
```js theme={null}
var xhr = new XMLHttpRequest();
xhr.open("GET", "https://third-party.dmp.com/get-segments?login=XXXX@XXXX.com&password=XXXX", false);
var segments = [];
xhr.onreadystatechange = function() {
if (this.readyState === XMLHttpRequest.DONE && this.status === 200) {
var data = JSON.parse(xhr.response);
data.map(function (segment) {
if (segment.segment_uuid && segment.name !== "undefined") {
segments.push({"label": segment.name, "value": segment.segment_uuid});
}
});
}
}
xhr.send();
return segments;
```
Ensure the code runs synchronously and returns its value with a blocking behavior. Avoid any asynchronous remote server calls, as this may cause the feature to malfunction.
# Kameleoon Debug Assistant extension
Source: https://docs.kameleoon.com/developer-docs/developer-tools/kameleoon-debug-assistant-extension
Install and use the Kameleoon Debug Assistant Chrome extension to inspect experiments, feature flags, segments, goals, and performance on any page.
For more information on the Kameleoon Graphic editor extension, refer to the article on [getting started with the Graphic editor](/user-manual/experimentation/web-experimentation/graphic-based-experiments/getting-started-with-the-graphic-editor#kameleoon-graphic-editor-extension).
## Installation of the extension
1. Add the extension to Chrome. [It can be downloaded here on the Chrome Web Store](https://chrome.google.com/webstore/detail/kameleoon/nimncjjomfcjmfnghgaopccmdggjfoam).
2. Open the web console (**F12** on PC or **command+option+I** on Mac).
3. Click the Kameleoon tab from the web console.
4. Click **Activate**.

5. The login page to the Kameleoon app opens. Enter your login details.
### Simplified authentication
You can also use the Kameleoon icon of the extension to start the authentication process:
1. Click the Kameleoon icon and a pop-up will appear.

2. Click **Open Login Pop-up** to display the login pop-up. You can use the login pop-up to enter your email and password to login.
### Cookie authentication
Click the Kameleoon icon and a pop-up will appear.
If you’re already logged in on your browser, a section will appear below the **Open Login Pop-up** button, allowing you to log in with your current session.
Click on **Log in as...**.
Logging out follows the same steps as logging in. Just click the Kameleoon icon > **Log out**.
### Authorizations
The **My websites** page opens.
The extension activates and gives you the authorizations to use the extension on all websites configured in your Kameleoon account.
The first time you activate the extension, you will be redirected to your website, so you can use the extension straight away.
If you add a new website to your Kameleoon account, you will be told that you don't have permission to use the extension on the site.
Click **Proceed to tag injection**. The button takes you directly to the Tag Injector. Then, update your authorizations. A message confirms the update.
If you add a new website to your Kameleoon account, you can also update your authorizations by clicking **Update list of sitecodes** at the bottom of the extension dashboard.

### Structure
The extension provides several tabs:
* Campaigns
* Assets
* Timeline
* Dev tools
* Options
You can access a dashboard page by clicking the Kameleoon logo.
## Dashboard
The dashboard appears by default when you open the extension.
Click the **+** icon to build and customize the dashboard, so it contains essential information.
Each widget can be enlarged, reduced, and closed.
You can increase the number of lines by clicking the three-dots menu in the top left.
The inserts at your disposal are as follows:
* **Consent:** Indicates whether you gave consent for Experiments or Personalizations (**true** indicates that you gave consent or that consent is not required; **false** means that you refused consent or that, pending your consent, Kameleoon blocked the experiments).
* **Custom data:** Lists the active custom data on the page, their ID, and value.
* **Experiments:** Lists all experiments running on the page and indicates their ID, evaluates targeting (true/false), and displays the ID of the registered variation and displayed variation.
* **Personalizations:** Same for all personalizations running on the page.
* **Site Code:** Displays the relevant sitecode.
* **Visitor Code:** Indicates the visitor code assigned to you, which allows monitoring of visits among other metrics.
You will find a link at the bottom of the dashboard that allows you to update sitecodes when a new website is added to your Kameleoon account.
## Campaigns
### Experiments
In the **Experiments** tab, you will find all your experiments running on the page.
You can add or remove columns by clicking **Add columns** to customize the table.

* **ID:** ID of the experiment. Click to display details.
* **Name:** Name of the experiment.
* **Triggered:** True if the experiment was triggered on the page, else false.
* **Triggered In Visit:** True if the experiment was triggered in the current visit, else false.
* **Active:** True if the experiment is currently active on the page, else false.
* **Activated In Visit:** True if the experiment was activated in the current visit, else false. Note that a triggered experiment does not necessarily imply that Kameleoon activated the experiment, as several additional factors can affect activation (for instance, the visitor being part of traffic excluded from the experiment, or set capping options).
* **Displayed Variation:** ID of the variation displayed (**No variation** when not targeted; **0** when targeted but assigned to the reference).
* **Associated Variation:** ID of the variation you have been assigned with your visitor code (**0** when not targeted). You can force a variation by selecting it in the dropdown. The eye icon on the right allows you to preview it.
* **Date Modified:** Date of the last change made to the experiment.
* **Assignment Time:** When you were assigned to the variation. If the variation is the original, and you have not been targeted, the value is **Not assigned yet**.
* **Online since:** The date the experiment went online.
#### Variations
When you click an experiment's ID, a menu opens. The first tab gathers all the experiment's variations, indicating their name, ID, and JS/CSS (if code has been injected in the variation).
You can switch from one variation to another by clicking the variation ID.

The **Elements** section lists all elements that Kameleoon changes for a variation. It allows you to debug your campaigns and quickly see if the elements are detected on the page. The element's selector represents each item. When the extension displays the element in red, the element does not appear on the page; in green, the element appears on the page.
Each item has two buttons: a copy button and a highlight button.

The copy button can be used to copy the CSS selector.
The highlight button can be used to highlight the associated element in the page. Therefore, it is not available when the element is not detected on the page.
You can also highlight all the elements on the page using the icon that appears above the list of elements.
#### Configuration
The experiment's entire configuration is displayed in the extension.
You will find the information that is normally in the console.
#### Targeting
The Targeting section displays the targeting conditions with logical links between them.
Some conditions give access to additional details when you click them. For example, for a JS condition, the JS to be executed appears.
### Feature flags
The Feature flags tab contains all feature flags that Kameleoon detects on the page.

Inspect each feature flag's behavior in this tab. The table includes the following information:
* **ID:** Feature flag's ID. Click the ID to view detailed information.
* **Name:** Feature flag's name.
* **Triggered:** True if the flag triggered on the page.
* **Triggered in visit:** True if the flag triggered during the current visit.
* **Active:** True if the flag is currently active on the page.
* **Activated in visit:** True if the flag activated in the current session.
* **Displayed variation:** ID of the displayed variation. **No variation** indicates that the user isn't targeted. **0** refers to the reference variation.
* **Associated variation:** The variation to which Kameleoon assigns the visitor. Use the dropdown to force a variation. The **eye** icon allows you to preview that variation.
When you click a flag ID, you can access the configuration, which includes details such as:
* JavaScript or CSS code injected for each variation (if any)
* Targeting and segmentation conditions
* Timeline and last modified date
The feature flag view helps debug feature flags and ensure proper delivery in real time.
### Personalizations
In this tab, you will find all personalizations running on the page
Add or remove columns by clicking on **Add columns** to customize the table.
* **ID:** ID of the personalization. Click to display details.
* **Name:** Name of the personalization.
* **Triggered:** Whether you are targeted.
* **Triggered In Visit:** True if the personalization was triggered in the current visit, else false.
* **Active:** True if the personalization is currently active on the page, else false.
* **Associated Variation:** ID of the variation you have been assigned with your visitor code (**0** when not targeted). You can force a variation by selecting it in the dropdown. The eye icon on the right allows you to preview it.
* **Activated In Visit:** True if the personalization was activated in the current visit, else false. Note that a triggered personalization does not necessarily imply that the associated event occurred,as several additional factors can affect the execution. For instance, capping options may prevent execution, or the visitor may be part of a control group for the personalization (in which case Kameleoon does not display the personalization).
* **Not Exposed Reason:** If the personalization was triggered but not displayed or activated, the **Not Exposed Reason** field details the reason for the non-exposition. Possible values are:
* `GLOBAL_EXCLUSION` (the visitor is part of the population globally excluded from all personalizations).
* `PERSONALIZATION_EXCLUSION` (the visitor is part of the population excluded from the current personalization. For example, the visitor is in the control group).
* `PRIORITY` (another personalization has higher priority).
* `SCHEDULE` (personalization is currently off according to its schedule).
* `PERSONALIZATION_CAPPING` (the personalization has reached its global capping in terms of visitors).
* `VISITOR_CAPPING` (the visitor has reached a capping preventing the display of the personalization).
* `SCENARIO` (the personalization won't be displayed because scenario conditions are not fulfilled).
* `SIMULATION` (in simulation mode, Kameleoon forces the non-exposition, which cannot happen in production; the reason is available if the personalization was triggered on the current page and the active property is false, else the value will be null).
* **Date Modified:** Date of the last change made to the personalization.
#### Variations
When you click a personalization's ID, a menu opens. The first tab indicates the variation's name and ID, and JS/CSS, if code has been injected in the variation.

The **Elements** section lists all the elements that are supposed to be changed for a variation. It allows you to debug your campaigns and quickly see if the elements are detected on the page. Each element is represented by its selector. When the element is displayed in red, it means that the element is not detected on the page; in green, the element is detected on the page.
#### Configuration
The personalization's entire configuration appears in the extension.
You will find the information that is normally in the console.
#### Targeting
The Targeting section displays the conditions with logical links between the conditions.
Some conditions give access to additional details when you click them. For example, for a JS condition, the JS to be executed will be displayed.
## Assets
### Segments
In the Segments tab, find all active segments on the page to verify parameters and targeting.
The segment is **Triggered** if your visit fulfilled the conditions at some point.
If you click the segment ID, you can access the conditions' details.
### Custom Data
In the Custom Data tab, find all configuration parameters of custom data to verify the settings.
Add or remove columns by clicking **Add columns**.

* **ID:** ID of the custom data.
* **Name:** Name of the custom data.
* **Value:** If one or several values have been associated with the custom data.
* **Format:** String/Boolean/Number
* **Type:** Unique/List
* **Scope:** Page/Visitor/Visit
* **Local:** Indicates if the custom data uses the visitor's local browser.
* **Mapping Identifier:** Indicates if the custom data uses a unique identifier on your side, such as an account ID or email.
* **Learnable:** Indicates if you activated the "learnable" function on the custom data.
### Goals
The Goals tab contains goal configurations to verify proper conversion.
Add or remove columns by clicking **Add columns**.
* **ID:** The ID of the goal.
* **Name:** The name of the goal.
* **Type:**
* Click
* Scroll
* URL
* Engagement
* Time spent
* Page views
* **Converted:** Whether the goal converted during the current visit.
* **Conversions:** The total number of times you converted this goal.
* **Revenue:** The total revenue associated with this goal (if applicable).
### Global custom script
You will find the global script (equivalent to script tracking in the app) here.
## Timeline
The Timeline tab displays all campaign events and their timestamps.
* **Load event:** When Kameleoon starts to load.
* **Consent initialized:** Consent initialized for A/B Testing or Personalization.
* **Consent enabled:** Consent enabled for A/B Testing and/or Personalization.
* **Consent disabled:** Consent disabled for A/B Testing and/or Personalization.
* **Custom data set:** The custom data appears with value XXXX.
* **Global script executed:** The global script executed.
* **Experiment triggered:** The experiment with ID XXX triggered.
* **Experiment activated:** The experiment with ID XXX activated.
* **Variation displayed:** The variation with ID XXX appeared.
* **Personalization activated:** The personalization with ID XXX activated.
* **Personalization triggered:** The personalization with ID XXX triggered.
* **Loading aborted:** Loading aborted for reason XXX or for opt-out reasons.
* **Conversion triggered:** The goal XXXX with ID XXX triggered.
## Dev tools
### Performance analysis
Use the Performance analysis tab to analyze the script's composition and identify parts that might slow down the website.
* **Script size:** Script size according to CDN.
* **Script size (uncompressed):** Overall size.
* **Last updated:** Date of the script's last update.
The **Engine** section (in gray) should occupy more than 35% of the total weight. If it doesn't, the Performance score below will be **POOR** instead of **OPTIMAL**.
Some additional indicators are provided as guidelines you should follow:
* Script size \< 120 KB
* No experiments (experiments running for more than three months)
* Less than 50 segments
* Less than 50 goals
* Global custom script \< 30 KB
### Request analysis
The **Request analysis** tab allows for easy debugging of all requests.

Add or remove columns by clicking **Add columns**.
### Visits analysis

The **Visits analysis** tab provides information on all visits:
* The number of visits
* The timestamp of the beginning of each visit
* The number of pages viewed during each visit
* The duration of each visit
Add or remove columns by clicking on **Add columns**.
### Code synchronization
You can synchronize Microsoft Visual Studio (VS Code) with the Chrome extension. Synchronization automatically sends updates to Chrome via a websocket between VS Code and the Kameleoon Chrome extension to test JS and CSS code. Chrome then injects the new code into the Kameleoon engine and reloads the page.
Refer to the [VS Code extension article](/developer-docs/developer-tools/vs-code-extension) for more information.
### Custom code injection

To use the Custom Code Injection feature:
1. Open the Kameleoon Chrome extension.
2. Click **Custom code injection** to access the page for managing your custom JavaScript code.
3. Write or paste your code into the text field.
4. Click **Inject code**.
The extension will execute the injected code on the current webpage.
### Tag injection
To inject the Kameleoon tag on a website:
1. Select your environment (development, preview, test, production).
2. Enter the code you want to inject.
3. Click **Inject tag**.
## Options
Two additional options are available.
### Block Kameleoon script
This option is useful for developers that must work on their website without any Kameleoon experiment or personalization running on the page.
### Block Kameleoon tracking request
This option is useful if you do not want your own visits and conversions to impact results.
## Troubleshooting: The extension does not load all data or is not working
In exceptional cases, the Kameleoon Chrome extension requires reinstallation. Follow these steps:
1. Log out of Kameleoon by clicking your avatar in the upper-right corner and logging out.
2. Close all windows and reopen Chrome.
3. [Go here](chrome:/extensions/) and remove the Kameleoon extension.
4. [Download the extension](https://chrome.google.com/webstore/detail/kameleoon/nimncjjomfcjmfnghgaopccmdggjfoam) again.
5. Click **Install**, then navigate to your site.
6. Click **Activate**; the browser redirects you to Kameleoon.
7. Log in to Kameleoon and go to the **My Sites** page. This completes the installation.
8. Close your site and reopen it.
The extension should load properly, and you will see the information displayed.
Please note that if you're not logged out, the installation might not work.
## Web plugin
The web plugin is a "light" version of the Chrome extension that works in other popular browsers, including Safari and Firefox.
The web plugin is responsive and works on mobile devices. Currently, the plugin provides information about experiments, personalizations, segments, custom data, and goal performance metrics.
To use the plugin, add "`/?kameleoonLightExtension=true`" after the site's URL. For example:
`https://www.yourwebsite.com/?kameleoonLightExtension=true`
# Kameleoon MCP server
Source: https://docs.kameleoon.com/developer-docs/developer-tools/mcp-server
Connect AI coding assistants directly to your Kameleoon project to automate experiment and feature flag workflows.
The Kameleoon Model Context Protocol (MCP) server connects AI coding assistants directly to your Kameleoon project, enabling agentic workflows for experiments and feature flags. Beyond reading configurations and pulling variation code, your AI assistant can build and manage experiments, feature flags, goals, segments, and targeting rules, and run the full rollout lifecycle, all from your development environment. Register and authenticate the server to automate your implementation lifecycle, from a winning variation to a gated production rollout.
## Features
After you connect the server, your AI agent can interact with Kameleoon to:
* Discover and inspect experiments, feature flags, goals, segments, and targeting rules.
* Build experiments end to end: create, duplicate, and run the full lifecycle (start, pause, resume, stop, delete).
* Manage feature flags: create, duplicate, delete, toggle per environment, and review the change history.
* Configure flag delivery: add targeted and experimentation rules, custom variations, and typed variables.
* Create and maintain goals and audience segments, and bind segments to experiments.
* Analyze experiment and feature-flag-experiment results, and pull raw variation code (JavaScript and CSS).
* Automate the full implementation lifecycle, from a winning variation to a gated production rollout.
### The primary workflow: Winning experiment to production
The Kameleoon MCP server automates the "last mile" of implementation. Without leaving the IDE, you can instruct your AI assistant to execute the following workflow:
1. Retrieve experiment results and identify the winning variation.
2. Extract the variation's raw code from Kameleoon.
3. Convert the code into native, production-ready code (such as React components) aligned with the existing codebase.
4. Create a feature flag in Kameleoon.
5. Wrap the new implementation behind the feature flag.
6. Enable and validate the feature in production.
## Available tools
The server exposes the tools below, grouped by area. Each tool maps to a single, well-scoped action, so you can compose them into larger workflows (for example: read results, pull code, create a flag, add a rule, enable it).
### Experiments
Build, inspect, and run A/B tests (Web Experiments).
| Tool | Description | Example prompt |
| ----------------------------- | -------------------------------------------------------------------------------------------------------------- | ------------------------------------------------------------------- |
| `experiment_list` | Find experiments by name or ID. Returns paginated summaries (id, name, status, tags). | "List active experiments on site `d1alzzxd7k`." |
| `experiment_get` | Retrieve an experiment's full configuration: variations, traffic split, goals, and targeting. | "Show the configuration for experiment `149640`." |
| `experiment_code_get` | Pull a variation's raw JavaScript, CSS, and custom JSON, plus the experiment's shared common JS and CSS. | "Pull the code for variation 1 of experiment `149640`." |
| `experiment_results_get` | Fetch statistical results: per-variation conversion rates, significance, confidence intervals, and the winner. | "Summarize results for experiment `149640`." |
| `experiment_create` | Create a draft experiment (type, base URL, goals, optional common code). | "Create a CLASSIC experiment `Homepage hero` on site `d1alzzxd7k`." |
| `experiment_duplicate` | Clone an experiment into a new draft, copying variations, code, deviations, and targeting. | "Duplicate experiment `149640`." |
| `experiment_lifecycle_update` | Drive the lifecycle: start, pause, resume, stop, or delete (stop and delete require confirmation). | "Start experiment `149640`." |
### Feature flags
Create and operate feature flags, toggle them per environment, and read their history and results.
| Tool | Description | Example prompt |
| ------------------------------------- | ------------------------------------------------------------------------------------------------------------ | ---------------------------------------------------------- |
| `feature_flag_list` | Find feature flags by key, name, or ID. | "List all feature flags for site `d1alzzxd7k`." |
| `feature_flag_get` | Retrieve a flag's full configuration in an environment: variations, variables, primary goal, and rule chain. | "Show configuration for flag `snake_game`." |
| `feature_flag_create` | Create a flag with default `on` and `off` variations. | "Create a flag `ui_refresh` for site `d1alzzxd7k`." |
| `feature_flag_duplicate` | Clone an existing flag (the copy starts disabled in every environment). | "Duplicate the `new_search` flag." |
| `feature_flag_delete` | Permanently delete a flag and all of its configuration. | "Delete the flag `ui_refresh`." |
| `feature_flag_enable` | Turn the per-environment master switch ON so the SDK evaluates rules. | "Enable `new_search` in production." |
| `feature_flag_disable` | Turn the per-environment master switch OFF (rules are preserved). | "Disable `new_search` in staging." |
| `feature_flag_activity_logs_get` | Read the audit trail of flag changes (who changed what, and when). | "Show the recent change history for our feature flags." |
| `feature_flag_experiment_results_get` | Fetch statistical results for a flag's experimentation rule. | "Get the experiment results for the rule on `new_search`." |
### Flag delivery, variations, and variables
Shape how a flag is delivered, and define the variations and typed variables it serves.
| Tool | Description | Example prompt |
| ------------------------------------------ | ------------------------------------------------------------------------------------------------------- | ------------------------------------------------------- |
| `feature_flag_rule_targeted_create` | Add a targeted delivery rule: serve one variation to a percentage of traffic, with optional scheduling. | "Roll `new_search` out to 20% in production." |
| `feature_flag_rule_experimentation_create` | Add an A/B experimentation rule that splits traffic across variations with statistical tracking. | "A/B test `off` vs `on` 50/50 on `new_search`." |
| `feature_flag_variation_create` | Add a custom variation (a named state of the feature) to a flag. | "Add a `variant_a` variation to `new_search`." |
| `feature_flag_variable_create` | Define a typed variable (BOOLEAN, NUMBER, STRING, JSON, JS, CSS, ENUM) with a default value. | "Add a STRING variable `label` defaulting to `Search`." |
| `feature_flag_variation_variable_set` | Override a variable's value for one specific variation. | "Set `label` to `Find` on `variant_a`." |
### Goals
Create and maintain the conversion goals used by experiments and flags.
| Tool | Description | Example prompt |
| ------------------ | ------------------------------------------------------------------------------------------- | ---------------------------------------------- |
| `goal_list` | Browse goals on a site, with usage counts across experiments, flags, and personalizations. | "List goals for site `d1alzzxd7k`." |
| `goal_get` | Inspect a goal's type configuration, tags, and usage counts. | "Show goal `271552`." |
| `goal_search` | Find a goal by a substring of its name. | "Search goals for `checkout`." |
| `goal_create` | Create a goal of any type (URL, CLICK, SCROLL, PAGE\_VIEWS, TIME\_SPENT, CUSTOM, and more). | "Create a URL goal that matches `/thank-you`." |
| `goal_update` | Edit a goal's name, description, tags, tracking tools, or multiple-conversions setting. | "Rename goal `271552` to `Signup complete`." |
| `goal_update_type` | Switch a goal's type and replace its type-specific configuration (tags are preserved). | "Change goal `271552` to a CLICK goal." |
| `goal_delete` | Permanently delete a goal. | "Delete goal `271552`." |
### Segments
Define and inspect the audiences you target.
| Tool | Description | Example prompt |
| ---------------- | ------------------------------------------------------------------------------------------------------- | -------------------------------------------------- |
| `segment_list` | Browse segments on a site, with usage counts. | "List segments for site `d1alzzxd7k`." |
| `segment_get` | Inspect a segment's condition tree (raw JSON plus a human-readable summary). | "Show segment `200604`." |
| `segment_create` | Create an audience segment from a condition tree (geolocation, device, browser, custom data, and more). | "Create a segment for desktop visitors in France." |
| `segment_delete` | Delete a segment. Blocked by default when the segment is in use (override with force). | "Delete segment `200604`." |
### Sites and targeting rules
Discover your projects and bind segments to experiments.
| Tool | Description | Example prompt |
| ----------------------- | ---------------------------------------------------------------------------------------------------- | ------------------------------------------------- |
| `site_list` | List the sites (projects) you can access, with each site's code, name, and tracking status. | "List my Kameleoon sites." |
| `targeting_rule_list` | List targeting rules on a site. | "List targeting rules for site `d1alzzxd7k`." |
| `targeting_rule_get` | Inspect a single targeting rule (segment, configuration, trigger, and the experiment it belongs to). | "Show targeting rule `118605`." |
| `targeting_rule_create` | Bind a segment to an experiment to control who participates. | "Target experiment `149640` to segment `200604`." |
## Claude Code integration
### Step 1: Register the server
To register the server for your user profile (making it available in all projects), open a terminal and run the following command:
```bash theme={null}
claude mcp add --scope user kameleoon -- npx -y mcp-remote@0.1.37 https://mcp.kameleoon.com/mcp 35535 --static-oauth-client-metadata '{ "scope": "openid" }'
```
To register the server only for the current project (which adds a `.mcp.json` file to your repository for team sharing), run:
```bash theme={null}
claude mcp add kameleoon -- npx -y mcp-remote@0.1.37 https://mcp.kameleoon.com/mcp 35535 --static-oauth-client-metadata '{ "scope": "openid" }'
```
Verify that Claude added the server:
```bash theme={null}
claude mcp list
```
**Expected output:** `kameleoon: ... - ✗ Failed to connect` (This is normal because you have not completed authentication yet).
### Step 2: Complete OAuth authentication
In the same terminal, trigger the login flow:
```bash theme={null}
npx -y mcp-remote@0.1.37 https://mcp.kameleoon.com/mcp 35535 --static-oauth-client-metadata '{ "scope": "openid" }'
```
1. The command automatically opens a browser tab. If it doesn't, copy the URL printed in the terminal and open it manually.
2. Sign in to your Kameleoon account.
3. Click **Authorize**.
4. When the browser displays a success message, press `Ctrl+C` in your terminal.
Verify the connection:
```bash theme={null}
claude mcp list
```
**Expected output:** `kameleoon: ... - ✓ Connected`
### Step 3: Start a new Claude Code session
Claude Code makes tools from newly added MCP servers available only in sessions that you start after registering the server. Close your current Claude Code chat and open a new one.
### Step 4: Verify the connection
In a new Claude Code conversation, try the following prompts:
* "List my Kameleoon feature flags."
* "What experiments are active on site X?"
* "Show me the status of experiment Y."
* "Show me the code for variation 1 of experiment Z."
### Claude troubleshooting
| Symptom | Cause | Fix | |
| --------------------------------------------- | ---------------------------------------------- | ---------------------------------------------------- | ---------------------------------------------- |
| Browser doesn't open. | Auto-launch failed. | Copy the URL from the terminal and open it manually. | |
| Connection refused on port 35535. | Port is in use. | Run \`netstat -ano | findstr :35535\`, kill the process, and retry. |
| Failed to connect after OAuth. | Token did not persist. | Re-run the Step 2 command to refresh your token. | |
| Tools are not visible in Claude. | Session started before adding the server. | Start a new Claude Code conversation. | |
| `mcpServers` key rejected in `settings.json`. | Wrong file; Claude Code does not use that key. | Use the `claude mcp add` command instead. | |
| Auth error after a long period. | OAuth token expired. | Re-run the Step 2 command. | |
## Antigravity integration
### Quick setup
Paste the following self-starter prompt directly into your Antigravity chat to connect automatically:
> "Connect to the Kameleoon MCP production server. The endpoint is `https://mcp.kameleoon.com/mcp`, using mcp-remote\@0.1.37 on port 35535 with the openid scope. Authenticate by running the npx mcp-remote command to trigger my browser, then verify the connection."
### Manual configuration
Edit the configuration file at `~/.gemini/antigravity/mcp_config.json` and add the following JSON block:
```json theme={null}
"kameleoon": {
"command": "npx",
"args": [
"-y",
"mcp-remote@0.1.37",
"https://mcp.kameleoon.com/mcp",
"35535",
"--static-oauth-client-metadata",
"{ \"scope\": \"openid\" }"
]
}
```
## Codex integration
### Quick setup
Paste the following self-starter prompt into your Codex chat:
> "Configure the Kameleoon MCP server at `https://mcp.kameleoon.com/mcp`. Use port 35535 for callback. Once configured, run the login command to trigger my browser and then list my feature flags."
### Manual configuration
Add the following block to `~/.codex/config.toml`. Create the file if it does not exist:
```toml theme={null}
[mcp_servers.kameleoon]
command = "npx"
args = ["-y", "mcp-remote@0.1.37", "https://mcp.kameleoon.com/mcp",
"35535", "--static-oauth-client-metadata",
"{ \"scope\": \"openid\" }"]
```
## Authenticate the connection
The Kameleoon MCP server uses OAuth. Run the following command in your terminal to start the authorization flow:
```bash theme={null}
npx -y mcp-remote@0.1.37 https://mcp.kameleoon.com/mcp 35535 \
--static-oauth-client-metadata '{ "scope": "openid" }'
```
**Expected behavior:**
1. The browser automatically opens a window.
2. Click **Authorize** on the Kameleoon login page.
3. Kameleoon completes the local callback on port 35535.
4. The terminal confirms that the proxy connected successfully.
A successful connection outputs text similar to the following:
```
Connected to remote server using StreamableHTTPClientTransport
Local STDIO server running
Proxy established successfully between local STDIO and remote StreamableHTTPClientTransport
```
## Verify tool operations
After you authenticate, run the following checks to confirm the tools work as expected:
1. **List available tools:** Confirm that `tools/list` succeeds and returns the Kameleoon tools. Ensure the output includes the tools listed in the tools table, such as `experiment_code_get`, `feature_flag_list`, and `feature_flag_create`.
2. **Retrieve feature flags:** Run `feature_flag_list(siteCode = "d1alzzxd7k")`. A successful response returns a list of feature flags for the specified site.
3. **Retrieve experiment results:** Run `experiment_results_get(experimentId = 149640)`. A successful response includes the experiment name, site code, type, and status.
## Cursor integration
Cursor integrates MCP tools directly into the IDE Chat sidebar, which makes them available while you code.
### Option 1: Configure via Cursor UI (Recommended)
1. Open Cursor Settings (`Cmd` + `Shift` + `J` on macOS, `Ctrl` + `Shift` + `J` on Windows/Linux).
2. Navigate to **Features** > **MCP Servers** > **+ Add New MCP Server**.
3. Set the **Name** to `kameleoon`.
4. Set the **Type** to `command`.
5. Enter the following string as the **Command**:
```bash theme={null}
npx -y mcp-remote@0.1.37 https://mcp.kameleoon.com/mcp 35535 --static-oauth-client-metadata '{ "scope": "openid" }'
```
6. Save the configuration.
### Option 2: Configure via mcp.json (Advanced)
Open `~/.cursor/mcp.json` (create the file if it does not exist) and add the following entry to the `mcpServers` object:
```json theme={null}
{
"mcpServers": {
"kameleoon": {
"command": "bash",
"args": [
"-lc",
"npx -y mcp-remote@0.1.37 https://mcp.kameleoon.com/mcp 35535 --static-oauth-client-metadata '{ \"scope\": \"openid\" }'"
]
}
}
}
```
Restart Cursor after you edit the file manually.
## Sample prompts for developer workflows
After you connect the Kameleoon MCP server, use prompts like the following in your IDE:
* "List the Kameleoon MCP tools available in this session."
* "Show me all feature flags for site code `d1alzzxd7k`."
* "Get the details for feature flag new\_search on site `d1alzzxd7k`."
* "Fetch experiment results for experiment `149640` and summarize the current status."
* "Pull the variation code for experiment `` and variation ``."
For more advanced workflows, try the following prompts:
* "Inspect feature flag new\_search for site `d1alzzxd7k` and explain what environments and variations it currently has."
* "Summarize experiment `149640` for an engineer. Include status, site code, winner state, and whether any variation data is available."
* "List the active feature flags for site `d1alzzxd7k` and point out any flags that look like stale candidates."
* "Retrieve the code for variation `` in experiment `` and explain what frontend behavior it changes."
* "Create a new feature flag named `` with key `` for site `d1alzzxd7k`."
* "Turn on feature flag `` in the staging environment for site `d1alzzxd7k`."
* "Turn off feature flag `` in the production environment for site `d1alzzxd7k`."
### Advanced workflow: End-to-end automation
To experience the full capability of the MCP server, use a comprehensive system prompt. The following example demonstrates how to transpose winning variation code into React components, which is intended primarily for React applications. It instructs the AI agent to handle the entire implementation lifecycle, from retrieving winning results to generating production-ready native code gated behind a new feature flag, and then rolling it out and validating it, all through the MCP tools.
Paste the following prompt into your AI assistant:
> You are integrating a Kameleoon A/B experiment into a production codebase by converting a Kameleoon PBX variation into maintainable native React code.
>
> **Context**
>
> * Experiment ID: 373001
> * Mode: strict\_winner\_only (default) or manual\_variation\_conversion (Fallback variation: 1266752)
>
> **Rules**
>
> * Inspect the repo first and follow existing conventions (structure, styling, routing, tests, feature flags).
> * Do not copy experiment code directly. Re-implement using idiomatic React (components, hooks, state).
> * Do not keep experiment-specific logic (IDs, Kameleoon APIs) in production code.
> * Prefer existing feature flag systems for rollout. Use the Kameleoon MCP feature-flag tools to create and gate the flag.
> * Avoid DOM manipulation (no querySelector, MutationObserver, etc.).
> * Do not add new dependencies unless necessary.
> * Do not modify the source experiment's lifecycle (do not stop or delete it) unless explicitly asked.
> * Be explicit if something is unclear.
>
> **Workflow steps**
>
> 1. Get experiment results (`experiment_results_get`).
> 2. Decide integration:
> * Mode A (default: `strict_winner_only`): Proceed only if `winner.status == "clear_winner"`.
> * Mode B (manual): Use the fallback variation provided in the context.
> 3. Get the variation code and the prompt that was used (`experiment_code_get`).
> 4. Convert the code to React (convert JS code to React components/hooks, and CSS code to the project styling system).
> 5. Create a feature flag "pbx-winning-experiment-373001" (`feature_flag_create`). If the implementation needs more than a simple on/off, add variations and typed variables (`feature_flag_variation_create`, `feature_flag_variable_create`, `feature_flag_variation_variable_set`), then gate the converted code behind the flag.
> 6. Roll out and validate: add a delivery rule (`feature_flag_rule_targeted_create` for a staged percentage rollout, or `feature_flag_rule_experimentation_create` to keep measuring), enable the flag in the target environment (`feature_flag_enable`), and confirm the final configuration with `feature_flag_get`.
## Tool parameters reference
Use the exact tool names and parameter names returned by `tools/list`. The live MCP schema supports the following parameters.
### Experiments
| Tool | Required parameters | Optional parameters |
| ----------------------------- | ------------------------------------------------- | ------------------------------------------------------------------------------------------------------------------------------------------------------------------------------------------------------------ |
| `experiment_list` | None | `siteCode`, `filterQuery`, `page`, `perPage`, `sortField`, `sortOrder` |
| `experiment_get` | `experimentId` | None |
| `experiment_code_get` | `experimentId`, `variationId` | None |
| `experiment_results_get` | `experimentId` | None |
| `experiment_create` | `payload` (`siteCode`, `name`, `type`, `baseURL`) | `payload`: `mainGoalId`, `goals`, `tags`, `description`, `commonJavaScriptCode`, `commonCssCode`, `trafficAllocationMethod`, `collectingDataEnabled`, `multipleTestingCorrection`, `executeCodeForReference` |
| `experiment_duplicate` | `experimentId` | None |
| `experiment_lifecycle_update` | `experimentId`, `status` | `confirm` (required for `stopped` and `deleted`), `reason` |
### Feature flags
| Tool | Required parameters | Optional parameters |
| ------------------------------------- | ---------------------------------------------------------- | ---------------------------------------------------------------------- |
| `feature_flag_list` | None | `siteCode`, `filterQuery`, `page`, `perPage`, `sortField`, `sortOrder` |
| `feature_flag_get` | `featureKey`, `siteCode` | `environmentKey` (`*` for all environments) |
| `feature_flag_create` | `siteCode`, `featureKey`, `name` | `description` |
| `feature_flag_duplicate` | `featureKey`, `siteCode` | None |
| `feature_flag_delete` | `featureKey`, `siteCode` | None |
| `feature_flag_enable` | `featureKey`, `siteCode`, `environmentKey` | None |
| `feature_flag_disable` | `featureKey`, `siteCode`, `environmentKey` | None |
| `feature_flag_activity_logs_get` | None | `type`, `sortKey` (`timestamp`), `sortOrder`, `page`, `perPage` |
| `feature_flag_experiment_results_get` | `featureKey`, `siteCode`, `environmentKey`, `experimentId` | None |
### Flag delivery, variations, and variables
| Tool | Required parameters | Optional parameters |
| ------------------------------------------ | ------------------------------------------------------------------------------------------------------------------------------------ | ------------------- |
| `feature_flag_rule_targeted_create` | `siteCode`, `featureKey`, `environmentKey`, `variationKey`, `exposition`, `releaseDateTime`, `timeZone` | `ruleName` |
| `feature_flag_rule_experimentation_create` | `siteCode`, `featureKey`, `environmentKey`, `controlVariationKey`, `trafficAllocations`, `exposition`, `releaseDateTime`, `timeZone` | `ruleName` |
| `feature_flag_variation_create` | `siteCode`, `featureKey`, `variationKey`, `variationName` | None |
| `feature_flag_variable_create` | `siteCode`, `featureKey`, `variableKey`, `variableType`, `defaultValue` | None |
| `feature_flag_variation_variable_set` | `siteCode`, `featureKey`, `variationKey`, `variableKey`, `value` | None |
### Goals
| Tool | Required parameters | Optional parameters |
| ------------------ | ---------------------------------------------------------------- | ---------------------------------------------------------------------------------------------------------------------------------------------------------------------------------------- |
| `goal_list` | None | `siteCode`, `page`, `perPage` |
| `goal_get` | `goalId` | None |
| `goal_search` | `query` | `siteCode`, `page`, `perPage` |
| `goal_create` | `payload` (`name`, `siteCode`, `type`, `hasMultipleConversions`) | `payload`: type-specific params (`matchString`, `matchType`, `scrollType`, `scrollValue`, `timeSeconds`, `pageViews`, `url`, `jsCode`), `tags`, `description`, `status`, `trackingTools` |
| `goal_update` | `goalId` | `name`, `description`, `tags`, `trackingTools`, `hasMultipleConversions` |
| `goal_update_type` | `goalId`, `type` | type-specific params |
| `goal_delete` | `goalId` | None |
### Segments
| Tool | Required parameters | Optional parameters |
| ---------------- | ------------------- | -------------------------------------- |
| `segment_list` | None | `siteCode`, `query`, `page`, `perPage` |
| `segment_get` | `segmentId` | None |
| `segment_create` | `name`, `siteCode` | `conditionDataTree`, `description` |
| `segment_delete` | `segmentId` | `force` |
### Sites and targeting rules
| Tool | Required parameters | Optional parameters |
| ----------------------- | -------------------------------------------------- | ------------------------------------------------------------------------------- |
| `site_list` | None | None |
| `targeting_rule_list` | None | `siteCode`, `page`, `perPage` |
| `targeting_rule_get` | `targetingRuleId` | None |
| `targeting_rule_create` | `segmentConfiguration`, `siteCode`, `experimentId` | `segmentId`, `triggerConfiguration`, `triggerId`, `targetingConfigurationParam` |
**Accepted enum values:** `experiment_lifecycle_update.status` is `started`, `resumed`, `paused`, `stopped`, or `deleted`. Experiment `type` is `AI`, `CLASSIC`, `DEVELOPER`, `MVT`, `PROMPT`, or `SDK_HYBRID`. Goal `type` is `CLICK`, `CUSTOM`, `SCROLL`, `PAGE_VIEWS`, `URL`, `TIME_SPENT`, `RETENTION_RATE`, `WAREHOUSE`, or `RATIO_METRICS`. `variableType` is `BOOLEAN`, `NUMBER`, `STRING`, `JSON`, `JS`, `CSS`, or `ENUM`. `trafficAllocations` is a comma-separated `variationKey:percentage` string that sums to 100 (for example `off:50,on:50`). `releaseDateTime` is an ISO-8601 local datetime without offset (for example `2026-07-01T09:00:00`) and `timeZone` is an IANA zone (for example `Europe/Paris` or `UTC`).
For environment-specific queries, pass `environmentKey = "production"` or `environmentKey = "staging"` where supported.
### Prompting tips
* Include the site code when you work with feature flags.
* Include the experiment ID when you query experiments or experiment results.
* Include both `experimentId` and `variationId` when you request variation code.
* Explicitly name the target environment when you ask the agent to enable or disable a feature flag.
* Request a plain-English summary if you want your AI agent to interpret the MCP response rather than just retrieving the raw data.
## General troubleshooting
### Port 35535 is already in use
If authentication fails with an `EADDRINUSE` error, another process already listens on the OAuth callback port.
* **Cause:** A stale `mcp-remote` process remains active from a previous authentication attempt.
* **Fix:** Stop the stale process that is using port 35535, then rerun the OAuth command.
### MCP server does not appear in Codex chat
Codex might not hot-reload newly added MCP servers into an already-running thread.
* **Fix:** Refresh Codex or start a new session after you update `config.toml`.
### Browser flow does not complete
If the OAuth browser window opens but authorization does not finish:
* Confirm that you clicked the **Authorize** button on the Kameleoon login page.
* Check that your browser or system settings do not block `localhost` callbacks.
* Manually open the callback URL if your browser fails to launch it automatically.
### Headless or remote agents fail to authenticate
Remote or headless agents (such as cloud-hosted Codex) cannot complete the browser-based authorization step.
* **Fix:** Use a desktop version of your tool instead.
### npx command not found
If the command fails with a "not found" error, ensure that `npx` is available on your system path. Node.js versions 5.2 and later include `npx` by default.
# VS Code extension
Source: https://docs.kameleoon.com/developer-docs/developer-tools/vs-code-extension
Write and test Kameleoon experiment code directly in Visual Studio Code with live injection via the Kameleoon Chrome extension.
As experiments become more complex, ensuring they work effectively and remain bug-free presents challenges. Previously, developers had two options:
* Write JavaScript code directly in Kameleoon and use the Previsualization feature to check it.
* Copy and paste code into the Chrome developer console.
Both methods were cumbersome, lowering productivity for developers and sometimes failing to match production conditions or showing differences when simulating experiment behavior.
Developers can now write JavaScript or TypeScript code in **Microsoft Visual Studio Code** using the Kameleoon Visual Studio Code extension. The extension automatically detects updates and sends them to the browser via Kameleoon’s Chrome extension. Chrome then injects the new code into the Kameleoon engine and automatically reloads the page. Visual Studio Code is the first development environment to integrate with Kameleoon; others may follow based on client requests.
## Installation
You can now install the extension from the [Visual Studio marketplace](https://marketplace.visualstudio.com/items?itemName=Kameleoon.kameleoon).
[Visual Studio marketplace](https://storage.googleapis.com/kameleoon-storage-documentation/developers/images/VS-Code-Extension-1.png)
## Getting started
The first step involves initializing the VS Code project. To initialize, go to the command palette and execute the **Kameleoon - Initialize** command.
Press *Ctrl+Shift+P* to bring up the *Command Palette* then start typing "Kameleoon - Initialize" to filter and display the *Kameleoon - Initialize* command.
Provide [Kameleoon Automation API credentials](/user-manual/account-and-team-management/users-and-teams/api-credentials) to allow the bridge to authenticate and communicate with the platform. Once you obtain credentials from the [profile](/user-manual/account-and-team-management/users-and-teams/api-credentials), add them to the **credentials.json** file at the root of the repository:
```json theme={null}
{
"client_id": "YOUR_CLIENT_ID",
"client_secret": "YOUR_CLIENT_SECRET"
}
```
Finally, install the required NodeJS modules by running this command:
```shell theme={null}
npm install
```
### Import from the Kameleoon account
Import all projects, experiments, personalizations, variations, segments, goals, and custom data using the **Kameleoon - Import all projects** command.
If the Kameleoon account is too large to load everything at once, use the **Kameleoon - Import project** command to select a single project to import.
## Usage
### Import entities
You can import an entity using one of the following commands:
```shell theme={null}
Kameleoon - Import all projects
Kameleoon - Import project
Kameleoon - Import experiment
Kameleoon - Import personalization
Kameleoon - Import segment
Kameleoon - Import custom data
Kameleoon - Import goal
```
### Create entities
You can create an entity using one of the following commands:
```shell theme={null}
Kameleoon - Create experiment
Kameleoon - Create personalization
Kameleoon - Create variation
Kameleoon - Create goal
Kameleoon - Create segment
Kameleoon - Create custom data
```
### Duplicate entities
You can duplicate an entity using one of the following commands:
```shell theme={null}
Kameleoon - Duplicate experiment
Kameleoon - Duplicate personalization
Kameleoon - Duplicate variation
Kameleoon - Duplicate goal
Kameleoon - Duplicate segment
Kameleoon - Duplicate custom data
```
### Fetch entities
You can update your local entity using one of the following commands:
```
Kameleoon - Fetch projectKameleoon - Fetch experimentKameleoon - Fetch personalizationKameleoon - Fetch segmentKameleoon - Fetch custom dataKameleoon - Fetch goal
```
### Deploy entities
You can deploy your local entity using one of the following commands:
```shell theme={null}
Kameleoon - Fetch project
Kameleoon - Fetch experiment
Kameleoon - Fetch personalization
Kameleoon - Fetch segment
Kameleoon - Fetch custom data
Kameleoon - Fetch goal
```
### Synchronize
```shell theme={null}
Kameleoon - Synchronize variation code to Chrome
Kameleoon - Synchronize common code to Chrome
Kameleoon - Synchronize global code to Chrome
Kameleoon - Remove synchronization
```
### Kameleoon Campaigns view
The extension provides a view called **Kameleoon Campaigns**. This view is available in the Explorer panel.
It allows you to see all your projects and campaigns, along with their current state and associated variations.
[Kameleoon Campaigns view](https://storage.googleapis.com/kameleoon-storage-documentation/developers/images/VS-Code-Extension-2.gif)
## Technical reference
### Entities
The following table provides an overview of managing entities using the VS Code extension:
| Project | Experiment | Personalization | Variation | Segment | Goal | Custom data |
| --------------------- | ---------- | --------------- | --------- | ------------------------------------------------------------------- | ---- | ----------- |
| \[entity].info.json | ✓ | ✓ | ✓ | ✓ | ✓ | ✓ |
| \[entity].config.json | X | ✓ | ✓ | ✓ | ✓ | ✓ |
| Has its own folder | ✓ | ✓ | ✓ | ✓ | ✓ | ✓ |
| Can be created | X | ✓ | ✓ | ✓ | ✓ | ✓ |
| Can be imported | ✓ | ✓ | ✓ | X | ✓ | ✓ |
| Can be updated | ✓ | ✓ | ✓ | Not individually; use fetch commands for experiment/personalization | ✓ | ✓ |
| Can be deleted | X | X | X | X | X | X |
### Project
The /projects folder contains the projects instead of the root, due to the /custom-data folder.
\[projects folder]\([https://storage.googleapis.com/kameleoon-storage-documentation/developers/images/VS-Code-Extension-3.png](https://storage.googleapis.com/kameleoon-storage-documentation/developers/images/VS-Code-Extension-3.png)
Each project has its own **proj.info.json** file containing IDs (**site ID** and **sitecode**). A project doesn’t have a **proj.config.json** file because the VS Code extension does not support project creation.
Each project can contain experiments, personalizations, custom data, goals, segments, and the global script.
#### Global script
The global script is contained under the **/projects/\*/global** folder.
\[Global script]\([https://storage.googleapis.com/kameleoon-storage-documentation/developers/images/VS-Code-Extension-4.png](https://storage.googleapis.com/kameleoon-storage-documentation/developers/images/VS-Code-Extension-4.png)
Because each project can have only one global script, the global script folder does not contain any **info.json** or **config.json** file. It only contains the script itself.
#### Experiment
Experiments are contained under the **/projects/\*/experiments** folder.
[Experiments folder](https://storage.googleapis.com/kameleoon-storage-documentation/developers/images/VS-Code-Extension-4.png)
Each experiment has its own folder.
Each experiment has its own **exp.config.json** and **exp.info.json** files.
By default, the extension creates the experiment’s folder using the same naming convention from previous versions, but also creates the **exp.info.json** and **exp.config.json** files. The folder name is not important because only the configuration files are used.
#### Personalization
Personalizations are contained under the **/projects/\*/personalizations** folder.
[Personalization folder](https://storage.googleapis.com/kameleoon-storage-documentation/developers/images/VS-Code-Extension-5.png)
Each personalization has its own folder.
Each personalization has its own **perso.config.json** and **perso.info.json** files.
By default, the extension creates the personalization folder using the same naming convention from previous versions, but also creates the **perso.info.json** and **perso.config.json** files. The folder name is not important because only the configuration files are used.
#### Variation
Variations are contained under the associated experiment or personalization folder.
[Variation folder](https://storage.googleapis.com/kameleoon-storage-documentation/developers/images/VS-Code-Extension-6.png)
Each variation has its own folder (**even in a personalization**).
Each variation has its own **var.config.json** and **var.info.json** files.
By default, the extension creates the variation’s folder using the same naming convention from previous versions, but also creates the **var.info.json** and **var.config.json** files. The folder name is not important because only the configuration files are used.
#### Segment
Segments are contained under the **/projects/\*/segments** folder.
[Segments folder](https://storage.googleapis.com/kameleoon-storage-documentation/developers/images/VS-Code-Extension-7.png)
Each segment has its own folder.
Each segment has its own **segment.config.json** and **segment.info.json** files.
By default, the extension creates the segment’s folder using the same naming convention from previous versions, but also creates the **segment.info.json** and **segment.config.json** files. The folder name is not important because only the configuration files are used.
#### Goal
Goals are contained under the **/projects/\*/goals** folder.
[Goals folder](https://storage.googleapis.com/kameleoon-storage-documentation/developers/images/VS-Code-Extension-8.png)
Each goal has its own folder.
Each goal has its own **goal.config.json** and **goal.info.json** files.
By default, the extension creates the goal’s folder using the same naming convention from previous versions, but also creates the **goal.info.json** and **goal.config.json** files. The folder name is not important because only the configuration files are used.
#### Custom data
Custom data are contained under the **/projects/\*/custom-data** folder.
[Custom-data folder](https://storage.googleapis.com/kameleoon-storage-documentation/developers/images/VS-Code-Extension-9.png)
Each custom data has its own folder.
Each custom data has its own **custom.config.json** and **custom.info.json** files.
By default, the extension creates the custom data’s folder using the same naming convention from previous versions, but also creates the **custom.info.json** and **custom.config.json** files. The folder name is not important because only the configuration files are used.
### Commands
#### Initialization commands
##### Kameleoon - Initialize
**Kameleoon - Initialize** is the first command to execute at the beginning of a new VS Code project.
This command will initialize the Visual Studio Code project by creating the following files:
```
credentials.jsongulpfile.jspackage.jsonREADME.md
```
After the command is executed, the **credential.json** file will be opened in the editor.
##### Accessibility
| Command | Right-click menu | Command Palette |
| ---------------------- | ---------------- | --------------- |
| Kameleoon - Initialize | X | ✓ |
#### Importation commands
Importation commands import missing entities. If the entity folder already exists, the command will not import it. Importation commands apply when importing a new entity. Use fetch commands to update entities to the latest versions.
##### Kameleoon - Import all projects
This command creates the /projects folder and imports all projects, creating each project folder, subfolders, and files.
##### Accessibility
| Command | Right-click menu | Command Palette |
| ------------------------------- | ----------------------------------- | --------------- |
| Kameleoon - Import all projects | Right click on the /projects folder | ✓ |
##### Kameleoon - Import project
This command will import a specific project under the **/projects** folder, and thus create the folders and files for every entity associated with it.
##### Accessibility
| Command | Right-click menu | Command Palette |
| -------------------------- | ---------------- | ------------------------------- |
| Kameleoon - Import project | ✕ | Run the command and pick a site |
##### Kameleoon - Import experiment
This command will import a specific experiment under the project, and thus create the experiment folders and files (including **exp.info.json** and **exp.config.json** files and the variations).
##### Accessibility
| Command | Right-click menu | Command Palette |
| ----------------------------- | ---------------- | ------------------------------- |
| Kameleoon - Import experiment | ✕ | Run the command and enter an ID |
##### Kameleoon - Import personalization
This command will import a specific personalization under the project, and thus create the personalization folders and files (including **perso.info.json** and **perso.config.json** files and the unique variation).
##### Accessibility
| Command | Right-click menu | Command Palette |
| ---------------------------------- | ---------------- | ------------------------------- |
| Kameleoon - Import personalization | ✕ | Run the command and enter an ID |
##### Kameleoon - Import goal
This command will import a specific goal under the project, and thus create the goal folders and files (**goal.config.json** and **goal.info.json**).
##### Accessibility
| Command | Right-click menu | Command Palette |
| ----------------------- | ---------------- | ------------------------------- |
| Kameleoon - Import goal | ✕ | Run the command and enter an ID |
##### Kameleoon - Import segment
This command will import a specific goal under the project, and thus create the segment folders and files (**segment.config.json** and **segment.info.json**).
##### Accessibility
| Command | Right-click menu | Command Palette |
| -------------------------- | ---------------- | ------------------------------- |
| Kameleoon - Import segment | ✕ | Run the command and enter an ID |
##### Kameleoon - Import custom data
This command will import a specific custom data under the project, and thus create the custom data folders and files (**custom.config.json** and **custom.info.json**).
##### Accessibility
| Command | Right-click menu | Command Palette |
| ------------------------------ | ---------------- | ------------------------------- |
| Kameleoon - Import custom data | ✕ | Run the command and enter an ID |
Fetch commands are available via the right-click menu on an entity folder containing a valid **\[entity-prefix].info.json** file with an ID, nested in the respective common entity folder. Fetch commands completely overwrite entity files using the API response.
| Command | Right-click menu | Command Palette | Command folder | Info file |
| --------------------------------- | ----------------------------------- | --------------- | ----------------------------- | ----------------- |
| Kameleoon - Fetch project | Right click on a project folder | ✕ | /projects | proj.info.json |
| Kameleoon - Fetch experiment | Right click on experiment folder | ✕ | /projects/\*/experiments | exp.info.json |
| Kameleoon - Fetch personalization | Right click on experiment folder | ✕ | /projects/\*/personalizations | perso.info.json |
| Kameleoon - Fetch segment | Right click on a segment folder | ✕ | /projects/\*/segments | segment.info.json |
| Kameleoon - Fetch goal | Right click on a goal folder | ✕ | /projects/\*/goals | goal.info.json |
| Kameleoon - Fetch custom data | Right click on a custom data folder | ✕ | /projects/\*/custom-data | custom.info.json |
##### Kameleoon - Fetch project
This command overwrites project files and folders (including experiments, personalizations, variations, segments, custom data, and global script) with the latest version. This command also creates files and folders for experiments, personalizations, variations, segments, custom data, and global scripts if entities or files are missing.
##### Accessibility
| Command | Right-click menu | Command Palette |
| ------------------------- | ------------------------------- | --------------- |
| Kameleoon - Fetch project | Right click on a project folder | ✕ |
##### Kameleoon - Fetch experiment
This command overwrites experiment files and folders (including variations) with the latest version. This command also creates variation folders and files if variations or files are missing.
##### Accessibility
| Command | Right-click menu | Command Palette |
| ---------------------------- | ----------------------------------- | --------------- |
| Kameleoon - Fetch experiment | Right click on an experiment folder | ✕ |
##### Kameleoon - Fetch personalization
This command overwrites personalization files and folders (including the unique variation) with the latest version. This command also creates variation files and folders if they are missing.
##### Accessibility
| Command | Right-click menu | Command Palette |
| --------------------------------- | --------------------------------------- | --------------- |
| Kameleoon - Fetch personalization | Right click on a personalization folder | ✕ |
##### Kameleoon - Fetch segment
This command will overwrite your segment files and folders to the last version.
##### Accessibility
| Command | Right-click menu | Command Palette |
| ------------------------- | ------------------------------- | --------------- |
| Kameleoon - Fetch segment | Right click on a segment folder | ✕ |
##### Kameleoon - Fetch goal
This command will overwrite your goal files and folders to the last version.
##### Accessibility
| Command | Right-click menu | Command Palette |
| ---------------------- | ---------------------------- | --------------- |
| Kameleoon - Fetch goal | Right click on a goal folder | ✕ |
##### Kameleoon - Fetch custom data
This command will overwrite your custom data files and folders to the last version.
##### Accessibility
| Command | Right-click menu | Command Palette |
| ----------------------------- | ----------------------------------- | --------------- |
| Kameleoon - Fetch custom data | Right click on a custom data folder | ✕ |
#### Creation commands
##### Kameleoon - Create experiment
This command will create a new experiment under the project, along with the experiment folders and files (including **exp.info.json** and **exp.config.json** files and the first variation) as it is described in this document.
##### Accessibility
| Command | Right-click menu | Command Palette |
| ----------------------------- | -------------------------------------- | --------------- |
| Kameleoon - Create experiment | Right click on the /experiments folder | ✓ |
##### Kameleoon - Create variation
This command will create a new variation under the experiment along with the variation folder and files (including **var.info.json** and **var.config.json files**) as it is described in this document.
##### Accessibility
| Command | Right-click menu | Command Palette |
| ---------------------------- | --------------------------------------- | --------------- |
| Kameleoon - Create variation | Right click on the an experiment folder | ✕ |
##### Kameleoon - Create personalization
This command will create a new personalization under the project, along with the personalization folders and files (including **perso.info.json** and **perso.config.json** files and the unique variation) as it is described in this document.
##### Accessibility
| Command | Right-click menu | Command Palette |
| ---------------------------------- | ------------------------------------------- | --------------- |
| Kameleoon - Create personalization | Right click on the /personalizations folder | ✓ |
##### Kameleoon - Create goal
This command will create a new goal under the project, along with the goal folder and files (including **goal.info.json** and **goal.config.json files**) as it is described in this document.
##### Accessibility
| Command | Right-click menu | Command Palette |
| ----------------------- | -------------------------------- | --------------- |
| Kameleoon - Create goal | Right click on the /goals folder | ✓ |
##### Kameleoon - Create segment
This command will create a new segment under the project, along with the segment folder and files (including **seg.info.json** and **seg.config.json files**) as it is described in this document.
##### Accessibility
| Command | Right-click menu | Command Palette |
| -------------------------- | ----------------------------------- | --------------- |
| Kameleoon - Create segment | Right click on the /segments folder | ✓ |
##### Kameleoon - Create custom data
This command will create a new custom data in the Kameleoon account and in the **/custom-data** folder, including the custom data’s folder and files (including **custom.info.json** and **custom.config.json** files) as it is described in this document.
##### Accessibility
| Command | Right-click menu | Command Palette |
| ------------------------------ | -------------------------------------- | --------------- |
| Kameleoon - Create custom data | Right click on the /custom-data folder | ✓ |
#### Duplication commands
##### Kameleoon - Duplicate experiment
This command will duplicate an experiment under the same project. It duplicates the experiment folders and files but with a different id and name.
##### Accessibility
| Command | Right-click menu | Command Palette |
| -------------------------------- | ------------------------------------------- | --------------- |
| Kameleoon - Duplicate experiment | Right click on a specific experiment folder | ✕ |
##### Kameleoon - Duplicate variation
This command will duplicate a variation under the same experiment. It duplicates the variation folders and files but with a different id and name.
##### Accessibility
| Command | Right-click menu | Command Palette |
| ------------------------------- | ------------------------------------------ | --------------- |
| Kameleoon - Duplicate variation | Right click on a specific variation folder | ✕ |
##### Kameleoon - Duplicate personalization
This command will duplicate a personalization under the same project. It duplicates the personalization folders and files but with a different id and name.
##### Accessibility
| Command | Right-click menu | Command Palette |
| ------------------------------------- | ------------------------------------------------ | --------------- |
| Kameleoon - Duplicate personalization | Right click on a specific personalization folder | ✕ |
##### Kameleoon - Duplicate segment
This command will duplicate a segment under the same project. It duplicates the segment folders and files but with a different id and name.
##### Accessibility
| Command | Right-click menu | Command Palette |
| ----------------------------- | ---------------------------------------- | --------------- |
| Kameleoon - Duplicate segment | Right click on a specific segment folder | ✕ |
##### Kameleoon - Duplicate goal
This command will duplicate a goal under the same project. It duplicates the goal folders and files but with a different id and name.
##### Accessibility
| Command | Right-click menu | Command Palette |
| -------------------------- | ------------------------------------- | --------------- |
| Kameleoon - Duplicate goal | Right click on a specific goal folder | ✕ |
##### Kameleoon - Duplicate custom data
This command will duplicate a custom data under the same project. It duplicates the custom data folders and files but with a different id and name.
##### Accessibility
| Command | Right-click menu | Command Palette |
| --------------------------------- | -------------------------------------------- | --------------- |
| Kameleoon - Duplicate custom data | Right click on a specific custom data folder | ✕ |
Deployment commands push changes to production. Deploying or synchronizing any script file (JS, TS, CSS, SCSS) prompts the extension to build and save the compiled code in the **\_build** folder.
##### Kameleoon - Deploy global code
This command will update the global code in production. The deployment of the global code is based on the project’s **proj.info.json** file.
##### Accessibility
| Command | Right-click menu | Command Palette |
| ------------------------------ | ------------------------------------------------------ | --------------- |
| Kameleoon - Deploy global code | Right click on a global folder or on its index.js file | ✕ |
##### Kameleoon - Deploy experiment
This command will update the experiment in production, based on **exp.config.json**, **exp.info.json**, **common.js**, **common.css**, and every nested variation folder.
##### Accessibility
| Command | Right-click menu | Command Palette |
| ----------------------------- | ------------------------------------------- | --------------- |
| Kameleoon - Deploy experiment | Right click on a specific experiment folder | ✕ |
##### Kameleoon - Deploy variation
This command will update the variation in production, based on the variation’s files, including **var.config.json** and **var.info.json**.
##### Accessibility
| Command | Right-click menu | Command Palette |
| ---------------------------- | ------------------------------------------ | --------------- |
| Kameleoon - Deploy variation | Right click on a specific variation folder | ✕ |
##### Kameleoon - Deploy personalization
This command will update the personalization in production, based on perso.config.json, perso.info.json and the nested folder with js and css files.
##### Accessibility
| Command | Right-click menu | Command Palette |
| ---------------------------------- | ------------------------------------------------ | --------------- |
| Kameleoon - Deploy personalization | Right click on a specific personalization folder | ✕ |
##### Kameleoon - Deploy goal
This command will update the goal information in production, based on **goal.config.json** and **goal.info.json** files.
##### Accessibility
| Command | Right-click menu | Command Palette |
| ----------------------- | ------------------------------------- | --------------- |
| Kameleoon - Deploy goal | Right click on a specific goal folder | ✕ |
##### Kameleoon - Deploy segment
This command will update the segment information in production, based on **segment.config.json** and **segment.info.json** files.
##### Accessibility
| Command | Right-click menu | Command Palette |
| -------------------------- | ---------------------------------------- | --------------- |
| Kameleoon - Deploy segment | Right click on a specific segment folder | ✕ |
##### Kameleoon - Deploy custom data
This command will update the segment information in production, based on **custom.config.json** and **custom.info.json** files.
##### Accessibility
| Command | Right-click menu | Command Palette |
| ------------------------------ | -------------------------------------------- | --------------- |
| Kameleoon - Deploy custom data | Right click on a specific custom data folder | ✕ |
#### Synchronization commands
Saving the synchronized file triggers synchronization. Only one entity can synchronize at a time.
##### Kameleoon - Synchronize variation code to Chrome
This command will synchronize both js and css files to the chrome extension, injecting code into the webpage. It also accepts TS and SCSS files.
##### Accessibility
| Command | Right-click menu | Command Palette |
| ------------------------------------------------ | ----------------------------------------------------------------------- | --------------- |
| Kameleoon - Synchronize variation code to Chrome | Right click on a specific variation script file (.css, .scss, .js, .ts) | ✕ |
##### Kameleoon - Synchronize common code to Chrome
This command will synchronize both **common.js** and **common.css** files to the chrome extension, injecting code into the webpage. It also accepts TS and SCSS files.
##### Accessibility
| Command | Right-click menu | Command Palette |
| --------------------------------------------- | ------------------------------------------------------------------------------- | --------------- |
| Kameleoon - Synchronize common code to Chrome | Right click on a specific experiment common script file (.css, .scss, .js, .ts) | ✕ |
##### Kameleoon - Synchronize global code to Chrome
This command will synchronize index.js file to the chrome extension, injecting code into the webpage.
##### Accessibility
| Command | Right-click menu | Command Palette |
| --------------------------------------------- | ------------------------------------------------------------------------- | --------------- |
| Kameleoon - Synchronize global code to Chrome | Right click on a specific global code script file (.css, .scss, .js, .ts) | ✕ |
##### Kameleoon - Remove synchronization
This command will remove synchronization.
##### Accessibility
| Command | Right-click menu | Command Palette |
| ---------------------------------- | --------------------------------------------------------------------------------------------------- | ----------------------------------------------------------------------------------------------------------------------- |
| Kameleoon - Remove synchronization | Right click on a specific script file (.css, .scss, .js, .ts) that you can use with synchronization | From the Command Palette, you can access to a dedicated Remove synchronization command for each type of synchronization |
## Frequently Asked Questions
The word “entity” refers to the different objects the extension interacts with, such as experiments, personalizations, projects, variations, segments, custom data, or goals.
Kameleoon no longer uses file and folder naming conventions. Create entities (experiments, variations, and others) using JSON configuration files.
This extension uses a convention based on configuration files called **file-based architecture**. The file-based architecture eliminates the file and folder naming conventions used in previous versions. Instead, it uses multiple JSON files containing entity information.
There are two types of files:
* **`[entity].info.json`** — This file contains the ID and other account related information.
* **`[entity].config.json`** — This file contains the configuration of the entity and can be used to recreate the same entity on another account.
### Do the import commands overwrite the files and folders?
No, the import commands do not overwrite the files and folders, but an import command can create the files and folders if they don’t exist.
### Do the fetch commands overwrite the files and folders?
Yes, the fetch commands will overwrite the files and folders. In the future, Kameleoon will provide merging capabilities to manage the different changes between the remote version and the local one.
### Are importation commands generating a new `engine.js` (previously named `kameleoon.js`) script after they are executed?
No, [importation commands](https://docs.google.com/document/d/1ALR2xs7FXv55JmG3ytSFZsvUnHrdavldJ6oUG-iumkY/edit#heading=h.wcwvfrwnscwe) do not generate a new `engine.js` script after execution.
### Are creation commands generating a new `engine.js` script after they are executed?
Yes, [creation commands](https://docs.google.com/document/d/1ALR2xs7FXv55JmG3ytSFZsvUnHrdavldJ6oUG-iumkY/edit#heading=h.3ujr0l9zgbgd) generate a new `engine.js` script after execution.
### Are deployment commands generating a new `engine.js` script after they are executed?
Yes, [deployment commands](https://docs.google.com/document/d/1ALR2xs7FXv55JmG3ytSFZsvUnHrdavldJ6oUG-iumkY/edit#heading=h.5t82fjid356v) generate a new `engine.js` script after execution.
### How to rollback and install a specific extension version?
Uninstall the current Kameleoon extension if you have it installed. Make sure you reload your Visual Studio Code window to apply the changes.
Go to [https://marketplace.visualstudio.com/items?itemName=Kameleoon.kameleoon](https://marketplace.visualstudio.com/items?itemName=Kameleoon.kameleoon)
Click **Version history**.
[Version history](https://storage.googleapis.com/kameleoon-storage-documentation/developers/images/VS-Code-Extension-10.gif)
Download the version you would like to install. You should have a VSIX file.
Import the VSIX file in VS Code.
1. Go to the extensions tab.
2. Click on the three dots at the top right corner of the “Extensions” panel.
3. Click on “*Install from VSIX…*”
### How to migrate from V3 to V4?
To migrate from V3 to V4, Kameleoon recommends pushing changes to production (optional), deleting all files and folders, and starting a new environment. The [Getting started](https://docs.google.com/document/d/1ALR2xs7FXv55JmG3ytSFZsvUnHrdavldJ6oUG-iumkY/edit#heading=h.ysyu20smapmp) section explains the steps to set up a new environment.
### How to disable the minimize option in Visual Studio Code?
You can disable the minimize or "minify" option for Kameleoon in VS Code by following these steps:
1. Open the Extensions tab in VS Code.

2. From **Kameleoon** in the list of installed extensions and click on **Settings**.

3. Select the option labeled **Enable JS minification for deploying and synchronization**.

# Coordinate SDKs across platforms
Source: https://docs.kameleoon.com/developer-docs/feature-experimentation/get-started/cross-platform-sdks
Maintain a unified visitor identity and consistent experiment handling when deploying Kameleoon SDKs across web, mobile, and backend platforms simultaneously.
Coordinate Kameleoon SDKs across websites, mobile apps, and backend servers to maintain a unified visitor identity. This coordination ensures consistent experiment handling and data flow across all platforms.
Use this guide if a project implements multiple Kameleoon SDKs:
* The JavaScript SDK or `engine.js` for web environments.
* The mobile SDK for Android or iOS apps.
* Server-side SDKs for backend integrations and decision logic.
## Architecture overview
A typical multi-environment setup includes the following components:
* **Website**: Uses the JavaScript SDK or `engine.js` to run client-side experiments and personalization campaigns.
* **Mobile app**: Uses a mobile SDK to display variations and track conversions.
* **Backend server**: Uses a server-side SDK to make centralized variation decisions or synchronize visitor data.
## Data and visitor code flow
* The **visitor code** identifies users consistently across all environments.
* The **server-side SDK** coordinates variation decisions when required.
* Each SDK sends analytics and tracking data directly to the Kameleoon platform.
## Visitor code and cross-device management
### Generate and share visitor codes
Each unique visitor must have one consistent visitor code across all platforms. This code allows Kameleoon to unify experiment decisions and tracking.
Follow this cross-platform flow:
1. The engine, web SDK, server-side SDK, or mobile application generates the visitor code.
2. The backend retrieves the existing visitor code when the user logs in on a new platform.
3. The system passes the visitor code to the mobile, server-side, and web SDKs. This ensures all platforms evaluate the same user consistently.
### Synchronize visitor codes
* Store the visitor code securely in the backend or user database and link it to the user ID.
* Follow these steps when a user login occurs on another platform:
* **Mobile app**: Request the visitor code from the backend.
* **Server-side SDK**: Use the same visitor code for all variation and tracking calls.
* **Web SDK**: Set the visitor code using the JavaScript API:
```javascript theme={null}
kameleoon.API.Visitor.setVisitorCode(visitorCode);
```
The web SDK and server-side SDK communicate automatically via the `kameleoonVisitorCode` cookie. You do not need to perform additional steps to link these two.
### Best practices
* Map the existing user identifier (such as `userId`) to a single Kameleoon visitor code across all platforms.
* Maintain the backend as the source of truth for visitor codes.
* Prevent SDKs from overwriting existing visitor codes for known users.
Unified identification ensures that every user action, conversion, and variation decision links to the same visitor in Kameleoon.
## Experiment handling across environments
Coordinate decisions and variation displays for experiments that span multiple environments, such as mobile and backend.
### Example scenario
In this scenario:
* The **mobile app** displays the variation.
* The **backend server** determines the assigned variation.
#### Implementation options
**Option 1: Server-side decision logic**
1. The **mobile app** sends the visitor code to the backend.
2. The **server-side SDK** calls `getVariation()` (or its equivalent) to retrieve the assigned variation.
3. The backend returns the variation ID or name to the mobile app.
4. The **mobile app** displays the variation and tracks exposure.
5. Both the **mobile** and **server SDKs** use the same visitor code for tracking events.
**Advantages:**
* Centralizes variation logic and ensures consistent decisions.
* Supports experiments that affect both backend logic and UI elements.
**Option 2: Client-side (mobile) decision logic**
1. The **mobile SDK** retrieves the variation assignment using the visitor code.
2. The mobile app applies the variation locally and tracks exposure directly.
3. (*Optional*) If the backend also participates in tracking or validation, the **server-side SDK** reuses the same visitor code to ensure consistent reporting.
**Advantages:**
* Provides a synchronous, zero-latency decision.
* Reduces latency by avoiding a server round trip.
* Optimizes UI-focused experiments that do not depend on backend logic.
## Choose the right setup
| Use case | Decision layer | Visitor code source | Notes |
| :--------------------------- | :-------------- | :------------------ | :------------------------- |
| **Mobile UI experiment** | Mobile SDK | Backend | Handles variation locally |
| **Backend or API-driven** | Server-side SDK | App or website | Centralized decision logic |
| **Cross-device consistency** | Any | Backend | Ensures unified tracking |
## Code examples: Pass visitor code between layers
```javascript Web (JS) theme={null}
const visitorCode = kameleoon.API.Visitor.code;
fetch("/api/syncVisitor", {
method: "POST",
body: JSON.stringify({ visitorCode }),
});
```
```swift Mobile (iOS) theme={null}
let kameleoonClient = try KameleoonClientFactory.create(
siteCode: siteCode,
visitorCode: visitorCodeFromBackend
)
let variation = try kameleoonClient.getVariation(featureKey: featureKey)
```
```python Server (Python) theme={null}
client = KameleoonClientFactory.create(SITE_CODE, config)
variation = client.get_variation(visitor_code, feature_key)
```
***
To handle SDK implementation across different layers:
* Assign a single visitor code per user across all platforms.
* Manage and distribute visitor codes from the backend.
* Select the variation logic layer based on the experiment type (server for centralized logic, client-side for app-driven UI).
* Maintain consistent, cross-device data by tracking all user activity with the same visitor code.
***
# Demo: Feature experimentation
Source: https://docs.kameleoon.com/developer-docs/feature-experimentation/get-started/demo-feature-experimentation
Follow a step-by-step tutorial using a TypeScript sample app to configure feature flags in Kameleoon, enable them in the app, and observe how they affect page behavior.
This hands-on tutorial for developers demonstrates how feature experimentation works on the Kameleoon platform. You'll start with a sample app and follow step-by-step instructions to configure a set of feature flags in the Kameleoon app, enable them in the sample app, and see how the feature flags affect the visitor's page.
The sample is written in TypeScript, but you don't need to know TypeScript to complete this tutorial. Experience with any modern programming language should be enough to understand the important points.
## Prerequisites
Before you get started, you need to create a couple accounts:
* [Sign up](https://login.kameleoon.com/app/sign-up?utm_campaign=FM%26E%20Free%20Trial\&utm_source=documentation%20dev\&utm_medium=cta%20dev%20doc) for a free 30-day Kameleoon trial account. You'll need to complete this tutorial within 30 days after requesting the account, but the tutorial should only take about 30 minutes to complete.
* A [GitHub](https://github.com) account.
## Run the sample app
First, you'll get the app running in GitHub Pages, so you don't need to worry about setting up a web server. You'll need to be logged into your [GitHub](https://github.com) account.
1. In the [Bouncing ball repo in GitHub](https://github.com/kameleoon/bouncing-ball), click **Fork**. Follow the prompts to create your own fork of the sample app in `github.com//bouncing-ball`. (Replace \ throughout this tutorial with your GitHub account name.)
2. In your new `https://github.com//bouncing-ball` repo in GitHub, click the **Actions** tab and click the button to enable workflows.
3. In the **Settings** tab, click **Pages**, click the **Source** dropdown, and click **GitHub Actions**.
4. In the **Actions** tab, click **Deploy static content to Pages** > **Run workflow** > **Run workflow**.
Once the build and deploy process completes (this might take a minute or two), you should be able to see the demo app running in a browser at `https://.github.io/bouncing-ball`! It should look something like this:

To make project changes faster, the update interval at which the SDK checks for configuration changes in the Kameleoon account can be programmatically adjusted:
1. In your GitHub repo, in the **Code** tab, open the `src/main.ts` file.
2. Click the **Edit this file** button (with the pencil icon).
3. Find and edit the `/src/main.ts` file. Find the following line:
```js theme={null}
const client = new KameleoonClient({ siteCode });
```
Replace the line with the following code:
```js theme={null}
const configuration = { updateInterval: 1,};const client = new KameleoonClient({ siteCode, configuration });
```
The new code adds a configuration with an `updateInterval` of 1. This value reduces the frequency with which the SDK polls for changes in the configuration to once every minute (from the default of 60 minutes). This frequent polling is not recommended for a production environment due to the performance impact, but it is helpful for the tutorial. Kameleoon also offers a [premium streaming option](../technical-reference/technical-considerations#streaming-premium-option) that pushes configuration changes to the SDK immediately.
4. Click **Commit changes...**.
## Set up a Kameleoon project
You'll need your Kameleoon trial account credentials before you start this section.
1. Sign in to the [Kameleoon app](https://app.kameleoon.com) using your trial account credentials.
2. In the left menu, expand **Admin** and click **Projects** > **New project**.
3. In the dialog, click **Site: Feature flags** in the first dropdown, and paste `https://.github.io/bouncing-ball` as the **URL of site**. Remember to replace `` with your GitHub account name. Click **Add**.
4. Copy the site code that's shown on the next page.

5. In your GitHub repo, in the **Code** tab, edit the `src/constants` file. Replace the `siteCode` value with the site code you just copied and click **Commit changes**.
If you check your app in the browser again (`https://.github.io/bouncing-ball`), you should see that all the bouncing circles have disappeared. That's because the circles were added by a Kameleoon feature flag in a different project. You just changed the site code so the site is now controlled by your Kameleoon project, which you haven't fully configured yet. Don't worry, you'll add your own circles back to the app with your own feature flags.
Troubleshooting: If you still see the **Slow + Random + Big** text and bouncing circles, try opening the page in an Incognito (or Privacy mode) window.
### Set up feature flags
Feature flags allow for rolling out new features to a limited audience and testing effectiveness before a full rollout. Configuration can be managed by developers or other team members. Understanding how feature flags are configured in the Kameleoon interface helps in using variables effectively within the app.
1. In the Kameleoon app, in the **Activate** menu, click **Feature flags**.
2. Click **New feature flag**.
3. Complete the fields with the following values:
* Name: `Bouncing ball demo`
* Project: \{Select your project from the dropdown}
* Flag type: **Permanent**
* Feature key: `bouncing_ball_demo` You can leave the tags and description field empty.
4. Click **Validate**.
### Set up variables
[Variables](/user-manual/experimentation/feature-experimentation/configure-your-feature-flags/define-feature-variables) are strings, numbers, boolean, or JSON values that you use in your app code to modify the app's behavior. Their values change depending on which variation Kameleoon assigns the visitor to.
For example, to determine whether visitors stay on a site longer when served a "Party time" variation versus a "Hypnotize" variation, set up a variation for each option and run an experiment.
1. On the new page that appears, expand the **Set Up** menu and click **Variables**.

2. Use the **+ Add Variable** button to add 6 variables with the following values:
| Variable key | Type | Default value |
| --------------------- | ------- | ------------------------------- |
| title\_text | String | Default variation: 1 green ball |
| randomize\_on\_bounce | Boolean | False |
| balls\_amount | Number | 1 |
| ball\_speed | Number | 10 |
| ball\_color | String | green |
| ball\_size | Number | 20 |
Watch for typos! The variable key names and types must match exactly. If you look at the `src/main.ts` file in your GitHub repo, you'll see why. The code sample uses these exact variable key names to retrieve the values of the variables, depending on the variation that Kameleoon assigns the visitor to.
3. Click **Save**.
You've now set up a set of variables with default values. The default values are the values your app uses when there are no active campaigns for the visitor. If you turned on your feature flags now, you would see the default variation, with 1 green ball bouncing around slowly. This is because no variations have been set up yet.
### Set up variations
[Variations](/user-manual/experimentation/feature-experimentation/configure-your-feature-flags/define-feature-variations) define the possible combinations of variables that control what a visitor sees in your app. Kameleoon assigns each visitor a variation on their first visit to the app.
1. In **Set Up**, click **Variations**.
2. Use the **+ Add variation** button to add two new variations:
* Name: `Party time`
* ball\_size: `50`
* ball\_color: `random`
* ball\_speed: `75`
* balls\_amount: `75`
* randomize\_on\_bounce: `True`
* title\_text: `Hey! Get up and dance!`
* Name: `Hypnotize`
* ball\_size: `200`
* ball\_color: `blue`
* ball\_speed: `2`
* balls\_amount: `10`
* randomize\_on\_bounce: `False`
* title\_text: `You're getting very, very sleepy`
### Set up a goal
Next, you'll set up a [goal](/user-manual/assets/goals/manage-goals). Goals define how you want to measure the effectiveness of your variations.
There are a number of different types of customizable goal types you can use, but this tutorial uses a basic "time spent" metric.
1. In the **Set Up** menu, click **Goals** > **+ Add goal**.
2. In the **Configure goals** section, click **+ Create a new goal** and complete the following fields:
* Name: Time spent
* Type: Time Spent
* Project: \{Select your project}
3. Click **Next** and set the goal to: **The visitor spent more than 30 seconds**.
4. Click **Validate**.
## Roll out an experiment
Now that your variations are configured, you can create an experiment that displays the two variations to a subset of your audience. You'll display one variation to 40% of your visitors and the other variation to a separate 40% of visitors. The remaining 20% of visitors will see an unmodified version of the app (the default).
1. In the Rollout Planner section, click **Production**.
2. Click **+ Add a rule** > **Experiment**.
3. Reduce the **Exposure** slider to **80%**.
4. Under **Variations to serve**, click **Party time** and change the **Exposition** value to **40.00%**.
5. Click **+ Add a variation**. The variation **Hypnotize** should be selected automatically (if not, select it). Change the **Exposition** value to **40.00%**.
6. Turn the **ON/OFF** toggle to **ON**.
7. Click **Save**.
## Test the app
Open the app in a browser. You should see one of the three possible variations: the Party time variation, the Hypnotize variation, or the Default variation.
 *Party time variation*
 *Hypnotize variation*
 *Default variation*
Now, try to simulate a new user until you see the other variations. This may take a few attempts as you may get assigned to the same variation multiple times. Because your browser saves a `visitorCode`, which is a unique ID that identifies you, you can't just refresh the page because you'll always see the variation that you were first assigned to. Instead, you need to look like a new visitor. Here are the simplest ways to do that:
* Switch to a different browser or device.
* Open the app in a new private window each time (depending on your chosen browser, this may be called "Incognito", "Private Browsing", or something similar).
After enough attempts, you should be able to see all three of the variations. If so, congratulations! You've successfully set up a feature experiment with Kameleoon! 🎉🎉🎉
## Next steps
* In the **Reporting** section of your experiment, look through some of the initial results, available integrations, and activity log. You won't have access to a lot of results data yet, due to low traffic.
* Look through the sample code to understand how the variables are applied in the code. If you're comfortable writing TypeScript, try adding your own variable.
* Look through the rest of this developer documentation and the [Experimentation User Guide](/user-manual/experimentation/feature-experimentation/create-and-manage-flags/create-a-feature-flag) to learn more about all of the available options and features.
* Install the SDK of your choice and start building your own feature flags, personalizations, and other experiments.
# Hybrid experimentation
Source: https://docs.kameleoon.com/developer-docs/feature-experimentation/get-started/hybrid-experimentation
Configure Kameleoon in Hybrid mode to combine the Kameleoon application file and server-side SDK for flexible, full-stack experimentation.
Hybrid mode lets you combine the Kameleoon web engine and a server-side SDK so each task uses the most appropriate integration.
* Implement and deploy variations more easily on the server side, while tracking to third-party analytics tools can be performed more effectively using the Kameleoon engine via the application file `engine.js`(previously called `kameleoon.js`), as many third-party web analytics solutions only operate on the front end.
* Target users by using data collected client-side, such as goal conversions or custom data based on data layer variables, within segments.
* Filter and break down data in Kameleoon reports using [25+ data points](/user-manual/experiment-analytics/analyze-results/results-page/results-page-settings#breakdown-audience) collected client-side by the front-end application engine.
* Exclude users from a feature flag if they have been exposed to a web experiment or personalization.
This article describes how to implement the optimal integration between the Kameleoon [web SDK](../../feature-experimentation/get-started/overview#server-side-sdks) and the Kameleoon [front-end application file](../../web-experimentation/implementation-and-deployment/standard-implementation#asynchronous-tag-without-anti-flicker) so that both sides communicate with each other.
Use the [Kameleoon Asynchronous tag without anti-flicker](../../web-experimentation/implementation-and-deployment/standard-implementation#asynchronous-tag-without-anti-flicker).
For web experimentation, you normally need to add the JavaScript installation tag either in the `` tag or at the beginning of the `` tag to prevent flickering. If you're using hybrid mode where flickering is not a concern, you can install the script anywhere before the closing `` tag since the tag is only used for tracking purposes.
Hybrid experimentation is currently only compatible with the Web SDKs. While the Mobile SDKs do not yet support hybrid mode with third-party web analytics tools, data points collected on the website can still be leveraged if both a website and a mobile app are offered. This means that data gathered from an identified user on the website can also be used in the mobile application, provided the visitor is identified consistently across both platforms.
## Synchronize user IDs between the back-end and front-end
One of the challenges of hybrid mode is making sure that Kameleoon can properly identify each visitor as the same individual on both sides. In Kameleoon, this requirement means that the `visitorCode`, which is a unique ID for every visitor, has to be identical on both sides. For example, a visitor registered with the `visitorCode` of `10ctbql0zpf4rwjy` for an experiment variation in the back-end must be associated with the visitor code `10ctbql0zpf4rwjy` when a conversion is triggered in the front-end. Using the same ID ensures correct tracking of the visitor's actions, which results in correct data and statistics.
To synchronize the user IDs, your hybrid app needs to call the `getVisitorCode()` method prior to calling other SDK methods. Since naming conventions vary between languages, the method names vary slightly depending on the SDK, but each language has a similarly named equivalent method. Kameleoon uses the following approach:
1. On the front-end, the Kameleoon JavaScript engine randomly generates a `visitorCode` for each new visitor. The engine considers a visitor to be new if the engine can't find a previous visitor code on the user's browser (for example, in a cookie or local storage). This normally happens when the Kameleoon engine runs for the first time on the visitor's browser. The Kameleoon engine can also obtain the identifier from a cookie that the back-end passes to it. This option allows you to set the identifier on the server, rather than in the front-end. For example, use this option if you want to specify your own unique visitor code for each visitor.
If you [Unify session data accross subdomains](../../web-experimentation/technical-concepts/unify-session-data-storage-across-subdomains), Kameleoon looks for a **kameleoonVisitorCode** key in local storage. If the key is present, its value is used as the identifier for the visitor code. The local storage version of this key always takes precedence, even if a **kameleoonVisitorCode** cookie with a different value exists. Note that Kameleoon does not reset the JavaScript cookie if the local storage and cookie values match. For ITP purposes, it is important to leave cookies that may have been set on the server side intact.
2. On the back-end, you need to call the `getVisitorCode()` method or equivalent in your SDK. Make sure to call this method before you provide a visitor identifier to any other SDK methods. The `getVisitorCode()` takes an optional string argument that you can use to pass your own identifier rather than rely on a randomly generated Kameleoon ID. When the method is called, Kameleoon first looks for a **kameleoonVisitorCode** cookie or query parameter associated with the current HTTP request. If found, the SDK uses this value as the visitor identifier.
If no cookie or parameter is found, Kameleoon uses the `getVisitorCode()` method argument, if you provided one, as the identifier. If you don't provide an argument, Kameleoon randomly generates the ID. In either of these cases, Kameleoon also sets the server-side **kameleoonVisitorCode** cookie with the value (via HTTP header).
By following this approach, the **visitorCode** is saved and shared between front-end and back-end. If an experiment is implemented on the first page of a visitor's journey on your website, the SDK will generate the identifier and pass it to the JavaScript engine. If the journey starts on a page where `getVisitorCode()` is not called (or the synchronization snippet is not run) on the back-end, then the JavaScript engine will generate the identifier first and pass it to the SDK. The SDK will read it and then rewrite it as a server-side cookie to bypass ITP restrictions.
## Linking feature experiments with front-end tracking code
It is often useful to set up experiment variations using an SDK, but implement tracking on the front-end using the JavaScript engine. This is a common scenario for the following reasons:
* Web analytics platforms (such as Mixpanel or Google Analytics 4) tend to be implemented on the front-end.
* A standard client-side tagging plan for Kameleoon using [web experimentation](https://www.kameleoon.com/en/platform/ab-testing-client-side) may already be in use.
* Tracking events and [data points](/user-manual/experiment-analytics/analyze-results/results-page/results-page-settings#breakdown-audience) on the front-end side for analytics purposes with reporting is often more convenient.
* There are [data points](../../sdks/web-sdks/js-sdk#targeting-conditions) suitable for use in feature experiments that are easier to collect on the front-end.
### Sending exposure events to third-party analytics
Kameleoon provides native [integrations](/user-manual/integrations/integrations-overview) with analytics and CDP platforms. In hybrid mode, you can use any of these integrations in combination with feature experiments, without needing to write additional code.
The front-end engine needs to know whenever an experiment has taken place in the back-end—that is, when a visitor has been bucketed into an experiment. This ensures only visitors that have actually triggered and seen the experiment are counted. To achieve this goal, use the `getEngineTrackingCode()` method (the name varies slightly depending on the SDK), which is available in all server-side SDKs. This method returns the JavaScript code to be inserted in the page to automatically send the exposure events from the front-end to the analytics solution in use. It can be embedded in the returned HTML page.
For example:
```html theme={null}
```
You also need to [activate](/user-manual/experimentation/feature-experimentation/track-your-feature-experiments/managing-third-party-integrations) your chosen integration (for example, Google Analytics 4 or Mixpanel) when configuring your feature experiment. The relevant data (such as experiment ID, experiment name, variation ID, variation name) will be automatically sent to the third party platform by the Kameleoon JavaScript engine.
### Using front-end data points and events in feature experiments
If you have implemented Kameleoon in hybrid mode, goals and [data points](/user-manual/experiment-analytics/analyze-results/results-page/results-page-settings#breakdown-audience) will be automatically tracked on the front end and will appear in Kameleoon reports as filtering and breakdown criteria. In addition, several [targeting conditions](../targeting-and-segmentation/native-segmentation) will be available in the Kameleoon SDK, ready to be used for targeting purposes.
### Managing consent in hybrid mode
When using Kameleoon in Hybrid mode and [consent is set to "Required"](/user-manual/project-management/consent-management-policy), ensure that both the JavaScript Activation API and SDK methods are called upon collecting consent to ensure that Kameleoon can collect user events from both the Kameleoon Application File and the SDK. Additionally, as Kameleoon is restricted from storing the visitorCode key in a cookie, ensure that the visitorCode key generated by the SDK for all first requests is shared with the Kameleoon engine running client-side. Read the [technical considerations](/user-manual/project-management/consent-management-policy#important-technical-considerations).
Consent information is synchronized between the Kameleoon Engine (`engine.js`) and the JavaScript SDK **only when either component is reinitialized** (for example, on page reload or when calling `API.Core.load`). As a result, we strongly recommend explicitly managing consent using the dedicated methods provided by the engine and the SDK, rather than relying on this synchronization mechanism.
# Overview
Source: https://docs.kameleoon.com/developer-docs/feature-experimentation/get-started/overview
Explore Kameleoon's server-side feature management and experimentation support across web, mobile, TV, and gaming platforms using SDKs.
In addition to the client-side capabilities, Kameleoon has extensive support for server-side feature management and experimentation on web apps, mobile apps, TV and gaming apps, or any other apps connected to the internet.
Here are a few additional features available using Kameleoon SDKs:
* Use [feature flags and feature experiments](/user-manual/experimentation/feature-experimentation/create-and-manage-flags/create-a-feature-flag) with advanced rollout and targeted delivery rules.
* Combine server-side experiments with client-side native capabilities using [Hybrid experimentation](./hybrid-experimentation).
Join the [Slack Community](https://join.slack.com/t/kameleooncommunity/shared_invite/zt-1s6m8s09e-~yA1EUgn5pLWW_mrgf8TrQ) to ask questions about product features and get access to the latest updates.
## Supported platforms
Kameleoon continually adds support for new languages and enhances existing SDKs with new features and methods. The minimum version required for specific SDK features varies depending on the language. The SDK compatibility table shows which features are available in each language and the minimum SDK version required for implementation. For comprehensive version history, see the changelog file in the [SDK Github repository](https://github.com/Kameleoon). Subscribing to receive email notifications is recommended.
### Server-side SDKs
| **SDK** | [Java](../../sdks/web-sdks/java-sdk) | [C#](../../sdks/web-sdks/csharp-sdk) | [PHP](../../sdks/web-sdks/php-sdk) | [NodeJS](../../sdks/web-sdks/nodejs-sdk) | [Ruby](../../sdks/web-sdks/ruby-sdk) | [Python](../../sdks/web-sdks/python-sdk) | [Go](../../sdks/web-sdks/go-sdk) |
| ------------------------------------------------------------------------------------------------------------------------------------------------------------- | ------------------------------------ | ------------------------------------ | ---------------------------------- | ---------------------------------------- | ------------------------------------ | ---------------------------------------- | -------------------------------- |
| [Real-time streaming](../technical-reference/technical-considerations#streaming-premium-option) | 2.0.6 | 2.2.0 | - | 1.0.0 | 2.1.0 | 2.0.0 | 2.1.0 |
| [Feature experiments](/user-manual/experimentation/feature-experimentation/using-the-rollout-planner/optimizations-and-scheduling/create-feature-experiments) | 3.0.0 | 3.0.0 | 3.0.0 | 1.0.0 | 2.0.0 | 2.1.0 | 2.0.0 |
| [Multi-environment feature flags](/user-manual/experimentation/feature-experimentation/configure-your-feature-flags/manage-environments) | 2.0.4 | 2.1.4 | 2.0.9 | 1.0.0 | 1.0.10 | 1.0.2 | 1.0.5 |
| [Feature flag variables](/user-manual/experimentation/feature-experimentation/configure-your-feature-flags/define-feature-variables) | 2.0.4 | 2.1.7 | 2.0.9 | 1.0.0 | 1.0.10 | 1.0.2 | 1.0.5 |
| [Predefined targeting conditions](../targeting-and-segmentation/native-segmentation) | 2.0.6 | 2.2.0 | 2.1.3 | 1.0.0 | 2.0.0 | 2.0.0 | 2.0.0 |
| Retrieve all targeted feature flags | 2.0.6 | 2.1.7 | 3.0.0 | 1.0.0 | 2.0.0 | 2.0.0 | 2.0.0 |
| Retrieve all feature flags variables | 3.0.0 | 2.1.9 | 3.0.0 | 1.0.0 | 2.0.0 | 2.0.0 | 2.0.0 |
| [Retrieve data for a user key (Data API Map endpoint)](../targeting-and-segmentation/use-external-data-to-target-users) | 2.0.5 | 2.1.5 | 2.1.0 | 1.0.0 | 1.1.0 | 1.0.3 | 1.0.6 |
| [Retrieve browsing data for a user (Data API Visitor endpoint)](../targeting-and-segmentation/native-segmentation#handling-data-in-kameleoon-sdks) | 3.2.0 | 3.3.0 | 3.3.0 | 2.2.0 | 2.2.0 | 2.4.0 | 2.3.0 |
| [Analytics integration](./hybrid-experimentation#sending-exposure-events-to-third-party-analytics) | 3.1.0 | 3.1.0 | 3.1.0 | 2.1.0 | 2.1.0 | 2.2.0 | 2.1.0 |
| [Legal consent management](/user-manual/project-management/consent-management-policy#for-web-experiments-/-feature-experiments-/-hybrid-experiments) | 4.0.0 | 4.0.0 | 4.0.0 | 3.1.0 | 3.0.0 | 3.0.0 | 3.0.0 |
| [Data warehouse integration](/user-manual/?s=data+warehouse) | 4.1.0 | 4.3.0 | 4.1.0 | 2.8.0 | 3.1.0 | 3.1.0 | 3.1.0 |
| [Cross-device experimentation](../../cross-device-experimentation) | 4.1.0 | 4.3.0 | 4.1.0 | 2.8.0 | 3.1.0 | 3.1.0 | 3.1.0 |
### Client-side or mobile SDKs
| **SDK** | [Android (Kotlin/Java)](../../sdks/mobile-sdks/android-sdk) | [iOS (Swift)](../../sdks/mobile-sdks/ios-sdk) | [JavaScript/TypeScript](../../sdks/web-sdks/js-sdk) | [Flutter](../../sdks/mobile-sdks/flutter-sdk) | [React/React Native](../../sdks/web-sdks/react-js-sdk) |
| ------------------------------------------------------------------------------------------------------------------------------------------------------------- | ----------------------------------------------------------- | --------------------------------------------- | --------------------------------------------------- | --------------------------------------------- | ------------------------------------------------------ |
| [Real-time streaming](../technical-reference/technical-considerations#streaming-premium-option) | 2.1.0 | 2.1.0 | 1.0.0 | 2.0.0 | 6.0.0 |
| [Feature experiments](/user-manual/experimentation/feature-experimentation/using-the-rollout-planner/optimizations-and-scheduling/create-feature-experiments) | 3.0.0 | 3.0.0 | 1.0.0 | 2.0.0 | 6.0.0 |
| [Multi-environment feature flags](/user-manual/experimentation/feature-experimentation/configure-your-feature-flags/manage-environments) | 2.0.12 | 2.0.14 | 1.0.0 | 1.0.3 | 6.0.0 |
| [Feature flag variables](/user-manual/experimentation/feature-experimentation/configure-your-feature-flags/define-feature-variables) | 2.0.12 | 2.0.14 | 1.0.0 | 1.0.3 | 1.0.0 |
| [Predefined targeting conditions](../targeting-and-segmentation/native-segmentation) | 2.1.1 | 2.1.2 | 1.0.0 | 2.0.0 | 4.0.0 |
| Retrieve all targeted feature flags | 2.1.1 | 2.1.2 | 1.0.0 | 2.0.0 | 6.0.0 |
| Retrieve all feature flags variables | 2.1.1 | 2.1.3 | 1.0.0 | 2.0.0 | 1.0.0 |
| [Retrieve data for a user key (Data API Map endpoint)](/api-reference/map/get-data-for-a-key) | 2.0.13 | 2.0.15 | 1.0.0 | 1.0.3 | 2.1.0 |
| [Retrieve browsing data for a user (Data API Visitor endpoint)](../targeting-and-segmentation/native-segmentation#handling-data-in-kameleoon-sdks) | 3.2.0 | 4.1.0 | 1.4.0 | 7.2.2 | N/A |
| [Legal consent management](/user-manual/project-management/consent-management-policy#for-web-experiments-/-feature-experiments-/-hybrid-experiments) | 4.0.0 | 4.0.0 | 2.1.0 | 3.0.0 | 8.1.0 |
| [Data warehouse integration](/user-manual/?s=data+warehouse) | 3.3.0 | 3.1.0 | 1.8.0 | 3.0.0 | 7.6.0 |
| [Cross-device experimentation](../../cross-device-experimentation) | 3.3.0 | 3.1.0 | 1.8.0 | 3.0.0 | 7.6.0 |
All Kameleoon SDKs are zero-latency SDKs, which means client-side code performs all campaign allocations. Because the allocations are not completed using a remote server call, the impact on website performance is under a millisecond compared to \~50 ms on average for API-based technologies.
### Serverless edge compute platforms
Kameleoon also supports feature management and experimentation at the edge by providing a set of starter kits to implement feature flags and experiments using [serverless edge compute platforms](../implementation-and-deployment/serverless-edge-compute-starter-kits) offered by modern Content Delivery Networks (CDNs), such as **Akamai EdgeWorkers**, **AWS Lambda\@Edge**, **Cloudflare Workers**, **Fastly Compute\@Edge** and **Vercel Edge Functions**.
| **Module** | **Current Version** | **Release Date** |
| -------------------------------------------------------------------------------- | ------------------- | ---------------- |
| [Fastly starter kit](https://github.com/Kameleoon/fastly-compute-starter-kit) | 0.2.2 | September 2023 |
| [Cloudflare Workers](https://github.com/Kameleoon/cloudflare-worker-starter-kit) | 1.0.2 | October 2024 |
| [Akamai EdgeWorkers](https://github.com/Kameleoon/akamai-starter-kit) | 0.2.0 | December 2024 |
| [AWS Lambda@Edge](https://github.com/Kameleoon/aws-lambda-edge-starter-kit) | 2.1.1 | July 2024 |
| [Vercel Edge Functions](https://github.com/Kameleoon/vercel-examples) | 0.1.0 | April 2023 |
### OpenFeature providers
Kameleoon supports OpenFeature, an open-source standard for feature flag management backed by the CNCF. OpenFeature ensures seamless compatibility across tools and custom solutions.
Kameleoon provides OpenFeature support for several SDKs. The full list is available in the [dedicated article](../technical-reference/open-feature-providers).
### Web Server Modules
| **Module** | **Current Version** | **Release Date** |
| ------------------------------------------------------------------------------ | ------------------- | ---------------- |
| [Nginx web server module](../implementation-and-deployment/web-server-modules) | 1.0.24 | September 2022 |
The web server module for Nginx currently only supports experiments.
### API
If Kameleoon SDKs do not support the language used in the application, build a service using one of the existing SDKs or implement a custom integration with the API.
When low latency is a priority for updating targeting conditions and feature flag configurations in real time, opting for an API implementation instead of an SDK may result in increased latency. Use the SDKs whenever possible, as they provide better performance, automatic error handling, and ensure a more seamless integration with the codebase.
Kameleoon supports all modern JavaScript frameworks, such as Angular, Vue.js, and Next.js, so you can always use a [JavaScript-based SDK](#selecting-a-javascript-sdk) for front-end development instead of relying on the API approach.
Visit the [API documentation](https://customers.kameleoon.com/apisdk/doc) to learn more about the available methods.
### Selecting a JavaScript SDK
In addition to the JavaScript/TypeScript SDK, Kameleoon also provides other JavaScript-based SDKs: the React SDK, React Native SDK, and NodeJS SDK. Most JavaScript frameworks work with the JavaScript/TypeScript SDK, but some are better suited to one of the other SDKs depending on the implementation. For example, apps that use server-side rendering (SSR) or [Edge integrations](../implementation-and-deployment/serverless-edge-compute-starter-kits) should use the NodeJS SDK. Here are the recommended SDKs based on JavaScript frameworks.
| Framework | Recommended SDK |
| --------------------------------- | -------------------------------------- |
| Edge integrations (any framework) | NodeJS SDK |
| Angular/AngularJS | JavaScript/TypeScript SDK |
| Express | NodeJS SDK |
| Deno | NodeJS SDK |
| Ionic | JavaScript/TypeScript SDK |
| JQuery | JavaScript/TypeScript SDK |
| NestJS | NodeJS SDK |
| NextJS (with SSR) | NodeJS SDK |
| NextJS (without SSR) | React SDK or JavaScript/TypeScript SDK |
| NodeJS | NodeJS SDK |
| Plain JavaScript | JavaScript/TypeScript SDK |
| React Native | React Native SDK |
| React | React SDK or JavaScript/TypeScript SDK |
| Svelte (with SSR) | NodeJS SDK |
| Svelte (without SSR) | JavaScript/TypeScript SDK |
| Vue (with SSR) | NodeJS SDK |
| Vue (without SSR ) | JavaScript/TypeScript SDK |
# SDK execution flow
Source: https://docs.kameleoon.com/developer-docs/feature-experimentation/get-started/sdk-execution-flow
Understand the three stages of Kameleoon SDK execution: initialization, user identification and attribute assignment, and variation assignment and tracking.
## Overview
Kameleoon's SDKs allow you to conduct experiments to enhance user experience in web and mobile applications. Based on the diagram below, implementing an experiment with a Kameleoon SDK involves three stages: **initialization**, **user identification and attribute assignment**, and **variation assignment and tracking**. This article will provide a detailed explanation of each of these stages.

Methods (and their names) described in each step below, will have different syntaxes, based on the convention of the particular language of the SDK.
### 1. Initialization
Upon initialization, the SDK fetches any updated feature flag configuration using Cloudflare’s Content Delivery Network via two methods: **Polling**, a default option where the SDK regularly sends a request to the CDN (default interval is every 60 minutes) to obtain the most recent configuration, and **Streaming**, a premium option where the Kameleoon SDK is notified of any real-time changes to the configuration via server-sent events (SSE). Once the configurations are fetched, the SDK begins visitor code assignment along with the variations and targeting process. For more information, refer to [technical considerations](../technical-reference/technical-considerations#feature-flags-configuration-and-bucketing).
As shown in the diagram, during **Streaming** , the `on_configuration_update` method (remember, name will vary across each SDK) allows you to handle the event when configuration has updated data. It takes one input parameter handler. The handler that will be called when the configuration is updated using a real-time configuration event. For more information, please refer to the individual [Web](#4-helpful-documents) and [Mobile](#4-helpful-documents) SDKs.
### 2. User identification and attribute assignment
At this stage, to calculate variation, **visitor code is allocated** and **user attributes** are incorporated:
* **1. Assigning visitor code:** Initialization provides the option to assign a unique ID to a visitor. For web SDKs, the `getVisitorCode()` method retrieves a visitor code from the request headers cookie. If the visitor code does not exist, the method generates a random visitor code and stores it in a response header cookie. For mobile SDKs, the visitor code is obtained from the mobile device’s memory.
* **2. Adding user attributes for targeting purposes:** Kameleoon’s targeting conditions enable activation of feature flags based on [user attributes](../targeting-and-segmentation/native-segmentation). To use these conditions effectively, set values using the `addData()` method and/or `getRemoteVisitorData()` to retrieve and use [specific criteria](../targeting-and-segmentation/native-segmentation#when-is-getremotevisitordata-required). User attributes are then stored in server memory for server-side SDKs, browser local storage for client-side SDKs, or device memory for mobile SDKs. For more details, refer to the [data storage article](../technical-reference/technical-considerations#data-storage).
* **3. Adding external data for targeting purposes:** External data, such as user preferences or CRM data, can be stored using the Data API (a REST API) via the [POST endpoint](/api-reference/map/update-data-for-several-keys/). This data is then retrieved in the SDK by using the `getRemoteData()` method.
### 3. Variation assignment and tracking
In Kameleoon SDKs, the `getVariation()` (`isFeatureActive()` / `getVariations()`) method retrieves the configuration of a feature experiment that contains multiple variations. It can be used to obtain the variation key(s) assigned to a specific user.
When a visitor meets all the targeting conditions and exposition rules for the feature flag, Kameleoon uses a hash function to assign the visitor to a variation and then sends an experiment event to the tracking service. If the visitor doesn’t meet the conditions, an activity event is sent to indicate that the user is active on the web or mobile app. Additionally, the `flush()` method can be used to send any other stored data to the tracking service.
### 4. Helpful documents
For language-specific integrations, please refer to the **Web SDK** and **Mobile SDK** articles:
**Web SDKs**
* [Node JS](../../sdks/web-sdks/nodejs-sdk)
* [Java](../../sdks/web-sdks/java-sdk)
* [JS/TS](../../sdks/web-sdks/js-sdk)
* [React](../../sdks/web-sdks/react-js-sdk)
* [C#](../../sdks/web-sdks/csharp-sdk)
* [Go](../../sdks/web-sdks/go-sdk)
* [PHP](../../sdks/web-sdks/php-sdk)
* [Ruby](../../sdks/web-sdks/ruby-sdk)
* [Python](../../sdks/web-sdks/python-sdk)
* [Rust](../../sdks/web-sdks/rust-sdk)
* [Elixir](../../sdks/web-sdks/elixir-sdk)
**Mobile SDKs**
* [iOS](../../sdks/mobile-sdks/ios-sdk)
* [Android](../../sdks/mobile-sdks/android-sdk)
* [Flutter](../../sdks/mobile-sdks/flutter-sdk)
* [React Native](../../sdks/mobile-sdks/react-native-sdk)
**Additional resources**
* [FAQ](../technical-reference/faq-global)
# SDK setup and feature flag tutorial
Source: https://docs.kameleoon.com/developer-docs/feature-experimentation/get-started/sdk-setup-and-feature-flag-tutorial
Set up the Kameleoon SDK and configure feature flags using this step-by-step checklist covering SDK integration, Kameleoon app setup, and optional Hybrid Mode.
Always check the [SDK documentation](../../feature-experimentation/get-started/overview) to ensure correct method names. The methods below are from the **Node.js SDK**. Some features or methods may not be available in all SDKs.
***
## SDK checklist overview
This guide provides a step-by-step checklist to [set up and use the Kameleoon SDK](#one-time-setup-in-the-sdk), [configure Feature Flags](#one-time-setup-in-the-kameleoon-app), and optionally [enable Hybrid Mode](#2-hybrid-mode-optional) (SDK + `engine.js`).
***
## 1. Basics
### One-time setup (in the SDK)
#### Step 1 – Install, configure, and initialize the SDK
* Install the SDK and configure it, paying attention to:
* `updateInterval`: Defines how often the SDK fetches the latest configuration from Kameleoon.
* `trackingInterval`: Defines how often the SDK sends tracked data to Kameleoon.
* Create a new `KameleoonClient` and call `initialize()` to load configuration.
* **PHP SDK only:** Install a [cron job](../../sdks/web-sdks/php-sdk#using-the-php-sdk-without-a-cron-job) to collect data.
***
#### Step 2 – Set the visitor code
* Use `getVisitorCode()` or a custom method to set the `kameleoonVisitorCode` cookie.
***
#### Step 3 (Optional) – Enable [Cross-Device Experimentation](../../cross-device-experimentation) & [Custom Bucketing Key](../../sdks/web-sdks/nodejs-sdk#using-a-custom-bucketing-key)
* **Cross-Device Experimentation:** Share the same `kameleoonVisitorCode` across devices.
* **Custom Bucketing Key:** Show the same variation to a defined group of visitors (e.g., users from the same organization).
***
#### Step 4 – Handle consent
* If an experiment requires consent, call `setLegalConsent()`. *(Not needed if the feature flag type uses Delivery Rules.)*
***
#### Step 5 – Send predefined data
* Use `addData()` to target:
* Device
* Browser
* Page URL
* Other predefined criteria
* Call `flush()` to send data to Kameleoon. *(Note: `flush` is also called implicitly by `isFeatureActive`, `getVariation`, and `trackConversion`.)*
***
#### Step 6 – Exclude and tag bots
* Exclude bots from results using `addData()` with the `userAgent` type.
* To tag internal bots, pass `curl/8.0` to `userAgent` in `addData()`.
***
### One-time setup (in the [Kameleoon app](https://app.kameleoon.com))
#### Step 7 – Create a feature flag
* Create a new feature flag in the Kameleoon App.
* Add at least one **rule** (Delivery or Experiment) to the **Rollout Planner**.
***
#### Step 8 – Define the segment
* **Option 1:** Target all visitors in the Kameleoon App and implement custom logic in the SDK.
* **Option 2 (Recommended):** Use a Kameleoon segment in the Kameleoon App.
* Ensure you use `addData()` in the SDK to send data used for targeting (page URL, device, browser, etc.).
***
#### Step 9 – Attach goals to the flag
* Attach at least one goal to track conversions.
***
#### Step 10 – Activate the flag
* Turn the flag **on** in the Kameleoon App to start serving variations.
***
### Setup for each flag (In the SDK)
#### Step 11 – Check feature activation
* Call `isFeatureActive()` to check if a visitor is targeted:
* Returns `false` if the variation is "off"
* Returns `true` if active
* Call `getVariation()` to retrieve the variation key.
***
#### Step 12 – Track conversions and set custom data
* Call `trackConversion()` with relevant parameters to track goals.
* Optionally, use `addData()` for custom targeting and segmentation.
***
#### Step 13 (Optional) – Use [previously collected data](../targeting-and-segmentation/native-segmentation#when-is-getremotevisitordata-required) or [External Data](../targeting-and-segmentation/use-external-data-to-target-users)
* **Previously Collected Data:** Call `getRemoteVisitorData()` to reuse collected or preloaded conditions.
* **External Data:** Use the **Data API** to collect external data and retrieve it in the SDK via `getRemoteData()`.
***
## 2. Hybrid Mode (Optional)
Follow these steps only if using [**Hybrid Mode**](./hybrid-experimentation) (Client-side SDK + `engine.js`).
### One-time setup (in the SDK)
#### Step 1 – Install engine.js
* Add the `engine.js` script to the front-end.
***
#### Step 2 – Handle frontend consent
If consent is required, handle it using:
* The **Activation API**
* The `kameleoonQueue` via Tag Manager
* A direct code snippet:
```js theme={null}
window.kameleoonQueue.push(['Kameleoon.API.Core.enableLegalConsent', 'BOTH']);
// or
window.kameleoonQueue.push(['Kameleoon.API.Core.disableLegalConsent', 'BOTH']);
```
***
#### Step 3 – Sync visitor code
If consent is **required**, sync the visitor code cookie between the SDK and the front-end:
```js theme={null}
window.kameleoonQueue.push({
level: "IMMEDIATE",
command: () => Kameleoon.API.Visitor.setVisitorCode("")
});
```
***
### Optional: Send data to external tools (Hybrid Mode)
#### One-time setup (in the [Kameleoon app](https://app.kameleoon.com))
##### Step 1 – Activate third-party integration
* In the **Integrations** section of the Kameleoon App, enable the analytics tool you want to use (e.g., GA4).
***
#### Setup for each flag (in the Kameleoon app)
##### Step 2 – Turn on the integration
* In the **Feature Flag Dashboard**, activate the tool for the chosen rule type (Experiment or Delivery).
* Ensure integration is enabled in the correct environment (Production, Development, or Staging).
***
#### Setup for each flag (in the SDK)
##### Step 3 – Retrieve tracking code
* Call `getEngineTrackingCode()` in the SDK code within **5 seconds** of activating the feature (`isFeatureActive` or `getVariation`).
***
##### Step 4 – Inject tracking code into the page
Insert the returned code into the HTML:
```js theme={null}
window.kameleoonQueue = window.kameleoonQueue || [];
window.kameleoonQueue.push(['Experiments.assignVariation', 244200, 962266]);
window.kameleoonQueue.push(['Experiments.trigger', 244200, true]);
```
***
##### Step 5 – Verify event transmission
* On the targeted page, inspect the page elements to confirm code injection.
* For GA4, verify the event is pushed into the `dataLayer`.
* In the **Network tab**, confirm that the event is sent to the correct analytics tool (GA4 should show a “collect” event).
# Serverless edge compute starter kits
Source: https://docs.kameleoon.com/developer-docs/feature-experimentation/implementation-and-deployment/serverless-edge-compute-starter-kits
Deploy Kameleoon feature flags and experiments at the edge using starter kits for Fastly, Cloudflare Workers, Vercel, AWS Lambda, and Akamai.
A key benefit of edge computing is that it overcomes the static nature of CDNs by running code at the edge. For experimentation purposes, this means bucketing decisions for experiments occur at the edge with reduced latency and avoid caching issues. Use a starter kit to minimize latency or to run feature flags and experiments on parts of the application that are heavily cached.
Kameleoon has extended and embedded the [NodeJS SDK](../../sdks/web-sdks/nodejs-sdk) into the following starter kits:
* [Fastly Compute@Edge](https://github.com/kameleoon/fastly-compute-starter-kit)
* [Cloudflare Workers](https://github.com/kameleoon/cloudflare-worker-starter-kit)
* [Vercel Edge Functions](https://github.com/Kameleoon/vercel-starter-kit)
* [AWS Lambda with CloudFront Lambda@Edge function](https://github.com/Kameleoon/aws-lambda-edge-starter-kit)
* [Akamai Edge](https://github.com/Kameleoon/akamai-starter-kit)
## Tracking in serverless environments
Most serverless edge compute providers, including AWS, Akamai, Vercel, and Fastly, charge based on the CPU time your functions consume. Waiting for tracking requests to complete at the edge increases execution time and costs. To optimize performance and reduce expenses, Kameleoon recommends performing tracking on the client side.
To implement client-side tracking, use one of the following methods:
* **Engine tracking code**: Use the `getEngineTrackingCode()` method to generate a tracking script that runs in the client browser.
* **JavaScript SDK**: Load the [Kameleoon JavaScript SDK](../../sdks/web-sdks/js-sdk) on the client side for tracking. Because the edge worker handles bucketing and experiment variation decisions, the client-side SDK only manages tracking and does not require variation configuration.
### Cloudflare Workers
Cloudflare Workers is an exception because it allows you to wait for asynchronous requests without additional costs. In a Cloudflare environment, you can perform tracking requests directly within the edge worker without increasing your billable CPU time.
# Web server modules
Source: https://docs.kameleoon.com/developer-docs/feature-experimentation/implementation-and-deployment/web-server-modules
Run Kameleoon A/B tests directly in Apache, Nginx, and other web servers to support variation delivery on heavily cached pages without back-end SDK code.
Kameleoon has traditionally allowed the operation of A/B tests at the (using a JavaScript engine) or at the (using a server-side SDK). However, because extensive caching strategies are common for performance reasons, HTTP requests may never reach the back-end application servers. Instead, a front-facing web server replies directly with a cached version of the requested page. In these configurations, server-side SDKs cannot be used, since the logic of allocating a visitor to an experiment happens in the back-end application code, which means many requests cannot be processed because a cached version of the page is returned instead. In other words, the code implementing traffic repartition to variations of an experiment would not be run.
To solve this challenge, Kameleoon A/B testing modules are available for the major web servers. This allows the web server to determine the variation used by each visitor. The server can reply with a cached version of the correct variation, so the application can benefit from standard caching strategies.
Web testing at the **web server level** is an intermediary level between the front-end and the back-end.
## General concepts
A Kameleoon web server module is a low-level component (written in C for optimal performance) that performs variation allocation whenever an HTTP request triggers an A/B experiment. It then (internally) redirects the request to a potentially different URL corresponding to the chosen variation.
For example, if a visitor hits the page `https://www.shop.com/plasma-tvs.html` and there is a running experiment on that category page, with three variations, the web server redirects the HTTP request internally to either `https://www.shop.com/plasma-tvs.html` (original version), `https://www.shop.com/plasma-tvs.html?version=B` (first variation) or `https://www.shop.com/plasma-tvs.html?version=C` (second variation). It then returns a cached version of these pages (or passes the call to the application server to generate a new one if the TTL value has expired).
The A/B/C test is completely transparent to end users. The visitor only sees the canonical URL `https://www.shop.com/plasma-tvs.html` in the browser.
Setup and configuration of the experiment (including setting the target and redirection URLs; for example, by adding the `?version=B` parameter) are completed in the Kameleoon platform. The web server module periodically refreshes its configuration from the Kameleoon servers and database. For convenient planning and deployment of A/B tests, all usual Kameleoon features are available, including starting, pausing, and stopping tests; changing deviation; and modifying configuration.
Due to the technical constraints of the client-server model on the web, using URL conditions is the only way to configure experiment targeting at the web server level. Similarly, always use URL redirects in Kameleoon to configure variations at the web server level. The negative performance and SEO impacts associated with front-end (browser) redirection are not an issue with web server redirects. Instead, internal web server redirects are perfectly safe and considered a good practice because they are processed internally on the web server (they're fast) and are transparent to search engine crawlers.
### Operating web server A/B experiments
1. In the Kameleoon app, create a new A/B experiment, with the **Code editor**.
2. In Kameleoon, create the variations you want to implement for the experiment. For each variation, choose the URL redirection option and enter the desired new URL.
3. Choose the targeting of the experiment by adding one or more URL targeting conditions. Any matched URL on the web server will trigger the web server module for the request and activate an internal redirect. The module stores a (first-party) cookie named **kameleoonVisitorCode** for matched requests.
Only URL redirection options are taken into account for web-server experiments. Any other modifications on the variations, such as JavaScript or CSS code changes via the graphical editor, are ignored.
You can then choose the deviation and launch the experiment as usual. Pausing or stopping the experiment also works as expected.
[Traffic exclusion](/user-manual/experimentation/web-experimentation/code-based-experiments/using-the-code-editor#finalization-steps) does not work with web server A/B experiments. Analytics for the original version of the experiment will include data from visitors in the excluded bucket, instead of excluding those visitors from the experiment entirely.
To help with potential treatments on the server-side (tracking, implementation of variations), the web server adds an HTTP header to any request that matches a Kameleoon experiment, when the option is turned on in Nginx config file (`kameleoon_headers on;`). The first header is named **kameleoon-experiment** and its content is in the format `experimentID=variationID`, where `experimentID` represents the triggered experiment ID, and `variationID` represents the ID of the variation assigned. The second header is named **kameleoon-redirection** and its content is in the format `variationID=redirectionURL`, where `variationID` represents the ID of the variation assigned and `redirectionURL` represents parameter used for the redirection.
## Supported platforms
### Nginx server module
The module supports version **1.18.0**, **1.20.2** and **1.21.4** of Nginx; the [Docker package is available here](../../../assets/developer-docs/kameleoon-module-nginx-1.2.0-docker.zip).
The latest version of the module supports version **1.27.1** of Nginx; the [Docker package is available here](../../../assets/developer-docs/kameleoon-module-nginx-1.4.0-docker.zip).
The module is tested under an x86\_64 architecture.
A Python script must also be installed in parallel (and launched periodically via a CRON job; 30 or 60 minute intervals are recommended). Automation API credentials (for OAuth 2.0 Authentication) are required to use the script. See the [API credentials](/user-manual/account-and-team-management/users-and-teams/api-credentials) article for details.
### Apache HTTPd server module (deprecated)
The Apache httpd module supports **version 2.4** and has been tested on a CentOS distribution with an x86\_64 CPU architecture.
A Python script must also be installed in parallel (and launched periodically via a CRON job; 30 or 60 minute intervals are recommended). This script refreshes or updates the generated Nginx configuration file required by the Kameleoon module. The script also reloads the configuration file.
# Headless CMS integration guide
Source: https://docs.kameleoon.com/developer-docs/feature-experimentation/integrations/headless-cms-integration-guide
Integrate Kameleoon feature flags with a headless CMS to control content delivery per variation, using the React SDK as a reference implementation.
## Step 1: Defining feature variations in Kameleoon
In your Kameleoon dashboard, create a new feature flag that controls which version of content is displayed. For example, if you’re experimenting with different versions of a homepage section:
* **Feature flag name:** `Homepage section`
* **Feature variation 1:** `section_v1`
* **Feature variable 1:** `content_id = ID of the content on version 1 of your CMS.`
* **Feature variation 2:** `section_v2`
* **Feature variable 2:** `content_id = ID of the content on version 2 of your CMS.`
These `content_id` values should correspond to the unique identifiers used in your headless CMS for each content version.

### Step 2: Fetching and displaying content from CMS
Now, in your React application, use the getFeatureVariable method to retrieve the content\_id based on the active variation and use it to fetch the corresponding content from your headless CMS.
```js theme={null}
// Define the type for your CMS content
interface CMSContent {
title: string;
body: string;
}
function HomepageSection() {
const [content, setContent] = useState(null);
useEffect(() => {
const fetchContent = async () => {
try {
// Fetch the content_id for the current variation
const content_id: string = await getFeatureVariable(
'homepage_section',
'content_id'
);
// Fetch the content from your headless CMS using the content_id
const response = await fetch(`https://your-cms.com/api/content/${content_id}`);
const data: CMSContent = await response.json();
// Update the state with the fetched content
setContent(data);
} catch (error) {
console.error('Error fetching content:', error);
}
};
fetchContent();
}, []);
return (
{/* Render the content fetched from your headless CMS */}
{content ? (
{content.title}
{content.body}
) : (
Loading...
)}
);
}
export default HomepageSection;
```
**Mechanism:**
* **Fetching the content id:** The `getFeatureVariable` method retrieves the `content_id` for the active variation. The `content_id` is then used to fetch the appropriate content from the CMS.
* **Error handling:** A try-catch block is included to handle any errors during the content fetch process.
* **Rendering:** The fetched content is rendered dynamically in your React component.
### Step 3: Managing CMS content
Ensure that each content variation in your headless CMS is associated with a unique ID. These IDs should match the `content_id` feature variables set in Kameleoon.
When users load the page, Kameleoon decides which variation to serve. Based on the `content_id`, the correct content is retrieved and displayed.
**Conclusion:** By following these steps, Kameleoon is integrated with the headless CMS using the React SDK. This setup allows for dynamic experimentation and delivery of different content variations, enhancing personalization and the effectiveness of the user experience.

# Setting up Vercel
Source: https://docs.kameleoon.com/developer-docs/feature-experimentation/integrations/setting-up-vercel
Integrate Kameleoon with Vercel Edge Functions to run server-side experiments at the edge, delivering personalized content with minimal latency for Next.js applications.
## Overview
By using [Vercel Edge Functions](https://vercel.com/features/edge-functions) with Kameleoon, personalized content can be efficiently delivered to website visitors. These edge functions deploy globally via the Vercel Edge Network, allowing server-side logic to reside closer to users for swift and efficient content delivery. For [NextJS](https://nextjs.org/) applications on Vercel, the Kameleoon integration facilitates experimentation directly at the edge. The Kameleoon Vercel Integration streamlines the initialization of Vercel projects by pushing Kameleoon configurations directly to Vercel's Edge Config.
Vercel enforces size limits on Edge Config values. Given these limits, Vercel Enterprise and Pro customers with moderately-sized environments stand to benefit most from this integration. For further details, consult Vercel's documentation on [Edge Config Limits and pricing](https://vercel.com/docs/storage/edge-config/edge-config-limits).
## Prerequisites
Before starting, ensure you have a Vercel account with at least one project.
## Installation
To install the Kameleoon Integration for Vercel:
1. Navigate to the [Vercel Marketplace](https://vercel.com/integrations/kameleoon).
2. Search for the Kameleoon Integration and click **Add Integration**.
3. Choose a Vercel Account for the Integration.
4. Select the Projects for the Integration.
5. Review the Integration permission requirements and click **Add Integration**.
You can now map Kameleoon projects to Edge Configs. Kameleoon will synchronize project configs with the specified Edge Config.
## Configuration
To modify an existing Kameleoon Vercel Integration:
1. Visit the [Vercel Integrations Dashboard](https://vercel.com/dashboard/integrations).
2. Find the Kameleoon Integration and click **Manage**.
3. Click **Configure** to open the Kameleoon configuration panel.
4. Choose a different Edge Config destination or add more connections.

5. Click **Save** to finalize the changes.
## Uninstallation
To remove an existing Vercel Integration:
1. Access the [Vercel Integrations Dashboard](https://vercel.com/dashboard/integrations).
2. Identify the Kameleoon Integration and select the **Manage** action.
3. Click **Configure** to access the Kameleoon configuration panel.
4. Choose **Remove connection**.
5. Return to the Vercel Integration Dashboard.
6. Select **Remove Integration**.
# How to collect data
Source: https://docs.kameleoon.com/developer-docs/feature-experimentation/targeting-and-segmentation/how-to-collect-data
Troubleshoot missing data collection in Kameleoon feature flags and experiments with a back office and SDK-side checklist.
***
## In the back office
Ensure the following conditions are met:
* The **rule** is created for the correct **environment** (`production`, `staging`, or `development`).
* The **rule** is **enabled** (turned **on**).
* The **rule** targets **traffic** that can actually be exposed (i.e. matching segments or visitors).
***
## In the SDK
Check these points carefully:
* The `KameleoonClient` is created with the **correct configuration**:
* `siteCode`
* `environment` variable
* `networkDomain` (if applicable)
* `getVisitorCode()` is called **only once**, and its value is **reused** wherever the `visitorCode` is needed.
* If using **Hybrid Mode** (with `engine.js` on the frontend):
* The `visitorCode` is correctly **synced** between the SDK and the frontend.
* For **Experiment Rules**:
* `setLegalConsent(true)` is called to ensure that **data collection** is allowed.
* For **Delivery Rules**:
* `isFeatureActive()` or `getVariation()` is called.
* The method returns `true` (or the expected variation).
* For **Experiment Rules**:
* `getVariation()` is called and returns the **expected variation**.
***
## Debugging tips
If you’ve confirmed all of the above and data is still missing:
* **Log in the console**:
* The consent value
* The `visitorCode`
* The variation values Verify that the values match those shown in the browser.
* **Enable SDK logging** and check for any **errors**.
# Target users with native segmentation criteria
Source: https://docs.kameleoon.com/developer-docs/feature-experimentation/targeting-and-segmentation/native-segmentation
Trigger feature flags based on specific criteria and manage visitor data across SDK environments.
Kameleoon targeting conditions trigger feature flags based on specific criteria. To use these conditions effectively, set their values with the `addData()` method. In some scenarios, call `getRemoteVisitorData()` to retrieve historical visitor data. This combination creates highly targeted and personalized experiences.
## Manage data in Kameleoon SDKs
Accurate data ensures consistent targeting and experimentation. The following sections explain how client-side and server-side SDKs manage targeting conditions and specify when to use `getRemoteVisitorData()` to fetch data from the server.
### Key terminology
* **Targeting condition**: The specific user or session attribute used for targeting (e.g., Conversion, Browser, Custom Data).
* **Client-side**: Data handling for standard SDKs operating in a web browser or mobile app.
* **Client-side (Cross-device)**: Data handling for client-side implementations that maintain a consistent visitor profile across multiple devices.
* **Server-side**: Data handling when the SDK runs on a backend server. Unlike client-side SDKs, server-side SDKs typically delete visitor information after a session ends.
### Data handling definitions
#### Client-side SDKs
* **No (Automatic)**: The SDK collects this data automatically. It requires no remote requests or explicit `addData()` calls.
* **No**: The SDK does not collect this data automatically. You must use `addData()`, `trackConversion()`, or evaluation methods like `getVariation()` to add this data. It does not require a remote request.
* **Yes**: You must call `getRemoteVisitorData()`. This applies to data generated on the server (like "Likelihood to convert") or when unifying sessions across multiple devices to retrieve actions from a previous device.
#### Server-side SDKs
* **Not supported**: The server-side SDK does not support this condition.
* **No (Automatic)**: Applies only to "SDK Type." The SDK collects this automatically.
* **No**: Use `addData()` or `trackConversion()` to provide this data. It does not require a remote request.
* **No/Yes**: You can provide data directly on the server or obtain it via a remote request. This occurs if a client-side SDK has already collected information during the current visit.
* **Yes**: You must call `getRemoteVisitorData()`. Because server-side SDKs have [limited data storage](../technical-reference/technical-considerations#data-storage), they require a remote call to identify historical actions, such as previous visits or exclusivity for an experiment.
## Data collection requirements
The SDK requires specific visitor data to evaluate targeting conditions. The table below identifies which criteria the SDK handles automatically and which require an explicit method call.
| Targeting condition | Actions (Web) | Actions (Mobile) | Actions (Server-side) |
| :------------------------- | :----------------------------------------------------------------- | :----------------------------------------------------------------- | :----------------------------------------------------------------- |
| **Exclusive feature flag** | `isFeatureActive()` / `getVariation(s)` / `getRemoteVisitorData()` | `isFeatureActive()` / `getVariation(s)` / `getRemoteVisitorData()` | `isFeatureActive()` / `getVariation(s)` / `getRemoteVisitorData()` |
| **Target feature flag** | `isFeatureActive()` / `getVariation(s)` / `getRemoteVisitorData()` | `isFeatureActive()` / `getVariation(s)` / `getRemoteVisitorData()` | `isFeatureActive()` / `getVariation(s)` / `getRemoteVisitorData()` |
| **Browser (web-only)** | Auto-added / `addData()` | Not supported | `addData()` / `getRemoteVisitorData()` |
| **Device** | Auto-added / `addData()` | Auto-added / `addData()` | `addData()` / `getRemoteVisitorData()` |
| **Conversion** | `addData()` / `getRemoteVisitorData()` | `addData()` / `getRemoteVisitorData()` | `addData()` / `getRemoteVisitorData()` |
| **Custom data** | `addData()` / `getRemoteVisitorData()` | `addData()` / `getRemoteVisitorData()` | `addData()` / `getRemoteVisitorData()` |
| **Page URL (web-only)** | Auto-added / `addData()` | Not supported | `addData()` / `getRemoteVisitorData()` |
| **Page title (web-only)** | Auto-added / `addData()` | Not supported | `addData()` / `getRemoteVisitorData()` |
| **Operating system** | Auto-added / `addData()` | Auto-added | `addData()` / `getRemoteVisitorData()` |
| **IP geolocation** | `addData()` | `addData()` | `addData()` / `getRemoteVisitorData()` |
| **SDK type** | Auto-added | Auto-added | Auto-added |
| **Visitor code** | `isFeatureActive()` / `getVariation(s)` / `getRemoteVisitorData()` | `KameleoonClientFactory.create()` | `isFeatureActive()` / `getVariation(s)` / `getRemoteVisitorData()` |
| **Segment** | `addData()` / `getRemoteVisitorData()` | `addData()` / `getRemoteVisitorData()` | `addData()` / `getRemoteVisitorData()` |
| **Likelihood to convert** | `getRemoteVisitorData()` | `getRemoteVisitorData()` | `getRemoteVisitorData()` |
## Use getRemoteVisitorData() for historical data
The following table outlines when a remote call to `getRemoteVisitorData()` is required to retrieve historical data for targeting decisions.
| Targeting condition | Client-side | Client-side (Cross-device) | Server-side |
| :------------------------- | :------------- | :------------------------- | :------------- |
| **Exclusive feature flag** | No | Yes | Yes |
| **Custom data** | No | Yes | Yes |
| **Page URL (web-only)** | No (Automatic) | No (Automatic) | No/Yes |
| **Page title (web-only)** | No (Automatic) | No (Automatic) | No/Yes |
| **IP geolocation** | No | No | No/Yes |
| **SDK type** | No (Automatic) | No (Automatic) | No (Automatic) |
| **Time since first visit** | No (Automatic) | Yes | Yes |
| **Total number of visits** | No (Automatic) | Yes | Yes |
| **Likelihood to convert** | Yes | Yes | Yes |
### Benefits of remote data retrieval
Calling `getRemoteVisitorData()` provides the following advantages:
* **Up-to-date information**: Decisions use real-time data from the Data API.
* **Cross-device consistency**: Accesses data collected from other devices or sessions.
* **Historical access**: Retrieves previous user behavior, such as past URL visits, even if the local SDK state has cleared.
Use the `VisitorDataFiltersType` parameter to specify the number of past visits to retrieve or to apply specific criteria filters.
## Hybrid Experimentation mode
Hybrid Experimentation combines the SDK with the Kameleoon JavaScript snippet to enable advanced targeting. For more details, see the [Hybrid Experimentation](../get-started/hybrid-experimentation) guide.
**Benefits:**
* Streamlines the implementation process.
* Accesses engine-collected client-side data (e.g., datalayer variables, front-end goals) directly at the SDK level.
**Requirement:**
* Implement both the SDK and the Kameleoon JavaScript tag.
## Calling `getRemoteVisitorData()` in this mode provides access to all data points automatically collected by the Kameleoon engine on the webpage.
# Use external data to target users
Source: https://docs.kameleoon.com/developer-docs/feature-experimentation/targeting-and-segmentation/use-external-data-to-target-users
Target users in Kameleoon experiments using external CRM or CDP data stored via the Data API Map endpoint and retrieved with the getRemoteVisitorData method.
## Using the Data API Map endpoint to store data
To store additional data on Kameleoon remote servers for use with feature flags and experiments, use the Data API Map endpoint to post data for each user. For further details, refer to the [Map documentation](/api-reference/map/update-data-for-several-keys).
This section explains how to retrieve and use data in feature flags and experiments. This allows for creating more targeted and personalized experiences for users based on relevant data.
### Create custom data
To use any data point as a targeting criterion, you first need to create a [custom data](/user-manual/assets/custom-data/create-custom-data) entry for the data point by following these steps:
1. In the [Kameleoon app](https://app.kameleoon.com), click **Configure** > **Custom data**.
2. In the **Custom data** section, click **New custom data**.
3. Choose the project.
4. Enter a descriptive name for the custom data.
5. For the acquisition method, choose **Kameleoon SDK method**.
6. For the type, select **Single** .
7. For the data format, select **String**.
8. Choose the appropriate [scope](../../custom-data#scope-for-targeting) for the data.
9. Click **Next** and **Skip** the following screen to save the custom data.
### Retrieve data from the Data API Map endpoint
Once you've created the custom data, you need to do the following:
1. Retrieve the relevant data from the Data API Map endpoint by using the `getRemoteData` method. See the documentation for the SDK being used.
2. The `getRemoteData` method returns a JSON object that contains data related to the user. You can parse this JSON response to retrieve the data value you want to use as a targeting condition and set it as the value of the custom data entry using the SDK `addData()` method.
### Use the custom data as a targeting criterion
You can now use the custom data entry as a targeting criteria in your feature flags. Here's how:
1. In the **Segments** page (**Configure** > **Segments**), create a new segment or open an existing segment to open the segment builder.
2. In the \**Custom Data* section, select the custom data as a targeting criterion.
3. Save the segment and use it in the feature flags.
# FAQ
Source: https://docs.kameleoon.com/developer-docs/feature-experimentation/technical-reference/faq-global
This list is regularly updated with common customer questions.
Use the Kameleoon Application script for web experiments created using the graphic or code editor. Use the web SDK for feature flags and feature experiments.
Note that Kameleoon can run in Hybrid mode. Hybrid mode uses both Web SDKs and the Kameleoon JavaScript application file. Hybrid mode allows you to use the optimal approach for individual tasks. For example, you can implement and deploy variations more easily on the server side, while tracking can be performed more effectively with the JavaScript file.
Kameleoon uses CDN servers during initialization. Once the configuration is received and cached, retrieval and updating occur quickly (50-70ms depending on the latency of the server from the nearest CDN).
There are two methods to get the configuration: [Polling](./technical-considerations#polling-default) and [Streaming](./technical-considerations#streaming-premium-option-premium-option).
The [Server Side Events](https://en.wikipedia.org/wiki/Server-sent_events) (SSE or EventSource) protocol is used.
The CDN is purged every time you update a feature flag configuration (for example, variations, traffic expositions, and targeting), or every 24 hours.
If you use a client-side SDK and the website restricts the loading of resources (scripts, images, media, CSS) via the standard Content-Security-Policy (CSP) HTTP header, update the site's CSP to allow Kameleoon resources to load:
```
script-src https://[your-site-code].kameleoon.io https://[your-site-code].kameleoon.eu https://client-config.kameleoon.com https://sdk-config.kameleoon.eu https://*.experimentation.dev 'unsafe-eval';
connect-src https://[your-site-code].kameleoon.io https://[your-site-code].kameleoon.eu https://eu-data.kameleoon.eu https://eu-data.kameleoon.io https://na-data.kameleoon.eu https://na-data.kameleoon.io https://editor.kameleoon.com https://api.kameleoon.com https://customers.kameleoon.com https://logger.kameleoon.io https://client-config.kameleoon.com https://sdk-config.kameleoon.eu https://*.experimentation.dev;
```
If you use Kameleoon in [Hybrid mode](../get-started/hybrid-experimentation), the domain for your Kameleoon scripts `https://[your-site-code].kameleoon.xx` may vary from one project to another. Your projects may be hosted on either `kameleoon.eu` or `kameleoon.io` depending on their creation date. Make sure you use the domain displayed in your project in the Kameleoon App. Replace \[your-site-code] with your Kameleoon [site code](/user-manual/faq#how-do-i-find-my-sitecode) in each line that it appears and add this to your configuration.
Since each server instance has its own memory, all collected visitor data will be stored on a given instance. You need to use a framework where requests from the same visitor are processed by the same server instance. Otherwise, visitor data must be added completely before each tracking request, or loaded using the `getRemoteVisitorData` method.
If the problem is in the SDK configuration difference, use the [Streaming](./technical-considerations#streaming-premium-option-premium-option) option.
All evaluations happen locally to eliminate latency. Tracking requests then go asynchronously to Kameleoon Data API servers.
To assign a visitor to an experiment variation, Kameleoon first builds an identifier using the visitor code, the experiment ID, and a potential additional element in case of respooling. Then, a synchronous implementation of the hash function [SHA-256](https://project.kameleoon.net/issues/256) computes a hash of this identifier. The integer obtained through hashing is then mapped to a floating number between zero and one to assign it to an experiment variation. The [SHA-256](https://project.kameleoon.net/issues/256) function is deterministic, so the same user (with the same visitor code) will always be assigned to the same variation for an experiment, unless recomputation of the assignment is explicitly requested.
Follow the methodology detailed [here](/user-manual/experimentation/feature-experimentation/use-cases/build-whitelists-to-rollout-a-feature-for-internal-users).
All possible cases are explained in this [article](/user-manual/experimentation/feature-experimentation/using-the-rollout-planner/rules-and-targeting/add-a-new-rollout-rule#user-targeting-and-bucketing).
There are several reasons no data is displayed on the results page:
* Wait 30-60 minutes for the Kameleoon server to confirm a visit. Every time the same visitor lands on the website, Kameleoon creates a new visit. The visit ends as soon as Kameleoon doesn't receive new activity events (for example, exposure to a campaign, page view, scroll, clicks) in the last 30 minutes. Kameleoon creates a new visit after 30 minutes of inactivity.
* If you have enabled bot filtering in the project settings, there might be an error with the user-agent value being set on the SDK. Refer to [this article](/user-manual/faq#how-does-kameleoon-filter-bot-traffic-from-my-results) for more details.
* Legal Consent is set to **Required** in the project settings, but the setLegalConsent SDK method has not been called. Refer to [this documentation](/user-manual/project-management/consent-management-policy#for-web-experiments-/-feature-experiments-/-hybrid-experiments) for more details.
* None of the SDK methods that send a tracking request to Kameleoon servers were used.
[The following article](/user-manual/experiment-analytics/analyze-results/advanced-analysis/analyze-a-feature-experiments-results) provides additional help in debugging the issue.
If you see a large number of visits from visitors, they could be bots. To prevent bots from affecting your experiment, enable the [Bot filtering option](/user-manual/faq#how-does-kameleoon-filter-bot-traffic-from-my-results) in your project settings. To indicate that a visitor is not a bot, you need to pass the Kameleoon UserAgent data by using the SDK method. Calling the method will prevent Kameleoon from filtering the user.
If your reports show unexpected allocation (for example, 10/90 instead of 50/50) or if visitors are missing, it might be due to one of the following reasons:
* **Narrowing the visitor pool for specific variations:** If you first call `getVariations(onlyActive: true, track: false)`, the SDK only returns visitors assigned to active (`ON`) variations. If you then only display experiment pages and call `getVariation(track: true)` for these specific visitors, Kameleoon tracks only the `ON` variation, which results in a report that only shows one variation.
* **Insufficient time for tracking requests:** Kameleoon sends data at a specific interval. If a visitor stays on a page with an integrated Kameleoon client for the `ON` variation, but moves to a page without it for the `OFF` variation, the client might not have enough time to send the tracking request for the `OFF` variation.
* **Missing configuration for specific variations:** You might have omitted the `UserAgent` or `setLegalConsent` for some variations. For example, if you only provide consent on the page for the `ON` variation, Kameleoon cannot track visitors in the `OFF` variation.
* **Missing visitor data:** The SDK does not collect visitor data automatically; you must add it explicitly for targeting and tracking to work correctly.
### Check your targeting setup
If you suspect targeting issues, follow these steps:
1. Create a non-targeting rule with 100% exposure and assign your desired variation.
2. Add targeting and ensure the user stops receiving the variation.
3. Add the required Kameleoon data.
The user should receive the variation again. If this fails, try using simpler targeting conditions to isolate the issue.
Yes, data is immediately available for targeting. Data will be available during the visitor session for server-based SDKs and during the set lifetime for client-based SDKs (mobile and web).
It depends on the type of SDK.
In server SDKs, the visitor's data is stored in operational memory during the visitor's session. The session's duration can be set, although the default is 30 minutes.
The longer the session duration using the sessionDuration parameter, the more data SDK holds in memory. More data means increased consumption. The session is extended by an additional 30 minutes each time a visitor is contacted. So, SDK guarantees that data will not be deleted for at least 30 minutes from the last request.
In client SDKs (mobile and web), data is stored in local storages (in web LocalStorage). Data can be stored forever; however, using the [dataExpirationInterval or targetingDataCleanupInterval](../../sdks/web-sdks/js-sdk#configuration-parameters) parameter, you can set the data's expiration date, after which, the data will be deleted.
Generally, there is no need to call the "flush" method manually: data is sent along with other calls to [SDK methods](#which-methods-trigger-http-requests-are-they-synchronous-or-asynchronous). However, if you need to send data to the Data API without triggering the visitor feature flag, then use the "flush" method.
If you have a server-based SDK, data is stored during a visitor's session. You don't need to load the data on every request if the user's session hasn't expired. In mobile SDKs, data is stored forever (or in accordance with your settings).
If the user session is no longer active or if the visitor is moving between devices in the client SDK, call the `getRemoteVisitorData` method with the appropriate parameters to get data sent to the Data API. After loading, the data is included in visitor targeting.
If legal consent is enabled, data can only be collected with visitors' consent.
If you're using the Experiment Rule and aren't receiving visitor statistics, ensure that:
* **In The [Kameleoon App](https://app.kameleoon.com)**
* The rule is created for the correct environment (production, staging, or development).
* The rule is enabled (turned on).
* The rule targets traffic that can actually be exposed.
* If bot filtering is enabled on your project, [add User Agent to the filter](/user-manual/faq#how-does-kameleoon-filter-bot-traffic-from-my-results).
* **In the SDK**
* The KameleoonClient is created with the correct configuration (siteCode, environment variable, and, if applicable, networkDomain).
* getVisitorCode is called only once, and its value is reused wherever the visitorCode is needed
* If using hybrid mode (engine.js on the front), the visitorCode is correctly synced with the front end.
* For experiment rules, setLegalConsent(true) is called to ensure data collection is allowed.
* For delivery rules, isFeatureActive() (or getVariation()) is called, and it returns true (or the expected variation).
* For experiment rules, getVariation() is called, and it returns the expected variation.
* **Debugging Tips**
* Log in the console: the consent value, the visitorCode, and the variation values, and verify they match what you see in the browser.
* Enable SDK logging and check for any errors.
According to GDPR rules, without visitor consent, Kameleoon only uses the technical information necessary for correct operation of product functionality.
Without consent, Kameleoon sends variations for Targeted Delivery rules (but not for Experiment rules). All other information (for example, CustomData, Page Views, and Geolocation) is sent only with visitor consent (when permission has been granted).
You can read about consent management in more detail [here](/user-manual/project-management/consent-management-policy#how-to-choose-your-consent-management-policy).
By default, the SDK batches multiple events together and sends a tracking request to Kameleoon servers for analytics purposes on a configurable interval. This approach improves efficiency and reduces server load.
A tracking request will be sent:
* **Periodically:** By default, a request is sent every **1000 milliseconds (1 second)**. You can change this interval by setting the **tracking interval** value.
* **On demand:** Instantly, if a method like `flush(instant=true)` is called in your code.
Specifically, a tracking request is triggered if any of the following methods are called before the interval expires:
* `getVariation` (when `track` is set to `true`).
* `getVariations` (when `track` is set to `true`).
* `isFeatureActive` (when `track` is set to `true`).
* `trackConversion`
* `flush` (with or without `instant=true`)
In addition to the above method calls, **client-side SDKs** send a tracking request every **15 seconds** if no other activity has occurred. This request helps maintain the visitor session. The activity tracking interval can be configured with the [Android](../../sdks/mobile-sdks/android-sdk#using-activitytrackingintervalmillisecond) and [iOS](../../sdks/mobile-sdks/ios-sdk#using-activitytrackingintervalmillisecond) SDKs.
For **server-side SDKs**, event batching is particularly useful as each tracking request can consolidate multiple visitors' data into a single request. This approach aggregates information on all affected visitors and sends it once per interval, improving efficiency and reducing server load.
Tracking requests are subject to [Data API rate limits](../../apis/data-api-rest/overview#rate-limits).
For **client-side SDKs**, in environments where multiple visitors share the same network (for example, in an office), they may appear to originate from the same IP address, which can exceed the rate limit and cause a `429 - Too Many Requests` error.
In different SDKs the methods may be named differently due to language peculiarities.
The following is a list of SDK methods that make HTTP requests:
* isFeatureActive / getFeatureVariationKey / getFeatureVariable / trackConversion / flush
* These methods make asynchronous requests to the Data API to store all information about the visitor (including variations received by the user), which are used to display statistics in the app.kameleoon.com
* getRemoteData / getRemoteVisitorData / getWarehouseAudience
* These methods make synchronous requests to the Data API to obtain information about the visitor
* Additionally, SDK makes asynchronous requests to obtain the configuration necessary for internal work.
`isFeatureActive` can be called when you need to know whether the flag is active, but do not need to know the exact variation received for the visitor. When using Experiment rules, it is better to call `getFeatureVariationKey` if you have two or more variations other than "off."
Yes, you can implement a hybrid integration using both a client-side SDK (such as the Kameleoon JavaScript SDK or the `engine.js` application file) and a server-side SDK. In this setup, it is essential to call the `getVisitorCode` method. This ensures consistent visitor recognition between the browser and the server, and guarantees consistent variation allocation when running both client-side code (for example, event tracking) and server-side code (such as feature execution) for a given feature flag.
You should use `getVisitorCode` in instances where you are using a hybrid integration (web-site \<-> server sdk, js sdk \<-> server, engine \<-> server sdk). When calling `getVisitorCode`, the visitor code will be obtained, and transmitted using a cookie. If you do not use a hybrid integration, you don't need to call `getVisitorCode`; however, you can still call it to generate a random visitor code.
Domain installation is required for `getVisitorCode`. Otherwise, you may get different variations for one visitor, since it will have different visitor codes on different subdomains of your site.
If you use server and client SDKs at the same time, you need to set the consent for both SDKs.
Please refer to [this](../../privacy-and-compliance/consent-management) article for more details.
Kameleoon, like many experience optimization solutions, can be blocked by certain ad blockers. These primarily affect the Web Experimentation application file (`engine.js`) and client-side SDKs, which rely on JavaScript code loaded on your website. Server-side SDKs, however, operate within your servers and are unaffected by ad blockers.
If you want users with ad blockers to be included in your experiments, Kameleoon offers a premium option that allows you to use a custom domain instead of Kameleoon's default domain. Custom domains prevent ad blockers from detecting and blocking Kameleoon. Once configured, Kameleoon will use your custom domain for all outgoing network requests to our servers, whether for tracking purposes or fetching SDK configuration updates.
Using a custom domain is not the same as self-hosting. When you use a custom domain, Kameleoon's infrastructure still hosts and serves all the content (for example, `engine.js`, SDK configuration, tracking calls). The difference is that these requests are routed through a domain you control, like `experiments.mydomain.com`.
To enable this option, contact your Technical Account Manager. You must provide a full domain (for example, `experiments-mydomain.com`), not a subdomain (for example, `experiments.mydomain.com`). The domain name cannot contain the substring `kameleoon`.
* For Web Experimentation, replace references to the default Kameleoon domain (`kameleoon.`) with your custom domain.
* **Example:** `//SITE_CODE.{your-domain}/engine.js`
* For client-side SDKs, use the `networkDomain` parameter in the SDK initialization.
If you want to self-host instead of using a custom domain, follow [this guide](../../web-experimentation/self-hosting/simple-self-hosting-and-on-premises-options#application-file-self-hosting).
# OpenFeature providers
Source: https://docs.kameleoon.com/developer-docs/feature-experimentation/technical-reference/open-feature-providers
Use Kameleoon as an OpenFeature provider to standardize feature flagging across different platforms and languages.
Kameleoon contributes to the OpenFeature ecosystem, an open-source initiative from the [Cloud Native Computing Foundation](https://www.cncf.io/) (CNCF). OpenFeature establishes a universal standard for feature flag management that works across various tools and custom solutions.
When you use Kameleoon as your OpenFeature provider, you can switch between platforms without rewriting your code. This approach eliminates vendor lock-in. Kameleoon offers OpenFeature providers for multiple languages and frameworks, which allows you to use officially supported SDKs while benefiting from the open-source community.
### Key benefits of OpenFeature
OpenFeature helps you perform the following tasks:
* **Standardize implementations:** Maintain consistent feature flag logic across different providers.
* **Simplify migrations:** Migrate between platforms by swapping the OpenFeature provider.
* **Streamline operations:** Reduce complexity by following community-driven best practices.
### Supported SDKs
Kameleoon provides [OpenFeature support](https://openfeature.dev/ecosystem/?instant_search%5Bquery%5D=kameleoon) for the following SDKs:
| Language | Repository Link |
| :-------------------------- | :-------------------------------------------------------------------- |
| **Java** | [GitHub Repository](https://github.com/Kameleoon/openfeature-java) |
| **.NET** | [GitHub Repository](https://github.com/Kameleoon/openfeature-dotnet) |
| **Python** | [GitHub Repository](https://github.com/Kameleoon/openfeature-python) |
| **Go** | [GitHub Repository](https://github.com/Kameleoon/openfeature-go) |
| **Ruby** | [GitHub Repository](https://github.com/Kameleoon/openfeature-ruby) |
| **PHP** | [GitHub Repository](https://github.com/Kameleoon/openfeature-php) |
| **Swift** | [GitHub Repository](https://github.com/Kameleoon/openfeature-swift) |
| **Kotlin** | [GitHub Repository](https://github.com/Kameleoon/openfeature-android) |
| **JavaScript / TypeScript** | [GitHub Repository](https://github.com/Kameleoon/openfeature-js) |
| **Node.js** | [GitHub Repository](https://github.com/Kameleoon/openfeature-nodejs) |
# Technical considerations
Source: https://docs.kameleoon.com/developer-docs/feature-experimentation/technical-reference/technical-considerations
Understand how Kameleoon SDKs handle feature flag configuration updates, zero-latency bucketing, polling vs. streaming, and client-side vs. server-side initialization.
## Feature flags configuration and bucketing
When a feature flag configuration is updated or turned on or off, SDKs can obtain the updated configuration from the Cloudflare Content Delivery Network (CDN) using either **polling** or **streaming**. Polling is the default option while streaming is a premium option.
Kameleoon SDKs are designed to comply with a **zero latency policy**. This means the SDK doesn't require additional remote server calls to activate and bucket users in a feature flag. Even the fastest remote server call would add a minimum of 20 ms of latency to the application and depending on several factors, this delay can increase to hundreds of milliseconds, or even completely block the loading of the web application for the end user. To prevent this added latency, Kameleoon SDKs assign visitors to experiments locally.
For client-side SDKs, which run on the user's device, the app must fetch the active feature flag configurations at the start of the session. This requires a remote call with an associated callback, which means application code that uses the SDK can't run experiments or apply feature flags before this callback finishes executing.
### Polling (default)
In this mode, the SDK sends a request to the CDN at regular intervals (by default, every 60 minutes) to retrieve the most recent configuration. The interval can be customized in the SDK configuration using the `refresh_interval_minute` (or `refresh_interval`) parameter.
When intervals are moderately spaced, updating the configuration consumes very little memory and network resources.
For Web Client-Side SDKs, the polling strategy includes local caching logic:
1. **Initial Load**: When a web page is opened, the SDK first attempts to load the configuration from the cache (if available).
2. **Background Update**: If the `refresh_interval` has elapsed, the SDK performs a background request to update the configuration and refreshes the cache.
3. **Cache Validity**: Cached configuration is considered valid for **1.5 hours** from the last successful update. If the visitor opens a page within this 1.5-hour window, the cached version will be used. Otherwise, the cache is ignored and a new request is made immediately.
This caching strategy ensures faster page loads and minimal network usage, while still keeping configuration reasonably fresh.
Let's say `refresh_interval` is set to 15 minutes, and a user is exposed to a feature flag. If the feature flag is turned off **10 minutes later**, and the same user returns to the website 20 minutes later :
* The SDK will first **load the configuration from cache** (still showing the flag as active).
* Simultaneously, it will **make a background request** to fetch the updated configuration and refresh the cache.
* This design prioritizes **performance**, ensuring quick page loads while asynchronously syncing with the latest config.
So, even though there's a short window where a user might see stale configuration (depending on the interval), the SDK quickly updates it in the background. The updated configuration will be applied the next time the visitor opens a page.
### Streaming (premium option)
The real-time streaming mode allows the SDK to automatically apply the new configuration without any delay. When streaming is enabled, the Kameleoon SDK is notified of any changes to the configuration in real time, thanks to server-sent events (SSE).
**Main benefits:**
* Update the configuration immediately (no waiting for the next polling cycle).
* Use less network traffic than polling at short intervals. Streaming does not send periodic requests. It opens the connection once and keeps it permanently open and remain ready to receive data.
**Availability:**
* This is a premium option that requires a subscription. To activate real-time streaming on a Kameleoon account, contact the Customer Success Manager or email [support@kameleoon.com](mailto:support@kameleoon.com).
* The PHP SDK does not support streaming due to technical constraints. The PHP SDK currently can't listen for configuration updates in a non-blocking way because the PHP SDK does not persist between requests. Each request creates a new SDK instance that destroys itself as soon as it receives a response.
* The real-time streaming mode is currently not compatible with [serverless edge compute platforms](../implementation-and-deployment/serverless-edge-compute-starter-kits).
* For other languages, see the [SDK compatibility matrix](../../feature-experimentation/get-started/overview) for the minimum supported version in the preferred language.
## Data storage
Kameleoon's SDKs are designed for optimal performance and user experience. To achieve this, they manage visitor data locally, either on the server or directly on the device, instead of fetching it from a remote source.
All visitor data relevant to Kameleoon experiments and feature flags is stored locally, which includes experiment assignments, segment data, and any custom data added using methods like `addData()` or fetched from the server with `getRemoteVisitorData()`. **The way this data is stored and its lifespan differs depending on whether a server-side or client-side SDK is used.**
### Server-side SDKs
**For server-side SDKs, visitor data is stored in the server's volatile memory (RAM)**, which provides fast access for experiment and feature flag evaluations. Data is organized as a map, using unique `visitorCode` values as keys.
* **Session-based storage:** Data is retained in memory only for the duration of a user's active session, which ends, by default, after 30 minutes of inactivity (no page views, clicks, etc.). All data collected during the session expires at the same time.
* **`session_duration` parameter**: The session duration can be adjusted using the `session_duration` parameter in the SDK configuration. This parameter lets the Kameleoon session align with the application's server-side management.
Increasing `session_duration` will require the SDK to allocate more RAM to store the increased visitor data
* **Data loss on server restart:** Because data is stored in RAM, it will be lost if the application server restarts. Usually, data loss is not a concern, as important visitor data (like user IDs or attributes) is typically retrieved from a persistent database and reassigned to the visitor upon a new request.
* **Retrieving data from previous visits:** The `getRemoteVisitorData()` method lets you retrieve custom data collected during a visitor's previous visit. This method automatically associates the latest data entry for a visitor, eliminating the need to call `addData()` again.
### Client-side SDKs
**As opposed to server-side SDKs, client-side SDKs utilize persistent local storage on the user's device.** This mechanism ensures that visitor data can be retained across browser sessions, app restarts, and even device reboots. The specific storage mechanism varies by platform:
* **iOS:** `UserDefaults`
* **Android:** `SharedPreferences`
* **JavaScript/TypeScript:** `LocalStorage`
* **Note for JS SDK:** The `kameleoonVisitorCode` is also shared via cookies to ensure seamless data continuity and communication with the Kameleoon application file (`engine.js`).
* **React Native:** `MMKV Storage`
Unlike server-side SDKs which use a global `session_duration`, client-side SDKs do not operate on a session-based expiry for all data. Instead, they use either `targetingDataCleanupInterval` or `data_expiration_interval_minute` to control how long individual pieces of data are stored.
* **`targetingDataCleanupInterval`/`data_expiration_interval_minute`:** These parameters determine the individual lifespan of each specific data entry. By default, data is stored indefinitely (until explicitly cleared) to ensure consistent user experiences across visits. You can set this parameter to a specific number of minutes if you need individual data points to expire after a certain time.
* **Data persistence:** This fundamental difference means that data persists even if the user closes the browser tab, navigates away from the site, or closes the mobile application.
* **Naming convention rationale:** The difference in parameter terminology (`session_duration` vs. `data_expiration_interval_minute`) directly reflects the underlying storage philosophy. `session_duration` governs the overall lifetime of all data within a server-side session. `data_expiration_interval_minute` allows granular control over the lifespan of each specific piece of data stored persistently on the client.
## Domain list
The Kameleoon SDKs require access to a set of URIs that provide specific services to the SDK. If you are restricting access and need to explicitly whitelist domains, make sure that our SDKs can reach the following domains:
| URL | Used by |
| ------------------------------------------------------------------------------------------- | ------------------------------- |
| `https://sdk-config.kameleoon.eu/` | Configuration file |
| `https://.kameleoon.io/sdk-config` / `https://client-config.kameleoon.com/mobile` | Configuration file (deprecated) |
| `https://events.kameleoon.com:8110/sse` | Real-time streaming |
| `https://api.kameleoon.com/oauth/token` | Authentication |
| `https://eu-data.kameleoon.io`/ `https://na-data.kameleoon.io` | Tracking |
The domain for your Kameleoon scripts may vary from one project to another. Your projects may be hosted on either `kameleoon.eu` or `kameleoon.io` depending on their creation date. Make sure you use the domain displayed in your project in the Kameleoon App.
# Consent management
Source: https://docs.kameleoon.com/developer-docs/privacy-and-compliance/consent-management
Manage visitor consent in Kameleoon, including available policies, SDK and API methods for setting consent, and the impact on data collection.
Refer to the [User Guide](/user-manual/project-management/consent-management-policy) for instructions on setting up the consent management policy when using Kameleoon on your web app.
Kameleoon provides native built-in integrations with [Consent management platforms](/user-manual/integrations/integrations-overview).
## Consent policies
For a given visitor, legal consent to use Kameleoon is considered either **granted**, **denied** or **unknown** (a special state used when consent is not defined, as the visitor has not granted nor denied it yet). To begin, you should choose how Kameleoon treats legal consent:
* **Consent not required**: With this policy, consent is not explicitly required for this website and module. Kameleoon assumes it is granted automatically and starts immediately in full-featured mode.
* **Consent required**: With this policy, consent must be explicitly obtained from the visitor. Until it is given, the legal consent will be considered to be "unknown" and Kameleoon will not operate normally.
To inform Kameleoon when legal consent has been obtained, you must either use the Kameleoon Activation API method, which requires custom JS code to be implemented or one of the SDKs if you run feature flags. For more information on this topic, refer to the [user guide](/user-manual/project-management/consent-management-policy#how-to-define-your-consent-management-policy).
To cover all possible use cases, Kameleoon's Web Experimentation behavior can be further customized when consent is considered unknown or when it is denied by the user. To learn more about the available options, read the article on [behavior when consent is unknown](/user-manual/project-management/consent-management-policy#behavior-when-consent-is-unknown).
## Reading the current consent state for a visitor
This section applies only to the Kameleoon Web Experimentation solution.
To obtain (read) the current legal consent state for a visitor, use the `Kameleoon.API.Visitor` object:
* `Kameleoon.API.Visitor.experimentLegalConsent`: returns **true**, **false**, or **null** if the state is unknown (consent is required but has not yet been granted nor denied).
* `Kameleoon.API.Visitor.personalizationLegalConsent`: returns **true**, **false**, or **null** if the state is unknown (consent is required but has not yet been granted nor denied).
While the `Kameleoon.API.Core.enableLegalConsent()` and `Kameleoon.API.Core.disableLegalConsent()` methods allow you to change (write) the legal consent status for this visitor, obtaining (reading) the current state is done via `Kameleoon.API.Visitor`.
If you have chosen a Consent not required policy, the legal consent can never be in an unknown state. The `Kameleoon.API.Visitor.experimentLegalConsent` or `Kameleoon.API.Visitor.personalizationLegalConsent` will always return **true** by default and will be set to **false** only if the `Kameleoon.API.Core.disableLegalConsent()` method is called.
## Modes of operation for Kameleoon Web Experimentation engine
This section applies only to the Kameleoon Web Experimentation solution.
Kameleoon's engine works differently depending on its mode of operation. To determine the operational mode, Kameleoon considers the current value of the consent in `Kameleoon.API.Visitor.experimentLegalConsent` and `Kameleoon.API.Visitor.personalizationLegalConsent`. If the value is is **null** (unknown state) or **false**, Kameleoon takes into account the corresponding configuration value in the [project settings](/user-manual/project-management/consent-management-policy#behavior-when-consent-is-unknown) for the **Behavior when consent is unknown** or **Behavior in case of opt-out**.
The following section describes all possible modes for the engine:
#### Active mode
This is the normal mode of operation. Kameleoon sends data to tracking servers and writes data to the device as needed. The visitor is supposed to have granted consent to the use of Kameleoon.
This mode is operational when `Kameleoon.API.Visitor.experimentLegalConsent` or `Kameleoon.API.Visitor.personalizationLegalConsent` is **true**
#### Disabled mode
In this mode, Kameleoon does nothing at all - data is neither sent out to remote servers nor written to the local device. Experiments and personalizations are never displayed. For all purposes, it's as if Kameleoon did not exist for this particular visitor.
This mode is operational when:
* `Kameleoon.API.Visitor.experimentLegalConsent` or `Kameleoon.API.Visitor.personalizationLegalConsent` is **null**, and you selected the option "Completely block Kameleoon" when [consent is unknown](/user-manual/project-management/consent-management-policy#behavior-when-consent-is-unknown).
* `Kameleoon.API.Visitor.experimentLegalConsent` or `Kameleoon.API.Visitor.personalizationLegalConsent` is **false**, and the customer selected "Completely block Kameleoon" for [the opt-out behavior](/user-manual/project-management/consent-management-policy#behavior-on-opt-out).
#### Delayed mode
In this mode, Kameleoon does not send any data to tracking servers nor write any data to the device. However, it will still display experiments (or personalizations) normally, if the visitor triggers the associated segment.
In addition, every data that should be written or sent to a remote server is kept in memory. If later Kameleoon switches to the active mode (usually because the consent is granted at some point), all the data gathered so far (in the context of this page) is written and sent at once. Thus the "delayed" name: if the full consent is obtained at some point, the end result will be that Kameleoon behaved almost like in active mode.
This mode is operational when `Kameleoon.API.Visitor.experimentLegalConsent` / `Kameleoon.API.Visitor.personalizationLegalConsent` is **null**, and you selected the option "Do not block Kameleoon" when [consent is unknown](/user-manual/project-management/consent-management-policy#behavior-when-consent-is-unknown).
#### Restricted mode
In this mode, Kameleoon does not send any data to tracking servers nor write any data to the device. However, it will still display experiments (or personalizations) that have been flagged with the "Technical" tag in Kameleoon. All other experiments / personalizations are not displayed.
This is a very useful mode that allows most Kameleoon operations to be disabled if a visitor does not want to grant consent, but that still permits critical experiments and personalizations to run for this visitor. Very often, Kameleoon is used as a quick workaround for deploying bugfixes and small improvements to production. In this particular context, data privacy regulations such as GDPR explicitely do not apply, and Kameleoon can be used without consent for such use cases.
The restricted mode is equivalent to the delayed mode, but more restrictive. Since it can be chosen as a result of a final legal consent choice (a denial), it is expected that data will probably never be written nor sent in this case (whereas the delayed mode is normally only a "transitional" mode).
This mode is operational when:
* `Kameleoon.API.Visitor.experimentLegalConsent` or `Kameleoon.API.Visitor.personalizationLegalConsent` is **null**, and you selected the option "Partially block Kameleoon" when [consent is unknown](/user-manual/project-management/consent-management-policy#behavior-when-consent-is-unknown).
* `Kameleoon.API.Visitor.experimentLegalConsent` or `Kameleoon.API.Visitor.personalizationLegalConsent` is **false**, you selected the option "Partially block Kameleoon" for [the opt-out behavior](/user-manual/project-management/consent-management-policy#behavior-on-opt-out).
It is very possible that Kameleoon will have different operational modes for AB experiments and personalizations. In that case, everything works as expected. For instance, experiments are displayed and tracking data, but nothing happens for personalizations.
## Advanced considerations
Choosing to implement an explicit consent policy in the context of AB testing usually leads to complex issues, and there is no ideal solution. The two main problems are described here.
The first thing to take into account is that if you choose a strict behavior (**disabled mode**) while consent is unknown, experiments / personalizations will be triggered "late" in the context of the first page view of a totally new visitor. With this setup, they can indeed be displayed only after the legal consent has been obtained, which is typically after a few seconds. This can unfortunately lead to some serious UX issues, depending on the underlying experiments and personalizations, and should be taken into account.
The **delayed mode** can mitigate this problem, as display is immediate and only writing is delayed. However, there is a second issue arising when a visitor "stays" with an unknown legal consent status over several pages. Since Kameleoon does not write any data to the device, not even the Kameleoon **visitorCode** identifier, it keeps being randomly (re)generated on each page while final consent is not determined. This implies that for experiments, variation allocation will happen at each new page view, and no consistency is guaranteed in those allocations. It is thus important to take steps to prevent this situation from happening. Several options are possible (blocking consent banner, denying consent automatically after X seconds...), but a visitor should never stay in the unknown legal consent status forever. Either consent is granted, or it is denied.
For the same technical reason (permanent variation reallocation), if the **restricted mode** is chosen for opt-out behavior, it is expected than only personalizations or experiments with a 100% traffic deviation to a variation will be flagged with the "Technical" tag. Doing otherwise can seriously deteriorate the navigational experience of users that refused, as they could be subject to several different variations in the same session.
# Data collection (backend)
Source: https://docs.kameleoon.com/developer-docs/privacy-and-compliance/data-collection-backend
Reference guide for all data stored on Kameleoon back-end servers, covering analytics data, synchronization fields, and retention behavior.
If you want to learn which data is stored **client-side**, in the visitor's browser, refer to the [data collection client-side](./data-collection-client-side) article.
This article primarily applies to **Kameleoon Web Experimentation** or when using [Kameleoon Hybrid Experimentation mode](../feature-experimentation/targeting-and-segmentation/native-segmentation#hybrid-experimentation-mode).
If you are only using Kameleoon's SDKs (Feature Experimentation), **no data will be collected** except:
* Data that is **explicitly sent** using the `addData` method of the SDK.
* All **exposure events** related to feature flag evaluations.
## List of collected data
The following data is collected and stored on Kameleoon back-end servers for each visit made by an individual visitor to your website:
* **Visitor code** (a unique Kameleoon identifier for this visitor)
* **Visit number** (if multiple visits were made by the same visitor)
* **Device type** (mobile, tablet, or desktop)
* **Operating system** (Windows, macOS, Linux)
* **Browser name and version**
* **Screen size**
* **Window size**
* **Browser time zone**
* **Browser language**
* **Original referrer** (acquisition channel)
* **Number of pages viewed**
* **Time elapsed since the visitor's previous visit** (if any)
* **Time spent on the website**
* **Start and end time of the visit**
* **Number of mouse clicks**
* **Ad blocker detection** (enabled/disabled)
* **List of conversions** (for example, clicks, transactions), including revenue (if applicable)
* **List of personalizations and A/B experiments** seen by the visitor
* **List of targeted Kameleoon segments** (requires [Audiences Explorer](/user-manual/ai-opportunity-detection/audiences-segment-analysis)
* **Current weather conditions** (if the corresponding targeting condition is activated): temperature, wind, rain, and other conditions.
* **Sunset and sunrise times** (required for some weather-based targeting criteria)
* **Geolocation** (only if a corresponding targeting condition is activated, as some weather-related criteria require geolocation data)
* **Products viewed** (only if the add-on is enabled)
* **Titles and URLs of pages visited**
* **Custom data**
* **External segmentation data** (obtained from a third-party DMP or CRM)
* **Conversion probabilities** computed by the **Kameleoon AI Predictive targeting engine** (only when at least one AI-driven personalization is active; required for generating Kameleoon Conversion Score heat ranges)
By default, **Kameleoon does NOT collect any personal information** as defined by **GDPR** or similar data privacy laws. However, personal data may still be collected and stored on Kameleoon back-end servers in the following cases:
* Your URLs contain parameters with personal data, as Kameleoon collects visited URLs. Kameleoon strongly recommends removing such parameters from your URLs, as they are collected by all web analytics platforms.
* You explicitly define a [custom data](../custom-data) field and populate it with personal data.
* You explicitly configure an integration with a third-party DMP or CRM that provides personal data.
Kameleoon will never store any IP addresses on its data servers. There are no exceptions to this rule: even when legal consent has been provided by a visitor, IP addresses are not saved.
## Data retention policy
Kameleoon retains visit and product event data for **24 months** for analytics purposes. The retention period begins when the first event is processed. If you require a shorter retention period, please contact your Customer Success Manager.
* [Cross-Device Experimentation](../cross-device-experimentation): 2 months of prior data can be retrieved for targeting in Web Experimentation and Feature Experimentation.
* [ITP Management](../web-experimentation/technical-concepts/itp-management): 2 months of prior data can be retrieved for targeting in Web Experimentation and Feature Experimentation.
* Remote Synchronization of Visits: 2 months of prior data can be retrieved for targeting in Web Experimentation and Feature Experimentation.
* AI Predictive Targeting: 2 months of prior data are used to compute Kameleoon Conversion Scores.
* Product Targeting: 2 months of prior data can be retrieved for targeting in Web Experimentation.
* Data API MAP Endpoint: 1 year of prior data can be retrieved in Web Experimentation and Feature Experimentation.
# Data collection (client-side)
Source: https://docs.kameleoon.com/developer-docs/privacy-and-compliance/data-collection-client-side
Reference guide for all data collected client-side by the Kameleoon application file and SDKs, including cookies, local storage, and session data.
To learn which data Kameleoon stores on its backend servers—primarily for analytics and reporting—read the [data collection back-end](./data-collection-backend) article.
## Introduction
Like any web analytics solution, Kameleoon collects data such as URLs visited, browser version, and time spent on your website. As an experimentation and personalization platform, Kameleoon also requires real-time, persistent access to this data to trigger experiments and personalization campaigns with minimal latency.
Because the JavaScript runtime environment resets on each page change, storing this data in memory alone is not possible. Instead, Kameleoon reads and writes data across different web pages (URLs).
Fetching data from a backend server at the start of each page load is one alternative, but this approach has two drawbacks:
* **Performance cost**: Each page load incurs an extra server call.
* **Scalability cost**: Frequent server requests degrade performance at scale.
Local storage is a more efficient approach. It lets Kameleoon store data directly in the browser.
### Local storage as a data storage mechanism
Kameleoon does not use cookies to store data for two reasons:
* Cookies are not designed to store large amounts of data.
* The browser sends cookies with every HTTP request, including requests for static resources such as images, which increases bandwidth usage and reduces performance.
Instead, Kameleoon uses Local Storage, a standard web technology that most browsers support. It works similarly to cookies but supports much larger storage capacity (typically a few MBs, depending on the browser).
Compared to cookies, Local Storage has the following properties:
* Only JavaScript can write to Local Storage—servers cannot.
* Only JavaScript can read data from Local Storage.
* The browser never sends Local Storage data to remote HTTP servers, which makes it more secure.
However, Local Storage has one key limitation: it is scoped to a single exact subdomain.
### Local storage limitations for unified session data
Unlike cookies—where a script on `http://www.example.com` can create a cookie accessible from `buy.example.com`—Local Storage is partitioned by subdomain and protocol.
For example, if your e-commerce website is hosted on `https://www.randomshop.com` but your conversion funnel runs on `https://transaction.randomshop.com`, Local Storage cannot share data between these two subdomains. This can produce inconsistent experiment variations across the customer journey, affecting both user experience and experiment validity.
Kameleoon provides a mechanism to unify session data across subdomains. For details, see [Unify session data across subdomains](../web-experimentation/technical-concepts/unify-session-data-storage-across-subdomains).
## List of collected data
This page covers two categories of data:
1. **Data collected and stored for all visitors** ([excluding visitors who opted out](./consent-management)).
2. **Data collected for internal use** when Kameleoon users build experiments on the platform.
For data privacy purposes, focus on the **first category**. The second category applies only to a small number of internal employees.
Kameleoon always stores data in a **first-party** context, associated with your domain. Kameleoon **never** stores third-party data on Kameleoon-owned domains.
## Data stored for all visitors
### Data stored in Local Storage
Local Storage does not have a built-in expiration mechanism. To work around this, Kameleoon emulates lifespan expiration by storing data with two fields:
* `"value"`: The stored information.
* `"expirationDate"`: A timestamp that defines when Kameleoon stops using the data.
Example:
```
kameleoonLegalConsent: {"value": {"AB_TESTING": true, "PERSONALIZATION": true},"expirationDate":1545297630228}
```
| **Key** | **Description** | **Lifespan** |
| ----------------------------------------------- | ------------------------------------------------------------------------------------------------------------------------------------------------------------------------------------------------------------------------------------------------------------------------------------------------------------------------------------------------------------------------------------------------------------------------------------- | ------------------------------ |
| `kameleoonVisitorCode` | Unique Kameleoon **visitorCode** identifier. | 365 days |
| `kameleoonData` | Visitor and session data (for example, browsing history and session info). Kameleoon stores this data in Local Storage using a simple encoding scheme. The full list of data this key contains appears below. | 365 days |
| `kameleoonExperiment-${experimentId}` | Experiment variation allocation and assigned variation ID (either "Reference", the variation ID, or "none" if traffic exclusion is configured), and the date Kameleoon assigned the variation. | 30 days (renews on revisit) |
| `kameleoonPersonalization-${personalizationId}` | The personalization variation allocation for this visitor. | 30 days (renews on revisit) |
| `kameleoonGlobalPersonalizationExposition` | The visitor's global exposition status for all personalizations. A value of `"false"` prevents this visitor from seeing any personalization. A value of `"true"` allows exposure when the visitor meets the required targeting conditions. By default, no global traffic exclusion applies. You can configure this value in the [project configuration settings](/user-manual/project-management/manage-your-projects#Configuration). | 365 days |
| `kameleoonLegalConsent` | Legal consent for the use of Kameleoon. The value format is, for example, `{"AB_TESTING": true, "PERSONALIZATION": false}` or `{"PERSONALIZATION": true}`. | 365 days |
| `kameleoonOpenTabs` | IDs of open tabs on the same website. | 365 days |
| `KameleoonProducts_device_id` | A unique device ID for the visitor. Kameleoon only stores this key if you have the Product Recommendation add-on. | 365 days |
| `kameleoonRequestEvents` | Failed requests that Kameleoon cannot send when the page reloads immediately. This behavior is specific to Safari. | Deleted once the page reloads. |
The `kameleoonData` key stores the following data for each visit (on this device only, or all visits if you use [cross-device history reconciliation](../cross-device-experimentation)):
* Custom data
* Device type (mobile, tablet, or desktop)
* Operating system
* Browser name and version
* Screen size
* Window size
* Browser time zone
* Browser language
* Original referrer (acquisition channel)
* Number of pages viewed
* Title and URL of pages visited
* Time spent on the website
* Visit start and end time
* Number of open tabs
* Whether an ad blocker is active
* List of conversions (clicks, transactions, and other events)
* List of personalizations and A/B experiments the visitor saw
* Current weather conditions (if the targeting condition is active): temperature, wind, rain, and other conditions
* Sunset time (if a weather targeting condition is active, because some weather criteria require it)
* Weather forecast (if the targeting condition is active): temperature, wind, rain, and other conditions
* Geolocation (if a geolocation or weather targeting condition is active)
* IP address (if the targeting condition is active)
* External segmentation data from a third-party DMP or CRM
* Products seen (if the Product Targeting add-on is enabled)
| **Key** | **Description** | **Lifespan** |
| ------------------------------------ | ---------------------------------------------------------------------------------------------------------------------------------------------------------------------- | -------------------------------------------------------------------------------- |
| `kameleoonClientData` | A local copy of the remote configuration file the SDK fetches. It contains configuration details for live feature flags. | Until removed manually or by browser settings. |
| `kameleoonConsentData` | Legal consent for Feature Experiments obtained from the visitor. | [targetingDataCleanupInterval](../sdks/web-sdks/js-sdk#configuration-parameters) |
| `kameleoonDataInfo` | Technical information for data cleanup and linked visitor sessions. Required for [cross-device experimentation](../sdks/web-sdks/js-sdk#cross-device-experimentation). | Until a tracking request succeeds. |
| `kameleoonForcedExperimentVariation` | A specific experiment variation required for custom evaluation of a given feature flag. | [targetingDataCleanupInterval](../sdks/web-sdks/js-sdk#configuration-parameters) |
| `kameleoonForcedFeatureVariation` | Specific feature variations used for simulation of a given feature flag. | Session |
| `kameleoonTargetingData` | Visitor and session data, including browsing history and session details, required for targeting purposes. | [targetingDataCleanupInterval](../sdks/web-sdks/js-sdk#configuration-parameters) |
| `kameleoonTrackingData` | All **visitor codes** on this browser for tracking requests. | Until a tracking request succeeds. |
| `kameleoonVariationData` | Assigned variations for each feature flag, used to maintain visitor consistency across sessions. | [targetingDataCleanupInterval](../sdks/web-sdks/js-sdk#configuration-parameters) |
The `kameleoonTargetingData` key stores the following data associated with the visitor:
* Custom data
* Conversion
* Page view
* Unique identifier
* Geolocation data
* User agent
* Browser
* Device
* Cookie
* Kameleoon conversion score (AI Predictive Targeting)
* Operating system
* Application version
* Visits data
* Personalization
#### Data stored in Session Storage
| **Key** | **Description** | **Lifespan** |
| --------------------------------- | ------------------------------------------------------------------------------------------------------------------------------------------------------------------------------------------------------------------ | --------------------- |
| `kameleoonDisabledForVisit` | Disables Kameleoon for the current visit. Kameleoon sets this key when you enable the [Disable Kameleoon for the entire visit](/user-manual/project-management/manage-your-projects#Configuration) timeout option. | Session duration |
| `kameleoonAnalyticsTrackingTimes` | Optimizes the number of third-party analytics tracking calls Kameleoon makes when you use a web analytics integration. | Session duration |
| `kameleoonTabId` | A unique 8-digit identifier that distinguishes a browser tab and prevents redundant tracking of the same page URL across multiple triggered events. | Session duration |
| `kameleoonActiveScript` | Kameleoon sets this value when the script confirms it is installed on the page. | Session storage value |
#### Data stored in cookies
Kameleoon uses **only one cookie** to store a randomly generated **visitor identifier**. The **Kameleoon CDN** may also set an optional cookie when it delivers the application file, unless you [self-host the application file](../web-experimentation/self-hosting/simple-self-hosting-and-on-premises-options#application-file-self-hosting).
If you use the Kameleoon Product Recommendation add-on, Kameleoon stores two additional cookies. You can contact your Customer Success Manager to enable a cookieless option that stores these data points in Local Storage instead.
| **Key** | **Description** | **Lifespan** |
| ------------------------------------ | ----------------------------------- | ---------------- |
| `KameleoonProducts_session_code` | A unique session identifier. | Session duration |
| `KameleoonProducts_session_last_act` | The timestamp of the last activity. | 1 hour |
| **Key** | **Description** | **Lifespan** |
| --------------------------- | ------------------------------------------------------------------------------------------------------------------------- | ------------------------------ |
| `_detectRootDomain` | Temporary test cookie (value=`testRootDomain`) that Kameleoon uses to detect the main domain of the site. | Deleted immediately after use. |
| `kameleoonVisitorCode` | The unique Kameleoon **visitorCode** identifier. | 365 days |
| `kameleoonReferrer` | Temporary cookie for redirect URL experiments. Kameleoon stores the `document.referrer` value before the redirect occurs. | Deleted immediately after use. |
| `kameleoonSimulationFFData` | Data required to simulate a specific variation of a feature flag. | Session |
### Temporary data stored only for Kameleoon internal use
#### Data stored in cookies
| **Key** | **Description** | **Lifespan** |
| --------------------------------------------------------------------------------------------------------------------------------------------- | ------------------------------------------------------------------------------------------------------------------------------------------------------------------------------------------------------------------------------------------------------------------------------- | ------------ |
| `kameleoonSimulationParameters` | Kameleoon Simulation Mode uses this cookie to enable simulation across subdomains. Without it, simulation does not work correctly if your site has subdomains. All simulation query parameters must be included in URL-encoded JSON format using `JSON.stringify`. For example: | |
| `KEY - kameleoonSimulationParameters`, `VALUE - {"kameleoon-experiment-id":"266118","kameleoon-simulation":"true","kameleoon-language":"en"}` | 1 hour, but deleted immediately when the simulation is closed. | |
#### Data stored in Local Storage
| **Key** | **Description** | **Lifespan** |
| -------------------------------- | ---------------------------------------------------------------------------------- | ------------ |
| `kameleoonSimulation` | Data required for simulation purposes. | 1 hour |
| `kameleoonSimulationShortURL` | The short URL of the simulation. | 1 hour |
| `kameleoonSimulationVisitorData` | All virtual data about the visitor and their visits, used for simulation purposes. | 1 hour |
#### Data stored in Session Storage
| **Key** | **Description** | **Lifespan** |
| ----------------------------------- | ----------------------------------------------------------------------------------------------------------------------------------------------------------------------------------- | ------------------------------------------------------- |
| `kameleoonFullApplicationCode` | The entire Kameleoon codebase, required for simulation. The production application file is size-optimized and does not include all code, so Kameleoon stores the full version here. | 1 hour |
| `kameleoonVariation-${variationId}` | Variation code and data for preview or simulation purposes. | 1 hour |
| `kameleoonRedirectionURL` | The absolute URL of the page when Kameleoon triggers a redirect experiment. Kameleoon stores this to prevent infinite redirect loops. | Removed when the visitor navigates to a different page. |
# Android SDK
Source: https://docs.kameleoon.com/developer-docs/sdks/mobile-sdks/android-sdk
Integrate the Kameleoon Android SDK to run experiments and activate feature flags in native Android applications.
With the Kameleoon Android SDK, you can run feature flags on native mobile Android applications. The Android SDK is compatible with both Kotlin and Java. The SDK is easy to integrate into your applications, and its memory and network usage are low.
**Getting started**: For help getting started, see the [developer guide](#developer-guide).
**Changelog**: Latest version of the Android SDK: 4.26.1 [Changelog](https://github.com/Kameleoon/client-android/blob/master/CHANGELOG.md)
**SDK methods**: For the full reference documentation of the Android SDK methods, see the [reference](#reference) section.
## Developer guide
Follow this section to install and configure the Android SDK in your Android app and learn about advanced features.
### Getting started
Follow these steps to install and configure the Kameleoon Android SDK in your application.
#### Installation
You can install the Android SDK by adding the following dependency to the `build.gradle` file in your Android app:
```java theme={null}
dependencies {
implementation 'com.kameleoon:kameleoon-client-android:4.20.0'
}
```
#### Additional configuration
To customize the SDK's behavior, create a `.properties` configuration file. The properties file's name and location are important:
* Create the file in your app's `assets/` directory.
* Name the file `kameleoon-client.properties`.
You can also [download a sample configuration](/assets/developer-docs/sdks/mobile-sdks/client-configs/kameleoon-client.properties) file.
These are the available properties you can set:
| Key | Description | Default value |
| -------------------------------------------------------------------------------------------------------- | ----------------------------------------------------------------------------------------------------------------------------------------------------------------------------------------------------------------------------------------------------------------------------------------------------------------------------------------------------------------------------------------------------------------------------------------------------------------------------------------------------------------------------------------------------------------------------------------------------------------------------------------------------------------------------------------------------------- | -------------------- |
| `refreshIntervalMinute` / `refresh_interval_minute` optional | Specifies the refresh interval, in minutes, for the SDK to fetch the configuration for the active experiments and feature flags. The value determines the maximum time it takes to propagate changes, such as activating or deactivating feature flags or launching experiments. If left unspecified, the default interval is 60 minutes. Additionally, a [streaming mode](/developer-docs/feature-experimentation/technical-reference/technical-considerations/#streaming-premium-option) is available that uses server-sent events (SSE) to push new configurations to the SDK automatically and apply them in real-time. | `60` minutes |
| `dataExpirationIntervalMinute` / `data_expiration_interval_minute` optional | Designates the predefined time period, in minutes, that the SDK stores the visitor and their associated data. Each data instance is evaluated individually, allowing you to set the amount of time the SDK saves data before automatically deleting it. If no interval is specified, the SDK does not automatically delete data from the device. | `Integer.MAX_VALUE` |
| `defaultTimeoutMillisecond` / `default_timeout_millisecond` optional | Specifies the time interval, in milliseconds, that it takes for network requests from the SDK to time out. Set the value to `30000` milliseconds (30 seconds) or more if you do not have a stable connection. Some methods have additional parameters for method-specific timeouts, but if you do not specify them explicitly, the default value is used. | `10000` milliseconds |
| `trackingIntervalMillisecond` / `tracking_interval_millisecond` optional | Specifies the interval for tracking requests, in milliseconds. All visitors who were evaluated for any feature flag or had data flushed will be included in this tracking request, which is performed once per interval. The minimum value is `1000` ms and the maximum value is `5000` ms. | `1000` ms |
| `environment` / `environment` optional | For customers using multi-environment experimentation and feature flagging, this option specifies which feature flag configuration to use. By default, each feature flag has the options `production`, `staging`, and `development`. If not specified, the default value is `production`. [More information](/user-manual/experimentation/feature-experimentation/configure-your-feature-flags/manage-environments). | `nil` |
| `isUniqueIdentifier` / `is_unique_identifier` optional | Indicates that the specified `visitorCode` is a unique identifier. | `false` |
| `networkDomain` / `network_domain` optional | Custom domain used by SDKs for outgoing requests, often for proxying. Must be a valid domain (e.g., example.com or sub.example.com). Invalid formats default to Kameleoon's value. | `nil` |
| `defaultDataFile` / `default_datafile` optional | The `default_datafile` feature ensures the Kameleoon SDK is always **READY** by providing a fallback configuration when no cached data file exists. Developers can preload a valid configuration by fetching it from `https://sdk-config.kameleoon.eu/v3/` and passing it as `default_datafile` during initialization. When a `dateModified` timestamp (in milliseconds) is provided and is newer than the cached version, the SDK will use the default datafile instead of the cached version. **If `dateModified` is omitted, the default datafile is only applied when no cached version exists**. This ensures the SDK always has a valid configuration, whether default, cached, or updated. | `nil` |
| `activityTrackingIntervalMillisecond` / `activity_tracking_interval_millisecond` optional | Sets how often the SDK sends an activity event to extend the visitor's session. Both the minimum and the default are `60 000` ms; any lower non-zero value is ignored and the default is applied instead. Set it to `0` to disable periodic activity tracking, in which case a single activity event is sent at startup. Changing this value has side effects, so review [this section](#using-activitytrackingintervalmillisecond) first. | `60 000` ms |
If you specify a `visitorCode` and set the `isUniqueIdentifier` parameter to `true`, the SDK methods use the `visitorCode` value as the unique visitor identifier, which is useful for [cross-device experimentation](/developer-docs/cross-device-experimentation). The SDK links the flushed data to the visitor that is associated with the specified identifier.
The `isUniqueIdentifier` can be useful in other edge-case scenarios, such as when you can't access the anonymous `visitorCode` that was originally assigned to the visitor, but you have access to an internal ID that is connected to the anonymous visitor through session merging.
##### Using `activityTrackingIntervalMillisecond`
The `activityTrackingIntervalMillisecond` parameter controls how often the SDK sends an activity event to extend the visitor's session on the Data API. A longer interval reduces network usage and battery consumption. The default and minimum value is `60 000` ms (60 seconds); any lower non-zero value is ignored and the default is applied instead. Timers pause while the app is in the background, so the interval only advances while the app is in the foreground.
Increasing this value has **significant side effects** you should weigh carefully:
1. **Visits with zero duration**
* Reports derive visit duration from tracked events. If the interval is longer than the time a visitor spends in the app, the SDK may send only the startup event. The visit's start and last-activity timestamps are then (nearly) identical, so the report usually shows a duration close to zero. You can avoid this by sending other events during the session (such as conversions or page views), which also extend the recorded duration.
2. **Time elapsed since last visit (targeting)**
* The "time elapsed since last visit" condition compares the current time against a previous visit's last recorded activity. That timestamp only refreshes once per interval, so its precision degrades as the interval grows: comparisons for durations close to or below the interval become unreliable.
3. **[Visit count](/user-manual/experiment-analytics/troubleshooting/data-discrepancies#how-visits-and-visitors-are-counted)**
* A new visit starts after 30 minutes of inactivity. If you set the interval longer than 30 minutes, every activity event arrives after the previous session has already expired, so the SDK creates a new visit at each interval and inflates the visit count.
Setting `activityTrackingIntervalMillisecond` to `0` disables periodic activity tracking entirely. In that case, the SDK sends only a single activity event at application startup.
#### Initialize the Kameleoon Client
After installing the SDK in your application and setting up the app properties, you must create the Kameleoon Client. A Client is a singleton object that acts as a bridge between your application and the Kameleoon platform. It includes all of the methods and properties you need to run a feature flag.
```java theme={null}
import com.kameleoon.KameleoonClient;
import com.kameleoon.KameleoonClientConfig;
import com.kameleoon.KameleoonClientFactory;
import com.kameleoon.KameleoonException;
public class MyApplication extends Application
{
private KameleoonClient kameleoonClient;
@Override
public void onCreate() {
super.onCreate();
try {
KameleoonClientConfig config = new KameleoonClientConfig.Builder()
.refreshIntervalMinute(15) // in minutes, 1 hour by default, optional
.defaultTimeoutMillisecond(10_000) // in milliseconds, 10 seconds by default, optional
.trackingIntervalMillisecond(1000) // in milliseconds, 1000 ms by default, optional
.dataExpirationIntervalMinute(1440 * 365) // in minutes, infinity by default, optional
.environment("staging") // optional
.isUniqueIdentifier(false) // optional, false by default. Set to true if the visitorCode corresponds to your customer's unique userId.
.networkDomain("example.com") // optional
.defaultDataFile("{...}") // optional
.activityTrackingIntervalMillisecond(20_000) // optional, 15_000 milliseconds by default
.build();
String siteCode = "a8st4f59bj";
String visitorCode = "yourVisitorCode";
kameleoonClient = KameleoonClientFactory.create(siteCode, visitorCode, config, getApplicationContext());
// or, if you want, the visitor code will be generated automatically
kameleoonClient = KameleoonClientFactory.create(siteCode, config, getApplicationContext());
} catch (KameleoonException.SiteCodeIsEmpty | KameleoonException.VisitorCodeInvalid exception) {
// Exceptions indicate that provided siteCode is empty or visitorCode is invalid
} catch (Exception exception) {
// Recommended (but optional) safeguard for unexpected exceptions from third-party libraries
}
}
public KameleoonClient getKameleoonClient() {
return kameleoonClient;
}
}
```
```kotlin theme={null}
import com.kameleoon.KameleoonClientConfig
import com.kameleoon.KameleoonClientFactory
import com.kameleoon.KameleoonException
class MyApplication : Application() {
var kameleoonClient: KameleoonClient? = null
private set
override fun onCreate() {
super.onCreate()
try {
val config = KameleoonClientConfig.Builder()
.refreshIntervalMinute(15) // in minutes, 1 hour by default, optional
.defaultTimeoutMillisecond(10_000) // in milliseconds, 10 seconds by default, optional
.trackingIntervalMillisecond(1000) // in milliseconds, 1000 ms by default, optional
.dataExpirationIntervalMinute(1440 * 365) // in minutes, infinity by default, optional
.environment("staging") // optional
.networkDomain("example.com") // optional
.defaultDataFile("{...}") // optional
.activityTrackingIntervalMillisecond(20_000) // optional, 15_000 milliseconds by default
.build()
val siteCode = "a8st4f59bj"
val visitorCode = "yourVisitorCode"
val kameleoonClient = KameleoonClientFactory.create(siteCode, visitorCode, config, applicationContext)
// or if you want that visitor code will be generated automatically
kameleoonClient = KameleoonClientFactory.create(siteCode, config, applicationContext)
} catch (e: KameleoonException.SiteCodeIsEmpty) {
// Exception indicating that provided siteCode is empty
} catch (e: KameleoonException.VisitorCodeInvalid) {
// Exception indicating that provided visitor code is invalid
} catch (e: Exception) {
// Recommended (but optional) safeguard for unexpected exceptions from third-party libraries
}
}
}
```
While executing, the `KameleoonClientFactory.create()` method initializes the client, but it is not immediately ready for use. This delay is because the Kameleoon Client must retrieve the current configuration of feature flags (along with their traffic repartition) from a Kameleoon remote server. This retrieval requires network access, which is not always available. Until the Kameleoon Client is fully ready, you should not attempt to run other methods in the Kameleoon Android SDK. Note that once the first configuration of the feature flags is fetched, it is then periodically refreshed, but even if the refresh fails for any reason, the Kameleoon client will continue to function using the previous configuration.
You can use the [`isReady()`](#isready) method to check if the Kameleoon client initialization is complete.
Alternatively, a **helper callback** can encapsulate the logic of feature flag triggering and variation implementation. The best approach ([`isReady()`](#isready) or **callback**) depends on preferences and the exact use case. Using [`isReady()`](#isready) is recommended when the SDK is expected to be ready for use soon. For example, `isReady()` is appropriate when running a feature flag on a dialog that users likely won't access for the first few seconds or minutes of navigating in the app. A callback is recommended when there is a high probability that the SDK is still initializing. For example, a feature flag that appears onscreen at the application launch should use a callback that makes the application wait until the SDK is ready or a specified timeout has expired.
It's your responsibility as the app developer to ensure the logic of your application code is correct within the context of A/B testing using Kameleoon. A good practice is to always assume that the application user can be left out of the feature flag when the Kameleoon client is not yet ready. This exclusion is easy to implement, because this corresponds to the implementation of the default or reference variation logic. The code samples in the next paragraph show examples of this approach.
You're now ready to implement feature management and features flags. See the [Reference](#reference) section for details about additional methods.
#### Best practices for initialization and usage
* Initializing [`KameleoonClient`](#create) as a singleton as early as possible after the application starts is recommended, as initialization may take some time. Since initialization is asynchronous, it does not block or delay the application startup process.
* Before using `KameleoonClient`, verify that it is initialized by calling the [`runWhenReady`](#runwhenready) method. Otherwise, attempts to use the client before it is ready will result in errors.
* ⚠️ Most key methods may throw exceptions, so proper exception handling is required. Be sure to review the documentation for each method you use to understand its potential exceptions.
```java theme={null}
// Initialize `KameleoonClient` on application startup and use it as a singleton later
try {
KameleoonClient kameleoonClient = KameleoonClientFactory.create("", getApplicationContext());
} catch (KameleoonException ignored) {}
// Example: Apply a discount percentage based on a feature flag variable's value
void applyDiscountIfApplicable() {
kameleoonClient.runWhenReady(1000, result -> {
double discount = 0.0;
try {
if (result.getOrThrow()) {
Variation variation = kameleoonClient.getVariation("discount");
discount = (double) variation.getVariables().get("discount_value").getValue();
}
} catch (Exception ignored) { }
if (discount > 0) {
applyDiscount(discount);
}
});
}
```
```kotlin theme={null}
// Initialize `KameleoonClient` on application startup and use it as a singleton later
try {
KameleoonClient kameleoonClient = KameleoonClientFactory.create("", applicationContext)
} catch (ignored: KameleoonException) {}
// Example: Apply a discount percentage based on a feature flag variable's value
fun applyDiscountIfApplicable() {
kameleoonClient.runWhenReady(1000) { result ->
val discount = runCatching {
if (result.getOrThrow()) {
val variation = kameleoonClient.getVariation("discount")
variation.variables["discount_value"]?.value as? Double
} else {
null
}
}.getOrNull() ?: 0.0
if (discount > 0) {
applyDiscount(discount)
}
}
}
```
```kotlin theme={null}
// Initialize `KameleoonClient` on application startup and use it as a singleton later
try {
val kameleoonClient = KameleoonClientFactory.create("", applicationContext)
} catch (ignored: KameleoonException) {}
// Example: Apply a discount percentage based on a feature flag variable's value
suspend fun applyDiscountIfApplicable() {
kameleoonClient.runWhenReady(1000).getOrNull() ?: return // Exit if initialization fails
val discount = runCatching {
val variation = kameleoonClient.getVariation("discount")
variation.variables["discount_value"]?.value as? Double
}.getOrNull() ?: 0.0
if (discount > 0) {
applyDiscount(discount)
}
}
```
#### Activating a feature flag
##### Retrieving a flag configuration
To implement a feature flag in your code, you must first create the feature flag in your Kameleoon account.
To determine the status or variation of a feature flag for a specific user, you should use the [`getVariation()`](#getvariation) or [`isFeatureActive()`](#isfeatureactive) method to retrieve the configuration based on the `featureKey`.
The `getVariation()` method handles both simple feature flags with ON/OFF states and more complex flags with multiple variations. The method retrieves the appropriate variation for the user by checking the feature rules, assigning the variation, and returning it based on the `featureKey` and `visitorCode`.
The `isFeatureActive()` method can be used if you want to retrieve the configuration of a simple feature flag that has only an ON or OFF state, as opposed to more complex feature flags with multiple variations or targeting options.
If your feature flag has associated variables (such as specific behaviors tied to each variation) `getVariation()` also enables you to access the [`Variation`](#variation) object, which provides details about the assigned variation and its associated experiment. This method checks whether the user is targeted, finds the visitor’s assigned variation, and saves it to storage. When `track=true`, the SDK will send the exposure event to the specified experiment on the next tracking request, which is automatically triggered based on the SDK’s [`tracking_interval_millisecond`](#additional-configuration). By default, this interval is set to 1000 milliseconds (1 second).
The `getVariation()` method allows you to control whether tracking is done. If `track=false`, no exposure events will be sent by the SDK. This is useful if you prefer not to track data through the SDK and instead rely on client-side tracking managed by the Kameleoon engine, for example. Additionally, setting `track=false` is helpful when using the `getVariations()` method, where you might only need the variations for all flags without triggering any tracking events. If you want to know more about how tracking works, view [this article](/developer-docs/feature-experimentation/technical-reference/faq-global#when-does-the-sdk-send-a-tracking-request-for-analytics)
##### Adding data points to target a user or filter / breakdown visits in reports
To target a user, ensure you've added relevant data points to their profile before retrieving the feature variation or checking if the flag is active. Use the [`addData()`](#adddata) method to add these data points to the user's profile.
To retrieve data points collected on other devices, use the [`getRemoteVisitorData()`](#getremotevisitordata) method. This method asynchronously fetches data from the servers. It is important to call `getRemoteVisitorData()` *before* retrieving the variation or checking if the feature flag is active, as this data might be required to assign a user to a given variation.
To learn more about available targeting conditions, see the [detailed article on the subject](/developer-docs/feature-experimentation/targeting-and-segmentation/native-segmentation).
Additionally, the data points you add to the visitor profile will be available when analyzing your experiments, allowing you to filter and break down your results by factors like device. See the complete list [here](/user-manual/experiment-analytics/analyze-results/results-page/results-page-settings#breakdown-audience).
If you need to track additional data points beyond what's automatically collected, you can use Kameleoon's [Custom Data feature](#customdata). Custom Data allows you to capture and analyze specific information relevant to your experiments. Don't forget to call the [`flush()`](#flush) method to send the collected data to Kameleoon servers for analysis.
##### Tracking goal conversions
When a user completes a desired action (such as making a purchase), it is recorded as a conversion. To track conversions, use the [`trackConversion()`](#trackconversion) method and provide the required `goalId` parameter.
The conversion tracking request will be sent along with the next scheduled tracking request, which the SDK sends at regular intervals (defined by [`tracking_interval_millisecond`](#additional-configuration)). If you prefer to send the request immediately, use the [`flush()`](#flush) method with the parameter `instant=true`.
### Cross-device experimentation
To support visitors who access an app from multiple devices, Kameleoon allows the synchronization of previously collected visitor data across each of the visitor's devices and reconciliation of their visit history across devices through cross-device experimentation. Case studies and detailed information on how Kameleoon handles data across devices are available in the [article on cross-device experimentation](/developer-docs/cross-device-experimentation).
#### Synchronizing custom data across devices
Although custom mapping synchronization is used to align visitor data across devices, it is not always necessary. Below are two scenarios where custom mapping sync is not required:
**Same user ID across devices**
If the same user ID is used consistently across all devices, synchronization is handled automatically without a custom mapping sync. It is enough to call the `getRemoteVisitorData()` method when you want to sync the data collected between multiple devices.
**Multi-server instances with consistent IDs**
In complex setups involving multiple servers (for example, distributed server instances), where the same user ID is available across servers, synchronization between servers (with `getRemoteVisitorData()`) is sufficient without additional custom mapping sync.
Customers who need additional data can refer to the [`getRemoteVisitorData()`](#getremotevisitordata) method description for further guidance. In the below code, it is assumed that the same unique identifier (in this case, the `visitorCode`, which can also be referred to as `userId`) is used consistently between the two devices for accurate data retrieval.
If you want to sync collected data in real time, you need to choose the scope **Visitor** for your custom data.
```java title="Device A" theme={null}
// In this, example Custom data with index `90` was set to "Visitor" scope in Kameleoon.
final int VISITOR_SCOPE_CUSTOM_DATA_INDEX = 90;
kameleoonClient.addData(new CustomData(VISITOR_SCOPE_CUSTOM_DATA_INDEX, "your data"));
kameleoonClient.flush();
```
```java title="Device B" theme={null}
// Before working with the data, call `getRemoteVisitorData`.
kameleoonClient.getRemoteVisitorData(result -> {
// After calling, the SDK on Device B will have access to CustomData of Visitor scope defined on Device A.
// So, "your data" will be available to target and track the visitor.
});
```
```kotlin title="Device A" theme={null}
// In this example Custom data with index `90` was set to "Visitor" scope on Kameleoon Platform.
val VISITOR_SCOPE_CUSTOM_DATA_INDEX = 90
kameleoonClient.addData(CustomData(VISITOR_SCOPE_CUSTOM_DATA_INDEX, "your data"))
kameleoonClient.flush()
```
```kotlin title="Device B" theme={null}
// Before working with the data, call the `getRemoteVisitorData` method.
kameleoonClient.getRemoteVisitorData { result ->
// After that the SDK on Device B will have an access to CustomData of Visitor scope defined on Device A.
// So "your data" will be available for targeting and tracking for the visitor.
}
```
```kotlin title="Device A" theme={null}
// In this example Custom data with index `90` was set to "Visitor" scope on Kameleoon Platform.
val VISITOR_SCOPE_CUSTOM_DATA_INDEX = 90
kameleoonClient.addData(CustomData(VISITOR_SCOPE_CUSTOM_DATA_INDEX, "your data"))
kameleoonClient.flush()
```
```kotlin title="Device B" theme={null}
// Before working with the data, call the `getRemoteVisitorData` method.
kameleoonClient.getRemoteVisitorData()
// After that the SDK on Device B will have an access to CustomData of Visitor scope defined on Device A.
// So "your data" will be available for targeting and tracking for the visitor.
```
#### Using custom data for session merging
[Cross-device experimentation](/developer-docs/cross-device-experimentation) allows for combining a visitor's history across each of their devices (history reconciliation). History reconciliation allows merging different visitor sessions into one. To reconcile visit history, use [`CustomData`](#customdata) to provide a unique identifier for the visitor. For more information, see the [dedicated documentation](/developer-docs/cross-device-experimentation/#activating-cross-device-history-reconciliation).
After cross-device reconciliation is enabled, calling [`getRemoteVisitorData()`](#getremotevisitordata) with the parameter `userId` retrieves all known data for a given user.
Sessions with the same identifier will always be shown the same variation in an experiment. In the Visitor view of your experiment's results pages, these sessions will appear as a single visitor.
The SDK configuration ensures that associated sessions always see the same variation of the experiment. However, there are some limitations regarding cross-device variation allocation. These limitations are outlined [here](/developer-docs/cross-device-experimentation#critical-points-and-practical-insights).
Follow the [activating cross-device history reconciliation](#cross-device-experimentation) guide to set up your custom data on the Kameleoon platform.
Afterwards, you can use the SDK normally. The following methods that may be helpful in the context of session merging:
* `getRemoteVisitorData()` with passed `isUniqueIdentifier=true` to [`KameleoonClientConfig`](#additional-configuration) - to retrieve data for all linked visitors.
* [`trackConversion()`](#trackconversion) or [`flush()`](#flush) with passed `isUniqueIdentifier=true` to `KameleoonClientConfig` - to track some data for specific visitor that is associated with another visitor.
As the custom data you use as the identifier must be set to **Visitor scope**, you need to use [cross-device custom data synchronization](/developer-docs/cross-device-experimentation) to retrieve the identifier with the [`getRemoteVisitorData()`](#getremotevisitordata) method on each device.
Here's an example of how to use custom data for session merging.
```java theme={null}
// In this example, `91` represents the Custom Data's index,
// configured as a unique identifier in Kameleoon.
final int MAPPING_INDEX = 91;
final String FEATURE_KEY = "ff123";
// 0. Initializing anonymous KameleoonClient
// Assume `anonymousVisitorCode` is the randomly generated ID for that visitor.
KameleoonClient anonymousKameleoonClient = KameleoonClientFactory.create(siteCode, anonymousVisitorCode, getApplicationContext());
anonymousKameleoonClient.runWhenReady(result -> {
// ...
});
// 1. Before the visitor is authenticated
// Retrieve the variation for an unauthenticated visitor.
Variation anonymousVariation = anonymousKameleoonClient.getVariation(FEATURE_KEY);
// 2. After the visitor is authenticated
// Assume `userId` is the authenticated visitor's visitor code.
anonymousKameleoonClient.addData(new CustomData(MAPPING_INDEX, userId));
anonymousKameleoonClient.flush(true);
KameleoonClient userKameleoonClient = KameleoonClientFactory.create(
siteCode, userId,
(new KameleoonClientConfig.Builder())
.isUniqueIdentifier(true) // Indicate that `userId` is a unique identifier
.build(),
getApplicationContext()
);
userKameleoonClient.runWhenReady(result -> {
// ...
});
// 3. After the visitor has been authenticated
// Retrieve the variation for the `userId`, which will match the anonymous visitor code's variation.
Variation userVariation = userKameleoonClient.getVariation(FEATURE_KEY);
boolean isSameVariation = userVariation.getKey().equals(anonymousVariation.getKey()); // true
// The `userId` and `anonymousVisitorCode` are now linked and tracked as a single visitor.
kameleoonClient.trackConversion(123, 10.0f);
// Additionally, the linked visitors will share all fetched remote visitor data.
kameleoonClient.getRemoteVisitorData(result -> {
// ...
});
```
```kotlin theme={null}
// In this example, `91` represents the Custom Data's index
// configured as a unique identifier in Kameleoon.
val MAPPING_INDEX = 91
val FEATURE_KEY = "ff123"
// 0. Initializing anonymous KameleoonClient
// Assume `anonymousVisitorCode` is the randomly generated ID for that visitor.
val anonymousKameleoonClient = KameleoonClientFactory.create(siteCode, anonymousVisitorCode, applicationContext)
anonymousKameleoonClient.runWhenReady { result ->
// ...
}
// 1. Before the visitor is authenticated
// Retrieve the variation for an unauthenticated visitor.
val anonymousVariation = anonymousKameleoonClient.getVariation(FEATURE_KEY)
// 2. After the visitor is authenticated
// Assume `userId` is the authenticated visitor's visitor code.
anonymousKameleoonClient.addData(CustomData(MAPPING_INDEX, userId))
anonymousKameleoonClient.flush(true)
val userKameleoonClient = KameleoonClientFactory.create(
siteCode, userId,
KameleoonClientConfig.Builder()
.isUniqueIdentifier(true) // Indicate that `userId` is a unique identifier
.build(),
applicationContext
)
userKameleoonClient.runWhenReady { result ->
// ...
}
// 3. After the visitor has been authenticated
// Retrieve the variation for the `userId`, which will match the anonymous visitor code's variation.
val userVariation = userKameleoonClient.getVariation(FEATURE_KEY)
val isSameVariation = userVariation.getKey() == anonymousVariation.getKey() // true
// The `userId` and `anonymousVisitorCode` are now linked and tracked as a single visitor.
userKameleoonClient.trackConversion(123, 10.0f)
// Additionally, the linked visitors will share all fetched remote visitor data.
userKameleoonClient.getRemoteVisitorData { result ->
// ...
}
```
```kotlin theme={null}
// In this example, `91` represents the Custom Data's index
// configured as a unique identifier in Kameleoon.
val MAPPING_INDEX = 91
val FEATURE_KEY = "ff123"
// 0. Initializing anonymous KameleoonClient
// Assume `anonymousVisitorCode` is the randomly generated ID for that visitor.
val anonymousKameleoonClient = KameleoonClientFactory.create(siteCode, anonymousVisitorCode, applicationContext)
anonymousKameleoonClient.runWhenReady()
// 1. Before the visitor is authenticated
// Retrieve the variation for an unauthenticated visitor.
val anonymousVariation = anonymousKameleoonClient.getVariation(FEATURE_KEY)
// 2. After the visitor is authenticated
// Assume `userId` is the authenticated visitor's visitor code.
anonymousKameleoonClient.addData(CustomData(MAPPING_INDEX, userId))
anonymousKameleoonClient.flush(true)
val userKameleoonClient = KameleoonClientFactory.create(
siteCode, userId,
KameleoonClientConfig.Builder()
.isUniqueIdentifier(true) // Indicate that `userId` is a unique identifier
.build(),
applicationContext
)
userKameleoonClient.runWhenReady()
// 3. After the visitor has been authenticated
// Retrieve the variation for the `userId`, which will match the anonymous visitor code's variation.
val userVariation = userKameleoonClient.getVariation(FEATURE_KEY)
val isSameVariation = userVariation.getKey() == anonymousVariation.getKey() // true
// The `userId` and `anonymousVisitorCode` are now linked and tracked as a single visitor.
userKameleoonClient.trackConversion(123, 10.0f)
// Additionally, the linked visitors will share all fetched remote visitor data.
userKameleoonClient.getRemoteVisitorData()
```
In this example, the application has a login page. Since the user ID is unknown at the moment of login, an anonymous visitor automatically generated by the SDK is used. The visitor code can be retrieved with the [`getVisitorCode()`](#getvisitorcode) method. After the user logs in, the anonymous visitor is associated with the user ID and used as a unique identifier for the visitor.
### Using a custom bucketing key
By default, Kameleoon uses a unique, anonymous visitor ID (`visitorCode`) to assign users to feature flag variations. This ID is typically generated and stored on the user's device (in a browser cookie for client-side and server-side SDKs—in persistent storage for mobile SDKs). However, in certain scenarios you may need to ensure all users of the same organization see the same variant of a feature flag.
The **Custom Bucketing Key** option allows you to override this default behavior by providing your own custom identifier for bucketing. This override ensures that Kameleoon's assignment logic uses your specified key instead of the default `visitorCode`.
#### Use cases
Using a custom bucketing key is essential for maintaining consistency and accuracy in your feature flag assignments, particularly in these situations:
* **Account-level or organizational experiments:** For B2B products or scenarios where you want to assign all users from the same organization to the same variation, you can use an identifier like an `accountId`. Custom bucketing keys are crucial for A/B testing features that impact an entire team or company.
By implementing a custom bucketing key, you ensure greater consistency and accuracy in your experiments, leading to more reliable results and a better user experience.
#### Technical details
When you configure a custom bucketing key for a feature flag, you provide Kameleoon with a specific identifier from your application's data:
```java theme={null}
kameleoonClient.addData(new CustomData(index, "newVisitorCode"));
```
```kotlin theme={null}
kameleoonClient.addData(CustomData(index, "newVisitorCode"))
```
* **Providing the custom key:** You provide your custom identifier to the Kameleoon SDK using the [`addData()`](#adddata) method. In this method, you will pass your chosen custom bucketing key as a [`CustomData`](#customdata) object. Here, `newVisitorCode` refers to the identifier you wish to use for your bucketing (for example, the new `userId` or `accountId`).
For the custom bucketing key to function correctly, it must also be defined and configured for the feature flag during the flag creation or editing process. Without this corresponding configuration, the SDK's bucketing will not apply your custom key. For detailed instructions on how to set this up in Kameleoon, refer to this [article](/user-manual/experimentation/feature-experimentation/create-and-manage-flags/create-a-feature-flag#Advanced_Flag_Settings).
* **Bucketing logic:** Once a custom bucketing key is provided through the `addData()` method, all hash calculations for assigning users to variations will use this `newVisitorCode` (your custom key) instead of the default `visitorCode`. Using the `newVisitorCode` means that the bucketing decision is tied to your custom identifier, ensuring consistent assignments across various contexts where that identifier is present.
* **Data tracking and analytics:** It's crucial to note that while the `newVisitorCode` (your custom key) is used for bucketing decisions, **all subsequent data (tracking events and conversions, for example) is sent and associated with the *original* `visitorCode`.** This separation ensures that your analytics accurately reflect individual user journeys and interactions within your experiment's broader context, even when bucketing is performed at a higher level (like an account) or across multiple devices/sessions. Your original visitor data remains intact for comprehensive reporting.
#### Technical requirements
To effectively use a custom bucketing key:
* The key must be a `String`.
* It must be unique for the entity you intend to bucket (for example, if using a `userId`, each user's ID should be unique).
* The key must be available to the SDK at the exact moment the feature flag decision is evaluated for that user or request.
### Targeting conditions
The Kameleoon SDKs support a variety of predefined targeting conditions that you can use to target users in your campaigns. For the list of conditions this SDK supports, see [use visit history to target users](/developer-docs/feature-experimentation/targeting-and-segmentation/native-segmentation).
You can also use your own [external data to target users](/developer-docs/apis/data-api-rest/tutorials/storing-and-retrieving-external-data-to-target-users).
### Error Handling
All methods of the **Kameleoon SDK** can **only** throw `KameleoonException` or its documented inherited exceptions (listed in the *Exceptions Thrown* section for each method).
These exceptions are **expected behavior** of the SDK. If you want to handle specific scenarios differently, you can catch individual inherited exceptions; otherwise, catching `KameleoonException` will handle all SDK‑related errors.
Although our **unit and integration tests** confirm that the SDK **never throws** `Exception` or `RuntimeException`, we understand that **patching SDK versions on Android can be difficult**, and unexpected issues may arise from **third‑party libraries** that could throw a `RuntimeException`. To prevent your application from crashing in such rare cases, we recommend that you also **catch `Exception` (or `RuntimeException`)** as an additional safeguard. This is strictly a precaution and **not an expected behavior of the SDK**.
For example:
```java theme={null}
try {
// Calling a method of the SDK
} catch (KameleoonException e) {
// Handling expected exceptions
} catch (Exception e) {
// Recommended (but optional) safeguard for unexpected exceptions from third-party libraries
}
```
```kotlin theme={null}
try {
// Calling a method of the SDK
} catch (e: KameleoonException) {
// Handling expected exceptions
} catch (e: Exception) {
// Recommended (but optional) safeguard for unexpected exceptions from third-party libraries
}
```
### Logging
The SDK generates logs to reflect various internal processes and issues.
#### Log levels
The SDK supports configuring limiting logging by a log level.
```java theme={null}
// The `NONE` log level does not allow logging.
com.kameleoon.logging.KameleoonLogger.setLogLevel(com.kameleoon.logging.LogLevel.NONE);
// The `ERROR` log level only allows logging issues that may affect the SDK's main behaviour.
com.kameleoon.logging.KameleoonLogger.setLogLevel(com.kameleoon.logging.LogLevel.ERROR);
// The `WARNING` log level allows logging issues which may require additional attention.
// It extends the `ERROR` log level.
// The `WARNING` log level is a default log level.
com.kameleoon.logging.KameleoonLogger.setLogLevel(com.kameleoon.logging.LogLevel.WARNING);
// The `INFO` log level allows logging general information on the SDK's internal processes.
// It extends the `WARNING` log level.
com.kameleoon.logging.KameleoonLogger.setLogLevel(com.kameleoon.logging.LogLevel.INFO);
// The `DEBUG` level logs additional details about the SDK’s internal processes and extends the `INFO` level
// with more granular diagnostic output.
// This information is not intended for end-user interpretation but can be sent to our support team
// to assist with internal troubleshooting.
com.kameleoon.logging.KameleoonLogger.setLogLevel(com.kameleoon.logging.LogLevel.DEBUG);
```
```kotlin theme={null}
// The `NONE` log level allows no logging.
com.kameleoon.logging.KameleoonLogger.setLogLevel(com.kameleoon.logging.LogLevel.NONE)
// The `ERROR` log level allows to log only issues that may affect the SDK's main behaviour.
com.kameleoon.logging.KameleoonLogger.setLogLevel(com.kameleoon.logging.LogLevel.ERROR)
// The `WARNING` log level allows to log issues which may require an attention.
// It extends the `ERROR` log level.
// The `WARNING` log level is a default log level.
com.kameleoon.logging.KameleoonLogger.setLogLevel(com.kameleoon.logging.LogLevel.WARNING)
// The `INFO` log level allows to log general information on the SDK's internal processes.
// It extends the `WARNING` log level.
com.kameleoon.logging.KameleoonLogger.setLogLevel(com.kameleoon.logging.LogLevel.INFO)
// The `DEBUG` log level allows to log extra information on the SDK's internal processes.
// It extends the `INFO` log level.
com.kameleoon.logging.KameleoonLogger.setLogLevel(com.kameleoon.logging.LogLevel.DEBUG)
```
#### Custom handling of logs
The SDK writes its logs to the console output by default. This behaviour can be overridden.
Logging limiting by a log level is performed apart from the log handling logic.
```java theme={null}
public class CustomLogger implements com.kameleoon.logging.Logger {
// `log` method accepts logs from the SDK
@Override
public void log(com.kameleoon.logging.LogLevel level, String message) {
// Custom log handling logic here. For example:
switch (level) {
case ERROR:
android.util.Log.e("your-log-tag", message);
break;
case WARNING:
android.util.Log.w("your-log-tag", message);
break;
case INFO:
android.util.Log.i("your-log-tag", message);
break;
case DEBUG:
android.util.Log.d("your-log-tag", message);
break;
default:
}
}
}
// Log level filtering is applied separately from log handling logic.
// The custom logger will only accept logs that meet or exceed the specified log level.
// Ensure the log level is set correctly.
com.kameleoon.logging.KameleoonLogger.setLogLevel(com.kameleoon.logging.LogLevel.DEBUG); // Optional, defaults to `LogLevel.WARNING`.
com.kameleoon.logging.KameleoonLogger.setLogger(new CustomLogger());
```
```kotlin theme={null}
class CustomLogger : com.kameleoon.logging.Logger {
override fun log(level: com.kameleoon.logging.LogLevel, message: String) {
// Custom log handling logic here. For example:
when (level) {
com.kameleoon.logging.LogLevel.ERROR -> android.util.Log.e("your-log-tag", message)
com.kameleoon.logging.LogLevel.WARNING -> android.util.Log.w("your-log-tag", message)
com.kameleoon.logging.LogLevel.INFO -> android.util.Log.i("your-log-tag", message)
com.kameleoon.logging.LogLevel.DEBUG -> android.util.Log.d("your-log-tag", message)
else -> {
// Optional: handle default case if needed
}
}
}
}
// Log level filtering is applied separately from log handling logic.
// The custom logger will only accept logs that meet or exceed the specified log level.
// Ensure the log level is set correctly.
com.kameleoon.logging.KameleoonLogger.setLogLevel(com.kameleoon.logging.LogLevel.DEBUG) // Optional, defaults to `LogLevel.WARNING`.
com.kameleoon.logging.KameleoonLogger.setLogger(CustomLogger())
```
### Passing the visitor code to a WebView
In some cases, you may need to pass the **visitor code** from the native application to a WebView that uses [Engine.js](/developer-docs/web-experimentation/implementation-and-deployment/standard-implementation) or the web [JavaScript](/developer-docs/sdks/web-sdks/js-sdk) or [React](/developer-docs/sdks/web-sdks/react-js-sdk) SDKs. The following example demonstrates the recommended way to achieve this:
```kotlin theme={null}
class WebViewActivity : AppCompatActivity() {
private var webView: WebView? = null
private val DEFAULT_URL = "https://example.com"
private val COOKIE_NAME = "kameleoonVisitorCode"
private val COOKIE_DOMAIN = ".example.com"
override fun onCreate(savedInstanceState: Bundle?) {
super.onCreate(savedInstanceState)
webView = WebView(this).also { webView ->
setContentView(webView)
configureWebView(DEFAULT_URL, kameleoonClient)
webView.loadUrl(DEFAULT_URL)
}
}
private fun configureWebView(url: String, kameleoonClient: KameleoonClient) {
CookieManager.getInstance().apply {
setCookie(
url,
"$COOKIE_NAME=${kameleoonClient.visitorCode}; Domain=$COOKIE_DOMAIN; Path=/; Secure"
)
flush()
}
}
}
```
```kotlin theme={null}
@Composable
fun KameleoonCookieWebView(url: String, kameleoonClient: KameleoonClient) {
AndroidView(
factory = { context ->
WebView(context).apply {
configureWebView(url, kameleoonClient)
loadUrl(url)
}
},
)
}
private fun WebView.configureWebView(url: String, kameleoonClient: KameleoonClient) {
val COOKIE_NAME = "kameleoonVisitorCode"
val COOKIE_DOMAIN = ".example.com"
CookieManager.getInstance().apply {
setCookie(
url,
"$COOKIE_NAME=${kameleoonClient.visitorCode}; Domain=$COOKIE_DOMAIN; Path=/; Secure"
)
flush()
}
}
```
```java theme={null}
public class WebViewActivity extends AppCompatActivity {
private WebView webView;
private static final String DEFAULT_URL = "https://example.com";
private static final String COOKIE_NAME = "kameleoonVisitorCode";
private static final String COOKIE_DOMAIN = ".example.com";
@Override
protected void onCreate(Bundle savedInstanceState) {
super.onCreate(savedInstanceState);
webView = new WebView(this);
setContentView(webView);
configureWebView(webView, DEFAULT_URL, kameleoonClient);
webView.loadUrl(url);
}
private void configureWebView(WebView webView, String url, KameleoonClient kameleoonClient) {
CookieManager cookieManager = CookieManager.getInstance();
cookieManager.setCookie(
url,
COOKIE_NAME + "=" + kameleoonClient.getVisitorCode() + "; Domain=" + COOKIE_DOMAIN + "; Path=/; Secure"
);
cookieManager.flush();
}
}
```
## Reference
This is the full reference documentation for the Kameleoon Android SDK.
### Initialization
Once you have [installed the SDK](#installation) in your application, the first step is initializing Kameleoon. All of your application's interactions with the SDK, such as triggering an experiment, are accomplished using this Kameleoon client object.
#### create()
Call this method before any others to initialize the SDK. This method is in `com.kameleoon.KameleoonClientFactory`. Your app conducts all interactions with the SDK using the resulting `KameleoonClient` object that this method creates.
You can customize the SDK's behavior (for example, the environment, credentials, and so on) by providing a [configuration object](#additional-configuration). Otherwise, the SDK tries to find and use your configuration file instead.
```java theme={null}
String siteCode = "a8st4f59bj";
try {
// pass client configuration and visitorCode as arguments
KameleoonClientConfig config = new KameleoonClientConfig.Builder()
.refreshIntervalMinute(15) // in minutes, 1 hour by default, optional
.defaultTimeoutMillisecond(10_000) // in milliseconds, 10 seconds by default, optional
.dataExpirationIntervalMinute(1440 * 365) // in minutes, infinity by default, optional
.isUniqueIdentifier(false) // optional, false by default. Set to true if the visitorCode corresponds to your customer's unique userId.
.environment("staging") // optional
.build();
String visitorCode = "yourVisitorCode";
KameleoonClient kameleoonClient = KameleoonClientFactory.create(siteCode, visitorCode, config, getApplicationContext());
} catch (KameleoonException.SiteCodeIsEmpty | KameleoonException.VisitorCodeInvalid exception) {
// Exception indicates that the provided siteCode is empty or the visitorCode is invalid
} catch (Exception exception) {
// Recommended (but optional) safeguard for unexpected exceptions from third-party libraries
}
try {
// generate visitorCode automatically and read client configuration from a file 'kameleoon-client.properties'
KameleoonClient kameleoonClient = KameleoonClientFactory.create(siteCode, getApplicationContext());
} catch (KameleoonException.SiteCodeIsEmpty | KameleoonException.VisitorCodeInvalid exception) {
// Exception indicates that the provided siteCode is empty or the visitorCode is invalid
} catch (Exception exception) {
// Recommended (but optional) safeguard for unexpected exceptions from third-party libraries
}
```
```kotlin theme={null}
val siteCode = "a8st4f59bj"
try {
// pass client configuration and visitor code as arguments
val config = KameleoonClientConfig.Builder()
.refreshIntervalMinute(15) // in minutes, 1 hour by default, optional
.defaultTimeoutMillisecond(10_000) // in milliseconds, 10 seconds by default, optional
.dataExpirationIntervalMinute(1440 * 365) // in minutes, infinity by default, optional
.environment("staging") // optional
.build();
val visitorCode = "yourVisitorCode"
val kameleoonClient = KameleoonClientFactory.create(siteCode, visitorCode, config, applicationContext)
} catch (e: KameleoonException.SiteCodeIsEmpty) {
// Exception indicating that the provided siteCode is empty
} catch (e: KameleoonException.VisitorCodeInvalid) {
// Exception indicating that the provided visitorCode is invalid
} catch (e: Exception) {
// Recommended (but optional) safeguard for unexpected exceptions from third-party libraries
}
try {
// generate visitorCode automatically and read client configuration from the 'kameleoon-client.properties' file
val kameleoonClient = KameleoonClientFactory.create(siteCode, applicationContext)
} catch (e: KameleoonException.SiteCodeIsEmpty) {
// Exception indicating that the provided siteCode is empty
} catch (e: KameleoonException.VisitorCodeInvalid) {
// Exception indicating that the provided visitorCode is invalid
} catch (e: Exception) {
// Recommended (but optional) safeguard for unexpected exceptions from third-party libraries
}
```
##### Parameters
| Name | Type | Description | Default |
| ------------------------------------------ | ----------------------- | ----------------------------------------------------------------------------------------------------------------------------------------------------------------------------------------------------------------------------------------------------------- | ------- |
| siteCode required | `String` | A [unique key](/user-manual/faq#how-do-i-find-my-sitecode) identifying the Kameleoon project used with the SDK. | |
| visitorCode optional | `String` | An optional visitor identifier. If available, use your internal **user ID**; otherwise, the SDK will generate one automatically. | `nil` |
| config optional | `KameleoonClientConfig` | Optional SDK configuration. If provided, it is used instead of reading from an external [configuration file](#additional-configuration). If not provided, the SDK attempts to read the file, but if the file is missing, it falls back to default behavior. | `nil` |
| applicationContext required | `Context` | The application's [context](https://developer.android.com/reference/android/content/Context). | |
##### Return value
| Type | Description |
| ----------------- | ------------------------------------------------------------------------------------------------------------------- |
| `KameleoonClient` | An instance of the `KameleoonClient` class that your app can then use to manage your experiments and feature flags. |
##### Exceptions thrown
| Type | Description |
| -------------------- | ------------------------------------------------------------------------------------------------------------------- |
| `VisitorCodeInvalid` | Exception indicating that the provided visitor code is not valid. It is either empty or longer than 255 characters. |
| `SiteCodeIsEmpty` | Exception indicating that the specified site code is empty string which is invalid value. |
#### isReady()
For mobile SDKs, the Kameleoon Client can't initialize immediately, as it must perform a server call to retrieve the current configuration for the active feature flags. Use this method to check if the SDK is ready by calling `isReady()` before triggering any feature flags.
Alternatively, you can use a callback (see the [`runWhenReady()`](#runwhenready) method for details).
```java theme={null}
boolean ready = kameleoonClient.isReady();
```
```kotlin theme={null}
val ready = kameleoonClient.isReady
```
##### Return value
| Type | Description |
| ------- | --------------------------------------------------------------------------------------------------------------------------- |
| boolean | Boolean representing the SDK's status. `true` if client is fully initialized and `false` if it is not yet ready to be used. |
#### runWhenReady()
* 🔄 *Performs an asynchronous request (if the configuration is outdated or missing)*
For mobile SDKs, the `KameleoonClient` cannot initialize immediately, as it must perform a server call to retrieve the current configuration for all feature flags. Use the [`runWhenReady()`](#runwhenready) method to handle the time until the client is ready for use. Additionally, you can set a maximum timeout period to control how long the client will wait before it becomes ready.
If `result.getOrThrow()=true`, the `KameleoonClient` is initialized and ready, and the feature flags will be triggered with their respective variations. If the result is `false` or a timeout occurs, the initialization will not complete successfully.
The callback or the coroutine-based code should include logic to apply the reference variation, as the user will be excluded from the feature flag if a timeout occurs.
Since the initial configuration may require a server call, this mechanism is asynchronous. Therefore, you should either:
* Provide a `completion` callback as an argument to the method to ensure you are notified when the `KameleoonClient` is fully initialized and ready for use.
* Use coroutines to handle asynchronous operations.
```java theme={null}
kameleoonClient.runWhenReady(1000, result -> {
int recommendedProductsNumber = 5; // Default control number for recommended products
try {
if (result.getOrThrow()) {
Variation variation = kameleoonClient.getVariation("featureKey");
recommendedProductsNumber = (int) variation.getVariables().get("recommendedProductsNumber").getValue();
}
} catch (Exception ignored) {
// The user will not be included in the experiment results and should see the control variation
}
applyVariation(recommendedProductsNumber);
});
```
##### Parameters
| Name | Type | Description | Default |
| ------------------------------------------- | --------------------------------------------- | ---------------------------------------------- | ---------------------------------------------------------------------------------------------------- |
| timeoutMilliseconds optional | `int` | Timeout for the initialization process | [`defaultTimeoutMillisecond`](#create) or [`default_timeout_millisecond`](#additional-configuration) |
| completion required | `ResultCompletion` | The callback that processes the received data. | |
```kotlin theme={null}
kameleoonClient.runWhenReady(1000) { result ->
val recommendedProductsNumber = runCatching {
if (result.getOrThrow()) {
val variation = kameleoonClient.getVariation("featureKey")
variation.variables["recommendedProductsNumber"]?.value as Int
} else {
null // The user will not be included in the experiment results and should see the control variation
}
}.getOrDefault(5) // Default control number for recommended products
applyVariation(recommendedProductsNumber)
}
```
##### Parameters
| Name | Type | Description | Default |
| ------------------------------------------- | --------------------------------------------- | ---------------------------------------------- | ---------------------------------------------------------------------------------------------------- |
| timeoutMilliseconds optional | `Int` | Timeout for the initialization process | [`defaultTimeoutMillisecond`](#create) or [`default_timeout_millisecond`](#additional-configuration) |
| completion required | `ResultCompletion` | The callback that processes the received data. | |
A common mistake is using suspended functions inside `mapCatching`, `runCatching`, or a `try-catch` block without properly re-throwing `CancellationException`, which can interfere with coroutine cancellation. To ensure correct behavior, try to avoid calling suspend functions within these blocks.
```kotlin theme={null}
viewModelScope.launch {
kameleoonClient.runWhenReady(1000).getOrNull() ?: return@launch
val recommendedProductsNumber = runCatching {
val variation = kameleoonClient.getVariation("featureKey")
variation.variables["recommendedProductsNumber"]?.value as? Int
}.getOrNull() ?: 5 // Default control number for recommended products
applyVariation(recommendedProductsNumber)
}
```
##### Parameters
| Name | Type | Description | Default |
| ------------------------------------------- | ----- | -------------------------------------- | ---------------------------------------------------------------------------------------------------- |
| timeoutMilliseconds optional | `Int` | Timeout for the initialization process | [`defaultTimeoutMillisecond`](#create) or [`default_timeout_millisecond`](#additional-configuration) |
##### Return value
| Type | Description |
| -------------- | ----------------------------------------------------------------------------------------- |
| `Result` | A Kotlin `Result` that contains either the success result or the exception that occurred. |
### Feature flags and variations
#### isFeatureActive()
* 📨 *Sends Tracking Data to Kameleoon (depending on the `track` parameter)*
This method was previously called `activateFeature`, which was removed in SDK version `4.0.0`.
Call this method to activate a feature toggle. This method accepts a `featureKey` as a required argument to check if the specified feature will be active for a visitor.
If the visitor has never been associated with this feature flag, the method returns a random boolean value (`true` if the visitor should be shown this feature, otherwise `false`). If the visitor is already registered with this feature flag, this method returns the previous `featureFlag` value.
Ensure you properly set up error handling as shown in the example code to catch potential exceptions.
Kameleoon uses tracking to count sessions and visitors when you call certain methods, such as `isFeatureActive()`, `getVariation()` or `getVariations()`.
Use the default `true` value for the `track` parameter when you expose visitors to a variation and need to count them. Set the `track` parameter to `false` only if you call these methods before you expose visitors.
For example, if you call `getVariations()` to retrieve all variations before you expose visitors, set the `track` parameter to `false`. This setting prevents Kameleoon from prematurely counting a session. You can then trigger tracking later when you explicitly expose the visitor.
Kameleoon sends tracking data every second by default. You can configure this interval up to five seconds using the tracking interval configuration option. Kameleoon groups tracking events into a single session as long as the interval between events is less than 30 minutes. If more than 30 minutes elapse between tracking events, Kameleoon counts the events as separate sessions. A visit appears in your reports 30 minutes after the last recorded event in the session.
```java theme={null}
String featureKey = "new_checkout";
boolean hasNewCheckout = false;
try {
hasNewCheckout = kameleoonClient.isFeatureActive(featureKey);
// disabling tracking
hasNewCheckout = kameleoonClient.isFeatureActive(featureKey, false);
} catch (KameleoonException.SDKNotReady e) {
// Exception indicating that the SDK has not completed its initialization yet.
} catch (KameleoonException.FeatureNotFound e) {
// SDK not initialized, or feature toggle not yet activated in Kameleoon - we consider the feature inactive
} catch (Exception exception) {
// Recommended (but optional) safeguard for unexpected exceptions from third-party libraries
}
if (hasNewCheckout)
{
// Implement new checkout code here
}
```
```kotlin theme={null}
val featureKey = "new_checkout"
var hasNewCheckout = false
try {
hasNewCheckout = kameleoonClient.isFeatureActive(featureKey)
// disabling tracking
hasNewCheckout = kameleoonClient.isFeatureActive(featureKey, false)
} catch (e: KameleoonException.SDKNotReady) {
// Exception indicating that the SDK has not completed its initialization yet.
hasNewCheckout = false
} catch (e: KameleoonException.FeatureNotFound) {
// SDK not initialized or feature toggle not yet activated on Kameleoon's side - we consider the feature inactive
hasNewCheckout = false
} catch (e: Exception) {
// Recommended (but optional) safeguard for unexpected exceptions from third-party libraries
hasNewCheckout = false
}
if (hasNewCheckout) {
// Implement new checkout code here
}
```
The `isFeatureActive()` method evaluates the served variant, not the master flag state. If you exclude rules, the method uses the **Then, for everyone else serve** default state. If you select **Off** for this default state, the method always returns `false` even when the master feature flag is **On**.
##### Parameters
| Name | Type | Description |
| ---------- | ------- | -------------------------------------------------------------------------------------------------- |
| featureKey | String | Unique key of the feature you want to expose to a user. This field is required. |
| track | boolean | An optional parameter to enable or disable tracking of the feature evaluation (`true` by default). |
##### Return value
| Type | Description |
| ------- | ------------------------------------------------------ |
| Boolean | Value of the feature that is registered for a visitor. |
##### Exceptions thrown
| Type | Description |
| --------------- | ---------------------------------------------------------------------------------------------------------------------------------------------------------------------------------------------------------------------------------------------------------------------------- |
| SDKNotReady | Exception indicating that the SDK has not completed its initialization. |
| FeatureNotFound | Exception indicating that the requested feature ID was not found in the SDK's internal configuration. This exception usually means the feature flag has not been activated on the Kameleoon side (but code implementing the feature is already deployed in the application). |
#### getVariation()
* 📨 *Sends Tracking Data to Kameleoon (depending on the `track` parameter)*
Retrieves the [`Variation`](#variation) assigned to a given visitor for a specific feature flag.
This method takes a `visitorCode` and `featureKey` as mandatory arguments. The `track` argument is optional and defaults to `true`.
It returns the assigned `Variation` for the visitor. If the visitor is not associated with any feature flag rules, the method returns the default `Variation` for the given feature flag.
Ensure that proper error handling is implemented in your code to manage potential exceptions.
The default variation refers to the variation assigned to a visitor when they do not match any predefined delivery rules for a feature flag. In other words, it is the fallback variation applied to all users who are not targeted by specific rules. It's represented as the variation in the "Then, for everyone else..." section in a management interface.
```java theme={null}
final String featureKey = "featureKey";
Variation variation = null;
try {
variation = kameleoonClient.getVariation(featureKey);
// disabling tracking
variation = kameleoonClient.getVariation(featureKey, false);
} catch (KameleoonException.SDKNotReady ex) {
// Exception indicating that the SDK has not completed its initialization yet.
} catch (KameleoonException.FeatureNotFound ex) {
// The feature key is not in the configuration file that has been fetched by the SDK.
} catch (KameleoonException.FeatureEnvironmentDisabled ex) {
// The feature flag is disabled for the environment.
}
if (variation != null) {
String title = (String) variation.getVariables().get("title").getValue();
switch (variation.getKey()) {
case "on":
// Main variation key is selected for visitorCode
break;
case "alternative_variation":
// Alternative variation key
break;
default:
// Default variation key
break;
}
}
```
```kotlin theme={null}
val featureKey = "featureKey"
var variation: Variation? = null
try {
variation = kameleoonClient.getVariation(featureKey)
// disabling tracking
variation = kameleoonClient.getVariation(featureKey, false)
} catch (e: KameleoonException.SDKNotReady) {
// Exception indicating that the SDK has not completed its initialization yet.
} catch (e: KameleoonException.FeatureNotFound) {
// The feature key is not yet in the configuration file that has been fetched by the SDK.
} catch (e: KameleoonException.FeatureEnvironmentDisabled) {
// The feature flag is disabled for the environment
}
val title = variation?.variables?.get("title")?.value as? String
when (variation?.key) {
"on" -> {
// Main variation key is selected for visitorCode
}
"alternative_variation" -> {
// Alternative variation key
}
else -> {
// Default variation key
}
}
```
##### Parameters
| Name | Type | Description | Default |
| ------------------------------------- | --------- | ------------------------------------------------------------------------------ | ------- |
| `visitorCode` required | `String` | Unique identifier of the visitor. | |
| `featureKey` required | `String` | Key of the feature you want to expose to a visitor. | |
| `track` optional | `boolean` | An optional parameter to enable or disable tracking of the feature evaluation. | `true` |
##### Return value
| Type | Description |
| ----------- | ------------------------------------------------------------------------------------- |
| `Variation` | An assigned [`Variation`](#variation) to a given visitor for a specific feature flag. |
##### Exceptions thrown
| Type | Description |
| ---------------------------- | --------------------------------------------------------------------------------------------------------------------------------------------------------------------------------------------------------------------------------------------------------------------- |
| `VisitorCodeInvalid` | Exception indicating that the provided visitor code is not valid. It is either empty or longer than 255 characters. |
| `FeatureNotFound` | Exception indicating that the requested feature key wasn't found in the internal configuration of the SDK. This usually means that the feature flag is not activated in the Kameleoon app (but code implementing the feature is already deployed in the application). |
| `FeatureEnvironmentDisabled` | Exception indicating that feature flag is disabled for the visitor's current environment (for example, production, staging, or development). |
#### getVariations()
* 📨 *Sends Tracking Data to Kameleoon (depending on the `track` parameter)*
Retrieves a map of [`Variation`](#variation) objects assigned to a given visitor across all feature flags.
This method iterates over all available feature flags and returns the assigned `Variation` for each flag associated with the specified visitor. It takes `onlyActive` and `track` as optional arguments.
* If `onlyActive` is set to `true`, the method `getVariations()` will return feature flags variations provided the user is not bucketed with the `off` variation.
* The `track` parameter controls whether or not the method will track the variation assignments. By default, it is set to `true`. If set to `false`, the tracking will be disabled.
The returned map consists of feature flag keys as keys and their corresponding `Variation` as values. If no variation is assigned for a feature flag, the method returns the default `Variation` for that flag.
Proper error handling should be implemented to manage potential exceptions.
The default variation refers to the variation assigned to a visitor when they do not match any predefined delivery rules for a feature flag. In other words, it is the fallback variation applied to all users who are not targeted by specific rules. It's represented as the variation in the "Then, for everyone else..." section in a management interface.
```java theme={null}
try {
Map variations = kameleoonClient.getVariations();
// only active variations
Map variations = kameleoonClient.getVariations(true);
// disable tracking
Map variations = kameleoonClient.getVariations(false, false);
} catch (KameleoonException.SDKNotReady ex) {
// Exception indicating that the SDK has not completed its initialization yet.
}
```
```kotlin theme={null}
try {
val variations = kameleoonClient.getVariations()
// only active variations
val variations = kameleoonClient.getVariations(true)
// disable tracking
val variations = kameleoonClient.getVariations(false, false)
} catch (e: KameleoonException.SDKNotReady) {
// Exception indicating that the SDK has not completed its initialization yet.
}
```
##### Parameters
| Name | Type | Description | Default |
| ------------------------------------ | --------- | ----------------------------------------------------------------------------------------------------------------- | ------- |
| `onlyActive` optional | `boolean` | An optional parameter indicating whether to return variations for active (`true`) or all (`false`) feature flags. | `false` |
| `track` optional | `boolean` | An optional parameter to enable or disable tracking of the feature evaluation. | `true` |
##### Return value
| Type | Description |
| ------------------------ | ----------------------------------------------------------------------------------------------------------------------------------- |
| `Map` | Map that contains the assigned [`Variation`](#variation) objects of the feature flags using the keys of the corresponding features. |
##### Exceptions thrown
| Type | Description |
| ------------- | ---------------------------------------------------- |
| `SDKNotReady` | Indicates that the SDK is not yet fully initialized. |
#### setForcedVariation()
The method allows you to programmatically assign a specific [`Variation`](#variation) to a user, bypassing the standard evaluation process. This is especially valuable for controlled experiments where the usual evaluation logic is not required or must be skipped. It can also be helpful in scenarios like debugging or custom testing.
When a **forced** variation is set, it overrides Kameleoon's real-time evaluation logic. Processes like segmentation, targeting conditions, and algorithmic calculations are skipped. To preserve segmentation and targeting conditions during an experiment, set `forceTargeting=false` instead.
A forced variation is treated the same as an evaluated variation. It is tracked in analytics and stored in the user context like any standard evaluated variation, ensuring consistency in reporting.
The method may throw exceptions under certain conditions (e.g., invalid parameters, user context, or internal issues). Proper exception handling is essential to ensure that your application remains stable and resilient.
```java theme={null}
final int experimentId = 9516;
try {
// Forcing the variation "on" for the experiment 9516 for the visitor
kameleoonClient.setForcedVariation(experimentId, "on");
// Forcing the variation "on" while preserving segmentation and targeting conditions during the experiment
kameleoonClient.setForcedVariation(experimentId, "on", false);
// Resetting the forced variation for the experiment 9516 for the visitor
kameleoonClient.setForcedVariation(experimentId, null);
} catch (KameleoonException e) {
// Handling the exception
}
```
```kotlin theme={null}
val experimentId = 9516
try {
// Forcing the variation "on" for the experiment 9516 for the visitor
kameleoonClient.setForcedVariation(experimentId, "on")
// Forcing the variation "on" while preserving segmentation and targeting conditions during the experiment
kameleoonClient.setForcedVariation(experimentId, "on", false)
// Resetting the forced variation for the experiment 9516 for the visitor
kameleoonClient.setForcedVariation(experimentId, null)
} catch (e: KameleoonException) {
// Handling the exception
}
```
##### Parameters
| Name | Type | Description | Default |
| ---------------------------------------- | --------- | ---------------------------------------------------------------------------------------------------------------------------------------------------------------------------- | ------- |
| `experimentId` required | `int` | **Experiment Id** that will be targeted and selected during the evaluation process. | |
| `variationKey` required | `String` | **Variation Key** corresponding to a `Variation` that should be forced as the returned value for the experiment. If the value is `null`, the forced variation will be reset. | |
| `forceTargeting` optional | `boolean` | Indicates whether targeting for the experiment should be forced and skipped (`true`) or applied as in the standard evaluation process (`false`). | `true` |
##### Exceptions thrown
| Type | Description |
| --------------------------- | ----------------------------------------------------------------------------------------------------------------------------------------------------------------------------------------------------------------------------------------------------- |
| `SDKNotReady` | Indicates that the SDK is not yet fully initialized. |
| `FeatureExperimentNotFound` | Exception indicating that the requested experiment id has not been found in the SDK's internal configuration. This is usually normal and means that the rule's corresponding experiment has not yet been activated on Kameleoon's side. |
| `FeatureVariationNotFound` | Exception indicating that the requested variation key(id) has not been found in the internal configuration of the SDK. This is usually normal and means that the variation's corresponding experiment has not yet been activated on Kameleoon's side. |
In most cases, only the basic error, `KameleoonException`, needs to be handled, as demonstrated in the example. However, if different types of errors require a response, handle each one separately based on specific requirements. Additionally, for enhanced reliability, general language errors can be handled by including `Exception`.
#### evaluateAudiences()
* 📨 *Sends Tracking Data to Kameleoon*
This method evaluates visitors against all available Audiences Explorer segments and tracks those who match.
`evaluateAudiences()` should be called **after all relevant visitor data has been set or updated**, and **just before** getting a feature variation or checking a feature flag. This approach ensures that the visitor is evaluated against the most current data available, allowing for accurate audience assignment based on all criteria.
After calling this method, you can perform a detailed analysis of segment performance in Audiences Explorer.
```java theme={null}
try {
kameleoonClient.evaluateAudiences();
} catch (KameleoonException e) {
// Handling the exception
}
```
```kotlin theme={null}
try {
kameleoonClient.evaluateAudiences()
} catch (e: KameleoonException) {
// Handling the exception
}
```
##### Exceptions thrown
| Type | Description |
| ------------- | ---------------------------------------------------- |
| `SDKNotReady` | Indicates that the SDK is not yet fully initialized. |
In most cases, only the basic error, `KameleoonException`, needs to be handled, as demonstrated in the example. However, if different types of errors require a response, handle each one separately based on specific requirements. Additionally, for enhanced reliability, general language errors can be handled by including `Exception`.
#### getDataFile()
To evaluate all feature flags, use [`getVariations()`](#getvariations). This method is more efficient than calling `DataFile` and iterating through flags with [`getVariation()`](#getvariation).
Returns the current SDK configuration as a [`DataFile`](#datafile) object.
```java theme={null}
try {
DataFile dataFile = kameleoonClient.getDataFile();
} catch (KameleoonException.SDKNotReady e) {
// Exception indicates that the SDK has not completed its initialization yet.
} catch (Exception e) {
// Recommended (but optional) safeguard for unexpected exceptions from third-party libraries
}
```
```kotlin theme={null}
try {
val dataFile = kameleoonClient.dataFile
val dateModified = dataFile.dateModified
} catch (e: KameleoonException.SDKNotReady) {
// Exception indicates that the SDK has not completed its initialization yet.
} catch (e: Exception) {
// Recommended (but optional) safeguard for unexpected exceptions from third-party libraries
}
```
##### Return value
| Type | Description |
| ---------- | ------------------------------------------------------------ |
| `DataFile` | The [`DataFile`](#datafile) containing the SDK configuration |
##### Errors thrown
| Type | Description |
| ------------- | ---------------------------------------------------- |
| `SDKNotReady` | Indicates that the SDK is not yet fully initialized. |
### Goals
#### trackConversion()
* 📨 *Sends Tracking Data to Kameleoon*
Use this method to track conversions. This method requires `goalId` to track conversion on this particular [goal](/user-manual/assets/goals/create-a-goal). In addition, this method also accepts `revenue`, `metadata` and `negative` arguments.
The `trackConversion()` method doesn't return any value. This method is non-blocking as the server call is made asynchronously.
```java theme={null}
final int goalId = 83023;
kameleoonClient.trackConversion(goalId); // default revenue
kameleoonClient.trackConversion(goalId, 10); // provided revenue == 10
kameleoonClient.trackConversion(goalId, new CustomData(1, "metadata")); // Add metadata
```
```kotlin theme={null}
val goalId = 83023
kameleoonClient.trackConversion(goalId) // default revenue
kameleoonClient.trackConversion(goalId, 10f) // provided revenue == 10
kameleoonClient.trackConversion(goalId, CustomData(1, "metadata")) // Add metadata
```
##### Parameters
| Name | Type | Description | Default |
| ---------------------------------- | --------------- | -------------------------------------------------------------------------------------------------------------------------------- | ------------------- |
| `goalId` required | `int` | ID of the goal. | |
| `revenue` optional | `float` | Revenue of the conversion. | `0` |
| `negative` optional | `boolean` | Defines if the revenue is positive or negative. | `false` |
| `metadata` optional | `CustomData...` | Metadata of the conversion. [Must be defined beforehand in the Kameleoon App](/user-manual/assets/goals/create-a-goal#metadata). | `new CustomData[0]` |
metadata values are accessible through [raw data exports](/user-manual/experiment-analytics/analyze-results/results-page/results-page-actions#Export) and [the results page](/user-manual/experiment-analytics/analyze-results/data-and-metrics/goal-metadata).
If the `metadata` parameter is provided, Kameleoon will use these specified values for the current conversion instead of what was previously collected using the [`addData()`](#adddata) method. If the parameter is omitted, Kameleoon will use the last tracked values for those [`CustomData`](#customdata) prior to the conversion and within the same visit.
Kameleoon will only consider the metadata values that are explicitly passed as parameters to the `trackConversion()` method.
In the example below, Kameleoon will associate the conversion only with the custom data value explicitly provided as a parameter (here: index 5 with the value 'Amex Credit Card').
```java theme={null}
kameleoonClient.addData(new CustomData(5, "Credit Card"), new CustomData(9, "Express Delivery"));
kameleoonClient.trackConversion(1000, new CustomData(5, "Amex Credit Card"));
```
```kotlin theme={null}
kameleoonClient.addData(CustomData(5, "Credit Card"), CustomData(9, "Express Delivery"))
kameleoonClient.trackConversion(1000, CustomData(5, "Amex Credit Card"))
```
### Events
#### onUpdateConfiguration()
This method was previously named `updateConfigurationHandler`, which was removed in SDK version `4.0.0` release.
The `onUpdateConfiguration()` method allows you to handle the event when configuration has updated data. It takes one input parameter, **completion**. The completion that will be called when the configuration is updated using a real-time configuration event.
##### Parameters
| Name | Type | Description |
| ------------ | ----------------------------------- | -------------------------------------------------------------------------------------------------------- |
| `completion` | `ResultCompletion` | The handler that will be called when the configuration is updated using a real-time configuration event. |
```java theme={null}
kameleoonClient.onUpdateConfiguration(result -> {
if (result.isSuccess()) {
// result value contains the value of Unix time (number of seconds that have elapsed since January 1, 1970) when configuration was updated
}
});
```
```kotlin theme={null}
kameleoonClient.onUpdateConfiguration { result ->
if (result.isSuccess) {
// result value contains the value of Unix time (number of seconds that have elapsed since January 1, 1970) when configuration was updated
}
}
```
### Visitor data
#### getVisitorCode()
Returns unique visitor code used in SDK.
```java theme={null}
String visitorCode = kameleoonClient.getVisitorCode();
```
```kotlin theme={null}
val visitorCode = kameleoonClient.visitorCode
```
##### Return value
| Type | Description |
| -------- | ------------------------------------------------------ |
| `String` | String representing a unique visitor code used in SDK. |
#### addData()
The `addData()` method adds [targeting data](#data-types) to storage so other methods can use the data to decide whether or not to target the current visitor.
The `addData()` method does not return any value and does not interact with Kameleoon back-end servers on its own. Instead, all the declared data is saved for future transmission using the [`flush()`](#flush) method. This approach reduces the number of server calls made, as the data is typically grouped into a single server call that is triggered by the `flush()`.
The [`trackConversion()`](#trackconversion) method also sends out any previously associated data, just like the `flush()`. The same holds true for [`getVariation()`](#getvariation) and [`getVariations()`](#getvariations) methods if an experimentation rule is triggered.
Each visitor can only have one instance of associated data for most data types. However, [`CustomData`](#customdata) is an exception. Visitors can have one instance of associated `CustomData` per index.
```java theme={null}
// Add a single data item (tracked by default)
kameleoonClient.addData(new CustomData(1, "value"));
// Add multiple data items (tracked by default)
kameleoonClient.addData(new CustomData(1, "value"), new Geolocation("France"));
// Add multiple data items stored locally for targeting only (not sent to the Kameleoon Data API)
kameleoonClient.addData(false, new CustomData(1, "value"), new Geolocation("France"));
```
```kotlin theme={null}
// Add a single data item (tracked by default)
kameleoonClient.addData(CustomData(1, "value"))
// Add multiple data items (tracked by default)
kameleoonClient.addData(CustomData(1, "value"), Geolocation("France"))
// Add multiple data items stored locally for targeting only (not sent to the Kameleoon Data API)
kameleoonClient.addData(false, CustomData(1, "value"), Geolocation("France"))
```
##### Parameters
| Name | Type | Description | Default value |
| ------------------------------- | --------- | -------------------------------------------------------------------------------------------------------------------------------------------------------------------------------------------- | ------------- |
| `track` optional | `boolean` | Specifies whether the added data is eligible for tracking. When set to `false`, the data is stored locally and used only for targeting evaluation; it is not sent to the Kameleoon Data API. | `true` |
| `data` required | `Data...` | Collection of Kameleoon data types. | |
#### flush()
* 📨 *Sends Tracking Data to Kameleoon*
`flush()` takes the Kameleoon data associated with a visitor, and sends a tracking request along with all of the data that were added previously using the `addData()` method that has not yet been sent when calling one of [these methods](/developer-docs/feature-experimentation/technical-reference/faq-global#when-does-the-sdk-send-a-tracking-request-for-analytics). `flush()` is non-blocking, as the server call is made asynchronously.
`flush()` provides control over when the data associated with a visitor is sent to the servers. For instance, if `addData()` is called a dozen times, sending data to the server after each `addData()` invocation would be inefficient. Call `flush()` once at the end.
The `flush()` method uses `visitorCode` as the unique visitor identifier, which is useful for [cross-device experimentation](/developer-docs/cross-device-experimentation). If you set the `isUniqueIdentifier` configuration parameter to `true`, the SDK links the flushed data to the visitor associated with the specified identifier.
```java theme={null}
kameleoonClient.addData(Device.phone());
kameleoonClient.addData(new Conversion(32, 10f, false));
kameleoonClient.flush(); // Interval tracking (most performant tracking method)
kameleoonClient.flush(true); // Instant tracking
```
```kotlin theme={null}
kameleoonClient.addData(Device.phone())
kameleoonClient.addData(Conversion(32, 10f, false))
kameleoonClient.flush() // Interval tracking (most performant tracking method)
kameleoonClient.flush(true) // Instant tracking
```
##### Parameters
| Name | Type | Description |
| ------- | ------- | ------------------------------------------------------------------------------------------------------------------------------------------------------------------------------------------- |
| instant | boolean | Boolean flag indicating whether the data should be sent instantly (`true`) or according to the scheduled tracking interval (`false`). This field is optional. The default value is `false`. |
#### getRemoteData()
* 🔄 *Performs an asynchronous request*
This method was previously called `retrieveDataFromRemoteSource`, which was removed in SDK version `4.0.0`.
Use this method to retrieve data from a remote Kameleoon server based on the active `siteCode` and the `key` argument (or the active `visitorCode` if the `key` is omitted). The `visitorCode` and `siteCode` are specified in `KameleoonClientFactory.create()`. Data can be stored quickly and conveniently on highly scalable remote servers using the Kameleoon Data API. The application can then retrieve the data using this method.
Since a server call is required, this mechanism is asynchronous. Therefore, you should either:
* Provide a `completion` callback as an argument to the method to ensure you are notified when the data has been successfully fetched.
* Use coroutines for asynchronous handling.
```java theme={null}
kameleoonClient.getRemoteData("key", result -> {
try {
JSONObject jsonObject = result.getOrThrow();
// jsonObject contains result of request
} catch (Exception ex) {
// request failed with an exception
}
});
```
##### Parameters
| Name | Type | Description | Default |
| ---------------------------------- | ----------------------------------------- | ----------------------------------------------------------- | ------- |
| key optional | `String` | The key that the data you're retrieving is associated with. | `null` |
| completion required | `ResultCompletion` | The callback that processes the received data. | |
```kotlin theme={null}
kameleoonClient.getRemoteData("key") { result ->
try {
val jsonObject: JSONObject = result.getOrThrow()
// jsonObject contains result of request
} catch (ex: Exception) {
// request failed with an exception
}
}
```
##### Parameters
| Name | Type | Description | Default |
| ---------------------------------- | ----------------------------------------- | ----------------------------------------------------------- | ------- |
| key optional | `String` | The key that the data you're retrieving is associated with. | `null` |
| completion required | `ResultCompletion` | The callback that processes the received data. | |
A common mistake is using suspended functions inside `mapCatching`, `runCatching`, or a `try-catch` block without properly re-throwing `CancellationException`, which can interfere with coroutine cancellation. To ensure correct behavior, try to avoid calling suspend functions within these blocks.
```kotlin theme={null}
viewModelScope.launch {
val jsonObject = kameleoonClient.getRemoteData("key").getOrNull() ?: return@launch
}
```
##### Parameters
| Name | Type | Description | Default |
| --------------------------- | -------- | ----------------------------------------------------------- | ------- |
| key optional | `String` | The key that the data you're retrieving is associated with. | `null` |
##### Return value
| Type | Description |
| -------------------- | ------------------------------------------------------------------------------------------------------- |
| `Result` | A Kotlin `Result` that contains either the fetched value (`JSONObject`) or the exception that occurred. |
#### getRemoteVisitorData()
* 🔄 *Performs an asynchronous request*
`getRemoteVisitorData()` is an asynchronous method for retrieving Kameleoon Visits Data for the visitor from the Kameleoon Data API. The method adds data to storage for other methods to use when making targeting decisions.
Data obtained using this method plays an important role when you want to:
* use data collected from other devices.
* access a user's history, such as custom data collected during previous visits.
Read [this article](/developer-docs/feature-experimentation/targeting-and-segmentation/native-segmentation) for a better understanding of possible use cases.
By default, `getRemoteVisitorData()` automatically retrieves the latest stored custom data with `scope=Visitor` and attaches it to the visitor without having to call the method `addData()`. It is particularly useful for [synchronizing custom data between multiple devices](/developer-docs/sdks/web-sdks/nodejs-sdk#synchronizing-custom-data-across-devices).
Checking only for failed results is recommended. However, if necessary, it can be verified that the data has been added to the visitor and is available for targeting purposes (or for debugging, though using [logging](#logging) is better for debugging). Additionally, data can be managed manually if the `shouldAddData=false` parameter is passed.
Since a server call is required, this mechanism is asynchronous. Therefore, you should either:
* Provide a `completion` callback as an argument to the method to ensure you are notified when the data has been successfully fetched and added to the visitor.
* Use coroutines for asynchronous handling.
```java theme={null}
// Visitor data will be fetched and automatically added for `visitorCode`.
kameleoonClient.getRemoteVisitorData(result -> {
if (result.isSuccess()) {
// Data was successfully retrieved from the Kameleoon servers and added to the visitor.
} else {
// The request failed due to an exception.
}
});
// If you only want to fetch data and add it yourself manually, set shouldAddData == `false`.
kameleoonClient.getRemoteVisitorData(false, result -> {
try {
List visitorData = result.getOrThrow();
// visitorData contains the fetched visitor data from Kameleoon servers, which can be manually added.
} catch (Exception ex) {
// The request failed due to an exception.
}
});
// If you want to fetch custom list of data types
RemoteVisitorDataFilter filter = RemoteVisitorDataFilter.builder()
.previousVisitAmount(25)
.experiments(true)
.conversion(true)
.build();
kameleoonClient.getRemoteVisitorData(filter, result -> {
if (result.isSuccess()) {
// Data was successfully retrieved from the Kameleoon servers and added to the visitor.
} else {
// The request failed due to an exception.
}
});
```
##### Parameters
| Name | Type | Description | Default |
| ------------------------------------- | ----------------------------------------- | ---------------------------------------------------------------------------------------------------------------------------------------------------------------- | ------- |
| filter optional | `RemoteVisitorDataFilter` | Filter that selects which data should be retrieved from visit history. By default, the method retrieves `CustomData` from the current and latest previous visit. | `null` |
| shouldAddData optional | `boolean` | A boolean indicating whether the method should automatically add retrieved data for a visitor. | `true` |
| completion required | `ResultCompletion, Exception>` | The callback that processes the received visitor data. | |
```kotlin theme={null}
// Visitor data will be fetched and automatically added to the visitor.
kameleoonClient.getRemoteVisitorData { result ->
if (result.isSuccess) {
// Data was successfully retrieved from the Kameleoon servers and added to the visitor.
} else {
// The request failed due to an exception.
}
}
// If you only want to fetch data and add it yourself manually, set shouldAddData == `false`
kameleoonClient.getRemoteVisitorData(false) { result ->
try {
val visitorData = result.getOrThrow()
// visitorData contains the fetched visitor data from Kameleoon servers, which can be manually added.
} catch (e: Exception) {
// The request failed due to an exception.
}
}
val filter = RemoteVisitorDataFilter.builder()
.previousVisitAmount(25)
.experiments(true)
.conversion(true)
.build()
kameleoonClient.getRemoteVisitorData(filter) { result ->
if (result.isSuccess) {
// Data was successfully retrieved from the Kameleoon servers and added to the visitor.
} else {
// The request failed due to an exception.
}
}
```
##### Parameters
| Name | Type | Description | Default |
| ------------------------------------- | ----------------------------------------- | ---------------------------------------------------------------------------------------------------------------------------------------------------------------- | ------- |
| filter optional | `RemoteVisitorDataFilter` | Filter that selects which data should be retrieved from visit history. By default, the method retrieves `CustomData` from the current and latest previous visit. | `null` |
| shouldAddData optional | `Boolean` | A boolean indicating whether the method should automatically add retrieved data for a visitor. | `true` |
| completion required | `ResultCompletion, Exception>` | The callback that processes the received visitor data. | |
A common mistake is using suspended functions inside `mapCatching`, `runCatching`, or a `try-catch` block without properly re-throwing `CancellationException`, which can interfere with coroutine cancellation. To ensure correct behavior, try to avoid calling suspend functions within these blocks.
```kotlin theme={null}
// Visitor data will be fetched and automatically added for `visitorCode`
viewModelScope.launch {
kameleoonClient.getRemoteVisitorData() ?: return@launch
}
// If you only want to fetch data and add it yourself manually, set shouldAddData == `false`
viewModelScope.launch {
kameleoonClient.getRemoteVisitorData(shouldAddData = false)
.onSuccess { visitorData ->
// visitorData contains the fetched visitor data from Kameleoon servers, which can be manually added.
}.onFailure { ex ->
// request failed with exception
}
}
viewModelScope.launch {
val filter = RemoteVisitorDataFilter.builder()
.previousVisitAmount(25)
.experiments(true)
.conversion(true)
.build()
// In general, we recommend checking only if the request fails.
kameleoonClient.getRemoteVisitorData(filter) ?: return@launch
}
```
##### Parameters
| Name | Type | Description | Default |
| ------------------------------------- | ------------------------- | ---------------------------------------------------------------------------------------------------------------------------------------------------------------- | ------- |
| filter optional | `RemoteVisitorDataFilter` | Filter that selects which data should be retrieved from visit history. By default, the method retrieves `CustomData` from the current and latest previous visit. | `null` |
| shouldAddData optional | `Boolean` | A boolean indicating whether the method should automatically add retrieved data for a visitor. | `true` |
##### Return value
| Type | Description |
| -------------------- | ------------------------------------------------------------------------------------------------------- |
| `Result>` | A Kotlin `Result` that contains either the fetched value (`List`) or the exception that occurred. |
##### Using parameters of `RemoteVisitorDataFilter`
The `getRemoteVisitorData()` method offers flexibility by letting you define various parameters when retrieving data on visitors. Whether you're targeting based on goals, experiments, or variations, the same approach applies across all data types.
For example, suppose you want to retrieve data on visitors who completed a goal "Order transaction". You can specify parameters within the `getRemoteVisitorData()` method to refine your targeting. For instance, if you want to target only users who converted on the goal in their last five visits, you can set the `previousVisitAmount` parameter to `5` and `conversions` to `true`.
The flexibility shown in this example is not limited to goal data. You can use parameters within the `getRemoteVisitorData()` method to retrieve data on a variety of visitor behaviors.
Here is the list of available `RemoteVisitorDataFilter` options:
| Name | Type | Description | Default |
| ------------------------------------------- | --------- | ----------------------------------------------------------------------------------------------------------------------------------------------------------------------------------------------------------------------------------------------------------------------------------------------------------------------------------------------- | ------- |
| previousVisitAmount optional | `int` | Number of previous visits to retrieve data from. Number between `1` and `25` | `1` |
| currentVisit optional | `boolean` | If true, current visit data will be retrieved | `true` |
| customData optional | `boolean` | If true, custom data will be retrieved. | `true` |
| geolocation optional | `boolean` | If true, geolocation data will be retrieved. | `false` |
| conversions optional | `boolean` | If true, conversion data will be retrieved. | `false` |
| experiments optional | `boolean` | If true, experiment data will be retrieved. | `false` |
| kcs optional | `boolean` | If true, Kameleoon Conversion Score (KCS) will be retrieved. Requires the [AI Predictive Targeting add-on](/user-manual/ai-predictive-targeting/target-users-based-on-likelihood-to-convert) | `false` |
| visitorCode optional | `boolean` | If true, Kameleoon will retrieve the `visitorCode` from the most recent visit and use it for the current visit. This is necessary if you want to ensure that the visitor, identified by their `visitorCode`, always receives the same variation across visits for [Cross-device experimentation](/developer-docs/cross-device-experimentation). | `true` |
| personalization optional | `boolean` | If true, personalization data will be retrieved. This is required for the personalization condition. | `false` |
| cbs optional | `boolean` | If true, Contextual Bandit score data will be retrieved. | `false` |
#### getVisitorWarehouseAudience()
* 🔄 *Performs an asynchronous request*
Retrieves all audience data associated with the visitor in your data warehouse. The optional `warehouseKey` parameter is typically your internal user ID. The `customDataIndex` parameter corresponds to the Kameleoon custom data that Kameleoon uses to target your visitors. You can refer to the [warehouse targeting documentation](/user-manual/integrations/data-warehouses/bigquery/use-bigquery-as-a-source-audience-targeting) for additional details.
Since a server call is required, this mechanism is asynchronous. Therefore, you should either:
* Provide a `completion` callback as an argument to the method to ensure you are notified when the data has been successfully fetched and added to the visitor.
* Use coroutines for asynchronous handling.
Checking only for failed results is recommended. However, if necessary, it can be verified that the data has been added to the visitor and is available for targeting purposes (or for debugging, though using [logging](#logging) is better for debugging).
```java theme={null}
// Visitor data will be fetched and automatically added for the visitor
kameleoonClient.getVisitorWarehouseAudience(customDataIndex, result -> {
if (result.isSuccess()) {
// Due to method called before this callback, data was automatically added to the visitor.
} else {
Exception exception = result.failure();
// The request failed due to an exception.
}
});
// If you need to specify warehouse key
kameleoonClient.getVisitorWarehouseAudience("warehouseKey", customDataIndex, result -> {
// Due to method called before this callback, data was automatically added to the visitor,
// but you can evaluate the added data if necessary.
try {
CustomData data = result.getOrThrow();
} catch (Exception exception) {
// The request failed due to an exception.
}
});
```
##### Parameters
| Name | Type | Description | Default |
| --------------------------------------- | ----------------------------------------- | ------------------------------------------------------------------------------------------------ | ------- |
| warehouseKey optional | `String` | A unique key to identify the warehouse data (usually, your internal user ID). | `null` |
| customDataIndex required | `int` | An integer representing the custom data index you want to use to target your BigQuery Audiences. | |
| completion required | `ResultCompletion` | The callback that processes the received data. | |
```kotlin theme={null}
// Visitor data will be fetched and automatically added for the visitor
kameleoonClient.getVisitorWarehouseAudience(customDataIndex) { result ->
if (result.isSuccess) {
// Due to method called before this callback, data was automatically added to the visitor.
} else {
val exception = result.failure()
// The request failed due to an exception.
}
}
// If you need to specify warehouse key
kameleoonClient.getVisitorWarehouseAudience("warehouseKey", customDataIndex) { result ->
// As a result of the method before this callback is called, data was automatically added to the visitor
// but you can evaluate the added data if you need to check it.
try {
val data = result.getOrThrow()
} catch (e: Exception) {
// The request failed due to an exception.
}
}
```
##### Parameters
| Name | Type | Description | Default |
| --------------------------------------- | ----------------------------------------- | ------------------------------------------------------------------------------------------------ | ------- |
| warehouseKey optional | `String` | A unique key to identify the warehouse data (usually, your internal user ID). | `null` |
| customDataIndex required | `Int` | An integer representing the custom data index you want to use to target your BigQuery Audiences. | |
| completion required | `ResultCompletion` | The callback that processes the received data. | |
A common mistake is using suspended functions inside `mapCatching`, `runCatching`, or a `try-catch` block without properly re-throwing `CancellationException`, which can interfere with coroutine cancellation. To ensure correct behavior, try to avoid calling suspend functions within these blocks.
```kotlin theme={null}
// Visitor data will be fetched and automatically added for the visitor
viewModelScope.launch {
// As a result of the method call, the data was automatically added to the visitor.
kameleoonClient.getVisitorWarehouseAudience(customDataIndex = customDataIndex) ?: return@launch
}
// If you need to specify warehouse key
viewModelScope.launch {
// As a result of the method call, the data was automatically added to the visitor.
kameleoonClient.getVisitorWarehouseAudience("warehouseKey", customDataIndex)
.onSuccess { customData ->
// But you can evaluate the added data if you need to check it.
}
.onFailure { ex ->
// The request failed due to an exception.
}
}
```
##### Parameters
| Name | Type | Description | Default |
| --------------------------------------- | -------- | ------------------------------------------------------------------------------------------------ | ------- |
| warehouseKey optional | `String` | A unique key indentifying the warehouse data (usually your internal user ID). | `null` |
| customDataIndex required | `Int` | An integer representing the custom data index you want to use to target your BigQuery Audiences. | |
##### Return value
| Type | Description |
| -------------------- | ------------------------------------------------------------------------------------------------------- |
| `Result` | A Kotlin `Result` that contains either the fetched value (`CustomData`) or the exception that occurred. |
#### setLegalConsent()
You must use this method to specify whether the visitor has given legal consent to use their personal data. Setting the `legalConsent` parameter to `false` limits the types of data that you can include in tracking requests. This method helps you adhere to legal and regulatory requirements while responsibly managing visitor data. You can find more information on personal data in the [consent management policy](/user-manual/project-management/consent-management-policy).
```java theme={null}
kameleoonClient.setLegalConsent(true);
```
```kotlin theme={null}
kameleoonClient.setLegalConsent(true)
```
##### Parameters
| Name | Type | Description |
| ------------ | ------- | ----------------------------------------------------------------------------------------------------------------------------------------------------------------------------------------------------------------------- |
| legalConsent | boolean | A boolean value representing the legal consent status. `true` indicates the visitor has given legal consent, `false` indicates the visitor has never provided, or has withdrawn, legal consent. This field is required. |
### Data types
This section lists the `com.Kameleoon.Data` types supported by Kameleoon. Several standard data types are provided, as well as the `CustomData` type for defining custom data types.
#### Conversion
The `Conversion` data set stored here can be used to filter experiment and personalization reports by any goal associated with it.
* Each visitor can have multiple `Conversion` objects.
* You can find the `goalId` in the Kameleoon app.
| Name | Type | Description | Default |
| ---------------------------------- | --------------- | ----------------------------------------------- | ------------------- |
| `goalId` required | `int` | ID of the goal. | |
| `revenue` optional | `float` | Revenue of the conversion | `0` |
| `negative` optional | `boolean` | Defines if the revenue is positive or negative. | `false` |
| `metadata` optional | `CustomData...` | Metadata of the conversion. | `new CustomData[0]` |
```java theme={null}
kameleoonClient.addData(new Conversion(32, 10f));
kameleoonClient.addData(new Conversion(33, 0f, true));
kameleoonClient.addData(
new Conversion(34, 5f, new CustomData(3, "metadata1", "md2"), new CustomData(5, "md3"))
);
```
```kotlin theme={null}
kameleoonClient.addData(Conversion(32, 10f))
kameleoonClient.addData(Conversion(33, 0f, true))
kameleoonClient.addData(
Conversion(34, 5f, CustomData(3, "metadata1", "md2"), CustomData(5, "md3"))
)
```
#### Device
Since Android SDK `4.13.0`, the `Device` is automatically detected based on the [`android.content.Context`](https://developer.android.com/reference/android/content/Context). However, you can still manually override it if needed.
Store information about the user's device.
| Name | Type | Description |
| ------------------------------ | --------- | ---------------------------------------------------- |
| device required | `Devices` | List of devices: **phone**, **tablet**, **desktop**. |
```java theme={null}
kameleoonClient.addData(Device.tablet());
```
#### Geolocation
`Geolocation` contains the visitor's geolocation details.
```java theme={null}
kameleoonClient.addData(new Geolocation("France", "Île-de-France", "Paris"));
```
```kotlin theme={null}
kameleoonClient.addData(Geolocation("France", "Île-de-France", "Paris"))
```
| Name | Type | Description |
| ------------------------------------ | --------------------- | ---------------------------------------------------------------------------------------------------------------- |
| `country` required | `String` | The country of the visitor. |
| `region` optional | `String` | The region of the visitor. |
| `city` optional | `String` | The city of the visitor. |
| `postalCode` optional | `String` | The postal code of the visitor. |
| `latitude` optional | `float` | The latitude coordinate representing the location of the visitor. Coordinate number represents decimal degrees. |
| `longitude` optional | `float` | The longitude coordinate representing the location of the visitor. Coordinate number represents decimal degrees. |
* Each visitor can have only one `Geolocation`. Adding a second `Geolocation` overwrites the first one.
#### CustomData
Define your own custom data types in the Kameleoon app or the Data API and use them from the SDK.
| Name | Type | Description | Default |
| ---------------------------------- | -------------------------------- | --------------------------------------------------------------------------------------------------------------------------------------------------------------------------------------- | ------- |
| index/name required | `int`/`String` | Index or Name of the custom data. **Either `index` or `name` must be provided** to identify the data. | |
| values required | `String...`/`Collection` | Values of the custom data to be stored. | |
| overwrite optional | `boolean` | Flag to explicitly control how the values are stored and how they appear in reports. [See more](/developer-docs/custom-data#default-logic-when-overwrite-parameter-is-false-or-omitted) | `true` |
* The index of the custom data is available in the **Custom data configuration** page of the Kameleoon app. Be careful: this index starts at 0, so the first custom data you create for a given site would have the index 0, not 1.
* Adding a `CustomData` instance created with a name when the SDK instance configuration is not up to date or the name is not registered, will result in the data being ignored.
```java theme={null}
kameleoonClient.addData(new CustomData(1, "value"));
// With several values
kameleoonClient.addData(new CustomData(1, "value1", "value2"));
// To set the 'overwrite' flag to false
kameleoonClient.addData(new CustomData(1, false, "value"));
// To use a name instead of the index
kameleoonClient.addData(new CustomData("my-custom-data", "value"));
```
```kotlin theme={null}
kameleoonClient.addData(CustomData(1, "value"))
// With several values
kameleoonClient.addData(CustomData(1, "value1", "value2"))
// To set the 'overwrite' flag to false
kameleoonClient.addData(CustomData(1, false, "value"))
// To use a name instead of the index
kameleoonClient.addData(CustomData("my-custom-data", "value"))
```
### Returned Types
#### DataFile
The `DataFile` contains the SDK configuration details.
It can be extended with additional information if required by clients. If you need more details, please contact your Customer Success Manager.
| Name | Type | Description |
| -------------- | -------------------------- | --------------------------------------------------------------------------------- |
| `featureFlags` | `Map` | A map of [`FeatureFlag`](#featureflag) objects, keyed by feature flag keys. |
| `dateModified` | `long` | The timestamp (in milliseconds) indicating when the `DataFile` was last modified. |
```java theme={null}
// Retrieves the map of feature flags from the DataFile.
// The map is keyed by feature flag identifiers, with each value being a FeatureFlag object.
Map featureFlags = dataFile.getFeatureFlags();
// Retrieves the last modification timestamp of the DataFile.
// The value is a long representing milliseconds since the Unix epoch.
long dateModified = dataFile.getDateModified();
```
```kotlin theme={null}
// Retrieves the map of feature flags from the DataFile.
// The map is keyed by feature flag identifiers, with each value being a FeatureFlag object.
val featureFlags = dataFile.featureFlags
// Retrieves the last modification timestamp of the DataFile.
// The value is a long representing milliseconds since the Unix epoch.
val dateModified = dataFile.dateModified
```
#### FeatureFlag
The `FeatureFlag` represents a set of properties that define a feature flag itself — for example, its [`Variations`](#variation), [`Rules`](#rule), environment status, and other related details.
It can be extended with additional information if required by clients. If you need more details, please contact your Customer Success Manager.
| Name | Type | Description |
| --------------------- | ------------------------ | -------------------------------------------------------------------------- |
| `environmentEnabled` | `boolean` | Indicating whether the feature flag is enabled in the current environment. |
| `defaultVariationKey` | `String` | The key of the default variation associated with the feature flag. |
| `variations` | `Map` | A map of `Variation` objects, keyed by variation keys. |
| `rules` | `List` | A list of `Rule` objects |
```java theme={null}
// Check whether the feature flag is enabled in the current environment
boolean isEnvironmentEnabled = featureFlag.isEnvironmentEnabled();
// Retrieve the key of the default variation
String defaultVariationKey = featureFlag.getDefaultVariationKey();
// Retrieve the default variation object
Variation defaultVariation = featureFlag.getDefaultVariation();
// Retrieve all variations of the feature flag as a map (key = variation key, value = Variation object)
Map variations = featureFlag.getVariations();
// Retrieve all targeting rules associated with the feature flag
List rules = featureFlag.getRules();
```
```kotlin theme={null}
// Check whether the feature flag is enabled in the current environment
val isEnvironmentEnabled = featureFlag.isEnvironmentEnabled
// Retrieve the key of the default variation
val defaultVariationKey = featureFlag.defaultVariationKey
// Retrieve the default variation object
val defaultVariation = featureFlag.defaultVariation
// Retrieve all variations of the feature flag as a map (key = variation key, value = Variation object)
val variations = featureFlag.variations
// Retrieve all targeting rules associated with the feature flag
val rules = featureFlag.rules
```
#### Rule
The `Rule` represents a set of properties that define a rule itself — for example, its [`Variations`](#variation).
It can be extended with additional information if required by clients. If you need more details, please contact your Customer Success Manager.
| Name | Type | Description |
| ------------ | ------------------------ | ------------------------------------------------------ |
| `variations` | `Map` | A map of `Variation` objects, keyed by variation keys. |
```java theme={null}
// Retrieve all variations of the rule as a map (key = variation key, value = Variation object)
Map variations = rule.getVariations();
```
```kotlin theme={null}
// Retrieve all variations of the rule as a map (key = variation key, value = Variation object)
val variations = rule.variations
```
#### Variation
`Variation` contains information about the assigned variation to the visitor (or the default variation, if no specific assignment exists).
| Name | Type | Description |
| ------------ | ----------------------- | ---------------------------------------------------------------------------------------------------------------------------------------------------- |
| name | `String` | The name of the variation. |
| key | `String` | The unique key identifying the variation. |
| id | `Integer` | The ID of the assigned variation (or `null` if it's the default variation). |
| experimentId | `Integer` | The ID of the experiment associated with the variation (or `null` if default). |
| variables | `Map` | A map containing the variables of the assigned variation, keyed by variable names. This could be an empty collection if no variables are associated. |
* The `Variation` object provides details about the assigned variation and its associated experiment, while the [`Variable`](#variable) object contains specific details about each variable within a variation.
* Ensure that your code handles the case where `id` or `experimentId` may be `null`, indicating a default variation.
* The `variables` map might be empty if no variables are associated with the variation.
```java theme={null}
// Retrieving the variation name
String variationName = variation.getName();
// Retrieving the variation key
String variationKey = variation.getKey();
// Retrieving the variation id
Integer variationId = variation.getId();
// Retrieving the experiment id
Integer experimentId = variation.getExperimentId();
// Retrieving the variables map
Map variables = variation.getVariables();
```
```kotlin theme={null}
// Retrieving the variation name
val variationName = variation.name
// Retrieving the variation key
val variationKey = variation.key
// Retrieving the variation id
val variationId = variation.id
// Retrieving the experiment id
val experimentId = variation.experimentId
// Retrieving the variables map
val variables = variation.variables
```
#### Variable
`Variable` contains information about a variable associated with the assigned variation.
| Name | Type | Description |
| ----- | -------- | ---------------------------------------------------------------------------------------------------------------------------------------------------------------- |
| key | `String` | The unique key identifying the variable. |
| type | `String` | The type of the variable. Possible values: **BOOLEAN**, **NUMBER**, **STRING**, **JSON**. |
| value | `Object` | The value of the variable, which can be of the following types: **boolean**, **int**, **long**, **double**, **String**, **JSONObject**, **JSONArray**, **null**. |
```java theme={null}
// Retrieving the variables map
Map variables = variation.getVariables();
// Variable type can be retrieved for further processing
String type = variables.get("isDiscount").getType();
// Get the Boolean value of "isDiscount"
Boolean isDiscount = (Boolean) variables.get("isDiscount").getValue();
// Get the numeric value of "number" as an Integer
Integer number = (Integer) variables.get("number").getValue();
// Get the String value of "title"
String title = (String) variables.get("title").getValue();
```
```kotlin theme={null}
// Retrieving the variables map
val variables = variation.variables
// Variable type can be retrieved for further processing
val type = variables["isDiscount"]?.type
// Get the Boolean value of "isDiscount"
val isDiscount = variables["isDiscount"]?.value as? Boolean
// Get the numeric value of "number" as an Integer
val number = variables.get("number").value as? Int
// Get the String value of "title"
val title = variables["title"]?.value as? String
```
### Deprecated methods
These methods are deprecated and will be removed in SDK version `5.0.0`.
#### getFeatureVariationKey()
* 📨 *Sends Tracking Data to Kameleoon*
Use [`getVariation()`](#getvariation) instead.
Use this method to get the feature variation key for a visitor. This method takes a `featureKey` as a required argument to retrieve the variation key for the specified user.
If the visitor has never been associated with this feature flag, the SDK returns a randomly assigned variation key (according to the feature flag rules). If the visitor is already registered with this feature flag, this method returns the previous variation key. If the user does not match any of the rules, the default value will be returned, which is defined in your customer's account.
Ensure you set up proper error handling as shown in the example code to catch potential exceptions.
```java theme={null}
String featureKey = "new_checkout";
String variationKey = "";
try {
variationKey = kameleoonClient.getFeatureVariationKey(featureKey);
} catch (KameleoonException.SDKNotReady e) {
// Exception indicates that the SDK has not completed its initialization yet.
} catch (KameleoonException.FeatureNotFound e) {
// The error has occurred; feature flag isn't found in current configuration.
} catch (KameleoonException.FeatureEnvironmentDisabled e) {
// The feature flag is disabled for the environment
} catch (Exception e) {
// Recommended (but optional) safeguard for unexpected exceptions from third-party libraries
}
switch (variationKey) {
case "on":
//main variation key is selected for visitorCode
break;
case "alternative_variation":
//alternative variation key
break;
default:
//default variation key
break;
}
```
```kotlin theme={null}
val featureKey = "new_checkout"
var variationKey = ""
try {
variationKey = kameleoonClient.getFeatureVariationKey(featureKey)
} catch (e: KameleoonException.SDKNotReady) {
// Exception indicates that the SDK has not completed its initialization yet.
} catch (e: KameleoonException.FeatureNotFound) {
// Exception indicates that the SDK not initialized or the feature toggle is not yet activated on Kameleoon's side. We consider the feature inactive.
} catch (e: KameleoonException.FeatureEnvironmentDisabled) {
// The feature flag is disabled for the environment
} catch (e: Exception) {
// Recommended (but optional) safeguard for unexpected exceptions from third-party libraries
}
when (variationKey) {
"on" -> {}
"alternative_variation" -> {}
else -> {}
}
```
#### getFeatureVariationKey()
* 📨 *Sends Tracking Data to Kameleoon*
Use [`getVariation()`](#getvariation) instead.
Use this method to get the feature variation key for a visitor. This method takes a `featureKey` as a required argument to retrieve the variation key for the specified user.
If the visitor has never been associated with this feature flag, the SDK returns a randomly assigned variation key (according to the feature flag rules). If the visitor is already registered with this feature flag, this method returns the previous variation key. If the user does not match any of the rules, the default value will be returned, which is defined in your customer's account.
Ensure you set up proper error handling as shown in the example code to catch potential exceptions.
```java theme={null}
String featureKey = "new_checkout";
String variationKey = "";
try {
variationKey = kameleoonClient.getFeatureVariationKey(featureKey);
} catch (KameleoonException.SDKNotReady e) {
// Exception indicates that the SDK has not completed its initialization yet.
} catch (KameleoonException.FeatureNotFound e) {
// The error has occurred; feature flag isn't found in current configuration.
} catch (KameleoonException.FeatureEnvironmentDisabled e) {
// The feature flag is disabled for the environment
} catch (Exception e) {
// Recommended (but optional) safeguard for unexpected exceptions from third-party libraries
}
switch (variationKey) {
case "on":
//main variation key is selected for visitorCode
break;
case "alternative_variation":
//alternative variation key
break;
default:
//default variation key
break;
}
```
```kotlin theme={null}
val featureKey = "new_checkout"
var variationKey = ""
try {
variationKey = kameleoonClient.getFeatureVariationKey(featureKey)
} catch (e: KameleoonException.SDKNotReady) {
// Exception indicates that the SDK has not completed its initialization yet.
} catch (e: KameleoonException.FeatureNotFound) {
// Exception indicates that the SDK not initialized or the feature toggle is not yet activated on Kameleoon's side. We consider the feature inactive.
} catch (e: KameleoonException.FeatureEnvironmentDisabled) {
// The feature flag is disabled for the environment
} catch (e: Exception) {
// Recommended (but optional) safeguard for unexpected exceptions from third-party libraries
}
when (variationKey) {
"on" -> {}
"alternative_variation" -> {}
else -> {}
}
```
#### getActiveFeatures()
* Use [`getVariations()`](#getvariations) instead.
* Previously called `getFeatureListForVisitorCode`, which was removed in SDK version `4.0.0` release.
`getActiveFeatures` method retrieves information about the active feature flags that are available for the visitor.
```java theme={null}
Map listActiveFeatureFlags = kameleoonClient.getActiveFeatures();
```
```kotlin theme={null}
val listActiveFeatureFlags = kameleoonClient.getActiveFeatures()
```
##### Return value
| Type | Description |
| ------------------------ | ------------------------------------------------------------------------------------------------------------------------------ |
| `Map` | A dictionary that contains the assigned variations of the active features using the keys of the corresponding active features. |
#### getFeatureVariable()
* 📨 *Sends Tracking Data to Kameleoon*
Use [`getVariation()`](#getvariation) instead.
This method gets a variable value of variation key for a specific user. It takes a `featureKey`, and `variableKey` as required arguments.
If the visitor has never been associated with the `featureKey`, the SDK returns a randomly assigned variable value for the specified variation key (according to the feature flag rules). If the visitor is already registered with this feature flag, the method returns the variable value for the previously registered variation. If the user does not match any of the rules, the default variable value is returned.
Ensure you set up proper error handling as shown in the example code to catch potential exceptions.
```java theme={null}
String featureKey = "feature_key";
String variableKey = "variableKey";
try {
Object variableValue = kameleoonClient.getFeatureVariable(featureKey, variableKey);
// your custom code, depending on variableValue
} catch (KameleoonException.SDKNotReady e) {
// Exception indicates that the SDK has not completed its initialization yet.
} catch (KameleoonException.FeatureNotFound e) {
// The error has occurred; feature flag isn't found in current configuration.
} catch (KameleoonException.FeatureVariableNotFound e) {
// Requested variable not defined in Kameleoon
} catch (KameleoonException.FeatureEnvironmentDisabled e) {
// The feature flag is disabled for the environment.
} catch (Exception e) {
// Recommended (but optional) safeguard for unexpected exceptions from third-party libraries
}
```
```kotlin theme={null}
val featureKey = "new_checkout"
val variableKey = "var"
try {
val variableValue = kameleoonClient.getFeatureVariable(featureKey, variableKey)
// your custom code depending on variableValue
} catch (e: KameleoonException.SDKNotReady) {
// Exception indicating that the SDK has not completed its initialization yet.
} catch (e: KameleoonException.FeatureNotFound) {
// The error has happened; feature flag isn't found in current configuration
} catch (e: KameleoonException.FeatureVariableNotFound) {
// Requested variable not defined on Kameleoon's side
} catch (e: KameleoonException.FeatureEnvironmentDisabled) {
// The feature flag is disabled for the environment
} catch (e: Exception) {
// Recommended (but optional) safeguard for unexpected exceptions from third-party libraries
}
```
##### Parameters
| Name | Type | Description |
| ------------ | ------ | ------------------------------------------------------------------------- |
| featureKey | String | Key of the feature you want to display to a user. This field is required. |
| variableName | String | Name of the variable you want to get a value for. This field is required. |
##### Return value
| Type | Description |
| ------ | ---------------------------------------------------------------------------------------------------------------------------------------------------------------------------------- |
| object | Value of variation variable that is registered for the specified `visitorCode` for this feature flag. Valid types: `boolean`, `int`, `double`, `String`, `JSONObject`, `JSONArray` |
##### Exceptions thrown
| Type | Description |
| -------------------------- | -------------------------------------------------------------------------------------------------------------------------------------------------------------------------------------------------------------------------------------------------------------------------------- |
| SDKNotReady | Exception indicating that the SDK has not completed its initialization. |
| FeatureNotFound | Exception indicating that the requested feature key was not found in the SDK's internal configuration. This exception usually means that the feature flag has not been activated on Kameleoon's side (but code implementing the feature is already deployed in the application). |
| FeatureVariableNotFound | Exception indicating that the specified variable was not found. Check that the variable key in the Kameleoon app matches the one in your code. |
| FeatureEnvironmentDisabled | Exception indicating that feature flag is disabled for the visitor's current environment (for example, production, staging, or development). |
#### getFeatureVariationVariables()
* Use [`getVariation()`](#getvariation) instead.
* This method was previously called `getFeatureAllVariables`, which was removed in SDK version `4.0.0` release.
To retrieve all of a feature's variables, call this method. You can modify your feature variables in the Kameleoon app.
This method takes one input parameter: `featureKey`. It returns the data as a `Map` type, as defined in the Kameleoon app. It throws an exception (`FeatureNotFound`) if the requested feature was not found in the SDK's internal configuration.
```java theme={null}
String featureKey = "myFeature";
String variationKey = "variation1";
try {
Map variables = kameleoonClient.getFeatureVariationVariables(featureKey, variationKey);
} catch (KameleoonException.SDKNotReady e) {
// Exception indicating that the SDK has not completed its initialization yet.
} catch (KameleoonException.FeatureNotFound e) {
// The feature is not yet activated on Kameleoon's side
} catch (KameleoonException.FeatureEnvironmentDisabled e) {
// The feature flag is disabled for the environment
} catch (Exception e) {
// This is a generic Exception handler which will handle all exceptions.
System.out.println("Exception occurred");
}
```
```kotlin theme={null}
val featureKey = "myFeature"
val variationKey = "variation1"
try {
val variables = kameleoonClient.getFeatureVariationVariables(featureKey, variationKey)
} catch (e: KameleoonException.SDKNotReady) {
// Exception indicating that the SDK has not completed its initialization yet.
} catch (e: KameleoonException.FeatureNotFound) {
// The feature is not yet activated on Kameleoon's side
} catch (e: KameleoonException.FeatureEnvironmentDisabled) {
// The feature flag is disabled for the environment
} catch (e: Exception) {
// This is a generic Exception handler which will handle all exceptions.
println("Exception occurred")
}
```
##### Parameters
| Name | Type | Description |
| ---------- | ------ | ---------------------------------------------------------------------------- |
| featureKey | String | Unique identifier of the feature you need to obtain. This field is required. |
##### Return value
| Type | Description |
| -------------------- | ----------------------------------------------------------------------------------------------------------------------------------------------------------------------------------------------- |
| `Map` | Data representing the variables associated with this feature flag. Values can be `int`, `String`, `boolean`, `JSONObject` or `JSONArray` (depending on the types defined in the web interface). |
##### Exceptions thrown
| Type | Description |
| -------------------------- | ----------------------------------------------------------------------------------------------------------------------------------------------------------------------------------------------------- |
| SDKNotReady | Exception indicating that the SDK has not completed its initialization. |
| FeatureNotFound | Exception indicating that the requested feature was not found in the SDK's internal configuration. This exception usually means that the feature flag has not yet been activated on Kameleoon's side. |
| FeatureVariableNotFound | Exception indicating that the specified variable was not found. Check that the variable key in the Kameleoon app matches the key in your code. |
| FeatureEnvironmentDisabled | Exception indicating that feature flag is disabled for the visitor's current environment (for example, production, staging, or development). |
#### getFeatureList()
If you want to iterate over all feature flags and call [`getVariation()`](#getvariation) on each, use the [`getVariations()`](#getvariations) method instead.
Returns a list of feature flag keys currently available for the SDK.
```java theme={null}
List allFeatureFlagListId = kameleoonClient.getFeatureList();
```
```kotlin theme={null}
val allFeatureFlagListId = kameleoonClient.getFeatureList()
```
##### Return value
| Type | Description |
| -------------- | ------------------------- |
| `List` | List of feature flag keys |
# Flutter SDK
Source: https://docs.kameleoon.com/developer-docs/sdks/mobile-sdks/flutter-sdk
Integrate the Kameleoon Flutter SDK to run experiments and activate feature flags across all platforms targeted by the Flutter framework.
With the Kameleoon Flutter SDK, experiments can run and feature flags can activate on all platforms targeted by the Flutter application framework. Integrating the SDK into applications is easy, and the footprint (in terms of memory and network usage) is low.
**Getting started**: For help getting started, see the [developer guide](#developer-guide).
**Changelog**: Latest version of the Flutter SDK: 3.8.0 [Changelog](https://github.com/Kameleoon/client-flutter/blob/master/CHANGELOG.md).
**SDK methods**: For the full reference documentation of the Flutter SDK methods, see the [reference](#reference) section.
## Developer guide
### Getting started
This guide helps integrate the SDK and start running experiments in Flutter applications. This tutorial explains the setup of a simple A/B test to change the number of recommended products based on different variations.
#### Install the Flutter client
To install the Kameleoon Flutter client, declare a dependency in your `pubspec.yaml` file:
```ruby theme={null}
kameleoon_client_flutter: ^3.0.0
```
In **release** mode, the JS library loads automatically. However, in **debug** mode, issues (due to the Dart Development Compiler) may occur when importing the JS library. To avoid potential problems, importing the JS library explicitly is strongly recommended.
Add the following script line to the `` section of your `index.html`:
```html theme={null}
```
#### Initialize the Kameleoon client
After installing the SDK into your application and setting up a server-side experiment in the Kameleoon app, the next step is creating the Kameleoon client.
A `KameleoonClient` is a singleton object (per `siteCode`) that acts as a bridge between your application and the Kameleoon platform. It includes all the methods and properties you need to run an experiment.
```dart theme={null}
import 'package:kameleoon_client_flutter/kameleoon_client_flutter.dart';
class _HomePage extends State {
KameleoonClient kameleoonClient
@override
void initState() {
super.initState();
try {
// pass client configuration and visitorCode as arguments
final config = KameleoonClientConfig(
refreshIntervalMinutes: 15, // 60 minutes by default, optional
defaultTimeoutMilliseconds: 10000, // 10_000 milliseconds by default, optional
dataExpirationIntervalMinutes: 1440 * 365, // infinity by default, optional
trackingIntervalMilliseconds: 500, // 1000 milliseconds by default, optional
environment: "staging", // optional
isUniqueIdentifier: false, // false by default, optional
domain: "example.com", // web only option, optional
networkDomain: "company.com", // web only option, optional
defaultDataFile: "{...}", // optional
activityTrackingIntervalMilliseconds: 60_000, // 60_000 milliseconds by default, optional
);
final visitorCode = "yourVisitorCode";
final kameleoonClient = KameleoonClientFactory.create(siteCode, visitorCode: visitorCode, config: config);
// or, if you want, visitor code will be generated automatically
final kameleoonClient = KameleoonClientFactory.create(siteCode, config: config);
} on SiteCodeIsEmpty catch (ex) {
// Exception indicates that the provided siteCode is empty
} on VisitorCodeInvalid catch (ex) {
// Exception indicates that the provided visitorCode is invalid
} on Exception catch (ex) {
// Any other error
}
}
}
```
While executing, the `KameleoonClientFactory.create()` method initializes the client, but it is not immediately ready for use, as the Kameleoon Client must retrieve the current configuration of feature flags (along with their traffic repartition) from a Kameleoon remote server. This retrieval requires network access, which is not always available. Until the Kameleoon Client is fully ready, you should not attempt to run other methods in the Kameleoon Android SDK. Note that once the first configuration of feature flags is fetched, it is then periodically refreshed, but even if the refresh fails for any reason, the Kameleoon client will continue to function using the previous configuration.
You can use the [`isReadyAsync()`](#isreadyasync) method to check if the Kameleoon client initialization is finished.
Alternatively, a **helper callback** can encapsulate the logic of feature flag triggering and variation implementation. The best approach ([`isReadyAsync()`](#isreadyasync) or **callback**) depends on preferences and the exact use case. Use [`isReadyAsync()`](#isreadyasync) when the SDK is expected to be ready for use soon. For example, `isReadyAsync()` is appropriate when running a feature flag on a dialog that users likely wouldn't access for the first few seconds or minutes of navigating the app. A callback is recommended when there is a high probability that the SDK is still initializing. For example, a feature flag that appears onscreen at the application's launch should use a callback that makes the application wait until either the SDK is ready or a specified timeout has expired.
It's your responsibility as the app developer to ensure the logic of your application code is correct within the context of A/B testing using Kameleoon. A good practice is to always assume that the application user can be left out of the feature flag when the Kameleoon client is not yet ready. This exclusion is easy to implement, as it corresponds to the implementation of the default or reference variation logic. The code samples in the next paragraph show examples of this approach.
You're now ready to implement feature management and features flags. See the [Reference](#reference) section for details about additional methods.
#### Activating a feature flag
##### Retrieving a flag configuration
To implement a feature flag in your code, you must first create a [feature flag](/user-manual/experimentation/feature-experimentation/create-and-manage-flags/create-a-feature-flag) in your Kameleoon account.
To determine if a feature flag is active for a specific user, you must retrieve its configuration. Use the [`getFeatureVariationKey()`](#getfeaturevariationkey) or [`isFeatureActive()`](#isfeatureactive) method to retrieve the configuration based on the `featureKey`.
Use the `isFeatureActive()` method if you want to retrieve the configuration of a simple feature flag that has only an ON or OFF state, as opposed to more complex feature flags with multiple variations or targeting options.
The `getFeatureVariationKey()` method retrieves the configuration of a feature experiment with several feature variations. You can use the method to get a variation key for a given user by providing the `visitorCode` and `featureKey` as mandatory arguments.
Feature flags can have associated variables that are used to customize their behavior. To retrieve these variables, use the [`getFeatureVariationVariables()`](#getfeaturevariationvariables) method after calling `getFeatureVariationKey()`, as you must obtain the `variationKey` for the user.
To check if a feature flag is active, you only need to use **one** method. Choose `isFeatureFlagActive` if you want to know if a feature flag is on or off. For more complex scenarios, like dynamically changing the feature's behavior, use `getFeatureFlagVariables`.
##### Adding data points to target a user or filter / breakdown visits in reports
To target a user, ensure you’ve added relevant data points to their profile before retrieving the feature variation or checking if the flag is active. Use the [`addData()`](#adddata) method to add these data points to the user’s profile.
To retrieve data points collected on other devices or to access past user data (collected client-side when using Kameleoon in Hybrid mode), use the [`getRemoteVisitorData()`](#getremotevisitordata) method. This method asynchronously fetches data from the servers. Call `getRemoteVisitorData()` **before** retrieving the variation or checking if the feature flag is active, as this data might be required to assign a user to a given variation of a feature flag.
To learn more about available targeting conditions, see the [detailed article on the subject](/developer-docs/feature-experimentation/targeting-and-segmentation/native-segmentation).
Additionally, the data points you add to the visitor profile will be available when analyzing your experiments, allowing you to filter and break down your results by factors like device and browser. Remember to call the `flush()` method to send saved data to the Kameleoon servers.
If you need to track additional data points beyond what's automatically collected, you can use Kameleoon's [Custom Data feature](#customdata). Custom Data lets you capture and analyze specific information relevant to your experiments. Don't forget to call the `flush()` method to send the collected data to Kameleoon servers for analysis.
##### Tracking flag exposition and goal conversions
Kameleoon will automatically track visitors’ exposition to flags as soon as you call one of these methods:
* `getFeatureVariationKey()`
* `getFeatureVariable()`
* `isFeatureActive()`
When a user completes a desired action (for example, making a purchase), it counts as a conversion. To track conversions, you must use the [`trackConversion()`](#trackconversion) method, and provide the `visitorCode` and `goalId` parameters.
### Using a custom bucketing key
By default, Kameleoon uses a unique, anonymous visitor ID (`visitorCode`) to assign users to feature flag variations. This ID is typically generated and stored on the user's device (in a browser cookie for client-side and server-side SDKs—in persistent storage for mobile SDKs). However, in certain scenarios you may need to ensure all users of the same organization see the same variant of a feature flag.
The **Custom Bucketing Key** option allows you to override this default behavior by providing your own custom identifier for bucketing. This override ensures that Kameleoon's assignment logic uses your specified key instead of the default `visitorCode`.
#### Use cases
Using a custom bucketing key is essential for maintaining consistency and accuracy in your feature flag assignments, particularly in these situations:
* **Account-level or organizational experiments:** For B2B products or scenarios where you want to assign all users from the same organization to the same variation, you can use an identifier like an `accountId`. Custom bucketing keys are crucial for A/B testing features that impact an entire team or company.
By implementing a custom bucketing key, you ensure greater consistency and accuracy in your experiments, leading to more reliable results and a better user experience.
#### Technical details
When you configure a custom bucketing key for a feature flag, you provide Kameleoon with a specific identifier from your application's data:
```dart theme={null}
try {
await kameleoonClient.addData(CustomData.withIndex(index, values: ["newVisitorCode"]))
} on KameleoonException {
// Generic exception in native plugin integration occurred.
}
```
* **Providing the custom key:** You provide your custom identifier to the Kameleoon SDK using the [`addData()`](#adddata) method. In this method, you will pass your chosen custom bucketing key as a [`CustomData`](#customdata) object. Here, `newVisitorCode` refers to the identifier you wish to use for your bucketing (for example, the new `userId` or `accountId`).
For the custom bucketing key to function correctly, it must also be defined and configured for the feature flag during the flag creation or editing process. Without this corresponding configuration, the SDK's bucketing will not apply your custom key. For detailed instructions on how to set this up in Kameleoon, refer to this [article](/user-manual/experimentation/feature-experimentation/create-and-manage-flags/create-a-feature-flag#Advanced_Flag_Settings).
* **Bucketing logic:** Once a custom bucketing key is provided through the `addData()` method, all hash calculations for assigning users to variations will use this `newVisitorCode` (your custom key) instead of the default `visitorCode`. Using the `newVisitorCode` means that the bucketing decision is tied to your custom identifier, ensuring consistent assignments across various contexts where that identifier is present.
* **Data tracking and analytics:** It's crucial to note that while the `newVisitorCode` (your custom key) is used for bucketing decisions, **all subsequent data (tracking events and conversions, for example) is sent and associated with the *original* `visitorCode`.** This separation ensures that your analytics accurately reflect individual user journeys and interactions within your experiment's broader context, even when bucketing is performed at a higher level (like an account) or across multiple devices/sessions. Your original visitor data remains intact for comprehensive reporting.
#### Technical requirements
To effectively use a custom bucketing key:
* The key must be a `String`.
* It must be unique for the entity you intend to bucket (for example, if using a `userId`, each user's ID should be unique).
* The key must be available to the SDK at the exact moment the feature flag decision is evaluated for that user or request.
### Targeting conditions
The Kameleoon SDKs support a variety of predefined targeting conditions that you can use to target users in your campaigns. For the list of conditions this SDK supports, see [use visit history to target users](/developer-docs/feature-experimentation/targeting-and-segmentation/native-segmentation).
You can also use your own [external data to target users](/developer-docs/apis/data-api-rest/tutorials/storing-and-retrieving-external-data-to-target-users).
### Logging
The SDK generates logs to reflect various internal processes and issues.
#### Log levels
The SDK supports configuring limiting logging by a log level.
```dart theme={null}
// The `none` log level does not allow logging.
KameleoonLogger.setLogLevel(LogLevel.none);
// The `error` log level only allows logging issues that may affect the SDK's main behaviour.
KameleoonLogger.setLogLevel(LogLevel.error);
// The `warning` log level allows logging issues which may require additional attention.
// It extends the `error` log level.
// The `warning` log level is a default log level.
KameleoonLogger.setLogLevel(LogLevel.warning);
// The `info` log level allows logging general information on the SDK's internal processes.
// It extends the `warning` log level.
KameleoonLogger.setLogLevel(LogLevel.info);
// The `DEBUG` level logs additional details about the SDK’s internal processes and extends the `INFO` level
// with more granular diagnostic output.
// This information is not intended for end-user interpretation but can be sent to support
// to assist with internal troubleshooting.
KameleoonLogger.setLogLevel(LogLevel.debug);
```
#### Custom handling of logs
The SDK writes its logs to the console output by default. This behaviour can be overridden.
Logging limiting by a log level is performed apart from the log handling logic.
```dart theme={null}
import 'package:logging/logging.dart' as logging;
class CustomLogger extends Logger {
final logger = logging.Logger("CustomLogger");
// `log` method accepts logs from the SDK
@override
void log(LogLevel level, String message) {
// Custom log handling logic here. For example:
switch (level) {
case LogLevel.error:
logger.severe(message);
break;
case LogLevel.warning:
logger.warning(message);
break;
case LogLevel.info:
logger.info(message);
break;
case LogLevel.debug:
logger.fine(message);
break;
default:
break;
}
}
}
// Log level filtering is applied separately from log handling logic.
// The custom logger will only accept logs that meet or exceed the specified log level.
// Ensure the log level is set correctly.
KameleoonLogger.setLogLevel(LogLevel.debug); // Optional, defaults to `LogLevel.warning`.
KameleoonLogger.setLogger(CustomLogger());
```
### Error Handling
Handling errors is considered a good practice to make your application more stable and avoid technical issues. Most `KameleoonClient` methods can throw a `KameleoonException` error.
Since it can be difficult to patch the SDK version on the Android client side, enclosing every SDK method in a `try` clause that catches the `KameleoonException` and the `Throwable` error type is recommended to prevent other fatal errors.
For example:
```dart theme={null}
try {
// Calling a method of the SDK
} on KameleoonException {
// Handling expected exceptions
} on Exception {
// Any other error
}
```
## Reference
This is a full reference documentation of the Flutter SDK.
### Initialization
Once you have [installed the SDK](#install-the-flutter-client) in your application, you must initialize Kameleoon. All of your application's interactions with the SDK, such as triggering an experiment, are accomplished using this Kameleoon client object.
#### create()
Call this method before any others to initialize the SDK. This method is in `KameleoonClientFactory`. Your app conducts all interactions with the SDK using the resulting `KameleoonClient` object that this method creates.
You can customize the SDK's behavior (for example, the environment, the credentials, and so on) by providing a [configuration object](#additional-configuration). Otherwise, the SDK tries to find your configuration file and uses it instead.
```dart theme={null}
import 'package:kameleoon_client_flutter/kameleoon_client_flutter.dart'
final siteCode = "a8st4f59bj";
try {
// pass client configuration and visitorCode as arguments
final config = KameleoonClientConfig(
refreshIntervalMinutes: 15, // 60 minutes by default, optional
defaultTimeoutMilliseconds: 10000, // 10_000 milliseconds by default, optional
dataExpirationIntervalMinutes: 1440 * 365, // infinity by default, optional
trackingIntervalMilliseconds: 500, // 1000 milliseconds by default, optional
environment: "staging", // optional
isUniqueIdentifier: false, // false by default, optional
domain: "example.com" // web only option, optional
networkDomain: "company.com", // web only option, optional
defaultDataFile: "{...}", // optional
activityTrackingIntervalMilliseconds: 60_000, // 60_000 milliseconds by default, optional
);
final visitorCode = "yourVisitorCode";
final kameleoonClient = KameleoonClientFactory.create(siteCode, visitorCode: visitorCode, config: config);
} on SiteCodeIsEmpty catch (ex) {
// Exception indicates that the provided siteCode is empty
} on VisitorCodeInvalid catch (ex) {
// Exception indicates that the provided visitorCode is invalid
} on Exception catch (ex) {
// Any other error
}
try {
// generate visitorCode automatically and use default Kameleoon client config
final kameleoonClient = KameleoonClientFactory.create(siteCode);
} on SiteCodeIsEmpty catch (ex) {
// Exception indicates that the provided siteCode is empty
} on Exception catch (ex) {
// Any other error
}
```
##### Parameters
| Name | Type | Description | Default |
| ----------------------------------- | ----------------------- | -------------------------------------------------------------------------------------------------------------------------------- | ------- |
| siteCode required | `String` | A [unique key](/user-manual/faq#how-do-i-find-my-sitecode) identifying the Kameleoon project used with the SDK. | |
| visitorCode optional | `String` | An optional visitor identifier. If available, use your internal **user ID**; otherwise, the SDK will generate one automatically. | `nil` |
| config optional | `KameleoonClientConfig` | If the SDK configuration is not provided, the SDK will automatically use the default settings. | `nil` |
##### Return value
| Type | Description |
| ----------------- | ------------------------------------------------------------------------------------------------------------------- |
| `KameleoonClient` | An instance of the `KameleoonClient` class that your app can then use to manage your experiments and feature flags. |
##### Exceptions thrown
| Type | Description |
| -------------------- | ------------------------------------------------------------------------------------------------------------------- |
| `VisitorCodeInvalid` | Exception indicating that the provided visitor code is not valid. It is either empty or longer than 255 characters. |
| `SiteCodeIsEmpty` | Exception indicating that the specified site code is empty string which is invalid value. |
#### isReadyAsync()
For mobile SDKs, the Kameleoon Client can't initialize immediately as it must perform a server call to retrieve the current configuration for the active feature flags. Use `isReadyAsync()` to check if the SDK is ready by calling this method before triggering any feature flags.
Alternatively, you can use a callback (see the [`runWhenReady()`](#runwhenready) method for details).
```dart theme={null}
final ready = kameleoonClient.isReadyAsync();
```
##### Return value
| Name | Type | Description |
| ----- | ---- | ------------------------------------------------------------------------------------------ |
| ready | bool | Boolean representing the SDK's status (properly initialized, or not yet ready to be used). |
#### runWhenReady()
For mobile SDKs, the Kameleoon Client can't initialize immediately as it must perform a server call to retrieve the current configuration for all active feature flags. Use the [`runWhenReady()`](#runwhenready) method of the `KameleoonClient` class to pass a callback that will be executed as soon as the SDK is ready for use. You can also set a timeout.
The callback given as the first argument to this method must be an instance of a type of `Function(bool ready)`. If the `ready` equals `true`, the Kameleoon client is ready and should contain code that triggers a feature flag and implements variations. Otherwise, the specified timeout will occur before the client is initialized. The callback should contain code that implements the reference variation, as the user will be excluded from the feature flag if a timeout occurs.
```dart theme={null}
kameleoonClient.runWhenReady((ready) async {
final defaultProductsNumber = 5;
if (ready) {
late int recommendedProductsNumber;
try {
recommendedProductsNumber = await kameleoonClient.getFeatureVariable("feature_key", "product_number");
} on Exception {
recommendedProductsNumber = defaultProductsNumber;
}
} else {
recommendedProductsNumber = defaultProductsNumber;
}
setState(() {
_recommendedProductsNumber = recommendedProductsNumber;
});
}, 2000);
```
##### Arguments
| Name | Type | Description |
| -------------------------------- | ---------------- | ------------------------------------------------------------------------------------------------------------------------------------------------------ |
| callback required | `Function(bool)` | Callback object with `ready` flag. |
| timeout (*optional)* | `Duration` | Timeout (in milliseconds). If not provided, it will use the default value of `defaultTimeoutMilliseconds` (from `KameleoonClientConfig`) milliseconds. |
### Feature flags and variations
#### isFeatureActive()
* 📨 *Sends Tracking Data to Kameleoon*
To activate a feature toggle, call this method. This method accepts a `featureKey` as a required argument to check if the specified feature will be active for a visitor.
If the visitor has never been associated with this feature flag, the method returns a random boolean value (`true` if the visitor should be shown this feature, otherwise `false`). If the visitor is already registered with this feature flag, this method returns the previous feature flag value.
Ensure you set up proper error handling as shown in the example code to catch potential exceptions.
Kameleoon uses tracking to count sessions and visitors when you call certain methods, such as `isFeatureActive()`, `getVariation()` or `getVariations()`.
Use the default `true` value for the `track` parameter when you expose visitors to a variation and need to count them. Set the `track` parameter to `false` only if you call these methods before you expose visitors.
For example, if you call `getVariations()` to retrieve all variations before you expose visitors, set the `track` parameter to `false`. This setting prevents Kameleoon from prematurely counting a session. You can then trigger tracking later when you explicitly expose the visitor.
Kameleoon sends tracking data every second by default. You can configure this interval up to five seconds using the tracking interval configuration option. Kameleoon groups tracking events into a single session as long as the interval between events is less than 30 minutes. If more than 30 minutes elapse between tracking events, Kameleoon counts the events as separate sessions. A visit appears in your reports 30 minutes after the last recorded event in the session.
```dart theme={null}
String featureKey = "new_checkout";
bool hasNewCheckout = false;
try {
hasNewCheckout = await kameleoonClient.isFeatureActive(featureKey);
} on SDKNotReady {
// Exception indicates that the SDK has not completed its initialization yet.
} on FeatureNotFound {
// The error has occurred; feature flag isn't found in current configuration.
} on KameleoonException {
// Generic exception in native plugin integration occurred.
} on Exception {
// Any other error
}
if (hasNewCheckout) {
// Implement new checkout code here
}
```
The `isFeatureActive()` method evaluates the served variant, not the master flag state. If you exclude rules, the method uses the **Then, for everyone else serve** default state. If you select **Off** for this default state, the method always returns `false` even when the master feature flag is **On**.
##### Arguments
| Name | Type | Description |
| ---------- | -------- | -------------------------------------------------------------------------------------------------- |
| featureKey | `String` | Unique key of the feature you want to expose to a user. This field is required. |
| track | `bool` | An optional parameter to enable or disable tracking of the feature evaluation (`true` by default). |
##### Return value
| Type | Description |
| -------------- | ------------------------------------------------------ |
| `Future` | Value of the feature that is registered for a visitor. |
##### Exceptions thrown
| Type | Description |
| ----------------- | --------------------------------------------------------------------------------------------------------------------------------------------------------------------------------------------------------------------------------------------------------------------------------- |
| SDKNotReady | Exception indicating that the SDK has not completed its initialization. |
| FeatureNotFound | Exception indicating that the requested feature ID was not found in the SDK's internal configuration. This exception usually means that the feature flag has not been activated on the Kameleoon side (but code implementing the feature is already deployed in the application). |
| PlatformException | Exception indicating that the native plugin integration works incorrectly. |
#### getVariation()
* 📨 *Sends Tracking Data to Kameleoon (depending on the `track` parameter)*
Retrieves the [`Variation`](#variation) assigned to a given visitor for a specific feature flag.
This method takes a `visitorCode` and `featureKey` as mandatory arguments. The `track` argument is optional and defaults to `true`.
It returns the assigned `Variation` for the visitor. If the visitor is not associated with any feature flag rules, the method returns the default `Variation` for the given feature flag.
Ensure that proper error handling is implemented in your code to manage potential exceptions.
The default variation refers to the variation assigned to a visitor when they do not match any predefined delivery rules for a feature flag. In other words, it is the fallback variation applied to all users who are not targeted by specific rules. It's represented as the variation in the "Then, for everyone else..." section in a management interface.
```dart theme={null}
final String featureKey = "featureKey";
Variation? variation;
try {
variation = await client.getVariation(featureKey);
// disabling tracking
variation = await client.getVariation(featureKey, track: false);
} on SDKNotReady {
// Exception indicating that the SDK has not completed its initialization yet.
} on FeatureNotFound {
// The feature key is not in the configuration file that has been fetched by the SDK.
} on FeatureEnvironmentDisabled {
// The feature flag is disabled for the environment.
}
String? title = variation?.variables['title']?.value;
switch (variation?.key) {
case "on":
// Main variation key is selected for visitorCode
break;
case "alternative_variation":
// Alternative variation key
break;
default:
// Default variation key
break;
}
```
##### Parameters
| Name | Type | Description | Default |
| ------------------------------------- | -------- | ------------------------------------------------------------------------------ | ------- |
| `visitorCode` required | `String` | Unique identifier of the visitor. | |
| `featureKey` required | `String` | Key of the feature you want to expose to a visitor. | |
| `track` optional | `bool` | An optional parameter to enable or disable tracking of the feature evaluation. | `true` |
##### Return value
| Type | Description |
| ------------------- | ------------------------------------------------------------------------------------- |
| `Future` | An assigned [`Variation`](#variation) to a given visitor for a specific feature flag. |
##### Exceptions thrown
| Type | Description |
| ---------------------------- | --------------------------------------------------------------------------------------------------------------------------------------------------------------------------------------------------------------------------------------------------------------------- |
| `VisitorCodeInvalid` | Exception indicating that the provided visitor code is not valid. It is either empty or longer than 255 characters. |
| `FeatureNotFound` | Exception indicating that the requested feature key wasn't found in the internal configuration of the SDK. This usually means that the feature flag is not activated in the Kameleoon app (but code implementing the feature is already deployed in the application). |
| `FeatureEnvironmentDisabled` | Exception indicating that feature flag is disabled for the visitor's current environment (for example, production, staging, or development). |
#### getVariations()
* 📨 *Sends Tracking Data to Kameleoon (depending on the `track` parameter)*
Retrieves a map of [`Variation`](#variation) objects assigned to a given visitor across all feature flags.
This method iterates over all available feature flags and returns the assigned `Variation` for each flag associated with the specified visitor. It takes `onlyActive` and `track` as optional arguments.
* If `onlyActive` is set to `true`, the method `getVariations()` will return feature flags variations provided the user is not bucketed with the `off` variation.
* The `track` parameter controls whether or not the method will track the variation assignments. By default, it is set to `true`. If set to `false`, the tracking will be disabled.
The returned map consists of feature flag keys as keys and their corresponding `Variation` as values. If no variation is assigned for a feature flag, the method returns the default `Variation` for that flag.
Proper error handling should be implemented to manage potential exceptions.
The default variation refers to the variation assigned to a visitor when they do not match any predefined delivery rules for a feature flag. In other words, it is the fallback variation applied to all users who are not targeted by specific rules. It's represented as the variation in the "Then, for everyone else..." section in a management interface.
```dart theme={null}
try {
Map variations = await kameleoonClient.getVariations();
// only active variations
Map variations = await kameleoonClient.getVariations(onlyActive: true);
// disable tracking
Map variations = await kameleoonClient.getVariations(onlyActive: false, track: false);
} on SDKNotReady {
// Exception indicating that the SDK has not completed its initialization yet.
}
```
##### Parameters
| Name | Type | Description | Default |
| ------------------------------------ | ------ | ----------------------------------------------------------------------------------------------------------------- | ------- |
| `onlyActive` optional | `bool` | An optional parameter indicating whether to return variations for active (`true`) or all (`false`) feature flags. | `false` |
| `track` optional | `bool` | An optional parameter to enable or disable tracking of the feature evaluation. | `true` |
##### Return value
| Type | Description |
| -------------------------------- | ----------------------------------------------------------------------------------------------------------------------------------- |
| `Future>` | Map that contains the assigned [`Variation`](#variation) objects of the feature flags using the keys of the corresponding features. |
##### Exceptions thrown
| Type | Description |
| ------------- | ---------------------------------------------------- |
| `SDKNotReady` | Indicates that the SDK is not yet fully initialized. |
#### getFeatureList()
Returns a list of feature flag keys currently available for the SDK.
```dart theme={null}
try {
final allFeatureFlagKeys = await kameleoonClient.getFeatureList();
} on KameleoonException {
// Generic exception in native plugin integration occurred.
}
```
##### Return value
| Type | Description |
| ---------------------- | ------------------------- |
| `Future>` | List of feature flag keys |
#### getDataFile()
To evaluate all feature flags, use [`getVariations()`](#getvariations). This method is more efficient than calling `DataFile` and iterating through flags with [`getVariation()`](#getvariation).
Returns the current SDK configuration as a [`DataFile`](#datafile) object.
```dart theme={null}
try {
final dataFile = await kameleoonClient.getDataFile();
final dateModified = dataFile.dateModified;
} on KameleoonException {
// Generic exception in native plugin integration occurred.
}
```
##### Return value
| Type | Description |
| ---------- | ------------------------------------------------------------ |
| `DataFile` | The [`DataFile`](#datafile) containing the SDK configuration |
##### Errors thrown
| Type | Description |
| ------------- | ---------------------------------------------------- |
| `SDKNotReady` | Indicates that the SDK is not yet fully initialized. |
#### setForcedVariation()
The method allows you to programmatically assign a specific [`Variation`](#variation) to a user, bypassing the standard evaluation process. This is especially valuable for controlled experiments where the usual evaluation logic is not required or must be skipped. It can also be helpful in scenarios like debugging or custom testing.
When a **forced** variation is set, it overrides Kameleoon's real-time evaluation logic. Processes like segmentation, targeting conditions, and algorithmic calculations are skipped. To preserve segmentation and targeting conditions during an experiment, set `forceTargeting=false` instead.
A forced variation is treated the same as an evaluated variation. It is tracked in analytics and stored in the user context like any standard evaluated variation, ensuring consistency in reporting.
The method may throw exceptions under certain conditions (e.g., invalid parameters, user context, or internal issues). Proper exception handling is essential to ensure that your application remains stable and resilient.
```dart theme={null}
final experimentId = 9516;
try {
// Forcing the variation "on" for the experiment 9516 for the visitor
await kameleoonClient.setForcedVariation(experimentId, "on")
// Forcing the variation "on" while preserving segmentation and targeting conditions during the experiment
await kameleoonClient.setForcedVariation(experimentId, "on", forceTargeting: false)
// Resetting the forced variation for the experiment 9516 for the visitor
await kameleoonClient.setForcedVariation(experimentId, null);
} on KameleoonException {
// Handling the exception
}
```
##### Parameters
| Name | Type | Description | Default |
| ---------------------------------------- | -------- | ---------------------------------------------------------------------------------------------------------------------------------------------------------------------------- | ------- |
| `experimentId` required | `int` | **Experiment Id** that will be targeted and selected during the evaluation process. | |
| `variationKey` required | `String` | **Variation Key** corresponding to a `Variation` that should be forced as the returned value for the experiment. If the value is `null`, the forced variation will be reset. | |
| `forceTargeting` optional | `bool` | Indicates whether targeting for the experiment should be forced and skipped (`true`) or applied as in the standard evaluation process (`false`). | `true` |
##### Errors thrown
| Type | Description |
| --------------------------- | ----------------------------------------------------------------------------------------------------------------------------------------------------------------------------------------------------------------------------------------------------- |
| `SDKNotReady` | Indicates that the SDK is not yet fully initialized. |
| `FeatureExperimentNotFound` | Exception indicating that the requested experiment id has not been found in the SDK's internal configuration. This is usually normal and means that the rule's corresponding experiment has not yet been activated on Kameleoon's side. |
| `FeatureVariationNotFound` | Exception indicating that the requested variation key(id) has not been found in the internal configuration of the SDK. This is usually normal and means that the variation's corresponding experiment has not yet been activated on Kameleoon's side. |
In most cases, only the basic error, `KameleoonException`, needs to be handled, as demonstrated in the example. However, if different types of errors require a response, handle each one separately based on specific requirements. Additionally, for enhanced reliability, general language errors can be handled by including `Exception`.
#### evaluateAudiences()
* 📨 *Sends Tracking Data to Kameleoon*
This method evaluates visitors against all available Audiences Explorer segments and tracks those who match.
`evaluateAudiences()` should be called **after all relevant visitor data has been set or updated**, and **just before** getting a feature variation or checking a feature flag. This approach ensures that the visitor is evaluated against the most current data available, allowing for accurate audience assignment based on all criteria.
After calling this method, you can perform a detailed analysis of segment performance in Audiences Explorer.
```dart theme={null}
try {
await kameleoonClient.evaluateAudiences();
} on KameleoonException {
// Handling the exception
}
```
##### Errors thrown
| Type | Description |
| ------------- | ---------------------------------------------------- |
| `SDKNotReady` | Indicates that the SDK is not yet fully initialized. |
In most cases, only the basic error, `KameleoonException`, needs to be handled, as demonstrated in the example. However, if different types of errors require a response, handle each one separately based on specific requirements. Additionally, for enhanced reliability, general language errors can be handled by including `Exception`.
### Goals
#### trackConversion()
* 📨 *Sends Tracking Data to Kameleoon*
Use this method to track conversions. This method requires `goalId` to track conversion on this particular [goal](/user-manual/assets/goals/create-a-goal). In addition, this method also accepts `revenue`, `metadata` and `negative` arguments.
The `trackConversion()` method doesn't return any value. This method is non-blocking as the server call is made asynchronously.
```dart theme={null}
kameleoonClient.trackConversion(goalId); // default revenue
kameleoonClient.trackConversion(goalId, 10); // provided revenue == 10
// Add metadata
kameleoonClient.trackConversionWithOptParams(goalId, metadata: [CustomData.withIndex(1, values: ["true"])]);
kameleoonClient.trackConversionWithOptParams(goalId, revenue: 10, metadata: [CustomData.withIndex(1, values: ["true"])]);
```
##### Parameters
| Name | Type | Description | Default |
| ---------------------------------- | ------------------ | -------------------------------------------------------------------------------------------------------------------------------- | ------- |
| `goalId` required | `int` | ID of the goal. | |
| `revenue` optional | `double` | Revenue of the conversion. | `0` |
| `negative` optional | `bool` | Defines if the revenue is positive or negative. | `false` |
| `metadata` optional | `List` | Metadata of the conversion. [Must be defined beforehand in the Kameleoon App](/user-manual/assets/goals/create-a-goal#metadata). | `[]` |
metadata values are accessible through [raw data exports](/user-manual/experiment-analytics/analyze-results/results-page/results-page-actions#Export) and [the results page](/user-manual/experiment-analytics/analyze-results/data-and-metrics/goal-metadata).
If the `metadata` parameter is provided, Kameleoon will use these specified values for the current conversion instead of what was previously collected using the [`addData()`](#adddata) method. If the parameter is omitted, Kameleoon will use the last tracked values for those [`CustomData`](#customdata) prior to the conversion and within the same visit.
Kameleoon will only consider the metadata values that are explicitly passed as parameters to the `trackConversion()` method.
In the example below, Kameleoon will associate the conversion only with the custom data value explicitly provided as a parameter (here: index 5 with the value 'Amex Credit Card').
```dart theme={null}
kameleoonClient.addData([
CustomData.withIndex(5, values: ["Credit Card"]),
CustomData.withIndex(9, values: ["Express Delivery"])
]);
kameleoonClient.trackConversionWithOptParams(1000, metadata: [CustomData.withIndex(5, values: ["Amex Credit Card"])]);
```
### Events
#### onUpdateConfiguration()
This method was previously called `updateConfigurationHandler`, which was removed in SDK version `3.0.0` release.
The `onUpdateConfiguration()` method allows you to handle the event when configuration has updated data. It takes one input parameter, **handler**. The handler that will be called when the configuration is updated using a real-time configuration event.
```dart theme={null}
kameleoonClient.onUpdateConfiguration((timestamp) {
// timestamp value contains the value of Unix time (number of seconds elapsed since January 1, 1970) when configuration was updated.
});
```
##### Parameters
| Name | Type | Description |
| --------- | ---------------- | -------------------------------------------------------------------------------------------------------- |
| `handler` | `Function(int)?` | The handler that will be called when the configuration is updated using a real-time configuration event. |
### Visitor data
#### getVisitorCode()
Returns unique visitor code used in SDK.
```dart theme={null}
final visitorCode = await kameleoonClient.getVisitorCode();
```
##### Return value
| Type | Description |
| ---------------- | ------------------------------------------------------ |
| `Future` | String representing a unique visitor code used in SDK. |
#### addData()
The `addData()` method adds [targeting data](#data-types) to storage so other methods can use the data to decide whether or not to target the current visitor.
The `addData()` method does not return any value and does not interact with Kameleoon back-end servers on its own. Instead, all the declared data is saved for future transmission using the [`flush()`](#flush) method. This approach reduces the number of server calls made, as the data is typically grouped into a single server call that is triggered by the `flush()`.
The [`trackConversion()`](#trackconversion) method also sends out any previously associated data, just like the `flush()`. The same holds true for [`getVariation()`](#getvariation) and [`getVariations()`](#getvariations) methods if an experimentation rule is triggered.
Each visitor can only have one instance of associated data for most data types. However, [`CustomData`](#customdata) is an exception. Visitors can have one instance of associated `CustomData` per index.
```dart theme={null}
try {
await kameleoonClient.addData([
Device(Devices.phone),
CustomData.withIndex(1, values: ["some custom value"]),
Conversion(32, 10f, false),
]);
} on KameleoonException {
// Generic exception in native plugin integration occurred.
}
```
##### Parameters
| Name | Type | Description | Default value |
| ------------------------------- | ------------ | -------------------------------------------------------------------------------------------------------------------------------------------------------------------------------------------- | ------------- |
| `track` optional | `bool` | Specifies whether the added data is eligible for tracking. When set to `false`, the data is stored locally and used only for targeting evaluation; it is not sent to the Kameleoon Data API. | `true` |
| `data` required | `List` | Collection of Kameleoon data types. | |
##### Exceptions
| Type | Description |
| ------------------- | -------------------------------------------------------------------------- |
| `PlatformException` | Exception indicating that the native plugin integration works incorrectly. |
#### flush()
* 📨 *Sends Tracking Data to Kameleoon*
Data associated with the current user via the `addData()` method is not sent immediately to the server. It is stored and accumulated until it is sent automatically by the `trackConversion()` method, or manually sent by calling the `flush()` method, giving control over exactly when the data is flushed to the servers. For example, if the `addData()` method is called a dozen times, sending data to the server after each `addData()` invocation would waste resources. Call `flush()` once at the end.
The `flush()` method doesn't return any value. This method is non-blocking as the server call is made asynchronously.
```dart theme={null}
kameleoonClient.flush(); // Interval tracking (most performant tracking method)
kameleoonClient.flush(instant: true); // Instant tracking
```
##### Exceptions thrown
| Type | Description |
| ----------------- | ------------------------------------------------------------------------------- |
| PlatformException | Exception indicating that the native plugin integration doesn't work correctly. |
#### getRemoteData()
This method was previously called `retrieveDataFromRemoteSource`, which was removed in SDK version `3.0.0` release.
Use this method to retrieve data from a remote Kameleoon server based on the active `siteCode` and the `key` argument (or the active `visitorCode` if the `key` is omitted). The `visitorCode` and `siteCode` are specified in `KameleoonClientFactory.create()`. Data can be stored quickly and conveniently on highly scalable remote servers using the Kameleoon Data API. The application can then retrieve the data using this method.
Note that since a server call is required, this mechanism is asynchronous.
```dart theme={null}
try {
final data = await kameleoonClient.getRemoteData("test");
} on KameleoonException {
// Generic exception in native plugin integration occurred.
} on Exception {
// Any other error (including network issues).
}
```
##### Parameters
| Name | Type | Description |
| ---- | ------ | -------------------------------------------------------------------------------- |
| key | String | The key that the data you try to get is associated with. This field is optional. |
##### Return value
| Type | Description |
| ----------------- | -------------------------------------------------------------------------------------- |
| `Future` | Future with retrieving data for specific `key` (or `visitorCode` if `key` is omitted). |
| Type | Description |
| ----------------- | ------------------------------------------------------------------------------- |
| PlatformException | Exception indicating that the native plugin integration works incorrectly. |
| Exception | Exception indicating that the request timed out or any other reason of failure. |
#### getRemoteVisitorData()
`getRemoteVisitorData()` is an asynchronous method for retrieving Kameleoon Visits Data for the `visitorCode` from the Kameleoon Data API. This method adds the data to storage for other methods to use when making targeting decisions.
Data obtained using this method plays an important role when you want to:
* use data collected from other devices.
* access a user's history, such as custom data collected during previous visits.
Read [this article](/developer-docs/feature-experimentation/targeting-and-segmentation/native-segmentation) for a better understanding of possible use cases.
By default, `getRemoteVisitorData()` automatically retrieves the latest stored custom data with `scope=Visitor` and attaches them to the visitor without having to call `addData()`. It is particularly useful for [synchronizing custom data between multiple devices](/developer-docs/sdks/web-sdks/nodejs-sdk#synchronizing-custom-data-across-devices).
```dart theme={null}
// Visitor data will be fetched and automatically added for `visitorCode`.
try {
final visitorData = await kameleoonClient.getRemoteVisitorData();
} on KameleoonException {
// Generic exception in native plugin integration occurred.
} on Exception {
// Any other error (including network issues).
}
// If you only want to fetch data and add it yourself manually, set addData == `false`.
try {
final visitorData = await kameleoonClient.getRemoteVisitorData(addData: false);
} on KameleoonException {
// Generic exception in native plugin integration occurred.
} on Exception {
// Any other error (including network issues).
}
// If you want to fetch custom list of data types
final filter = RemoteVisitorDataFilter.withValues(
previousVisitAmount: 25,
currentVisit: true,
conversions: true,
);
try {
final visitorData = await kameleoonClient.getRemoteVisitorData(filter: filter, addData: false);
} on KameleoonException {
// Generic exception in native plugin integration occurred.
} on Exception {
// Any other error (including network issues).
}
```
##### Parameters
| Name | Type | Description |
| ------- | ------------------------- | ----------------------------------------------------------------------------------------------------------------------------------------------------------------------------------------------------------------------------------------------------------------------------------- |
| filter | `RemoteVisitorDataFilter` | Filter that selects which data should be retrieved from visit history. By default, `getRemoteVisitorData` retrieves `CustomData` from the current and latest previous visit (`RemoteVisitorDataFilter()`). All other filters parameters default to `false`. This field is optional. |
| addData | boolean | A boolean indicating whether the method should automatically add retrieved data for a visitor. If unspecified, the default value is **true**. This field is optional. |
##### Return value
| Type | Description |
| -------------------- | ----------------------------------------------------- |
| `Future>` | An array containing the fetched data for the visitor. |
##### Exceptions thrown
| Type | Description |
| ----------------- | ------------------------------------------------------------------------------- |
| PlatformException | Exception indicating that the native plugin integration doesn't work correctly. |
| Exception | Exception indicating that the request timed out or any other reason of failure. |
##### Using parameters in getRemoteVisitorData()
The `getRemoteVisitorData()` method offers flexibility by letting you define various parameters when retrieving data on visitors. Whether you're targeting based on goals, experiments, or variations, the same approach applies across all data types.
For example, suppose you want to retrieve data on visitors who completed a goal "Order transaction". You can specify parameters within the `getRemoteVisitorData()` method to refine your targeting. For instance, if you want to target only users who converted on the goal in their last five visits, you can set the `previousVisitAmount` parameter to `5` and `conversions` to `true`.
The flexibility shown in this example is not limited to goal data. You can use parameters within the `getRemoteVisitorData()` method to retrieve data on a variety of visitor behaviors.
Here is the list of available `RemoteVisitorDataFilter` options:
| Name | Type | Description | Default |
| ------------------------------------------- | --------- | ----------------------------------------------------------------------------------------------------------------------------------------------------------------------------------------------------------------------------------------------------------------------------------------------------------------------------------------------- | ------- |
| previousVisitAmount optional | `int` | Number of previous visits to retrieve data from. Number between `1` and `25` | `1` |
| currentVisit optional | `boolean` | If true, current visit data will be retrieved. | `true` |
| customData optional | `boolean` | If true, custom data will be retrieved. | `true` |
| geolocation optional | `boolean` | If true, geolocation data will be retrieved. | `false` |
| conversions optional | `boolean` | If true, conversion data will be retrieved. | `false` |
| experiments optional | `boolean` | If true, experiment data will be retrieved. | `false` |
| pageViews (*optional*, *web only*) | `boolean` | If true, page data will be retrieved. | `false` |
| device (*optional*, *web only*) | `boolean` | If true, device data will be retrieved. | `false` |
| browser (*optional*, *web only*) | `boolean` | If true, browser data will be retrieved. | `false` |
| operatingSystem (*optional*, *web only*) | `boolean` | If true, operating system data will be retrieved. | `false` |
| kcs optional | `boolean` | If true, Kameleoon Conversion Score (KCS) will be retrieved. Requires the [AI Predictive Targeting add-on](/user-manual/ai-predictive-targeting/target-users-based-on-likelihood-to-convert) | `false` |
| visitorCode optional | `boolean` | If true, Kameleoon will retrieve the `visitorCode` from the most recent visit and use it for the current visit. This is necessary if you want to ensure that the visitor, identified by their `visitorCode`, always receives the same variation across visits for [Cross-device experimentation](/developer-docs/cross-device-experimentation). | `true` |
| cbs optional | `boolean` | If true, Contextual Bandit score data will be retrieved. | `false` |
#### getVisitorWarehouseAudience()
Retrieves all audience data associated with the visitor in your data warehouse. The optional `warehouseKey` parameter is typically your internal user ID. The `customDataIndex` parameter corresponds to the Kameleoon custom data that Kameleoon uses to target your visitors. You can refer to the [warehouse targeting documentation](/user-manual/integrations/data-warehouses/bigquery/use-bigquery-as-a-source-audience-targeting) for additional details. The method returns the result as a `CustomData` object, confirming that the data has been added to the visitor and is available for targeting purposes.
Since a server call is required, this mechanism is asynchronous.
```dart theme={null}
try {
final customData = await kameleoonClient.getVisitorWarehouseAudience(customDataIndex);
} on KameleoonException {
// Generic exception in native plugin integration occurred.
} on Exception {
// Any other error (including network issues).
}
// If you need to specify warehouse key
try {
final customData = await kameleoonClient.getVisitorWarehouseAudience(customDataIndex, "warehouseKey");
} on KameleoonException {
// Generic exception in native plugin integration occurred.
} on Exception {
// Any other error (including network issues).
}
```
##### Parameters
| Name | Type | Description |
| --------------- | ------ | ------------------------------------------------------------------------------------------------------- |
| visitorCode | string | A unique visitor identification string, can't exceed 255 characters. |
| customDataIndex | int | An integer representing the index of the custom data you want to use to target your BigQuery Audiences. |
| warehouseKey | string | A unique key to identify the warehouse data (usually, your internal user ID). This field is optional. |
##### Return value
| Type | Description |
| -------------------- | ------------------------------------------------------------------------------- |
| `Future` | A `CustomData` instance confirming that the data has been added to the visitor. |
##### Exceptions thrown
| Type | Description |
| ----------------- | ------------------------------------------------------------------------------- |
| PlatformException | Exception indicating that the native plugin integration doesn't work correctly. |
| Exception | Exception indicating that the request timed out or any other reason of failure. |
#### setLegalConsent()
You must use this method to specify whether the visitor has given legal consent to use their personal data. Setting the `consent` parameter to `false` limits the types of data that you can include in tracking requests. This method helps you adhere to legal and regulatory requirements while responsibly managing visitor data. You can find more information on personal data in the [consent management policy](/user-manual/project-management/consent-management-policy).
```dart theme={null}
try {
final customData = await kameleoonClient.setLegalConsent(true);
} on KameleoonException {
// Generic exception in native plugin integration occurred.
} on Exception {
// Any other error (including network issues).
}
```
##### Parameters
| Name | Type | Description |
| ------- | ------- | ----------------------------------------------------------------------------------------------------------------------------------------------------------------------------------------------------------------------- |
| consent | boolean | A boolean value representing the legal consent status. `true` indicates the visitor has given legal consent, `false` indicates the visitor has never provided, or has withdrawn, legal consent. This field is required. |
##### Exceptions thrown
| Type | Description |
| ----------------- | -------------------------------------------------------------------------- |
| PlatformException | Exception indicating that the native plugin integration works incorrectly. |
##### Consent revocation behavior
This is applicable only to the Flutter Web SDK.
When you call `setLegalConsent()` with `consent=false`, the SDK does not delete the `kameleoonVisitorCode` cookie. Instead, it stops extending the cookie's expiration date, allowing the cookie to persist until it naturally expires.
If your compliance requirements demand the immediate removal of the cookie file upon opt-out, you must delete it manually using your framework’s native cookie management methods. The SDK will not remove the file automatically.
### Data types
This section lists the `Data` types supported by Kameleoon. Several standard data types are provided, as well as the `CustomData` type for defining custom data types.
#### Conversion
The `Conversion` data set stored here can be used to filter experiment and personalization reports by any goal associated with it.
* Each visitor can have multiple `Conversion` objects.
* You can find the `goalId` in the Kameleoon app.
| Name | Type | Description | Default |
| ---------------------------------- | ------------------ | ----------------------------------------------- | ------- |
| `goalId` required | `int` | ID of the goal. | |
| `revenue` optional | `double` | Revenue of the conversion | `0` |
| `negative` optional | `bool` | Defines if the revenue is positive or negative. | `false` |
| `metadata` optional | `List` | Metadata of the conversion. | `[]` |
```dart theme={null}
try {
final conversion = Conversion(32, 10);
final conversionMetadata = Conversion(32, 10, false, [CustomData.withIndex(1, values: ["true"])]);
final conversionOptParams = Conversion.withOptParams(32, metadata: [CustomData.withIndex(1, values: ["true"])]);
await kameleoonClient.addData([conversion, conversionMetadata, conversionOptParams]);
} on KameleoonException {
// Generic exception in native plugin integration occurred.
}
```
#### CustomData
This data type is available for both types of SDKs: Mobile & Web.
`CustomData` allows any type of data to be easily associated with each visitor. `CustomData` can then be used as a targeting condition in [segments](/user-manual/assets/segments/create-a-segment/) or as a filter/breakdown in experiment reports.
To learn more about custom data, please refer to this [article](/developer-docs/custom-data).
| Name | Type | Description | |
| ---------------------------------- | -------------- | --------------------------------------------------------------------------------------------------------------------------------------------------------------------------------------- | ------ |
| index/name required | `int`/`String` | Index or Name of the custom data. **Either `index` or `name` must be provided** to identify the data. | |
| overwrite optional | `bool` | Flag to explicitly control how the values are stored and how they appear in reports. [See more](/developer-docs/custom-data#default-logic-when-overwrite-parameter-is-false-or-omitted) | `true` |
| values optional | `List` | Values of the custom data to be stored. | |
* Each visitor is allowed only one `CustomData` for each unique `index`. Adding another `CustomData` with the same `index` will replace the existing `CustomData`.
* The custom data `index` can be found in the [Custom Data dashboard](/user-manual/assets/custom-data/manage-custom-data) under the “INDEX” column.
* To prevent the SDK from sending data with the selected index to Kameleoon servers for privacy reasons, enable the **Use this data only locally for targeting purposes** option when creating custom data.
* Adding a `CustomData` instance created with a name when the SDK instance configuration is not up to date or the name is not registered, will result in the data being ignored.
```dart theme={null}
try {
await kameleoonClient.addData([CustomData.withIndex(1, values: ["some custom value"])]);
// With several values
await kameleoonClient.addData(CustomData.withIndex(1, values: ["value 1", "value 2"]))
// To set the 'overwrite' flag to false
await kameleoonClient.addData(CustomData.withIndex(1, overwrite: false, values: ["first value", "second value"]))
// To use a name instead of the index
await kameleoonClient.addData(CustomData.withName("my-custom-data", values: ["value"]))
} on KameleoonException {
// Generic exception in native plugin integration occurred.
}
```
#### Device
This data type is available for both types of SDKs: Mobile & Web.
Store information about the user's device.
| Name | Type | Description |
| ------ | ------- | ----------------------------------------------------------------------- |
| device | Devices | List of devices: `phone`, `tablet`, `desktop`. This field is mandatory. |
```dart theme={null}
try {
await kameleoonClient.addData([Device(Devices.phone)]);
} on KameleoonException {
// Generic exception in native plugin integration occurred.
}
```
#### Geolocation
This data type is available for both types of SDKs: Mobile & Web.
`Geolocation` contains the visitor's geolocation details.
| Name | Type | Description |
| ------------------------------------ | ---------------------- | ---------------------------------------------------------------------------------------------------------------- |
| `country` required | `String` | The country of the visitor. |
| `region` optional | `String?` | The region of the visitor. |
| `city` optional | `String?` | The city of the visitor. |
| `postalCode` optional | `String?` | The postal code of the visitor. |
| `latitude` optional | `double?` | The latitude coordinate representing the location of the visitor. Coordinate number represents decimal degrees. |
| `longitude` optional | `double?` | The longitude coordinate representing the location of the visitor. Coordinate number represents decimal degrees. |
* Each visitor can have only one `Geolocation`. Adding a second `Geolocation` overwrites the first one.
```dart theme={null}
try {
await kameleoonClient.addData([Geolocation("France", region: "Île-de-France", city: "Paris")]);
} on KameleoonException {
// Generic exception in native plugin integration occurred.
}
```
#### Browser
The data type is available only for Web SDK
The `Browser` data set stored here can be used to filter experiment and personalization reports by any value associated with it.
| Name | Type | Description |
| --------------------------------- | ---------- | ----------------------------------------------------------------------------------------------- |
| `browser` required | `Browsers` | List of browsers: `chrome`, `internetExplorer`, `firefox`, `safari`, `opera`, `other`. |
| `version` optional | `double?` | Version of the browser, floating point number represents major and minor version of the browser |
```dart theme={null}
try {
await kameleoonClient.addData([Browser(Browsers.chrome)]);
await kameleoonClient.addData([Browser(Browsers.chrome, 10.0)]);
} on KameleoonException {
// Generic exception in native plugin integration occurred.
}
```
#### PageView
This data type is only available for Web SDKs.
| Name | Type | Description |
| --------- | ----------- | -------------------------------------------------- |
| url | String | URL of the page viewed. This field is mandatory. |
| title | String | Title of the page viewed. This field is mandatory. |
| referrers | `List` | Referrers of viewed pages. This field is optional. |
The referrer's index (ID) is available in the Acquisition channel configuration page of the Kameleoon app. Be careful: this index starts at 0, so the first [acquisition channel](/user-manual/assets/advanced-targeting-tools/create-an-acquisition-channel) you create for a given site will have the ID 0, not 1.
```dart theme={null}
try {
await kameleoonClient.addData([PageView("https://url.com", "title", [3])]);
} on KameleoonException {
// Generic exception in native plugin integration occurred.
}
```
#### OperatingSystem
This data type is only available for Web SDKs.
`OperatingSystem` contains information about the operating system on the visitor's device.
Each visitor can only have one `OperatingSystem`. Adding a second `OperatingSystem` overwrites the first one.
| Name | Type | Description |
| ---- | ------------------ | ---------------------------------------------------------------------------------------------------------------- |
| type | `OperatingSystems` | List of operating systems: `windows`, `mac`, `ios`, `linux`, `android`, `windowsPhone` . This field is required. |
```dart theme={null}
try {
await kameleoonClient.addData([OperatingSystem(OperatingSystem.linux)]);
} on KameleoonException {
// Generic exception in native plugin integration occurred.
}
```
#### Cookie
This data type is only available for Web SDKs.
`Cookie` contains information about the cookie stored on the visitor's device.
| Name | Type | Description |
| ------- | --------------------- | --------------------------------------------------------------------------------- |
| cookies | `Map` | A string object map consisting of cookie keys and values. This field is required. |
Each visitor can only have one `Cookie`. Adding second `Cookie` overwrites the first one.
```dart theme={null}
try {
await kameleoonClient.addData([Cookie({
"my_key1": "my_value1",
"my_key2": "my_value2"
})]);
} on KameleoonException {
// Generic exception in native plugin integration occurred.
}
```
### Returned Types
#### DataFile
The `DataFile` contains the SDK configuration details.
It can be extended with additional information if required by clients. If you need more details, please contact your Customer Success Manager.
| Name | Type | Description |
| -------------- | -------------------------- | --------------------------------------------------------------------------------- |
| `featureFlags` | `Map` | A map of [`FeatureFlag`](#featureflag) objects, keyed by feature flag keys. |
| `dateModified` | `int` | The timestamp (in milliseconds) indicating when the `DataFile` was last modified. |
```dart theme={null}
// Retrieves the map of feature flags from the DataFile.
// The map is keyed by feature flag identifiers, with each value being a FeatureFlag object.
final featureFlags = dataFile.featureFlags;
// Retrieves the last modification timestamp of the DataFile.
// The value is an int representing milliseconds since the Unix epoch.
final dateModified = dataFile.dateModified;
```
#### FeatureFlag
The `FeatureFlag` represents a set of properties that define a feature flag itself — for example, its [`Variations`](#variation), [`Rules`](#rule), environment status, and other related details.
It can be extended with additional information if required by clients. If you need more details, please contact your Customer Success Manager.
| Name | Type | Description |
| --------------------- | ------------------------ | -------------------------------------------------------------------------- |
| `environmentEnabled` | `bool` | Indicating whether the feature flag is enabled in the current environment. |
| `defaultVariationKey` | `String` | The key of the default variation associated with the feature flag. |
| `variations` | `Map` | A map of `Variation` objects, keyed by variation keys. |
| `rules` | `List` | A list of `Rule` objects |
```dart theme={null}
// Check whether the feature flag is enabled in the current environment
final isEnvironmentEnabled = featureFlag.environmentEnabled
// Retrieve the key of the default variation
final defaultVariationKey = featureFlag.defaultVariationKey
// Retrieve the default variation object
final defaultVariation = featureFlag.defaultVariation
// Retrieve all variations of the feature flag as a map (key = variation key, value = Variation object)
final variations = featureFlag.variations
// Retrieve all targeting rules associated with the feature flag
final rules = featureFlag.rules
```
#### Rule
The `Rule` represents a set of properties that define a rule itself — for example, its [`Variations`](#variation).
It can be extended with additional information if required by clients. If you need more details, please contact your Customer Success Manager.
| Name | Type | Description |
| ------------ | ------------------------ | ------------------------------------------------------ |
| `variations` | `Map` | A map of `Variation` objects, keyed by variation keys. |
```dart theme={null}
// Retrieve all variations of the rule as a map (key = variation key, value = Variation object)
final variations = rule.variations
```
#### Variation
`Variation` contains information about the visitor's assigned variation (or the default variation, if no specific assignment exists).
| Name | Type | Description |
| ------------ | ----------------------- | ---------------------------------------------------------------------------------------------------------------------------------------------------- |
| name | `String` | The name of the variation. |
| key | `String` | The unique key identifying the variation. |
| id | `int?` | The ID of the assigned variation (or `null` if it's the default variation). |
| experimentId | `int?` | The ID of the experiment associated with the variation (or `null` if default). |
| variables | `Map` | A map containing the variables of the assigned variation, keyed by variable names. This could be an empty collection if no variables are associated. |
* The `Variation` object provides details about the assigned variation and its associated experiment, while the [`Variable`](#variable) object contains specific details about each variable within a variation.
* Ensure that your code handles the case where `id` or `experimentId` may be `null`, indicating a default variation.
* The `variables` map might be empty if no variables are associated with the variation.
```dart theme={null}
// Retrieving the variation name
var variationName = variation.name
// Retrieving the variation key
var variationKey = variation.key;
// Retrieving the variation id
var variationId = variation.id;
// Retrieving the experiment id
var experimentId = variation.experimentId;
// Retrieving the variables map
var variables = variation.variables;
```
#### Variable
`Variable` contains information about a variable associated with the assigned variation.
| Name | Type | Description |
| ----- | --------- | -------------------------------------------------------------------------------------------------------------------------------------------------------------------------------- |
| key | `String` | The unique key identifying the variable. |
| type | `String` | The type of the variable. Possible values: **BOOLEAN**, **NUMBER**, **STRING**, **JSON**. |
| value | `dynamic` | The value of the variable, which can be of the following types: **bool**, **int**, **double**, **String**, **Map\** (json object), **\[dynamic]** (json array). |
```swift theme={null}
// Retrieving the variables map
var variables = variation.variables;
// Variable type can be retrieved for further processing
var type = variables["isDiscount"]?.type ?? "";
// Retrieving the variable value by key
var isDiscount = variables["isDiscount"]?.value as bool? ?? false;
// Variable value can be of different types
var title = variables["title"]?.value as String? ?? "";
```
### Deprecated methods
These methods are deprecated and will be removed in SDK version `4.0.0`.
#### isReady()
Use [`isReadyAsync()`](#isreadyasync) instead. On iOS and Android, [`isReady()`](#isready) may return incorrect (`false`) results even if the SDK has already been initialized with [`defaultDataFile`](#initialize-the-kameleoon-client).
For mobile SDKs, the Kameleoon Client can't initialize immediately as it must perform a server call to retrieve the current configuration for the active feature flags. Use `isReady()` to check if the SDK is ready by calling this method before triggering any feature flags.
Alternatively, you can use a callback (see the [`runWhenReady()`](#runwhenready) method for details).
```dart theme={null}
final ready = kameleoonClient.isReady();
```
##### Return value
| Name | Type | Description |
| ----- | ---- | ------------------------------------------------------------------------------------------ |
| ready | bool | Boolean representing the SDK's status (properly initialized, or not yet ready to be used). |
#### getFeatureVariationKey()
* 📨 *Sends Tracking Data to Kameleoon*
Use [`getVariation()`](#getvariation) instead.
Use this method to get the feature variation key for a visitor. This method takes `featureKey` as a required argument to retrieve the variation key for the specified user.
If the visitor has never been associated with this feature flag, the SDK returns a randomly assigned variation key (according to the feature flag rules). If the visitor is already registered with this feature flag, this method returns the previous variation key. If the user does not match any of the rules, the default value will be returned, which is defined in your customer's account.
Ensure you set up proper error handling as shown in the example code to catch potential exceptions.
```dart theme={null}
String featureKey = "new_checkout";
String variationKey = "";
try {
variationKey = await kameleoonClient.getFeatureVariationKey(featureKey);
} on SDKNotReady {
// Exception indicates that the SDK has not completed its initialization yet.
} on FeatureNotFound {
// The error has occurred; feature flag isn't found in current configuration.
} on FeatureEnvironmentDisabled {
// The feature flag is disabled for the environment.
} on KameleoonException {
// Generic exception in native plugin integration occurred.
} on Exception {
// Any other error.
}
switch(variationKey) {
case 'on':
// Main variation key is selected for visitorCode
break;
case 'alternative_variation':
// Alternative variation key
break;
default:
// Default variation key
break;
}
```
##### Parameters
| Name | Type | Description |
| ---------- | ------ | ------------------------------------------------------------------------- |
| featureKey | String | Key of the feature you want to expose to a user. This field is mandatory. |
##### Return value
| Type | Description |
| ---------------- | ------------------------------------------------------------------ |
| `Future` | Variation key of the feature flag that is registered to a visitor. |
##### Exceptions thrown
| Type | Description |
| ----------------- | --------------------------------------------------------------------------------------------------------------------------------------------------------------------------------------------------------------------------------------------------------------------------------- |
| SDKNotReady | Exception indicating that the SDK has not completed its initialization. |
| FeatureNotFound | Exception indicating that the requested feature ID was not found in the SDK's internal configuration. This exception usually means that the feature flag has not been activated on the Kameleoon side (but code implementing the feature is already deployed in the application). |
| PlatformException | Exception indicating that the native plugin integration don't work correctly. |
#### getActiveFeatures()
* Use [`getVariations()`](#getvariations) instead.
* Previously called `getFeatureListForVisitorCode`, which was removed in SDK version `4.0.0` release.
`getActiveFeatures` method retrieves information about the active feature flags that are available for the visitor.
```dart theme={null}
try {
final activeFeatures = await kameleoonClient.getActiveFeatures();
} on KameleoonException {
// Generic exception in native plugin integration occurred.
}
```
##### Return value
| Type | Description |
| -------------------------------- | --------------------------------------------------------------------------------------------------------------------- |
| `Future>` | Map that contains the assigned variations of the active features using the keys of the corresponding active features. |
#### getFeatureVariable()
* 📨 *Sends Tracking Data to Kameleoon*
- Use [`getVariation()`](#getvariation) instead.
- This method was previously called `obtainFeatureVariable`, which was removed in SDK version `3.0.0`.
This method gets a variable value of variation key for a specific user. It takes a `featureKey` and `variableKey` as required arguments.
If the visitor has never been associated with the `featureKey`, the SDK returns a randomly assigned variable value for the specified variation key (according to the feature flag rules). If the visitor is already registered with this feature flag, this method returns the variable value for previously registered variation. If the user does not match any of the rules, the default variable value is returned.
Ensure you set up proper error handling as shown in the example code to catch potential exceptions.
```dart theme={null}
String featureKey = "feature_key";
String variableKey = "product_number";
int recommendedProductsNumber = 5;
try {
recommendedProductsNumber = await kameleoonClient.getFeatureVariable(featureKey, variableKey);
} on SDKNotReady {
// Exception indicates that the SDK has not completed its initialization yet.
} on FeatureNotFound {
// The error has occurred; feature flag isn't found in current configuration.
} on FeatureEnvironmentDisabled {
// The feature flag is disabled for the environment.
} on FeatureVariableNotFound {
// Requested variable not defined in Kameleoon.
} on KameleoonException {
// Generic exception in native plugin integration occurred.
} on Exception {
// Any other error.
}
setState(() {
_recommendedProductsNumber = recommendedProductsNumber;
});
```
##### Parameters
| Name | Type | Description |
| ----------- | ------ | -------------------------------------------------------------------------------- |
| featureKey | String | Key of the feature you want to expose to a user. This field is mandatory. |
| variableKey | String | Name of the variable for which you want to get a value. This field is mandatory. |
##### Return value
| Type | Description |
| ----------------- | --------------------------------------------------------------------------------------------------------------------------------------------------------- |
| `Future` | Value of the variation's variable that is registered to a visitor for this feature flag. Possible types: `bool`, `int`, `double`, `String`, `List`, `Map` |
##### Exceptions thrown
| Type | Description |
| -------------------------- | --------------------------------------------------------------------------------------------------------------------------------------------------------------------------------------------------------------------------------------------------------------------------------- |
| SDKNotReady | Exception indicating that the SDK has not completed its initialization. |
| FeatureNotFound | Exception indicating that the requested feature ID was not found in the SDK's internal configuration. This exception usually means that the feature flag has not been activated on the Kameleoon side (but code implementing the feature is already deployed in the application). |
| FeatureEnvironmentDisabled | Exception indicating that the feature flag is disabled for the visitor's current environment (for example, production, staging, or development). |
| FeatureVariableNotFound | Exception indicating that the specified variable was not found. Check that the variable key in the Kameleoon app matches the key in your code. |
| PlatformException | Exception indicating that the native plugin integration works incorrectly. |
#### getFeatureVariationVariables()
* Use [`getVariation()`](#getvariation) instead.
* This method was previously called `getFeatureAllVariables`, which was removed in SDK version `4.0.0` release.
To retrieve all of a feature's variables, call this method. You can modify your feature variables in the Kameleoon app.
This method takes one input parameter: `featureKey`. It returns the data as a `Map` type, as defined in the Kameleoon app. It throws an exception (`FeatureNotFound`) if the requested feature was not found in the SDK's internal configuration.
```dart theme={null}
final featureKey = "featureKey";
final variationKey = "variationKey";
try {
final allVariables = await client.getFeatureVariationVariables(featureKey, variationKey);
} on SDKNotReady {
// Exception indicates that the SDK has not completed its initialization yet.
} on FeatureNotFound {
// The error has occurred; feature flag isn't found in current configuration.
} on FeatureEnvironmentDisabled {
// The feature flag is disabled for the environment.
} on KameleoonException {
// Generic exception in native plugin integration occurred.
} on Exception {
// Any other error.
}
```
##### Parameters
| Name | Type | Description |
| ------------------------------------ | ------ | ------------------------------------------------- |
| featureKey required | String | Identifier key of the feature you want to obtain. |
| variationKey required | String | The key of the variation you want to obtain. |
##### Return value
| Type | Description |
| ------------------------------ | ------------------------------------------------------------------------------------------------------------------------------------------------------------ |
| `Future>` | Data associated with this feature flag. The values of can be an int, double, bool, String, List or Map (depending on the type defined on the web interface). |
##### Exceptions thrown
| Type | Description |
| -------------------------- | ------------------------------------------------------------------------------------------------------------------------------------------------------------------------------------------------------------------------------------------------- |
| FeatureNotFound | Exception indicating that the requested feature has not been found in the SDK's internal configuration. This exception is usually normal and means that the feature flag has not been activated on Kameleoon's side. |
| FeatureEnvironmentDisabled | Exception indicating that feature flag is disabled for the visitor's current environment (for example, production, staging, or development). |
| FeatureVariationNotFound | Exception indicating that the requested variation ID has not been found in the SDK's internal configuration. This exception is usually normal and means that the variation's corresponding experiment has not been activated on Kameleoon's side. |
| PlatformException | Exception indicating that the native plugin integration doesn't work correctly. |
# iOS SDK
Source: https://docs.kameleoon.com/developer-docs/sdks/mobile-sdks/ios-sdk
Integrate the Kameleoon iOS SDK to run experiments and activate feature flags in native Swift iOS applications.
With the Kameleoon iOS (Swift) SDK, experiments can run and feature flags can activate on native mobile iOS applications. Integrating the SDK into Swift apps is easy, and the footprint (memory and network usage) is low.
**Getting started**: For help getting started, see the [developer guide](#developer-guide).
**Changelog**: Latest version of the Swift SDK: 4.27.3 [Changelog](https://github.com/Kameleoon/client-swift/blob/master/CHANGELOG.md).
**SDK methods**: For the full reference documentation of the iOS SDK methods, see the [reference](#reference) section.
## Developer guide
Follow these steps to install and configure the Kameleoon iOS SDK in your application for the first time.
### Getting started
#### Starter kit
To help with getting started, Kameleoon provides a starter kit and demo application to test the SDK. The starter kit includes a fully configured app with examples demonstrating how SDK methods can be used in an app. The starter kit, demo application, and detailed instructions are available at [Starter kit for iOS](https://github.com/Kameleoon/ios-examples)
#### Prerequisites
* Use Swift version 5.0 or higher on the iOS platform. Support for earlier iOS applications (including earlier Swift versions and Objective-C apps) is not planned. A Universal Framework version is available, compatible both with x86\_64 (for the iOS Simulator) and ARM (for production deployment into the App Store).
#### Installation
You can install the iOS SDK using CocoaPods or Swift Package Manager:
With CocoaPods , paste the following code in your Podfile and replace `YOUR_TARGET_NAME` with the value for your app:
```swift theme={null}
# Podfile
use_frameworks!
target 'YOUR_TARGET_NAME' do
pod 'kameleoonClient'
end
```
Then, in a command prompt, in the `Podfile` directory, run the install command:
```custom_code theme={null}
pod install
```
With Swift Package Manager , add a package dependency to your Xcode project . Select **File > Swift Packages > Add Package Dependency** and enter the repository URL: `https://github.com/Kameleoon/client-swift`.
Alternatively, you can modify your `Package.swift` file directly:
```swift theme={null}
dependencies: [
.package(url: "https://github.com/Kameleoon/client-swift.git", from("3.0.3"))
]
```
***
#### Additional configuration
To customize the SDK's behavior, create a `kameleoon-client-swift.plist` configuration file in the root directory of your Xcode project. You can also [download a sample configuration](/assets/developer-docs/sdks/mobile-sdks/client-configs/kameleoon-client-swift.plist) file.
These are the keys you can set:
| Key | Description | Default value |
| -------------------------------------------------------------------------------------------------------- | ----------------------------------------------------------------------------------------------------------------------------------------------------------------------------------------------------------------------------------------------------------------------------------------------------------------------------------------------------------------------------------------------------------------------------------------------------------------------------------------------------------------------------------------------------------------------------------------------------------------------------------------------------------------------------------------------------------- | -------------------- |
| `refreshIntervalMinute` / `refresh_interval_minute` optional | Specifies the refresh interval, in minutes, for the SDK to fetch the configuration for the active experiments and feature flags. The value determines the maximum time it takes to propagate changes, such as activating or deactivating feature flags or launching experiments. If left unspecified, the default interval is 60 minutes. Additionally, a [streaming mode](/developer-docs/feature-experimentation/technical-reference/technical-considerations/#streaming-premium-option) is available that uses server-sent events (SSE) to push new configurations to the SDK automatically and apply them in real-time. | `60` minutes |
| `dataExpirationIntervalMinute` / `data_expiration_interval_minute` optional | Designates the predefined time period, in minutes, that the SDK stores the visitor and their associated data. Each data instance is evaluated individually, allowing you to set the amount of time the SDK saves data before automatically deleting it. If no interval is specified, the SDK does not automatically delete data from the device. | `Date.distantFuture` |
| `defaultTimeoutMillisecond` / `default_timeout_millisecond` optional | Specifies the time interval, in milliseconds, that it takes for network requests from the SDK to time out. Set the value to `30000` milliseconds (30 seconds) or more if you do not have a stable connection. Some methods have additional parameters for method-specific timeouts, but if you do not specify them explicitly, the default value is used. | `10000` ms |
| `trackingIntervalMillisecond` / `tracking_interval_millisecond` optional | Specifies the interval for tracking requests, in milliseconds. All visitors who were evaluated for any feature flag or had data flushed will be included in this tracking request, which is performed once per interval. The minimum value is `1000` ms and the maximum value is `5000` ms. | `1000` ms |
| `environment` / `environment` optional | For customers using multi-environment experimentation and feature flagging, this option specifies which feature flag configuration to use. By default, each feature flag has the options `production`, `staging`, and `development`. If not specified, the default value is `production`. [More information](/user-manual/experimentation/feature-experimentation/configure-your-feature-flags/manage-environments). | `nil` |
| `isUniqueIdentifier` / `is_unique_identifier` optional | Indicates that the specified `visitorCode` is a unique identifier. | `false` |
| `networkDomain` / `network_domain` optional | Custom domain used by SDKs for outgoing requests, often for proxying. Must be a valid domain (e.g., example.com or sub.example.com). Invalid formats default to Kameleoon's value. | `nil` |
| `defaultDataFile` / `default_datafile` optional | The `default_datafile` feature ensures the Kameleoon SDK is always **READY** by providing a fallback configuration when no cached data file exists. Developers can preload a valid configuration by fetching it from `https://sdk-config.kameleoon.eu/v3/` and passing it as `default_datafile` during initialization. When a `dateModified` timestamp (in milliseconds) is provided and is newer than the cached version, the SDK will use the default datafile instead of the cached version. **If `dateModified` is omitted, the default datafile is only applied when no cached version exists**. This ensures the SDK always has a valid configuration, whether default, cached, or updated. | `nil` |
| `activityTrackingIntervalMillisecond` / `activity_tracking_interval_millisecond` optional | Sets how often the SDK sends an activity event to extend the visitor's session. Changing it can have side effects — see [this section](#using-activitytrackingintervalmillisecond) before adjusting it. Minimum and default is `60 000` ms; any lower non-zero value is ignored and the default is applied. Set it to `0` to disable periodic activity tracking, in which case a single activity event is sent at startup. | `60 000` ms |
If you specify a `visitorCode` and set the `isUniqueIdentifier` parameter to `true`, the SDK methods use the `visitorCode` value as the unique visitor identifier, which is useful for [cross-device experimentation](/developer-docs/cross-device-experimentation). The SDK links the flushed data to the visitor that is associated with the specified identifier.
The `isUniqueIdentifier` can be useful in other edge-case scenarios, such as when you can't access the anonymous `visitorCode` that was originally assigned to the visitor, but you have access to an internal ID that is connected to the anonymous visitor through session merging.
##### Using `activityTrackingIntervalMillisecond`
The `activityTrackingIntervalMillisecond` parameter controls how often the SDK sends an activity event to extend the visitor's session on the Data API. A longer interval reduces network usage and battery consumption. The default and minimum value is `60 000` ms (60 seconds); any lower non-zero value is ignored and the default is applied instead. Timers pause while the app is in the background, so the interval only advances while the app is in the foreground.
Increasing this value has **significant side effects** you should weigh carefully:
1. **Visits with zero duration**
* Reports derive visit duration from tracked events. If the interval is longer than the time a visitor spends in the app, the SDK may send only the startup event. The visit's start and last-activity timestamps are then (nearly) identical, so the report usually shows a duration close to zero. You can avoid this by sending other events during the session (such as conversions or page views), which also extend the recorded duration.
2. **Time elapsed since last visit (targeting)**
* The "time elapsed since last visit" condition compares the current time against a previous visit's last recorded activity. That timestamp only refreshes once per interval, so its precision degrades as the interval grows: comparisons for durations close to or below the interval become unreliable.
3. **[Visit count](/user-manual/experiment-analytics/troubleshooting/data-discrepancies#how-visits-and-visitors-are-counted)**
* A new visit starts after 30 minutes of inactivity. If you set the interval longer than 30 minutes, every activity event arrives after the previous session has already expired, so the SDK creates a new visit at each interval and inflates the visit count.
Setting `activityTrackingIntervalMillisecond` to `0` disables periodic activity tracking entirely. In that case, the SDK sends only a single activity event at application startup.
#### Initialize the Kameleoon Client
After you've set up the SDK in your application, you must create the Kameleoon Client. A Client is a singleton object that acts as a bridge between your application and the Kameleoon platform. It includes all the methods and properties you need to run an experiment.
```swift theme={null}
import kameleoonClient
let visitorCode = "visitorCode"
let siteCode = "a8st4f59bj"
do {
// pass client configuration as an argument
let config = try KameleoonClientConfig(
clientId: "clientId", // optional
clientSecret: "clientSecret", // optional
refreshIntervalMinute: 15, // optional, 60 minutes by default
dataExpirationIntervalMinute: 60*24*365, // optional, `Date.distantFuture` by default
defaultTimeoutMillisecond: 10_000, // optional, 10_000 milliseconds by default
trackingIntervalMillisecond: 500, // optional, 1000 milliseconds by default
environment: "production", // optional
isUniqueIdentifier: false, // optional, false by default. Set to true if the visitorCode corresponds to your customer's unique userId.
networkDomain: "example.com", // optional, nil by default
defaultDataFile: "{...}", // optional, nil by default
activityTrackingIntervalMillisecond: 20_000 // optional, 15_000 milliseconds by default
)
let kameleoonClient = try KameleoonClientFactory.create(
siteCode: siteCode,
visitorCode: visitorCode, // optional
config: config // optional
)
} catch KameleoonError.visitorCodeInvalid {
// Provided visitor code is invalid
} catch KameleoonError.siteCodeIsEmpty {
// Indicates that provided site code is empty
} catch {
// Unexpected error occurred
}
do {
// read client configuration from a file 'kameleoon-client-swift.plist'
// visitor code isn't provided, so SDK generates a random visitor code which it will use in the future
let kameleoonClient = try KameleoonClientFactory.create(siteCode: siteCode)
} catch KameleoonError.visitorCodeInvalid {
// Provided visitor code is invalid
} catch {
// Unexpected error occurred
}
```
The `KameleoonClientFactory.create()` method initializes the client, but the client is not immediately ready for use. The client must retrieve the current configuration of experiments and feature flags (along with their traffic repartition) from a Kameleoon remote server. This retrieval requires the client to have network access, which is not always available. Until the Kameleoon Client is fully ready, you should not attempt to run other methods in the Kameleoon iOS SDK. After the client fetches the first configuration of feature flags, it periodically refreshes the configuration. If the refresh fails for any reason, the Kameleoon client continues to function using the previous configuration.
You can use the `.ready` public getter to check if the Kameleoon client initialization is finished.
Alternatively, a **helper callback** can encapsulate the logic of experiment triggering and variation implementation. The best approach (`.ready` or **callback**) depends on preferences and the use case. Using `.ready` is recommended when the SDK is expected to be ready for use soon. For example, `.ready` is appropriate when running an experiment on a dialog that would be accessible only after a few seconds or minutes of navigation within the app. A callback is recommended when there is a high probability that the SDK will still be initializing when the experiment is reached. For example, an experiment visible at the launch of the app should use a callback that makes the application wait until either the SDK is ready or a specified timeout has expired.
It's your responsibility as the app developer to ensure the client is ready before calling any methods. A good practice is to always assume that the app user should be left out of the experiment if the Kameleoon client is not yet ready. This exclusion is easy to do, as it corresponds to the implementation of the default reference variation logic as shown in the code sample above.
You're now ready to implement feature management and features flags. See the [Reference](#reference) section for details about additional methods.
#### Best practices for initialization and usage
* Initializing [`KameleoonClient`](#create) as a singleton as early as possible after the application starts is recommended, as initialization may take some time. Since initialization is asynchronous, it does not block or delay the application startup process.
* Before using `KameleoonClient`, verify that it is initialized by calling the [`runWhenReady`](#runwhenready) method. Otherwise, attempts to use the client before it is ready will result in errors.
* ⚠️ Most key methods may throw errors, so proper exception handling is required. Be sure to review the documentation for each method you use to understand its potential errors.
```swift theme={null}
// Initialize `KameleoonClient` on application startup and use it as a singleton later
do {
let kameleoonClient = try KameleoonClientFactory.create(siteCode: "");
} catch {}
// Example: Apply a discount percentage based on a feature flag variable's value
func applyDiscountIfApplicable() {
client.runWhenReady(timeoutMilliseconds: 1000) { ready in
guard ready else { return }
if let variation = try? client.getVariation(featureKey: "discount"),
let discount = variation.variables["discount_value"]?.value as? Double {
applyDiscount(value: discount)
}
}
}
```
```swift theme={null}
// Initialize `KameleoonClient` on application startup and use it as a singleton later
do {
let kameleoonClient = try KameleoonClientFactory.create(siteCode: "");
} catch {}
// Example: Apply a discount percentage based on a feature flag variable's value
func applyDiscountIfApplicable() async throws {
try await client.runWhenReady(timeoutMilliseconds: 1000)
if let variation = try client.getVariation(featureKey: "discount"),
let discount = variation.variables["discount_value"]?.value as? Double {
applyDiscount(value: discount)
}
}
```
#### Activating a feature flag
##### Retrieving a flag configuration
To implement a feature flag in your code, you must first create the feature flag in your Kameleoon account.
To determine the status or variation of a feature flag for a specific user, you should use the [`getVariation()`](#getvariation) or [`isFeatureActive()`](#isfeatureactive) method to retrieve the configuration based on the `featureKey`.
The `getVariation()` method handles both simple feature flags with ON/OFF states and more complex flags with multiple variations. The method retrieves the appropriate variation for the user by checking the feature rules, assigning the variation, and returning it based on the `featureKey` and `visitorCode`.
The `isFeatureActive()` method can be used if you want to retrieve the configuration of a simple feature flag that has only an ON or OFF state, as opposed to more complex feature flags with multiple variations or targeting options.
If your feature flag has associated variables (such as specific behaviors tied to each variation) `getVariation()` also enables you to access the [`Variation`](#variation) object, which provides details about the assigned variation and its associated experiment. This method checks whether the user is targeted, finds the visitor’s assigned variation, and saves it to storage. When `track=true`, the SDK will send the exposure event to the specified experiment on the next tracking request, which is automatically triggered based on the SDK’s [`tracking_interval_millisecond`](#additional-configuration). By default, this interval is set to 1000 milliseconds (1 second).
The `getVariation()` method allows you to control whether tracking is done. If `track=false`, no exposure events will be sent by the SDK. This is useful if you prefer not to track data through the SDK and instead rely on client-side tracking managed by the Kameleoon engine, for example. Additionally, setting `track=false` is helpful when using the `getVariations()` method, where you might only need the variations for all flags without triggering any tracking events. If you want to know more about how tracking works, view [this article](/developer-docs/feature-experimentation/technical-reference/faq-global#when-does-the-sdk-send-a-tracking-request-for-analytics)
##### Adding data points to target a user or filter / breakdown visits in reports
To target a user, ensure you've added relevant data points to their profile before retrieving the feature variation or checking if the flag is active. Use the [`addData()`](#adddata) method to add these data points to the user's profile.
To retrieve data points collected on other devices, use the [`getRemoteVisitorData()`](#getremotevisitordata) method. This method asynchronously fetches data from the servers. It is important to call `getRemoteVisitorData()` *before* retrieving the variation or checking if the feature flag is active, as this data might be required to assign a user to a given variation.
To learn more about available targeting conditions, see the [detailed article on the subject](/developer-docs/feature-experimentation/targeting-and-segmentation/native-segmentation).
Additionally, the data points you add to the visitor profile will be available when analyzing your experiments, allowing you to filter and break down your results by factors like device. See the complete list [here](/user-manual/experiment-analytics/analyze-results/results-page/results-page-settings#breakdown-audience).
If you need to track additional data points beyond what's automatically collected, you can use Kameleoon's [Custom Data feature](#customdata). Custom Data allows you to capture and analyze specific information relevant to your experiments. Don't forget to call the [`flush()`](#flush) method to send the collected data to Kameleoon servers for analysis.
##### Tracking goal conversions
When a user completes a desired action (such as making a purchase), it is recorded as a conversion. To track conversions, use the [`trackConversion()`](#trackconversion) method and provide the required `goalId` parameter.
The conversion tracking request will be sent along with the next scheduled tracking request, which the SDK sends at regular intervals (defined by [`tracking_interval_millisecond`](#additional-configuration)). If you prefer to send the request immediately, use the [`flush()`](#flush) method with the parameter `instant=true`.
### Cross-device experimentation
To support visitors who access an app from multiple devices, Kameleoon allows the synchronization of previously collected visitor data across each of the visitor's devices and reconciliation of their visit history across devices through cross-device experimentation. Case studies and detailed information on how Kameleoon handles data across devices are available in the [article on cross-device experimentation](/developer-docs/cross-device-experimentation).
#### Synchronizing custom data across devices
Although custom mapping synchronization is used to align visitor data across devices, it is not always necessary. Below are two scenarios where custom mapping sync is not required:
**Same user ID across devices**
If the same user ID is used consistently across all devices, synchronization is handled automatically without a custom mapping sync. It is enough to call the `getRemoteVisitorData()` method when you want to sync the data collected between multiple devices.
**Multi-server instances with consistent IDs**
In complex setups involving multiple servers (for example, distributed server instances), where the same user ID is available across servers, synchronization between servers (with `getRemoteVisitorData()`) is sufficient without additional custom mapping sync.
Customers who need additional data can refer to the [`getRemoteVisitorData()`](#getremotevisitordata) method description for further guidance. In the below code, it is assumed that the same unique identifier (in this case, the `visitorCode`, which can also be referred to as `userId`) is used consistently between the two devices for accurate data retrieval.
If you want to sync collected data in real time, you need to choose the scope **Visitor** for your custom data.
```swift title="Device A" theme={null}
// In this example, Custom data with index `90` was set to "Visitor" scope in Kameleoon.
let visitorScopeCustomDataIndex = 90
kameleoonClient.addData(CustomData(id: visitorScopeCustomDataIndex, values: "your data"))
kameleoonClient.flush()
```
```swift title="Device B" theme={null}
// Before working with the data, call `getRemoteVisitorData`.
kameleoonClient.getRemoteVisitorData { result in
// After calling, the SDK on Device B will have access to CustomData of Visitor scope defined on Device A.
// So, "your data" will be available to target and track the visitor.
}
```
```swift title="Device A" theme={null}
// In this example, Custom data with index `90` was set to "Visitor" scope in Kameleoon.
let visitorScopeCustomDataIndex = 90
kameleoonClient.addData(CustomData(id: visitorScopeCustomDataIndex, values: "your data"))
kameleoonClient.flush()
```
```swift title="Device B" theme={null}
// Before working with the data, call `getRemoteVisitorData`.
try await kameleoonClient.getRemoteVisitorData()
// After calling, the SDK on Device B will have access to CustomData of Visitor scope defined on Device A.
// So, "your data" will be available to target and track the visitor.
```
#### Using custom data for session merging
[Cross-device experimentation](/developer-docs/cross-device-experimentation) allows for combining a visitor's history across each of their devices (history reconciliation). History reconciliation allows merging different visitor sessions into one. To reconcile visit history, use [`CustomData`](#customdata) to provide a unique identifier for the visitor. For more information, see the [dedicated documentation](/developer-docs/cross-device-experimentation/#activating-cross-device-history-reconciliation).
After cross-device reconciliation is enabled, calling [`getRemoteVisitorData()`](#getremotevisitordata) with the parameter `userId` retrieves all known data for a given user.
Sessions with the same identifier will always be shown the same variation in an experiment. In the Visitor view of your experiment's results pages, these sessions will appear as a single visitor.
The SDK configuration ensures that associated sessions always see the same variation of the experiment. However, there are some limitations regarding cross-device variation allocation. These limitations are outlined [here](/developer-docs/cross-device-experimentation#critical-points-and-practical-insights).
Follow the [activating cross-device history reconciliation](#cross-device-experimentation) guide to set up your custom data on the Kameleoon platform.
Afterwards, you can use the SDK normally. The following methods that may be helpful in the context of session merging:
* `getRemoteVisitorData()` with passed `isUniqueIdentifier=true` to [`KameleoonClientConfig`](#additional-configuration) - to retrieve data for all linked visitors.
* [`trackConversion()`](#trackconversion) or [`flush()`](#flush) with passed `isUniqueIdentifier=true` to `KameleoonClientConfig` - to track some data for specific visitor that is associated with another visitor.
As the custom data you use as the identifier must be set to **Visitor scope**, you need to use [cross-device custom data synchronization](/developer-docs/cross-device-experimentation) to retrieve the identifier with the [`getRemoteVisitorData()`](#getremotevisitordata) method on each device.
Here's an example of how to use custom data for session merging.
```swift theme={null}
// In this example, `91` represents the Custom Data's index,
// configured as a unique identifier in Kameleoon.
let mappingIndex = 91;
let featureKey = "ff123";
// 0. Initializing anonymous KameleoonClient
// Assume `anonymousVisitorCode` is the randomly generated ID for the visitor.
let anonymousKameleoonClient = KameleoonClientFactory.create(
siteCode: siteCode,
visitorCode: anonymousVisitorCode
)
anonymousKameleoonClient.runWhenReady { result in
// ...
}
// 1. Before the visitor is authenticated
// Retrieve the variation for an unauthenticated visitor.
let anonymousVariation = anonymousKameleoonClient.getVariation(featureKey)
// 2. After the visitor is authenticated
// Assume `userId` is the visitor code of the authenticated visitor.
anonymousKameleoonClient.addData(CustomData(id: mappingIndex, values: userId))
anonymousKameleoonClient.flush(instant: true)
KameleoonClient userKameleoonClient = KameleoonClientFactory.create(
siteCode: siteCode,
visitorCode: userId,
config: KameleoonClientConfig(
isUniqueIdentifier: true // Indicate that `userId` is a unique identifier
)
)
userKameleoonClient.runWhenReady { result in
// ...
}
// 3. After the visitor has been authenticated
// Retrieve the variation for the `userId`, which will match the anonymous visitor code's variation.
let userVariation = userKameleoonClient.getVariation(featureKey: featureKey)
let isSameVariation = userVariation.key == anonymousVariation.key // true
// The `userId` and `anonymousVisitorCode` are now linked and tracked as a single visitor.
userKameleoonClient.trackConversion(goalId: 123, revenue: 10.0);
// Additionally, the linked visitors will share all fetched remote visitor data.
userKameleoonClient.getRemoteVisitorData { result in
// ...
}
```
```swift theme={null}
// In this example, `91` represents the Custom Data's index,
// configured as a unique identifier in Kameleoon.
let mappingIndex = 91;
let featureKey = "ff123";
// 0. Initializing anonymous KameleoonClient
// Assume `anonymousVisitorCode` is the randomly generated ID for the visitor.
let anonymousKameleoonClient = KameleoonClientFactory.create(
siteCode: siteCode,
visitorCode: anonymousVisitorCode
)
try await anonymousKameleoonClient.runWhenReady()
// 1. Before the visitor is authenticated
// Retrieve the variation for an unauthenticated visitor.
let anonymousVariation = anonymousKameleoonClient.getVariation(featureKey)
// 2. After the visitor is authenticated
// Assume `userId` is the visitor code of the authenticated visitor.
anonymousKameleoonClient.addData(CustomData(id: mappingIndex, values: userId))
anonymousKameleoonClient.flush(instant: true)
KameleoonClient userKameleoonClient = KameleoonClientFactory.create(
siteCode: siteCode,
visitorCode: userId,
config: KameleoonClientConfig(
isUniqueIdentifier: true // Indicate that `userId` is a unique identifier
)
)
try await userKameleoonClient.runWhenReady()
// 3. After the visitor has been authenticated
// Retrieve the variation for the `userId`, which will match the anonymous visitor code's variation.
let userVariation = userKameleoonClient.getVariation(featureKey: featureKey)
let isSameVariation = userVariation.key == anonymousVariation.key // true
// The `userId` and `anonymousVisitorCode` are now linked and tracked as a single visitor.
userKameleoonClient.trackConversion(goalId: 123, revenue: 10.0);
// Additionally, the linked visitors will share all fetched remote visitor data.
try await userKameleoonClient.getRemoteVisitorData()
```
In this example, the application has a login page. Since the user ID is unknown at the moment of login, an anonymous visitor automatically generated by the SDK is used. The visitor code can be retrieved with the [`getVisitorCode()`](#getvisitorcode) method. After the user logs in, the anonymous visitor is associated with the user ID and used as a unique identifier for the visitor.
### Using a custom bucketing key
By default, Kameleoon uses a unique, anonymous visitor ID (`visitorCode`) to assign users to feature flag variations. This ID is typically generated and stored on the user's device (in a browser cookie for client-side and server-side SDKs—in persistent storage for mobile SDKs). However, in certain scenarios you may need to ensure all users of the same organization see the same variant of a feature flag.
The **Custom Bucketing Key** option allows you to override this default behavior by providing your own custom identifier for bucketing. This override ensures that Kameleoon's assignment logic uses your specified key instead of the default `visitorCode`.
#### Use cases
Using a custom bucketing key is essential for maintaining consistency and accuracy in your feature flag assignments, particularly in these situations:
* **Account-level or organizational experiments:** For B2B products or scenarios where you want to assign all users from the same organization to the same variation, you can use an identifier like an `accountId`. Custom bucketing keys are crucial for A/B testing features that impact an entire team or company.
By implementing a custom bucketing key, you ensure greater consistency and accuracy in your experiments, leading to more reliable results and a better user experience.
#### Technical details
When you configure a custom bucketing key for a feature flag, you provide Kameleoon with a specific identifier from your application's data:
```swift theme={null}
try? kameleoonClient.addData(CustomData(id: index, values: "newVisitorCode"))
```
* **Providing the custom key:** You provide your custom identifier to the Kameleoon SDK using the [`addData()`](#adddata) method. In this method, you will pass your chosen custom bucketing key as a [`CustomData`](#customdata) object. Here, `newVisitorCode` refers to the identifier you wish to use for your bucketing (for example, the new `userId` or `accountId`).
For the custom bucketing key to function correctly, it must also be defined and configured for the feature flag during the flag creation or editing process. Without this corresponding configuration, the SDK's bucketing will not apply your custom key. For detailed instructions on how to set this up in Kameleoon, refer to this [article](/user-manual/experimentation/feature-experimentation/create-and-manage-flags/create-a-feature-flag#Advanced_Flag_Settings).
* **Bucketing logic:** Once a custom bucketing key is provided through the `addData()` method, all hash calculations for assigning users to variations will use this `newVisitorCode` (your custom key) instead of the default `visitorCode`. Using the `newVisitorCode` means that the bucketing decision is tied to your custom identifier, ensuring consistent assignments across various contexts where that identifier is present.
* **Data tracking and analytics:** It's crucial to note that while the `newVisitorCode` (your custom key) is used for bucketing decisions, **all subsequent data (tracking events and conversions, for example) is sent and associated with the *original* `visitorCode`.** This separation ensures that your analytics accurately reflect individual user journeys and interactions within your experiment's broader context, even when bucketing is performed at a higher level (like an account) or across multiple devices/sessions. Your original visitor data remains intact for comprehensive reporting.
#### Technical requirements
To effectively use a custom bucketing key:
* The key must be a `String`.
* It must be unique for the entity you intend to bucket (for example, if using a `userId`, each user's ID should be unique).
* The key must be available to the SDK at the exact moment the feature flag decision is evaluated for that user or request.
### Targeting conditions
The Kameleoon SDKs support a variety of predefined targeting conditions that you can use to target users in your campaigns. For the list of conditions this SDK supports, see [use visit history to target users](/developer-docs/feature-experimentation/targeting-and-segmentation/native-segmentation).
You can also use your own [external data to target users](/developer-docs/apis/data-api-rest/tutorials/storing-and-retrieving-external-data-to-target-users).
### Logging
The SDK generates logs to reflect various internal processes and issues.
#### Log levels
The SDK supports configuring limiting logging by a log level.
```swift theme={null}
// The `none` log level does not allow logging.
KameleoonLogger.logLevel = .none
// The `ERROR` log level only allows logging issues that may affect the SDK's main behaviour.
KameleoonLogger.logLevel = .error
// The `WARNING` log level allows logging issues which may require additional attention.
// It extends the `ERROR` log level.
// The `WARNING` log level is a default log level.
KameleoonLogger.logLevel = .warning
// The `INFO` log level allows logging general information on the SDK's internal processes.
// It extends the `WARNING` log level.
KameleoonLogger.logLevel = .info
// The `DEBUG` level logs additional details about the SDK’s internal processes and extends the `INFO` level
// with more granular diagnostic output.
// This information is not intended for end-user interpretation but can be sent to support
// to assist with internal troubleshooting.
KameleoonLogger.logLevel = .debug
```
#### Custom handling of logs
The SDK writes its logs to the console output by default. This behaviour can be overridden.
Logging limiting by a log level is performed apart from the log handling logic.
```swift theme={null}
public struct CustomLogger: Logging {
let customLogger = Logger(subsystem: "com.yourcompany.app", category: "app")
public func log(level: LogLevel, message: String) {
switch level {
case .error:
customLogger.error("\(message)")
case .warning:
customLogger.warning("\(message)")
case .info:
customLogger.info("\(message)")
case .debug:
customLogger.debug("\(message)")
default:
break
}
}
}
// Log level filtering is applied separately from log handling logic.
// The custom logger will only accept logs that meet or exceed the specified log level.
// Ensure the log level is set correctly.
KameleoonLogger.logLevel = .debug // Optional, defaults to `LogLevel.WARNING`.
KameleoonLogger.logger = CustomLogger()
```
### Passing the visitor code to a WebView
In some cases, you may need to pass the **visitor code** from the native application to a WebView that uses [Engine.js](/developer-docs/web-experimentation/implementation-and-deployment/standard-implementation) or the web [JavaScript](/developer-docs/sdks/web-sdks/js-sdk) or [React](/developer-docs/sdks/web-sdks/react-js-sdk) SDKs. The following example demonstrates the recommended way to achieve this:
```swift theme={null}
struct WebView: UIViewRepresentable {
let url: URL
let kameleoonClient: KameleoonClient
private let kameleoonCookieName = "kameleoonVisitorCode"
func makeUIView(context: Context) -> WKWebView {
let config = WKWebViewConfiguration()
let webView = WKWebView(frame: .zero, configuration: config)
let cookieStore = webView.configuration.websiteDataStore.httpCookieStore
let cookie = makeVisitorCookie()
cookieStore.setCookie(cookie) {
webView.load(URLRequest(url: url))
}
return webView
}
func updateUIView(_ webView: WKWebView, context: Context) {}
private func makeVisitorCookie() -> HTTPCookie {
let properties: [HTTPCookiePropertyKey: Any] = [
.domain: ".example.com",
.path: "/",
.name: kameleoonCookieName,
.value: kameleoonClient.visitorCode,
.secure: true,
.expires: Date(timeIntervalSinceNow: 60 * 60 * 24 * 365)
]
return HTTPCookie(properties: properties)!
}
}
```
```swift theme={null}
struct WebView: View {
let url: URL
let kameleoonClient: KameleoonClient
private let websiteDataStore: WKWebsiteDataStore
private let kameleoonCookieName = "kameleoonVisitorCode"
@State private var page: WebPage
init(url: URL, kameleoonClient: KameleoonClient) {
self.url = url
self.kameleoonClient = kameleoonClient
let websiteDataStore = WKWebsiteDataStore.default()
var configuration = WebPage.Configuration()
configuration.websiteDataStore = websiteDataStore
self.websiteDataStore = websiteDataStore
_page = State(initialValue: WebPage(configuration: configuration))
}
var body: some View {
WebView(page)
.webViewBackForwardNavigationGestures(.enabled)
.task(id: url) {
let cookieStore = websiteDataStore.httpCookieStore
let properties: [HTTPCookiePropertyKey: Any] = [
.domain: ".example.com",
.path: "/",
.name: kameleoonCookieName,
.value: kameleoonClient.visitorCode,
.secure: true
]
if let cookie = HTTPCookie(properties: properties) {
await cookieStore.setCookie(cookie)
}
page.load(URLRequest(url: url))
}
}
}
```
### Apple privacy compliance
Starting May 1st, 2024, Apple requires apps that include a third-party SDK, such as the Kameleoon iOS SDK, that include a privacy manifest file. The latest version of the SDK is code-signed, compliant, and includes a valid manifest file with the SDK. No action is required if you're using the Kameleoon iOS SDK version 4.2 or later.
## Reference
This is the full reference documentation for the Kameleoon iOS (Swift) SDK.
### Initialization
Once you have [installed the SDK](#installation) in your application, you must initialize Kameleoon. All of your application's interactions with the SDK, such as triggering an experiment, are accomplished using this Kameleoon client object.
#### create()
Call this method before any others to initialize the SDK. This method is in `KameleoonClientFactory`. `create()` creates an instance of `KameleoonClient` to manage all interactions between the SDK and your app.
You can customize the SDK's behavior (for example, the environment, the credentials) by providing a [configuration object](#additional-configuration). Otherwise, the SDK tries to find your configuration file and will use it instead.
```swift theme={null}
let visitorCode = "visitorCode"
let siteCode = "a8st4f59bj"
do {
// pass client configuration as an argument
let config = try KameleoonClientConfig(
clientId: "clientId", // optional
clientSecret: "clientSecret", // optional
refreshIntervalMinute: 15, // optional, 60 minutes by default
dataExpirationIntervalMinute: 60*24*365, // optional, `Date.distantFuture` by default
defaultTimeoutMillisecond: 10_000, // optional, 10_000 milliseconds by default
trackingIntervalMillisecond: 500, // optional, 1000 milliseconds by default
environment: "production", // optional
isUniqueIdentifier: false, // optional, false by default. Set to true if the visitorCode corresponds to your customer's unique userId.
networkDomain: "example.com", // optional, nil by default
defaultDataFile: "{...}", // optional, nil by default
activityTrackingIntervalMillisecond: 20_000 // optional, 15_000 milliseconds by default
)
let kameleoonClient = try KameleoonClientFactory.create(
siteCode: siteCode,
visitorCode: visitorCode, // optional
config: config // optional
)
} catch KameleoonError.visitorCodeInvalid {
// Provided visitor code is invalid
} catch KameleoonError.siteCodeIsEmpty {
// Indicates that provided site code is empty
} catch {
// Unexpected error occurred
}
do {
// read client configuration from a file 'kameleoon-client-swift.plist'
// visitor code isn't provided, so SDK generates a random visitor code which will be used in the future
let kameleoonClient = KameleoonClientFactory.create(siteCode: siteCode)
} catch KameleoonError.visitorCodeInvalid {
// Provided visitor code is invalid
} catch KameleoonError.siteCodeIsEmpty {
// Indicates that provided site code is empty
} catch {
// Unexpected error occurred
}
```
##### Parameters
| Name | Type | Description | Default |
| ----------------------------------- | ------------------------ | ----------------------------------------------------------------------------------------------------------------------------------------------------------------------------------------------------------------------------------------------------------- | ------- |
| siteCode required | `String` | A [unique key](/user-manual/faq#how-do-i-find-my-sitecode) identifying the Kameleoon project used with the SDK. | |
| visitorCode optional | `String?` | An optional visitor identifier. If available, use your internal **user ID**; otherwise, the SDK will generate one automatically. | `nil` |
| config optional | `KameleoonClientConfig?` | Optional SDK configuration. If provided, it is used instead of reading from an external [configuration file](#additional-configuration). If not provided, the SDK attempts to read the file, but if the file is missing, it falls back to default behavior. | `nil` |
##### Return value
| Type | Description |
| ----------------- | ------------------------------------------------------------------------------------------------------------------- |
| `KameleoonClient` | An instance of the `KameleoonClient` class that your app can then use to manage your experiments and feature flags. |
##### Exceptions thrown
| Type | Description |
| ----------------------------------- | ------------------------------------------------------------------------------------------------------------------- |
| `KameleoonError.visitorCodeInvalid` | Exception indicating that the provided visitor code is not valid. It is either empty or longer than 255 characters. |
| `KameleoonError.siteCodeIsEmpty` | Exception indicating that the specified site code is empty string which is invalid value. |
#### ready
For mobile SDKs, the Kameleoon Client's initialization is not immediate. The SDK needs to perform a server call to retrieve the current configuration for all active experiments. Check if the SDK is ready by calling this method before triggering an experiment. Alternatively, you can use the [`runWhenReady()`](#runwhenready) method with a callback.
```swift theme={null}
let ready = kameleoonClient.ready
```
##### Return value
| Name | Type | Description |
| ----- | ---- | ------------------------------------------------------------------------------------------------------ |
| ready | Bool | Boolean representing the status of the SDK (true if fully initialized, false if not ready to be used). |
#### runWhenReady()
* 🔄 *Performs an asynchronous request (if the configuration is outdated or missing)*
For mobile SDKs, the `KameleoonClient` cannot initialize immediately, as it needs to perform a server call to retrieve the current configuration for all feature flags. Use the [`runWhenReady()`](#runwhenready) method to wait until the client is ready for use. Additionally, you can set a maximum timeout period to control how long the client will wait before it becomes ready.
If `ready=true`, the `KameleoonClient` is fully initialized, and feature flags will be evaluated and assigned their respective variations. If the result is `false` or a timeout occurs, the initialization will not complete.
The callback or asynchronous code should handle applying the reference variation, as a timeout will exclude the user from the feature flag.
Since the initial configuration may require a server call, this mechanism is asynchronous. Therefore, you should either:
* Provide a `completion` callback as an argument to the method to ensure you are notified when the `KameleoonClient` is fully initialized and ready for use.
* Use asynchronous operations.
```swift theme={null}
func applyRecommendedProductsVariation() {
let defaultValue = 5 // Default control number for recommended products
kameleoonClient.runWhenReady(timeoutMilliseconds: 1000) { ready in
guard ready else {
applyVariation(recommendedProductsNumber: defaultValue)
return
}
let variation = try? kameleoonClient.getVariation(featureKey: "featureKey")
let recommendedProductsNumber = variation.variables["recommendedProductsNumber"]?.value as? Int ?? defaultValue
applyVariation(recommendedProductsNumber: recommendedProductsNumber)
}
}
```
##### Arguments
| Name | Type | Description | Default |
| ------------------------------------------- | ---------------- | ------------------------------------------------------------------------------------------------------------------------------------------------------------------ | ---------------------------------------------------------------------------------------------------- |
| timeoutMilliseconds optional | `Int` | Timeout for the initialization process | [`defaultTimeoutMillisecond`](#create) or [`default_timeout_millisecond`](#additional-configuration) |
| callback required | `(Bool) -> Void` | Callback object. It is a lambda expression that will get a `Bool` argument representing whether the `KameleoonClient` became ready before the timeout was reached. | |
A common mistake is calling `async` functions with `try?` or inside a **nested** `do-catch` block **without rethrowing `CancellationError`**. This can interfere with task cancellation, causing unexpected behavior.
To ensure correct task cancellation, avoid using `try?` or `do-catch` around `async` functions unless you explicitly rethrow `CancellationError`.
```swift theme={null}
func applyRecommendedProductsVariation() async throws {
let defaultValue = 5 // Default control number for recommended products
try await kameleoonClient.runWhenReady(timeoutMilliseconds: 1000)
let variation = try kameleoonClient.getVariation(featureKey: "featureKey")
let recommendedProductsNumber = variation.variables["recommendedProductsNumber"]?.value as? Int ?? defaultValue
applyVariation(recommendedProductsNumber: recommendedProductsNumber)
}
```
##### Parameters
| Name | Type | Description | Default |
| ------------------------------------------- | ----- | -------------------------------------- | ---------------------------------------------------------------------------------------------------- |
| timeoutMilliseconds optional | `Int` | Timeout for the initialization process | [`defaultTimeoutMillisecond`](#create) or [`default_timeout_millisecond`](#additional-configuration) |
##### Errors thrown
| Type | Description |
| ---------------------------- | --------------------------------------------------------------- |
| `KameleoonError.sdkNotReady` | Exception indicating that the SDK is not fully initialized yet. |
### Feature flags and variations
#### isFeatureActive()
* *📨 Sends Tracking Data to Kameleoon (depending on the `track` parameter)*
This method was previously called `activateFeature`, which was removed in SDK version `4.0.0`.
To activate a feature toggle, call this method. `isFeatureActive()` accepts `featureKey` as a required argument to check if the specified feature will be active for a visitor.
If a visitor has never been associated with this feature flag, this method returns a random boolean value (`true` if the user should be shown this feature, otherwise `false`). If the visitor is already registered with this feature flag, the method returns the previous `featureFlag` value.
Ensure you implement error handling as shown in the example code to catch potential errors.
Kameleoon uses tracking to count sessions and visitors when you call certain methods, such as `isFeatureActive()`, `getVariation()` or `getVariations()`.
Use the default `true` value for the `track` parameter when you expose visitors to a variation and need to count them. Set the `track` parameter to `false` only if you call these methods before you expose visitors.
For example, if you call `getVariations()` to retrieve all variations before you expose visitors, set the `track` parameter to `false`. This setting prevents Kameleoon from prematurely counting a session. You can then trigger tracking later when you explicitly expose the visitor.
Kameleoon sends tracking data every second by default. You can configure this interval up to five seconds using the tracking interval configuration option. Kameleoon groups tracking events into a single session as long as the interval between events is less than 30 minutes. If more than 30 minutes elapse between tracking events, Kameleoon counts the events as separate sessions. A visit appears in your reports 30 minutes after the last recorded event in the session.
```swift theme={null}
let featureKey = "new_checkout"
var hasNewCheckout = false
do {
hasNewCheckout = try kameleoonClient.isFeatureActive(featureKey: featureKey)
// disabling tracking
hasNewCheckout = kameleoonClient.isFeatureActive(featureKey: featureKey, track: false);
} catch {
switch error {
case KameleoonError.sdkNotReady:
// Exception indicating that the SDK has not completed its initialization yet.
hasNewCheckout = false
case KameleoonError.Feature.notFound:
// The feature key is not in the configuration file that has been fetched by the SDK.
hasNewCheckout = false
default:
// Any other error.
hasNewCheckout = false
}
}
if hasNewCheckout
{
// Implement new checkout code here
}
```
The `isFeatureActive()` method evaluates the served variant, not the master flag state. If you exclude rules, the method uses the **Then, for everyone else serve** default state. If you select **Off** for this default state, the method always returns `false` even when the master feature flag is **On**.
##### Arguments
| Name | Type | Description |
| ---------- | -------- | ------------------------------------------------------------------------------------------- |
| featureKey | `String` | The key of the feature you want to expose to a user. This field is required. |
| track | `Bool` | An optional parameter to enable or disable feature evaluation tracking (`true` by default). |
##### Return value
| Type | Description |
| ------ | -------------------------------------------------------- |
| `Bool` | Value of the feature that is registered for the visitor. |
##### Errors thrown
| Type | Description |
| --------------------------------- | -------------------------------------------------------------------------------------------------------------------------------------------------------------------------------------------------------------------------------------------------------------------------------------------- |
| `KameleoonError.sdkNotReady` | Exception indicating that the SDK is not fully initialized. |
| `KameleoonError.Feature.notFound` | Exception indicating that the requested feature ID has not been found in the SDK's internal configuration. This exception usually means that the feature flag has not yet been activated on Kameleoon's side (but code implementing the feature is already deployed in the web-application). |
#### getVariation()
* 📨 *Sends Tracking Data to Kameleoon (depending on the `track` parameter)*
Retrieves the [`Variation`](#variation) assigned to a given visitor for a specific feature flag.
This method takes a `visitorCode` and `featureKey` as mandatory arguments. The `track` argument is optional and defaults to `true`.
It returns the assigned `Variation` for the visitor. If the visitor is not associated with any feature flag rules, the method returns the default `Variation` for the given feature flag.
Ensure that proper error handling is implemented in your code to manage potential exceptions.
The default variation refers to the variation assigned to a visitor when they do not match any predefined delivery rules for a feature flag. In other words, it is the fallback variation applied to all users who are not targeted by specific rules. It's represented as the variation in the "Then, for everyone else..." section in a management interface.
```swift theme={null}
let featureKey = "featureKey"
var variation: Types.Variation?
do {
variation = try kameleoonClient.getVariation(featureKey: featureKey)
// disabling tracking
variation = kameleoonClient.getVariation(featureKey: featureKey, track: false);
} catch {
switch error {
case KameleoonError.sdkNotReady:
// Exception indicating that the SDK has not completed its initialization yet.
case KameleoonError.Feature.notFound:
// The feature key is not in the configuration file that has been fetched by the SDK.
case KameleoonError.Feature.environmentDisabled:
// The feature flag is disabled for the environment.
default:
// Any other error.
}
}
let title = variation?.variables["title"].value
switch variation?.key {
case "on":
// Main variation key is selected for visitorCode
case "alternative_variation":
// Alternative variation key
default:
// Default variation key
}
```
##### Parameters
| Name | Type | Description | Default |
| ------------------------------------- | -------- | ------------------------------------------------------------------------------ | ------- |
| `visitorCode` required | `String` | Unique identifier of the visitor. | |
| `featureKey` required | `String` | Key of the feature you want to expose to a visitor. | |
| `track` optional | `Bool` | An optional parameter to enable or disable tracking of the feature evaluation. | `true` |
##### Return value
| Type | Description |
| ----------- | ------------------------------------------------------------------------------------- |
| `Variation` | An assigned [`Variation`](#variation) to a given visitor for a specific feature flag. |
##### Errors thrown
| Type | Description |
| -------------------------------------------- | --------------------------------------------------------------------------------------------------------------------------------------------------------------------------------------------------------------------------------------------------------------------- |
| `KameleoonError.visitorCodeInvalid` | Exception indicating that the provided visitor code is not valid. It is either empty or longer than 255 characters. |
| `KameleoonError.Feature.notFound` | Exception indicating that the requested feature key wasn't found in the internal configuration of the SDK. This usually means that the feature flag is not activated in the Kameleoon app (but code implementing the feature is already deployed in the application). |
| `KameleoonError.Feature.environmentDisabled` | Exception indicating that feature flag is disabled for the visitor's current environment (for example, production, staging, or development). |
#### getVariations()
* 📨 *Sends Tracking Data to Kameleoon (depending on the `track` parameter)*
Retrieves a map of [`Variation`](#variation) objects assigned to a given visitor across all feature flags.
This method iterates over all available feature flags and returns the assigned `Variation` for each flag associated with the specified visitor. It takes `onlyActive` and `track` as optional arguments.
* If `onlyActive` is set to `true`, the method `getVariations()` will return feature flags variations provided the user is not bucketed with the `off` variation.
* The `track` parameter controls whether or not the method will track the variation assignments. By default, it is set to `true`. If set to `false`, the tracking will be disabled.
The returned map consists of feature flag keys as keys and their corresponding `Variation` as values. If no variation is assigned for a feature flag, the method returns the default `Variation` for that flag.
Proper error handling should be implemented to manage potential exceptions.
The default variation refers to the variation assigned to a visitor when they do not match any predefined delivery rules for a feature flag. In other words, it is the fallback variation applied to all users who are not targeted by specific rules. It's represented as the variation in the "Then, for everyone else..." section in a management interface.
```swift theme={null}
do {
let variations = kameleoonClient.getVariations();
// only active variations
let variations = kameleoonClient.getVariations(onlyActive: true);
// disable tracking
let variations = kameleoonClient.getVariations(track: false);
} catch KameleoonError.sdkNotReady {
// Exception indicating that the SDK has not completed its initialization yet.
}
```
##### Parameters
| Name | Type | Description | Default |
| ------------------------------------ | ------ | ----------------------------------------------------------------------------------------------------------------- | ------- |
| `onlyActive` optional | `Bool` | An optional parameter indicating whether to return variations for active (`true`) or all (`false`) feature flags. | `false` |
| `track` optional | `Bool` | An optional parameter to enable or disable tracking of the feature evaluation. | `true` |
##### Return value
| Type | Description |
| ------------------------- | ----------------------------------------------------------------------------------------------------------------------------------- |
| `Dict` | Map that contains the assigned [`Variation`](#variation) objects of the feature flags using the keys of the corresponding features. |
##### Errors thrown
| Type | Description |
| ---------------------------- | ---------------------------------------------------- |
| `KameleoonError.sdkNotReady` | Indicates that the SDK is not yet fully initialized. |
#### setForcedVariation()
The method allows you to programmatically assign a specific [`Variation`](#variation) to a user, bypassing the standard evaluation process. This is especially valuable for controlled experiments where the usual evaluation logic is not required or must be skipped. It can also be helpful in scenarios like debugging or custom testing.
When a **forced** variation is set, it overrides Kameleoon's real-time evaluation logic. Processes like segmentation, targeting conditions, and algorithmic calculations are skipped. To preserve segmentation and targeting conditions during an experiment, set `forceTargeting=false` instead.
A forced variation is treated the same as an evaluated variation. It is tracked in analytics and stored in the user context like any standard evaluated variation, ensuring consistency in reporting.
The method may throw exceptions under certain conditions (e.g., invalid parameters, user context, or internal issues). Proper exception handling is essential to ensure that your application remains stable and resilient.
```swift theme={null}
let experimentId = 9516
do {
// Forcing the variation "on" for the experiment 9516 for the visitor
try kameleoonClient.setForcedVariation(experimentId: experimentId, variationKey: "on")
// Forcing the variation "on" while preserving segmentation and targeting conditions during the experiment
try kameleoonClient.setForcedVariation(experimentId: experimentId, variationKey: "on", forceTargeting: false)
// Resetting the forced variation for the experiment 9516 for the visitor
try kameleoonClient.setForcedVariation(experimentId: experimentId, variationKey: nil);
} catch {
// Handling the KameleoonError, KameleoonError.Feature and common Error
}
```
##### Parameters
| Name | Type | Description | Default |
| ---------------------------------------- | -------- | --------------------------------------------------------------------------------------------------------------------------------------------------------------------------- | ------- |
| `experimentId` required | `Int` | **Experiment Id** that will be targeted and selected during the evaluation process. | |
| `variationKey` required | `String` | **Variation Key** corresponding to a `Variation` that should be forced as the returned value for the experiment. If the value is `nil`, the forced variation will be reset. | |
| `forceTargeting` optional | `Bool` | Indicates whether targeting for the experiment should be forced and skipped (`true`) or applied as in the standard evaluation process (`false`). | `true` |
##### Errors thrown
| Type | Description |
| ------------------------------------------- | ----------------------------------------------------------------------------------------------------------------------------------------------------------------------------------------------------------------------------------------------------- |
| `KameleoonError.sdkNotReady` | Indicates that the SDK is not yet fully initialized. |
| `KameleoonError.Feature.experimentNotFound` | Exception indicating that the requested experiment id has not been found in the SDK's internal configuration. This is usually normal and means that the rule's corresponding experiment has not yet been activated on Kameleoon's side. |
| `KameleoonError.Feature.variationNotFound` | Exception indicating that the requested variation key(id) has not been found in the internal configuration of the SDK. This is usually normal and means that the variation's corresponding experiment has not yet been activated on Kameleoon's side. |
In most cases, only the basic error, `KameleoonError/KameleoonError.Feature`, needs to be handled, as demonstrated in the example. However, if different types of errors require a response, handle each one separately based on specific requirements. Additionally, for enhanced reliability, general language errors can be handled by including `Error`.
#### evaluateAudiences()
* 📨 *Sends Tracking Data to Kameleoon*
This method evaluates visitors against all available Audiences Explorer segments and tracks those who match.
`evaluateAudiences()` should be called **after all relevant visitor data has been set or updated**, and **just before** getting a feature variation or checking a feature flag. This approach ensures that the visitor is evaluated against the most current data available, allowing for accurate audience assignment based on all criteria.
After calling this method, you can perform a detailed analysis of segment performance in Audiences Explorer.
```swift theme={null}
do {
try kameleoonClient.evaluateAudiences();
} catch {
// Handling the errors
}
```
##### Errors thrown
| Type | Description |
| ---------------------------- | ---------------------------------------------------- |
| `KameleoonError.sdkNotReady` | Indicates that the SDK is not yet fully initialized. |
In most cases, only the basic error, `KameleoonError/KameleoonError.Feature`, needs to be handled, as demonstrated in the example. However, if different types of errors require a response, handle each one separately based on specific requirements. Additionally, for enhanced reliability, general language errors can be handled by including `Error`.
#### getFeatureList()
If you want to iterate over all feature flags and call [`getVariation()`](#getvariation) on each, use the [`getVariations()`](#getvariations) method instead.
Returns a list of feature flag keys currently available for the SDK.
```swift theme={null}
let allFeatureList = kameleoonClient.getFeatureList()
```
##### Return value
| Type | Description |
| ---------- | ------------------------- |
| `[String]` | List of feature flag keys |
#### getDataFile()
To evaluate all feature flags, use [`getVariations()`](#getvariations). This method is more efficient than calling `DataFile` and iterating through flags with [`getVariation()`](#getvariation).
Returns the current SDK configuration as a [`DataFile`](#datafile) object.
```swift theme={null}
do {
let dataFile = try kameleoonClient.getDataFile()
} catch KameleoonError.sdkNotReady {
// Exception indicates that the SDK has not completed its initialization yet.
} catch {
// Handling the KameleoonError, KameleoonError.Feature and common Error
}
```
##### Return value
| Type | Description |
| ---------- | ------------------------------------------------------------ |
| `DataFile` | The [`DataFile`](#datafile) containing the SDK configuration |
##### Errors thrown
| Type | Description |
| ---------------------------- | ---------------------------------------------------- |
| `KameleoonError.sdkNotReady` | Indicates that the SDK is not yet fully initialized. |
### Goals
#### trackConversion()
* 📨 *Sends Tracking Data to Kameleoon*
Use this method to track conversions. This method requires `goalId` to track conversion on this particular [goal](/user-manual/assets/goals/create-a-goal). In addition, this method also accepts `revenue`, `metadata` and `negative` arguments.
The `trackConversion()` method doesn't return any value. This method is non-blocking as the server call is made asynchronously.
```swift theme={null}
let goalId = 83023
kameleoonClient.trackConversion(goalId: goalId, revenue: 10.0)
kameleoonClient.trackConversion(goalId: goalId, revenue: 10.0, metadata: CustomData(id: 1, values: "metadata"))
```
##### Parameters
| Name | Type | Description | Default |
| ---------------------------------- | ------------------------------ | -------------------------------------------------------------------------------------------------------------------------------- | ------- |
| `goalId` required | `Int` | ID of the goal. | |
| `revenue` optional | `Double` | Revenue of the conversion. | `0` |
| `negative` optional | `Bool` | Defines if the revenue is positive or negative. | `false` |
| `metadata` optional | `CustomData... / [CustomData]` | Metadata of the conversion. [Must be defined beforehand in the Kameleoon App](/user-manual/assets/goals/create-a-goal#metadata). | `[]` |
metadata values are accessible through [raw data exports](/user-manual/experiment-analytics/analyze-results/results-page/results-page-actions#Export) and [the results page](/user-manual/experiment-analytics/analyze-results/data-and-metrics/goal-metadata).
If the `metadata` parameter is provided, Kameleoon will use these specified values for the current conversion instead of what was previously collected using the [`addData()`](#adddata) method. If the parameter is omitted, Kameleoon will use the last tracked values for those [`CustomData`](#customdata) prior to the conversion and within the same visit.
Kameleoon will only consider the metadata values that are explicitly passed as parameters to the `trackConversion()` method.
In the example below, Kameleoon will associate the conversion only with the custom data value explicitly provided as a parameter (here: index 5 with the value 'Amex Credit Card').
```swift theme={null}
kameleoonClient.addData([CustomData(id: 5, values: "Credit Card"), CustomData(id: 9, "Express Delivery")]);
kameleoonClient.trackConversionWithOptParams(goalId: 1000, metadata: CustomData(5, "Amex Credit Card"));
```
### Events
#### updateConfigurationHandler()
The `updateConfigurationHandler()` method allows you to handle the event when configuration has updated data. It takes one input parameter, **handler**. The handler that will be called when the configuration is updated using a real-time configuration event.
```swift theme={null}
kameleoonClient.updateConfigurationHandler {
// configuration was updated
}
```
##### Parameters
| Name | Type | Description |
| --------- | ------------------------ | -------------------------------------------------------------------------------------------------------- |
| `handler` | `Optional<(() -> Void)>` | The handler that will be called when the configuration is updated using a real-time configuration event. |
### Visitor data
#### visitorCode
Returns unique visitor code used in SDK.
```swift theme={null}
let visitorCode = kameleoonClient.visitorCode
```
##### Return value
| Type | Description |
| -------- | ------------------------------------------------------ |
| `String` | String representing a unique visitor code used in SDK. |
#### addData()
The `addData()` method adds [targeting data](#data-types) to storage so other methods can use the data to decide whether or not to target the current visitor.
The `addData()` method does not return any value and does not interact with Kameleoon back-end servers on its own. Instead, all the declared data is saved for future transmission using the [`flush()`](#flush) method. This approach reduces the number of server calls made, as the data is typically grouped into a single server call that is triggered by the `flush()`.
The [`trackConversion()`](#trackconversion) method also sends out any previously associated data, just like the `flush()`. The same holds true for [`getVariation()`](#getvariation) and [`getVariations()`](#getvariations) methods if an experimentation rule is triggered.
Each visitor can only have one instance of associated data for most data types. However, [`CustomData`](#customdata) is an exception. Visitors can have one instance of associated `CustomData` per index.
```swift theme={null}
// Add a single data item (tracked by default)
kameleoonClient.addData(CustomData(index: 1, values: "value"))
// Add multiple data items (tracked by default)
kameleoonClient.addData(
CustomData(index: 20, values: "value"),
Geolocation(country: "France")
)
// Add multiple data items stored locally for targeting only (not sent to the Kameleoon Data API)
kameleoonClient.addData(
track: false,
CustomData(index: 20, values: "value"),
Geolocation(country: "France")
)
```
##### Parameters
| Name | Type | Description | Default value |
| ------------------------------- | ------------------------------------ | -------------------------------------------------------------------------------------------------------------------------------------------------------------------------------------------- | ------------- |
| `track` optional | `Bool` | Specifies whether the added data is eligible for tracking. When set to `false`, the data is stored locally and used only for targeting evaluation; it is not sent to the Kameleoon Data API. | `true` |
| `data` required | `KameleoonData... / [KameleoonData]` | Collection of Kameleoon data types. | |
#### flush()
* 📨 *Sends Tracking Data to Kameleoon*
The `flush()` method collects the Kameleoon data linked to the visitor. It then sends a tracking request, along with all data added using the `addData` method that has not yet been sent using one of [these methods](/developer-docs/feature-experimentation/technical-reference/faq-global#when-does-the-sdk-send-a-tracking-request-for-analytics). `flush()` is non-blocking as the server call is made asynchronously.
`flush` provides control over when data associated with a given `visitorCode` is sent to the servers. For instance, if `addData()` is called a dozen times, sending data to the server each time `addData()` is invoked would be inefficient. Call `flush()` once.
```swift theme={null}
kameleoonClient.addData(CustomData(id: 20, values: "true", "20"))
kameleoonClient.addData(Conversion(goalId: 32, revenue: 10.0, negative: false))
kameleoonClient.flush() // Interval tracking (most performant way for tracking)
kameleoonClient.flush(instant: true) // Instant tracking
```
##### Parameters
| Name | Type | Description |
| ------- | ------ | ------------------------------------------------------------------------------------------------------------------------------------------------------------------------------------------------------------------------------------------------------------------------------------------------------------------------------------------------------------------------------------------- |
| instant | `Bool` | Boolean flag indicating whether the data should be sent instantly (`true`) or according to the default tracking interval (`false`) set with the SDK parameter `trackingIntervalMillisecond` in [`KameleoonClientConfig`](/developer-docs/sdks/mobile-sdks/ios-sdk#initialize-the-kameleoon-client) or [`tracking_interval_millisecond`](#additional-configuration). This field is optional. |
##### Errors thrown
| Type | Description |
| ---------------------------- | ------------------------------------------------------------------- |
| `KameleoonError.sdkNotReady` | Error indicating that the SDK has not completed its initialization. |
#### getRemoteData()
* 🔄 *Performs an asynchronous request*
This method was previously called `retrieveDataFromRemoteSource`, which was removed in SDK version `4.0.0` release.
Use this method to retrieve data from a remote Kameleoon server based on the active `siteCode` and the `key` argument (or the active `visitorCode` if the `key` is omitted). The `visitorCode` and `siteCode` are specified in `KameleoonClientFactory.create()`. Data can be stored quickly and conveniently on highly scalable remote servers using the Kameleoon Data API. The application can then retrieve the data using this method.
Since a server call is required, this mechanism is asynchronous. Therefore, you should either:
* Provide a `completion` callback as an argument to the method to ensure you are notified when the data has been successfully fetched.
* Use asynchronous operations.
```swift theme={null}
struct Test1: Decodable {
let value: String
private enum CodingKeys: String, CodingKey {
case value = "json_value"
}
}
kameleoonClient.getRemoteData(key: "test") { (result: Result) in
switch result {
case .success(let test1):
// test1 is a decoded value for Test1 type
case .failure:
// error includes information about request's failure
}
}
kameleoonClient.getRemoteData(key: "test") { (data: Result) in
switch result {
case .success(let data):
if let json = try JSONSerialization.jsonObject(with: data) as? [String: Any] {
print(json)
}
case .failure:
// error includes information about request's failure
}
}
```
##### Parameters
| Name | Type | Description | Default |
| ---------------------------------- | --------------------------------------- | --------------------------------------------------------- | ------- |
| key optional | `String` | The key that the data you want to get is associated with. | `""` |
| completion required | `(Result) -> Void` | The callback that processes the received data. | |
A common mistake is calling `async` functions with `try?` or inside a **nested** `do-catch` block **without rethrowing `CancellationError`**. This can interfere with task cancellation, causing unexpected behavior.
To ensure correct task cancellation, avoid using `try?` or `do-catch` around `async` functions unless you explicitly rethrow `CancellationError`.
```swift theme={null}
struct Test1: Decodable {
let value: String
private enum CodingKeys: String, CodingKey {
case value = "json_value"
}
}
Task {
do {
let test1: Test1 = try await kameleoonClient.getRemoteData(key: "test")
// test1 is a decoded value for Test1 type
} catch {
// handle error
}
}
Task {
do {
let data: Data = try await kameleoonClient.getRawRemoteData(key: "test")
if let json = try JSONSerialization.jsonObject(with: data) as? [String: Any] {
print(json)
}
} catch {
// handle error
}
}
```
##### Parameters
| Name | Type | Description | Default |
| --------------------------- | -------- | --------------------------------------------------------- | ------- |
| key optional | `String` | The key that the data you want to get is associated with. | `""` |
##### Return Value
| Type | Description |
| ----------- | ---------------------------------------------------------------------------------------------------------------------- |
| `Decodable` | A [`Decodable`](https://developer.apple.com/documentation/swift/decodable) object containing the parsed fetched value. |
##### Errors thrown
| Type | Description |
| ------- | ------------------------------------------------------ |
| `Error` | Indicates that the request has failed due to an error. |
#### getRemoteVisitorData()
* 🔄 *Performs an asynchronous request*
`getRemoteVisitorData()` is an asynchronous method for retrieving Kameleoon Visits Data for the visitor from the Kameleoon Data API. The method adds the data to storage for other methods to use when making targeting decisions.
Data obtained using this method plays an important role when you want to:
* use data collected from other devices.
* access a user's history, such as custom data collected during previous visits.
Read [this article](/developer-docs/feature-experimentation/targeting-and-segmentation/native-segmentation) for a better understanding of possible use cases.
By default, `getRemoteVisitorData()` automatically retrieves the latest stored custom data with `scope=Visitor` and attaches them to the visitor without the need to call the method `addData()`. It is particularly useful for [synchronizing custom data between multiple devices](/developer-docs/sdks/web-sdks/nodejs-sdk#synchronizing-custom-data-across-devices).
Checking only for failed results is recommended. However, if necessary, it can be verified that the data has been added to the visitor and is available for targeting purposes (or for debugging, though using [logging](#logging) is better for debugging). Additionally, data can be managed manually if the `addData=false` parameter is passed.
Since a server call is required, this mechanism is asynchronous. Therefore, you should either:
* Provide a `completion` callback as an argument to the method to ensure you are notified when the data has been successfully fetched and added to the visitor.
* Use asynchronous operations.
```swift theme={null}
// Fetch visitor data and automatically add it
kameleoonClient.getRemoteVisitorData { result in
switch result {
case .success(let visitorData):
// visitorData includes all retrieved data that was added for the visitor
case .failure:
// Handle the error, which contains information about the request failure
}
}
// Fetch visitor data without automatically adding it
kameleoonClient.getRemoteVisitorData(addData: false) { result in
switch result {
case .success(let visitorData):
// visitorData includes all retrieved data that was added for the visitor
case .failure:
// Handle the error, which contains information about the request failure
}
}
// Fetch a custom list of data types
let filter = Types.RemoteVisitorDataFilter(
previousVisitAmount: 25, currentVisit: true, conversions: true, experiments: true, geolocation: true
)
kameleoonClient.getRemoteVisitorData(filter: filter) { result in
switch result {
case .success(let visitorData):
// visitorData includes all retrieved data that was added for the visitor
case .failure:
// Handle the error, which contains information about the request failure
}
}
```
##### Parameters
| Name | Type | Description | Default |
| ---------------------------------- | ------------------------------------------ | ---------------------------------------------------------------------------------------------------------------------------------------------------------------- | --------------------------------- |
| filter optional | `RemoteVisitorDataFilter` | Filter that selects which data should be retrieved from visit history. By default, the method retrieves `CustomData` from the current and latest previous visit. | `RemoteVisitorDataFilter.default` |
| addData optional | `Boolean` | A boolean indicating whether the method should automatically add retrieved data for a visitor. | `true` |
| completion required | `(Result<[KameleoonData], Error>) -> Void` | The callback that processes the received visitor data. | |
A common mistake is calling `async` functions with `try?` or inside a **nested** `do-catch` block **without rethrowing `CancellationError`**. This can interfere with task cancellation, causing unexpected behavior.
To ensure correct task cancellation, avoid using `try?` or `do-catch` around `async` functions unless you explicitly rethrow `CancellationError`.
```swift theme={null}
// Fetch visitor data and automatically add it
Task {
do {
let visitorData = try await kameleoonClient.getRemoteVisitorData()
// visitorData includes all retrieved data that was added for the visitor
} catch {
// Handle the error, which contains information about the request failure
}
}
// Fetch visitor data without automatically adding it
Task {
do {
let visitorData = try await kameleoonClient.getRemoteVisitorData(addData: false)
// visitorData includes all retrieved data but was not added for the visitor
} catch {
// Handle the error, which contains information about the request failure
}
}
// Fetch a custom list of data types
Task {
do {
let filter = Types.RemoteVisitorDataFilter(
previousVisitAmount: 25, currentVisit: true, conversions: true, experiments: true, geolocation: true
)
let visitorData = try await kameleoonClient.getRemoteVisitorData(filter: filter)
// visitorData includes all retrieved data based on the specified filter
} catch {
// Handle the error, which contains information about the request failure
}
}
```
##### Parameters
| Name | Type | Description | Default |
| ------------------------------- | ------------------------- | ---------------------------------------------------------------------------------------------------------------------------------------------------------------- | --------------------------------- |
| filter optional | `RemoteVisitorDataFilter` | Filter that selects which data should be retrieved from visit history. By default, the method retrieves `CustomData` from the current and latest previous visit. | `RemoteVisitorDataFilter.default` |
| addData optional | `Boolean` | A boolean indicating whether the method should automatically add retrieved data for a visitor. | `true` |
##### Return Value
| Type | Description |
| ----------------- | ----------------------------------------------------- |
| `[KameleoonData]` | An array containing the fetched data for the visitor. |
##### Errors thrown
| Type | Description |
| ------- | ------------------------------------------------------ |
| `Error` | Indicates that the request has failed due to an error. |
##### Using parameters with RemoteVisitorDataFilter
The `getRemoteVisitorData()` method offers flexibility by allowing you to define various parameters when retrieving data on visitors. Whether you're targeting based on goals, experiments, or variations, the same approach applies across all data types.
For example, suppose you want to retrieve data on visitors who completed a goal "Order transaction". You can specify parameters within the `getRemoteVisitorData()` method to refine your targeting. For instance, if you want to target only users who converted on the goal in their last five visits, you can set the `previousVisitAmount` parameter to `5` and `conversions` to `true`.
The flexibility shown in this example is not limited to goal data. You can use parameters within the `getRemoteVisitorData()` method to retrieve data on a variety of visitor behaviors.
Here is the list of available `Types.RemoteVisitorDataFilter` options:
| Name | Type | Description | Default |
| ------------------------------------------- | ------ | -------------------------------------------------------------------------------------------------------------------------------------------------------------------------------------------------------------------------------------------------------------------------------------------------------------------------------------------------------- | ------- |
| previousVisitAmount optional | `Int` | Number of previous visits to retrieve data from. Number between `1` and `25` | `1` |
| currentVisit optional | `Bool` | If true, current visit data will be retrieved | `true` |
| customData optional | `Bool` | If true, custom data will be retrieved. | `true` |
| conversions optional | `Bool` | If true, conversion data will be retrieved. | `false` |
| experiments optional | `Bool` | If true, experiment data will be retrieved. | `false` |
| geolocation optional | `Bool` | If true, geolocation data will be retrieved. | `false` |
| kcs optional | `Bool` | If true, Kameleoon Conversion Score (KCS) will be retrieved. Requires the [AI Predictive Targeting add-on](/user-manual/ai-predictive-targeting/target-users-based-on-likelihood-to-convert) | `false` |
| visitorCode optional | `Bool` | If true, Kameleoon will retrieve the `visitorCode` from the most recent visit and use it for the current visit. `visitorCode` is necessary if you want to ensure that the visitor, identified by their `visitorCode`, always receives the same variation across visits for [Cross-device experimentation](/developer-docs/cross-device-experimentation). | `true` |
| personalization optional | `Bool` | If true, personalization data will be retrieved. `personalization` is required for the personalization condition | `false` |
| cbs optional | `Bool` | If true, Contextual Bandit score data will be retrieved. | `false` |
#### getVisitorWarehouseAudience()
* 🔄 *Performs an asynchronous request*
Retrieves all audience data associated with the visitor in your data warehouse. The optional `warehouseKey` parameter is typically your internal user ID. The `customDataIndex` parameter corresponds to the Kameleoon custom data that Kameleoon uses to target your visitors. You can refer to the [warehouse targeting documentation](/user-manual/integrations/data-warehouses/bigquery/use-bigquery-as-a-source-audience-targeting) for additional details.
Since a server call is required, this mechanism is asynchronous. Therefore, you should either:
* Provide a `completion` callback as an argument to the method to ensure you are notified when the data has been successfully fetched and added to the visitor.
* Use coroutines for asynchronous handling.
Checking only for failed results is recommended. However, if necessary, it can be verified that the data has been added to the visitor and is available for targeting purposes (or for debugging, though using [logging](#logging) is better for debugging).
```swift theme={null}
// Fetch visitor warehouse audience data
kameleoonClient.getVisitorWarehouseAudience(customDataIndex: 10) { result in
switch result {
case .success(let customData):
// Data was added. You can access it from `customData`
case .failure:
// Handle the error, which contains information about the request failure
}
}
// Fetch visitor warehouse audience data with a specific warehouse key
kameleoonClient.getVisitorWarehouseAudience(
warehouseKey: "warehouseKey", customDataIndex: 10
) { result in
switch result {
case .success(let customData):
// Data was added. You can access it from `customData`
case .failure:
// Handle the error, which contains information about the request failure
}
}
```
##### Parameters
| Name | Type | Description | Default |
| --------------------------------------- | ------------------------------------- | ------------------------------------------------------------------------------------------------------- | ------- |
| warehouseKey optional | `String` | The unique key to identify the warehouse data (usually your internal user ID). | `""` |
| customDataIndex required | `Int` | An integer representing the index of the custom data you want to use to target your BigQuery Audiences. | |
| completion | `(Result) -> Void` | The callback that processes the received data. | |
A common mistake is calling `async` functions with `try?` or inside a **nested** `do-catch` block **without rethrowing `CancellationError`**. This can interfere with task cancellation, causing unexpected behavior.
To ensure correct task cancellation, avoid using `try?` or `do-catch` around `async` functions unless you explicitly rethrow `CancellationError`.
```swift theme={null}
// Fetch visitor warehouse audience data
Task {
do {
let customData = try await kameleoonClient.getVisitorWarehouseAudience(customDataIndex: 10)
// Data was added. You can access it from `customData`
} catch {
// Handle the error, which contains information about the request failure
}
}
// Fetch visitor warehouse audience data with a specific warehouse key
Task {
do {
let customData = try await kameleoonClient.getVisitorWarehouseAudience(
warehouseKey: "warehouseKey", customDataIndex: 10
)
// Data was added. You can access it from `customData`
} catch {
// Handle the error, which contains information about the request failure
}
}
```
##### Parameters
| Name | Type | Description | Default |
| --------------------------------------- | -------- | ------------------------------------------------------------------------------------------------------- | ------- |
| warehouseKey optional | `String` | The unique key to identify the warehouse data (usually your internal user ID). | `""` |
| customDataIndex required | `Int` | An integer representing the index of the custom data you want to use to target your BigQuery Audiences. | |
##### Return Value
| Type | Description |
| ------------ | ----------------------------------------------------------------------------------------------------------------------------------------- |
| `CustomData` | A [`CustomData`](#customdata) entry added for a visitor. Generally, you can ignore this value, but it may be useful for testing purposes. |
##### Errors thrown
| Type | Description |
| ------- | ------------------------------------------------------ |
| `Error` | Indicates that the request has failed due to an error. |
#### setLegalConsent()
You must use this method to specify whether the visitor has given legal consent to use their personal data. Setting the `legalConsent` parameter to `false` limits the types of data that you can include in tracking requests. This method helps you adhere to legal and regulatory requirements while responsibly managing visitor data. You can find more information on personal data in the [consent management policy](/user-manual/project-management/consent-management-policy).
##### Parameters
| Name | Type | Description |
| ------------ | ------- | ----------------------------------------------------------------------------------------------------------------------------------------------------------------------------------------------------------------------- |
| legalConsent | boolean | A boolean value representing the legal consent status. `true` indicates the visitor has given legal consent; `false` indicates the visitor has never provided, or has withdrawn, legal consent. This field is required. |
```swift theme={null}
kameleoonClient.setLegalConsent(true)
```
### Data types
This section lists the data types supported by Kameleoon. Several standard data types are provided, as well as the `CustomData` type for defining custom data types.
#### Conversion
The `Conversion` data set stored here can be used to filter experiment and personalization reports by any goal associated with it.
* Each visitor can have multiple `Conversion` objects.
* You can find the `goalId` in the Kameleoon app.
| Name | Type | Description | Default |
| ---------------------------------- | ------------------------------ | ----------------------------------------------- | ------- |
| `goalId` required | `Int` | ID of the goal. | |
| `revenue` optional | `Double` | Revenue of the conversion | `0` |
| `negative` optional | `Bool` | Defines if the revenue is positive or negative. | `false` |
| `metadata` optional | `CustomData... / [CustomData]` | Metadata of the conversion. | `[]` |
```swift theme={null}
kameleoonClient.addData(Conversion(goalId: 32, revenue: 10.0, negative: false))
kameleoonClient.addData(Conversion(goalId: 32, metadata: CustomData(id: 1, values: "metadata")))
```
#### CustomData
`CustomData` allows any type of data to be easily associated with each visitor. `CustomData` can then be used as a targeting condition in [segments](/user-manual/assets/segments/create-a-segment/) or as a filter/breakdown in experiment reports.
To learn more about custom data, please refer to this [article](/developer-docs/custom-data).
| Name | Type | Description | |
| ---------------------------------- | ------------------------- | --------------------------------------------------------------------------------------------------------------------------------------------------------------------------------------- | ------ |
| index/name required | `Int`/`String` | Index or Name of the custom data. **Either `index` or `name` must be provided** to identify the data. | |
| overwrite optional | `Bool` | Flag to explicitly control how the values are stored and how they appear in reports. [See more](/developer-docs/custom-data#default-logic-when-overwrite-parameter-is-false-or-omitted) | `true` |
| values required | `String...` or `[String]` | Values of the custom data to be stored. | |
* Each visitor is allowed only one `CustomData` for each unique `index`. Adding another `CustomData` with the same `index` will replace the existing `CustomData`.
* The custom data `index` can be found in the [Custom Data dashboard](/user-manual/assets/custom-data/manage-custom-data) under the “INDEX” column.
* To prevent the SDK from sending data with the selected index to Kameleoon servers for privacy reasons, enable the **Use this data only locally for targeting purposes** option when creating custom data.
* Adding a `CustomData` instance created with a name when the SDK instance configuration is not up to date or the name is not registered, will result in the data being ignored.
```swift theme={null}
kameleoonClient.addData(CustomData(index: 1, values: "value"))
// With several values
kameleoonClient.addData(CustomData(index: 1, values: "value 1", "value 2"))
// To set the 'overwrite' flag to false
kameleoonClient.addData(CustomData(index: 1, overwrite: false, values: ["first value", "second value"]))
// To use a name instead of the index
kameleoonClient.addData(CustomData(name: "my-custom-data", values: "value"))
```
#### Device
Since iOS SDK `4.14.0`, the `Device` is automatically detected based on the value of [`UIDevice.current.userInterfaceIdiom`](https://developer.apple.com/documentation/uikit/uiuserinterfaceidiom). However, you can still manually override it if needed.
Store information about the user's device.
| Name | Type | Description |
| ------ | ------ | ---------------------------------------------------------------------- |
| device | Device | List of devices: `phone`, `tablet`, `desktop`. This field is required. |
```swift theme={null}
try? kameleoonClient.addData(Device.desktop);
```
#### Geolocation
`Geolocation` contains the visitor's geolocation details.
| Name | Type | Description |
| ------------------------------------ | ---------------------- | ---------------------------------------------------------------------------------------------------------------- |
| `country` required | `String` | The country of the visitor. |
| `region` optional | `String?` | The region of the visitor. |
| `city` optional | `String?` | The city of the visitor. |
| `postalCode` optional | `String?` | The postal code of the visitor. |
| `latitude` optional | `Double?` | The latitude coordinate representing the location of the visitor. Coordinate number represents decimal degrees. |
| `longitude` optional | `Double?` | The longitude coordinate representing the location of the visitor. Coordinate number represents decimal degrees. |
* Each visitor can have only one `Geolocation`. Adding a second `Geolocation` overwrites the first one.
```swift theme={null}
kameleoonClient.addData(Geolocation(country: "France", region: "Île-de-France", city: "Paris"));
```
### Returned Types
#### DataFile
The `DataFile` contains the SDK configuration details.
It can be extended with additional information if required by clients. If you need more details, please contact your Customer Success Manager.
| Name | Type | Description |
| -------------- | ----------------------- | --------------------------------------------------------------------------------- |
| `featureFlags` | `[String: FeatureFlag]` | A map of [`FeatureFlag`](#featureflag) objects, keyed by feature flag keys. |
| `dateModified` | `Int` | The timestamp (in milliseconds) indicating when the `DataFile` was last modified. |
```swift theme={null}
// Retrieves the dictionary of feature flags from the DataFile.
// The dictionary is keyed by feature flag identifiers, with each value being a FeatureFlag object.
let featureFlags = dataFile.featureFlags
// Retrieves the last modification timestamp of the DataFile.
// The value is an Int representing milliseconds since the Unix epoch.
let dateModified = dataFile.dateModified
```
#### FeatureFlag
The `FeatureFlag` represents a set of properties that define a feature flag itself — for example, its [`Variations`](#variation), [`Rules`](#rule), environment status, and other related details.
It can be extended with additional information if required by clients. If you need more details, please contact your Customer Success Manager.
| Name | Type | Description |
| --------------------- | --------------------- | -------------------------------------------------------------------------- |
| `environmentEnabled` | `Bool` | Indicating whether the feature flag is enabled in the current environment. |
| `defaultVariationKey` | `String` | The key of the default variation associated with the feature flag. |
| `variations` | `[String: Variation]` | A map of `Variation` objects, keyed by variation keys. |
| `rules` | `[Rule]` | A list of `Rule` objects |
```swift theme={null}
// Check whether the feature flag is enabled in the current environment
let isEnvironmentEnabled = featureFlag.environmentEnabled
// Retrieve the key of the default variation
let defaultVariationKey = featureFlag.defaultVariationKey
// Retrieve the default variation object
let defaultVariation = featureFlag.defaultVariation
// Retrieve all variations of the feature flag as a map (key = variation key, value = Variation object)
let variations = featureFlag.variations
// Retrieve all targeting rules associated with the feature flag
let rules = featureFlag.rules
```
#### Rule
The `Rule` represents a set of properties that define a rule itself — for example, its [`Variations`](#variation).
It can be extended with additional information if required by clients. If you need more details, please contact your Customer Success Manager.
| Name | Type | Description |
| ------------ | --------------------- | ------------------------------------------------------ |
| `variations` | `[String: Variation]` | A map of `Variation` objects, keyed by variation keys. |
```swift theme={null}
// Retrieve all variations of the rule as a map (key = variation key, value = Variation object)
let variations = rule.variations
```
#### Variation
`Variation` contains information about the assigned variation to the visitor (or the default variation, if no specific assignment exists).
| Name | Type | Description |
| ------------ | -------------------- | ----------------------------------------------------------------------------------------------------------------------------------------------------------- |
| name | `String` | The name of the variation. |
| key | `String` | The unique key identifying the variation. |
| id | `Int` | The ID of the assigned variation (or `-1` if it's the default variation). |
| experimentId | `Int` | The ID of the experiment associated with the variation (or `-1` if default). |
| variables | `[String: Variable]` | A map containing the variables of the assigned variation, keyed by variable names. `variables` could be an empty collection if no variables are associated. |
* The `Variation` object provides details about the assigned variation and its associated experiment, while the [`Variable`](#variable) object contains specific details about each variable within a variation.
* Ensure that your code handles the case where `id` or `experimentId` may be `-1`, indicating a default variation.
* The `variables` map might be empty if no variables are associated with the variation.
```swift theme={null}
// Retrieving the variation name
let variationName = variation.name
// Retrieving the variation key
let variationKey = variation.key
// Retrieving the variation id
let variationId = variation.id
// Retrieving the experiment id
let experimentId = variation.experimentId
// Retrieving the variables map
let variables = variation.variables
```
#### Variable
`Variable` contains information about a variable associated with the assigned variation.
| Name | Type | Description |
| ----- | -------- | --------------------------------------------------------------------------------------------------------------------------------------------------------------------- |
| key | `String` | The unique key identifying the variable. |
| type | `String` | The type of the variable. Possible values: **BOOLEAN**, **NUMBER**, **STRING**, **JSON**. |
| value | `Any?` | The value of the variable, which can be of the following types: **Bool**, **Int**, **Double**, **String**, **\[String: Any]** (json object), **\[Any]** (json array). |
```swift theme={null}
// Retrieving the variables map
let variables = variation.variables
// Variable type can be retrieved for further processing
let type = variables["isDiscount"]?.type ?? ""
// Get the bool value of "isDiscount" (default to false if missing or not a Bool)
let isDiscount = variables["isDiscount"]?.value as? Bool ?? false
// Get the numeric value of "number" as an Int (default to 0 if missing or not numeric)
let number = (variables["number"]?.value as? NSNumber)?.intValue ?? 0
// Get the String value of "title" (default to an empty string if missing or not a String)
let title = variables["title"]?.value as? String ?? ""
```
### Deprecated methods
These methods are deprecated and will be removed in SDK version `5.0.0`.
#### getFeatureVariationKey()
* 📨 *Sends Tracking Data to Kameleoon*
Use [`getVariation()`](#getvariation) instead.
Use this method to get the [feature variation](/user-manual/experimentation/feature-experimentation/configure-your-feature-flags/define-feature-variations) key for a specific user. This method takes a `featureKey` as a required argument to retrieve the variation key for the specified user.
If the visitor has never been associated with this feature flag, the SDK returns a randomly assigned variation key (according to the feature flag rules). If the visitor is already registered with this feature flag, this method returns the previous variation key. If the visitor does not match any of the rules, the default variation you defined in the Kameleoon app will be returned.
Ensure you set up proper error handling as shown in the example code to catch potential errors.
```swift theme={null}
let featureKey = "new_checkout"
var variationKey = ""
do {
variationKey = try kameleoonClient.getFeatureVariationKey(featureKey: featureKey)
switch variationKey {
case "variation 1":
// The visitor has been bucketed with variation 1 key
case "variation 2":
// The visitor has been bucketed with variation 2 key
default:
//The visitor has been bucketed with the default variation or is part of the unallocated traffic sample
}
} catch {
switch error {
case KameleoonError.sdkNotReady:
// Exception indicating that the SDK has not completed its initialization yet.
case KameleoonError.Feature.notFound:
// The feature key is not in the configuration file that has been fetched by the SDK. Trigger the old checkout for this visitor.
case KameleoonError.Feature.environmentDisabled:
// The feature flag is disabled for the environment.
default:
// Any other error.
}
}
```
#### getActiveFeatureList()
Use [`getVariations()`](#getvariations) instead.
To get the list of feature flag keys currently available and active for the visitor.
```swift theme={null}
let activeFeatureFlags = kameleoonClient.getActiveFeatureList()
```
##### Return value
| Type | Description |
| --------- | ---------------------------------------------------------- |
| \[String] | List of feature flag keys which are active for the visitor |
#### getActiveFeatures()
Use [`getVariations()`](#getvariations) instead.
`getActiveFeatures` method retrieves information about the active feature flags that are available for the specified visitor code.
```swift theme={null}
let activeFeatures = kameleoonClient.getActiveFeatures()
```
##### Return value
| Type | Description |
| --------------------------- | ----------------------------------------------------------------------------------------------------------------------------------------- |
| `[String: Types.Variation]` | A dictionary that contains the visitor's assigned variations for each active feature using the keys of the corresponding active features. |
#### getFeatureVariable()
* 📨 *Sends Tracking Data to Kameleoon*
- Use [`getVariation()`](#getvariation) instead.
- This method was previously called `obtainFeatureVariable()`, which was removed in SDK version `4.0.0`.
Call this method to get the [feature variable](/user-manual/experimentation/feature-experimentation/configure-your-feature-flags/define-feature-variables) of a variation key associated with a user.
This method takes `featureKey`, and `variableKey` as required arguments to get the variable of the variation key for a given user.
If a visitor has never been associated with this feature flag, the SDK returns a variable value for the variation key that it randomly assigns according to the feature flag rules. If the user is already registered with this feature flag, the SDK returns the variable value for the previously associated variation. If the user does not match any of the rules, the default variable is returned.
```swift theme={null}
String featureKey = "myFeature"
String variableKey = "myVariable"
try {
let variable = kameleoonClient.getFeatureVariable(featureKey: featureKey, variableKey: variableKey)
// your custom code, depending on variableValue
} catch {
switch error {
case KameleoonError.sdkNotReady:
// Exception indicating that the SDK has not completed its initialization.
case KameleoonError.Feature.notFound:
// The Feature Key is not in the configuration file that has been fetched by the SDK. Trigger the old checkout for this visitor.
case KameleoonError.Feature.environmentDisabled:
// The feature flag is disabled for the environment.
case KameleoonError.Feature.variableNotFound:
// Exception indicating that the requested variable has not been found. Check that the variable's key matches the one in your code.
default:
// Any other error.
}
}
```
##### Parameters
| Name | Type | Description |
| ----------- | ------ | ------------------------------------------------------------------------------- |
| featureKey | String | Identification key of the feature you want to retrieve. This field is required. |
| variableKey | String | Name of the variable you want to get a value for. This field is required. |
##### Return value
| Type | Description |
| ---- | ------------------------------------------------------------------------------------------------------------------------------------------------------- |
| Any | Data associated with this feature flag. The values can be `Int`, `String`, `Bool` or `Dictionary` (depending on the type defined on the web interface). |
##### Errors thrown
| Type | Description |
| ---------------------------------------------- | -------------------------------------------------------------------------------------------------------------------------------------------------------------------------------------------------------------------------------------------------------------------------------------------- |
| KameleoonError.sdkNotReady | Exception indicating that the SDK is not fully initialized. |
| KameleoonError.Feature.notFound | Exception indicating that the requested feature ID has not been found in the SDK's internal configuration. This exception usually means that the feature flag has not yet been activated on Kameleoon's side (but code implementing the feature is already deployed in the web-application). |
| KameleoonException.Feature.environmentDisabled | Exception indicating that the feature flag is disabled for the visitor's current environment (for example, production, staging, or development). |
| KameleoonError.Feature.variableNotFound | Exception indicating that the requested variable wasn't found. Check that the variable's key in the Kameleoon app matches the key in your code. |
#### getFeatureVariationVariables()
* Use [`getVariation()`](#getvariation) instead.
* This method was previously called `getFeatureAllVariables`, which was removed in SDK version `4.0.0`.
To retrieve all of the variables for a feature, call this method. You can modify your feature variables in the Kameleoon app.
This method takes `featureKey` as an argument. It returns data with the `[String: Any]` type, as defined on the web interface. It will throw an exception (`KameleoonError.Feature.notFound`) if the requested feature has not been found in the SDK's internal configuration.
```swift theme={null}
let featureKey = "myFeature"
let variationKey = "on"
do {
allVariables = try kameleoonClient.getFeatureVariationVariables(featureKey: featureKey, variationKey: variationKey);
} catch KameleoonError.Feature.notFound {
// The feature is not activated in Kameleoon.
} catch KameleoonError.Feature.environmentDisabled {
// The feature flag is disabled for the environment.
} catch {
// This is a generic Exception handler that will handle all errors.
}
```
##### Parameters
| Name | Type | Description |
| ------------ | ------ | ------------------------------------------------------------------------------- |
| featureKey | String | Identification key of the feature you want to retrieve. This field is required. |
| variationKey | String | The key of the variation you want to retrieve. This field is required. |
##### Return value
| Type | Description |
| -------------- | ------------------------------------------------------------------------------------------------------------------------------------------------------- |
| \[String: Any] | Data associated with this feature flag. The values can be `Int`, `String`, `Bool` or `Dictionary` (depending on the type defined on the web interface). |
##### Errors thrown
| Type | Description |
| ---------------------------------------------- | ------------------------------------------------------------------------------------------------------------------------------------------------------------------------------------------------------------------------------------------------------------------------------------------------------------------------------------------------------- |
| KameleoonError.sdkNotReady | Exception indicating that the SDK is not fully initialized. |
| KameleoonError.Feature.notFound | Exception indicating that the requested feature ID has not been found in the SDK's internal configuration. This exception usually means that the feature flag has not been activated in the Kameleoon app (but code implementing the feature is already deployed in the web application). |
| KameleoonException.Feature.environmentDisabled | Exception indicating that the feature flag is disabled for the visitor's current environment (for example, production, staging, or development). |
| KameleoonError.Feature.variationNotFound | Exception indicating that the requested variation key has not been found in the SDK's internal configuration. This exception means that the feature flag has not yet been retrieved by the SDK, which may happen if the SDK is in [polling](/developer-docs/feature-experimentation/technical-reference/technical-considerations#polling-default) mode. |
```swift theme={null}
let featureKey = "myFeature"
let variationKey = "on"
do {
allVariables = try kameleoonClient.getFeatureVariationVariables(featureKey: featureKey, variationKey: variationKey);
} catch KameleoonError.Feature.notFound {
// The feature is not activated in Kameleoon.
} catch KameleoonError.Feature.environmentDisabled {
// The feature flag is disabled for the environment.
} catch {
// This is a generic Exception handler that will handle all errors.
}
```
# React Native SDK
Source: https://docs.kameleoon.com/developer-docs/sdks/mobile-sdks/react-native-sdk
Integrate the Kameleoon React SDK to run experiments and activate feature flags in React applications using hooks and components.
With the Kameleoon React SDK, you can run feature experiments and activate feature flags on your front-end web and mobile application. Integrating our SDK into your web and mobile application is easy, and its footprint (memory and network usage) is low.
**Getting started**: For help getting started, see the [developer guide](#developer-guide)
**Changelog**: Details on the latest version of the React SDK can be found in the [changelog](https://github.com/Kameleoon/client-react/blob/main/CHANGELOG.md).
**SDK methods**: For the full reference documentation of the React SDK, see the [reference](#reference) section.
**Requirements**: React SDK requires `React 16.8.0+`
## Developer guide
Follow this section to integrate the SDK into your application and learn more about using the SDK.
### Getting started
This section walks you through installing and configurating the SDK for the first time.
#### Installation
The Kameleoon SDK Installation tool is the preferred way to install the SDK. This **SDK Installer** helps you to install the SDK of your choice, generate a basic code sample, and configure [external dependencies](#external-dependencies) if needed.
To start the SDK Installation tool, install and run it globally:
```bash theme={null}
npm install --global @kameleoon/sdk-installer
kameleoon-sdk
```
Or run it directly with `npx`:
```bash theme={null}
npx @kameleoon/sdk-installer
```
#### Create the Kameleoon Client
To get started, you need to create an entry point for React SDK by creating a Kameleoon Client at the top level of your application using the `createClient()` function imported from `kameleoon` package.
```tsx theme={null}
import {
createClient,
Environment,
SDKConfigurationType,
} from '@kameleoon/react-sdk';
// -- Optional configuration
const configuration: Partial = {
updateInterval: 60,
environment: Environment.Production,
cookieDomain: '.example.com',
};
const client = createClient({ siteCode: 'my_site_code', configuration });
```
```jsx theme={null}
import { createClient, Environment } from '@kameleoon/react-sdk';
// -- Optional configuration
const configuration = {
updateInterval: 60,
environment: Environment.Production,
cookieDomain: '.example.com',
};
const client = createClient({ siteCode: 'my_site_code', configuration });
```
#### Wrap the application in the Kameleoon Provider
The second step is connecting the previously created Kameleoon Client to `KameleoonProvider` by passing the configured client to `KameleoonProvider`:
```tsx theme={null}
import {
createClient,
Environment,
KameleoonProvider,
} from '@kameleoon/react-sdk';
const client = createClient({
siteCode: 'my_site_code',
configuration: {
updateInterval: 60,
environment: Environment.Production,
},
});
function AppWrapper(): JSX.Element {
return (
);
}
```
```jsx theme={null}
import {
createClient,
Environment,
KameleoonProvider,
} from '@kameleoon/react-sdk';
const client = createClient({
siteCode: 'my_site_code',
configuration: {
updateInterval: 60,
environment: Environment.Production,
},
});
function AppWrapper() {
return (
);
}
```
If you are using **Next.js** for server-side rendering (SSR), you **have to** use `KameleoonProviderSSR` or `KameleoonProvider` with `stubMode=true`.
This prevents the SDK client from being initialized on the server and ensures that the React SDK runs exclusively on the client side.
```tsx theme={null}
import {
createClient,
Environment,
KameleoonProviderSSR,
} from '@kameleoon/react-sdk';
function AppWrapper(): JSX.Element {
return (
);
}
```
If you are using **Next.js** for server-side rendering (SSR), you **have to** use `KameleoonProviderSSR` or `KameleoonProvider` with `stubMode=true`.
This prevents the SDK client from being initialized on the server and ensures that the React SDK runs exclusively on the client side.
```jsx theme={null}
import {
createClient,
Environment,
KameleoonProviderSSR,
} from '@kameleoon/react-sdk';
function AppWrapper() {
return (
);
}
```
If you are using **Next.js** for server-side rendering (SSR), you **have to** use `KameleoonProviderSSR` or `KameleoonProvider` with `stubMode=true`.
This prevents the SDK client from being initialized on the server and ensures that the React SDK runs exclusively on the client side.
```tsx theme={null}
import {
createClient,
Environment,
KameleoonProvider,
} from '@kameleoon/react-sdk';
// Checks if the code is running on the server (Node.js) and not in the browser.
// This can be replaced with any other mechanism you use to detect server-side execution.
const isServer = typeof window === 'undefined';
const client = createClient({
siteCode: 'my_site_code',
configuration: {
updateInterval: 60,
environment: Environment.Production,
},
externals: {
// Add your external dependencies here, e.g. storage, eventSource, visitorCodeManager, etc.
},
stubMode: isServer,
});
function AppWrapper(): JSX.Element {
return (
);
}
```
If you are using **Next.js** for server-side rendering (SSR), you **have to** use `KameleoonProviderSSR` or `KameleoonProvider` with `stubMode=true`.
This prevents the SDK client from being initialized on the server and ensures that the React SDK runs exclusively on the client side.
```jsx theme={null}
import {
createClient,
Environment,
KameleoonProvider,
} from '@kameleoon/react-sdk';
// Checks if the code is running on the server (Node.js) and not in the browser.
// This can be replaced with any other mechanism you use to detect server-side execution.
const isServer = typeof window === 'undefined';
const client = createClient({
siteCode: 'my_site_code',
configuration: {
updateInterval: 60,
environment: Environment.Production,
},
externals: {
// Add your external dependencies here, e.g. storage, eventSource, visitorCodeManager, etc.
},
stubMode: isServer,
});
function AppWrapper() {
return (
);
}
```
##### KameleoonProvider
Use this provider on root level by wrapping your app to gain an access to `KameleoonClient`. This ensures your app does not flicker due to flag changes at startup time.
###### Props
| Name | Type | Description |
| -------------------------------- | ----------------- | ------------------------------------------------------ |
| children required | `ReactNode` | child elements of the provider |
| client required | `KameleoonClient` | `KameleoonClient` instance created by `createClient()` |
##### KameleoonProviderSSR
Use this provider on root level by wrapping your app to gain an access to `KameleoonClient`.
`KameleoonProviderSSR` differs from `KameleoonProvider` in that it creates a `KameleoonClient` instance inside the context on the first client request. This prevents the risk of creating the client on the server side. It is recommended for use in SSR-based systems, such as Next.js with SSR.
###### Props
| Name | Type | Description |
| ------------------------------------- | --------------- | ---------------------------------------------------------------------- |
| children required | `ReactNode` | child elements of the provider |
| sdkParameters required | `SDKParameters` | `SDKParameters` settings for creating an instance of `KameleoonClient` |
#### Await for the client initialization
`KameleoonClient` initialization is done asynchronously in order to make sure that Kameleoon API call was successful for that hook `useInitialize` is used. You can use `async/await`, `Promise.then()` or any other method to handle asynchronous client initialization.
```tsx theme={null}
import { useEffect, useCallback } from 'react';
import { useInitialize } from '@kameleoon/react-sdk';
function MyComponent(): JSX.Element {
const { initialize } = useInitialize();
// -- Waiting for the client initialization using `async/await`
const init = useCallback(async (): Promise => {
await initialize();
}, [initialize]);
useEffect(() => {
init();
}, [init]);
}
```
```jsx theme={null}
import { useEffect, useCallback } from 'react';
import { useInitialize } from '@kameleoon/react-sdk';
function MyComponent() {
const { initialize } = useInitialize();
// -- Waiting for the client initialization using `async/await`
const init = useCallback(async () => {
await initialize();
}, [initialize]);
useEffect(() => {
init();
}, [init]);
}
```
#### Activating a feature flag
##### Assigning a unique ID to a user
To assign a unique ID to a user, you can use the [`getVisitorCode()`](#getvisitorcode) method. If a **visitor code** doesn’t exist (from the request headers cookie), the method generates a random unique ID or uses a `defaultVisitorCode` that you would have generated. The ID is then set in a response headers cookie.
If you are using Kameleoon in [Hybrid mode](/developer-docs/feature-experimentation/get-started/hybrid-experimentation), calling the `getVisitorCode()` method ensures that the unique ID (**visitor code**) is shared between the application file `engine.js` (previously named, `kameleoon.js`) and the SDK.
##### Retrieving a flag configuration
To implement a feature flag in your code, you must first create the feature flag in your Kameleoon account.
To determine the status or variation of a feature flag for a specific user, you should use the [`getVariation()`](#getvariation) or [`isFeatureFlagActive()`](#isfeatureflagactive) method to retrieve the configuration based on the `featureKey`.
The `getVariation()` method handles both simple feature flags with ON/OFF states and more complex flags with multiple variations. The method retrieves the appropriate variation for the user by checking the feature rules, assigning the variation, and returning it based on the `featureKey` and `visitorCode`.
The `isFeatureFlagActive()` method can be used if you want to retrieve the configuration of a simple feature flag that has only an ON or OFF state, as opposed to more complex feature flags with multiple variations or targeting options.
If your feature flag has associated variables (such as specific behaviors tied to each variation) `getVariation()` also enables you to access the [`Variation`](#variation) object, which provides details about the assigned variation and its associated experiment. This method checks whether the user is targeted, finds the visitor’s assigned variation, and saves it to storage. When `track=true`, the SDK will send the exposure event to the specified experiment on the next tracking request, which is automatically triggered based on the SDK’s [`tracking_interval_millisecond`](#configuration-parameters). By default, this interval is set to 1000 milliseconds (1 second).
The `getVariation()` method allows you to control whether tracking is done. If `track=false`, no exposure events will be sent by the SDK. This is useful if you prefer not to track data through the SDK and instead rely on client-side tracking managed by the Kameleoon engine, for example. Additionally, setting `track=false` is helpful when using the `getVariations()` method, where you might only need the variations for all flags without triggering any tracking events. If you want to know more about how tracking works, view [this article](/developer-docs/feature-experimentation/technical-reference/faq-global#when-does-the-sdk-send-a-tracking-request-for-analytics)
##### Adding data points to target a user or filter / breakdown visits in reports
To target a user, ensure you've added relevant data points to their profile before retrieving the feature variation or checking if the flag is active. Use the [`addData()`](#adddata) method to add these data points to the user's profile.
To retrieve data points collected on other devices or to access past user data (collected client-side when using Kameleoon in Hybrid mode), use the [`getRemoteVisitorData()`](#getremotevisitordata) method. This method asynchronously fetches data from the servers. It is important to call `getRemoteVisitorData()` *before* retrieving the variation or checking if the feature flag is active, as this data might be required to assign a user to a given variation.
To learn more about available targeting conditions, see the [detailed article on the subject](/developer-docs/feature-experimentation/targeting-and-segmentation/native-segmentation).
Additionally, the data points you add to the visitor profile will be available when analyzing your experiments, allowing you to filter and break down your results by factors like device and browser. Kameleoon Hybrid mode automatically collects a variety of data points on the client-side, making it easy to break down your results based on these pre-collected data points. See the complete list [here](/user-manual/experiment-analytics/analyze-results/results-page/results-page-settings#breakdown-audience).
If you need to track additional data points beyond what's automatically collected, you can use Kameleoon's [Custom Data feature](#customdata). Custom Data allows you to capture and analyze specific information relevant to your experiments. Don't forget to call the [`flush()`](#flush) method to send the collected data to Kameleoon servers for analysis.
To ensure your results are accurate, it's recommended to filter out bots by using the [`UserAgent`](#useragent) data type.
##### Tracking goal conversions
When a user completes a desired action (such as making a purchase), it is recorded as a conversion. To track conversions, use the [`trackConversion()`](#trackconversion) method and provide the required `visitorCode` and `goalId` parameters.
The conversion tracking request will be sent along with the next scheduled tracking request, which the SDK sends at regular intervals (defined by [`tracking_interval_millisecond`](#configuration-parameters)). If you prefer to send the request immediately, use the [`flush()`](#flush) method with the parameter `instant=true`.
##### Sending events to analytics solutions
To track conversions and send exposure events to your customer analytics solution, you must first implement Kameleoon in [Hybrid mode](/developer-docs/feature-experimentation/get-started/hybrid-experimentation/). Then, use the [`getEngineTrackingCode()`](#getenginetrackingcode) method.
The `getEngineTrackingCode()` method retrieves the unique tracking code required to send exposure events to your analytics solution. Using this method allows you to record events and send them to your desired analytics platform.
### React Native considerations
React Native on `android` platform doesn't support `Real Time Update` feature.
While React SDK works the same way in both React Native and React contexts, it's important to note that setup steps differ.
Due to the lack of browser API in React Native, React SDK has to have different [external dependency](#external-dependencies) implementations to work correctly.
For that, Kameleoon provides several dedicated npm packages that you can install and set up manually or install using [Kameleoon SDK Installation Tool](#installation) (recommended).
The packages include:
* `@kameleoon/react-native-storage` - built using `react-native-mmkv` library
* `@kameleoon/react-native-event-source` - built using `react-native-event-source-ts` library
* `@kameleoon/react-native-visitor-code-manager` - built on top of `react-native-mmkv` library
* `@kameleoon/react-native-platform-analyzer` - built using `react-native` library
* *optional* `@kameleoon/react-native-secure-prng` - built using `react-native-get-random-values` library
If you don't want to use the listed packages, you can provide your own implementation following [the external dependencies guide](#external-dependencies).
Example React SDK setup for React Native application:
```ts theme={null}
import { createClient } from '@kameleoon/react-sdk';
import { KameleoonEventSource } from '@kameleoon/react-native-event-source';
import { KameleoonStorage } from '@kameleoon/react-native-storage';
import { KameleoonVisitorCodeManager } from '@kameleoon/react-native-visitor-code-manager';
import { KameleoonSecurePRNG } from '@kameleoon/react-native-secure-prng';
import { KameleoonPlatformAnalyzer } from '@kameleoon/react-native-platform-analyzer';
// --- Create KameleoonClient ---
const client = createClient({
siteCode: 'my_site_code',
externals: {
storage: new KameleoonStorage(),
eventSource: new KameleoonEventSource(),
visitorCodeManager: new KameleoonVisitorCodeManager(),
platformAnalyzer: new KameleoonPlatformAnalyzer(),
// -- Optional --
prng: new KameleoonSecurePRNG(),
},
});
```
```js theme={null}
import { createClient } from '@kameleoon/react-sdk';
import { KameleoonEventSource } from '@kameleoon/react-native-event-source';
import { KameleoonStorage } from '@kameleoon/react-native-storage';
import { KameleoonVisitorCodeManager } from '@kameleoon/react-native-visitor-code-manager';
import { KameleoonSecurePRNG } from '@kameleoon/react-native-secure-prng';
import { KameleoonPlatformAnalyzer } from '@kameleoon/react-native-platform-analyzer';
// --- Create KameleoonClient ---
const client = createClient({
siteCode: 'my_site_code',
externals: {
storage: new KameleoonStorage(),
eventSource: new KameleoonEventSource(),
visitorCodeManager: new KameleoonVisitorCodeManager(),
platformAnalyzer: new KameleoonPlatformAnalyzer(),
// -- Optional --
prng: new KameleoonSecurePRNG(),
},
});
```
### Using a custom bucketing key
By default, Kameleoon uses a unique, anonymous visitor ID (`visitorCode`) to assign users to feature flag variations. This ID is typically generated and stored on the user's device (in a browser cookie for client-side and server-side SDKs—in persistent storage for mobile SDKs). However, in certain scenarios you may need to ensure all users of the same organization see the same variant of a feature flag.
The **Custom Bucketing Key** option allows you to override this default behavior by providing your own custom identifier for bucketing. This override ensures that Kameleoon's assignment logic uses your specified key instead of the default `visitorCode`.
#### Use cases
Using a custom bucketing key is essential for maintaining consistency and accuracy in your feature flag assignments, particularly in these situations:
* **Account-level or organizational experiments:** For B2B products or scenarios where you want to assign all users from the same organization to the same variation, you can use an identifier like an `accountId`. Custom bucketing keys are crucial for A/B testing features that impact an entire team or company.
By implementing a custom bucketing key, you ensure greater consistency and accuracy in your experiments, leading to more reliable results and a better user experience.
#### Technical details
When you configure a custom bucketing key for a feature flag, you provide Kameleoon with a specific identifier from your application's data:
```jsx theme={null}
addData(visitorCode, new CustomData(index, 'newVisitorCode'));
```
[More information in addData()](#adddata)
* **Providing the custom key:** You provide your custom identifier to the Kameleoon SDK using the [`addData()`](#adddata) method. In this method, you will pass your chosen custom bucketing key as a [`CustomData`](#customdata) object. Here, `newVisitorCode` refers to the identifier you wish to use for your bucketing (for example, the new `userId` or `accountId`).
For the custom bucketing key to function correctly, it must also be defined and configured for the feature flag during the flag creation or editing process. Without this corresponding configuration, the SDK's bucketing will not apply your custom key. For detailed instructions on how to set this up in Kameleoon, refer to this [article](/user-manual/experimentation/feature-experimentation/create-and-manage-flags/create-a-feature-flag#Advanced_Flag_Settings).
* **Bucketing logic:** Once a custom bucketing key is provided through the `addData()` method, all hash calculations for assigning users to variations will use this `newVisitorCode` (your custom key) instead of the default `visitorCode`. Using the `newVisitorCode` means that the bucketing decision is tied to your custom identifier, ensuring consistent assignments across various contexts where that identifier is present.
* **Data tracking and analytics:** It's crucial to note that while the `newVisitorCode` (your custom key) is used for bucketing decisions, **all subsequent data (tracking events and conversions, for example) is sent and associated with the *original* `visitorCode`.** This separation ensures that your analytics accurately reflect individual user journeys and interactions within your experiment's broader context, even when bucketing is performed at a higher level (like an account) or across multiple devices/sessions. Your original visitor data remains intact for comprehensive reporting.
#### Technical requirements
To effectively use a custom bucketing key:
* The key must be a `string`.
* It must be unique for the entity you intend to bucket (for example, if using a `userId`, each user's ID should be unique).
* The key must be available to the SDK at the exact moment the feature flag decision is evaluated for that user or request.
### Targeting conditions
The Kameleoon SDKs support a variety of predefined targeting conditions that you can use to target users in your campaigns.
For the list of conditions supported by this SDK, see [use visit history to target users](/developer-docs/feature-experimentation/targeting-and-segmentation/native-segmentation).
You can also use your own [external data to target users](/developer-docs/feature-experimentation/targeting-and-segmentation\use-external-data-to-target-users).
### Logging
The SDK generates logs to reflect various internal processes and issues.
#### Log levels
The SDK supports configuring limiting logging by a log level.
```ts theme={null}
import { KameleoonClient, KameleoonLogger, LogLevel } from '@kameleoon/react-sdk';
const client = createClient({ siteCode: 'my_site_code', configuration });
// The `NONE` log level does not allow logging.
client.setLogLevel(LogLevel.NONE);
// Or use KameleoonLogger
KameleoonLogger.setLogLevel(LogLevel.NONE);
// The `ERROR` log level only allows logging issues that may affect the SDK's main behaviour.
client.setLogLevel(LogLevel.ERROR);
// Or use KameleoonLogger
KameleoonLogger.setLogLevel(LogLevel.ERROR);
// The `WARNING` log level allows logging issues which may require additional attention.
// It extends the `ERROR` log level.
// The `WARNING` log level is a default log level.
client.setLogLevel(LogLevel.WARNING);
// Or use KameleoonLogger
KameleoonLogger.setLogLevel(LogLevel.WARNING);
```
```ts theme={null}
import { KameleoonClient, KameleoonLogger, LogLevel } from ‘@kameleoon/react-sdk/full’;
// The `INFO` log level allows logging general information on the SDK’s internal processes.
// It extends the `WARNING` log level.
client.setLogLevel(LogLevel.INFO);
// Or use KameleoonLogger
KameleoonLogger.setLogLevel(LogLevel.INFO);
// The `DEBUG` level logs additional details about the SDK’s internal processes and extends the `INFO` level
// with more granular diagnostic output.
// This information is not intended for end-user interpretation but can be sent to our support team
// to assist with internal troubleshooting.
client.setLogLevel(LogLevel.DEBUG);
// Or use KameleoonLogger
KameleoonLogger.setLogLevel(LogLevel.DEBUG);
```
```js theme={null}
import { KameleoonClient, KameleoonLogger, LogLevel } from ‘@kameleoon/react-sdk’;
const client = createClient({ siteCode: ‘my_site_code’, configuration });
// The `NONE` log level allows no logging.
client.setLogLevel(LogLevel.NONE);
// Or use KameleoonLogger
KameleoonLogger.setLogLevel(LogLevel.NONE);
// The `ERROR` log level only allows logging issues that may affect the SDK’s main behaviour.
client.setLogLevel(LogLevel.ERROR);
// Or use KameleoonLogger
KameleoonLogger.setLogLevel(LogLevel.ERROR);
// The `WARNING` log level allows logging issues which may require additional attention.
// It extends the `ERROR` log level.
// The `WARNING` log level is a default log level.
client.setLogLevel(LogLevel.WARNING);
// Or use KameleoonLogger
KameleoonLogger.setLogLevel(LogLevel.WARNING);
```
```js theme={null}
import { KameleoonClient, KameleoonLogger, LogLevel } from ‘@kameleoon/react-sdk/full’;
// The `INFO` log level allows logging general information on the SDK’s internal processes.
// It extends the `WARNING` log level.
client.setLogLevel(LogLevel.INFO);
// Or use KameleoonLogger
KameleoonLogger.setLogLevel(LogLevel.INFO);
// The `DEBUG` level logs additional details about the SDK’s internal processes and extends the `INFO` level
// with more granular diagnostic output.
// This information is not intended for end-user interpretation but can be sent to our support team
// to assist with internal troubleshooting.
client.setLogLevel(LogLevel.DEBUG);
// Or use KameleoonLogger
KameleoonLogger.setLogLevel(LogLevel.DEBUG);
```
#### Custom handling of logs
The SDK writes its logs to the console output by default. This behaviour can be overridden.
Logging limiting by a log level is performed apart from the log handling logic.
```ts theme={null}
import { KameleoonClient, KameleoonLogger, IExternalLogger, LogLevel } from '@kameleoon/react-sdk';
export class CustomLogger implements IExternalLogger {
// `log` method accepts logs from the SDK
public log(level: LogLevel, message: string): void {
// Custom log handling logic here. For example:
switch (level) {
case LogLevel.DEBUG:
console.debug(message);
break;
case LogLevel.INFO:
console.info(message);
break;
case LogLevel.WARNING:
console.warn(message);
break;
case LogLevel.ERROR:
console.error(message);
break;
}
}
}
const client = createClient({
siteCode: 'my_site_code',
externals: {
logger: new CustomLogger(),
},
});
// Log level filtering is applied separately from log handling logic.
// The custom logger will only accept logs that meet or exceed the specified log level.
// Ensure the log level is set correctly.
client.setLogLevel(LogLevel.DEBUG);
// Or use KameleoonLogger
KameleoonLogger.setLogLevel(LogLevel.DEBUG);
```
```js theme={null}
import { KameleoonClient, KameleoonLogger, LogLevel } from '@kameleoon/react-sdk';
export class CustomLogger {
// `log` method accepts logs from the SDK
log(level, message) {
// Custom log handling logic here. For example:
switch (level) {
case 'DEBUG':
console.debug(message);
break;
case 'INFO':
console.info(message);
break;
case 'WARNING':
console.warn(message);
break;
case 'ERROR':
console.error(message);
break;
}
}
}
const client = createClient({
siteCode: 'my_site_code',
externals: {
logger: new CustomLogger(),
},
});
// Log level filtering is applied separately from log handling logic.
// The custom logger will only accept logs that meet or exceed the specified log level.
// Ensure the log level is set correctly.
client.setLogLevel(LogLevel.DEBUG);
// Or use KameleoonLogger
KameleoonLogger.setLogLevel(LogLevel.DEBUG);
```
### Domain information
You provide a domain as the `domain` in `KameleoonClient` \[configuration], which is used for storing Kameleoon visitor code in cookies. This is important when working with the [`getVisitorCode`](#getvisitorcode) and [`setLegalConsent`](#setlegalconsent) methods. The domain you provide is stored in the cookie as the `Domain=` key.
#### Setting the domain
The domain you provide indicates the URL address can use the cookie. For example, if your domain is `www.example.com`. the cookie is only available from a `www.example.com` URL. That means that pages with the `app.example.com` domain can't use the cookie.
To be more flexible around subdomains, you can prefix a domain with `.`. For example, the domain `.example.com` allows the cookie to function on both `app.example.com` and `login.example.com`.
You can't use regular expressions, special symbols, protocol, or port numbers in the `domain`.
Additionally, a [specific list of subdomains](https://publicsuffix.org/list/public_suffix_list.dat) are not allowed to be used with the prefix `.`.
Here's a small domain cheat sheet:
| Domain | Allowed URLs | Disallowed URLs |
| ------------------------------ | --------------------- | -------------------- |
| `www.example.com` | ✅`www.example.com` | ❌ `app.example.com` |
| | ✅ `example.com` | ❌ `.com` |
| | | |
| `.example.com` = `example.com` | ✅ `example.com` | ❌ `otherexample.com` |
| | ✅ `www.example.com` | |
| | ✅ `app.example.com` | |
| | ✅ `login.example.com` | |
| `https://www.example.com` | ⛔ bad domain | ⛔ bad domain |
| `www.example.com:4408` | ⛔ bad domain | ⛔ bad domain |
| `.localhost.com` = `localhost` | ⛔ bad domain | ⛔ bad domain |
#### Developing on localhost
`localhost` is always considered a bad domain, making it hard to test the domain when developing on localhost.
There are two ways to avoid this issue:
* Don't specify the `domain` field in the SDK client while testing. This prevents `localhost` issues (the cookie will be set on any domain).
* Create a local domain for `localhost`. For example:
* Navigate to `/etc/hosts` on *Linux* or to `c:\Windows\System32\Drivers\etc\hosts` on *Windows*
* Open `hosts` with file super user or administrator rights
* Add a domain to the localhost port, for example: `127.0.0.1 app.com`
* Now you can run your app locally on `app.com:{my_port}` and specify `.app.com` as your domain
### External dependencies
SDK external dependencies use the *dependency injection* pattern to give you the ability to provide your own implementations for certain parts of an SDK.
In the React SDK, all external dependencies have default implementations, which use a native browser API so there's no need to provide them unless another API is required for specific use cases.
Here's the list of available external dependencies:
| Dependency | Interface | API Used | Description |
| -------------------------------------------- | ----------------------------- | ------------------------------------------------- | ---------------------------------------------------------------------------------------------------------------------------------------------------------------------------------------- |
| `storage` optional | `IExternalStorage` | Browser `localStorage` | Used for storing all the existing and collected SDK data |
| `requester` optional | `IExternalRequester` | Browser `fetch` | Used for performing all the network requests |
| `eventSource` optional | `IExternalEventSource` | Browser `EventSource` | Used for receiving Server Sent Events for [Real Time Update](/developer-docs/feature-experimentation/technical-reference/technical-considerations#streaming-premium-option) capabilities |
| `visitorCodeManager` optional | `IExternalVisitorCodeManager` | Browser cookie | Used for storing and synchronizing visitor code |
| `prng` optional | `IExternalPRNG` | `Math.random` or Browser `crypto.getRandomValues` | Used to generate unique IDs for tracking events |
| `logger` optional | `ILogger` | Custom implementation | Used for custom handling of logs from the SDK. Allows to define how logs are processed and where they are output. |
| `platformAnalyzer` optional | `IPlatformAnalyzer` | React Native API | Automatically detects the platform and attaches this information to the visitor data. Designed specifically for React Native. |
The following example implements external dependencies. To import an interface from an SDK, create a class that implements it and pass the instantiated class to the SDK.
#### Storage
```ts theme={null}
import { IExternalStorage } from '@kameleoon/react-sdk';
// --- External Storage implementation ---
// - JavaScript `Map` is used as an example storage
const storage = new Map();
class MyStorage implements IExternalStorage {
public read(key: string): T | null {
// - Read data using `key`
const data = storage.get(key);
// - Return `null` if there's no data
if (!data) {
return null;
}
// - Return obtained data
return data;
}
public write(key: string, data: T): void {
// - Write data using `key`
storage.set(key, data);
}
}
// --- Create KameleoonClient ---
const client = createClient({
siteCode: 'my_site_code',
externals: {
storage: new MyStorage(),
},
});
```
```js theme={null}
import { KameleoonClient } from '@kameleoon/react-sdk';
// --- External Storage implementation ---
// - JavaScript `Map` is used as an example storage
const storage = new Map();
class MyStorage {
read(key) {
// - Read data using `key`
const data = storage.get(key);
// - Return `null` if there's no data
if (!data) {
return null;
}
// - Return obtained data
return data;
}
write(key, data) {
// - Write data using `key`
storage.set(key, data);
}
}
// --- Create KameleoonClient ---
const client = createClient({
siteCode: 'my_site_code',
externals: {
storage: new MyStorage(),
},
});
```
#### EventSource
```ts theme={null}
import {
IExternalEventSource,
EventSourceOpenParametersType,
} from '@kameleoon/react-sdk';
// --- External EventSource implementation ---
// - Example uses native browser `EventSource`
class MyEventSource implements IExternalEventSource {
private eventSource?: EventSource;
public open({
eventType,
onEvent,
url,
}: EventSourceOpenParametersType): void {
// - Initialize `EventSource`
const eventSource = new EventSource(url);
this.eventSource = eventSource;
// - Add event listener with provided event type and event callback
this.eventSource.addEventListener(eventType, onEvent);
}
public close(): void {
// - Cleanup open event source
if (this.eventSource) {
this.eventSource.close();
}
}
public onError(callback: (error: Event) => void): void {
// - Set error callback
if (this.eventSource) {
this.eventSource.onerror = callback;
}
}
}
// --- Create KameleoonClient ---
const client = createClient({
siteCode: 'my_site_code',
externals: {
eventSource: new MyEventSource(),
},
});
```
```js theme={null}
// --- External EventSource implementation ---
// - Example uses native browser `EventSource`
class MyEventSource {
eventSource;
open({ eventType, onEvent, url }) {
// - Initialize `EventSource`
const eventSource = new EventSource(url);
this.eventSource = eventSource;
// - Add event listener with provided event type and event callback
this.eventSource.addEventListener(eventType, onEvent);
}
close() {
// - Cleanup open event source
if (this.eventSource) {
this.eventSource.close();
}
}
public onError(callback) {
// - Set error callback
if (this.eventSource) {
this.eventSource.onerror = callback;
}
}
}
// --- Create KameleoonClient ---
const client = createClient({
siteCode: 'my_site_code',
externals: {
eventSource: new MyEventSource(),
},
});
```
#### VisitorCodeManager
```ts theme={null}
import {
IExternalVisitorCodeManager,
SetDataParametersType,
KameleoonUtils,
} from '@kameleoon/react-sdk';
// --- External Visitor Code Manager implementation ---
// - Example uses browser `document.cookie` API
class MyVisitorCodeManager implements IExternalVisitorCodeManager {
public getData(key: string): string | null {
const cookieString = document.cookie;
// - Return `null` if no cookie was found
if (!cookieString) {
return null;
}
// - Parse cookie using provided `key`
return KameleoonUtils.getCookieValue(cookieString, key);
}
public setData({
visitorCode,
domain,
maxAge,
key,
path,
}: SetDataParametersType): void {
// - Set cookie with provided parameters
let resultCookie = `${key}=${visitorCode}; Max-Age=${maxAge}; Path=${path}`;
if (domain) {
resultCookie += `; Domain=${domain}`;
}
document.cookie = resultCookie;
}
}
// --- Create KameleoonClient ---
const client = createClient({
siteCode: 'my_site_code',
externals: {
visitorCodeManager: new MyVisitorCodeManager(),
},
});
```
```js theme={null}
import { KameleoonUtils } from '@kameleoon/react-sdk';
// --- External Visitor Code Manager implementation ---
// - Example uses browser `document.cookie` API
class MyVisitorCodeManager {
getData(key) {
const cookieString = document.cookie;
// - Return `null` if no cookie was found
if (!cookieString) {
return null;
}
// - Parse cookie using provided `key`
return KameleoonUtils.getCookieValue(cookieString, key);
}
setData({ visitorCode, domain, maxAge, key, path }) {
// - Set cookie with provided parameters
let resultCookie = `${key}=${visitorCode}; Max-Age=${maxAge}; Path=${path}`;
if (domain) {
resultCookie += `; Domain=${domain}`;
}
document.cookie = resultCookie;
}
}
// --- Create KameleoonClient ---
const client = createClient({
siteCode: 'my_site_code',
externals: {
visitorCodeManager: new MyVisitorCodeManager(),
},
});
```
#### Requester
```ts theme={null}
import {
RequestType,
IExternalRequester,
KameleoonResponseType,
SendRequestParametersType,
} from '@kameleoon/react-sdk';
// --- External Requester Implementation
export class MyRequester implements IExternalRequester {
public async sendRequest({
url,
parameters,
}: SendRequestParametersType): Promise {
// - Using native browser `fetch`
return await fetch(url, parameters);
}
}
// --- Create KameleoonClient ---
const client = createClient({
siteCode: 'my_site_code',
externals: {
requester: new MyRequester(),
},
});
```
```js theme={null}
import { KameleoonClient } from '@kameleoon/react-sdk';
// --- External Requester Implementation
export class MyRequester {
async sendRequest({ url, parameters }) {
// - Using native browser `fetch`
return await fetch(url, parameters);
}
}
// --- Create KameleoonClient ---
const client = new KameleoonClient({
siteCode: 'my_site_code',
externals: {
requester: new MyRequester(),
},
});
```
[Return mocked result](#simulatesuccessrequest)
#### Pseudo Random Number Generator
Pseudo Random Number Generator (PRNG) is a dependency that generates random floating point number between `0` and `1` (similar to `Math.random`).
Default Kameleoon implementation relies on Browser's `crypto` or `Math.random` function if `crypto` is not available.
Those API are very secure and reliable, however in some edge cases (especially in some `React Native` engines) you might want to provide your own implementation or use a dedicated Kameleoon package for React Native - `@kameleoon/react-native-secure-prng`
```ts theme={null}
import { IExternalPRNG } from '@kameleoon/react-sdk';
// --- External Pseudo Random Number Generator (PRNG) implementation ---
class MyPRNG implements IExternalPRNG {
public getRandomNumber(): number {
// Return a random floating point number between `0` and `1`, like `Math.random()` does.
return Math.random();
}
}
// --- Create KameleoonClient ---
const client = createClient({
siteCode: 'my_site_code',
externals: {
prng: new MyPRNG(),
},
});
```
```js theme={null}
// --- External Pseudo Random Number Generator (PRNG) implementation ---
class MyPRNG {
getRandomNumber() {
// Return a random floating point number between `0` and `1`, like `Math.random()` does.
return Math.random();
}
}
// --- Create KameleoonClient ---
const client = createClient({
siteCode: 'my_site_code',
externals: {
prng: new MyPRNG(),
},
});
```
### Error Handling
Almost every React SDK callback which is returned by hooks may throw an error at some point, these errors are not just caveats but rather deliberately predefined `KameleoonError`s
that extend native JavaScript `Error` class providing useful messages and special `type` field with a type `KameleoonException`.
`KameleoonException` is an enum containing all possible error types.
To know exactly what type of `KameleoonException` the callbacks may throw, you can check `Throws` section of the hooks description on this page or just hover over the callback in your IDE to see jsdocs description.
Overall handling the errors considered a good practice to make your application more stable and avoid technical issues.
***
```tsx theme={null}
import { useEffect, useCallback } from 'react';
import {
useInitialize,
useVisitorCode,
useData,
CustomData,
KameleoonError,
KameleoonException,
} from '@kameleoon/react-sdk';
function MyComponent(): JSX.Element {
const { initialize } = useInitialize();
const { getVisitorCode } = useVisitorCode();
const { addData } = useData();
const init = useCallback(async (): Promise => {
try {
await initialize();
// -- Get visitor code
const visitorCode = getVisitorCode();
const customData = new CustomData(0, 'my_data');
addData(visitorCode, customData);
} catch (error) {
// -- Type guard for inferring error type, as native JavaScript `catch`
// only infers `unknown`.
if (error instanceof KameleoonError) {
switch (error.type) {
case KameleoonException.VisitorCodeMaxLength:
// -- Handle an error
break;
case KameleoonException.StorageWrite:
// -- Handle an error
break;
case KameleoonException.Initialization:
// -- Handle an error
break;
default:
break;
}
}
}
}, [initialize, addData, visitorCode, getVisitorCode]);
useEffect(() => {
init();
}, [init]);
}
```
```jsx theme={null}
import { useEffect, useCallback } from 'react';
import {
useInitialize,
useVisitorCode,
useData,
CustomData,
KameleoonException,
} from '@kameleoon/react-sdk';
function MyComponent() {
const { initialize } = useInitialize();
const { getVisitorCode } = useVisitorCode();
const { addData } = useData();
const init = useCallback(async () => {
try {
await initialize();
// -- Get visitor code
const visitorCode = getVisitorCode();
const customData = new CustomData(0, 'my_data');
addData(visitorCode, customData);
} catch (error) {
switch (error.type) {
case KameleoonException.VisitorCodeMaxLength:
// -- Handle an error
break;
case KameleoonException.StorageWrite:
// -- Handle an error
break;
case KameleoonException.Initialization:
// -- Handle an error
break;
default:
break;
}
}
}, [initialize, addData, visitorCode, getVisitorCode]);
useEffect(() => {
init();
}, [init]);
}
```
### Cross-device experimentation
To support visitors who access an app from multiple devices, Kameleoon allows the synchronization of previously collected visitor data across each of the visitor's devices and reconciliation of their visit history across devices through cross-device experimentation. Case studies and detailed information on how Kameleoon handles data across devices are available in the [article on cross-device experimentation](/developer-docs/cross-device-experimentation).
#### Synchronizing custom data across devices
Although custom mapping synchronization is used to align visitor data across devices, it is not always necessary. Below are two scenarios where custom mapping sync is not required:
**Same user ID across devices**
If the same user ID is used consistently across all devices, synchronization is handled automatically without a custom mapping sync. It is enough to call the `getRemoteVisitorData()` method when you want to sync the data collected between multiple devices.
**Multi-server instances with consistent IDs**
In complex setups involving multiple servers (for example, distributed server instances), where the same user ID is available across servers, synchronization between servers (with `getRemoteVisitorData()`) is sufficient without additional custom mapping sync.
Customers who need additional data can refer to the [`getRemoteVisitorData()`](#getremotevisitordata) method description for further guidance. In the below code, it is assumed that the same unique identifier (in this case, the `visitorCode`, which can also be referred to as `userId`) is used consistently between the two devices for accurate data retrieval.
If you want to sync collected data in real time, you need to choose the scope **Visitor** for your custom data.
```tsx title="Device One" theme={null}
import { useEffect, useCallback } from 'react';
import { useInitialize, useData, CustomData } from '@kameleoon/react-sdk';
function MyComponent(): JSX.Element {
const { initialize } = useInitialize();
const { addData, flush } = useData();
const init = useCallback(async (): Promise => {
await initialize();
// -- Custom Data with index `0` was set to `Visitor` scope
// in Kameleoon.
const customDataIndex = 0;
const customData = new CustomData(customDataIndex, 'my_data');
addData('my_visitor', customData);
flush();
}, [initialize, addData]);
useEffect(() => {
init();
}, [init]);
}
```
```tsx title="Device Two" theme={null}
import { useEffect, useCallback } from 'react';
import { useInitialize, useData, CustomData } from '@kameleoon/react-sdk';
function MyComponent(): JSX.Element {
const { initialize } = useInitialize();
const { getRemoteVisitorData } = useData();
const init = useCallback(async (): Promise => {
await initialize();
// -- Before working with data, call `getRemoteVisitorData`.
await getRemoteVisitorData({ visitorCode: 'my_visitor_code' });
// -- New SDK code will have access to CustomData with `Visitor` scope
// defined on Device One.
// So, "my_data" is now available to target and track "my_visitor".
}, [initialize, addData]);
useEffect(() => {
init();
}, [init]);
}
```
```jsx title="Device One" theme={null}
import { useEffect, useCallback } from 'react';
import { useInitialize, useData, CustomData } from '@kameleoon/react-sdk';
function MyComponent() {
const { initialize } = useInitialize();
const { addData, flush } = useData();
const init = useCallback(async () => {
await initialize();
// -- Custom Data with index `0` was set to `Visitor` scope
// in Kameleoon.
const customDataIndex = 0;
const customData = new CustomData(customDataIndex, 'my_data');
addData('my_visitor', customData);
flush();
}, [initialize, addData]);
useEffect(() => {
init();
}, [init]);
}
```
```jsx title="Device Two" theme={null}
import { useEffect, useCallback } from 'react';
import { useInitialize, useData, CustomData } from '@kameleoon/react-sdk';
function MyComponent() {
const { initialize } = useInitialize();
const { getRemoteVisitorData } = useData();
const init = useCallback(async () => {
await initialize();
// -- Before working with data, call `getRemoteVisitorData`.
await getRemoteVisitorData({ visitorCode: 'my_visitor_code' });
// -- New SDK code will have access to CustomData with `Visitor` scope
// defined on Device One.
// So, "my_data" is now available to target and track "my_visitor".
}, [initialize, addData]);
useEffect(() => {
init();
}, [init]);
}
```
#### Using custom data for session merging
[Cross-device experimentation](/developer-docs/cross-device-experimentation) allows you to combine a visitor's history across each of their devices (history reconciliation). One of the powerful features that history reconciliation provides is the ability to merge different visitors sessions into one. To reconcile visit history, you can use [`CustomData`](#customdata) to provide a unique identifier for the visitor.
Follow the [activating cross-device history reconciliation](/developer-docs/cross-device-experimentation#activating-cross-device-history-reconciliation) guide to set up your custom data on the Kameleoon platform
When your custom data is set up, you can use it in your code to merge a visitor's session.
Sessions with the same identifier will always see the same experiment variation and will be displayed as a single visitor in the `Visitor` view of your experiment's result pages.
The configuration SDK ensures that associated sessions always see the same variation of the experiment.
Afterwards, you can use the SDK normally. The following methods might be helpful in the context of session merging:
* Use [`getRemoteVisitorData`](#getremotevisitordata) with `isUniqueIdentifier=true` to retrieve data for all linked visitors
* Use [`trackConversion`](#trackconversion) or [`flush`](#flush) with `isUniqueIdentifier=true` to track some data for specific visitor that is associated with another visitor
As the custom data you use as the identifier must be set to `Visitor` scope, you need to use [cross-device custom data synchronization](/developer-docs/sdks/web-sdks/nodejs-sdk#synchronizing-custom-data-across-devices) to retrieve the identifier with the [`getRemoteVisitorData`](#getremotevisitordata) method on each device.
Here's an example of how to use custom data for session merging. In this example, we have an application with a login page. Since we don't know the user ID at the moment of login, we use an anonymous visitor identifier generated by the [`getVisitorCode`](#getvisitorcode) method. After the user logs in, we can associate the anonymous visitor with the user ID and use it as a unique identifier for the visitor.
```tsx title="Login Page" theme={null}
import { useEffect, useCallback } from 'react';
import {
useInitialize,
useFeatureFlag,
useVisitorCode,
CustomData,
} from '@kameleoon/react-sdk';
function LoginPage(): JSX.Element {
const [visitorCode, setVisitorCode] = useState(null);
const { initialize } = useInitialize();
const { getVariation } = useFeatureFlag();
const { getVisitorCode } = useVisitorCode();
const init = useCallback(async (): Promise => {
await initialize();
const anonymousVisitor = getVisitorCode();
// -- Saving `visitorCode` in the state to re-use it later.
setVisitorCode(anonymousVisitor);
// -- Getting a variation, assume it's variation `A`
const variation = getVariation({
visitorCode: anonymousVisitor,
featureKey: 'my_feature_key',
});
}, [initialize, getVariation, getVisitorCode]);
useEffect(() => {
init();
}, [init]);
}
```
```tsx title="Application Page" theme={null}
import { useEffect, useCallback } from 'react';
import {
useData,
useFeatureFlag,
useVisitorCode,
CustomData,
} from '@kameleoon/react-sdk';
type Props = {
anonymousVisitor: string;
};
function ApplicationPage(props: Props): JSX.Element {
const { addData, trackConversion, getRemoteVisitorData } = useData();
const { getVariation } = useFeatureFlag();
const init = useCallback(async (): Promise => {
// -- At this point anonymous visitor has logged in,
// and we have a user ID to use as a visitor identifier
// -- Associating both visitors with an identifier Custom Data,
// where index `1` is the Custom Data's index, configured
// as a unique identifier in Kameleoon.
const userIdentifierData = new CustomData(1, 'my_user_id');
// -- Let's assume the anonymous visitor identifier
// was passed as a prop.
addData(props.anonymousVisitor, userIdentifierData);
// -- Retrieving the variation for the user ID ensures
// consistency with the anonymous visitor's variation.
// Both the anonymous visitor and the user ID will be
// assigned variation `A`.
const variation = getVariation({
visitorCode: 'my_user_id',
featureKey: 'my_feature_key',
});
// -- `my_user_id` and `anonymousVisitor` are now linked.
// They can be tracked as a single visitor.
trackConversion({
visitorCode: 'my_user_id',
goalId: 123,
revenue: 100,
// -- Informing the SDK that the visitor is a unique identifier
isUniqueIdentifier: true,
});
// -- Additionally, linked visitors share previously
// collected remote data.
const data = await getRemoteVisitorData({
visitorCode: 'my_user_id',
// -- Informing the SDK that the visitor is a unique identifier.
isUniqueIdentifier: true,
});
}, [
getRemoteVisitorData,
trackConversion,
addData,
getVariation,
]);
useEffect(() => {
init();
}, [init]);
}
```
```jsx title="Login Page" theme={null}
import { useEffect, useCallback } from 'react';
import {
useInitialize,
useFeatureFlag,
useVisitorCode,
CustomData,
} from '@kameleoon/react-sdk';
function LoginPage() {
const [visitorCode, setVisitorCode] = useState(null);
const { initialize } = useInitialize();
const { getVariation } = useFeatureFlag();
const { getVisitorCode } = useVisitorCode();
const init = useCallback(async () => {
await initialize();
const anonymousVisitor = getVisitorCode();
// -- Saving `visitorCode` in the state to re-use it later.
setVisitorCode(anonymousVisitor);
// -- Getting a variation, assume it's variation `A`
const variation = getVariation({
visitorCode: anonymousVisitor,
featureKey: 'my_feature_key',
});
}, [initialize, getVariation, getVisitorCode]);
useEffect(() => {
init();
}, [init]);
}
```
```jsx title="Application Page" theme={null}
import { useEffect, useCallback } from 'react';
import {
useData,
useFeatureFlag,
useVisitorCode,
CustomData,
} from '@kameleoon/react-sdk';
function ApplicationPage(props) {
const { addData, trackConversion, getRemoteVisitorData } = useData();
const { getVariation } = useFeatureFlag();
const init = useCallback(async () => {
// -- At this point anonymous visitor has logged in,
// and we have a user ID to use as a visitor identifier
// -- Associating both visitors with an identifier Custom Data,
// where index `1` is the Custom Data's index, configured
// as a unique identifier in Kameleoon.
const userIdentifierData = new CustomData(1, 'my_user_id');
// -- Let's assume the anonymous visitor identifier
// was passed as a prop.
addData(props.anonymousVisitor, userIdentifierData);
// -- Retrieving the variation for the user ID ensures
// consistency with the anonymous visitor's variation.
// Both the anonymous visitor and the user ID will be
// assigned variation `A`.
const variation = getVariation({
visitorCode: 'my_user_id',
featureKey: 'my_feature_key',
});
// -- `my_user_id` and `anonymousVisitor` are now linked.
// They can be tracked as a single visitor.
trackConversion({
visitorCode: 'my_user_id',
goalId: 123,
revenue: 100,
// -- Informing the SDK that the visitor is a unique identifier.
isUniqueIdentifier: true,
});
// -- Additionally, linked visitors share previously
// collected remote data.
const data = await getRemoteVisitorData({
visitorCode: 'my_user_id',
// -- Informing the SDK know the visitor is a unique identifier.
isUniqueIdentifier: true,
});
}, [
getRemoteVisitorData,
trackConversion,
addData,
getVariation,
]);
useEffect(() => {
init();
}, [init]);
}
```
[Cross-device experimentation](/developer-docs/cross-device-experimentation) allows you to combine a visitor's history across each of their devices (history reconciliation). One of the powerful features that history reconciliation provides is the ability to merge different visitors sessions into one. To reconcile visit history, you can use [`CustomData`](#customdata) to provide a unique identifier for the visitor.
Follow the [activating cross-device history reconciliation](/developer-docs/cross-device-experimentation#activating-cross-device-history-reconciliation) guide to set up your custom data on the Kameleoon platform
When your custom data is set up, you can use it in your code to merge a visitor's session.
Sessions with the same identifier will always see the same experiment variation and will be displayed as a single visitor in the `Visitor` view of your experiment's result pages.
The SDK configuration ensures that associated sessions always see the same variation of the experiment.
Before using other methods make sure to let SDK know that the visitor is a unique identifier by adding [`UniqueIdentifier`](#uniqueidentifier) data to a visitor
As the custom data you use as the identifier must be set to `Visitor` scope, you need to use [cross-device custom data synchronization](/developer-docs/sdks/web-sdks/nodejs-sdk#synchronizing-custom-data-across-devices) to retrieve the identifier with the [`getRemoteVisitorData`](#getremotevisitordata) method on each device.
Here's an example of how to use custom data for session merging. In this example, we have an application with a login page. Since we don't know the user ID at the moment of login, we use an anonymous visitor identifier generated by the [`getVisitorCode`](#getvisitorcode) method. After the user logs in, we can associate the anonymous visitor with the user ID and use it as a unique identifier for the visitor.
```tsx title="Login Page" theme={null}
import { useEffect, useCallback } from 'react';
import {
useInitialize,
useFeatureFlag,
useVisitorCode,
CustomData,
} from '@kameleoon/react-sdk';
function LoginPage(): JSX.Element {
const [visitorCode, setVisitorCode] = useState(null);
const { initialize } = useInitialize();
const { getVariation } = useFeatureFlag();
const { getVisitorCode } = useVisitorCode();
const init = useCallback(async (): Promise => {
await initialize();
const anonymousVisitor = getVisitorCode();
// -- Saving `visitorCode` in the state to re-use it later.
setVisitorCode(anonymousVisitor);
// -- Getting a variation, assume it's variation `A`
const variation = getVariation({
visitorCode: anonymousVisitor,
featureKey: 'my_feature_key',
});
}, [initialize, getVariation, getVisitorCode]);
useEffect(() => {
init();
}, [init]);
}
```
```tsx title="Application Page" theme={null}
import { useEffect, useCallback } from 'react';
import {
useData,
useFeatureFlag,
useVisitorCode,
CustomData,
UniqueIdentifier,
} from '@kameleoon/react-sdk';
type Props = {
anonymousVisitor: string;
};
function ApplicationPage(props: Props): JSX.Element {
const { addData, trackConversion, getRemoteVisitorData, flush } = useData();
const { getVariation } = useFeatureFlag();
const init = useCallback(async (): Promise => {
// -- At this point anonymous visitor has logged in,
// and we have a user ID to use as a visitor identifier
// -- Associating both visitors with an identifier Custom Data,
// where index `1` is the Custom Data's index, configured
// as a unique identifier in Kameleoon.
const userIdentifierData = new CustomData(1, 'my_user_id');
// -- Let's assume the anonymous visitor identifier
// was passed as a prop.
addData(props.anonymousVisitor, userIdentifierData);
// -- Flushing data for the anonymous `visitorCode`
flush(props.anonymousVisitor);
// -- Informing the SDK that the visitor is unique identifier.
addData('my_user_id', new UniqueIdentifier(true));
// -- Retrieving the variation for the user ID ensures
// consistency with the anonymous visitor's variation.
// Both the anonymous visitor and the user ID will be
// assigned variation `A`.
const variation = getVariation({
visitorCode: 'my_user_id',
featureKey: 'my_feature_key',
});
// -- `my_user_id` and `anonymousVisitor` are now linked.
// They can be tracked as a single visitor.
trackConversion({
visitorCode: 'my_user_id',
goalId: 123,
revenue: 100,
});
// -- Additionally, linked visitors share previously
// collected remote data.
const data = await getRemoteVisitorData({
visitorCode: 'my_user_id',
});
}, [
getRemoteVisitorData,
trackConversion,
addData,
getVariation,
]);
useEffect(() => {
init();
}, [init]);
}
```
```jsx title="Login Page" theme={null}
import { useEffect, useCallback } from 'react';
import {
useInitialize,
useFeatureFlag,
useVisitorCode,
CustomData,
} from '@kameleoon/react-sdk';
function LoginPage() {
const [visitorCode, setVisitorCode] = useState(null);
const { initialize } = useInitialize();
const { getVariation } = useFeatureFlag();
const { getVisitorCode } = useVisitorCode();
const init = useCallback(async () => {
await initialize();
const anonymousVisitor = getVisitorCode();
// -- Saving `visitorCode` in the state to re-use it later.
setVisitorCode(anonymousVisitor);
// -- Getting a variation, assume it's variation `A`
const variation = getVariation({
visitorCode: anonymousVisitor,
featureKey: 'my_feature_key',
});
}, [initialize, getVariation, getVisitorCode]);
useEffect(() => {
init();
}, [init]);
}
```
```jsx title="Application Page" theme={null}
import { useEffect, useCallback } from 'react';
import {
useData,
useFeatureFlag,
useVisitorCode,
CustomData,
UniqueIdentifier,
} from '@kameleoon/react-sdk';
function ApplicationPage(props) {
const { addData, trackConversion, getRemoteVisitorData, flush } = useData();
const { getVariation } = useFeatureFlag();
const init = useCallback(async () => {
// -- At this point anonymous visitor has logged in,
// and we have a user ID to use as a visitor identifier
// -- Associating both visitors with an identifier Custom Data,
// where index `1` is the Custom Data's index, configured
// as a unique identifier in Kameleoon.
const userIdentifierData = new CustomData(1, 'my_user_id');
// -- Let's assume the anonymous visitor identifier
// was passed as a prop.
addData(props.anonymousVisitor, userIdentifierData);
// -- Flushing data for the anonymous `visitorCode`
flush(props.anonymousVisitor);
// -- Informing the SDK that the visitor is a unique identifier.
addData('my_user_id', new UniqueIdentifier(true));
// -- Retrieving the variation for the user ID ensures
// consistency with the anonymous visitor's variation.
// Both the anonymous visitor and the user ID will be
// assigned variation `A`.
const variation = client.getVariation({
visitorCode: 'my_user_id',
featureKey: 'my_feature_key',
});
// -- `my_user_id` and `anonymousVisitor` are now linked.
// They can be tracked as a single visitor.
trackConversion({
visitorCode: 'my_user_id',
goalId: 123,
revenue: 100,
});
// -- Additionally, linked visitors share previously
// collected remote data.
const data = await getRemoteVisitorData({
visitorCode: 'my_user_id',
});
}, [
getRemoteVisitorData,
trackConversion,
addData,
getVariation,
]);
useEffect(() => {
init();
}, [init]);
}
```
### Utilities
SDK has a set of utility methods that can be used to simplify the development process. All the methods are represented as static members of `KameleoonUtils` class.
#### simulateSuccessRequest
Method `simulateSuccessRequest` is used to simulate a successful request to the Kameleoon server. It can be useful for custom [Requester](#requester) implementations when developer needs to simulate a successful request, for example disabling tracking.
```ts theme={null}
import {
KameleoonUtils,
IExternalRequester,
SendRequestParametersType,
RequestType,
KameleoonResponseType,
} from '@kameleoon/react-sdk';
// - Example of `Requester` with disabled tracking
class Requester implements IExternalRequester {
public async sendRequest({
url,
parameters,
requestType,
}: SendRequestParametersType): Promise {
if (requestType === RequestType.Tracking) {
return KameleoonUtils.simulateSuccessRequest(
requestType,
null,
);
}
return await fetch(url, parameters);
}
}
```
```js theme={null}
import { KameleoonUtils } from '@kameleoon/react-sdk';
// - Example of `Requester` with disabled tracking
class Requester {
async sendRequest({ url, parameters, requestType }) {
if (requestType === RequestType.Tracking) {
return KameleoonUtils.simulateSuccessRequest(requestType, null);
}
return await fetch(url, parameters);
}
}
```
##### Parameters
| Name | Type | Description |
| ----------------------------------- | -------------------------------------- | --------------------------------------------------------------------- |
| requestType required | `RequestType` | A type of request |
| data required | `SimulateRequestDataType[RequestType]` | A type of request data, which is different depending on `RequestType` |
Data type `SimulateRequestDataType` is defined as follows:
* `RequestType.Tracking` - `null`
* `RequestType.ClientConfiguration` - `ClientConfigurationDataType`
* `RequestType.RemoteData` - `JSONType`
##### Return value
| Type | Description |
| -------------------------------- | -------------------------------------------------- |
| `Promise` | returns a promise with the response of the request |
#### getCookieValue
Method `getCookieValue` is used to parse a common cookie string (`key_1=value_1; key_2=value_2; ...`) and get the value of a specific cookie key. It's useful when working with a custom implementation of [`VisitorCodeManager`](#visitorcodemanager).
```ts theme={null}
import { KameleoonUtils } from '@kameleoon/react-sdk';
const cookies = 'key_1=value_1; key_2=value_2';
const key = 'key_1';
const value = KameleoonUtils.getCookieValue(cookies, key); // = `value_1`
```
```js theme={null}
import { KameleoonUtils } from '@kameleoon/react-sdk';
const cookies = 'key_1=value_1; key_2=value_2';
const key = 'key_1';
const value = KameleoonUtils.getCookieValue(cookies, key); // = `value_1`
```
##### Parameters
| Name | Type | Description |
| ------------------------------ | -------- | ------------------------------------------------------ |
| cookie required | `string` | Cookie string in a form `key_1=value_1; key_2=value_2` |
| key required | `string` | String representation of a key to find a value by |
##### Return value
| Type | Description | |
| -------- | ----------- | ----------------------------------------------------------------------- |
| \`string | null\` | returns a string with a cookie value or `null` if the key was not found |
## Reference
This is the full reference documentation for the React SDK.
### Initialization
This section provides the methods you use to create and initialize the Kameleoon Client in your application.
#### initialize()
An asynchronous `initialize` function, collected with `useInitialize` hook, that's used for KameleoonClient initialization by fetching Kameleoon SDK related data from server or by retrieving data from local source if data is up-to-date or update interval has not been reached.
* If the SDK configuration could not be retrieved but there is an older configuration available in SDK storage, the SDK uses the older configuration as a fallback and the `initialize` does not throw an error.
* Client initialization has an optional *offline mode*.
It is activated by setting optional `useCache` parameter to `true`.
In *offline mode* if tracking requests from any of the following methods fail due to internet connectivity issues, the SDK automatically resends the request as soon as it detects that the internet connection has been re-established:
* [flush](#flush)
* [trackConversion](#trackconversion)
* [getFeatureFlagVariationKey](#getfeatureflagvariationkey)
* [getFeatureVariable](#getfeatureflagvariable)
* [sFeatureFlagActive](#isfeatureflagactive)
```tsx theme={null}
import { useEffect, useCallback } from 'react';
import { useInitialize } from '@kameleoon/react-sdk';
function MyComponent(): JSX.Element {
const { initialize } = useInitialize();
const init = useCallback(async (): Promise => {
await initialize();
}, [initialize]);
useEffect(() => {
init();
}, [init]);
}
```
```jsx theme={null}
import { useEffect, useCallback } from 'react';
import { useInitialize } from '@kameleoon/react-sdk';
function MyComponent() {
const { initialize } = useInitialize();
const init = useCallback(async () => {
await initialize();
}, [initialize]);
useEffect(() => {
init();
}, [init]);
}
```
##### Parameters
| Name | Type | Description | Default Value |
| -------------------------------- | ------------------------ | ---------------------------------------------------------------------------------------------------------------------------------------------------- | ------------- |
| useCache optional | `boolean` or `undefined` | parameter for activating SDK offline mode, if `true` is passed failed polls will not return error and will use cached data if such data is available | `false` |
##### Return value
| Type | Description |
| ------------------ | ------------------------------------------------------------------------------------------------------------------------------------------------------------------------------------------------------------------------------------------------------------------------- |
| `Promise` | a promise resolved to a boolean indicating a successful sdk initialization. Generally initialize will throw an error if the something that can not be handled will happen, so the `boolean` value will almost always be `true` and won't give as much useful information. |
##### Exceptions thrown
| Type | Description |
| ------------------------------------------ | --------------------------------------------------------- |
| `KameleoonException.StorageWrite` | Couldn't update storage data |
| `KameleoonException.ClientConfiguration` | Couldn't retrieve client configuration from Kameleoon API |
| `KameleoonException.MaximumRetriesReached` | Maximum retries reached, request failed |
An asynchronous `initialize` function, collected with `useInitialize` hook, that's used for KameleoonClient initialization by fetching Kameleoon SDK related data from server or by retrieving data from local source if data is up-to-date or update interval has not been reached.
* If the SDK configuration could not be retrieved but there is an older configuration available in SDK storage, the SDK uses the older configuration as a fallback and the `initialize` does not throw an error.
* SDK supports an *offline mode*.
In *offline mode* if tracking requests from any of the following methods fail due to internet connectivity issues, the SDK automatically resends the request as soon as it detects that the internet connection has been re-established:
* [flush](#flush)
* [trackConversion](#trackconversion)
* [getFeatureFlagVariationKey](#getfeatureflagvariationkey)
* [getFeatureVariable](#getfeatureflagvariable)
* [sFeatureFlagActive](#isfeatureflagactive)
```tsx theme={null}
import { useEffect, useCallback } from 'react';
import { useInitialize } from '@kameleoon/react-sdk';
function MyComponent(): JSX.Element {
const { initialize } = useInitialize();
const init = useCallback(async (): Promise => {
await initialize();
}, [initialize]);
useEffect(() => {
init();
}, [init]);
}
```
```jsx theme={null}
import { useEffect, useCallback } from 'react';
import { useInitialize } from '@kameleoon/react-sdk';
function MyComponent() {
const { initialize } = useInitialize();
const init = useCallback(async () => {
await initialize();
}, [initialize]);
useEffect(() => {
init();
}, [init]);
}
```
##### Return value
| Type | Description |
| ------------------ | ------------------------------------------------------------------------------------------------------------------------------------------------------------------------------------------------------------------------------------------------------------------------- |
| `Promise` | a promise resolved to a boolean indicating a successful sdk initialization. Generally initialize will throw an error if the something that can not be handled will happen, so the `boolean` value will almost always be `true` and won't give as much useful information. |
##### Exceptions thrown
| Type | Description |
| ------------------------------------------ | --------------------------------------------------------- |
| `KameleoonException.StorageWrite` | Couldn't update storage data |
| `KameleoonException.ClientConfiguration` | Couldn't retrieve client configuration from Kameleoon API |
| `KameleoonException.MaximumRetriesReached` | Maximum retries reached, request failed |
#### isInitialized()
The `isInitialized` function, collected with the `useInitialize` hook, is a small utility method that checks if the SDK initialization has completed. For example, this can be useful when dealing with a deeply nested component tree, because it allows you to quickly check the SDK readiness without having to manage a global state, or pass the initialization result using component props.
```tsx theme={null}
import { useEffect, useCallback } from 'react';
import { useInitialize, useFeatureFlag } from '@kameleoon/react-sdk';
function MyComponent(): JSX.Element {
const { initialize } = useInitialize();
const init = useCallback(async (): Promise => {
await initialize();
}, [initialize]);
useEffect(() => {
init();
}, [init]);
}
function DeeplyNestedComponent(): JSX.Element {
const { isInitialized } = useInitialize();
const { getVariation } = useFeatureFlag();
if (isInitialized()) {
const variation = getVariation({ visitorCode: 'visitor_code', featureKey: 'my_feature_key' });
}
}
```
```jsx theme={null}
import { useEffect, useCallback } from 'react';
import { useInitialize, useFeatureFlag } from '@kameleoon/react-sdk';
function MyComponent() {
const { initialize } = useInitialize();
const init = useCallback(async () => {
await initialize();
}, [initialize]);
useEffect(() => {
init();
}, [init]);
}
function DeeplyNestedComponent() {
const { isInitialized } = useInitialize();
const { getVariation } = useFeatureFlag();
if (isInitialize()) {
const variation = getVariation({ visitorCode: 'visitor_code', featureKey: 'my_feature_key' });
}
}
```
##### Return value
A `boolean` value. Returns `true` if SDK was successfully initialized, otherwise returns `false`.
#### createClient()
To get started, you need to create an entry point for React SDK by creating a Kameleoon Client at the top level of your application using the `createClient()` function imported from `kameleoon` package.
An instance of `KameleoonClient` is created using `createClient()` function.
```tsx theme={null}
import {
createClient,
Environment,
SDKConfigurationType,
} from '@kameleoon/react-sdk';
// -- Optional configuration
const configuration: Partial = {
updateInterval: 60,
environment: Environment.Production,
cookieDomain: '.example.com',
};
const client = createClient({ siteCode: 'my_site_code', configuration });
```
```jsx theme={null}
import { createClient, Environment } from '@kameleoon/react-sdk';
// -- Optional configuration
const configuration = {
updateInterval: 60,
environment: Environment.Production,
cookieDomain: '.example.com',
};
const client = createClient({ siteCode: 'my_site_code', configuration });
```
##### Parameters
An object of type `SDKParameters` containing:
| Name | Type | Description |
| ------------------------------------- | ------------------------------- | ------------------------------------------------------------------------------------------------------------------------------------------------ |
| siteCode required | `string` | This is a [unique key](/user-manual/faq#how-do-i-find-my-sitecode) of the Kameleoon project you are using with the SDK. This field is mandatory. |
| configuration optional | `Partial` | client's configuration |
| externals optional | `ExternalsType` | external implementation of SDK dependencies ([External dependencies](#external-dependencies)) |
##### Configuration Parameters
| Name | Type | Description | Default Value |
| ---------------------------------------------------- | ------------- | -------------------------------------------------------------------------------------------------------------------------------------------------------------------------------------------------------------------------------------------------------------------------------------------------------------------------------------------------------------------------------------------------------------------------------------------------------------------------------------------------------------------------------------------------------------------------------------------------------------------------------------------------------------------------------------------- | ------------------------------------------ |
| updateInterval optional | `number` | Specifies the refresh interval, in minutes, that the SDK fetches the configuration for the active experiments and feature flags. The value determines the maximum time it takes to propagate changes, such as activating or deactivating feature flags or launching experiments, to your production servers. If left unspecified, the default interval is set to 60 minutes. Additionally, we offer a [streaming mode](/developer-docs/feature-experimentation/technical-reference/technical-considerations/#streaming-premium-option) that uses server-sent events (SSE) to push new configurations to the SDK automatically and apply new configurations in real-time, without any delays. | `60` |
| environment optional | `Environment` | feature flag environment | `Environment.Production` |
| targetingDataCleanupInterval optional | `number` | interval in *minutes* for cleaning up targeting data; minimum value is 1 minute | `undefined` (no cleanup will be performed) |
| domain optional | `string` | [domain](#domain-information) that the cookie belongs to. Deprecated, use `cookieDomain` instead | `undefined` |
| cookieDomain optional | `string` | [domain](#domain-information) that the cookie belongs to. | `undefined` |
| networkDomain optional | `string` | custom domain the SDKs uses for all outgoing network requests, commonly used for proxying. The format is `second_level_domain.top_level_domain` (for example, `example.com`). If an invalid format is specified, the SDK uses the default Kameleoon value | `undefined` |
| requestTimeout optional | `number` | timeout in *milliseconds* for all SDK network requests, if timeout is exceeded request will fail immediately | `10_000` (10 seconds) |
| trackingInterval optional | `number` | Specifies the interval for tracking requests, in milliseconds. All visitors who were evaluated for any feature flag or had associated data will be included in this tracking request, which is performed once per interval. The minimum value is `100` ms and the maximum value is `1_000` ms | `1_000` (1 second) |
The `domain` parameter is deprecated and will be removed in a future release. Use `cookieDomain` instead.
| Name | Type | Description | Default Value |
| ---------------------------------------------------- | ----------------------- | --------------------------------------------------------------------------------------------------------------------------------------------------------------------------------------------------------------------------------------------------------------------------------------------------------------------------------------------------------------------------------------------------------------------------------------------------------------------------------------------------------------------------------------------------------------------------------------------------------------------------------------------------------------------------------------------------------- | ------------------------------------------ |
| updateInterval optional | `number` | Specifies the refresh interval, in minutes, that the SDK fetches the configuration for the active experiments and feature flags. The value determines the maximum time it takes to propagate changes, such as activating or deactivating feature flags or launching experiments, to your production servers. If left unspecified, the default interval is set to 60 minutes. Additionally, we offer a [streaming mode](/developer-docs/feature-experimentation/technical-reference/technical-considerations/#streaming-premium-option) that uses server-sent events (SSE) to push new configurations to the SDK automatically and apply new configurations in real-time, without any delays. | `60` |
| environment optional | `Environment \| string` | feature flag environment | `Environment.Production` |
| targetingDataCleanupInterval optional | `number` | interval in *minutes* for cleaning up targeting data; minimum value is 1 minute | `undefined` (no cleanup will be performed) |
| cookieDomain optional | `string` | [domain](#domain-information) that the cookie belongs to. | `undefined` |
| networkDomain optional | `string` | custom domain the SDKs uses for all outgoing network requests, commonly used for proxying. The format is `second_level_domain.top_level_domain` (for example, `example.com`). If an invalid format is specified, the SDK uses the default Kameleoon value | `undefined` |
| requestTimeout optional | `number` | timeout in *milliseconds* for all SDK network requests, if timeout is exceeded request will fail immediately | `10_000` (10 seconds) |
| trackingInterval optional | `number` | Specifies the interval for tracking requests, in milliseconds. All visitors who were evaluated for any feature flag or had associated data will be included in this tracking request, which is performed once per interval. The minimum value is `1_000` ms and the maximum value is `5_000` ms | `1_000` (1 second) |
| stubMode optional | `boolean` | When set to true, the client will operate in stub mode and perform no operations. In this mode, all method calls execute no actions, ensuring that no external actions or side effects occur. | `false` |
| defaultDataFile optional | `string` | The `defaultDataFile` feature ensures the Kameleoon SDK is always **READY** by providing a fallback configuration when no cached data file exists. Developers can preload a valid configuration by fetching it from `https://sdk-config.kameleoon.eu/v3/` and passing it as `defaultDataFile` during initialization. When a `dateModified` timestamp (in milliseconds) is provided and is newer than the cached version, the SDK will use the default datafile instead of the cached version. **If `dateModified` is omitted, the default datafile is only applied when no cached version exists**. This ensures the SDK always has a valid configuration, whether default, cached, or updated. | `undefined` |
**Option 1 (Recommended):** Use `JSON.stringify()`
```js theme={null}
const dataFileJson = {"configuration":{"consentType":.....,
{"key":"show_car","type":"JSON","value":"{\"make\":\"Porsche\",\"model\":\"911\"}"}},
"dateModified":1752209266000};
const dataFileString = JSON.stringify(dataFileJson);
const configuration = {
updateInterval: 20,
defaultDataFile: dataFileString
};
```
**Option 2:** Raw JSON string (escape special characters)
```js theme={null}
const configuration = {
updateInterval: 20,
defaultDataFile: `{"configuration":{"consentType":.....,
{"key":"show_car","type":"JSON","value":"{\\"make\\":\\"Porsche\\",\\"model\\":\\"911\\"}"},
"dateModified":1752209266000}`
};
```
##### Return value
| Type | Description |
| ----------------- | ------------------------------- |
| `KameleoonClient` | an instance of KameleoonClient. |
Make sure not to use several client instances in one application as it is not fully supported yet and may overwrite the local storage configuration and cause unintended behavior (bugs).
### Feature flags and variations
This section provides the methods you use to retrieve and manage the feature flags and variations assigned to the visitor.
#### getVariation()
* 📨 *Sends Tracking Data to Kameleoon (depending on the `track` parameter)*
Retrieves the [`Variation`](#variation) assigned to a given visitor for a specific feature flag.
This method takes `featureKey` as a mandatory argument and `track` as an optional argument. The `track` argument is optional and defaults to `true`.
It returns the assigned `Variation` for the visitor. If the visitor is not associated with any feature flag rules, the method returns the default `Variation` for the given feature flag.
Ensure that proper error handling is implemented in your code to manage potential exceptions.
The default variation refers to the variation assigned to a visitor when they do not match any predefined delivery rules for a feature flag. In other words, it is the fallback variation applied to all users who are not targeted by specific rules. It's represented as the variation in the "Then, for everyone else..." section in a management interface.
```tsx theme={null}
import { useEffect, useCallback } from 'react';
import {
useInitialize,
useFeatureFlag,
useVisitorCode,
} from '@kameleoon/react-sdk';
function MyComponent(): JSX.Element {
const { initialize } = useInitialize();
const { getVariation } = useFeatureFlag();
const { getVisitorCode } = useVisitorCode();
const init = useCallback(async (): Promise => {
await initialize();
// -- Get visitor code using `getVisitorCode` function
const visitorCode = getVisitorCode();
// -- Get variation with tracking
const variation = getVariation({
visitorCode,
featureKey: 'my_feature_key',
});
// -- Get variation without tracking
const variation = getVariation({
visitorCode,
featureKey: 'my_feature_key',
track: false,
});
// -- An Example variation:
// {
// key: 'variation_key',
// id: 123,
// experimentId: 456,
// variables: Map {
// 'variable_key' => {
// key: 'variable_key',
// type: VariableType.BOOLEAN,
// value: true,
// }
// },
// }
}, [initialize, visitorCode, getVariation, getVisitorCode]);
useEffect(() => {
init();
}, [init]);
}
```
```js theme={null}
import { useEffect, useCallback } from 'react';
import {
useInitialize,
useFeatureFlag,
useVisitorCode,
} from '@kameleoon/react-sdk';
function MyComponent() {
const { initialize } = useInitialize();
const { getVariation } = useFeatureFlag();
const { getVisitorCode } = useVisitorCode();
const init = useCallback(async () => {
await initialize();
// -- Get visitor code using `getVisitorCode` function
const visitorCode = getVisitorCode();
// -- Get variation with tracking
const variation = getVariation({
visitorCode,
featureKey: 'my_feature_key',
});
// -- Get variation without tracking
const variation = getVariation({
visitorCode,
featureKey: 'my_feature_key',
track: false,
});
// -- An Example variation:
// {
// key: 'variation_key',
// id: 123,
// experimentId: 456,
// variables: Map {
// 'variable_key' => {
// key: 'variable_key',
// type: VariableType.BOOLEAN,
// value: true,
// }
// },
// }
}, [initialize, visitorCode, getVariation, getVisitorCode]);
useEffect(() => {
init();
}, [init]);
}
```
##### Parameters
An object of type `GetVariationParamsType` with the following properties:
| Name | Type | Description | Default |
| ------------------------------------- | --------- | ------------------------------------------------------------------------------ | ------- |
| `visitorCode` required | `string` | Unique identifier of the visitor. | |
| `featureKey` required | `string` | Key of the feature you want to expose to a visitor. | |
| `track` optional | `boolean` | An optional parameter to enable or disable tracking of the feature evaluation. | `true` |
##### Return value
| Type | Description |
| ----------- | ------------------------------------------------------------------------------------- |
| `Variation` | An assigned [`Variation`](#variation) to a given visitor for a specific feature flag. |
##### Exceptions thrown
| Type | Description |
| ----------------------------------------------------- | --------------------------------------------------------------------------------------------------------------------------------------------------------------------------------------------------------------------------------------------------------------------- |
| `KameleoonException.Initialization` | Method was executed before the `kameleoonClient` completed its [`initialize`](#initialize) call. |
| `KameleoonException.VisitorCodeEmpty` | The visitor code is empty. |
| `KameleoonException.VisitorCodeMaxLength` | The visitor code exceeded the maximum length (255 characters). |
| `KameleoonException.FeatureFlagConfigurationNotFound` | Exception indicating that the requested feature key wasn't found in the internal configuration of the SDK. This usually means that the feature flag is not activated in the Kameleoon app (but code implementing the feature is already deployed in the application). |
| `KameleoonException.FeatureFlagEnvironmentDisabled` | Exception indicating that feature flag is disabled for the visitor's current environment (for example, production, staging, or development). |
#### getVariations()
* 📨 *Sends Tracking Data to Kameleoon (depending on the `track` parameter)*
* 🎯 *Events:* [`EventType.Evaluation`](#events-1)
Method is obtained using `useFeatureFlag` hook.
Retrieves a map of [`Variation`](#variation) objects assigned to a given visitor across all feature flags.
This method iterates over all available feature flags and returns the assigned `Variation` for each flag associated with the specified visitor. It takes `visitorCode` as a mandatory argument, while `onlyActive` and `track` are optional.
* If `onlyActive` is set to `true`, the method `getVariations()` will return feature flags variations provided the user is not bucketed with the `off` variation.
* The `track` parameter controls whether or not the method will track the variation assignments. By default, it is set to `true`. If set to `false`, the tracking will be disabled.
The returned map consists of feature flag keys as keys and their corresponding `Variation` as values. If no variation is assigned for a feature flag, the method returns the default `Variation` for that flag.
Proper error handling should be implemented to manage potential exceptions.
The default variation refers to the variation assigned to a visitor when they do not match any predefined delivery rules for a feature flag. In other words, it is the fallback variation applied to all users who are not targeted by specific rules. It's represented as the variation in the "Then, for everyone else..." section in a management interface.
```ts theme={null}
import { useEffect, useCallback } from 'react';
import {
useInitialize,
useFeatureFlag,
useVisitorCode,
} from '@kameleoon/react-sdk';
function MyComponent(): JSX.Element {
const { initialize } = useInitialize();
const { getVariations } = useFeatureFlag();
const { getVisitorCode } = useVisitorCode();
const init = useCallback(async (): Promise => {
await initialize();
// -- Get visitor code using `getVisitorCode` function
const visitorCode = getVisitorCode();
// -- Get all feature flag variations with tracking
const variations = getVariations({
visitorCode,
});
// -- Get active feature flag variations with tracking
const variations = getVariations({
visitorCode,
onlyActive: true,
});
// -- Get active feature flag variations without tracking
const variations = getVariations({
visitorCode,
onlyActive: true,
track: false,
});
// -- An Example variations:
// Map {
// 'feature_key' => {
// key: 'variation_key',
// id: 123,
// experimentId: 456,
// variables: Map {
// 'variable_key' => {
// key: 'variable_key',
// type: VariableType.BOOLEAN,
// value: true,
// }
// },
// }
// }
}, [initialize, visitorCode, getVariations, getVisitorCode]);
useEffect(() => {
init();
}, [init]);
}
```
```js theme={null}
import { useEffect, useCallback } from 'react';
import {
useInitialize,
useFeatureFlag,
useVisitorCode,
} from '@kameleoon/react-sdk';
function MyComponent() {
const { initialize } = useInitialize();
const { getVariations } = useFeatureFlag();
const { getVisitorCode } = useVisitorCode();
const init = useCallback(async (): Promise => {
await initialize();
// -- Get visitor code using `getVisitorCode` function
const visitorCode = getVisitorCode();
// -- Get all feature flag variations with tracking
const variations = getVariations({
visitorCode,
});
// -- Get active feature flag variations with tracking
const variations = getVariations({
visitorCode,
onlyActive: true,
});
// -- Get active feature flag variations without tracking
const variations = getVariations({
visitorCode,
onlyActive: true,
track: false,
});
// -- An Example variations:
// Map {
// 'feature_key' => {
// key: 'variation_key',
// id: 123,
// experimentId: 456,
// variables: Map {
// 'variable_key' => {
// key: 'variable_key',
// type: VariableType.BOOLEAN,
// value: true,
// }
// },
// }
// }
}, [initialize, visitorCode, getVariations, getVisitorCode]);
useEffect(() => {
init();
}, [init]);
}
```
##### Parameters
An object of type `GetVariationsParamsType` with the following properties:
| Name | Type | Description | Default |
| ------------------------------------- | --------- | ----------------------------------------------------------------------------------------------------------------- | ------- |
| `visitorCode` required | `string` | Unique identifier of the visitor. | |
| `onlyActive` optional | `boolean` | An optional parameter indicating whether to return variations for active (`true`) or all (`false`) feature flags. | `false` |
| `track` optional | `boolean` | An optional parameter to enable or disable tracking of the feature evaluation. | `true` |
##### Return value
| Type | Description |
| ------------------------ | ----------------------------------------------------------------------------------------------------------------------------------- |
| `Map` | Map that contains the assigned [`Variation`](#variation) objects of the feature flags using the keys of the corresponding features. |
##### Exceptions thrown
| Type | Description |
| ----------------------------------------- | ------------------------------------------------------------------------------------------------ |
| `KameleoonException.Initialization` | Method was executed before the `kameleoonClient` completed its [`initialize`](#initialize) call. |
| `KameleoonException.VisitorCodeEmpty` | The visitor code is empty. |
| `KameleoonException.VisitorCodeMaxLength` | The visitor code exceeded the maximum length (255 characters). |
#### isFeatureFlagActive()
* 📨 *Sends Tracking Data to Kameleoon (depending on the `track` parameter)*
* 🎯 *Events:* `EventType.Evaluation`
The method `isFeatureFlagActive()`, used with the `useFeatureFlag` hook, determines whether a visitor identified by `visitorCode` has the specified `featureKey` active. This method checks the targeting conditions, identifies the variation for the visitor, and saves this information to storage. Additionally, the hook sends a tracking request.
There is also an overload for this method that includes a `track` parameter, allowing you to disable the tracking of the feature evaluation.
Visitor must be targeted to has feature flag active
Kameleoon uses tracking to count sessions and visitors when you call certain methods, such as `isFeatureFlagActive()`, `getVariation()` or `getVariations()`.
Use the default `true` value for the `track` parameter when you expose visitors to a variation and need to count them. Set the `track` parameter to `false` only if you call these methods before you expose visitors.
For example, if you call `getVariations()` to retrieve all variations before you expose visitors, set the `track` parameter to `false`. This setting prevents Kameleoon from prematurely counting a session. You can then trigger tracking later when you explicitly expose the visitor.
Kameleoon sends tracking data every second by default. You can configure this interval up to five seconds using the tracking interval configuration option. Kameleoon groups tracking events into a single session as long as the interval between events is less than 30 minutes. If more than 30 minutes elapse between tracking events, Kameleoon counts the events as separate sessions. A visit appears in your reports 30 minutes after the last recorded event in the session.
```tsx theme={null}
import { useEffect, useCallback } from 'react';
import {
useInitialize,
useData,
useFeatureFlag,
useVisitorCode,
CustomData,
} from '@kameleoon/react-sdk';
function MyComponent(): JSX.Element {
const { initialize } = useInitialize();
const { addData } = useData();
const { isFeatureFlagActive } = useFeatureFlag();
const { getVisitorCode } = useVisitorCode();
const init = useCallback(async (): Promise => {
await initialize();
// -- Get visitor code using `getVisitorCode` function
const visitorCode = getVisitorCode();
const featureKey = 'my_feature_key';
// -- Add CustomData with index `0` containing visitor id to check the targeting
addData(visitorCode, new CustomData(0, 'visitor_id'));
// -- Get the status of feature flag
const isActive = isFeatureFlagActive(visitorCode, featureKey);
// -- Check if the feature flag is active for visitor without tracking
const isActive = isFeatureFlagActive({ visitorCode, featureKey: 'my_feature', track: false});
}, [initialize, visitorCode, isFeatureFlagActive, getVisitorCode]);
useEffect(() => {
init();
}, [init]);
}
```
```jsx theme={null}
import { useEffect, useCallback } from 'react';
import {
useInitialize,
useData,
useFeatureFlag,
useVisitorCode,
CustomData,
} from '@kameleoon/react-sdk';
function MyComponent() {
const { initialize } = useInitialize();
const { addData } = useData();
const { isFeatureFlagActive } = useFeatureFlag();
const { getVisitorCode } = useVisitorCode();
const init = useCallback(async () => {
await initialize();
// -- Get visitor code using `getVisitorCode` function.
const visitorCode = getVisitorCode();
const featureKey = 'my_feature_key';
// -- Add CustomData with index `0` containing visitor id to check targeting.
addData(visitorCode, new CustomData(0, 'visitor_id'));
// -- Get the feature flag's status.
const isActive = isFeatureFlagActive(visitorCode, featureKey);
// -- Check if the feature flag is active for visitors without tracking.
const isActive = isFeatureFlagActive({ visitorCode, featureKey: 'my_feature', track: false});
}, [initialize, visitorCode, isFeatureFlagActive, getVisitorCode]);
useEffect(() => {
init();
}, [init]);
}
```
The `isFeatureFlagActive()` method evaluates the served variant, not the master flag state. If you exclude rules, the method uses the **Then, for everyone else serve** default state. If you select **Off** for this default state, the method always returns `false` even when the master feature flag is **On**.
##### Parameters
There are two overloads available for this method:
1. Two parameters overload:
This overload is deprecated and will be removed in the next major version. Please use the new overload with an object parameter.
| Name | Type | Description |
| ----------------------------------- | -------- | ------------------------------------------------------------------------ |
| visitorCode required | `string` | unique visitor identification string, can't exceed 255 characters length |
| featureKey required | `string` | a unique key for feature flag |
2. Object parameter overload of type `IsFeatureFlagActiveParamsType`:
| Name | Type | Description | Default |
| ----------------------------------- | --------- | ------------------------------------------------------------------------ | ------- |
| visitorCode required | `string` | unique visitor identification string, can't exceed 255 characters length | - |
| featureKey required | `string` | a unique key for feature flag | - |
| track optional | `boolean` | a boolean indicator of whether to track the feature evaluation | `true` |
##### Return value
| Type | Description |
| --------- | ------------------------------------------------------------------------------------------------- |
| `boolean` | indicator of whether the feature flag with `featureKey` is active for visitor with `visitorCode`. |
##### Exceptions thrown
| Type | Description |
| ----------------------------------------------------- | -------------------------------------------------------------------------------------- |
| `KameleoonException.Initialization` | Method was executed before the `kameleoonClient` completed it's `initialize` call |
| `KameleoonException.VisitorCodeMaxLength` | The visitor code exceeded the maximum length (255 characters) |
| `KameleoonException.VisitorCodeEmpty` | The visitor code is empty |
| `KameleoonException.FeatureFlagConfigurationNotFound` | No feature flag was found for the specified `featureKey` |
| `KameleoonException.DataInconsistency` | Allocated variation was found but there is no feature flag with according `featureKey` |
***
#### setForcedVariation()
The method allows you to programmatically assign a specific [`Variation`](#variation) to a user, bypassing the standard evaluation process. This is especially valuable for controlled experiments where the usual evaluation logic is not required or must be skipped. It can also be helpful in scenarios like debugging or custom testing.
When a **forced** variation is set, it overrides Kameleoon's real-time evaluation logic. Processes like segmentation, targeting conditions, and algorithmic calculations are skipped. To preserve segmentation and targeting conditions during an experiment, set `forceTargeting=false` instead.
**Simulated** variations always take precedence in the execution order. If a **simulated** variation calculation is triggered, it will be fully processed and completed first.
A forced variation is treated the same as an evaluated variation. It is tracked in analytics and stored in the user context like any standard evaluated variation, ensuring consistency in reporting.
The method may throw exceptions under certain conditions (e.g., invalid parameters, user context, or internal issues). Proper exception handling is essential to ensure that your application remains stable and resilient.
It’s important to distinguish **forced** variations from **[simulated](#getvisitorcode)** variations:
* **Forced variations**: Are specific to an individual experiment.
* **Simulated variations**: Affect the overall **feature flag** result.
```tsx theme={null}
import { useEffect, useCallback } from 'react';
import {
useInitialize,
useFeatureFlag,
useVisitorCode,
} from '@kameleoon/react-sdk';
function MyComponent(): JSX.Element {
const { initialize } = useInitialize();
const { getVisitorCode } = useVisitorCode();
const { setForcedVariation } = useFeatureFlag();
const init = useCallback(async (): Promise => {
await initialize();
// -- Get visitor code
const visitorCode = getVisitorCode();
// -- Forcing the variation "on" in the feature flag "featureKey1" for the visitor
setForcedVariation({
visitorCode: visitorCode,
experimentId: 9516,
variationKey: 'on',
forceTargeting: false,
});
// -- Resetting the forced variation for the "featureKey1" feature flag for the visitor
setForcedVariation({
visitorCode: visitorCode,
experimentId: 9516,
variationKey: null,
});
}, [initialize, visitorCode, setForcedVariation, getVisitorCode]);
useEffect(() => {
init();
}, [init]);
}
```
```jsx theme={null}
import { useEffect, useCallback } from 'react';
import {
useInitialize,
useFeatureFlag,
useVisitorCode,
} from '@kameleoon/react-sdk';
function MyComponent() {
const { initialize } = useInitialize();
const { getVisitorCode } = useVisitorCode();
const { setForcedVariation } = useFeatureFlag();
const init = useCallback(async () => {
await initialize();
// -- Get visitor code
const visitorCode = getVisitorCode();
// -- Forcing the variation "on" for the "featureKey1" feature flag for the visitor
setForcedVariation({
visitorCode: visitorCode,
experimentId: 9516,
variationKey: 'on',
forceTargeting: false,
});
// -- Resetting the forced variation for the "featureKey1" feature flag for the visitor
setForcedVariation({
visitorCode: visitorCode,
experimentId: 9516,
variationKey: null,
});
}, [initialize, visitorCode, setForcedVariation, getVisitorCode]);
useEffect(() => {
init();
}, [init]);
}
```
##### Parameters
An object of type `SetForcedVariationParametersType` with the following properties:
| Name | Type | Description | Default | |
| ---------------------------------------- | --------- | ------------------------------------------------------------------------------------------------------------------------------------------------ | ---------------------------------------------------------------------------------------------------------------------------------------------------------------------------- | - |
| `visitorCode` required | `string` | Unique identifier of the visitor. | | |
| `experimentId` required | `number` | **Experiment Id** that will be targeted and selected during the evaluation process. | | |
| `variationKey` required | \`string | null\` | **Variation Key** corresponding to a `Variation` that should be forced as the returned value for the experiment. If the value is `null`, the forced variation will be reset. | |
| `forceTargeting` optional | `boolean` | Indicates whether targeting for the experiment should be forced and skipped (`true`) or applied as in the standard evaluation process (`false`). | `true` | |
##### Exceptions thrown
| Type | Description |
| -------------------------------------------------- | ----------------------------------------------------------------------------------------------------------------------------------------------------------------------------------------------------------------------------------------------------- |
| `KameleoonException.VisitorCodeEmpty` | The visitor code is empty. |
| `KameleoonException.VisitorCodeMaxLength` | The visitor code exceeded the maximum length (255 characters). |
| `KameleoonException.Initialization` | Indicates that the SDK is not yet fully initialized. |
| `KameleoonException.FeatureFlagExperimentNotFound` | Exception indicating that the requested experiment id has not been found in the SDK's internal configuration. This is usually normal and means that the rule's corresponding experiment has not yet been activated on Kameleoon's side. |
| `KameleoonException.FeatureFlagVariationNotFound` | Exception indicating that the requested variation key(id) has not been found in the internal configuration of the SDK. This is usually normal and means that the variation's corresponding experiment has not yet been activated on Kameleoon's side. |
| `KameleoonException.StorageRead` | Couldn't read storage data. |
| `KameleoonException.StorageWrite` | Couldn't update storage data. |
In most cases, only the basic error, `KameleoonException`, needs to be handled, as demonstrated in the example. However, if different types of errors require a response, handle each one separately based on specific requirements. Additionally, for enhanced reliability, general language errors can be handled by including `Error`.
#### evaluateAudiences()
* 📨 *Sends Tracking Data to Kameleoon*
This method evaluates visitors against all available Audiences Explorer segments and tracks those who match.
`evaluateAudiences()` should be called **after all relevant visitor data has been set or updated**, and **just before** getting a feature variation or checking a feature flag. This approach ensures that the visitor is evaluated against the most current data available, allowing for accurate audience assignment based on all criteria.
After calling this method, you can perform a detailed analysis of segment performance in Audiences Explorer.
```tsx theme={null}
import { useEffect, useCallback } from 'react';
import {
useInitialize,
useFeatureFlag,
useVisitorCode,
} from '@kameleoon/react-sdk';
function MyComponent(): JSX.Element {
const { initialize } = useInitialize();
const { getVisitorCode } = useVisitorCode();
const { evaluateAudiences } = useFeatureFlag();
const init = useCallback(async (): Promise => {
await initialize();
// -- Get visitor code
const visitorCode = getVisitorCode();
evaluateAudiences(visitorCode);
}, [initialize, visitorCode, evaluateAudiences, getVisitorCode]);
useEffect(() => {
init();
}, [init]);
}
```
```jsx theme={null}
import { useEffect, useCallback } from 'react';
import {
useInitialize,
useFeatureFlag,
useVisitorCode,
} from '@kameleoon/react-sdk';
function MyComponent(): JSX.Element {
const { initialize } = useInitialize();
const { getVisitorCode } = useVisitorCode();
const { evaluateAudiences } = useFeatureFlag();
const init = useCallback(async (): Promise => {
await initialize();
// -- Get visitor code
const visitorCode = getVisitorCode();
evaluateAudiences(visitorCode);
}, [initialize, visitorCode, evaluateAudiences, getVisitorCode]);
useEffect(() => {
init();
}, [init]);
}
```
##### Parameters
| Name | Type | Description |
| ------------------------------------- | -------- | --------------------------------- |
| `visitorCode` required | `string` | Unique identifier of the visitor. |
##### Exceptions thrown
| Type | Description |
| ----------------------------------------- | ------------------------------------------------------------------------------------------------ |
| `KameleoonException.Initialization` | Method was executed before the `kameleoonClient` completed its [`initialize`](#initialize) call. |
| `KameleoonException.VisitorCodeEmpty` | The visitor code is empty. |
| `KameleoonException.VisitorCodeMaxLength` | The visitor code exceeded the maximum length (255 characters). |
In most cases, only the basic error, `KameleoonException`, needs to be handled, as demonstrated in the example. However, if different types of errors require a response, handle each one separately based on specific requirements. Additionally, for enhanced reliability, general language errors can be handled by including `Error`.
#### getDataFile()
To evaluate all feature flags, use [`getVariations()`](#getvariations). This method is more efficient than calling `DataFile` and iterating through flags with [`getVariation()`](#getvariation).
Returns the current SDK configuration as a [`DataFile`](#datafile) object.
```tsx theme={null}
import { useEffect, useCallback } from 'react';
import {
useFeatureFlag,
} from '@kameleoon/react-sdk';
function MyComponent(): JSX.Element {
const { getDataFile } = useFeatureFlag();
useEffect(() => {
const dataFile = getDataFile();
}, [getDataFile]);
}
```
```js theme={null}
import { useEffect, useCallback } from 'react';
import {
useFeatureFlag,
} from '@kameleoon/react-sdk';
function MyComponent(): JSX.Element {
const { getDataFile } = useFeatureFlag();
useEffect(() => {
const dataFile = getDataFile();
}, [getDataFile]);
}
```
##### Return value
| Type | Description |
| ---------- | ------------------------------------------------------------ |
| `DataFile` | The [`DataFile`](#datafile) containing the SDK configuration |
### Visitor data
This section provides the methods you use to manage visitor data.
#### getVisitorCode()
`getVisitorCode` method collected from `useVisitorCode` hook obtains a visitor code from the browser cookie. If the visitor code doesn't exist yet, the function generates a random visitor code (or uses the `defaultVisitorCode` value if you provided one) and sets the new visitor code in a cookie.
The `getVisitorCode()` method allows you to set **simulated** variations for a visitor. When cookies (from a **request** or **document**) contain the key `kameleoonSimulationFFData`, the standard evaluation process is bypassed. Instead, the method directly returns a [`Variation`](#variation) based on the provided data.
You can apply simulations in two ways:
* **Automatically (recommended):** If using Kameleoon Web Experimentation or the SDK in [Hybrid mode](/developer-docs/feature-experimentation/get-started/hybrid-experimentation#linking-feature-experiments-with-front-end-tracking-code), the cookie is created automatically when simulating a variant's display using the [Simulation Panel](/user-manual/experimentation/feature-experimentation/using-the-rollout-planner/validation-and-rollback/using-simulation-mode).
* **Manually:** Set the `kameleoonSimulationFFData` cookie manually.
It’s important to distinguish **simulated** variations from **[forced](#setforcedvariation)** variations:
* **Simulated variations**: Affect the overall **feature flag** result.
* **Forced variations**: Are specific to an individual experiment.
⚙️ **Manual setup**
Please ensure the `kameleoonSimulationFFData` cookie follows this format:
* `kameleoonSimulationFFData={"featureKey":{"expId":10,"varId":20}}`: Simulates the variation with `varId` of experiment `expId` for the given `featureKey`.
* `kameleoonSimulationFFData={"featureKey":{"expId":0}}`: Simulates the default variation (defined in the **Then, for everyone else in Production, serve** section) for the given `featureKey`.
⚠️ To ensure proper functionality, the cookie value must be encoded as a URI component using a method such as [`encodeURIComponent`](https://developer.mozilla.org/en-US/docs/Web/JavaScript/Reference/Global_Objects/encodeURIComponent).
```tsx theme={null}
import { useEffect, useCallback } from 'react';
import { useInitialize, useVisitorCode } from '@kameleoon/react-sdk';
function MyComponent(): JSX.Element {
const { initialize } = useInitialize();
const { getVisitorCode } = useVisitorCode();
const init = useCallback(async (): Promise => {
await initialize();
// -- Get visitor code
const visitorCode = getVisitorCode();
// -- Pass, save, and retrieve the default visitorCode.
const visitorCode = getVisitorCode('default_visitor_code');
}, [initialize, getVisitorCode]);
useEffect(() => {
init();
}, [init]);
}
```
```jsx theme={null}
import { useEffect, useCallback } from 'react';
import { useInitialize, useVisitorCode } from '@kameleoon/react-sdk';
function MyComponent() {
const { initialize } = useInitialize();
const { getVisitorCode } = useVisitorCode();
const init = useCallback(async () => {
await initialize();
// -- Get visitor code
const visitorCode = getVisitorCode();
// -- Pass, save, and retrieve the default visitorCode.
const visitorCode = getVisitorCode('default_visitor_code');
}, [initialize, getVisitorCode]);
useEffect(() => {
init();
}, [init]);
}
```
##### Parameters
| Name | Type | Description |
| ------------------------------------------ | -------- | ------------------------------------------------------------------- |
| defaultVisitorCode optional | `string` | visitor code to be used in case there is no visitor code in cookies |
If you don't provide a `defaultVisitorCode` and there is no visitor code stored in a cookie, the visitor code will be randomly generated.
##### Return value
| Type | Description |
| -------- | -------------------- |
| `string` | result visitor code. |
##### Exceptions thrown
| Type | Description |
| ----------------------------------------- | ------------------------------------ |
| `KameleoonException.VisitorCodeMaxLength` | The visitor code length was exceeded |
| `KameleoonException.VisitorCodeEmpty` | The visitor code is empty |
***
#### addData()
The `addData` function, used with the `useData` hook, collects targeting data to store for other hooks to determine if the current visitor is targeted.
* The `addData()` function does not return any value and does not interact with Kameleoon back-end servers on its own. Instead, all the declared data is saved for future transmission via the [flush](#flush) method .This approach helps reduce the number of server calls made, as the data is typically grouped into a single server call triggered by the execution of [flush](#flush).
The [trackConversion](#trackconversion) method also sends out any previously associated data, just like the [flush](#flush). The same holds true for [getFeatureFlagVariationKey](#getfeatureflagvariationkey) and [getFeatureVariable](#getfeatureflagvariable) methods if an experimentation rule is triggered.
* `userAgent` data will not be stored in storage like other data, and it will be sent with every tracking request for bot filtration.
* Check the list of [supported conditions](#targeting-conditions) to know what data types can be used for targeting
Each visitor can only have one instance of associated data for most data types. However, `CustomData` is an exception. Visitors can have one instance of associated `CustomData` per `customDataIndex`.
```tsx theme={null}
import { useEffect, useCallback } from 'react';
import {
useInitialize,
useVisitorCode,
useData,
CustomData,
Browser,
BrowserType,
} from '@kameleoon/react-sdk';
function MyComponent(): JSX.Element {
const { initialize } = useInitialize();
const { getVisitorCode } = useVisitorCode();
const { addData } = useData();
const init = useCallback(async (): Promise => {
await initialize();
// -- Get visitor code
const visitorCode = getVisitorCode();
// -- Create Kameleoon Data Types
const customData = new CustomData(0, 'my_data');
const browserData = new Browser(BrowserType.Chrome);
// -- Add a single data item (tracked by default)
addData('my_visitor_code', browserData);
// -- Add multiple data items (tracked by default)
addData('my_visitor_code', browserData, customData);
// -- Add multiple data items from array (tracked by default)
const dataArr = [browserData, customData];
addData('my_visitor_code', ...dataArr);
// -- Add multiple data items stored locally for targeting only (not sent to the Kameleoon Data API)
addData({visitorCode: 'my_visitor_code', track: false, data: dataArr});
}, [initialize, visitorCode, addData, getVisitorCode]);
useEffect(() => {
init();
}, [init]);
}
```
```jsx theme={null}
import { useEffect, useCallback } from 'react';
import {
useInitialize,
useVisitorCode,
useData,
CustomData,
Browser,
BrowserType,
} from '@kameleoon/react-sdk';
function MyComponent() {
const { initialize } = useInitialize();
const { getVisitorCode } = useVisitorCode();
const { addData } = useData();
const init = useCallback(async () => {
await initialize();
// -- Get visitor code
const visitorCode = getVisitorCode();
// -- Create Kameleoon Data Types
const customData = new CustomData(0, 'my_data');
const browserData = new Browser(BrowserType.Chrome);
// -- Add a single data item (tracked by default)
addData('my_visitor_code', browserData);
// -- Add multiple data items (tracked by default)
addData('my_visitor_code', browserData, customData);
// -- Add multiple data items from array (tracked by default)
const dataArr = [browserData, customData];
addData('my_visitor_code', ...dataArr);
// -- Add multiple data items stored locally for targeting only (not sent to the Kameleoon Data API)
addData({visitorCode: 'my_visitor_code', track: false, data: dataArr});
}, [initialize, visitorCode, addData, getVisitorCode]);
useEffect(() => {
init();
}, [init]);
}
```
##### Parameters
| Name | Type | Description | Default value |
| ------------------------------------- | --------------------- | -------------------------------------------------------------------------------------------------------------------------------------------------------------------------------------------- | ------------- |
| visitorCode required | `string` | unique visitor identification string, can't exceed 255 characters. | |
| track optional | `boolean` | Specifies whether the added data is eligible for tracking. When set to `false`, the data is stored locally and used only for targeting evaluation; it is not sent to the Kameleoon Data API. | `true` |
| kameleoonData optional | `KameleoonDataType[]` | number of instances of any type of `KameleoonData`, can be added solely in array or as sequential arguments | |
* `kameleoonData` is variadic argument it can be passed as one or several arguments (see the example)
* The index or ID of the [custom data](/user-manual/assets/custom-data/create-custom-data) can be found in your Kameleoon account. It is important to note that this index starts at `0`, which means that the first custom data you create for a given site will be assigned `0` as its ID, not `1`.
##### Exceptions thrown
| Type | Description |
| ----------------------------------------- | --------------------------------------------------------------------------------- |
| `KameleoonException.VisitorCodeMaxLength` | The visitor code exceeded the maximum length (255 characters) |
| `KameleoonException.VisitorCodeEmpty` | The visitor code is empty |
| `KameleoonException.StorageWrite` | Couldn't update storage data |
| `KameleoonException.Initialization` | Method was executed before the `kameleoonClient` completed it's `initialize` call |
See the [Data types](#data-types) reference for more details of how to manage different data types.
***
#### flush()
Method `flush` collected with `useData` takes the Kameleoon data associated with the visitor and sends the data tracking request along with all of the data that's been added previously using the [addData](#adddata).
If you don't specify a `visitorCode`, the SDK flushes all of its stored data to the remote Kameleoon servers. If any previously failed tracking requests were stored locally during [offline mode](#initialize), the SDK attempts to send the stored requests before executing the latest request.
The `isUniqueIdentifier` parameter can be useful in some edge-case scenarios, such as when you can't access the anonymous `visitorCode` that was originally assigned to the visitor, but you do have access to an internal ID that is connected to the anonymous visitor using session merging capabilities.
```tsx theme={null}
import { useEffect, useCallback } from 'react';
import {
useInitialize,
useVisitorCode,
useData,
CustomData,
} from '@kameleoon/react-sdk';
function MyComponent(): JSX.Element {
const { initialize } = useInitialize();
const { getVisitorCode } = useVisitorCode();
const { addData, flush } = useData();
const init = useCallback(async (): Promise => {
await initialize();
// -- Get visitor code
const visitorCode = getVisitorCode();
// -- Create instance of CustomData
const customData = new CustomData(0, 'my_data');
addData(visitorCode, customData);
// -- Flush added custom data for visitor
flush(visitorCode);
// -- Instantly flush added custom data for visitor (fire-and-forget)
flushInstant(visitorCode);
// -- Instantly flush added custom data for visitor and wait for completion
await flushInstant(visitorCode);
// -- Flush data for all the visitors
flush();
// -- Instantly flush data for all the visitors (fire-and-forget)
flushInstant();
// -- Instantly flush data for all the visitors and wait for completion
await flushInstant();
// -- Flush data with unique visitor identifier flag
const internalUserId = 'my_user_id';
flush(internalUserId, true);
}, [initialize, visitorCode, addData, flush, getVisitorCode]);
useEffect(() => {
init();
}, [init]);
}
```
```jsx theme={null}
import { useEffect, useCallback } from 'react';
import {
useInitialize,
useVisitorCode,
useData,
CustomData,
} from '@kameleoon/react-sdk';
function MyComponent() {
const { initialize } = useInitialize();
const { getVisitorCode } = useVisitorCode();
const { addData, flush } = useData();
const init = useCallback(async () => {
await initialize();
// -- Get visitor code
const visitorCode = getVisitorCode();
// -- Create instance of CustomData
const customData = new CustomData(0, 'my_data');
addData(visitorCode, customData);
// -- Flush added custom data for visitor
flush(visitorCode);
// -- Flush data for all the visitors
flush();
// -- Flush data with unique visitor identifier flag
const internalUserId = 'my_user_id';
flush(internalUserId, true);
}, [initialize, visitorCode, addData, flush, getVisitorCode]);
useEffect(() => {
init();
}, [init]);
}
```
##### Parameters
| Name | Type | Description | Default |
| ------------------------------------------ | --------- | ----------------------------------------------------------------------------------------------------------------------------------------------------------- | ------- |
| visitorCode optional | `string` | unique visitor identification string, can't exceed 255 characters length, if not passed all the data will be flushed (sent to the remote Kameleoon servers) | - |
| isUniqueIdentifier optional | `boolean` | an optional parameter for specifying if the visitorCode is a unique identifier | `false` |
##### Exceptions thrown
| Type | Description |
| ----------------------------------------- | --------------------------------------------------------------------------------- |
| `KameleoonException.VisitorCodeMaxLength` | The visitor code exceeded the maximum length (255 characters) |
| `KameleoonException.VisitorCodeEmpty` | The visitor code is empty |
| `KameleoonException.Initialization` | Method was executed before the `kameleoonClient` completed it's `initialize` call |
`flush()` takes the Kameleoon data associated with the visitor and schedules the data to be sent with the next tracking request. The time of the next tracking request is defined by SDK Configuration [`trackingInterval`](#configuration-parameters) parameter. Visitor data can be added using [addData](#adddata) and [getRemoteVisitorData](#getremotevisitordata) methods.
If you don't specify a `visitorCode`, the SDK flushes all of its stored data to the remote Kameleoon servers. If any previously failed tracking requests were stored locally during [offline mode](#initialize), the SDK attempts to send the stored requests before executing the latest request.
If you need to send tracking requests immediately, use `flushInstant()` — the asynchronous version of `flush` that returns `Promise`. You can `await` it when you need delivery guarantees (for example, before page navigation/unload), or call it without `await` as a fire-and-forget request:
* `await flushInstant(visitorCode)` sends tracking requests immediately for a specific visitor and waits for completion
* `await flushInstant()` sends tracking requests immediately for all visitors and waits for completion
```tsx theme={null}
import { useEffect, useCallback } from 'react';
import {
useInitialize,
useVisitorCode,
useData,
CustomData,
} from '@kameleoon/react-sdk';
function MyComponent(): JSX.Element {
const { initialize } = useInitialize();
const { getVisitorCode } = useVisitorCode();
const { addData, flush } = useData();
const init = useCallback(async (): Promise => {
await initialize();
// -- Get visitor code
const visitorCode = getVisitorCode();
// -- Create instance of CustomData
const customData = new CustomData(0, 'my_data');
addData(visitorCode, customData);
// -- Flush added custom data for visitor
flush(visitorCode);
// -- Instantly flush added custom data for visitor
flush({ visitorCode, instant: true });
// -- Flush data for all the visitors
flush();
// -- Instantly flush data for all the visitors
flush({ instant: true });
}, [initialize, visitorCode, addData, flush, getVisitorCode]);
useEffect(() => {
init();
}, [init]);
}
```
```jsx theme={null}
import { useEffect, useCallback } from 'react';
import {
useInitialize,
useVisitorCode,
useData,
CustomData,
} from '@kameleoon/react-sdk';
function MyComponent() {
const { initialize } = useInitialize();
const { getVisitorCode } = useVisitorCode();
const { addData, flush } = useData();
const init = useCallback(async () => {
await initialize();
// -- Get visitor code
const visitorCode = getVisitorCode();
// -- Create instance of CustomData
const customData = new CustomData(0, 'my_data');
addData(visitorCode, customData);
// -- Flush added custom data for visitor
flush(visitorCode);
// -- Instantly flush added custom data for visitor
flush({ visitorCode, instant: true });
// -- Flush data for all the visitors
flush();
// -- Instantly flush data for all the visitors
flush({ instant: true });
}, [initialize, visitorCode, addData, flush, getVisitorCode]);
useEffect(() => {
init();
}, [init]);
}
```
##### Parameters
| Name | Type | Description | Default |
| ----------------------------------- | -------- | -------------------------------------------------------------------------------------------------------------------------------------------------- | ------- |
| visitorCode optional | `string` | unique visitor identification string, can't exceed 255 characters, if not passed, all data will be flushed (sent to the remote Kameleoon servers). | - |
Or an object with the type FlushParamsType, containing:
| Name | Type | Description | Default |
| ----------------------------------- | --------- | -------------------------------------------------------------------------------------------------------------------------------------------------- | ------- |
| visitorCode optional | `string` | unique visitor identification string, can't exceed 255 characters, if not passed, all data will be flushed (sent to the remote Kameleoon servers). | - |
| instant optional | `boolean` | Boolean flag indicating whether the data should be sent instantly (`true`) or according to the scheduled tracking interval (`false`). | - |
##### Exceptions thrown
| Type | Description |
| ----------------------------------------- | --------------------------------------------------------------------------------- |
| `KameleoonException.VisitorCodeMaxLength` | The visitor code exceeded the maximum length (255 characters) |
| `KameleoonException.VisitorCodeEmpty` | The visitor code is empty |
| `KameleoonException.Initialization` | Method was executed before the `kameleoonClient` completed it's `initialize` call |
***
#### getRemoteData()
Asynchronous method `getRemoteData`, collected with the `useData` hook, returns a data stored for specified site code on a remote Kameleoon server.
For example, you can use this function to retrieve user preferences, historical data, or any other data relevant to your application's logic. By storing this data on our highly scalable servers using our \[Data API], you can efficiently manage massive amounts of data and retrieve it for each of your visitors or users.
```tsx theme={null}
import { useEffect, useCallback } from 'react';
import { useData } from '@kameleoon/react-sdk';
function MyComponent(): JSX.Element {
const { getRemoteData } = useData();
const getData = useCallback(async (): Promise => {
// -- Get remote data
const jsonData = await getRemoteData('my_data_key');
const data = JSON.parse(jsonData);
}, [getRemoteData]);
useEffect(() => {
getData();
}, [getData]);
}
```
```jsx theme={null}
import { useEffect, useCallback } from 'react';
import { useData } from '@kameleoon/react-sdk';
function MyComponent() {
const { getRemoteData } = useData();
const getData = useCallback(async () => {
// -- Get remote data
const jsonData = await getRemoteData('my_data_key');
const data = JSON.parse(jsonData);
}, [getRemoteData]);
useEffect(() => {
getData();
}, [getData]);
}
```
##### Parameters
| Name | Type | Description |
| --------------------------- | -------- | ---------------------------------------------------------- |
| key required | `string` | unique key that the data you try to get is associated with |
##### Return value
| Type | Description |
| ---------- | --------------------------------------------- |
| `JSONType` | promise with data retrieved for specific key. |
##### Exceptions thrown
| Type | Description |
| ------------------------------- | -------------------------------------------- |
| `KameleoonException.RemoteData` | Couldn't retrieve data from Kameleoon server |
***
#### getRemoteVisitorData()
`getRemoteVisitorData()` is an asynchronous method for retrieving Kameleoon Visits Data for the `visitorCode` from the Kameleoon Data API. The method adds the data to storage for other methods to use when making targeting decisions.
Data obtained using this method plays an important role when you want to:
* use data collected from other devices.
* access a user's history, such as previously visited pages during past visits.
* use data that is only accessible on the client-side, like datalayer variables and goals that only convert on the front-end.
Read [this article](/developer-docs/feature-experimentation/targeting-and-segmentation/native-segmentation) for a better understanding of possible use cases.
By default, `getRemoteVisitorData()` automatically retrieves the latest stored custom data with `scope=Visitor` and attaches them to the visitor without the need to call the method `addData()`. It is particularly useful for [synchronizing custom data between multiple devices](/developer-docs/sdks/web-sdks/nodejs-sdk#synchronizing-custom-data-across-devices).
The `isUniqueIdentifier` parameter can be useful in edge-case scenarios, such as when you can't access the anonymous `visitorCode` that was originally assigned to the visitor, but you do have access to an internal ID that is connected to the anonymous visitor using session merging capabilities.
```tsx theme={null}
import { useEffect, useCallback } from 'react';
import {
useData,
KameleoonDataType,
VisitorDataFiltersType,
} from '@kameleoon/react-sdk';
function MyComponent(): JSX.Element {
const { getRemoteVisitorData } = useData();
const getData = useCallback(async (): Promise => {
// -- Get remote visitor data and add it to storage.
const kameleoonDataList: KameleoonDataType[] = await getRemoteVisitorData({
visitorCode: 'my_visitor_code',
});
// -- Get remote visitor data without adding it to storage.
const kameleoonDataList: KameleoonDataType[] = await getRemoteVisitorData({
visitorCode: 'my_visitor_code',
shouldAddData: false,
});
// -- Get remote visitor data without adding it to storage,
// and customizing filters for retrieving visits data.
const filters: VisitorDataFiltersType = {
currentVisit: true,
previousVisitAmount: 10,
customData: true,
geolocation: true,
conversions: true,
};
const kameleoonDataList: KameleoonDataType[] = await getRemoteVisitorData({
visitorCode: 'my_visitor_code',
shouldAddData: false,
filters,
});
}, [getRemoteVisitorData]);
useEffect(() => {
getData();
}, [getData]);
}
```
```jsx theme={null}
import { useEffect, useCallback } from 'react';
import { useData } from '@kameleoon/react-sdk';
function MyComponent() {
const { getRemoteVisitorData } = useData();
const getData = useCallback(async () => {
// -- Get remote visitor data and add it to storage.
const kameleoonDataList = await getRemoteVisitorData({
visitorCode: 'my_visitor_code',
});
// -- Get remote visitor data without adding it to storage.
const kameleoonDataList = await getRemoteVisitorData({
visitorCode: 'my_visitor_code',
shouldAddData: false,
});
// -- Get remote visitor data without adding it to storage,
// and customizing filters for retrieving visits data.
const filters = {
currentVisit: true,
previousVisitAmount: 10,
customData: true,
geolocation: true,
conversions: true,
};
const kameleoonDataList = await getRemoteVisitorData({
visitorCode: 'my_visitor_code',
shouldAddData: false,
filters,
});
}, [getRemoteVisitorData]);
useEffect(() => {
getData();
}, [getData]);
}
```
##### Parameters
An object with the type `RemoteVisitorDataParamsType` containing:
| Name | Type | Description | Default Value |
| ------------------------------------------ | ------------------------ | ------------------------------------------------------------------------------------------------------------------------------------------------------ | --------------------------------------------------------------------------------------------------------------- |
| visitorCode required | `string` | unique visitor identification string, can't exceed 255 characters length | - |
| shouldAddData optional | `boolean` | boolean flag identifying whether the retrieved custom data should be set to the storage like `addData` method does | `true` |
| filters optional | `VisitorDataFiltersType` | filters for specifying what data should be retrieved from visits, by default only `customData` is retrieved from the current and latest previous visit | `{ previousVisitAmount: 1, currentVisit: true, customData: true }`, other filters parameters are set to `false` |
| isUniqueIdentifier optional | `boolean` | optional parameter that, when `true`, specifies that the visitorCode is a unique identifier | `false` |
##### Return value
| Type | Description |
| --------------------- | --------------------------------------------- |
| `KameleoonDataType[]` | promise with list of Kameleoon Data retrieved |
##### Exceptions thrown
| Type | Description |
| ----------------------------------------- | ---------------------------------------------------------------------- |
| `KameleoonException.VisitorCodeMaxLength` | The visitor code exceeded the maximum length (255 characters) |
| `KameleoonException.VisitorCodeEmpty` | The visitor code is empty |
| `KameleoonException.RemoteData` | Couldn't retrieve data from Kameleoon server |
| `KameleoonException.VisitAmount` | Visit amount must be a number between 1 and 25 |
| `KameleoonException.Initialization` | Method was executed before `initialize` was done for `kameleoonClient` |
##### Using parameters in getRemoteVisitorData()
The `getRemoteVisitorData()` method offers flexibility by allowing you to define various parameters when retrieving data on visitors. Whether you're targeting based on goals, experiments, or variations, the same approach applies across all data types.
For example, let's say you want to retrieve data on visitors who completed a goal "Order transaction". You can specify parameters within the `getRemoteVisitorData()` method to refine your targeting. For instance, if you want to target only users who converted on the goal in their last five visits, you can set the `previousVisitAmount` parameter to 5 and `conversions` to true.
The flexibility shown in this example is not limited to goal data. You can use parameters within the `getRemoteVisitorData()` method to retrieve data on a variety of visitor behaviors.
Here is the list of available `VisitorDataFiltersType` filters:
| Name | Type | Description | Default |
| ------------------------------------------- | --------- | -------------------------------------------------------------------------------------------------------------------------------------------------------------------------------------------- | ------- |
| previousVisitAmount optional | `number` | Number of previous visits to retrieve data from. Number between `1` and `25` | `1` |
| currentVisit optional | `boolean` | If true, current visit data will be retrieved | `true` |
| customData optional | `boolean` | If true, custom data will be retrieved. | `true` |
| pageViews optional | `boolean` | If true, page data will be retrieved. | `false` |
| geolocation optional | `boolean` | If true, geolocation data will be retrieved. | `false` |
| device optional | `boolean` | If true, device data will be retrieved. | `false` |
| browser optional | `boolean` | If true, browser data will be retrieved. | `false` |
| operatingSystem optional | `boolean` | If true, operating system data will be retrieved. | `false` |
| conversions optional | `boolean` | If true, conversion data will be retrieved. | `false` |
| experiments optional | `boolean` | If true, experiment data will be retrieved. | `false` |
| kcs optional | `boolean` | If true, Kameleoon Conversion Score (KCS) will be retrieved. Requires the [AI Predictive Targeting add-on](/user-manual/ai-predictive-targeting/target-users-based-on-likelihood-to-convert) | `false` |
`getRemoteVisitorData()` is an asynchronous method for retrieving Kameleoon Visits Data for the `visitorCode` from the Kameleoon Data API. The method adds the data to storage for other methods to use when making targeting decisions.
Data obtained using this method plays an important role when you want to:
* use data collected from other devices.
* access a user's history, such as previously visited pages during past visits.
* use data that is only accessible on the client-side, like datalayer variables and goals that only convert on the front-end.
Read [this article](/developer-docs/feature-experimentation/targeting-and-segmentation/native-segmentation) for a better understanding of possible use cases.
By default, `getRemoteVisitorData()` automatically retrieves the latest stored custom data with `scope=Visitor` and attaches them to the visitor without the need to call the method `addData()`. It is particularly useful for [synchronizing custom data between multiple devices](/developer-docs/sdks/web-sdks/nodejs-sdk#synchronizing-custom-data-across-devices).
```tsx theme={null}
import { useEffect, useCallback } from 'react';
import {
useData,
KameleoonDataType,
VisitorDataFiltersType,
} from '@kameleoon/react-sdk';
function MyComponent(): JSX.Element {
const { getRemoteVisitorData } = useData();
const getData = useCallback(async (): Promise => {
// -- Get remote visitor data and add it to storage.
const kameleoonDataList: KameleoonDataType[] = await getRemoteVisitorData({
visitorCode: 'my_visitor_code',
});
// -- Get remote visitor data without adding it to storage.
const kameleoonDataList: KameleoonDataType[] = await getRemoteVisitorData({
visitorCode: 'my_visitor_code',
shouldAddData: false,
});
// -- Get remote visitor data without adding it to storage,
// and customizing filters for retrieving visits data.
const filters: VisitorDataFiltersType = {
currentVisit: true,
previousVisitAmount: 10,
customData: true,
geolocation: true,
conversions: true,
};
const kameleoonDataList: KameleoonDataType[] = await getRemoteVisitorData({
visitorCode: 'my_visitor_code',
shouldAddData: false,
filters,
});
}, [getRemoteVisitorData]);
useEffect(() => {
getData();
}, [getData]);
}
```
```jsx theme={null}
import { useEffect, useCallback } from 'react';
import { useData } from '@kameleoon/react-sdk';
function MyComponent() {
const { getRemoteVisitorData } = useData();
const getData = useCallback(async () => {
// -- Get remote visitor data and add it to storage.
const kameleoonDataList = await getRemoteVisitorData({
visitorCode: 'my_visitor_code',
});
// -- Get remote visitor data without adding it to storage.
const kameleoonDataList = await getRemoteVisitorData({
visitorCode: 'my_visitor_code',
shouldAddData: false,
});
// -- Get remote visitor data without adding it to storage,
// and customizing filters for retrieving visits data
const filters = {
currentVisit: true,
previousVisitAmount: 10,
customData: true,
geolocation: true,
conversions: true,
};
const kameleoonDataList = await getRemoteVisitorData({
visitorCode: 'my_visitor_code',
shouldAddData: false,
filters,
});
}, [getRemoteVisitorData]);
useEffect(() => {
getData();
}, [getData]);
}
```
##### Parameters
An object with the type `RemoteVisitorDataParamsType` containing:
| Name | Type | Description | Default Value |
| ------------------------------------- | ------------------------ | ------------------------------------------------------------------------------------------------------------------------------------------------------ | --------------------------------------------------------------------------------------------------------------- |
| visitorCode required | `string` | unique visitor identification string, can't exceed 255 characters length | - |
| shouldAddData optional | `boolean` | boolean flag identifying whether the retrieved custom data should be set to the storage like `addData` method does | `true` |
| filters optional | `VisitorDataFiltersType` | filters for specifying what data should be retrieved from visits, by default only `customData` is retrieved from the current and latest previous visit | `{ previousVisitAmount: 1, currentVisit: true, customData: true }`, other filters parameters are set to `false` |
##### Return value
| Type | Description |
| --------------------- | --------------------------------------------- |
| `KameleoonDataType[]` | promise with list of Kameleoon Data retrieved |
##### Exceptions thrown
| Type | Description |
| ----------------------------------------- | ---------------------------------------------------------------------- |
| `KameleoonException.VisitorCodeMaxLength` | The visitor code exceeded the maximum length (255 characters) |
| `KameleoonException.VisitorCodeEmpty` | The visitor code is empty |
| `KameleoonException.RemoteData` | Couldn't retrieve data from Kameleoon server |
| `KameleoonException.VisitAmount` | Visit amount must be a number between 1 and 25 |
| `KameleoonException.Initialization` | Method was executed before `initialize` was done for `kameleoonClient` |
##### Using parameters in getRemoteVisitorData()
The `getRemoteVisitorData()` method offers flexibility by allowing you to define various parameters when retrieving data on visitors. Whether you're targeting based on goals, experiments, or variations, the same approach applies across all data types.
For example, let's say you want to retrieve data on visitors who completed a goal "Order transaction". You can specify parameters within the `getRemoteVisitorData()` method to refine your targeting. For instance, if you want to target only users who converted on the goal in their last five visits, you can set the `previousVisitAmount` parameter to 5 and `conversions` to true.
The flexibility shown in this example is not limited to goal data. You can use parameters within the `getRemoteVisitorData()` method to retrieve data on a variety of visitor behaviors.
Here is the list of available `VisitorDataFiltersType` filters:
| Name | Type | Description | Default |
| ------------------------------------------- | --------- | ----------------------------------------------------------------------------------------------------------------------------------------------------------------------------------------------------------------------------------------------------------------------------------------------------------------------------------------------- | ------- |
| previousVisitAmount optional | `number` | Number of previous visits to retrieve data from. Number between `1` and `25` | `1` |
| currentVisit optional | `boolean` | If true, current visit data will be retrieved | `true` |
| customData optional | `boolean` | If true, custom data will be retrieved. | `true` |
| pageViews optional | `boolean` | If true, page data will be retrieved. | `false` |
| geolocation optional | `boolean` | If true, geolocation data will be retrieved. | `false` |
| device optional | `boolean` | If true, device data will be retrieved. | `false` |
| browser optional | `boolean` | If true, browser data will be retrieved. | `false` |
| operatingSystem optional | `boolean` | If true, operating system data will be retrieved. | `false` |
| conversions optional | `boolean` | If true, conversion data will be retrieved. | `false` |
| experiments optional | `boolean` | If true, experiment data will be retrieved. | `false` |
| kcs optional | `boolean` | If true, Kameleoon Conversion Score (KCS) will be retrieved. Requires the [AI Predictive Targeting add-on](/user-manual/ai-predictive-targeting/target-users-based-on-likelihood-to-convert) | `false` |
| visitorCode optional | `boolean` | If true, Kameleoon will retrieve the `visitorCode` from the most recent visit and use it for the current visit. This is necessary if you want to ensure that the visitor, identified by their `visitorCode`, always receives the same variation across visits for [Cross-device experimentation](/developer-docs/cross-device-experimentation). | `true` |
| personalization optional | `boolean` | If true, personalization data will be retrieved. This is required for the personalization condition | `false` |
| cbs optional | `boolean` | If true, Contextual Bandit score data will be retrieved. | `false` |
***
#### getVisitorWarehouseData()
Asynchronous method `getVisitorWarehouseAudience` collected with `useData` hook retrieves all audience data associated with the visitor in your data warehouse using the specified `visitorCode` and `warehouseKey`. The `warehouseKey` is typically your internal user ID. The `customDataIndex` parameter corresponds to the Kameleoon custom data that Kameleoon uses to target your visitors. Refer to the [warehouse targeting documentation](/user-manual/integrations/data-warehouses/bigquery/use-bigquery-as-a-source-audience-targeting) for additional details.
```tsx theme={null}
import { useEffect, useCallback } from 'react';
import { useData, CustomData } from '@kameleoon/react-sdk';
function MyComponent(): JSX.Element {
const { getVisitorWarehouseAudience } = useData();
const getData = useCallback(async (): Promise => {
// -- Get visitor warehouse audience data using `warehouseKey`
// and add it to storage.
const customData: CustomData = await getVisitorWarehouseAudience({
visitorCode: 'my_visitor',
customDataIndex: 10,
warehouseKey: 'my_key',
});
// -- Get visitor warehouse audience data using `visitorCode`
// and add it to storage.
const customData: CustomData = await getVisitorWarehouseAudience({
visitorCode: 'my_visitor',
customDataIndex: 10,
});
}, [getRemoteData]);
useEffect(() => {
getData();
}, [getData]);
}
```
```jsx theme={null}
import { useEffect, useCallback } from 'react';
import { useData } from '@kameleoon/react-sdk';
function MyComponent() {
const { getVisitorWarehouseAudience } = useData();
const getData = useCallback(async () => {
// -- Get visitor warehouse audience data using `warehouseKey`
// and add it to storage.
const customData = await getVisitorWarehouseAudience({
visitorCode: 'my_visitor',
customDataIndex: 10,
warehouseKey: 'my_key',
});
// -- Get visitor warehouse audience data using `visitorCode`
// and add it to storage.
const customData = await getVisitorWarehouseAudience({
visitorCode: 'my_visitor',
customDataIndex: 10,
});
}, [getRemoteData]);
useEffect(() => {
getData();
}, [getData]);
}
```
##### Parameters
Parameters object consisting of:
| Name | Type | Description |
| --------------------------------------- | -------- | --------------------------------------------------------------------------------------------------- |
| visitorCode required | `string` | unique visitor identification string, can't exceed 255 characters length |
| customDataIndex required | `number` | number representing the index of the custom data you want to use to target your Warehouse Audiences |
| warehouseKey optional | `string` | unique key to identify the warehouse data (usually, your internal user ID) |
##### Return value
| Type | Description |
| ----------------------------- | ----------------------------------------------------------------------------------------------- |
| `Promise` | promise containing CustomData with the associated warehouse data or `null` if there was no data |
##### Exceptions thrown
| Type | Description |
| ----------------------------------------- | ------------------------------------------------------------- |
| `KameleoonException.VisitorCodeMaxLength` | The visitor code exceeded the maximum length (255 characters) |
| `KameleoonException.VisitorCodeEmpty` | The visitor code is empty |
| `KameleoonException.RemoteData` | Couldn't retrieve data from Kameleoon server |
***
#### setLegalConsent()
Method `setLegalConsent`, collected with `useVisitorCode` hook, specifies whether the visitor has given legal consent to use personal data. Setting the `legalConsent` parameter to `false` limits the types of data that you can include in tracking requests. This helps you adhere to legal and regulatory requirements while responsibly managing visitor data. You can find more information on personal data in the [consent management policy](/user-manual/project-management/consent-management-policy).
* Consent information is in sync between the Kameleoon Engine (application file engine.js) and the React SDK. This synchronization means that once consent is set on either the Engine or the SDK, it's automatically set for both. This feature eliminates the need for manual consent handling and ensures that SDKs operate in compliance with user preferences.
If you use Kameleoon in Hybrid mode, we recommend reading the consent section in our [Hybrid experimentation article](/developer-docs/feature-experimentation/get-started/hybrid-experimentation/#managing-consent-in-hybrid-mode)
* When handling legal consent, it's important to use [`getVisitorCode`](#getvisitorcode) method. Additionally, `getVisitorCode` does not accept `domain` as an argument. Instead, pass it to the [`createClient`](#createclient) function.
```ts theme={null}
import { useEffect, useCallback } from 'react';
import { useInitialize, useVisitorCode } from '@kameleoon/react-sdk';
function MyComponent(): JSX.Element {
const { initialize } = useInitialize();
const { getVisitorCode, setLegalConsent } = useVisitorCode();
const init = useCallback(async (): Promise => {
await initialize();
// -- Get visitor code
const visitorCode = getVisitorCode();
setLegalConsent(visitorCode, true);
}, [initialize, getVisitorCode, setLegalConsent]);
useEffect(() => {
init();
}, [init]);
}
```
```js theme={null}
import { useEffect, useCallback } from 'react';
import { useInitialize, useVisitorCode } from '@kameleoon/react-sdk';
function MyComponent() {
const { initialize } = useInitialize();
const { getVisitorCode, setLegalConsent } = useVisitorCode();
const init = useCallback(async () => {
await initialize();
// -- Get visitor code
const visitorCode = getVisitorCode();
setLegalConsent(visitorCode, true);
}, [initialize, getVisitorCode, setLegalConsent]);
useEffect(() => {
init();
}, [init]);
}
```
##### Parameters
| Name | Type | Description |
| ----------------------------------- | --------- | ---------------------------------------------------------------------------------------------------------------------------------------------------------------------------------------------- |
| visitorCode required | `string` | unique visitor identification string, can't exceed 255 characters length |
| consent required | `boolean` | a boolean value representing the legal consent status. `true` indicates the visitor has given legal consent, `false` indicates the visitor has never provided, or has withdrawn, legal consent |
##### Exceptions thrown
| Type | Description |
| ----------------------------------------- | -------------------------------------------------------------------- |
| `KameleoonException.VisitorCodeMaxLength` | The visitor code length exceeded the maximum length (255 characters) |
| `KameleoonException.VisitorCodeEmpty` | The visitor code is empty |
##### Consent revocation behavior
When you call `setLegalConsent()` with `consent=false`, the SDK does not delete the `kameleoonVisitorCode` cookie. Instead, it stops extending the cookie's expiration date, allowing the cookie to persist until it naturally expires.
If your compliance requirements demand the immediate removal of the cookie file upon opt-out, you must delete it manually using your framework’s native cookie management methods. The SDK will not remove the file automatically.
***
### Goals and third-party analytics
This section provides the methods you use to track when a visitor action achieve one of you goals (a conversion).
#### trackConversion()
* 📨 *Sends Tracking Data to Kameleoon*
The `trackConversion()` function, used with the `useData` hook creates and adds [`Conversion`](#conversion) data to the visitor with specified parameters and executes `flush()`.
Use this method to track a conversion for a specific [goal](/user-manual/assets/goals/create-a-goal) and user. This method requires `visitorCode` and `goalId`. In addition, this method also accepts an optional `revenue` argument. The `visitorCode` is usually identical to the one that was used when triggering the experiment.
The `trackConversion()` method doesn't return any value. This method is non-blocking as the server call is made asynchronously.
If you specify a `visitorCode` and set `isUniqueIdentifier` to `true`, the `trackConversion()` method uses it as the unique visitor identifier, which is useful for [cross-device experimentation](#cross-device-experimentation) because the SDK links the flushed data with the visitor that is associated with the specified identifier.
The `isUniqueIdentifier` can also be useful in other edge-case scenarios, such as when you can't access the anonymous `visitorCode` that was originally assigned to the visitor, but you do have access to an internal ID that is connected to the anonymous visitor using session merging capabilities.
```tsx theme={null}
import { useEffect, useCallback } from 'react';
import { useInitialize, useVisitorCode, useData } from '@kameleoon/react-sdk';
function MyComponent(): JSX.Element {
const { initialize } = useInitialize();
const { getVisitorCode } = useVisitorCode();
const { trackConversion } = useData();
const init = useCallback(async (): Promise => {
await initialize();
// -- Get visitor code
const visitorCode = getVisitorCode();
// -- Track conversion
trackConversion({ visitorCode, revenue: 2000, goalId: 123 });
// -- Track conversion with unique visitor identifier flag
const internalUserId = 'my_user_id';
trackConversion({
visitorCode: internalUserId,
revenue: 20000,
goalId: 123,
isUniqueIdentifier: true,
});
}, [initialize, trackConversion, visitorCode, getVisitorCode]);
useEffect(() => {
init();
}, [init]);
}
```
```jsx theme={null}
import { useEffect, useCallback } from 'react';
import { useInitialize, useVisitorCode, useData } from '@kameleoon/react-sdk';
function MyComponent() {
const { initialize } = useInitialize();
const { getVisitorCode } = useVisitorCode();
const { trackConversion } = useData();
const init = useCallback(async () => {
await initialize();
// -- Get visitor code
const visitorCode = getVisitorCode();
// -- Track conversion
trackConversion({ visitorCode, revenue: 2000, goalId: 123 });
// -- Track conversion with unique visitor identifier flag
const internalUserId = 'my_user_id';
trackConversion({
visitorCode: internalUserId,
revenue: 20000,
goalId: 123,
isUniqueIdentifier: true,
});
}, [initialize, trackConversion, visitorCode, getVisitorCode]);
useEffect(() => {
init();
}, [init]);
}
```
##### Parameters
Parameters object consisting of:
| Name | Type | Description | Default |
| -------------------------------------------- | --------- | ------------------------------------------------------------------------------- | ------- |
| `visitorCode` required | `string` | Unique identifier of the visitor. | |
| `goalId` required | `number` | ID of the goal. | |
| `revenue` optional | `number` | Revenue of the conversion. | `0` |
| `isUniqueIdentifier` optional | `boolean` | An optional parameter for specifying if the visitorCode is a unique identifier. | `false` |
##### Exceptions thrown
| Type | Description |
| ----------------------------------------- | -------------------------------------------------------------- |
| `KameleoonException.VisitorCodeMaxLength` | The visitor code exceeded the maximum length (255 characters). |
| `KameleoonException.VisitorCodeEmpty` | The visitor code is empty. |
| `KameleoonException.StorageWrite` | Couldn't update storage data. |
* 📨 *Sends Tracking Data to Kameleoon*
The `trackConversion()` function, used with the `useData` hook creates and adds [`Conversion`](#conversion) data to the visitor with specified parameters and executes `flush()`.
Use this method to track a conversion for a specific [goal](/user-manual/assets/goals/create-a-goal) and user. This method requires `visitorCode` and `goalId`. In addition, this method also accepts an optional `revenue`, `negative` and `metadata` arguments. The `visitorCode` is usually identical to the one that was used when triggering the experiment.
The `trackConversion()` method doesn't return any value. This method is non-blocking as the server call is made asynchronously.
```tsx theme={null}
import { useEffect, useCallback } from 'react';
import { useInitialize, useVisitorCode, useData, CustomData } from '@kameleoon/react-sdk';
function MyComponent(): JSX.Element {
const { initialize } = useInitialize();
const { getVisitorCode } = useVisitorCode();
const { trackConversion } = useData();
const init = useCallback(async (): Promise => {
await initialize();
// -- Get visitor code
const visitorCode = getVisitorCode();
// -- Track conversion
trackConversion({
visitorCode,
revenue: 2000,
goalId: 123,
metadata: [new CustomData(0, 'value')],
negative: true,
});
}, [initialize, trackConversion, visitorCode, getVisitorCode]);
useEffect(() => {
init();
}, [init]);
}
```
```jsx theme={null}
import { useEffect, useCallback } from 'react';
import { useInitialize, useVisitorCode, useData, CustomData } from '@kameleoon/react-sdk';
function MyComponent() {
const { initialize } = useInitialize();
const { getVisitorCode } = useVisitorCode();
const { trackConversion } = useData();
const init = useCallback(async () => {
await initialize();
// -- Get visitor code
const visitorCode = getVisitorCode();
// -- Track conversion
trackConversion({
visitorCode,
revenue: 2000,
goalId: 123,
metadata: [new CustomData(0, 'value')],
negative: true,
});
}, [initialize, trackConversion, visitorCode, getVisitorCode]);
useEffect(() => {
init();
}, [init]);
}
```
##### Parameters
Parameters object consisting of:
| Name | Type | Description | Default |
| ------------------------------------- | -------------- | -------------------------------------------------------------------------------------------------------------------------------- | ----------- |
| `visitorCode` required | `string` | Unique identifier of the visitor. | |
| `goalId` required | `number` | ID of the goal. | |
| `revenue` optional | `number` | Revenue of the conversion. | `0` |
| `negative` optional | `boolean` | Defines if the revenue is positive or negative. | `false` |
| `metadata` optional | `CustomData[]` | Metadata of the conversion. [Must be defined beforehand in the Kameleoon App](/user-manual/assets/goals/create-a-goal#metadata). | `undefined` |
metadata values are accessible through [raw data exports](/user-manual/experiment-analytics/analyze-results/results-page/results-page-actions#Export) and [the results page](/user-manual/experiment-analytics/analyze-results/data-and-metrics/goal-metadata).
If the `metadata` parameter is provided, Kameleoon will use these specified values for the current conversion instead of what was previously collected using the [`addData()`](#adddata) method. If the parameter is omitted, Kameleoon will use the last tracked values for those [`CustomData`](#customdata) prior to the conversion and within the same visit.
Kameleoon will only consider the metadata values that are explicitly passed as parameters to the `trackConversion()` method.
In the example below, Kameleoon will associate the conversion only with the custom data value explicitly provided as a parameter (here: index 5 with the value 'Amex Credit Card').
```ts theme={null}
addData(visitorCode, new CustomData(5, 'Credit Card'), new CustomData(9, 'Express Delivery'));
trackConversion({
visitorCode,
goalId: 1000,
metadata: [new CustomData(5, 'Amex Credit Card')]
});
```
```js theme={null}
addData(visitorCode, new CustomData(5, 'Credit Card'), new CustomData(9, 'Express Delivery'));
trackConversion({
visitorCode,
goalId: 1000,
metadata: [new CustomData(5, 'Amex Credit Card')]
});
```
##### Exceptions thrown
| Type | Description |
| ----------------------------------------- | -------------------------------------------------------------- |
| `KameleoonException.VisitorCodeMaxLength` | The visitor code exceeded the maximum length (255 characters). |
| `KameleoonException.VisitorCodeEmpty` | The visitor code is empty. |
| `KameleoonException.StorageWrite` | Couldn't update storage data. |
***
#### getEngineTrackingCode()
Kameleoon integrates with several analytics solutions, including Mixpanel, Google Analytics 4, and Segment. To track server-side experiments correctly, call the `getEngineTrackingCode()` method after the visitor triggers an experiment. The SDK returns JavaScript queue commands for the experiments that the visitor triggered during the previous five seconds. When you insert this code into the page, Engine.js processes the commands and sends the exposure events through the active analytics integration.
Refer to [hybrid experimentation](/developer-docs/feature-experimentation/get-started/hybrid-experimentation) for more information on implementing this method.
```tsx theme={null}
import { useEffect, useCallback } from 'react';
import { useInitialize, useFeatureFlag } from '@kameleoon/react-sdk';
function MyComponent(): JSX.Element {
const { initialize } = useInitialize();
const { getEngineTrackingCode, getVariation } =
useFeatureFlag();
const [engineCode, setEngineCode] = useState('');
const init = useCallback(async (): Promise => {
await initialize();
// -- Trigger feature experiment
// -- E.g., result `variationKey` id is `200` and implicit experiment id is `100`
getVariation({ visitorCode: 'visitor_code', featureKey: 'my_feature_key' });
// -- Get tracking code and set it to state
setEngineCode(getEngineTrackingCode('visitor_code'));
// -- Result engine code will look like this
// `
// window.kameleoonQueue = window.kameleoonQueue || [];
// window.kameleoonQueue.push(['Experiments.assignVariation', 100, 200, true]);
// window.kameleoonQueue.push(['Experiments.trigger', 100, true]);
// `
}, [initialize, getVariation, getEngineTrackingCode]);
useEffect(() => {
init();
}, [init]);
useEffect(() => {
if (!engineCode) {
return;
}
// -- Insert tracking code into the page
const script = document.createElement('script');
script.textContent = engineCode;
document.body.appendChild(script);
// -- Remove script from the page
return () => {
document.body.removeChild(script);
};
}, [engineCode]);
}
```
```jsx theme={null}
import { useEffect, useCallback } from 'react';
import { useInitialize, useFeatureFlag } from '@kameleoon/react-sdk';
function MyComponent() {
const { initialize } = useInitialize();
const { getEngineTrackingCode, getVariation } =
useFeatureFlag();
const [engineCode, setEngineCode] = useState('');
const init = useCallback(async () => {
await initialize();
// -- Trigger feature experiment
// -- E.g., result `variationKey` id is `200` and implicit experiment id is `100`
getVariation({ visitorCode: 'visitor_code', featureKey: 'my_feature_key' });
// -- Get tracking code and set it to state
setEngineCode(getEngineTrackingCode('visitor_code'));
// -- Result engine code will look like this
// `
// window.kameleoonQueue = window.kameleoonQueue || [];
// window.kameleoonQueue.push(['Experiments.assignVariation', 100, 200, true]);
// window.kameleoonQueue.push(['Experiments.trigger', 100, true]);
// `
}, [initialize, getVariation, getEngineTrackingCode]);
useEffect(() => {
init();
}, [init]);
useEffect(() => {
if (!engineCode) {
return;
}
// -- Insert tracking code into the page
const script = document.createElement('script');
script.textContent = engineCode;
document.body.appendChild(script);
// -- Remove script from the page
return () => {
document.body.removeChild(script);
};
}, [engineCode]);
}
```
* To use this feature, implement both the React SDK and Kameleoon [Engine.js](/developer-docs/web-experimentation/implementation-and-deployment/standard-implementation). Because Engine.js is used only for tracking in this flow, you can install the asynchronous tag before the closing `` tag.
* You can insert the returned tracking code directly into an HTML `
```
In this example, `123456` and `234567` are experiment IDs, and `7890` and `8901` are variation IDs. In your implementation, the SDK generates these values in the returned tracking code.
##### Parameters
| Name | Type | Description |
| ------------------------------------- | -------- | --------------------------------- |
| `visitorCode` required | `string` | Unique identifier of the visitor. |
##### Return value
| Type | Description |
| -------- | ---------------------------------------- |
| `string` | JavaScript code to insert into the page. |
##### Exceptions thrown
| Type | Description |
| ----------------------------------------- | ------------------------------------------------------------- |
| `KameleoonException.VisitorCodeMaxLength` | The visitor code exceeded the maximum length (255 characters) |
| `KameleoonException.VisitorCodeEmpty` | The visitor code is empty |
***
### Events
This section provides the methods you use to handle events.
#### onEvent()
Method `onEvent`, collected with the `useInitialize` hook, fires a callback when a specific event is triggered. The callback function has access to the data associated with the event. The SDK methods in this documentation note which event types they can trigger, if any.
```tsx theme={null}
import { useEffect, useCallback } from 'react';
import {
useInitialize,
EventType,
EvaluationEventDataType,
} from '@kameleoon/react-sdk';
function MyComponent(): JSX.Element {
const { initialize, onEvent } = useInitialize();
const init = useCallback(async (): Promise => {
await initialize();
// -- Define logic to execute on SDK event
onEvent(EventType.Evaluation, (eventData: EventDataType) => {
// -- My Logic
});
}, [initialize, onEvent]);
useEffect(() => {
init();
}, [init]);
}
```
```jsx theme={null}
import { useEffect, useCallback } from 'react';
import { useInitialize, EventType } from '@kameleoon/react-sdk';
function MyComponent() {
const { initialize, onEvent } = useInitialize();
const init = useCallback(async () => {
await initialize();
// -- Define logic to execute on SDK event
.onEvent(EventType.Evaluation, (eventData) => {
// -- My Logic
});
}, [initialize, onEvent]);
useEffect(() => {
init();
}, [init]);
}
```
You can only assign one callback to each `EventType`.
##### Events
Events are defined in the `EventType` enum. Depending on the event type, the `eventData` parameter will have a different type.
| Type | `eventData` type | Description |
| ------------------------------- | ---------------------------------- | --------------------------------------------------------------------------------------------------------------------- |
| `EventType.Evaluation` | `EvaluationEventDataType` | Triggered when the SDK evaluates any variation for a feature flag. It is triggered regardless of the result variation |
| `EventType.ConfigurationUpdate` | `ConfigurationUpdateEventDataType` | Triggered when the SDK receives a configuration update from the server (when using real-time streaming) |
##### Parameters
| Name | Type | Description |
| -------------------------------- | ----------------------------------------------- | --------------------------------------------------------------------------------------------------------- |
| event required | `EventType` | a type of the event to associate the callback action with |
| callback required | `(eventData: EventDataType) => void` | a callback function with the `eventData` parameter that will be called when a configuration update occurs |
##### Exceptions thrown
| Type | Description |
| ----------------------------------- | --------------------------------------------------------------------------------- |
| `KameleoonException.Initialization` | Method was executed before the `kameleoonClient` completed it's `initialize` call |
***
##### Sending exposure events to external tools
Kameleoon offers built-in integrations with various analytics and CDP solutions, such as [Mixpanel, Google Analytics 4, Segment...](/user-manual/integrations/integrations-overview). To ensure that you can track and analyze your server-side experiments, Kameleoon provides a method `getEngineTrackingCode()` that returns the JavasScript code to be inserted in your page to automatically send the exposure events to the analytics solution you are using. The SDK builds a tracking code for your active analytics solution based on the experiments that the visitor has triggered in the last 5 seconds.
For more information about hybrid experimentation, please refer to this [documentation](/developer-docs/feature-experimentation/get-started/hybrid-experimentation).
To benefit from this feature, you will need to implement both the React SDK and our Kameleoon JavaScript tag. We recommend you implement the \[Kameleoon asynchronous tag], which you can install before your closing `` tag in your HTML page, as it will be only used for tracking purposes.
### Data types
Kameleoon Data types are helper classes used for storing data in storage in predefined forms.
During the [flush](#flush) execution, the SDK collects all the data and sends it along with the tracking request.
Data available in the SDK is not available for targeting and reporting in the Kameleoon app until you add the data. For example, by using the `addData()` method.
See [use visit history to target users](/developer-docs/feature-experimentation/targeting-and-segmentation/native-segmentation) for more information.
If you are using hybrid mode, you can call `getRemoteVisitorData()` to automatically fill all data that Kameleoon has collected previously.
#### Browser
Since React SDK `10.11.0`, `Browser` is automatically detected based on the `User-Agent` string. However, you can still manually override it if needed.
Browser contains browser information.
Each visitor can only have one `Browser`. Adding a second `Browser` overwrites the first one.
| Name | Type | Description |
| ------------------------------- | ------------- | ----------------------------------------------------------------------------------------------- |
| browser required | `BrowserType` | predefined browser type (`Chrome`, `InternetExplorer`, `Firefox`, `Safari`, `Opera`, `Other`) |
| version optional | `number` | version of the browser, floating point number represents major and minor version of the browser |
```tsx theme={null}
import { useEffect, useCallback } from 'react';
import {
useInitialize,
useData,
Browser,
BrowserType,
} from '@kameleoon/react-sdk';
function MyComponent(): JSX.Element {
const { initialize } = useInitialize();
const { addData } = useData();
const init = useCallback(async (): Promise => {
await initialize();
// -- Add new browser data to client
const browser = new Browser(BrowserType.Chrome, 86.1);
addData('my_visitor_code', browser);
}, [initialize, addData]);
useEffect(() => {
init();
}, [init]);
}
```
```jsx theme={null}
import { useEffect, useCallback } from 'react';
import {
useInitialize,
useData,
Browser,
BrowserType,
} from '@kameleoon/react-sdk';
function MyComponent() {
const { initialize } = useInitialize();
const { addData } = useData();
const init = useCallback(async () => {
await initialize();
// -- Add new browser data to client
const browser = new Browser(BrowserType.Chrome, 86.1);
addData('my_visitor_code', browser);
}, [initialize, addData]);
useEffect(() => {
init();
}, [init]);
}
```
***
#### UniqueIdentifier
`UniqueIdentifier` data is used as marker for unique visitor identification.
If you add `UniqueIdentifier` for a visitor, `visitorCode` is used as the unique visitor identifier, which is useful for [Cross-device experimentation](/developer-docs/cross-device-experimentation). Associating a `UniqueIdentifier` with a visitor notify SDK that the visitor is linked to another visitor.
The `UniqueIdentifier` can also be useful in other edge-case scenarios, such as when you can't access the anonymous `visitorCode` that was originally assigned to the visitor, but you do have access to an internal ID that is connected to the anonymous visitor using session merging capabilities.
Each visitor can only have one `UniqueIdentifier`. Adding another `UniqueIdentifier` overwrites the first one.
| Name | Type | Description |
| ----------------------------- | --------- | ------------------------------------------------------------------------------------------------------------------------------------------------------------- |
| value required | `boolean` | value that specifies if the visitor is associated with another visitor, provided `false` will imply that the visitor is not associated with any other visitor |
```tsx theme={null}
import { useEffect, useCallback } from 'react';
import { useInitialize, useData, UniqueIdentifier } from '@kameleoon/react-sdk';
function MyComponent(): JSX.Element {
const { initialize } = useInitialize();
const { addData } = useData();
const init = useCallback(async (): Promise => {
await initialize();
// -- Add new unique identifier to a visitor
addData('my_visitor_code', new UniqueIdentifier(true));
}, [initialize, addData]);
useEffect(() => {
init();
}, [init]);
}
```
```jsx theme={null}
import { useEffect, useCallback } from 'react';
import { useInitialize, useData, UniqueIdentifier } from '@kameleoon/react-sdk';
function MyComponent() {
const { initialize } = useInitialize();
const { addData } = useData();
const init = useCallback(async () => {
await initialize();
// -- Add new unique identifier to a visitor
addData('my_visitor_code', new UniqueIdentifier(true));
}, [initialize, addData]);
useEffect(() => {
init();
}, [init]);
}
```
***
#### Conversion
The `Conversion` data set stored here can be used to filter experiment and personalization reports by any goal associated with it.
* Each visitor can have multiple `Conversion` objects.
* You can find the `goalId` in the Kameleoon app.
`ConversionParametersType` conversionParameters - an object with conversion parameters described below
| Name | Type | Description | Default |
| ---------------------------------- | -------------- | ----------------------------------------------- | ----------- |
| `goalId` required | `number` | ID of the goal. | |
| `revenue` optional | `float` | Revenue of the conversion | `0` |
| `negative` optional | `boolean` | Defines if the revenue is positive or negative. | `false` |
| `metadata` optional | `CustomData[]` | Metadata of the conversion. | `undefined` |
```tsx theme={null}
import { useEffect, useCallback } from 'react';
import {
useInitialize,
useData,
Conversion,
ConversionParametersType,
CustomData,
} from '@kameleoon/react-sdk';
function MyComponent(): JSX.Element {
const { initialize } = useInitialize();
const { addData } = useData();
const init = useCallback(async (): Promise => {
await initialize();
// -- Defined conversion parameters
const conversionParameters: ConversionParametersType = {
goalId: 123,
revenue: 10000,
negative: true,
metadata: [new CustomData(0, 'value')],
};
// -- Add new conversion data to client
const conversion = new Conversion(conversionParameters);
addData('my_visitor_code', conversion);
}, [initialize, addData]);
useEffect(() => {
init();
}, [init]);
}
```
```jsx theme={null}
import { useEffect, useCallback } from 'react';
import { useInitialize, useData, Conversion, CustomData } from '@kameleoon/react-sdk';
function MyComponent() {
const { initialize } = useInitialize();
const { addData } = useData();
const init = useCallback(async () => {
await initialize();
// -- Defined conversion parameters
const conversionParameters = {
goalId: 123,
revenue: 10000,
negative: true,
metadata: [new CustomData(0, 'value')],
};
// -- Add new conversion data to client
const conversion = new Conversion(conversionParameters);
addData(visitorCode, conversion);
}, [initialize, addData]);
useEffect(() => {
init();
}, [init]);
}
```
#### Cookie
`Cookie` contains information about the cookie stored on the visitor's device.
* Generally, the React SDK will attempt to use a `localStorage` cookie for the conditions. If not possible, SDK can use `Cookie` data as an alternative.
* Each visitor can only have one `Cookie`. Adding a second `Cookie` overwrites the first one.
| Name | Type | Description |
| ------------------------------ | -------------- | ------------------------------------------------------------------- |
| cookie required | `CookieType[]` | A list of `CookieType` objects consisting of cookie keys and values |
```ts theme={null}
import {
KameleoonClient,
CookieType,
Cookie,
useInitialize,
useData,
} from '@kameleoon/react-sdk';
function MyComponent(): JSX.Element {
const { initialize } = useInitialize();
const { addData } = useData();
const init = useCallback(async (): Promise => {
await initialize();
// -- Add new cookie data to client
const cookieData: CookieType[] = [
{ key: 'key_1', value: 'value_1' },
{ key: 'key_2', value: 'value_2' },
];
const cookie = new Cookie(cookieData);
addData('my_visitor_code', cookie);
}, [initialize, addData]);
useEffect(() => {
init();
}, [init]);
}
```
```js theme={null}
import {
KameleoonClient,
CookieType,
Cookie,
useInitialize,
useData,
} from '@kameleoon/react-sdk';
function MyComponent() {
const { initialize } = useInitialize();
const { addData } = useData();
const init = useCallback(async () => {
await initialize();
// -- Add new cookie data to client
const cookieData = [
{ key: 'key_1', value: 'value_1' },
{ key: 'key_2', value: 'value_2' },
];
const cookie = new Cookie(cookieData);
addData('my_visitor_code', cookie);
}, [initialize, addData]);
useEffect(() => {
init();
}, [init]);
}
```
##### Methods
`Cookie` data has a static utility method `fromString` that you can use to create a cookie instantly by parsing a string that contains valid cookie data.
The method accepts `string` as parameter and returns an initialized `Cookie` instance.
```ts theme={null}
import { Cookie } from '@kameleoon/react-sdk';
const cookieString = 'key_1=value_1; key_2=value_2';
const cookie: Cookie = Cookie.fromString(cookieString);
// -- The result cookie will contain the following cookie array
// [
// { key: 'key_1', value: 'value_1' },
// { key: 'key_2', value: 'value_2' },
// ]
```
```js theme={null}
import { Cookie } from '@kameleoon/react-sdk';
const cookieString = 'key_1=value_1; key_2=value_2';
const cookie = Cookie.fromString(cookieString);
// -- The result cookie will contain the following cookie array
// [
// { key: 'key_1', value: 'value_1' },
// { key: 'key_2', value: 'value_2' },
// ]
```
#### GeolocationData
`GeolocationData` contains the visitor's geolocation details
Each visitor can only have one `GeolocationData`. Adding a second `GeolocationData` overwrites the first one.
An object parameter with the type `GeolocationInfoType` containing the following fields:
| Name | Type | Description |
| ----------------------------------- | ------------------ | --------------------------------------------------------------------------------------------------------------------- |
| country required | `string` | The country of the visitor |
| region optional | `string` | The region of the visitor |
| city optional | `string` | The city of the visitor |
| postalCode optional | `string` | The postal code of the visitor |
| coordinates optional | `[number, number]` | Coordinates array tuple of two position values (longitude and latitude). Coordinate number represents decimal degrees |
```ts theme={null}
import {
KameleoonClient,
GeolocationData,
GeolocationInfoType,
useData,
useInitialize,
} from '@kameleoon/react-sdk';
function MyComponent(): JSX.Element {
const { initialize } = useInitialize();
const { addData } = useData();
const init = useCallback(async (): Promise => {
await initialize();
// -- Add geolocation data
const geolocationInfo: GeolocationInfoType = {
country: 'France',
region: 'Île-de-France',
city: 'Paris',
postalCode: '75008',
coordinates: [48.8738, 2.295],
};
const geolocationData = new GeolocationData(geolocationInfo);
addData('my_visitor_code', geolocationData);
}, [initialize, addData]);
useEffect(() => {
init();
}, [init]);
}
```
```js theme={null}
import {
KameleoonClient,
GeolocationData,
useData,
useInitialize,
} from '@kameleoon/react-sdk';
function MyComponent() {
const { initialize } = useInitialize();
const { addData } = useData();
const init = useCallback(async () => {
await initialize();
// -- Add geolocation data
const geolocationInfo = {
country: 'France',
region: 'Île-de-France',
city: 'Paris',
postalCode: '75008',
coordinates: [48.8738, 2.295],
};
const geolocationData = new GeolocationData(geolocationInfo);
addData('my_visitor_code', geolocationData);
}, [initialize, addData]);
useEffect(() => {
init();
}, [init]);
}
```
***
#### CustomData
To retain custom data for future visits, the SDK transmits `CustomData` with a `Visitor` scope during the next tracking request. You can configure the scope in the data settings on the [custom data dashboard](https://app.kameleoon.com/customData/dashboard).
`CustomData` allows you to associate any type of data with each visitor easily. This data can then be used as a targeting condition in [segments](/user-manual/assets/segments/create-a-segment/) or as a filter or breakdown in experiment reports.
For more information about custom data, please refer to this [article](/developer-docs/custom-data).
| Name | Type | Description | Default |
| ---------------------------------- | ----------------- | --------------------------------------------------------------------------------------------------------------------------------------------------------------------------------------- | ------- |
| index/name required | `number`/`string` | Index or Name of the custom data. **Either `index` or `name` must be provided** to identify the data. | |
| overwrite optional | `boolean` | Flag to explicitly control how the values are stored and how they appear in reports. [See more](/developer-docs/custom-data#default-logic-when-overwrite-parameter-is-false-or-omitted) | `true` |
| value required | `string[]` | The custom data value. It must be stringified to match the `string` type. *Note:* value is variadic. | |
* Each visitor is allowed only one `CustomData` for each unique `index`. Adding another `CustomData` with the same `index` will replace the existing one.
* The custom data ‘index’ can be found in the [Custom Data dashboard](/user-manual/assets/custom-data/manage-custom-data) under the “INDEX” column.
* To prevent the SDK from sending data with the selected index to Kameleoon servers for privacy reasons, enable the option: **Use this data only locally for targeting purposes** when creating custom data.
* Adding a `CustomData` instance created with a name when the SDK instance is not initialized or the name is not registered, will result in the data being ignored.
```tsx theme={null}
import { useEffect, useCallback } from 'react';
import { useInitialize, useData, CustomData } from '@kameleoon/react-sdk';
function MyComponent(): JSX.Element {
const { initialize } = useInitialize();
const { addData } = useData();
const init = useCallback(async (): Promise => {
await initialize();
// -- Defined conversion parameters
const dataItemOne = 'abc';
const dataItemTwo = JSON.stringify(100);
const dataItemThree = JSON.stringify({ a: 200, b: 300 });
const customDataIndex = 0;
// -- Create custom data using single parameter
const customData = new CustomData(customDataIndex, dataItemOne);
// -- Create custom data using overwrite flag
const customData = new CustomData(customDataIndex, false, dataItemOne);
// -- Create custom data using name instead of index
const customData = new CustomData('customDataName', dataItemOne);
// -- Create custom data using variadic number of parameters
const customData = new CustomData(
customDataIndex,
dataItemOne,
dataItemTwo,
);
// -- Create custom data using an array of values
const dataList = [dataItemOne, dataItemTwo, dataItemThree];
const customData = new CustomData(customDataIndex, ...dataList);
// -- Create custom data using overwrite flag
const customData = new CustomData(customDataIndex, false, ...dataList);
// -- Create custom data using name instead of index
const customData = new CustomData('customDataName', false, ...dataList);
// -- Add new custom data to client
addData('my_visitor_code', customData);
}, [initialize, addData]);
useEffect(() => {
init();
}, [init]);
}
```
```jsx theme={null}
import { useEffect, useCallback } from 'react';
import { useInitialize, useData, CustomData } from '@kameleoon/react-sdk';
function MyComponent() {
const { initialize } = useInitialize();
const { addData } = useData();
const init = useCallback(async () => {
await initialize();
// -- Defined conversion parameters
const dataItemOne = 'abc';
const dataItemTwo = JSON.stringify(100);
const dataItemThree = JSON.stringify({ a: 200, b: 300 });
const customDataIndex = 0;
// -- Create custom data using single parameter
const customData = new CustomData(customDataIndex, dataItemOne);
// -- Create custom data using overwrite flag
const customData = new CustomData(customDataIndex, false, dataItemOne);
// -- Create custom data using name instead of index
const customData = new CustomData('customDataName', dataItemOne);
// -- Create custom data using variadic number of parameters
const customData = new CustomData(
customDataIndex,
dataItemOne,
dataItemTwo,
);
// -- Create custom data using an array of values
const dataList = [dataItemOne, dataItemTwo, dataItemThree];
const customData = new CustomData(customDataIndex, ...dataList);
// -- Create custom data using overwrite flag
const customData = new CustomData(customDataIndex, false, ...dataList);
// -- Create custom data using name instead of index
const customData = new CustomData('customDataName', false, ...dataList);
// -- Add new custom data to client
addData('my_visitor_code', customData);
}, [initialize, addData]);
useEffect(() => {
init();
}, [init]);
}
```
***
#### Device
Since React SDK `10.11.0`, `Device` is automatically detected based on the `User-Agent` string. However, you can still manually override it if needed.
**React Native:** Support for this feature is currently experimental and may require adjustments to work correctly. In React Native, the `Device` is automatically detected based on the `DPI` from `react-native.Dimensions`.
Device contains information about your device.
Each visitor can only have one `Device`. Adding a second `Device` overwrites the first one.
| Name | Type | Description |
| ---------------------------------- | ------------ | ------------------------------------------------------------- |
| deviceType required | `DeviceType` | possible types for device type (`PHONE`, `TABLET`, `DESKTOP`) |
```tsx theme={null}
import { useEffect, useCallback } from 'react';
import {
useInitialize,
useData,
Device,
DeviceType,
} from '@kameleoon/react-sdk';
function MyComponent(): JSX.Element {
const { initialize } = useInitialize();
const { addData } = useData();
const init = useCallback(async (): Promise => {
await initialize();
// -- Add new device data to client
const device = new Device(DeviceType.Desktop);
addData('my_visitor_code', device);
}, [initialize, addData]);
useEffect(() => {
init();
}, [init]);
}
```
```jsx theme={null}
import { useEffect, useCallback } from 'react';
import {
useInitialize,
useData,
Device,
DeviceType,
} from '@kameleoon/react-sdk';
function MyComponent() {
const { initialize } = useInitialize();
const { addData } = useData();
const init = useCallback(async () => {
await initialize();
// -- Add new device data to client
const device = new Device(DeviceType.Desktop);
addData('my_visitor_code', device);
}, [initialize, addData]);
useEffect(() => {
init();
}, [init]);
}
```
***
#### OperatingSystem
Since React SDK `10.11.0`, `OperatingSystem` is automatically detected based on the `User-Agent` string. However, you can still manually override it if needed.
**React Native:** Support for this feature is currently experimental and may require adjustments to work correctly. In React Native, the `OperatingSystem` is automatically detected based on the `react-native.Platform`.
`OperatingSystem` contains the visitor's operating system information.
Each visitor can only have one `OperatingSystem`. Adding a second `OperatingSystem` overwrites the previous one.
| Name | Type | Description |
| --------------------------------------- | --------------------- | -------------------------------------------------------------------------------------------- |
| operatingSystem required | `OperatingSystemType` | possible types for device type: `WINDOWS_PHONE`, `WINDOWS`, `ANDROID`, `LINUX`, `MAC`, `IOS` |
```tsx theme={null}
import { useEffect, useCallback } from 'react';
import {
useInitialize,
useData,
OperatingSystem,
OperatingSystemType,
} from '@kameleoon/react-sdk';
function MyComponent(): JSX.Element {
const { initialize } = useInitialize();
const { addData } = useData();
const init = useCallback(async (): Promise => {
await initialize();
// -- Add operating system data
const operatingSystem = new OperatingSystem(OperatingSystemType.Windows);
addData('my_visitor_code', operatingSystem);
}, [initialize, addData]);
useEffect(() => {
init();
}, [init]);
}
```
```jsx theme={null}
import { useEffect, useCallback } from 'react';
import {
useInitialize,
useData,
OperatingSystem,
OperatingSystemType,
} from '@kameleoon/react-sdk';
function MyComponent() {
const { initialize } = useInitialize();
const { addData } = useData();
const init = useCallback(async () => {
await initialize();
// -- Add operating system data
const operatingSystem = new OperatingSystem(OperatingSystemType.Windows);
addData('my_visitor_code', operatingSystem);
}, [initialize, addData]);
useEffect(() => {
init();
}, [init]);
}
```
***
#### PageView
Since React SDK `10.11.0`, `PageView` is automatically detected based on the `window.location?.href` and `document.title`. However, you can still manually override it if needed.
**React Native:** Support for this feature is currently experimental and may require adjustments to work correctly.
PageView contains information about your web page.
Each visitor can have one `PageView` per unique URL. Adding a `PageView` with the same URL as an existing one will notify SDK that the visitor revisited page
`PageViewParametersType` pageViewParameters - an object with page view parameters described below
| Name | Type | Description |
| ---------------------------------- | ---------- | ---------------------------------------------------------------------------------- |
| urlAddress required | `string` | url address of the page to track |
| title required | `string` | title of the web page |
| referrer optional | `number[]` | an optional parameter containing a list of referrers Indices, has no default value |
```tsx theme={null}
import { useEffect, useCallback } from 'react';
import {
useInitialize,
useData,
PageView,
PageViewParametersType,
} from '@kameleoon/react-sdk';
function MyComponent(): JSX.Element {
const { initialize } = useInitialize();
const { addData } = useData();
const init = useCallback(async (): Promise => {
await initialize();
// -- Define page view parameters
const pageViewParameters: PageViewParametersType = {
urlAddress: 'www.example.com',
title: 'my example',
referrers: [123, 456],
};
// -- Add new page view data to client
const pageView = new PageView(pageViewParameters);
addData('my_visitor_code', pageView);
}, [initialize, addData]);
useEffect(() => {
init();
}, [init]);
}
```
```jsx theme={null}
import { useEffect, useCallback } from 'react';
import { useInitialize, useData, PageView } from '@kameleoon/react-sdk';
function MyComponent() {
const { initialize } = useInitialize();
const { addData } = useData();
const init = useCallback(async () => {
await initialize();
// -- Define page view parameters
const pageViewParameters = {
urlAddress: 'www.example.com',
title: 'my example',
referrers: [123, 456],
};
// -- Add new page view data to client
const pageView = new PageView(pageViewParameters);
addData('my_visitor_code', pageView);
}, [initialize, addData]);
useEffect(() => {
init();
}, [init]);
}
```
***
#### UserAgent
Store information on the user-agent of the visitor. Server-side experiments are more vulnerable to **bot traffic** than client-side experiments. To address this, Kameleoon uses the IAB/ABC International Spiders and Bots List to identify known bots and spiders. Kameleoon also uses the `UserAgent` field to filter out bots and other unwanted traffic that could otherwise skew your conversion metrics. For more details, see the help article on [bot filtering](/user-manual/faq#how-does-kameleoon-filter-bot-traffic-from-my-results).
If you use internal bots, we suggest that you pass the value **curl/8.0** of the userAgent to exclude them from our analytics.
A visitor can only have one `UserAgent`. Adding a second `UserAgent` overwrites the first one.
| Name | Type | Description |
| ----------------------------- | -------- | ------------------------- |
| value required | `string` | value used for comparison |
Server-side experiments are more vulnerable to **bot traffic** than client-side experiments. To address this, Kameleoon uses the IAB/ABC International Spiders and Bots List to identify known bots and spiders. We recommend that you pass the user agent to be filtered by Kameleoon when running server-side experiments for each visitor browsing your website, to avoid counting bots in your analytics.
If you use internal bots, we suggest that you pass the value **curl/8.0** of the userAgent to exclude them from our analytics.
```tsx theme={null}
import { useEffect, useCallback } from 'react';
import { useInitialize, useData, UserAgent } from '@kameleoon/react-sdk';
function MyComponent(): JSX.Element {
const { initialize } = useInitialize();
const { addData } = useData();
const init = useCallback(async (): Promise => {
await initialize();
// -- Add new user agent data to client
const userAgent = new UserAgent('my_unique_value');
addData('my_visitor_code', userAgent);
}, [initialize, addData]);
useEffect(() => {
init();
}, [init]);
}
```
```jsx theme={null}
import { useEffect, useCallback } from 'react';
import { useInitialize, useData, UserAgent } from '@kameleoon/react-sdk';
function MyComponent() {
const { initialize } = useInitialize();
const { addData } = useData();
const init = useCallback(async () => {
await initialize();
// -- Add new user agent data to client
const userAgent = new UserAgent('my_unique_value');
addData('my_visitor_code', userAgent);
}, [initialize, addData]);
useEffect(() => {
init();
}, [init]);
}
```
#### ApplicationVersion
`ApplicationVersion` represents the semantic version number of your application.
A **visitor** can have only one `ApplicationVersion`. Adding a second instance will overwrite the first one.
| Name | Type | Description |
| ------------------------------- | -------- | ------------------------------------------------------------------------------------------------------------------------------------------------ |
| version optional | `string` | The mobile application version. This field must follow semantic versioning. Accepted formats are `major`, `major.minor`, or `major.minor.patch`. |
```tsx theme={null}
import { useEffect, useCallback } from 'react';
import {
useInitialize,
useData,
ApplicationVersion,
} from '@kameleoon/react-sdk';
function MyComponent(): JSX.Element {
const { initialize } = useInitialize();
const { addData } = useData();
const init = useCallback(async (): Promise => {
await initialize();
// -- Add new application version data to client
const applicationVersion = new ApplicationVersion('1.2');
addData('my_visitor_code', applicationVersion);
}, [initialize, addData]);
useEffect(() => {
init();
}, [init]);
}
```
```jsx theme={null}
import { useEffect, useCallback } from 'react';
import {
useInitialize,
useData,
ApplicationVersion,
} from '@kameleoon/react-sdk';
function MyComponent() {
const { initialize } = useInitialize();
const { addData } = useData();
const init = useCallback(async () => {
await initialize();
// -- Add new application version data to client
const applicationVersion = new ApplicationVersion('1.2');
addData('my_visitor_code', applicationVersion);
}, [initialize, addData]);
useEffect(() => {
init();
}, [init]);
}
```
***
### Returned Types
#### DataFile
The `DataFile` contains the SDK configuration details.
It can be extended with additional information if required by clients. If you need more details, please contact your Customer Success Manager.
| Name | Type | Description |
| -------------- | -------------------------- | --------------------------------------------------------------------------------- |
| `featureFlags` | `Map` | A map of [`FeatureFlag`](#featureflag) objects, keyed by feature flag keys. |
| `dateModified` | `number` | The timestamp (in milliseconds) indicating when the `DataFile` was last modified. |
```ts theme={null}
import { FeatureFlag } from '@kameleoon/javascript-sdk';
// Retrieves the map of feature flags from the DataFile.
// The map is keyed by feature flag identifiers, with each value being a FeatureFlag object.
const featureFlags: Map = dataFile.featureFlags;
// Retrieves the last modification timestamp of the DataFile.
// The value is a number representing milliseconds since the Unix epoch.
const dateModified: number = dateFile.dateModified;
```
```js theme={null}
// Retrieves the map of feature flags from the DataFile.
// The map is keyed by feature flag identifiers, with each value being a FeatureFlag object.
const featureFlags = dataFile.featureFlags;
// Retrieves the last modification timestamp of the DataFile.
// The value is a number representing milliseconds since the Unix epoch.
const dateModified = dateFile.dateModified;
```
#### FeatureFlag
The `FeatureFlag` represents a set of properties that define a feature flag itself — for example, its [`Variations`](#variation), [`Rules`](#rule), environment status, and other related details.
It can be extended with additional information if required by clients. If you need more details, please contact your Customer Success Manager.
| Name | Type | Description |
| --------------------- | ------------------------ | -------------------------------------------------------------------------- |
| `environmentEnabled` | `boolean` | Indicating whether the feature flag is enabled in the current environment. |
| `defaultVariationKey` | `string` | The key of the default variation associated with the feature flag. |
| `variations` | `Map` | A map of `Variation` objects, keyed by variation keys. |
| `rules` | `Rule[]` | A list of `Rule` objects |
```ts theme={null}
import { Variation, Rule } from '@kameleoon/react-sdk';
// Check whether the feature flag is enabled in the current environment
const isEnvironmentEnabled: boolean = featureFlag.environmentEnabled;
// Retrieve the key of the default variation
const defaultVariationKey: string = featureFlag.defaultVariationKey;
// Retrieve all variations of the feature flag as a map (key = variation key, value = Variation object)
const variations: Map = featureFlag.variations;
// Retrieve all targeting rules associated with the feature flag
const rules: Rule[] = featureFlag.rules;
```
```js theme={null}
// Check whether the feature flag is enabled in the current environment
const isEnvironmentEnabled = featureFlag.environmentEnabled;
// Retrieve the key of the default variation
const defaultVariationKey = featureFlag.defaultVariationKey;
// Retrieve all variations of the feature flag as a map (key = variation key, value = Variation object)
const variations = featureFlag.variations;
// Retrieve all targeting rules associated with the feature flag
const rules = featureFlag.rules;
```
#### Rule
The `Rule` represents a set of properties that define a rule itself — for example, its [`Variations`](#variation).
It can be extended with additional information if required by clients. If you need more details, please contact your Customer Success Manager.
| Name | Type | Description |
| ------------ | ------------------------ | ------------------------------------------------------ |
| `variations` | `Map` | A map of `Variation` objects, keyed by variation keys. |
```ts theme={null}
import { Variation } from '@kameleoon/react-sdk';
// Retrieve all variations of the rule as a map (key = variation key, value = Variation object)
const variations: Map = rule.variations;
```
```js theme={null}
// Retrieve all variations of the rule as a map (key = variation key, value = Variation object)
const variations = rule.variations;
```
#### Variation
`Variation` contains information about the assigned variation to the visitor (or the default variation, if no specific assignment exists).
| Name | Type | Description |
| ------------ | ----------------------- | --------------------------------------------------------------------------------------------------- |
| name | `string` | name of the variation. |
| key | `string` | key of the variation. |
| id | `number` or `null` | id of the variation or `null` if the visitor landed on the default variation. |
| experimentId | `number` or `null` | id of the experiment or `null` if the visitor landed on the default variation. |
| variables | `Map` | map of variables for the variation, where key is the variable key and value is the variable object. |
* Ensure that your code handles the case where `id` or `experimentId` may be `null`, indicating a default variation.
* The `variables` map might be empty if no variables are associated with the variation.
```ts theme={null}
// Retrieving the variation name
const variationName = variation.name;
// Retrieving the variation key
const variationKey = variation.key;
// Retrieving the variation id
const variationId = variation.id;
// Retrieving the experiment id
const experimentId = variation.experimentId;
// Retrieving the variables map
const variables = variation.variables;
```
```js theme={null}
// Retrieving the variation name
const variationName = variation.name;
// Retrieving the variation key
const variationKey = variation.key;
// Retrieving the variation id
const variationId = variation.id;
// Retrieving the experiment id
const experimentId = variation.experimentId;
// Retrieving the variables map
const variables = variation.variables;
```
#### Variable
`Variable` contains information about a variable associated with the assigned variation.
| Name | Type | Description |
| ----- | -------- | ------------------------------------------------------------------------------------------------------------------------------------------ |
| key | `string` | The unique key identifying the variable. |
| type | `string` | The type of the variable. Possible values: **BOOLEAN**, **NUMBER**, **STRING**, **JSON**, **JS**, **CSS**. |
| value | `any` | The value of the variable, which can be of the following types: **boolean**, **number**, **String**, **Record\**, **any\[]**. |
```ts theme={null}
// Retrieving the variables map
const variables = variation.variables;
// Variable type can be retrieved for further processing
const type = variables.get('isDiscount')?.type || '';
// Retrieving the variable value by key
const isDiscount = variables.get('isDiscount')?.value || false;
// Variable value can be of different types
const title = variables.get('title')?.value || '';
```
```js theme={null}
// Retrieving the variables map
const variables = variation.variables;
// Variable type can be retrieved for further processing
const type = variables.get('isDiscount')?.type || '';
// Retrieving the variable value by key
const isDiscount = variables.get('isDiscount')?.value || false;
// Variable value can be of different types
const title = variables.get('title')?.value || '';
```
### Deprecated methods
These methods are deprecated and will be removed in the next major update.
#### getFeatureFlagVariationKey()
* 📨 *Sends Tracking Data to Kameleoon*
* 🎯 *Events:* `EventType.Evaluation`
Use the [`getVariation`](#getvariation) method.
The method `getFeatureFlagVariationKey()`, which is used with the `useFeatureFlag` hook, retrieves the variation key for a visitor identified by their `visitorCode`. This process includes checking the targeting criteria, identifying the appropriate variation assigned to the visitor, storing this information, and sending a tracking request.
If a user has never been associated with a feature flag, the SDK will randomly return a variation key according to the rules of that feature flag. If the user is already linked to the feature flag, the SDK will identify the previously assigned variation key. If the user does not meet any of the specified rules, the SDK will return the default value defined in Kameleoon’s feature flag delivery rules. It’s important to note that the default value may not always be a variation key; it could also be a boolean value or another data type, depending on how the feature flag is configured.
```tsx theme={null}
import { useEffect, useCallback } from 'react';
import {
useInitialize,
useFeatureFlag,
useVisitorCode,
} from '@kameleoon/react-sdk';
function MyComponent(): JSX.Element {
const { initialize } = useInitialize();
const { getFeatureFlagVariationKey } = useFeatureFlag();
const { getVisitorCode } = useVisitorCode();
const init = useCallback(async (): Promise => {
await initialize();
// -- Get visitor code using `getVisitorCode` function.
const visitorCode = getVisitorCode();
const featureKey = 'my_feature_key';
// -- Get the variationKey for the visitor under `visitorCode` in the feature flag.
const variationKey = getFeatureFlagVariationKey(visitorCode, featureKey);
}, [initialize, visitorCode, getFeatureFlagVariationKey, getVisitorCode]);
useEffect(() => {
init();
}, [init]);
}
```
```jsx theme={null}
import { useEffect, useCallback } from 'react';
import {
useInitialize,
useFeatureFlag,
useVisitorCode,
} from '@kameleoon/react-sdk';
function MyComponent() {
const { initialize } = useInitialize();
const { getFeatureFlagVariationKey } = useFeatureFlag();
const { getVisitorCode } = useVisitorCode();
const init = useCallback(async () => {
await initialize();
// -- Get visitor code using `getVisitorCode` function
const visitorCode = getVisitorCode();
const featureKey = 'my_feature_key';
// -- Get the variationKey for the visitor under `visitorCode` in the found feature flag
const variationKey = getFeatureFlagVariationKey(visitorCode, featureKey);
}, [initialize, visitorCode, getFeatureFlagVariationKey, getVisitorCode]);
useEffect(() => {
init();
}, [init]);
}
```
##### Parameters
| Name | Type | Description |
| ----------------------------------- | -------- | ------------------------------------------------------------------------ |
| visitorCode required | `string` | unique visitor identification string, can't exceed 255 characters length |
| featureKey required | `string` | a unique key for feature flag |
##### Return value
| Type | Description |
| -------- | --------------------------------------------------------------------------------------------------- |
| `string` | a string containing variable key for the allocated feature flag variation for the provided visitor. |
##### Exceptions thrown
| Type | Description |
| ----------------------------------------------------- | ---------------------------------------------------------------------- |
| `KameleoonException.Initialization` | Method was executed before `initialize` was done for `kameleoonClient` |
| `KameleoonException.VisitorCodeMaxLength` | The visitor code exceeded the maximum length (255 characters) |
| `KameleoonException.VisitorCodeEmpty` | The visitor code is empty |
| `KameleoonException.FeatureFlagConfigurationNotFound` | No feature flag was found for the specified `featureKey` |
| `KameleoonException.FeatureFlagEnvironmentDisabled` | Feature flag is disabled for the current environment |
#### getVisitorFeatureFlags()
* 🚫 *Doesn't send Tracking Data to Kameleoon*
* 🎯 *Events:* `EventType.Evaluation` (for each feature flag)
Use the [`getVariations`](#getvariations) method.
The `getVisitorFeatureFlags` method, utilized with the `useFeatureFlag` hook, returns a list of *active* feature flags that target the visitor associated with the `visitorCode` (the visitor must have one of the allocated variations).
This method only collects the feature flags that are currently active for the visitor. As a result, it does not include any feature flags for which the visitor is assigned to the “off” variation (default or control). If you need to retrieve all of the visitor’s feature flags, use `getFeatureFlags` instead.
For example:
```ts theme={null}
// -- `getVisitorFeatureFlags` doesn't trigger feature experiments;
// it only returns feature flags where visitors didn't get the `off` variation.
getVisitorFeatureFlags('my_visitor').forEach(({ key }) => {
// -- `getFeatureFlagVariationKey` triggers a feature experiment,
// as `off` is already filtered out - visitors will never take part
// in an experiment where the `off` variation was allocated.
getFeatureFlagVariationKey('my_visitor', key);
});
```
For cases where you need all of the visitor's feature flags, use [`getFeatureFlags`](#getfeatureflags) instead:
```ts theme={null}
// -- Both `off` and other variations are processed as expected
getFeatureFlags('my_visitor').forEach(({ key }) => {
getFeatureFlagVariationKey('my_visitor', key);
});
```
```tsx theme={null}
import { useEffect, useCallback } from 'react';
import {
useInitialize,
useFeatureFlag,
useVisitorCode,
} from '@kameleoon/react-sdk';
function MyComponent(): JSX.Element {
const { initialize } = useInitialize();
const { getVisitorCode } = useVisitorCode();
const { getVisitorFeatureFlags } = useFeatureFlag();
const init = useCallback(async (): Promise => {
await initialize();
// -- Get visitor code
const visitorCode = getVisitorCode();
// -- Get active feature flags for visitor
const featureFlags = getVisitorFeatureFlags(visitorCode);
}, [initialize, visitorCode, getVisitorFeatureFlags, getVisitorCode]);
useEffect(() => {
init();
}, [init]);
}
```
```jsx theme={null}
import { useEffect, useCallback } from 'react';
import {
useInitialize,
useFeatureFlag,
useVisitorCode,
} from '@kameleoon/react-sdk';
function MyComponent() {
const { initialize } = useInitialize();
const { getVisitorCode } = useVisitorCode();
const { getVisitorFeatureFlags } = useFeatureFlag();
const init = useCallback(async () => {
await initialize();
// -- Get visitor code
const visitorCode = getVisitorCode();
// -- Get active feature flags for visitor
const featureFlags = getVisitorFeatureFlags(visitorCode);
}, [initialize, visitorCode, getVisitorFeatureFlags, getVisitorCode]);
useEffect(() => {
init();
}, [init]);
}
```
##### Parameters
| Name | Type | Description |
| ----------------------------------- | -------- | ------------------------------------------------------------------------ |
| visitorCode required | `string` | unique visitor identification string, can't exceed 255 characters length |
##### Return value
| Type | Description |
| ------------------- | ---------------------------------------------------------------------- |
| `FeatureFlagType[]` | list of feature flags, each feature flag item contains `id` and `key`. |
##### Exceptions thrown
| Type | Description |
| ----------------------------------------- | --------------------------------------------------------------------------------- |
| `KameleoonException.Initialization` | Method was executed before the `kameleoonClient` completed it's `initialize` call |
| `KameleoonException.VisitorCodeMaxLength` | The visitor code exceeded the maximum length (255 characters) |
| `KameleoonException.VisitorCodeEmpty` | The visitor code is empty |
| `KameleoonException.StorageRead` | Error while reading storage data |
***
#### getActiveFeatureFlags()
* 🚫 *Doesn't send Tracking Data to Kameleoon*
* 🎯 *Events:* `EventType.Evaluation` (for each feature flag)
Use the [`getVariations`](#getvariations) method.
The `getActiveFeatureFlags` method, collected with the `useFeatureFlag` hook, returns a `Map`, where key is feature key and value is detailed information about the visitor's variation and it's variables
```tsx theme={null}
import { useEffect, useCallback } from 'react';
import {
useInitialize,
useFeatureFlag,
useVisitorCode,
} from '@kameleoon/react-sdk';
function MyComponent(): JSX.Element {
const { initialize } = useInitialize();
const { getVisitorCode } = useVisitorCode();
const { getActiveFeatureFlags } = useFeatureFlag();
const init = useCallback(async (): Promise => {
await initialize();
// -- Get visitor code
const visitorCode = getVisitorCode();
// -- Get active feature flags for visitor
// with detailed variation and variables data
const activeFeatures = getActiveFeatureFlags(visitorCode);
// -- Result example:
// Map {
// 'feature-key-one' => {
// id: 100,
// key: 'variation-key-one',
// experimentId: 200,
// variables: [
// { key: 'variable_bool', type: VariableType.Boolean, value: true },
// ]
// },
// 'feature-key-two' => {
// id: null, // -> `null` because it is default variation
// key: 'default-variation-key',
// experimentId: null, // -> `null` because it is default variation
// variables: []
// }
// }
}, [initialize, visitorCode, getVisitorFeatureFlags, getVisitorCode]);
useEffect(() => {
init();
}, [init]);
}
init();
```
```jsx theme={null}
import { useEffect, useCallback } from 'react';
import {
useInitialize,
useFeatureFlag,
useVisitorCode,
} from '@kameleoon/react-sdk';
function MyComponent(): JSX.Element {
const { initialize } = useInitialize();
const { getVisitorCode } = useVisitorCode();
const { getActiveFeatureFlags } = useFeatureFlag();
const init = useCallback(async (): Promise => {
await initialize();
// -- Get visitor code
const visitorCode = getVisitorCode();
// -- Get active feature flags for visitor
// with detailed variation and variables data
const activeFeatures = getActiveFeatureFlags(visitorCode);
// -- Result example:
// Map {
// 'feature-key-one' => {
// id: 100,
// key: 'variation-key-one',
// experimentId: 200,
// variables: [
// { key: 'variable_bool', type: VariableType.Boolean, value: true },
// ]
// },
// 'feature-key-two' => {
// id: null, // -> `null` because it is default variation
// key: 'default-variation-key',
// experimentId: null, // -> `null` because it is default variation
// variables: []
// }
// }
}, [initialize, visitorCode, getVisitorFeatureFlags, getVisitorCode]);
useEffect(() => {
init();
}, [init]);
}
init();
```
This method only collects the visitor's *active* feature flags. This means the result excludes all the feature flags for which the visitor is assigned to the `off` (default or control) variation. When you need all of the visitor's feature flags to iterate over, use `getFeatureFlags` instead.
See the [getVisitorFeatureFlags](#getvisitorfeatureflags) *CAUTION* section method for more details.
##### Parameters
| Name | Type | Description |
| ----------------------------------- | -------- | ------------------------------------------------------------------------ |
| visitorCode required | `string` | unique visitor identification string, can't exceed 255 characters length |
##### Return value
| Type | Description |
| ------------------------------------- | ----------------------------------------------------------------------------------------------------------------------------------- |
| `Map` | a map of feature flags, where key is feature key and value is detailed information about the visitor's variation and it's variables |
##### Exceptions thrown
| Type | Description |
| ----------------------------------------- | --------------------------------------------------------------------------------- |
| `KameleoonException.Initialization` | Method was executed before the `kameleoonClient` completed it's `initialize` call |
| `KameleoonException.VisitorCodeMaxLength` | The visitor code exceeded the maximum length of 255 characters |
| `KameleoonException.VisitorCodeEmpty` | The visitor code is empty |
| `KameleoonException.StorageRead` | Error while reading storage data |
| `KameleoonException.NumberParse` | Couldn't parse Number value |
| `KameleoonException.JSONParse` | Couldn't parse JSON value |
***
#### getFeatureFlagVariable()
* 📨 *Sends Tracking Data to Kameleoon*
* 🎯 *Events:* `EventType.Evaluation`
Use the [`getVariation`](#getvariation) method.
The `getFeatureFlagVariable` method, collected with `useFeatureFlag` hook, returns a variable for the visitor under `visitorCode` in the found feature flag, this includes targeting check, finding the according variation exposed to the visitor and saving it to storage along with sending tracking request.
```tsx theme={null}
import { useEffect, useCallback } from 'react';
import {
useInitialize,
useVisitorCode,
useFeatureFlag,
VariableType,
JSONType,
} from '@kameleoon/react-sdk';
function MyComponent(): JSX.Element {
const { initialize } = useInitialize();
const { getVisitorCode } = useVisitorCode();
const { getFeatureFlagVariable } = useFeatureFlag();
const init = useCallback(async (): Promise => {
await initialize();
// -- Get visitor code
const visitorCode = getVisitorCode();
// -- Get feature variable
const result = getFeatureFlagVariable({
visitorCode,
featureKey: 'my_feature_key',
variableKey: 'my_variable_key',
});
// -- Infer the type of variable by its `type`
switch (result.type) {
case VariableType.BOOLEAN:
const myBool: boolean = result.value;
break;
case VariableType.NUMBER:
const myNum: number = result.value;
break;
case VariableType.JSON:
const myJson: JSONType = result.value;
break;
case VariableType.STRING:
case VariableType.JS:
case VariableType.CSS:
const myStr: string = result.value;
break;
default:
break;
}
}, [initialize, getFeatureFlagVariable, visitorCode, getVisitorCode]);
useEffect(() => {
init();
}, [init]);
}
```
```jsx theme={null}
import { useEffect, useCallback } from 'react';
import {
useInitialize,
useVisitorCode,
useFeatureFlag,
} from '@kameleoon/react-sdk';
function MyComponent() {
const { initialize } = useInitialize();
const { getVisitorCode } = useVisitorCode();
const { getFeatureFlagVariable } = useFeatureFlag();
const init = useCallback(async () => {
await initialize();
// -- Get visitor code
const visitorCode = getVisitorCode();
// -- Get feature variable
const variableResult = getFeatureFlagVariable({
visitorCode,
featureKey: 'my_feature_key',
variableKey: 'my_variable_key',
});
const { type, value } = variableResult;
}, [initialize, getFeatureFlagVariable, visitorCode, getVisitorCode]);
useEffect(() => {
init();
}, [init]);
}
```
##### Parameters
Parameters object of type `GetFeatureFlagVariableParamsType` containing the following fields:
| Name | Type | Description |
| ----------------------------------- | -------- | ---------------------------------------------------------------------------------------------------------------------- |
| visitorCode required | `string` | unique visitor identification string, can't exceed 255 characters length |
| featureKey required | `string` | a unique key for feature flag |
| variableKey required | `string` | key of the variable to be found for a feature flag with the specified `featureKey`, can be found on Kameleoon Platform |
##### Return value
| Type | Description |
| ------------------------- | --------------------------------------------------------------------------------------------------------------------------------------------------------------------------------------------------------------- |
| `FeatureFlagVariableType` | a variable object containing `type` and `value` fields. You can check the `type` field against `VariableType` enum. For example, if the `type` is `VariableType.BOOLEAN` then `value` will be a `boolean` type. |
##### Exceptions thrown
| Type | Description |
| ----------------------------------------------------- | ------------------------------------------------------------------------------- |
| `KameleoonException.Initialization` | Method was executed before `initialize` was done for `kameleoonClient` |
| `KameleoonException.VisitorCodeMaxLength` | The visitor code exceeded the maximum length (255 characters) |
| `KameleoonException.VisitorCodeEmpty` | The visitor code is empty |
| `KameleoonException.FeatureFlagConfigurationNotFound` | No feature flag was found for the specified `featureKey` |
| `KameleoonException.FeatureFlagVariableNotFound` | No feature variable was found for the specified `visitorCode` and `variableKey` |
| `KameleoonException.FeatureFlagEnvironmentDisabled` | Feature flag is disabled for the current environment |
| `KameleoonException.JSONParse` | Couldn't parse JSON value |
| `KameleoonException.NumberParse` | Couldn't parse Number value |
#### getFeatureFlagVariables()
* 📨 *Sends Tracking Data to Kameleoon*
* 🎯 *Events:* `EventType.Evaluation` (for each feature flag)
Use the [`getVariations`](#getvariations) method.
The `getFeatureFlagVariables` method, collected with the `useFeatureFlag`, hook returns a list of variables for the visitor under `visitorCode` in the found feature flag, this includes targeting check, finding the according variation exposed to the visitor and saving it to storage along with sending tracking request.
```tsx theme={null}
import { useEffect, useCallback } from 'react';
import {
useInitialize,
useFeatureFlag,
useVisitorCode,
} from '@kameleoon/react-sdk';
function MyComponent(): JSX.Element {
const { initialize } = useInitialize();
const { getVisitorCode } = useVisitorCode();
const { getFeatureFlagVariables } = useFeatureFlag();
const init = useCallback(async (): Promise => {
await initialize();
// -- Get visitor code
const visitorCode = getVisitorCode();
// -- Get a list of variables for the visitor under `visitorCode` in the feature flag
const variables = getFeatureFlagVariables(visitorCode, 'my_feature_key');
}, [initialize, getFeatureFlagVariables, getVisitorCode]);
useEffect(() => {
init();
}, [init]);
}
```
```jsx theme={null}
import { useEffect, useCallback } from 'react';
import {
useInitialize,
useFeatureFlag,
useVisitorCode,
} from '@kameleoon/react-sdk';
function MyComponent() {
const { initialize } = useInitialize();
const { getVisitorCode } = useVisitorCode();
const { getFeatureFlagVariables } = useFeatureFlag();
const init = useCallback(async () => {
await initialize();
// -- Get visitor code
const visitorCode = getVisitorCode('www.example.com');
// -- Get a list of variables for the visitor under `visitorCode` in the feature flag
const variables = getFeatureFlagVariables(visitorCode, 'my_feature_key');
}, [initialize, getFeatureFlagVariables, getVisitorCode]);
useEffect(() => {
init();
}, [init]);
}
```
##### Parameters
| Name | Type | Description |
| ----------------------------------- | -------- | ------------------------------------------------------------------------ |
| visitorCode required | `string` | unique visitor identification string, can't exceed 255 characters length |
| featureKey required | `string` | a unique key for feature flag |
##### Return value
| Type | Description |
| ----------------------------- | ------------------------------------------------------------------------------------------------------------------------------------------------------------------------------------------------------------------------------- |
| `FeatureVariableResultType[]` | a list of variable objects containing `key`, `type` and `value` fields. You can check the `type` field against `VariableType` enum. For example, if the `type` is `VariableType.BOOLEAN` then `value` will be a `boolean` type. |
##### Exceptions thrown
| Type | Description |
| ----------------------------------------------------- | --------------------------------------------------------------------------------- |
| `KameleoonException.Initialization` | Method was executed before the `kameleoonClient` completed it's `initialize` call |
| `KameleoonException.VisitorCodeMaxLength` | The visitor code exceeded the maximum length (255 characters) |
| `KameleoonException.VisitorCodeEmpty` | The visitor code is empty |
| `KameleoonException.FeatureFlagConfigurationNotFound` | No feature flag was found for the specified `featureKey` |
| `KameleoonException.FeatureFlagVariationNotFound` | No feature variation was found for the specified `visitorCode` and `variableKey` |
| `KameleoonException.FeatureFlagEnvironmentDisabled` | Feature flag is disabled for the current environment |
| `KameleoonException.JSONParse` | Couldn't parse JSON value |
| `KameleoonException.NumberParse` | Couldn't parse Number value |
***
#### onConfigurationUpdate()
Use the `onEvent` method with `EventType.ConfigurationUpdate` instead.
Method `onConfigurationUpdate` collected with `useInitialize` hook fires a callback on client configuration update.
This hook only works for server sent events of real time update
```tsx theme={null}
import { useEffect, useCallback } from 'react';
import { useInitialize } from '@kameleoon/react-sdk';
function MyComponent(): JSX.Element {
const { initialize, onConfigurationUpdate } = useInitialize();
const init = useCallback(async (): Promise => {
await initialize();
// -- Define logic to execute on client configuration update
onConfigurationUpdate(() => {
// -- My Logic
});
}, [initialize, onConfigurationUpdate]);
useEffect(() => {
init();
}, [init]);
}
```
```jsx theme={null}
import { useEffect, useCallback } from 'react';
import { useInitialize } from '@kameleoon/react-sdk';
function MyComponent() {
const { initialize, onConfigurationUpdate } = useInitialize();
const init = useCallback(async () => {
await initialize();
// -- Define logic to execute on client configuration update
onConfigurationUpdate(() => {
// -- My Logic
});
}, [initialize, onConfigurationUpdate]);
useEffect(() => {
init();
}, [init]);
}
```
##### Parameters
| Name | Type | Description |
| -------------------------------- | ------------ | ---------------------------------------------------------------------------------- |
| callback required | `() => void` | callback function with no parameters that will be called upon configuration update |
##### Exceptions thrown
| Type | Description |
| ----------------------------------- | -------------------------------------------------------------------------------- |
| `KameleoonException.Initialization` | Method was executed before the `kameleoonClient` completed its `initialize` call |
***
#### getFeatureFlags()
🚫 *Doesn't send Tracking Data to Kameleoon*
The `getFeatureFlags` method collected with the `useFeatureFlag` hook returns a list of feature flags stored in the client configuration.
```tsx theme={null}
import { useEffect, useCallback } from 'react';
import { useInitialize, useFeatureFlag } from '@kameleoon/react-sdk';
function MyComponent(): JSX.Element {
const { initialize } = useInitialize();
const { getFeatureFlags } = useFeatureFlag();
const init = useCallback(async (): Promise => {
await initialize();
// -- Get list of all feature flags
const featureFlags = getFeatureFlags();
}, [initialize, getFeatureFlags]);
useEffect(() => {
init();
}, [init]);
}
```
```jsx theme={null}
import { useEffect, useCallback } from 'react';
import { useInitialize, useFeatureFlag } from '@kameleoon/react-sdk';
function MyComponent() {
const { initialize } = useInitialize();
const { getFeatureFlags } = useFeatureFlag();
const init = useCallback(async () => {
await initialize();
// -- Get list of all feature flags
const featureFlags = getFeatureFlags();
}, [initialize, getFeatureFlags]);
useEffect(() => {
init();
}, [init]);
}
```
##### Return value
| Type | Description |
| ------------------- | ---------------------------------------------------------------------- |
| `FeatureFlagType[]` | list of feature flags, each feature flag item contains `id` and `key`. |
##### Exceptions thrown
| Type | Description |
| ----------------------------------- | --------------------------------------------------------------------------------- |
| `KameleoonException.Initialization` | Method was executed before the `kameleoonClient` completed it's `initialize` call |
# Versions
Source: https://docs.kameleoon.com/developer-docs/sdks/versions
This article describes the latest versions of Kameleoon SDKs and their release dates.
**SDK**
**Current Version**
**Release Date / Changelog**
[Android (Kotlin/Java)](/developer-docs/sdks/mobile-sdks/android-sdk)
4.26.3
[July 2026](https://github.com/Kameleoon-new/client-android/blob/main/CHANGELOG.md)
[iOS (Swift)](/developer-docs/sdks/mobile-sdks/ios-sdk)
4.27.3
[July 2026](https://github.com/Kameleoon-new/client-swift/blob/main/CHANGELOG.md)
[JS/TS](/developer-docs/sdks/web-sdks/js-sdk)
4.24.5
[July 2026](https://github.com/Kameleoon-new/client-javascript/blob/main/CHANGELOG.md)
[Flutter](/developer-docs/sdks/mobile-sdks/flutter-sdk)
3.8.0
[July 2026](https://github.com/Kameleoon-new/client-flutter/blob/main/CHANGELOG.md)
[React/React Native](/developer-docs/sdks/web-sdks/react-js-sdk)
10.26.5
[July 2026](https://github.com/Kameleoon-new/client-react/blob/main/CHANGELOG.md)
[Java](/developer-docs/sdks/web-sdks/java-sdk)
4.23.0
[July 2026](https://github.com/Kameleoon-new/client-java/blob/main/CHANGELOG.md)
[C#](/developer-docs/sdks/web-sdks/csharp-sdk)
4.22.1
[July 2026](https://github.com/Kameleoon-new/client-csharp/blob/main/CHANGELOG.md)
[PHP](/developer-docs/sdks/web-sdks/php-sdk)
4.23.0
[May 2026](https://github.com/Kameleoon-new/client-php/blob/main/CHANGELOG.md)
[NodeJS](/developer-docs/sdks/web-sdks/nodejs-sdk)
5.26.2
[July 2026](https://github.com/Kameleoon-new/client-nodejs/blob/main/CHANGELOG.md)
[Ruby](/developer-docs/sdks/web-sdks/ruby-sdk)
3.21.0
[July 2026](https://github.com/Kameleoon-new/client-ruby/blob/main/CHANGELOG.md)
[Python](/developer-docs/sdks/web-sdks/python-sdk)
3.20.0
[May 2026](https://github.com/Kameleoon-new/client-python/blob/main/CHANGELOG.md)
[Go](/developer-docs/sdks/web-sdks/go-sdk)
3.20.0
[May 2026](https://github.com/Kameleoon-new/client-go/blob/main/CHANGELOG.md)
[Rust](/developer-docs/sdks/web-sdks/rust-sdk)
0.9.5
[June 2026](https://github.com/Kameleoon-new/client-rust/blob/main/CHANGELOG.md)
[Elixir](/developer-docs/sdks/web-sdks/elixir-sdk)
0.9.0
[June 2026](https://github.com/Kameleoon-new/client-elixir/blob/main/CHANGELOG.md)
# C# SDK
Source: https://docs.kameleoon.com/developer-docs/sdks/web-sdks/csharp-sdk
Integrate the Kameleoon C# SDK to run server-side experiments and activate feature flags on .NET application servers.
Welcome to the developer documentation for the Kameleoon C# SDK! Use our SDK to run experiments on your back-end .NET application server. It is easy to integrate our SDK into your web-application, and its memory and network usage are low.
**Getting started**: For help getting started, see the [developer guide](#developer-guide).
**SDK methods**: For the full reference documentation of the C# SDK methods, see the [reference](#reference) section.
**Changelog**: Latest version of the C# SDK: 4.22.1 [changelog](https://github.com/Kameleoon/client-csharp/blob/master/CHANGELOG.md).
## Developer guide
### Getting started
This guide is designed to help you integrate our SDK into your C# applications.
#### Starter kit
To help with getting started, Kameleoon provides a starter kit and demo application to test the SDK. The starter kit includes a fully configured app with examples demonstrating how SDK methods can be used in an app. The starter kit, demo application, and detailed instructions are available at [Starter kit for .NET](https://github.com/Kameleoon/dotnet-examples)
#### Install the C# client
You can use the NuGet, .NET CLI, or Paket package manager to install the C# client.
```sh theme={null}
Install-Package KameleoonClient
```
```sh theme={null}
dotnet add package KameleoonClient
```
```sh theme={null}
paket add KameleoonClient
```
#### Additional configuration
Create a `.properties` configuration file to provide credentials and customize the SDK's behavior. You can also [download a sample configuration](/assets/developer-docs/sdks/web-sdks/client-configs/client-csharp.conf) file. Save this file in the default path `/etc/kameleoon/client-csharp.conf`. If you place the file in another location, you'll need to pass the path as an argument to `KameleoonClientFactory.Create()`. With the current version of the C# SDK, these are the available keys:
| Key | Description | Default value |
| ---------------------------------------------------------------------------------------- | ---------------------------------------------------------------------------------------------------------------------------------------------------------------------------------------------------------------------------------------------------------------------------------------------------------------------------------------------------------------------------------------------------------------------------------------------------------------------------------------------------------------------------------------------------------------------------------------------------------------------------- | -------------------- |
| `clientId` / `client_id` required | Required for authentication to the Kameleoon service. To find your `client_id`, see the [API credentials](/user-manual/account-and-team-management/users-and-teams/api-credentials) documentation. | |
| `clientSecret` / `client_secret` required | Required for authentication to the Kameleoon service. To find your `client_secret`, see the [API credentials](/user-manual/account-and-team-management/users-and-teams/api-credentials) documentation. | |
| `sessionDurationMinute` / `session_duration_minute` optional | Designates the predefined time interval that Kameleoon stores the visitor and their associated data in memory (RAM). Note that increasing the session duration increases the amount of RAM that needs to be allocated to store visitor data. | `30` minutes |
| `refreshIntervalMinute` / `refresh_interval_minute` optional | Specifies the refresh interval, in minutes, that the SDK fetches the configuration for the active experiments and feature flags. The value determines the maximum time it takes to propagate changes, such as activating or deactivating feature flags or launching experiments, to your production servers. Additionally, we offer a [streaming mode](/developer-docs/feature-experimentation/technical-reference/technical-considerations/#streaming-premium-option) that uses server-sent events (SSE) to push new configurations to the SDK automatically and apply new configurations in real-time, without any delays. | `60` minutes |
| `defaultTimeoutMillisecond` / `default_timeout_millisecond` optional | Specifies the timeout, in milliseconds, for network requests from the SDK. Set the value to 30 seconds or more if you do not have a stable connection. Some methods have an additional parameter that you can use to override the default timeout for that particular method. If you do not specify the timeout for a method explicitly, the SDK uses this default value. | `10000` milliseconds |
| `trackingIntervalMilliseconds` / `tracking_interval_millisecond` optional | Specifies the interval for tracking requests in milliseconds. All visitors who Kameleoon evaluated for any feature flag or had data flushed are included in this tracking request, which the SDK performs once per interval. The minimum value is `1000` ms, which is also the default, and the maximum value is `5000` ms. | `1000` milliseconds |
| `environment` / `environment` optional | Environment from which the feature flag’s configuration is to be used. The value can be `production`, `staging`, `development`. See the [managing environments](/user-manual/experimentation/feature-experimentation/configure-your-feature-flags/manage-environments) article for details. | `production` |
| `topLevelDomain` / `top_level_domain` *(required in hybrid mode)* | The current top-level domain for your website. Use the format: `example.com`. Don’t include `https://`, `www`, or other subdomains. Kameleoon uses this information to set the corresponding cookie on the top-level domain. | `null` |
| `proxyHost` / `proxy_host` optional | Sets the proxy host for all outgoing server calls made by the SDK. | `null` |
| `networkDomain` / `network_domain` optional | Custom domain used by SDKs for outgoing requests, often for proxying. Must be a valid domain (e.g., example.com or sub.example.com). Invalid formats default to Kameleoon's value. | `null` |
#### Initialize the Kameleoon client
After you've installed the SDK and configured your credentials and SDK behavior, create the Kameleoon client in your application code. For example:
```csharp theme={null}
using Kameleoon;
string siteCode = "a8st4f59bj";
try {
// Read from default configuration path: "/etc/kameleoon/client-csharp.conf"
IKameleoonClient kameleoonClient = KameleoonClientFactory.Create(siteCode);
} catch (KameleoonException.SiteCodeIsEmpty e) {
// indicates that provided site code is empty
} catch (KameleoonException.ConfigCredentialsInvalid exception) {
// indicates that provided clientId / clientSecret are not valid
}
try {
IKameleoonClient kameleoonClient = KameleoonClientFactory.Create(siteCode, "custom/file/path/client-csharp.conf");
} catch (KameleoonException.SiteCodeIsEmpty e) {
// indicates that provided site code is empty
} catch (KameleoonException.ConfigCredentialsInvalid exception) {
// indicates that provided clientId / clientSecret are not valid
}
try {
KameleoonClientConfig config = new KameleoonClientConfig(
clientId: "", // mandatory
clientSecret: "", // mandatory
refreshIntervalMinute: 60, // in minutes, optional (60 minutes by default)
sessionDurationMinute: 30, // in minutes, optional (30 minutes by default)
defaultTimeoutMillisecond: 10_000, // in milliseconds, optional (10000 ms by default)
trackingIntervalMilliseconds: 1000, // in milliseconds, optional (1000 ms by default)
environment: "development", // optional
topLevelDomain: "example.com", // mandatory if you use hybrid mode (engine or web experiments)
proxyHost: "proxy.host.com", // optional
networkDomain: "example.com", // optional
);
IKameleoonClient kameleoonClient = KameleoonClientFactory.Create(siteCode, config);
} catch (KameleoonException.SiteCodeIsEmpty e) {
// indicates that provided site code is empty
} catch (KameleoonException.ConfigCredentialsInvalid exception) {
// indicates that provided clientId / clientSecret are not valid
}
```
An `IKameleoonClient` is a singleton object that connects your app to the Kameleoon platform. It includes all the methods and features you need to run an experiment.
As a developer, you must ensure your app uses the correct logic for A/B testing with Kameleoon. It’s best to exclude a visitor from the experiment if you haven’t launched it yet. Excluding is simple because this fits with the default logic for variations.
#### Activating a feature flag
##### Assigning a unique ID to a user
To assign a unique ID to a user, you can use the [`GetVisitorCode()`](#getvisitorcode) method. If a **visitor code** doesn’t exist (from the request headers cookie), the method generates a random unique ID or uses a `defaultVisitorCode` that you would have generated. The ID is then set in a response headers cookie.
If you are using Kameleoon in [Hybrid mode](/developer-docs/feature-experimentation/get-started/hybrid-experimentation), calling the `GetVisitorCode()` method ensures that the unique ID (**visitor code**) is shared between the application file `engine.js` (previously named, `kameleoon.js`) and the SDK.
##### Retrieving a flag configuration
To implement a feature flag in your code, you must first create the feature flag in your Kameleoon account.
To determine the status or variation of a feature flag for a specific user, you should use the [`GetVariation()`](#getvariation) or [`IsFeatureActive()`](#isfeatureactive) method to retrieve the configuration based on the `featureKey`.
The `GetVariation()` method handles both simple feature flags with ON/OFF states and more complex flags with multiple variations. The method retrieves the appropriate variation for the user by checking the feature rules, assigning the variation, and returning it based on the `featureKey` and `visitorCode`.
The `IsFeatureActive()` method can be used if you want to retrieve the configuration of a simple feature flag that has only an ON or OFF state, as opposed to more complex feature flags with multiple variations or targeting options.
If your feature flag has associated variables (such as specific behaviors tied to each variation) `GetVariation()` also enables you to access the [`Variation`](#variation) object, which provides details about the assigned variation and its associated experiment. This method checks whether the user is targeted, finds the visitor’s assigned variation, and saves it to storage. When `track=true`, the SDK will send the exposure event to the specified experiment on the next tracking request, which is automatically triggered based on the SDK’s [`tracking_interval_millisecond`](#additional-configuration). By default, this interval is set to 1000 milliseconds (1 second).
The `GetVariation()` method allows you to control whether tracking is done. If `track=false`, no exposure events will be sent by the SDK. This is useful if you prefer not to track data through the SDK and instead rely on client-side tracking managed by the Kameleoon engine, for example. Additionally, setting `track=false` is helpful when using the `GetVariations()` method, where you might only need the variations for all flags without triggering any tracking events. If you want to know more about how tracking works, view [this article](/developer-docs/feature-experimentation/technical-reference/faq-global#when-does-the-sdk-send-a-tracking-request-for-analytics)
##### Adding data points to target a user or filter / breakdown visits in reports
To target a user, ensure you've added relevant data points to their profile before retrieving the feature variation or checking if the flag is active. Use the [`AddData()`](#adddata) method to add these data points to the user's profile.
To retrieve data points collected on other devices or to access past user data (collected client-side when using Kameleoon in Hybrid mode), use the [`GetRemoteVisitorData()`](#getremotevisitordata) method. This method asynchronously fetches data from the servers. It is important to call `GetRemoteVisitorData()` *before* retrieving the variation or checking if the feature flag is active, as this data might be required to assign a user to a given variation.
To learn more about available targeting conditions, see the [detailed article on the subject](/developer-docs/feature-experimentation/targeting-and-segmentation/native-segmentation).
Additionally, the data points you add to the visitor profile will be available when analyzing your experiments, allowing you to filter and break down your results by factors like device and browser. Kameleoon Hybrid mode automatically collects a variety of data points on the client-side, making it easy to break down your results based on these pre-collected data points. See the complete list [here](/user-manual/experiment-analytics/analyze-results/results-page/results-page-settings#breakdown-audience).
If you need to track additional data points beyond what's automatically collected, you can use Kameleoon's [Custom Data feature](#customdata). Custom Data allows you to capture and analyze specific information relevant to your experiments. Don't forget to call the [`Flush()`](#flush) method to send the collected data to Kameleoon servers for analysis.
To ensure your results are accurate, it's recommended to filter out bots by using the [`UserAgent`](#useragent) data type.
##### Tracking goal conversions
When a user completes a desired action (such as making a purchase), it is recorded as a conversion. To track conversions, use the [`TrackConversion()`](#trackconversion) method and provide the required `visitorCode` and `goalId` parameters.
The conversion tracking request will be sent along with the next scheduled tracking request, which the SDK sends at regular intervals (defined by [`tracking_interval_millisecond`](#additional-configuration)). If you prefer to send the request immediately, use the [`Flush()`](#flush) method with the parameter `instant=true`.
##### Sending events to analytics solutions
To track conversions and send exposure events to your customer analytics solution, you must first implement Kameleoon in [Hybrid mode](/developer-docs/feature-experimentation/get-started/hybrid-experimentation/). Then, use the [`GetEngineTrackingCode()`](#getenginetrackingcode) method.
The `GetEngineTrackingCode()` method retrieves the unique tracking code required to send exposure events to your analytics solution. Using this method allows you to record events and send them to your desired analytics platform.
### Cross-device experimentation
To support visitors who access an app from multiple devices, Kameleoon allows the synchronization of previously collected visitor data across each of the visitor's devices and reconciliation of their visit history across devices through cross-device experimentation. Case studies and detailed information on how Kameleoon handles data across devices are available in the [article on cross-device experimentation](/developer-docs/cross-device-experimentation).
#### Synchronizing custom data across devices
Although custom mapping synchronization is used to align visitor data across devices, it is not always necessary. Below are two scenarios where custom mapping sync is not required:
**Same user ID across devices**
If the same user ID is used consistently across all devices, synchronization is handled automatically without a custom mapping sync. It is enough to call the `GetRemoteVisitorData()` method when you want to sync the data collected between multiple devices.
**Multi-server instances with consistent IDs**
In complex setups involving multiple servers (for example, distributed server instances), where the same user ID is available across servers, synchronization between servers (with `GetRemoteVisitorData()`) is sufficient without additional custom mapping sync.
Customers who need additional data can refer to the [`GetRemoteVisitorData()`](#getremotevisitordata) method description for further guidance. In the below code, it is assumed that the same unique identifier (in this case, the `visitorCode`, which can also be referred to as `userId`) is used consistently between the two devices for accurate data retrieval.
If you want to sync collected data in real time, you need to choose the scope **Visitor** for your custom data.
```csharp title="Device A" theme={null}
// In this example Custom data with index `90` was set to "Visitor" scope on Kameleoon Platform.
const int VisitorScopeCustomDataIndex = 90;
kameleoonClient.AddData(visitorCode, new CustomData(VisitorScopeCustomDataIndex, "your data"));
kameleoonClient.Flush(visitorCode);
```
```csharp title="Device B" theme={null}
// Before working with the data, call the `GetRemoteVisitorData` method.
await kameleoonClient.GetRemoteVisitorData(visitorCode);
// After calling the method, the SDK on Device B will have access to CustomData of Visitor scope as defined on Device A.
// So, "your data" will be available for targeting and tracking the visitor.
```
#### Using custom data for session merging
[Cross-device experimentation](/developer-docs/cross-device-experimentation) allows for combining a visitor's history across each of their devices (history reconciliation). History reconciliation allows merging different visitor sessions into one. To reconcile visit history, use [`CustomData`](#customdata) to provide a unique identifier for the visitor. For more information, see the [dedicated documentation](/developer-docs/cross-device-experimentation/#activating-cross-device-history-reconciliation).
After cross-device reconciliation is enabled, calling [`GetRemoteVisitorData()`](#getremotevisitordata) with the parameter `userId` retrieves all known data for a given user.
Sessions with the same identifier will always be shown the same variation in an experiment. In the Visitor view of your experiment's results pages, these sessions will appear as a single visitor.
The SDK configuration ensures that associated sessions always see the same variation of the experiment. However, there are some limitations regarding cross-device variation allocation. These limitations are outlined [here](/developer-docs/cross-device-experimentation#critical-points-and-practical-insights).
Follow the [activating cross-device history reconciliation](#cross-device-experimentation) guide to set up your custom data on the Kameleoon platform.
Afterwards, you can use the SDK normally. The following methods that may be helpful in the context of session merging:
* `GetRemoteVisitorData()` with added `UniqueIdentifier(true)` - to retrieve data for all linked visitors.
* [`TrackConversion()`](#trackconversion) or [`Flush()`](#flush) with added `UniqueIdentifier(true)` data - to track some data for specific visitor that is associated with another visitor.
As the custom data you use as the identifier must be set to **Visitor scope**, you need to use [cross-device custom data synchronization](/developer-docs/cross-device-experimentation) to retrieve the identifier with the [`GetRemoteVisitorData()`](#getremotevisitordata) method on each device.
Here's an example of how to use custom data for session merging.
```csharp theme={null}
// In this example, `91` represents the index of the Custom Data
// configured as a unique identifier in Kameleoon.
const int MappingIndex = 91;
const string FeatureKey = "ff123";
// 1. Before the visitor is authenticated
// Retrieve the variation for an unauthenticated visitor.
// Assume `anonymousVisitorCode` is the randomly generated ID for that visitor.
Variation anonymousVariation = kameleoonClient.GetVariation(anonymousVisitorCode, FeatureKey);
// 2. After the visitor is authenticated
// Assume `userId` is the visitor code of the authenticated visitor.
kameleoonClient.AddData(anonymousVisitorCode, new CustomData(MappingIndex, userId));
kameleoonClient.Flush(anonymousVisitorCode, instant=true);
// Indicate that `userId` is a unique identifier.
kameleoonClient.AddData(userId, new UniqueIdentifier(true));
// 3. After the visitor has been authenticated
// Retrieve the variation for the `userId`, which will match the anonymous visitor code's variation.
Variation userVariation = kameleoonClient.GetVariation(userId, FeatureKey);
bool isSameVariation = userVariation.Key == anonymousVariation.Key; // true
// The `userId` and `anonymousVisitorCode` are now linked and tracked as a single visitor.
kameleoonClient.TrackConversion(userId, 123, 10.0);
// Additionally, the linked visitors will share all fetched remote visitor data.
await kameleoonClient.GetRemoteVisitorData(userId);
```
In this example, the application has a login page. Since the user ID is unknown at the moment of login, an anonymous visitor identifier generated by the [`GetVisitorCode()`](#getvisitorcode) method is used. After the user logs in, the anonymous visitor is associated with the user ID and used as a unique identifier for the visitor.
### Using a custom bucketing key
By default, Kameleoon uses a unique, anonymous visitor ID (`visitorCode`) to assign users to feature flag variations. This ID is typically generated and stored on the user's device (in a browser cookie for client-side and server-side SDKs—in persistent storage for mobile SDKs). However, in certain scenarios you may need to ensure all users of the same organization see the same variant of a feature flag.
The **Custom Bucketing Key** option allows you to override this default behavior by providing your own custom identifier for bucketing. This override ensures that Kameleoon's assignment logic uses your specified key instead of the default `visitorCode`.
#### Use cases
Using a custom bucketing key is essential for maintaining consistency and accuracy in your feature flag assignments, particularly in these situations:
* **Account-level or organizational experiments:** For B2B products or scenarios where you want to assign all users from the same organization to the same variation, you can use an identifier like an `accountId`. Custom bucketing keys are crucial for A/B testing features that impact an entire team or company.
By implementing a custom bucketing key, you ensure greater consistency and accuracy in your experiments, leading to more reliable results and a better user experience.
#### Technical details
When you configure a custom bucketing key for a feature flag, you provide Kameleoon with a specific identifier from your application's data:
```csharp theme={null}
kameleoonClient.AddData(visitorCode, new CustomData(index, "newVisitorCode"));
```
* **Providing the custom key:** You provide your custom identifier to the Kameleoon SDK using the [`AddData()`](#adddata) method. In this method, you will pass your chosen custom bucketing key as a [`CustomData`](#customdata) object. Here, `newVisitorCode` refers to the identifier you wish to use for your bucketing (for example, the new `userId` or `accountId`).
For the custom bucketing key to function correctly, it must also be defined and configured for the feature flag during the flag creation or editing process. Without this corresponding configuration, the SDK's bucketing will not apply your custom key. For detailed instructions on how to set this up in Kameleoon, refer to this [article](/user-manual/experimentation/feature-experimentation/create-and-manage-flags/create-a-feature-flag#Advanced_Flag_Settings).
* **Bucketing logic:** Once a custom bucketing key is provided through the `AddData()` method, all hash calculations for assigning users to variations will use this `newVisitorCode` (your custom key) instead of the default `visitorCode`. Using the `newVisitorCode` means that the bucketing decision is tied to your custom identifier, ensuring consistent assignments across various contexts where that identifier is present.
* **Data tracking and analytics:** It's crucial to note that while the `newVisitorCode` (your custom key) is used for bucketing decisions, **all subsequent data (tracking events and conversions, for example) is sent and associated with the *original* `visitorCode`.** This separation ensures that your analytics accurately reflect individual user journeys and interactions within your experiment's broader context, even when bucketing is performed at a higher level (like an account) or across multiple devices/sessions. Your original visitor data remains intact for comprehensive reporting.
#### Technical requirements
To effectively use a custom bucketing key:
* The key must be a `string`.
* It must be unique for the entity you intend to bucket (for example, if using a `userId`, each user's ID should be unique).
* The key must be available to the SDK at the exact moment the feature flag decision is evaluated for that user or request.
### Targeting conditions
The Kameleoon SDKs support a variety of predefined targeting conditions that you can use to target users in your campaigns. For the list of conditions this SDK supports, see [use visit history to target users](/developer-docs/feature-experimentation/targeting-and-segmentation/native-segmentation).
You can also use your own [external data to target users](/developer-docs/apis/data-api-rest/tutorials/storing-and-retrieving-external-data-to-target-users).
### Logging
The SDK generates logs to reflect various internal processes and issues.
#### Log levels
The SDK supports configuring limiting logging by a log level.
```csharp theme={null}
// The `None` log level does not allow logging.
Kameleoon.Logging.KameleoonLogger.LogLevel = Kameleoon.Logging.LogLevel.None;
// The `Error` log level only allows logging issues that may affect the SDK's primary behavior.
Kameleoon.Logging.KameleoonLogger.LogLevel = Kameleoon.Logging.LogLevel.Error;
// The `Warning` log level allows logging issues which may require additional attention.
// It extends the `Error` log level.
// The `Warning` log level is a default log level.
Kameleoon.Logging.KameleoonLogger.LogLevel = Kameleoon.Logging.LogLevel.Warning;
// The `Info` log level allows logging general information on the SDK's internal processes.
// It extends the `Warning` log level.
Kameleoon.Logging.KameleoonLogger.LogLevel = Kameleoon.Logging.LogLevel.Info;
// The `DEBUG` level logs additional details about the SDK’s internal processes and extends the `INFO` level
// with more granular diagnostic output.
// This information is not intended for end-user interpretation but can be sent to our support team
// to assist with internal troubleshooting.
Kameleoon.Logging.KameleoonLogger.LogLevel = Kameleoon.Logging.LogLevel.Debug;
```
#### Custom handling of logs
The SDK writes its logs to the console output by default. This behaviour can be overridden.
Logging limiting by a log level is performed apart from the log handling logic.
```csharp theme={null}
class CustomLogger : Kameleoon.Logging.ILogger
{
private readonly Microsoft.Extensions.Logging.ILogger inner;
public CustomLogger(Microsoft.Extensions.Logging.ILogger inner)
{
this.inner = inner;
}
// `Log` method accepts logs from the SDK
public void Log(Kameleoon.Logging.LogLevel level, string message)
{
// Custom log handling logic here. For example:
switch (level)
{
case Kameleoon.Logging.LogLevel.Error:
Microsoft.Extensions.Logging.LoggerExtensions.LogError(inner, message);
break;
case Kameleoon.Logging.LogLevel.Warning:
Microsoft.Extensions.Logging.LoggerExtensions.LogWarning(inner, message);
break;
case Kameleoon.Logging.LogLevel.Info:
Microsoft.Extensions.Logging.LoggerExtensions.LogInformation(inner, message);
break;
case Kameleoon.Logging.LogLevel.Debug:
Microsoft.Extensions.Logging.LoggerExtensions.LogDebug(inner, message);
break;
}
}
}
// Log level filtering is applied separately from log handling logic.
// The custom logger will only accept logs that meet or exceed the specified log level.
// Ensure the log level is set correctly.
Kameleoon.Logging.KameleoonLogger.LogLevel = Kameleoon.Logging.LogLevel.Debug; // Optional; defaults to `LogLevel.Warning`.
Kameleoon.Logging.KameleoonLogger.Logger = new CustomLogger();
```
## Reference
This is the full reference documentation of the C# SDK.
### Initialization
#### Create()
To start using the SDK, you need to initialize it. Your app interacts with the SDK through the `KameleoonClient` class found in `Kameleoon.IKameleoonClient`. You can create this object using the static method **Kameleoon.KameleoonClientFactory** `Create()`.
```csharp theme={null}
using Kameleoon;
string siteCode = "a8st4f59bj";
try {
// Read from default configuration path: "/etc/kameleoon/client-csharp.conf"
IKameleoonClient kameleoonClient = KameleoonClientFactory.Create(siteCode);
} catch (KameleoonException.SiteCodeIsEmpty e) {
// indicates that provided site code is empty
} catch (KameleoonException.ConfigCredentialsInvalid exception) {
// indicates that provided clientId / clientSecret are not valid
}
try {
IKameleoonClient kameleoonClient = KameleoonClientFactory.Create(siteCode, "custom/file/path/client-csharp.conf");
} catch (KameleoonException.SiteCodeIsEmpty e) {
// indicates that provided site code is empty
} catch (KameleoonException.ConfigCredentialsInvalid exception) {
// indicates that provided clientId / clientSecret are not valid
}
try {
KameleoonClientConfig config = new KameleoonClientConfig(
clientId: "", // mandatory
clientSecret: "", // mandatory
refreshIntervalMinute: 60, // in minutes, optional (60 minutes by default)
sessionDurationMinute: 30, // in minutes, optional (30 minutes by default)
defaultTimeoutMillisecond: 10_000, // in milliseconds, optional (10000 ms by default)
trackingIntervalMilliseconds: 1000, // in milliseconds, optional (1000 ms by default)
environment: "development", // optional
topLevelDomain: "example.com", // mandatory if you use hybrid mode (engine or web experiments)
proxyHost: "proxy.host.com" // optional
networkDomain: "example.com", // optional
);
IKameleoonClient kameleoonClient = KameleoonClientFactory.Create(siteCode, config);
} catch (KameleoonException.SiteCodeIsEmpty e) {
// indicates that provided site code is empty
} catch (KameleoonException.ConfigCredentialsInvalid exception) {
// indicates that provided clientId / clientSecret are not valid
}
```
##### Parameters
| Name | Type | Description | Default |
| --------------------------------------------- | ----------------------- | ----------------------------------------------------------------------------------------------------------------------- | ----------------------------------- |
| siteCode required | `string` | This is a [unique key](/user-manual/faq#how-do-i-find-my-sitecode) of the Kameleoon project you are using with the SDK. | |
| configurationFilePath optional | `string` | Path to the SDK configuration file. | `/etc/kameleoon/client-csharp.conf` |
| kameleoonConfig optional | `KameleoonClientConfig` | Configuration SDK object that you can pass instead of using a configuration file. | `null` |
##### Return value
| Type | Description |
| ------------------ | ------------------------------------------------------------------------------------------------------------- |
| `IKameleoonClient` | An instance of the **KameleoonClient** class, that will be used to manage your experiments and feature flags. |
##### Exceptions thrown
| Type | Description |
| --------------------------------------------- | ------------------------------------------------------------------------------------------------------------------------------ |
| `KameleoonException.ConfigCredentialsInvalid` | Exception indicating that the requested credentials were not provided in the configuration file or as arguments on the method. |
| `KameleoonException.SiteCodeIsEmpty` | Exception indicating that the specified site code is empty string which is invalid value. |
#### WaitInit()
`WaitInit()` awaits the initialization of the Kameleoon client. This method allows you to verify that the client has successfully initialized before you proceed with other operations.
```csharp theme={null}
using static Kameleoon;
try {
await kameleoonClient.WaitInit();
} catch (Exception exception) {
// indicates that client could not be initialized due to the thrown exception.
}
```
##### Return value
| Type | Description |
| ---- | ------------------------------------------------------------------------- |
| Task | The task will complete when the client has been successfully initialized. |
##### Exceptions thrown
| Type | Description |
| --------- | ------------------------------------------------------------------------------------ |
| Exception | Exception indicating that client is not initialized properly and cannot be used yet. |
### Feature flags and variations
#### IsFeatureActive()
* 📨 *Sends Tracking Data to Kameleoon (depending on the `track` parameter)*
This method was previously called `ActivateFeature`, which was removed in SDK version `4.0.0`.
To activate a feature toggle, call the `IsFeatureActive` method.
This method requires a **visitorCode** and a **featureKey** (or **featureID**) to check if a user can access a specific feature.
If the user has never been linked to this feature, the SDK will randomly decide whether to activate it, returning either **true** (the user can access the feature) or **false** (the user cannot). If the user with the given **visitorCode** is already linked to this feature, the system will return the previous value of the **featureFlag**.
Make sure to include proper error handling in your code, as shown in the example, to catch any potential errors.
If you specify a `visitorCode`, the `IsFeatureActive()` method uses it as the unique visitor identifier, which is useful for [cross-device experimentation](/developer-docs/cross-device-experimentation). When you specify a `visitorCode` and set the `isUniqueIdentifier` parameter to `true`, the SDK links the flushed data with the visitor associated with the specified identifier.
The parameter `isUniqueIdentifier` is deprecated. Please use [`UniqueIdentifier`](#uniqueidentifier) instead.
The `isUniqueIdentifier` can be helpful in unique situations; for example, if you cannot access the anonymous `visitorCode` given to a visitor, but you can use an internal ID linked to that visitor through session merging.
Kameleoon uses tracking to count sessions and visitors when you call certain methods, such as `IsFeatureActive()`, `GetVariation()` or `GetVariations()`.
Use the default `true` value for the `track` parameter when you expose visitors to a variation and need to count them. Set the `track` parameter to `false` only if you call these methods before you expose visitors.
For example, if you call `GetVariations()` to retrieve all variations before you expose visitors, set the `track` parameter to `false`. This setting prevents Kameleoon from prematurely counting a session. You can then trigger tracking later when you explicitly expose the visitor.
Kameleoon sends tracking data every second by default. You can configure this interval up to five seconds using the tracking interval configuration option. Kameleoon groups tracking events into a single session as long as the interval between events is less than 30 minutes. If more than 30 minutes elapse between tracking events, Kameleoon counts the events as separate sessions. A visit appears in your reports 30 minutes after the last recorded event in the session.
```csharp theme={null}
string visitorCode = kameleoonClient.GetVisitorCode(Request, Response, "example.com");
string featureKey = "new_checkout";
bool hasNewCheckout = false;
try {
hasNewCheckout = kameleoonClient.IsFeatureActive(visitorCode, featureKey);
// disabling tracking
hasNewCheckout = kameleoonClient.IsFeatureActive(visitorCode, featureKey, track: false);
}
catch (KameleoonException.FeatureNotFound e) {
// Feature toggle not yet activated on Kameleoon's side - we consider the feature inactive.
hasNewCheckout = false;
}
catch (Exception e) {
// This is a generic Exception handler which will handle all exceptions.
Console.WriteLine("Exception occurred");
}
if (hasNewCheckout)
{
// Implement new checkout code here.
}
```
The `IsFeatureActive()` method evaluates the served variant, not the master flag state. If you exclude rules, the method uses the **Then, for everyone else serve** default state. If you select **Off** for this default state, the method always returns `false` even when the master feature flag is **On**.
##### Parameters
| Name | Type | Description |
| ------------------------------- | ------ | ----------------------------------------------------------------------------------------------------------------------------------------------------- |
| visitorCode | string | Unique identifier of the user. This field is mandatory. |
| featureKey | string | Key of the feature you want to expose to a user. This field is mandatory. |
| isUniqueIdentifier (Deprecated) | bool | An optional parameter for specifying if the visitorCode is a unique identifier. If not provided, the default value is `false`. The field is optional. |
| track | bool | An optional parameter to enable or disable tracking of the feature evaluation (`true` by default). |
##### Return value
| Type | Description |
| ---- | -------------------------------------------------------------------- |
| bool | Value of the feature that is registered for a given **visitorCode**. |
##### Exceptions thrown
| Type | Description |
| ------------------------------------- | ------------------------------------------------------------------------------------------------------------------------------------------------------------------------------------------------------------------------------------------------------------------------------------------------------------ |
| KameleoonException.VisitorCodeInvalid | Exception indicating that the specified visitor code is not valid. (It is either empty or longer than 255 characters). |
| KameleoonException.FeatureNotFound | Exception indicating that the requested feature ID has not been found in the internal configuration of the SDK. This is usually normal and means that the feature flag has not yet been activated on Kameleoon's side (but code implementing the feature is already deployed on the web-application's side). |
#### GetVariation()
* 📨 *Sends Tracking Data to Kameleoon (depending on the `track` parameter)*
Retrieves the [`Variation`](#variation) assigned to a given visitor for a specific feature flag.
This method takes a `visitorCode` and `featureKey` as mandatory arguments. The `track` argument is optional and defaults to `true`.
It returns the assigned `Variation` for the visitor. If the visitor is not associated with any feature flag rules, the method returns the default `Variation` for the given feature flag.
Ensure that proper error handling is implemented in your code to manage potential exceptions.
The default variation refers to the variation assigned to a visitor when they do not match any predefined delivery rules for a feature flag. In other words, it is the fallback variation applied to all users who are not targeted by specific rules. It's represented as the variation in the "Then, for everyone else..." section in a management interface.
```csharp theme={null}
const string featureKey = "new_checkout";
Variation variation;
try
{
variation = kameleoonClient.GetVariation(visitorCode, featureKey);
// disabling tracking
variation = kameleoonClient.GetVariation(visitorCode, featureKey, false);
} catch (KameleoonException.FeatureNotFound e)
{
// The error has occurred; the feature flag isn't found in the current configuration.
} catch (KameleoonException.FeatureEnvironmentDisabled e)
{
// The feature flag is disabled for the environment.
} catch (KameleoonException.VisitorCodeInvalid e)
{
// The visitor code you passed to the method is invalid and can't be accepted by SDK.
}
// Fetch a variable value for the assigned variation.
string title = variation.Variables["title"].Value;
switch (variation.Key)
{
case "on":
// Main variation key is selected for visitorCode.
break;
case "alternative_variation":
// Alternative variation key
break;
default:
// Default variation key
break;
}
```
##### Parameters
| Name | Type | Description | Default |
| ------------------------------------- | -------- | ------------------------------------------------------------------------------ | ------- |
| `visitorCode` required | `string` | Unique identifier of the visitor. | |
| `featureKey` required | `string` | Key of the feature you want to expose to a visitor. | |
| `track` optional | `bool` | An optional parameter to enable or disable tracking of the feature evaluation. | `true` |
##### Return value
| Type | Description |
| ----------- | ------------------------------------------------------------------------------------- |
| `Variation` | An assigned [`Variation`](#variation) to a given visitor for a specific feature flag. |
##### Exceptions thrown
| Type | Description |
| ---------------------------- | --------------------------------------------------------------------------------------------------------------------------------------------------------------------------------------------------------------------------------------------------------------------- |
| `VisitorCodeInvalid` | Exception indicating that the provided visitor code is not valid. It is either empty or longer than 255 characters. |
| `FeatureNotFound` | Exception indicating that the requested feature key wasn't found in the internal configuration of the SDK. This usually means that the feature flag is not activated in the Kameleoon app (but code implementing the feature is already deployed in the application). |
| `FeatureEnvironmentDisabled` | Exception indicating that feature flag is disabled for the visitor's current environment (for example, production, staging, or development). |
#### GetVariations()
* 📨 *Sends Tracking Data to Kameleoon (depending on the `track` parameter)*
Retrieves a map of [`Variation`](#variation) objects assigned to a given visitor across all feature flags.
This method iterates over all available feature flags and returns the assigned `Variation` for each flag associated with the specified visitor. It takes `visitorCode` as a mandatory argument, while `onlyActive` and `track` are optional.
* If `onlyActive` is set to `true`, the method `GetVariations()` will return feature flags variations provided the user is not bucketed with the `off` variation.
* The `track` parameter controls whether or not the method will track the variation assignments. By default, it is set to `true`. If set to `false`, the tracking will be disabled.
The returned map consists of feature flag keys as keys and their corresponding `Variation` as values. If no variation is assigned for a feature flag, the method returns the default `Variation` for that flag.
Proper error handling should be implemented to manage potential exceptions.
The default variation refers to the variation assigned to a visitor when they do not match any predefined delivery rules for a feature flag. In other words, it is the fallback variation applied to all users who are not targeted by specific rules. It's represented as the variation in the "Then, for everyone else..." section in a management interface.
```csharp theme={null}
IReadOnlyDictionary variations;
try
{
variations = kameleoonClient.GetVariations(visitorCode);
// only active variations
variations = kameleoonClient.GetVariations(visitorCode, true);
// disable tracking
variations = kameleoonClient.GetVariations(visitorCode, track: false);
}
catch (VisitorCodeInvalid e)
{
// Handle exception
}
```
##### Parameters
| Name | Type | Description | Default |
| ------------------------------------- | -------- | ----------------------------------------------------------------------------------------------------------------- | ------- |
| `visitorCode` required | `string` | Unique identifier of the visitor. | |
| `onlyActive` optional | `bool` | An optional parameter indicating whether to return variations for active (`true`) or all (`false`) feature flags. | `false` |
| `track` optional | `bool` | An optional parameter to enable or disable tracking of the feature evaluation. | `true` |
##### Return value
| Type | Description |
| ---------------------------------------- | ----------------------------------------------------------------------------------------------------------------------------------- |
| `IReadOnlyDictionary` | Map that contains the assigned [`Variation`](#variation) objects of the feature flags using the keys of the corresponding features. |
##### Exceptions thrown
| Type | Description |
| -------------------- | ------------------------------------------------------------------------------------------------------------------- |
| `VisitorCodeInvalid` | Exception indicating that the provided visitor code is not valid. It is either empty or longer than 255 characters. |
#### GetFeatureList()
This method was previously named `ObtainFeatureList()`, which was removed in SDK version `4.0.0`.
Returns a list of feature flag keys currently available for the SDK.
```csharp theme={null}
const featureFlagIds = kameleoonClient.GetFeatureList()
```
##### Return value
| Type | Description |
| -------------- | ------------------------- |
| `List` | List of feature flag keys |
#### SetForcedVariation()
The method allows you to programmatically assign a specific [`Variation`](#variation) to a user, bypassing the standard evaluation process. This is especially valuable for controlled experiments where the usual evaluation logic is not required or must be skipped. It can also be helpful in scenarios like debugging or custom testing.
When a **forced** variation is set, it overrides Kameleoon's real-time evaluation logic. Processes like segmentation, targeting conditions, and algorithmic calculations are skipped. To preserve segmentation and targeting conditions during an experiment, set `forceTargeting=false` instead.
**Simulated** variations always take precedence in the execution order. If a **simulated** variation calculation is triggered, it will be fully processed and completed first.
A forced variation is treated the same as an evaluated variation. It is tracked in analytics and stored in the user context like any standard evaluated variation, ensuring consistency in reporting.
The method may throw exceptions under certain conditions (e.g., invalid parameters, user context, or internal issues). Proper exception handling is essential to ensure that your application remains stable and resilient.
It’s important to distinguish **forced** variations from **[simulated](#getvisitorcode)** variations:
* **Forced variations**: Are specific to an individual experiment.
* **Simulated variations**: Affect the overall **feature flag** result.
```csharp theme={null}
const int experimentId = 9516;
try
{
// Forcing the variation "on" in the experiment 9516 for the visitor
kameleoonClient.SetForcedVariation(visitorCode, experimentId, "on");
// Forcing the variation "on" while preserving segmentation and targeting conditions during the experiment
kameleoonClient.SetForcedVariation(visitorCode, experimentId, "on", false);
// Resetting the forced variation for the experiment 9516 for the visitor
kameleoonClient.SetForcedVariation(visitorCode, experimentId, null);
}
catch (KameleoonException ex)
{
// Handling the exception
}
```
##### Parameters
| Name | Type | Description | Default |
| ---------------------------------------- | -------- | ---------------------------------------------------------------------------------------------------------------------------------------------------------------------------- | ------- |
| `visitorCode` required | `string` | Unique identifier of the visitor. | |
| `experimentId` required | `int` | **Experiment Id** that will be targeted and selected during the evaluation process. | |
| `variationKey` required | `string` | **Variation Key** corresponding to a `Variation` that should be forced as the returned value for the experiment. If the value is `null`, the forced variation will be reset. | |
| `forceTargeting` optional | `bool` | Indicates whether targeting for the experiment should be forced and skipped (`true`) or applied as in the standard evaluation process (`false`). | `true` |
##### Exceptions thrown
| Type | Description |
| --------------------------- | ----------------------------------------------------------------------------------------------------------------------------------------------------------------------------------------------------------------------------------------------------- |
| `VisitorCodeInvalid` | Exception indicating that the provided visitor code is not valid. It is either empty or longer than 255 characters. |
| `FeatureExperimentNotFound` | Exception indicating that the requested experiment id has not been found in the SDK's internal configuration. This is usually normal and means that the rule's corresponding experiment has not yet been activated on Kameleoon's side. |
| `FeatureVariationNotFound` | Exception indicating that the requested variation key(id) has not been found in the internal configuration of the SDK. This is usually normal and means that the variation's corresponding experiment has not yet been activated on Kameleoon's side. |
In most cases, only the basic error, `KameleoonException`, needs to be handled, as demonstrated in the example. However, if different types of errors require a response, handle each one separately based on specific requirements. Additionally, for enhanced reliability, general language errors can be handled by including `Exception`.
#### EvaluateAudiences()
* 📨 *Sends Tracking Data to Kameleoon*
This method evaluates visitors against all available Audiences Explorer segments and tracks those who match.
`EvaluateAudiences()` should be called **after all relevant visitor data has been set or updated**, and **just before** getting a feature variation or checking a feature flag. This approach ensures that the visitor is evaluated against the most current data available, allowing for accurate audience assignment based on all criteria.
After calling this method, you can perform a detailed analysis of segment performance in Audiences Explorer.
```csharp theme={null}
try
{
kameleoonClient.EvaluateAudiences(visitorCode);
}
catch (KameleoonException ex)
{
// Handling the exception
}
```
##### Parameters
| Name | Type | Description |
| ------------------------------------- | -------- | --------------------------------- |
| `visitorCode` required | `string` | Unique identifier of the visitor. |
##### Exceptions thrown
| Type | Description |
| -------------------- | ------------------------------------------------------------------------------------------------------------------- |
| `VisitorCodeInvalid` | Exception indicating that the provided visitor code is not valid. It is either empty or longer than 255 characters. |
In most cases, only the basic error, `KameleoonException`, needs to be handled, as demonstrated in the example. However, if different types of errors require a response, handle each one separately based on specific requirements. Additionally, for enhanced reliability, general language errors can be handled by including `Exception`.
#### GetDataFile()
```csharp theme={null}
DataFile dataFile = kameleoonClient.GetDataFile();
```
##### Return value
### Visitor data
#### GetVisitorCode()
This method was previously called `ObtainVisitorCode`, which was removed in SDK version `4.0.0`.
To get the Kameleoon **visitorCode** for the current visitor, use the `GetVisitorCode()` method. This method is crucial in environments where front-end and back-end systems must consistently identify users. Here’s how it works:
1. Check for a **kameleoonVisitorCode** cookie or query parameter in the current HTTP request. If you find one, use that as the visitor identifier and skip the next step.
2. If you don’t find a cookie or parameter, either randomly create a new identifier or use the **defaultVisitorCode** argument if it’s provided. Doing so lets you use your identifiers as visitor codes, making connecting Kameleoon visitors to your own users easier without needing extra look-ups.
3. Set the server-side **kameleoonVisitorCode** cookie using the identifier value. The method returns this identifier value.
If you provide your own `visitorCode`, make sure it is unique! Also note that the length of `visitorCode` is limited to **255** characters. Using an identifier with too many characters will result in an exception.
The `GetVisitorCode()` method allows you to set **simulated** variations for a visitor. When cookies (from a **request** or **document**) contain the key `kameleoonSimulationFFData`, the standard evaluation process is bypassed. Instead, the method directly returns a [`Variation`](#variation) based on the provided data.
You can apply simulations in two ways:
* **Automatically (recommended):** If using Kameleoon Web Experimentation or the SDK in [Hybrid mode](/developer-docs/feature-experimentation/get-started/hybrid-experimentation#linking-feature-experiments-with-front-end-tracking-code), the cookie is created automatically when simulating a variant's display using the [Simulation Panel](/user-manual/experimentation/feature-experimentation/using-the-rollout-planner/validation-and-rollback/using-simulation-mode).
* **Manually:** Set the `kameleoonSimulationFFData` cookie manually.
It’s important to distinguish **simulated** variations from **[forced](#setforcedvariation)** variations:
* **Simulated variations**: Affect the overall **feature flag** result.
* **Forced variations**: Are specific to an individual experiment.
⚙️ **Manual setup**
Please ensure the `kameleoonSimulationFFData` cookie follows this format:
* `kameleoonSimulationFFData={"featureKey":{"expId":10,"varId":20}}`: Simulates the variation with `varId` of experiment `expId` for the given `featureKey`.
* `kameleoonSimulationFFData={"featureKey":{"expId":0}}`: Simulates the default variation (defined in the **Then, for everyone else in Production, serve** section) for the given `featureKey`.
⚠️ To ensure proper functionality, the cookie value must be encoded as a URI component using a method such as [`encodeURIComponent`](https://developer.mozilla.org/en-US/docs/Web/JavaScript/Reference/Global_Objects/encodeURIComponent).
```csharp theme={null}
try
{
string visitorCode = kameleoonClient.GetVisitorCode(Request, Response);
string visitorCode = kameleoonClient.GetVisitorCode(Request, Response, defaultVisitorCode);
}
catch (VisitorCodeInvalid e)
{
// Handle exception
}
```
##### Parameters
| Name | Type | Description |
| ------------------ | ---------------------------------------------------------------- | ------------------------------------------------------------------------------------------------------------------------------------------------------------------------------------------------------------- |
| Request | Microsoft.AspNetCore.Http.HttpRequest / System.Web.HttpRequest | The current Request object should be passed as the first parameter. This field is mandatory. |
| Response | Microsoft.AspNetCore.Http.HttpResponse / System.Web.HttpResponse | The current Response object should be passed as the second parameter. This field is mandatory. |
| defaultVisitorCode | string | This parameter will be used as the **visitorCode** if no existing **kameleoonVisitorCode** cookie is found on the request. This field is optional, and by default a random **visitorCode** will be generated. |
##### Return value
| Type | Description |
| ------ | --------------------------------------------------------------------------------------------------------------------------- |
| string | A **visitorCode** that will be associated with this particular user and should be used with most of the methods of the SDK. |
##### Exceptions thrown
| Type | Description |
| ------------------------------------- | -------------------------------------------------------------------------------------------------------------------- |
| KameleoonException.VisitorCodeInvalid | Exception indicating that the provided visitor code is not valid (it is either empty or longer than 255 characters). |
#### AddData()
The `AddData()` method adds [targeting data](#data-types) to storage so other methods can use the data to decide whether or not to target the current visitor.
The `AddData()` method does not return any value and does not interact with Kameleoon back-end servers on its own. Instead, all the declared data is saved for future transmission using the [`Flush()`](#flush) method. This approach reduces the number of server calls made, as the data is typically grouped into a single server call that is triggered by the `Flush()`.
The [`TrackConversion()`](#trackconversion) method also sends out any previously associated data, just like the `Flush()`. The same holds true for [`GetVariation()`](#getvariation) and [`GetVariations()`](#getvariations) methods if an experimentation rule is triggered.
Each visitor can only have one instance of associated data for most data types. However, [`CustomData`](#customdata) is an exception. Visitors can have one instance of associated `CustomData` per index.
```csharp theme={null}
// Add a single data item (tracked by default)
kameleoonClient.AddData(new Browser(Browser.Browsers.CHROME));
// Add multiple data items (tracked by default)
kameleoonClient.AddData(
visitorCode,
new PageView("https://url.com", "title", new int[] {3}),
new UserAgent("UserAgent")
);
// Add multiple data items stored locally for targeting only (not sent to the Kameleoon Data API)
kameleoonClient.AddData(
visitorCode,
false,
new PageView("https://url.com", "title", new int[] {3}),
new UserAgent("UserAgent")
);
```
##### Parameters
| Name | Type | Description | Default value |
| ------------------------------------- | ---------------- | -------------------------------------------------------------------------------------------------------------------------------------------------------------------------------------------- | ------------- |
| `visitorCode` required | `string` | Unique identifier of the visitor. | |
| `track` optional | `bool` | Specifies whether the added data is eligible for tracking. When set to `false`, the data is stored locally and used only for targeting evaluation; it is not sent to the Kameleoon Data API. | `true` |
| `data` required | `params IData[]` | Collection of Kameleoon data types. | |
##### Exceptions
| Type | Description |
| -------------------- | ------------------------------------------------------------------------------------------------------------------- |
| `VisitorCodeInvalid` | Exception indicating that the provided visitor code is not valid. It is either empty or longer than 255 characters. |
#### Flush()
* 📨 *Sends Tracking Data to Kameleoon*
The `Flush()` method collects the Kameleoon data linked to the visitor. It then sends a tracking request along with all the previously added data using the `AddData` method, which has not yet been sent using one of [these methods](/developer-docs/feature-experimentation/technical-reference/faq-global#when-does-the-sdk-send-a-tracking-request-for-analytics). `Flush()` is non-blocking as the server call is made asynchronously.
`Flush()` lets you control when the data associated with a given `visitorCode` is sent to our servers. For instance, if you call `AddData()` a dozen times, it would be inefficient to send data to the server after each time `AddData()` is invoked, so all you have to do is call `Flush()` once at the end.
If you specify a `visitorCode`, the `Flush()` method uses it as the unique visitor identifier, which is useful for [cross-device experimentation](/developer-docs/cross-device-experimentation). When you specify a `visitorCode` and set the `isUniqueIdentifier` parameter to `true`, the SDK links the flushed data with the visitor associated with the specified identifier.
The parameter `isUniqueIdentifier` is deprecated. Please use [`UniqueIdentifier`](#uniqueidentifier) instead.
The `isUniqueIdentifier` can be helpful in unique situations; for example, if you cannot access the anonymous `visitorCode` given to a visitor, but you can use an internal ID linked to that visitor through session merging.
```csharp theme={null}
string visitorCode = kameleoonClient.GetVisitorCode(Request, Response, "example.com");
kameleoonClient.AddData(new Browser(Browser.Browsers.CHROME));
kameleoonClient.AddData(
visitorCode,
new PageView("https://url.com", "title", new int[] {3}),
new Conversion(32, 10f, false)
);
kameleoonClient.Flush(visitorCode); // Interval tracking (most performant tracking method)
kameleoonClient.Flush(true, visitorCode); // Instant tracking
// if you operate with unique ID
kameleoonClient.AddData(visitorCode, new UniqueIdentifier(true));
kameleoonClient.Flush(visitorCode);
```
##### Parameters
| Name | Type | Description |
| ------------------------------- | ------ | ------------------------------------------------------------------------------------------------------------------------------------------------------------------------------------------------------------------------------------------------------------------------------------ |
| instant | bool | Boolean flag indicating whether the data should be sent instantly (`true`) or according to the scheduled tracking interval (`false`). This field is optional. |
| visitorCode | string | Unique identifier of the user. This field is mandatory. |
| isUniqueIdentifier (Deprecated) | bool | An optional parameter for specifying if the visitorCode is a unique identifier. The `visitorCode` should be provided and not `null` to apply `isUniqueIdentifier` for a visitor, otherwise it will be ignored. If not provided, the default value is `false`. The field is optional. |
#### GetRemoteData()
This method was previously named `RetrieveDataFromRemoteSource`, which was removed in SDK version `4.0.0`.
`GetRemoteData()` is a method that lets you fetch data for a specific **siteCode** (set in `KameleoonClientFactory.create()`) from a remote Kameleoon server using a **key** you provide. Our Data API stores this data on our servers, which are designed to efficiently handle large amounts of data. Keep in mind that because this method involves a server call, it works asynchronously.
```csharp theme={null}
var testValue = await kameleoonClient.GetRemoteData("test"); // default timeout
testValue = await kameleoonClient.GetRemoteData("test", 1000);
try {
testValue = await kameleoonClient.GetRemoteData("test");
} catch (Exception e) {
// Timeout or Json Parsing Exception
}
```
##### Parameters
| Name | Type | Description |
| ------- | ------ | -------------------------------------------------------------------------------------------------------------------------------------------------------------------------------------------------- |
| key | string | The key that the data you try to get is associated with. This field is mandatory. |
| timeout | int? | Timeout (in milliseconds). This parameter specifies the maximum amount of time to wait for a result. This field is optional, if not provided, it will use the default value of 10000 milliseconds. |
##### Return value
| Type | Description |
| ------- | ---------------------------------------------------------- |
| JObject | Data associated with retrieving data for specific **key**. |
##### Exceptions thrown
| Type | Description |
| --------- | -------------------------------------------------------------------------------------------------------------- |
| Exception | Exception indicating that the request timed out or retrieved data can't be parsed with `JObject.Parse` method. |
#### GetRemoteVisitorData()
`GetRemoteVisitorData()` is a method that retrieves Kameleoon visit data for a specific user using their `VisitorCode`. It works in the background and stores this data for other methods to make targeting decisions.
This data is important for several reasons:
* It helps you use information collected from different devices.
* It allows you to access a user’s history, such as previously visited pages from earlier visits.
* It lets you use data only available on the client side, such as datalayer variables and goals that only track conversions on the front-end.
Read [this article](/developer-docs/feature-experimentation/targeting-and-segmentation/native-segmentation) for a better understanding of possible use cases.
By default, `GetRemoteVisitorData()` automatically retrieves the latest stored custom data with `Scope=Visitor` and attaches them to the visitor without the need to call the method `AddData()`. It is particularly useful for [synchronizing custom data between multiple devices](/developer-docs/sdks/web-sdks/nodejs-sdk#synchronizing-custom-data-across-devices).
The parameter `isUniqueIdentifier` is deprecated. Please use [`UniqueIdentifier`](#uniqueidentifier) instead.
The `isUniqueIdentifier` can be helpful in unique situations; for example, if you cannot access the anonymous `visitorCode` given to a visitor, but you can use an internal ID linked to that visitor through session merging.
```csharp theme={null}
string visitorCode = "visitorCode";
// Visitor data will be fetched and automatically added for `visitorCode`
Task> visitorData = kameleoonClient.GetRemoteVisitorData(visitorCode);
// If you only want to fetch data and add it yourself manually, set addData == `false`.
Task> visitorData = kameleoonClient.GetRemoteVisitorData(visitorCode, false);
// If you want to fetch custom list of data types
var filter = new RemoteVisitorDataFilter(25, customData: false, conversions: true, experiments: true);
var visitorData = kameleoonClient.getRemoteVisitorData(visitorCode, filter: filter);
try {
IReadOnlyCollection visitorData = await kameleoonClient.GetRemoteVisitorData(visitorCode);
// Your custom code
} catch (Exception e) {
// Catch exception
}
```
##### Parameters
| Name | Type | Description |
| ------------------------------- | ----------------------------------------- | -------------------------------------------------------------------------------------------------------------------------------------------------------------------------------------------------------------------------------------------------------------------------------------------------------------------------------------------------------------- |
| visitorCode | string | The visitor code for which you want to retrieve the assigned data. This field is mandatory. |
| addData | bool | A boolean indicating whether the method should automatically add retrieved data for a visitor. This field is optional. |
| timeout | int? | Timeout (in milliseconds). This parameter specifies the maximum amount of time to wait for a result. This field is optional. If not provided, the default value is 10000 milliseconds. |
| filter | `Kameleoon.Types.RemoteVisitorDataFilter` | Filter for specifying what data should be retrieved from visits, by default only `CustomData` is retrieved from the current and latest previous visit (`new RemoteVisitorDataFilter(previousVisitAmount: 1, currentVisit: true, customData: true)` or `RemoteVisitorDataFilter.Default`). Other filters parameters are set to `false`. This field is optional. |
| isUniqueIdentifier (Deprecated) | bool | An optional parameter for specifying if the visitorCode is a unique identifier. If not provided, the default value is `false`. The field is optional. |
##### Return value
| Type | Description |
| ---------------------------------- | ------------------------------------------- |
| `Task>` | Collection associated with a given visitor. |
##### Exceptions thrown
| Type | Description |
| -------------------- | ------------------------------------------------------------------------------- |
| HttpRequestException | Exception indicating that the request was failed for any reason. |
| Exception | Exception indicating that the request timed out or any other reason of failure. |
##### Using parameters in GetRemoteVisitorData()
The `GetRemoteVisitorData()` method offers flexibility by allowing you to define various parameters when retrieving data on visitors. Whether you're targeting based on goals, experiments, or variations, the same approach applies across all data types.
For example, let's say you want to retrieve data on visitors who completed a goal "Order transaction". You can specify parameters within the `GetRemoteVisitorData()` method to refine your targeting. For instance, if you want to target only users who converted on the goal in their last five visits, you can set the `PreviousVisitAmount` parameter to 5 and `Conversions` to true.
The flexibility shown in this example is not limited to goal data. You can use parameters within the `GetRemoteVisitorData()` method to retrieve data on a variety of visitor behaviors.
Here is the list of available `Kameleoon.Types.RemoteVisitorDataFilter` options:
| Name | Type | Description | Default |
| ------------------------------------------- | ------ | -------------------------------------------------------------------------------------------------------------------------------------------------------------------------------------------------------- | ------- |
| previousVisitAmount optional | `int` | Number of previous visits to retrieve data from. Number between `1` and `25` | `1` |
| currentVisit optional | `bool` | If true, current visit data will be retrieved | `true` |
| customData optional | `bool` | If true, custom data will be retrieved. | `true` |
| pageViews optional | `bool` | If true, page data will be retrieved. | `false` |
| geolocation optional | `bool` | If true, geolocation data will be retrieved. | `false` |
| device optional | `bool` | If true, device data will be retrieved. | `false` |
| browser optional | `bool` | If true, browser data will be retrieved. | `false` |
| operatingSystem optional | `bool` | If true, operating system data will be retrieved. | `false` |
| conversions optional | `bool` | If true, conversion data will be retrieved. | `false` |
| experiments optional | `bool` | If true, experiment data will be retrieved. | `false` |
| kcs optional | `bool` | If true, Kameleoon Conversion Score (KCS) will be retrieved. Requires the [AI Predictive Targeting add-on](/user-manual/ai-predictive-targeting/target-users-based-on-likelihood-to-convert). | `false` |
| visitorCode optional | `bool` | If true, the `visitorCode` from the most recent visit should be retrieved and applied to the current visitor. Required for [Cross-device experimentation](/developer-docs/cross-device-experimentation). | `true` |
| cbs optional | `bool` | If true, Contextual Bandit score data will be retrieved. | `false` |
#### GetVisitorWarehouseAudience()
This method retrieves all audience data associated with the visitor in your data warehouse using the specified `visitorCode` and `warehouseKey`. The `warehouseKey` is typically your internal user ID. The `customDataIndex` parameter corresponds to the Kameleoon custom data that Kameleoon uses to target your visitors. You can refer to the [warehouse targeting documentation](/user-manual/integrations/data-warehouses/bigquery/use-bigquery-as-a-source-audience-targeting) for additional details. The method returns a `CustomData` object, confirming that the data has been added to the visitor and is available for targeting purposes.
```csharp theme={null}
Task warehouseAudienceDataTask = kameleoonClient.
GetVisitorWarehouseAudience(visitorCode, customDataIndex); // default timeout
Task warehouseAudienceDataTask = kameleoonClient.
GetVisitorWarehouseAudience(visitorCode, customDataIndex, timeout: 1000);
// If you need to specify warehouse key
Task warehouseAudienceDataTask = kameleoonClient.
GetVisitorWarehouseAudience(visitorCode, customDataIndex, warehouseKeyValue); // default timeout
Task warehouseAudienceDataTask = kameleoonClient.
GetVisitorWarehouseAudience(visitorCode, customDataIndex, warehouseKeyValue, 1000);
try
{
CustomData warehouseAudienceData = await warehouseAudienceDataTask;
// Your custom code
}
catch (Exception e)
{
// Catch exception
}
```
##### Parameters
| Name | Type | Description |
| --------------- | ------ | -------------------------------------------------------------------------------------------------------------------------------------------------------------------------------------- |
| visitorCode | string | A unique visitor identification string, can't exceed 255 characters length. |
| customDataIndex | int | An integer representing the index of the custom data you want to use to target your BigQuery Audiences. |
| warehouseKey | string | A unique key to identify the warehouse data (usually, your internal user ID). This field is optional. |
| timeout | int? | Timeout (in milliseconds). This parameter specifies the maximum amount of time to wait for a result. This field is optional. If not provided, the default value is 10000 milliseconds. |
##### Return value
| Type | Description |
| ------------------ | ------------------------------------------------------------------------------- |
| `Task` | A `CustomData` instance confirming that the data has been added to the visitor. |
##### Exceptions thrown
| Type | Description |
| ------------------------------------- | -------------------------------------------------------------------------------------------------------------------- |
| KameleoonException.VisitorCodeInvalid | Exception indicating that the provided visitor code is not valid (it is either empty or longer than 255 characters). |
| HttpRequestException | Exception indicating that the request was failed for any reason. |
| Exception | Exception indicating that the request timed out or any other reason of failure. |
#### SetLegalConsent()
You must use this method to specify whether the visitor has given legal consent to use personal data. Setting the `legalConsent` parameter to `false` limits the types of data that you can include in tracking requests. This method helps you adhere to legal and regulatory requirements while responsibly managing visitor data. You can find more information on personal data in the [consent management policy](/user-manual/project-management/consent-management-policy).
```csharp theme={null}
string visitorCode = kameleoonClient.GetVisitorCode(httpRequest, httpResponse);
kameleoonClient.SetLegalConsent(visitorCode, true, httpResponse);
```
##### Parameters
| Name | Type | Description |
| ------------ | --------------------------------------------------------------- | ----------------------------------------------------------------------------------------------------------------------------------------------------------------------------------------------------------------------- |
| visitorCode | string | The user's unique identifier. This field is required. |
| legalConsent | bool | A boolean value representing the legal consent status. `true` indicates the visitor has given legal consent, `false` indicates the visitor has never provided, or has withdrawn, legal consent. This field is required. |
| response | Microsoft.AspNetCore.Http.HttpResponse / System.Web.HttpRequest | The HTTP response where values in the cookies will be adjusted based on the legal consent status. This field is optional. |
##### Exceptions thrown
| Type | Description |
| ------------------------------------- | ------------------------------------------------------------------------------------------------------------------- |
| KameleoonException.VisitorCodeInvalid | Exception indicating that the provided visitor code is not valid. It is either empty or longer than 255 characters. |
##### Consent revocation behavior
When you call `setLegalConsent()` with `consent=false`, the SDK does not delete the `kameleoonVisitorCode` cookie. Instead, it stops extending the cookie's expiration date, allowing the cookie to persist until it naturally expires.
If your compliance requirements demand the immediate removal of the cookie file upon opt-out, you must delete it manually using your framework’s native cookie management methods. The SDK will not remove the file automatically.
### Goals and third-party analytics
#### TrackConversion()
* 📨 *Sends Tracking Data to Kameleoon*
Use this method to track a conversion for a specific [goal](/user-manual/assets/goals/create-a-goal) and user. This method requires `visitorCode` and `goalId`. In addition, this method also accepts an optional `revenue`, `negative` and `metadata` arguments. The `visitorCode` is usually identical to the one that was used when triggering the experiment.
The `TrackConversion()` method doesn't return any value. This method is non-blocking as the server call is made asynchronously.
The parameter `isUniqueIdentifier` is deprecated. Please use [`UniqueIdentifier`](#uniqueidentifier) instead.
The `isUniqueIdentifier` can also be useful in other edge-case scenarios, such as when you can't access the anonymous `visitorCode` that was originally assigned to the visitor, but you do have access to an internal ID that is connected to the anonymous visitor using session merging capabilities.
```csharp theme={null}
using Kameleoon;
string visitorCode = kameleoonClient.GetVisitorCode(Request, Response, "example.com");
int goalId = 83023;
kameleoonClient.TrackConversion(visitorCode, goalId);
// Add metadata
var cd = new CustomData(1, "metadata");
kameleoonClient.TrackConversion(visitorCode, goalId, metadata: cd)
```
##### Parameters
| Name | Type | Description | Default |
| ------------------------------------- | --------------------- | ------------------------------------------------------------------------------------------------------------------------------------------------------------------------------------------------------------------------------------------------------------------------------------------------------------------------------------ | ------------------- |
| `visitorCode` required | `string` | Unique identifier of the visitor. | |
| `goalId` required | `int` | ID of the goal. | |
| `revenue` optional | `float?` | Revenue of the conversion. | `0` |
| `negative` optional | `bool` | Defines if the revenue is positive or negative. | `false` |
| `metadata` optional | `params CustomData[]` | Lets you set specific values for custom data which have been defined as metadata for the goal in the Kameleoon App. Example: `[CustomData{id: 5, value: "Payment Type"}, CustomData{id: 6, value: "Delivery Method"}]`. In this example, `5` and `6` are the indexes of the custom data (5 = “Payment Type”, 6 = “Delivery Method”). | `new CustomData[0]` |
| `isUniqueIdentifier` *(deprecated)* | `bool` | An optional parameter for specifying if the visitorCode is a unique identifier. | `false` |
metadata values are accessible through [raw data exports](/user-manual/experiment-analytics/analyze-results/results-page/results-page-actions#Export) and [the results page](/user-manual/experiment-analytics/analyze-results/data-and-metrics/goal-metadata).
If the `metadata` parameter is provided, Kameleoon will use these specified values for the current conversion instead of what was previously collected using the [`AddData()`](#adddata) method. If the parameter is omitted, Kameleoon will use the last tracked values for those [`CustomData`](#customdata) prior to the conversion and within the same visit.
Kameleoon will only consider the metadata values that are explicitly passed as parameters to the `TrackConversion()` method.
In the example below, Kameleoon will associate the conversion only with the custom data value explicitly provided as a parameter (here: index 5 with the value 'Amex Credit Card').
```csharp theme={null}
kameleoonClient.AddData(visitorCode, new CustomData(5, "Credit Card"), new CustomData(9, "Express Delivery"));
kameleoonClient.TrackConversion(visitorCode, 10, metadata: new CustomData(5, "Amex Credit Card"));
```
##### Exceptions
| Type | Description |
| -------------------- | ------------------------------------------------------------------------------------------------------------------- |
| `VisitorCodeInvalid` | Exception indicating that the provided visitor code is not valid. It is either empty or longer than 255 characters. |
#### GetEngineTrackingCode()
Kameleoon integrates with several analytics solutions, including Mixpanel, Google Analytics 4, and Segment. To track server-side experiments correctly, call the `GetEngineTrackingCode()` method after the visitor triggers an experiment. The SDK returns JavaScript queue commands for the experiments that the visitor triggered during the previous five seconds. When you insert this code into the page, Engine.js processes the commands and sends the exposure events through the active analytics integration.
Refer to [hybrid experimentation](/developer-docs/feature-experimentation/get-started/hybrid-experimentation) for more information on implementing this method.
```csharp theme={null}
string engineTrackingCode = kameleoonClient.GetEngineTrackingCode(visitorCode);
```
* To use this feature, implement both the C# SDK and Kameleoon [Engine.js](/developer-docs/web-experimentation/implementation-and-deployment/standard-implementation). Because Engine.js is used only for tracking in this flow, you can install the asynchronous tag before the closing `` tag.
* If you only want to track experiments in Kameleoon and do not need to send exposure events to third-party analytics tools, use the [JavaScript / TypeScript SDK](/developer-docs/sdks/web-sdks/js-sdk). This option works well for [serverless edge compute platforms](/developer-docs/feature-experimentation/implementation-and-deployment/serverless-edge-compute-starter-kits). The JavaScript / TypeScript SDK automatically tracks variations when you call [`getVisitorCode`](/developer-docs/sdks/web-sdks/js-sdk#getvisitorcode), as long as you add the corresponding experiment assignments to `window.kameleoonQueue`.
* You can insert the returned tracking code directly into an HTML `
```
In this example, `123456` and `234567` are experiment IDs, and `7890` and `8901` are variation IDs. In your implementation, the SDK generates these values in the returned tracking code.
##### Parameters
| Name | Type | Description |
| ------------------------------------- | -------- | --------------------------------- |
| `visitorCode` required | `string` | Unique identifier of the visitor. |
##### Return value
| Type | Description |
| -------- | ---------------------------------------- |
| `string` | JavaScript code to insert into the page. |
### Events
#### UpdateConfigurationHandler()
The `UpdateConfigurationHandler()` method allows you to handle the event when configuration has updated data. It takes one input parameter, **handler**. The handler that will be called when the configuration is updated using a real-time configuration event.
```csharp theme={null}
kameleoonClient.UpdateConfigurationHandler(async delegate () {
// Configuration was updated
});
```
##### Parameters
| Name | Type | Description |
| --------- | -------- | -------------------------------------------------------------------------------------------------------- |
| `handler` | `Action` | The handler that will be called when the configuration is updated using a real-time configuration event. |
### Data types
Data available in the SDK is not available for targeting and reporting in the Kameleoon app until it is added; for example, by using the `addData()` method.
See [use visit history to target users](/developer-docs/feature-experimentation/targeting-and-segmentation/native-segmentation) for more information.
If you are in hybrid mode, you can call `GetRemoteVisitorData()` to automatically fill all data that Kameleoon collected previously.
The following data types are available in `Kameleoon.Data.IData`.
#### Browser
The `Browser` data set stored here can be used to filter experiment and personalization reports by any value associated with it.
| Name | Type | Description |
| --------------------------------- | ------------------ | ----------------------------------------------------------------------------------------------- |
| `browser` required | `Browser.Browsers` | List of browsers: `CHROME`, `INTERNET_EXPLORER`, `FIREFOX`, `SAFARI`, `OPERA`, `OTHER`. |
| `version` optional | `float?` | Version of the browser, floating point number represents major and minor version of the browser |
```csharp theme={null}
kameleoonClient.AddData(visitorCode, new Browser(Browser.Browsers.CHROME));
kameleoonClient.AddData(visitorCode, new Browser(Browser.Browsers.SAFARI, 16));
```
#### PageView
| Name | Type | Description |
| --------- | ------ | -------------------------------------------------- |
| url | string | URL of the page viewed. This field is mandatory. |
| title | string | Title of the page viewed. This field is mandatory. |
| referrers | int\[] | Referrers of viewed pages. This field is optional. |
The index (ID) of the referrer is available in our Back-Office in the Acquisition channel configuration page. Be careful: this index starts at 0, so the first [acquisition channel](/user-manual/assets/advanced-targeting-tools/create-an-acquisition-channel) you create for a given site would have the ID 0, not 1.
```csharp theme={null}
kameleoonClient.AddData(
visitorCode,
new PageView("https://url.com", "title", new int[] {3})
);
```
#### Conversion
The `Conversion` data set stored here can be used to filter experiment and personalization reports by any goal associated with it.
* Each visitor can have multiple `Conversion` objects.
* You can find the `goalId` in the Kameleoon app.
| Name | Type | Description | Default |
| ---------------------------------- | --------------------- | ----------------------------------------------- | ------------------- |
| `goalId` required | `int` | ID of the goal. | |
| `revenue` optional | `float` | Revenue of the conversion | `0` |
| `negative` optional | `bool` | Defines if the revenue is positive or negative. | `false` |
| `metadata` optional | `params CustomData[]` | Metadata of the conversion. | `new CustomData[0]` |
```csharp theme={null}
kameleoonClient.AddData(visitorCode, new Conversion(32, 10f));
kameleoonClient.AddData(visitorCode, new Conversion(33, negative: true));
kameleoonClient.AddData(
visitorCode,
new Conversion(34, 5f, metadata: new CustomData(3, "metadata1", "md2"), new CustomData(5, "md3"))
);
```
#### CustomData
`CustomData` allows any type of data to be easily associated with each visitor. It can then be used as a targeting condition in [segments](/user-manual/assets/segments/create-a-segment/) or as a filter/breakdown in experiment reports.
To learn more about custom data, please refer to this [article](/developer-docs/custom-data).
| Name | Type | Description | Default |
| ---------------------------------- | ----------------- | --------------------------------------------------------------------------------------------------------------------------------------------------------------------------------------- | ------- |
| index/name required | `int`/`string` | Index or Name of the custom data. **Either `index` or `name` must be provided** to identify the data. | |
| values required | `params string[]` | Values of the custom data to be stored. | |
| overwrite optional | `bool` | Flag to explicitly control how the values are stored and how they appear in reports. [See more](/developer-docs/custom-data#default-logic-when-overwrite-parameter-is-false-or-omitted) | `true` |
* Each visitor is allowed only one `CustomData` for each unique `index`. Adding another `CustomData` with the same `index` will replace the existing one.
* The custom data ‘index’ can be found in the [Custom Data dashboard](/user-manual/assets/custom-data/manage-custom-data) under the “INDEX” column.
* To prevent the SDK from sending data with the selected index to Kameleoon servers for privacy reasons, enable the option: **Use this data only locally for targeting purposes** when creating custom data.
* Adding a `CustomData` instance created with a name when the SDK instance configuration is not up to date or the name is not registered, will result in the data being ignored.
```csharp theme={null}
kameleoonClient.AddData(visitorCode, new CustomData(1, "value"));
// With several values
kameleoonClient.AddData(visitorCode, new CustomData(1, "value1", "value2"));
// To set the 'overwrite' flag to false
kameleoonClient.AddData(visitorCode, new CustomData(1, false, "value"));
// To use a name instead of the index
kameleoonClient.AddData(visitorCode, new CustomData("my-custom-data", "value"));
```
#### Device
| Name | Type | Description |
| ------ | ----------- | ----------------------------------------------------------------------------- |
| device | Device.Type | List of devices: **PHONE**, **TABLET**, **DESKTOP**. This field is mandatory. |
```csharp theme={null}
kameleoonClient.AddData(visitorCode, new Device(Device.Type.DESKTOP));
```
#### UserAgent
Server-side experiments are more likely to be affected by bot traffic than client-side experiments. Kameleoon uses the IAB/ABC International Spiders and Bots List to tackle this issue and recognize known bots and spiders. Kameleoon also uses the `UserAgent` field to filter out bots and other unwanted traffic that might distort your conversion metrics. For more details, see our help article on [bot filtering](/user-manual/faq#how-does-kameleoon-filter-bot-traffic-from-my-results).
If you use internal bots, we suggest that you pass the value **curl/8.0** of the userAgent to exclude them from our analytics.
| Name | Type | Description |
| ----- | ------ | ---------------------------------------------------------------------------------------- |
| Value | string | The `UserAgent` value that will be sent with tracking requests. This field is mandatory. |
```csharp theme={null}
kameleoonClient.AddData(visitorCode, new UserAgent("Your User Agent"));
```
#### UniqueIdentifier
If you don't add `UniqueIdentifier` for a visitor, `visitorCode` is used as the unique visitor identifier, which is useful for [Cross-device experimentation](/developer-docs/cross-device-experimentation). When you add `UniqueIdentifier` for a visitor, the SDK links the flushed data with the visitor associated with the specified identifier.
The `isUniqueIdentifier` can be helpful in unique situations; for example, if you cannot access the anonymous `visitorCode` given to a visitor, but you can use an internal ID linked to that visitor through session merging.
| Name | Type | Description |
| ----- | ------ | ------------------------------------------------------------------------------------------- |
| value | `bool` | Parameter for specifying if the visitorCode is a unique identifier. This field is required. |
```csharp theme={null}
kameleoonClient.AddData(visitorCode, new UniqueIdentifier(true));
```
#### OperatingSystem
`OperatingSystem` contains information about the operating system on the visitor's device.
Each visitor can only have one `OperatingSystem`. Adding a second `OperatingSystem` overwrites the first one.
| Name | Type | Description |
| ---- | ---------------------- | ------------------------------------------------------------------------------------------------------------------- |
| type | `OperatingSystem.Type` | List of operating systems: `WINDOWS`, `MAC`, `IOS`, `LINUX`, `ANDROID` and `WINDOWS_PHONE`. This field is required. |
```csharp theme={null}
kameleoonClient.addData(visitorCode, new OperatingSystem(OperatingSystem.Type.WINDOWS));
```
#### Cookie
`Cookie` contains information about the cookie stored on the visitor's device.
| Name | Type | Description |
| ------- | ------------------------------------- | --------------------------------------------------------------------------------- |
| cookies | `IReadOnlyDictionary` | A string object map consisting of cookie keys and values. This field is required. |
Each visitor can only have one `Cookie`. Adding a second `Cookie` overwrites the first one.
```csharp theme={null}
Cookie cookie = new Cookie (new Dictionary() {
{ "k1", "v1" },
{ "k2", "v2" },
});
kameleoonClient.addData(visitorCode, cookie);
```
#### Geolocation
`Geolocation` contains the visitor's geolocation details.
| Name | Type | Description |
| ------------------------------------ | --------------------- | ---------------------------------------------------------------------------------------------------------------- |
| `country` required | `string` | The country of the visitor. |
| `region` optional | `string` | The region of the visitor. |
| `city` optional | `string` | The city of the visitor. |
| `postalCode` optional | `string` | The postal code of the visitor. |
| `latitude` optional | `float` | The latitude coordinate representing the location of the visitor. Coordinate number represents decimal degrees. |
| `longitude` optional | `float` | The longitude coordinate representing the location of the visitor. Coordinate number represents decimal degrees. |
* Each visitor can have only one `Geolocation`. Adding a second `Geolocation` overwrites the first one.
```csharp theme={null}
kameleoonClient.addData(visitorCode, new Geolocation("France", "Île-de-France", "Paris"));
```
#### ApplicationVersion
`ApplicationVersion` represents the semantic version number of your application.
A **visitor** can have only one `ApplicationVersion`. Adding a second instance will overwrite the first one.
| Name | Type | Description |
| ------------------------------- | -------- | ------------------------------------------------------------------------------------------------------------------------------------------------ |
| version optional | `string` | The mobile application version. This field must follow semantic versioning. Accepted formats are `major`, `major.minor`, or `major.minor.patch`. |
```csharp theme={null}
client.AddData(visitorCode, new ApplicationVersion("10")) // major
client.AddData(visitorCode, new ApplicationVersion("10.20")) // major.minor
client.AddData(visitorCode, new ApplicationVersion("10.20.30")) // major.minor.patch
```
### Returned Types
#### DataFile
The `DataFile` contains the SDK configuration details.
It can be extended with additional information if required by clients. If you need more details, please contact your Customer Success Manager.
| Name | Type | Description |
| -------------- | ------------------------------------------ | --------------------------------------------------------------------------------- |
| `FeatureFlags` | `IReadOnlyDictionary` | A map of [`FeatureFlag`](#featureflag) objects, keyed by feature flag keys. |
| `DateModified` | `long` | The timestamp (in milliseconds) indicating when the `DataFile` was last modified. |
```csharp theme={null}
// Retrieves the map of feature flags from the DataFile.
// The map is keyed by feature flag identifiers, with each value being a FeatureFlag object.
IReadOnlyDictionary featureFlags = dataFile.FeatureFlags;
// Retrieves the last modification timestamp of the DataFile.
// The value is a long representing milliseconds since the Unix epoch.
long dateModified = dataFile.DateModified;
```
#### Variation
`Variation` contains information about the assigned variation to the visitor (or the default variation if no specific assignment exists).
| Name | Type | Description |
| ------------ | --------------------------------------- | ----------------------------------------------------------------------------------------------------------------------------------------------------------- |
| Key | `string` | The unique key identifying the variation. |
| Id | `int` | The ID of the assigned variation (or `Variation.UndefinedId` if it's the default variation). |
| ExperimentId | `int` | The ID of the experiment associated with the variation (or `Variation.UndefinedId` if default). |
| Variables | `IReadOnlyDictionary` | A dictionary containing the variables of the assigned variation, keyed by variable names. This could be an empty collection if no variables are associated. |
* The `Variation` object provides details about the assigned variation and its associated experiment, while the [`Variable`](#variable) object contains specific details about each variable within a variation.
* Ensure that your code handles the case where `Id` or `ExperimentId` may be `Variation.UndefinedId`, indicating a default variation.
* The `Variables` dictionary might be empty if no variables are associated with the variation.
```csharp theme={null}
// Retrieving the variation key
string variationKey = variation.Key;
// Retrieving the variation id
int variationId = variation.Id;
// Retrieving the experiment id
int experimentId = variation.ExperimentId;
// Retrieving the variables map
var variables = variation.Variables;
```
#### Variable
`Variable` contains information about a variable associated with the assigned variation.
| Name | Type | Description |
| ----- | -------- | ------------------------------------------------------------------------------------------------------------------------------------------- |
| Key | `string` | The unique key identifying the variable. |
| Type | `string` | The type of the variable. Possible values: **BOOLEAN**, **NUMBER**, **STRING**, **JSON**, **JS**, **CSS**. |
| Value | `object` | The value of the variable, which can be of the following types: **bool**, **int**, **double**, **string**, **Newtonsoft.Json.Linq.JToken**. |
```csharp theme={null}
// Retrieving the variables map
var variables = variation.Variables;
// Variable type can be retrieved for further processing
string type = variables["isDiscount"].Type;
// Retrieving the variable value by key
bool isDiscount = (bool)variables["isDiscount"].Value;
// Variable value can be of different types
string title = (string)variables["title"].Value;
```
### Deprecated methods
These methods are deprecated and will be removed in SDK version `5.0.0`.
#### GetFeatureVariationKey()
* 📨 *Sends Tracking Data to Kameleoon*
To get feature variation key, call `GetFeatureVariationKey()`.
Use [`GetVariation()`](#getvariation) instead.
This method requires a **visitorCode** and a **featureKey** (or **featureID**) to check if a user can access a specific feature.
If the user has never been linked to this feature, the SDK will randomly decide whether to activate it, returning either **true** (they can access the feature) or **false** (they cannot). If the user with the given **visitorCode** is already linked to this feature, the system will return the previous value of the **featureFlag**.
Make sure to include proper error handling in your code, as shown in the example, to catch any potential errors.
If you specify a `visitorCode`, the `GetFeatureVariationKey()` method uses it as the unique visitor identifier, which is useful for [cross-device experimentation](/developer-docs/cross-device-experimentation). When you specify a `visitorCode` and set the `isUniqueIdentifier` parameter to `true`, the SDK links the flushed data with the visitor associated with the specified identifier.
The parameter `isUniqueIdentifier` is deprecated. Please use [`UniqueIdentifier`](#uniqueidentifier) instead.
The `isUniqueIdentifier` can be helpful in unique situations; for example, if you cannot access the anonymous `visitorCode` given to a visitor, but you can use an internal ID linked to that visitor through session merging.
```csharp theme={null}
string visitorCode = kameleoonClient.GetVisitorCode(Request, Response, "example.com");
string featureKey = "new_checkout";
string variationKey = "";
try {
variationKey = kameleoonClient.GetFeatureVariationKey(visitorCode, featureKey);
} catch (KameleoonException.FeatureNotFound e) {
// The feature is not yet activated on Kameleoon's side.
} catch (KameleoonException.FeatureEnvironmentDisabled e) {
// The feature flag is disabled for the environment.
}
switch (variationKey) {
case "on":
// Main variation key is selected for visitorCode.
break;
case "alternative_variation":
// Alternative variation key
break;
default:
// Default variation key
break;
}
```
##### Parameters
| Name | Type | Description |
| ------------------------------- | ------ | ----------------------------------------------------------------------------------------------------------------------------------------------------- |
| visitorCode | string | Unique identifier of the user. This field is mandatory. |
| featureKey | string | Key of the feature you want to expose to a user. This field is mandatory. |
| isUniqueIdentifier (Deprecated) | bool | An optional parameter for specifying if the visitorCode is a unique identifier. If not provided, the default value is `false`. The field is optional. |
##### Return value
| Type | Description |
| ------ | --------------------------------------------------------------------------------- |
| string | Variation key of the feature flag that is registered for a given **visitorCode**. |
##### Exceptions thrown
| Type | Description |
| --------------------------------------------- | ------------------------------------------------------------------------------------------------------------------------------------------------------------------------------------------------------------------------------------------------------------------------------------------------------------- |
| KameleoonException.FeatureNotFound | Exception indicating that the requested feature key has not been found in the internal configuration of the SDK. This is usually normal and means that the feature flag has not yet been activated on Kameleoon's side (but code implementing the feature is already deployed on the web-application's side). |
| KameleoonException.FeatureEnvironmentDisabled | Exception indicating that feature flag is disabled for the visitor's current environment (for example, production, staging, or development). |
#### GetActiveFeatureListForVisitor()
* Use [`GetActiveFeatures`](#getactivefeatures) instead.
* This method was previously called `ObtainFeatureListForVisitorCode()`, which was removed in SDK version `4.0.0`.
This method takes a single `visitorCode` parameter. Return only the active feature flags for the specified visitor.
```csharp theme={null}
var featureListIds = kameleoonClient.GetActiveFeatureListForVisitor(visitorCode)
```
##### Parameters
| Name | Type | Description |
| ----------- | ------ | ------------------------------------------------------- |
| visitorCode | string | Unique identifier of the user. This field is mandatory. |
##### Return value
| Type | Description |
| -------------- | -------------------------------------------------------------------- |
| `List` | List of active feature flag IDs available for specific `visitorCode` |
#### GetFeatureVariable()
* 📨 *Sends Tracking Data to Kameleoon*
Use [`GetVariation()`](#getvariation) instead.
To get variable of variation key associated with a user, call the `GetFeatureVariable()` method of our SDK.
This method requires a **visitorCode** and a **featureKey** (or **featureID**) to check if a user can access a specific feature.
If the user has never been linked to this feature, the SDK will randomly decide whether to activate it, returning either **true** (they can access the feature) or **false** (they cannot). If the user with the given **visitorCode** is already linked to this feature, the system will return the previous value of the **featureFlag**.
Make sure to include proper error handling in your code, as shown in the example, to catch any potential errors.
If you specify a `visitorCode`, the `GetFeatureVariable()` method uses it as the unique visitor identifier, which is useful for [cross-device experimentation](/developer-docs/cross-device-experimentation). When you specify a `visitorCode` and set the `isUniqueIdentifier` parameter to `true`, the SDK links the flushed data with the visitor associated with the specified identifier.
The parameter `isUniqueIdentifier` is deprecated. Please use [`UniqueIdentifier`](#uniqueidentifier) instead.
The `isUniqueIdentifier` can be helpful in unique situations; for example, if you cannot access the anonymous `visitorCode` given to a visitor, but you can use an internal ID linked to that visitor through session merging.
```csharp theme={null}
var visitorCode = kameleoonClient.GetVisitorCode(req, res, "example.com");
const string featureKey = "feature_key";
const string variableKey = "var"
try {
var variableValue = kameleoonClient.GetFeatureVariable(visitorCode, featureKey, variableKey);
// Your custom code, depending on variableValue
} catch (KameleoonException.FeatureNotFound e) {
// The feature is not yet activated in the Kameleoon app
} catch (KameleoonException.FeatureEnvironmentDisabled e) {
// The feature flag is disabled for the environment
} catch (KameleoonException.FeatureVariableNotFound e) {
// Requested variable not defined in the Kameleoon app
}
```
##### Parameters
| Name | Type | Description |
| ------------------------------- | ------ | ----------------------------------------------------------------------------------------------------------------------------------------------------- |
| visitorCode | string | Unique identifier of the user. This field is mandatory. |
| featureKey | string | Key of the feature you want to expose to a user. This field is mandatory. |
| variableKey | string | Key of the variable you want to get a value. This field is mandatory. |
| isUniqueIdentifier (Deprecated) | bool | An optional parameter for specifying if the visitorCode is a unique identifier. If not provided, the default value is `false`. The field is optional. |
##### Return value
| Type | Description |
| ------ | --------------------------------------------------------------------------------------------------------------------------------------------------------------- |
| object | Value of variable of variation that is registered for a given **visitorCode** for this feature flag. Possible types: bool, int, double, string, JObject, JArray |
##### Exceptions thrown
| Type | Description |
| --------------------------------------------- | ------------------------------------------------------------------------------------------------------------------------------------------------------------------------------------------------------------------------------------------------------------------------------------------------------------- |
| KameleoonException.FeatureNotFound | Exception indicating that the requested feature key has not been found in the internal configuration of the SDK. This is usually normal and means that the feature flag has not yet been activated on Kameleoon's side (but code implementing the feature is already deployed on the web application's side). |
| KameleoonException.FeatureEnvironmentDisabled | Exception indicating that feature flag is disabled for the visitor's current environment (for example, production, staging, or development). |
| KameleoonException.FeatureVariableNotFound | Exception indicating that the requested variable wasn't found. Check that the variable's key in the Kameleoon app matches the one in your code. |
| KameleoonException.VisitorCodeInvalid | Exception indicating that the specified visitor code is not valid. (It is either empty or longer than 255 characters). |
#### GetActiveFeatures()
Use [`GetVariations()`](#getvariations) instead.
`GetActiveFeatures` method retrieves information about the active feature flags that are available for the specified visitor code.
The `Kameleoon.Types.Variation.Id` and `Kameleoon.Types.Variation.ExperimentId` properties of returned variations are optional. If not specified, the default value is `Kameleoon.Types.Variation.UndefinedId`.
```csharp theme={null}
IReadOnlyDictionary activeFeatures = GetActiveFeatures(visitorCode);
```
##### Parameters
| Name | Type | Description |
| ----------- | ------ | -------------------------------------------------------------------------------------------------------- |
| visitorCode | string | Unique identifier of the visitor you want to retrieve active feature flags for. This field is mandatory. |
##### Return value
| Type | Description |
| -------------------------------------------------------- | --------------------------------------------------------------------------------------------------------------- |
| `IReadOnlyDictionary` | A dictionary that contains the assigned variations of the active features using the active feature IDs as keys. |
##### Exceptions thrown
| Type | Description |
| ------------------------------------- | ------------------------------------------------------------------------------------------------------------------- |
| KameleoonException.VisitorCodeInvalid | Exception indicating that the provided visitor code is not valid. It is either empty or longer than 255 characters. |
#### GetFeatureVariationVariables()
* Use [`GetVariation()`](#getvariation) instead.
* This method was previously called `GetFeatureAllVariables()`, which was removed in SDK version `4.0.0`.
Call this method to retrieve all feature variables for a feature. You can modify feature variables in the Kameleoon app.
This method takes two input parameters: `featureKey` and `variationKey`. It returns the data with the `Dictionary` type, as defined on the web interface. It will throw an exception (`KameleoonException.FeatureNotFound`) if the requested feature has not been found in the SDK's internal configuration.
```csharp theme={null}
string featureKey = "myFeature";
try {
var allVariables = kameleoonClient.GetFeatureVariationVariables(featureKey, variationKey);
} catch (KameleoonException.FeatureNotFound e) {
// The feature is not yet activated in the Kameleoon app.
} catch (KameleoonException.FeatureEnvironmentDisabled e) {
// The feature flag is disabled for the environment.
} catch (KameleoonException.FeatureVariationNotFound e) {
// The variation is not activated in the Kameleoon app (the associated experiment is not online).
} catch (Exception e) {
// This is a generic Exception handler which will handle all exceptions.
Console.WriteLine("Exception occurred");
}
```
##### Parameters
| Name | Type | Description |
| ------------ | -------- | -------------------------------------------------------------------------- |
| featureKey | `string` | Identifier key of the feature you need to obtain. This field is mandatory. |
| variationKey | `string` | Key of the variation you want to obtain. This field is required. |
##### Return value
| Type | Description |
| ---------------------------- | ------------------------------------------------------------------------------------------------------------------------------------------------------ |
| `Dictionary` | Data associated with this feature flag. The values of can be a number, string, boolean or object (depending on the type defined on the web interface). |
##### Exceptions thrown
| Type | Description |
| --------------------------------------------- | ------------------------------------------------------------------------------------------------------------------------------------------------------------------------------------------------------------------- |
| KameleoonException.FeatureNotFound | Exception indicating that the requested feature has not been found in the internal configuration of the SDK. This is usually normal and means that the feature flag has not yet been activated on Kameleoon's side. |
| KameleoonException.FeatureEnvironmentDisabled | Exception indicating that the feature flag is disabled for the visitor's current environment (for example, production, staging, or development). |
| KameleoonException.FeatureVariationNotFound | Exception indicating that the requested variation ID wasn't found in the internal configuration of the SDK. This usually means that the variation's corresponding experiment is not activated in the Kameleoon app. |
# Elixir SDK
Source: https://docs.kameleoon.com/developer-docs/sdks/web-sdks/elixir-sdk
Integrate the Kameleoon Elixir SDK to run experiments and activate feature flags in Elixir services and web back-ends.
With the Kameleoon Elixir SDK, you can run experiments and activate feature flags in your Elixir services and web back-ends.
**Getting started**: For help getting started, see the [developer guide](#developer-guide).
**Version**: Latest version of the Elixir SDK: 0.9.0 [Changelog](https://docs.kameleoon.com/developer-docs/sdks/web-sdks/elixir-sdk).
**SDK methods**: For the full reference documentation of the Elixir SDK, see the [reference](#reference) section.
## Developer guide
This guide is designed to help you integrate the Elixir SDK quickly and start evaluating feature flags in your Elixir application.
### Getting started
#### Install the Elixir client
The Kameleoon Elixir SDK includes native code powered by the Kameleoon Rust core. During dependency compilation, Mix invokes Cargo to build the native library. Make sure **Rust** and **Cargo** are installed and available in your system's `PATH` before running `mix deps.get` or `mix compile`.
Install Rust and Cargo: [https://rust-lang.org/tools/install](https://rust-lang.org/tools/install)
The Rust core is compiled locally for your target platform and architecture, ensuring optimal compatibility with your environment.
We plan to provide prebuilt native libraries for common platforms in future releases to simplify installation. These prebuilt binaries will be suitable for most use cases, while local compilation will remain available for users who prefer to build from source.
Add the SDK as a dependency in your `mix.exs` file:
```elixir title="mix.exs" theme={null}
def deps do
[
{:kameleoon_client, "~> 0.9.0"}
]
end
```
#### Additional configuration
Create a `client-elixir.json` configuration file to provide credentials and customize SDK behavior.
We recommend saving this file to the default path, `/etc/kameleoon/client-elixir.conf`.
The Elixir SDK can be configured either with a configuration file used by `config_path:` or by passing a `%Kameleoon.ClientConfig{}` struct with the `config:` option.
The following table shows the available properties that you can set:
| Key (Code / Config File) | Description | Default value |
| ----------------------------------------------------------------------------- | ------------------------------------------------------------------------------------------------------------------------------------------------------------------------------------------------------ | -------------------- |
| `client_id` / `clientId` required | Required for authentication to the Kameleoon service. To find your `client_id`, see the [API credentials](/user-manual/account-and-team-management/users-and-teams/api-credentials) documentation. | |
| `client_secret` / `clientSecret` required | Required for authentication to the Kameleoon service. To find your `client_secret`, see the [API credentials](/user-manual/account-and-team-management/users-and-teams/api-credentials) documentation. | |
| `session_duration_minutes` / `sessionDurationMinutes` optional | Time interval, in minutes, during which the SDK keeps a visitor and their associated data in memory. | `30` minutes |
| `refresh_interval_minutes` / `refreshIntervalMinutes` optional | Interval, in minutes, used to refresh the active experiments and feature flags configuration. | `60` minutes |
| `default_timeout_millis` / `defaultTimeoutMillis` optional | Default timeout, in milliseconds, for SDK network requests. | `10000` milliseconds |
| `tracking_interval_millis` / `trackingIntervalMillis` optional | Interval, in milliseconds, used to batch tracking requests. Values are clamped to the `[1000, 5000]` range. | `1000` milliseconds |
| `environment` / `environment` optional | Environment from which the feature flag configuration should be used. The value can be `production`, `staging`, or `development`. | `production` |
| `top_level_domain` / `topLevelDomain` optional | The current top-level domain for your website. Use the format `example.com` without protocol or subdomains. | `nil` |
| `proxy_host` / `proxyHost` optional | Proxy host for outgoing SDK calls. Supported formats: `https://my.prox`, `https://my.prox:4545`, `socks5://192.168.1.1:9000`. | `nil` |
| `network_domain` / `networkDomain` optional | Custom domain used by SDKs for outgoing requests, often for proxying. Must be a valid domain (e.g., example.com or sub.example.com). Invalid formats default to Kameleoon's value. | `nil` |
#### Initialize the Kameleoon client
After you have installed the SDK and configured your credentials, create a `%Kameleoon.Client{}` by using `Kameleoon.ClientFactory`.
```elixir theme={null}
alias Kameleoon.Client
alias Kameleoon.ClientFactory
site_code = "a8st4f59bj"
{:ok, client} = ClientFactory.create(site_code, config_path: "/etc/kameleoon/client-elixir.conf")
:ok = Client.initialize(client)
```
```elixir theme={null}
alias Kameleoon.Client
alias Kameleoon.ClientConfig
alias Kameleoon.ClientFactory
site_code = "a8st4f59bj"
config = %ClientConfig{
client_id: "", # mandatory
client_secret: "", # mandatory
refresh_interval_minutes: 60, # optional (60 minutes by default)
session_duration_minutes: 30, # optional (30 minutes by default)
default_timeout_millis: 10_000, # optional (10000 ms by default)
tracking_interval_millis: 1_000, # optional (1000 ms by default)
environment: "development", # optional
top_level_domain: ".example.com", # optional mandatory if you use hybrid mode (engine or web experiments)
proxy_host: "http://192.168.0.25:8080", # optional
network_domain: "example.com" # optional
}
{:ok, client} = ClientFactory.create(site_code, config: config)
:ok = Client.initialize(client)
```
A `%Kameleoon.Client{}` is the main object used to evaluate feature flags, add visitor data, and send tracking requests.
* It is recommended to use `%Kameleoon.Client{}` as a singleton object, as it serves as the bridge between your application and the Kameleoon platform. It exposes all required methods and properties to run experiments efficiently.
* The Elixir SDK initializes asynchronously. You should call [`initialize()`](#initialize) before relying on feature evaluation in production code.
#### Activating a feature flag
##### Assigning a unique ID to a user
To assign a unique ID to a user, you can use the [`get_visitor_code`](#get_visitor_code) method. If a **visitor code** doesn’t exist (from the request headers cookie), the method generates a random unique ID or uses a `default_visitor_code` that you would have generated. The ID is then set in a response headers cookie.
If you are using Kameleoon in [Hybrid mode](/developer-docs/feature-experimentation/get-started/hybrid-experimentation), calling the `get_visitor_code` method ensures that the unique ID (**visitor code**) is shared between the application file `engine.js` (previously named, `kameleoon.js`) and the SDK.
##### Retrieving a flag configuration
To implement a feature flag in your code, you must first create the feature flag in your Kameleoon account.
To determine the status or variation of a feature flag for a specific user, you should use the [`get_variation`](#get_variation) or [`is_feature_active?`](#is_feature_active) method to retrieve the configuration based on the `feature_key`.
The `get_variation` method handles both simple feature flags with ON/OFF states and more complex flags with multiple variations. The method retrieves the appropriate variation for the user by checking the feature rules, assigning the variation, and returning it based on the `feature_key` and `visitor_code`.
The `is_feature_active?` method can be used if you want to retrieve the configuration of a simple feature flag that has only an ON or OFF state, as opposed to more complex feature flags with multiple variations or targeting options.
If your feature flag has associated variables (such as specific behaviors tied to each variation) `get_variation` also enables you to access the [`Variation`](#variation) object, which provides details about the assigned variation and its associated experiment. This method checks whether the user is targeted, finds the visitor’s assigned variation, and saves it to storage. When `track=true`, the SDK will send the exposure event to the specified experiment on the next tracking request, which is automatically triggered based on the SDK’s [`tracking_interval_millis`](#additional-configuration). By default, this interval is set to 1000 milliseconds (1 second).
The `get_variation` method allows you to control whether tracking is done. If `track=false`, no exposure events will be sent by the SDK. This is useful if you prefer not to track data through the SDK and instead rely on client-side tracking managed by the Kameleoon engine, for example. Additionally, setting `track=false` is helpful when using the `get_variations` method, where you might only need the variations for all flags without triggering any tracking events. If you want to know more about how tracking works, view [this article](/developer-docs/feature-experimentation/technical-reference/faq-global#when-does-the-sdk-send-a-tracking-request-for-analytics)
##### Adding data points to target a user or filter / breakdown visits in reports
To target a user, ensure you've added relevant data points to their profile before retrieving the feature variation or checking if the flag is active. Use the [`Client.add_data`](#add_data) method to add these data points to the user's profile.
To retrieve data points collected on other devices or to access past user data (collected client-side when using Kameleoon in Hybrid mode), use the [`get_remote_visitor_data`](#get_remote_visitor_data) method. This method asynchronously fetches data from the servers. It is important to call `get_remote_visitor_data` *before* retrieving the variation or checking if the feature flag is active, as this data might be required to assign a user to a given variation.
To learn more about available targeting conditions, see the [detailed article on the subject](/developer-docs/feature-experimentation/targeting-and-segmentation/native-segmentation).
Additionally, the data points you add to the visitor profile will be available when analyzing your experiments, allowing you to filter and break down your results by factors like device and browser. Kameleoon Hybrid mode automatically collects a variety of data points on the client-side, making it easy to break down your results based on these pre-collected data points. See the complete list [here](/user-manual/experiment-analytics/analyze-results/results-page/results-page-settings#breakdown-audience).
If you need to track additional data points beyond what's automatically collected, you can use Kameleoon's [Custom Data feature](#customdata). Custom Data allows you to capture and analyze specific information relevant to your experiments. Don't forget to call the [`flush`](#flush) method to send the collected data to Kameleoon servers for analysis.
To ensure your results are accurate, it's recommended to filter out bots by using the [`UserAgent`](#useragent) data type.
##### Tracking goal conversions
When a user completes a desired action (such as making a purchase), it is recorded as a conversion. To track conversions, use the [`track_conversion`](#track_conversion) method and provide the required `visitor_code` and `goal_id` parameters.
The conversion tracking request will be sent along with the next scheduled tracking request, which the SDK sends at regular intervals (defined by [`tracking_interval_millis`](#additional-configuration)). If you prefer to send the request immediately, use the [`Client.flush_instant`](#flush) method.
##### Sending events to analytics solutions
To track conversions and send exposure events to your customer analytics solution, you must first implement Kameleoon in [Hybrid mode](/developer-docs/feature-experimentation/get-started/hybrid-experimentation/). Then, use the [`get_engine_tracking_code`](#get_engine_tracking_code) method.
The `get_engine_tracking_code` method retrieves the unique tracking code required to send exposure events to your analytics solution. Using this method allows you to record events and send them to your desired analytics platform.
### Using a custom bucketing key
By default, Kameleoon uses a unique, anonymous visitor ID (`visitor_code`) to assign users to feature flag variations. This ID is typically generated and stored on the user's device (in a browser cookie for client-side and server-side SDKs—in persistent storage for mobile SDKs). However, in certain scenarios you may need to ensure all users of the same organization see the same variant of a feature flag.
The **Custom Bucketing Key** option allows you to override this default behavior by providing your own custom identifier for bucketing. This override ensures that Kameleoon's assignment logic uses your specified key instead of the default `visitor_code`.
#### Use cases
Using a custom bucketing key is essential for maintaining consistency and accuracy in your feature flag assignments, particularly in these situations:
* **Account-level or organizational experiments:** For B2B products or scenarios where you want to assign all users from the same organization to the same variation, you can use an identifier like an `account_id`. Custom bucketing keys are crucial for A/B testing features that impact an entire team or company.
By implementing a custom bucketing key, you ensure greater consistency and accuracy in your experiments, leading to more reliable results and a better user experience.
#### Technical details
When you configure a custom bucketing key for a feature flag, you provide Kameleoon with a specific identifier from your application's data:
```elixir theme={null}
alias Kameleoon.Client
alias Kameleoon.Data.CustomData
:ok = Client.add_data(client, visitor_code, CustomData.new!(42, ["new_visitor_code"]))
```
* **Providing the custom key:** You provide your custom identifier to the Kameleoon SDK using the [`Client.add_data`](#add_data) method. In this method, you will pass your chosen custom bucketing key as a [`CustomData`](#customdata) object. Here, `new_visitor_code` refers to the identifier you wish to use for your bucketing (for example, the new `user_id` or `account_id`).
For the custom bucketing key to function correctly, it must also be defined and configured for the feature flag during the flag creation or editing process. Without this corresponding configuration, the SDK's bucketing will not apply your custom key. For detailed instructions on how to set this up in Kameleoon, refer to this [article](/user-manual/experimentation/feature-experimentation/create-and-manage-flags/create-a-feature-flag#Advanced_Flag_Settings).
* **Bucketing logic:** Once a custom bucketing key is provided through the `Client.add_data` method, all hash calculations for assigning users to variations will use this `new_visitor_code` (your custom key) instead of the default `visitor_code`. Using the `new_visitor_code` means that the bucketing decision is tied to your custom identifier, ensuring consistent assignments across various contexts where that identifier is present.
* **Data tracking and analytics:** It's crucial to note that while the `new_visitor_code` (your custom key) is used for bucketing decisions, **all subsequent data (tracking events and conversions, for example) is sent and associated with the *original* `visitor_code`.** This separation ensures that your analytics accurately reflect individual user journeys and interactions within your experiment's broader context, even when bucketing is performed at a higher level (like an account) or across multiple devices/sessions. Your original visitor data remains intact for comprehensive reporting.
#### Technical requirements
To effectively use a custom bucketing key:
* The key must be a `String.t()`.
* It must be unique for the entity you intend to bucket (for example, if using a `user_id`, each user's ID should be unique).
* The key must be available to the SDK at the exact moment the feature flag decision is evaluated for that user or request.
### Targeting conditions
The Kameleoon SDKs support a variety of predefined targeting conditions that you can use to target users in your campaigns. For the list of conditions this SDK supports, see [use visit history to target users](/developer-docs/feature-experimentation/targeting-and-segmentation/native-segmentation).
You can also use your own [external data to target users](/developer-docs/apis/data-api-rest/tutorials/storing-and-retrieving-external-data-to-target-users).
### Cross-device experimentation
To support visitors who access an app from multiple devices, Kameleoon allows the synchronization of previously collected visitor data across each of the visitor's devices and reconciliation of their visit history across devices through cross-device experimentation. Case studies and detailed information on how Kameleoon handles data across devices are available in the [article on cross-device experimentation](/developer-docs/cross-device-experimentation).
#### Synchronizing custom data across devices
Although custom mapping synchronization is used to align visitor data across devices, it is not always necessary. Below are two scenarios where custom mapping sync is not required:
**Same user ID across devices**
If the same user ID is used consistently across all devices, synchronization is handled automatically without a custom mapping sync. It is enough to call the `get_remote_visitor_data` method when you want to sync the data collected between multiple devices.
**Multi-server instances with consistent IDs**
In complex setups involving multiple servers (for example, distributed server instances), where the same user ID is available across servers, synchronization between servers (with `get_remote_visitor_data`) is sufficient without additional custom mapping sync.
Customers who need additional data can refer to the [`get_remote_visitor_data`](#get_remote_visitor_data) method description for further guidance. In the below code, it is assumed that the same unique identifier (in this case, the `visitor_code`, which can also be referred to as `userId`) is used consistently between the two devices for accurate data retrieval.
If you want to sync collected data in real time, you need to choose the scope **Visitor** for your custom data.
```elixir title="Device A" theme={null}
# In this example, a Custom data with index `90` was set to "Visitor" scope in Kameleoon.
alias Kameleoon.Client
alias Kameleoon.Data.CustomData
visitor_scope_custom_data_index = 90
:ok = Client.add_data(client, visitor_code, CustomData.new!(visitor_scope_custom_data_index, ["your data"]))
:ok = Client.flush_instant(client, visitor_code)
```
```elixir title="Device B" theme={null}
# Before working with the data, call the `get_remote_visitor_data` method.
:ok = Client.get_remote_visitor_data(client, visitor_code)
# After calling the method, the SDK on Device B will have access to CustomData of Visitor scope defined on Device A.
# So, "your data" will be available for targeting and tracking the visitor.
```
#### Using custom data for session merging
[Cross-device experimentation](/developer-docs/cross-device-experimentation) allows for combining a visitor's history across each of their devices (history reconciliation). History reconciliation allows merging different visitor sessions into one. To reconcile visit history, use [`CustomData`](#customdata) to provide a unique identifier for the visitor. For more information, see the [dedicated documentation](/developer-docs/cross-device-experimentation/#activating-cross-device-history-reconciliation).
After cross-device reconciliation is enabled, calling [`get_remote_visitor_data`](#get_remote_visitor_data) with the parameter `userId` retrieves all known data for a given user.
Sessions with the same identifier will always be shown the same variation in an experiment. In the Visitor view of your experiment's results pages, these sessions will appear as a single visitor.
The SDK configuration ensures that associated sessions always see the same variation of the experiment. However, there are some limitations regarding cross-device variation allocation. These limitations are outlined [here](/developer-docs/cross-device-experimentation#critical-points-and-practical-insights).
Follow the [activating cross-device history reconciliation](#cross-device-experimentation) guide to set up your custom data on the Kameleoon platform.
Afterwards, you can use the SDK normally. The following methods that may be helpful in the context of session merging:
* `get_remote_visitor_data` with added `UniqueIdentifier(true)` - to retrieve data for all linked visitors.
* [`track_conversion`](#track_conversion) or [`flush`](#flush) with added `UniqueIdentifier(true)` data - to track some data for specific visitor that is associated with another visitor.
As the custom data you use as the identifier must be set to **Visitor scope**, you need to use [cross-device custom data synchronization](/developer-docs/cross-device-experimentation) to retrieve the identifier with the [`get_remote_visitor_data`](#get_remote_visitor_data) method on each device.
Here's an example of how to use custom data for session merging.
```elixir theme={null}
# In this example, 91 represents the Custom Data's index configured as a unique identifier in Kameleoon.
alias Kameleoon.Client
alias Kameleoon.Data.CustomData
alias Kameleoon.Data.UniqueIdentifier
mapping_index = 91
feature_key = "ff123"
anonymous_visitor_code = "anonymous-visitor"
user_id = "authenticated-user"
# 1. Before the visitor is authenticated
# Retrieve the variation for an unauthenticated visitor.
# Assume anonymousVisitorCode is the randomly generated ID for that visitor.
{:ok, anonymous_variation} = Client.get_variation(client, anonymous_visitor_code, feature_key)
# 2. After the visitor is authenticated
# Assume `userId` is the visitor code of the authenticated visitor.
:ok = Client.add_data(client, anonymous_visitor_code, CustomData.new!(mapping_index, [user_id]))
:ok = Client.flush_instant(client, anonymous_visitor_code)
# Indicate that `userId` is a unique identifier.
:ok = Client.add_data(client, user_id, UniqueIdentifier.new!(true))
# 3. After the visitor was authorized
# Retrieve the variation for the `userId`, which will match the anonymous visitor code's variation.
{:ok, user_variation} = Client.get_variation(client, user_id, feature_key)
is_same_variation = user_variation.key == anonymous_variation.key # true
# `userId` and `anonymousVisitorCode` are now linked and can be tracked as a single visitor.
:ok = Client.track_conversion(client, user_id, 123)
# Additionally, the linked visitors share all fetched previously tracked remote data.
:ok = Client.get_remote_visitor_data(client, user_id)
```
In this example, the application has a login page. Since the user ID is unknown at the moment of login, an anonymous visitor identifier generated by the [`get_visitor_code`](#get_visitor_code) method is used. After the user logs in, the anonymous visitor is associated with the user ID and used as a unique identifier for the visitor.
### Logging
The SDK generates logs to reflect various internal processes and issues.
#### Log levels
The SDK supports configuring limiting logging by a log level.
```elixir theme={null}
alias Kameleoon.Logger
# The `:none` log level does not allow logging.
:ok = Logger.set_log_level(:none)
# The `:error` log level only allows logging issues that may affect the SDK's primary behaviour.
:ok = Logger.set_log_level(:error)
# The `:warning` log level allows logging issues which may require attention.
# It extends the `:error` log level.
# The `:warning` log level is the default log level.
:ok = Logger.set_log_level(:warning)
# The `:info` log level allows logging general information on the SDK's internal processes.
# It extends the `:warning` log level.
:ok = Logger.set_log_level(:info)
# The `:debug` level logs additional details about the SDK's internal processes.
:ok = Logger.set_log_level(:debug)
```
#### Custom handling of logs
The SDK writes its logs to the console output by default. This behaviour can be overridden.
Logging limiting by a log level is performed apart from the log handling logic.
```elixir theme={null}
defmodule CustomLogger do
@behaviour Kameleoon.Logger
require Logger
@impl true
def log(level, message) do
Logger.log(level, message)
end
end
# Log level filtering is applied separately from log handling logic.
# The custom logger will only accept logs that meet or exceed the specified log level.
:ok = Kameleoon.Logger.set_log_level(:debug)
:ok = Kameleoon.Logger.set_logger(CustomLogger)
```
## Reference
This is the full reference documentation for the Elixir SDK.
### Initialization
#### create()
To use the SDK, create a `%Kameleoon.Client{}` from a `%Kameleoon.ClientConfig{}` instance with `Kameleoon.ClientFactory.create()`.
```elixir theme={null}
alias Kameleoon.ClientConfig
alias Kameleoon.ClientFactory
config = %ClientConfig{
client_id: "", # mandatory
client_secret: "", # mandatory
refresh_interval_minutes: 60, # optional (60 minutes by default)
session_duration_minutes: 30, # optional (30 minutes by default)
default_timeout_millis: 10_000, # optional (10000 ms by default)
tracking_interval_millis: 1_000, # optional (1000 ms by default)
environment: "development", # optional
top_level_domain: ".example.com", # optional mandatory if you use hybrid mode (engine or web experiments)
proxy_host: "http://192.168.0.25:8080", # optional
network_domain: "example.com" # optional
}
{:ok, client} = ClientFactory.create(site_code, config: config)
```
```elixir theme={null}
alias Kameleoon.ClientFactory
{:ok, client} = ClientFactory.create("a8st4f59bj", config_path: "/etc/kameleoon/client-elixir.conf")
```
##### Parameters
| Name | Type | Description |
| ------------------------------------- | ---------------------------- | ---------------------------------------------------- |
| `site_code` required | `String.t()` | Unique key of the Kameleoon project used by the SDK. |
| `config_path` optional | `String.t()` | Path to the configuration file. |
| `config` optional | `Kameleoon.ClientConfig.t()` | SDK configuration struct. |
##### Return value
| Type | Description |
| ---------------------------------------------------- | ---------------------------------------------------------------- |
| `{:ok, Kameleoon.Client.t()} \| {:error, Error.t()}` | A client instance on success, otherwise an initialization error. |
##### Errors
| Type | Description |
| -------------------------- | -------------------------------- |
| `ConfigCredentialsInvalid` | The SDK credentials are missing. |
| `SiteCodeIsEmpty` | The provided site code is empty. |
#### initialize()
Waits for the Kameleoon client to initialize, using either the configured [`default_timeout_millis`](#additional-configuration) or a provided `timeout`. This method ensures that the client is fully initialized before performing any further operations.
```elixir theme={null}
alias Kameleoon.Client
# Initializes the client using the configured default timeout
:ok = Client.initialize(client)
# Initializes the client with a custom timeout of 5 seconds
:ok = Client.initialize(client, timeout: 5_000)
```
##### Parameters
| Name | Type | Description |
| --------------------------------- | ------------------- | --------------------------------------------------------- |
| `timeout` optional | `non_neg_integer()` | Maximum time to wait for initialization, in milliseconds. |
##### Return value
| Type | Description |
| ---------------------------- | ----------------------------------------------------------------------------- |
| `:ok \| {:error, Error.t()}` | Indicates whether initialization completed successfully or an error occurred. |
##### Errors
| Type | Description |
| ---------------- | ---------------------------------------------------- |
| `Initialization` | Indicates that the SDK is not yet fully initialized. |
#### is\_ready()
Checks whether the client has been initialized.
```elixir theme={null}
alias Kameleoon.Client
ready? = Client.is_ready?(client)
if ready? do
# The client is ready
end
```
##### Return value
| Type | Description |
| ----------- | --------------------------------------------------------------------- |
| `boolean()` | `true` if the client is ready to be used, `false` if it is not ready. |
#### forget()
Removes the cached SDK client associated with the specified `site_code`.
```elixir theme={null}
alias Kameleoon.ClientFactory
# Removes the cached client for the given site code
:ok = ClientFactory.forget("a8st4f59bj")
# Removes the cached client for the given site code and environment
:ok = ClientFactory.forget("a8st4f59bj", environment: "production")
```
##### Parameters
| Name | Type | Description |
| ------------------------------------- | ------------ | -------------------------------------------------- |
| `site_code` required | `String.t()` | Unique identifier of the Kameleoon project. |
| `environment` optional | `String.t()` | Environment key associated with the cached client. |
##### Return value
| Type | Description |
| ---------------------------- | ---------------------------------------------------------------------------------- |
| `:ok \| {:error, Error.t()}` | Indicates whether the cached client was successfully removed or an error occurred. |
### Feature flags and variations
#### is\_feature\_active()
* 📨 *Sends tracking data to Kameleoon (depending on the `track` option)*
Determines whether a feature flag is active for a given user.
If the visitor has not yet been evaluated for this feature flag, the SDK evaluates the targeting rules and returns the result. If the visitor already has a stored evaluation for the feature, the SDK reuses the existing result to ensure consistency.
Kameleoon uses tracking to count sessions and visitors when you call certain methods, such as `is_feature_active?`, `get_variation` or `get_variations`.
Use the default `true` value for the `track` parameter when you expose visitors to a variation and need to count them. Set the `track` parameter to `false` only if you call these methods before you expose visitors.
For example, if you call `get_variations` to retrieve all variations before you expose visitors, set the `track` parameter to `false`. This setting prevents Kameleoon from prematurely counting a session. You can then trigger tracking later when you explicitly expose the visitor.
Kameleoon sends tracking data every second by default. You can configure this interval up to five seconds using the tracking interval configuration option. Kameleoon groups tracking events into a single session as long as the interval between events is less than 30 minutes. If more than 30 minutes elapse between tracking events, Kameleoon counts the events as separate sessions. A visit appears in your reports 30 minutes after the last recorded event in the session.
The `is_feature_active?` method evaluates the served variant, not the master flag state. If you exclude rules, the method uses the **Then, for everyone else serve** default state. If you select **Off** for this default state, the method always returns `false` even when the master feature flag is **On**.
```elixir theme={null}
alias Kameleoon.Client
feature_key = "new_checkout"
# Evaluates the feature flag and sends tracking data (default behavior)
{:ok, active?} = Client.is_feature_active?(client, visitor_code, feature_key)
# Evaluates the feature flag without sending tracking data
{:ok, active_without_tracking?} = Client.is_feature_active?(client, visitor_code, feature_key, track: false)
```
##### Parameters
| Name | Type | Description | Default |
| -------------------------------------- | ------------ | ------------------------------------------------------- | ------- |
| `visitor_code` required | `String.t()` | Unique identifier of the user. | |
| `feature_key` required | `String.t()` | Key of the feature to evaluate for the user. | |
| `track` optional | `boolean()` | Enables or disables tracking of the feature evaluation. | `true` |
##### Return value
| Type | Description |
| ----------------------------------------- | --------------------------------------------------------------------------------------------------- |
| `{:ok, boolean()} \| {:error, Error.t()}` | Indicates whether the feature flag is active for the specified `visitor_code`, or returns an error. |
##### Errors
| Type | Description |
| -------------------- | --------------------------------------------------------------------------------------------------------------------------------------------------------------------------------------------------------------------------------------------------------------------- |
| `Initialization` | Indicates that the SDK is not yet fully initialized. |
| `FeatureNotFound` | Exception indicating that the requested feature key wasn't found in the internal configuration of the SDK. This usually means that the feature flag is not activated in the Kameleoon app (but code implementing the feature is already deployed in the application). |
| `VisitorCodeInvalid` | Exception indicating that the provided visitor code is not valid. It is either empty or longer than 255 characters. |
#### get\_variation()
* 📨 *Sends Tracking Data to Kameleoon (depending on the `track` parameter)*
Retrieves the [`Variation`](#variation) assigned to a given visitor for a specific feature flag.
This method takes a `visitor_code` and `feature_key` as mandatory arguments. The `track` argument is optional and defaults to `true`.
It returns the assigned `Variation` for the visitor. If the visitor is not associated with any feature flag rules, the method returns the default `Variation` for the given feature flag.
Ensure that proper error handling is implemented in your code to manage potential exceptions.
The default variation refers to the variation assigned to a visitor when they do not match any predefined delivery rules for a feature flag. In other words, it is the fallback variation applied to all users who are not targeted by specific rules. It's represented as the variation in the "Then, for everyone else..." section in a management interface.
```elixir theme={null}
alias Kameleoon.Client
feature_key = "new_checkout"
# Retrieves the variation assigned to the visitor (with tracking enabled by default)
{:ok, variation} = Client.get_variation(client, visitor_code, feature_key)
# Retrieves the variation without sending tracking data
{:ok, variation_without_tracking} =
Client.get_variation(client, visitor_code, feature_key, track: false)
```
##### Parameters
| Name | Type | Description | Default |
| -------------------------------------- | ------------ | ------------------------------------------------------------------------------ | ------- |
| `visitor_code` required | `String.t()` | Unique identifier of the visitor. | |
| `feature_key` required | `String.t()` | Key of the feature you want to expose to a visitor. | |
| `track` optional | `boolean()` | An optional parameter to enable or disable tracking of the feature evaluation. | `true` |
##### Return value
| Type | Description |
| --------------------------------------------- | -------------------------------------------------------------------------------------------------------------------- |
| `{:ok, Variation.t()} \| {:error, Error.t()}` | An assigned [`Variation`](#variation) to a given visitor for a specific feature flag on success, otherwise an error. |
##### Errors
| Type | Description |
| ---------------------------- | --------------------------------------------------------------------------------------------------------------------------------------------------------------------------------------------------------------------------------------------------------------------- |
| `Initialization` | Indicates that the SDK is not yet fully initialized. |
| `VisitorCodeInvalid` | Exception indicating that the provided visitor code is not valid. It is either empty or longer than 255 characters. |
| `FeatureNotFound` | Exception indicating that the requested feature key wasn't found in the internal configuration of the SDK. This usually means that the feature flag is not activated in the Kameleoon app (but code implementing the feature is already deployed in the application). |
| `FeatureEnvironmentDisabled` | Exception indicating that feature flag is disabled for the visitor's current environment (for example, production, staging, or development). |
| `FeatureEvaluationBlocked` | Exception indicating that feature evaluation is blocked. The reason is described in the error message. This usually occurs due to GDPR restrictions when the visitor has not provided legal consent. |
#### get\_variations()
* 📨 *Sends Tracking Data to Kameleoon (depending on the `track` parameter)*
Retrieves a map of [`Variation`](#variation) objects assigned to a given visitor across all feature flags.
This method iterates over all available feature flags and returns the assigned `Variation` for each flag associated with the specified visitor. It takes `visitor_code` as a mandatory argument, while `only_active` and `track` are optional.
* If `only_active` is set to `true`, the method `get_variations` will return feature flags variations provided the user is not bucketed with the `off` variation.
* The `track` parameter controls whether or not the method will track the variation assignments. By default, it is set to `true`. If set to `false`, the tracking will be disabled.
The returned map consists of feature flag keys as keys and their corresponding `Variation` as values. If no variation is assigned for a feature flag, the method returns the default `Variation` for that flag.
Proper error handling should be implemented to manage potential exceptions.
The default variation refers to the variation assigned to a visitor when they do not match any predefined delivery rules for a feature flag. In other words, it is the fallback variation applied to all users who are not targeted by specific rules. It's represented as the variation in the "Then, for everyone else..." section in a management interface.
```elixir theme={null}
alias Kameleoon.Client
# Retrieves all variations assigned to the visitor (with default options)
{:ok, variations} = Client.get_variations(client, visitor_code)
# Retrieves only active variations for the visitor
{:ok, only_active_variations} = Client.get_variations(client, visitor_code, only_active: true)
# Retrieves variations without sending tracking data
{:ok, variations_without_tracking} = Client.get_variations(client, visitor_code, track: false)
```
##### Parameters
| Name | Type | Description | Default |
| -------------------------------------- | ------------ | ----------------------------------------------------------------------------------------------------------------- | ------- |
| `visitor_code` required | `String.t()` | Unique identifier of the visitor. | |
| `only_active` optional | `boolean()` | An optional parameter indicating whether to return variations for active (`true`) or all (`false`) feature flags. | `false` |
| `track` optional | `boolean()` | An optional parameter to enable or disable tracking of the feature evaluation. | `true` |
##### Return value
| Type | Description |
| -------------------------------------------------------------- | ------------------------------------------------------------------------------------------------------------------------------------------------------------------ |
| `{:ok, %{String.t() => Variation.t()}} \| {:error, Error.t()}` | Map that contains the assigned [`Variation`](#variation) objects of the feature flags using the keys of the corresponding features on success, otherwise an error. |
##### Errors
| Type | Description |
| -------------------- | ------------------------------------------------------------------------------------------------------------------- |
| `Initialization` | Indicates that the SDK is not yet fully initialized. |
| `VisitorCodeInvalid` | Exception indicating that the provided visitor code is not valid. It is either empty or longer than 255 characters. |
#### set\_forced\_variation()
The method allows you to programmatically assign a specific [`Variation`](#variation) to a user, bypassing the standard evaluation process. This is especially valuable for controlled experiments where the usual evaluation logic is not required or must be skipped. It can also be helpful in scenarios like debugging or custom testing.
When a **forced** variation is set, it overrides Kameleoon's real-time evaluation logic. Processes like segmentation, targeting conditions, and algorithmic calculations are skipped. To preserve segmentation and targeting conditions during an experiment, set `force_targeting=false` instead.
**Simulated** variations always take precedence in the execution order. If a **simulated** variation calculation is triggered, it will be fully processed and completed first.
A forced variation is treated the same as an evaluated variation. It is tracked in analytics and stored in the user context like any standard evaluated variation, ensuring consistency in reporting.
The method may throw exceptions under certain conditions (e.g., invalid parameters, user context, or internal issues). Proper exception handling is essential to ensure that your application remains stable and resilient.
It’s important to distinguish **forced** variations from **[simulated](#get_visitor_code)** variations:
* **Forced variations**: Are specific to an individual experiment.
* **Simulated variations**: Affect the overall **feature flag** result.
```elixir theme={null}
alias Kameleoon.Client
experiment_id = 202_387
# Forces the visitor into "variation_2" for the given experiment
:ok = Client.set_forced_variation(client, visitor_code, experiment_id, "variation_2")
# Removes any previously forced variation for the visitor in this experiment
:ok = Client.set_forced_variation(client, visitor_code, experiment_id, nil)
# Forces the visitor into "variation_2" with custom options.
# In this case, targeting rules are respected (force_targeting = false).
:ok =
Client.set_forced_variation(
client, visitor_code, experiment_id, "variation_2", force_targeting: false
)
```
##### Parameters
| Name | Type | Description | Default |
| ----------------------------------------- | ------------------- | --------------------------------------------------------------------------------------------------------------------------------------------------------------------------- | ------- |
| `visitor_code` required | `String.t()` | Unique identifier of the visitor. | |
| `experiment_id` required | `non_neg_integer()` | **Experiment Id** that will be targeted and selected during the evaluation process. | |
| `variation_key` required | `String.t() \| nil` | **Variation Key** corresponding to a `Variation` that should be forced as the returned value for the experiment. If the value is `nil`, the forced variation will be reset. | |
| `force_targeting` optional | `boolean()` | Indicates whether targeting for the experiment should be forced and skipped (`true`) or applied as in the standard evaluation process (`false`). | `true` |
##### Return value
| Type | Description |
| ---------------------------- | --------------------------------------------------------------------------------- |
| `:ok \| {:error, Error.t()}` | Indicates whether the forced variation was successfully set or an error occurred. |
##### Errors
| Type | Description |
| --------------------------- | ----------------------------------------------------------------------------------------------------------------------------------------------------------------------------------------------------------------------------------------------------- |
| `Initialization` | Indicates that the SDK is not yet fully initialized. |
| `VisitorCodeInvalid` | Exception indicating that the provided visitor code is not valid. It is either empty or longer than 255 characters. |
| `FeatureExperimentNotFound` | Exception indicating that the requested experiment id has not been found in the SDK's internal configuration. This is usually normal and means that the rule's corresponding experiment has not yet been activated on Kameleoon's side. |
| `FeatureVariationNotFound` | Exception indicating that the requested variation key(id) has not been found in the internal configuration of the SDK. This is usually normal and means that the variation's corresponding experiment has not yet been activated on Kameleoon's side. |
#### evaluate\_audiences()
* 📨 *Sends Tracking Data to Kameleoon*
This method evaluates visitors against all available Audiences Explorer segments and tracks those who match.
`evaluate_audiences` should be called **after all relevant visitor data has been set or updated**, and **just before** getting a feature variation or checking a feature flag. This approach ensures that the visitor is evaluated against the most current data available, allowing for accurate audience assignment based on all criteria.
After calling this method, you can perform a detailed analysis of segment performance in Audiences Explorer.
```elixir theme={null}
alias Kameleoon.Client
:ok = Client.evaluate_audiences(client, visitor_code)
```
##### Parameters
| Name | Type | Description |
| -------------------------------------- | ------------ | --------------------------------- |
| `visitor_code` required | `String.t()` | Unique identifier of the visitor. |
##### Return value
| Type | Description |
| ---------------------------- | --------------------------------------------------------------------- |
| `:ok \| {:error, Error.t()}` | Indicates whether audience evaluation succeeded or an error occurred. |
##### Errors
| Type | Description |
| -------------------- | ------------------------------------------------------------------------------------------------------------------- |
| `VisitorCodeInvalid` | Exception indicating that the provided visitor code is not valid. It is either empty or longer than 255 characters. |
#### get\_datafile()
To evaluate all feature flags, use [`get_variations`](#get_variations). This method is more efficient than calling `DataFile` and iterating through flags with [`get_variation`](#get_variation).
Returns the current SDK configuration as a [`DataFile`](#datafile) object.
```elixir theme={null}
alias Kameleoon.Client
{:ok, datafile} = Client.get_datafile(client)
```
##### Return value
| Type | Description |
| -------------------------------------------- | -------------------------------------------------------------------------------------------- |
| `{:ok, DataFile.t()} \| {:error, Error.t()}` | The [`DataFile`](#datafile) containing the SDK configuration on success, otherwise an error. |
##### Errors
| Type | Description |
| ---------------- | ---------------------------------------------------- |
| `Initialization` | Indicates that the SDK is not yet fully initialized. |
### Visitor data
#### get\_visitor\_code()
Use `get_visitor_code()` to obtain the current visitor's Kameleoon `visitor_code`. The method works with any cookie store that implements the `Kameleoon.CookieAccessor` behaviour.
The implementation logic is as follows:
1. The SDK checks whether a `kameleoonVisitorCode` cookie is already available through the provided accessor.
2. If the cookie is absent, the SDK uses `default_visitor_code` when you provide one.
3. Otherwise, the SDK generates a new visitor code and stores it through the accessor.
For more information, refer to [Hybrid experimentation](/developer-docs/feature-experimentation/get-started/hybrid-experimentation/).
If you provide your own `visitor_code`, its uniqueness must be guaranteed on your side. Also note that the length of `visitor_code` is limited to `255` characters.
The `get_visitor_code` method allows you to set **simulated** variations for a visitor. When cookies (from a **request** or **document**) contain the key `kameleoonSimulationFFData`, the standard evaluation process is bypassed. Instead, the method directly returns a [`Variation`](#variation) based on the provided data.
You can apply simulations in two ways:
* **Automatically (recommended):** If using Kameleoon Web Experimentation or the SDK in [Hybrid mode](/developer-docs/feature-experimentation/get-started/hybrid-experimentation#linking-feature-experiments-with-front-end-tracking-code), the cookie is created automatically when simulating a variant's display using the [Simulation Panel](/user-manual/experimentation/feature-experimentation/using-the-rollout-planner/validation-and-rollback/using-simulation-mode).
* **Manually:** Set the `kameleoonSimulationFFData` cookie manually.
It’s important to distinguish **simulated** variations from **[forced](#set_forced_variation)** variations:
* **Simulated variations**: Affect the overall **feature flag** result.
* **Forced variations**: Are specific to an individual experiment.
⚙️ **Manual setup**
Please ensure the `kameleoonSimulationFFData` cookie follows this format:
* `kameleoonSimulationFFData={"featureKey":{"expId":10,"varId":20}}`: Simulates the variation with `varId` of experiment `expId` for the given `featureKey`.
* `kameleoonSimulationFFData={"featureKey":{"expId":0}}`: Simulates the default variation (defined in the **Then, for everyone else in Production, serve** section) for the given `featureKey`.
⚠️ To ensure proper functionality, the cookie value must be encoded as a URI component using a method such as [`encodeURIComponent`](https://developer.mozilla.org/en-US/docs/Web/JavaScript/Reference/Global_Objects/encodeURIComponent).
```elixir theme={null}
alias Kameleoon.Client
defmodule MemoryCookies do
@behaviour Kameleoon.CookieAccessor
@impl true
def get(cookies, key), do: Map.get(cookies, key)
@impl true
def set(cookies, key, value, _max_age, _top_level_domain) do
Map.put(cookies, key, value)
end
end
# Generate or retrieve a visitor code using an auto-generated value.
cookies = %{}
{:ok, visitor_code, cookies} = Client.get_visitor_code(client, {MemoryCookies, cookies})
# Generate or retrieve a visitor code using a predefined user ID.
cookies = %{}
{:ok, visitor_code, cookies} = Client.get_visitor_code(client, {MemoryCookies, cookies}, "user_id")
```
```elixir theme={null}
alias Kameleoon.Client
defmodule PlugConnCookies do
@behaviour Kameleoon.CookieAccessor
@impl true
def get(conn, key), do: conn.req_cookies[key]
@impl true
def set(conn, key, value, max_age, top_level_domain) do
opts = [path: "/", max_age: max_age]
opts = if top_level_domain, do: Keyword.put(opts, :domain, top_level_domain), else: opts
Plug.Conn.put_resp_cookie(conn, key, value, opts)
end
end
def get_visitor_code(conn, client) do
cookies = {PlugConnCookies, conn}
with {:ok, visitor_code, conn} <- Client.get_visitor_code(client, cookies) do
{:ok, visitor_code, conn}
end
end
```
##### Parameters
| Name | Type | Description |
| ---------------------------------------------- | -------------------- | ---------------------------------------------------------------------------------------------- |
| `cookies` required | `{module(), term()}` | Cookie accessor module and framework-specific state used to read and store the visitor cookie. |
| `default_visitor_code` optional | `String.t() \| nil` | Visitor code to use when no cookie is present. |
##### Return value
| Type | Description |
| -------------------------------------------------- | ------------------------------------------------------------------------------------- |
| `{:ok, String.t(), term()} \| {:error, Error.t()}` | String representing a unique visitor code used in SDK on success, otherwise an error. |
#### add\_data()
The `Client.add_data` method adds [targeting data](#data-types) to storage so other methods can use the data to decide whether or not to target the current visitor.
The `Client.add_data` method does not return any value and does not interact with Kameleoon back-end servers on its own. Instead, all the declared data is saved for future transmission using the [`flush`](#flush) method. This approach reduces the number of server calls made, as the data is typically grouped into a single server call that is triggered by the `flush`.
The [`track_conversion`](#track_conversion) method also sends out any previously associated data, just like the `flush`. The same holds true for [`get_variation`](#get_variation) and [`get_variations`](#get_variations) methods if an experimentation rule is triggered.
Each visitor can only have one instance of associated data for most data types. However, [`CustomData`](#customdata) is an exception. Visitors can have one instance of associated `CustomData` per index.
```elixir theme={null}
alias Kameleoon.Client
alias Kameleoon.Data.Browser
alias Kameleoon.Data.PageView
alias Kameleoon.Data.UserAgent
:ok = Client.add_data(client, visitor_code, Browser.new!(:chrome, version: 123.0))
:ok =
Client.add_data(client, visitor_code, [
PageView.new!("https://example.com/pricing", title: "Pricing", referrers: [3]),
UserAgent.new!("Mozilla/5.0")
])
:ok =
Client.add_data(
client,
visitor_code,
PageView.new!("https://example.com/checkout", title: "Checkout"),
track: false
)
```
##### Parameters
| Name | Type | Description | Default value |
| -------------------------------------- | ------------------------ | -------------------------------------------------------------------------------------------------------------------------------------------------------------------------------------------- | ------------- |
| `visitor_code` required | `String.t()` | Unique identifier of the visitor. | |
| `data` required | `struct() \| [struct()]` | Collection of Kameleoon data types. | |
| `track` optional | `boolean()` | Specifies whether the added data is eligible for tracking. When set to `false`, the data is stored locally and used only for targeting evaluation; it is not sent to the Kameleoon Data API. | `true` |
##### Return value
| Type | Description |
| ---------------------------- | ------------------------------------------------------------------- |
| `:ok \| {:error, Error.t()}` | Indicates whether data was successfully added or an error occurred. |
##### Errors
| Type | Description |
| -------------------- | ------------------------------------------------------------------------------------------------------------------- |
| `Initialization` | Indicates that the SDK is not yet fully initialized. |
| `VisitorCodeInvalid` | Exception indicating that the provided visitor code is not valid. It is either empty or longer than 255 characters. |
#### flush()
* *📨 Sends tracking data to Kameleoon*
The `flush()` method aggregates all Kameleoon data associated with a visitor and sends a tracking request to the server. This request includes any data previously added via the [`add_data`](#add_data) method that has not yet been transmitted through other tracking mechanisms (see the referenced methods for details). The `flush()` operation is non-blocking, as the server call is performed asynchronously.
This method provides control over when data linked to a specific `visitor_code` is transmitted. For example, if `add_data()` is called multiple times, sending a request after each invocation would be inefficient. Instead, you can batch these updates and call `flush()` once to send all accumulated data in a single request.
The `flush()` method uses the provided `visitor_code` as the unique visitor identifier.
* `flush()` — Queues a flush operation according to the configured tracking interval.
* `flush_instant()` — Sends tracking data immediately without waiting for the interval.
```elixir theme={null}
alias Kameleoon.Client
# Queues a flush operation for the given visitor_code.
# Data will be sent according to the configured tracking interval.
:ok = Client.flush(client, visitor_code)
# Immediately sends all pending tracking data for the given visitor_code.
:ok = Client.flush_instant(client, visitor_code)
```
##### Parameters
| Name | Type | Description |
| -------------------------------------- | ------------ | --------------------------------- |
| `visitor_code` required | `String.t()` | Unique identifier of the visitor. |
##### Return value
| Type | Description |
| ---------------------------- | ------------------------------------------------------------------------------------------------ |
| `:ok \| {:error, Error.t()}` | Indicates whether the operation was successfully scheduled or executed, or if an error occurred. |
##### Errors
| Type | Description |
| -------------------- | ------------------------------------------------------------------------------------------------------------------- |
| `Initialization` | Indicates that the SDK is not yet fully initialized. |
| `VisitorCodeInvalid` | Exception indicating that the provided visitor code is not valid. It is either empty or longer than 255 characters. |
#### get\_remote\_data()
The `get_remote_data()` method lets you retrieve remote data stored on Kameleoon servers for the specified `key`. In most setups, this data is written through the Kameleoon Data API and can later be fetched by your Elixir service whenever you need additional application context.
This method is useful when you want to keep structured information on Kameleoon's remote infrastructure and reuse it from your back-end without maintaining a separate retrieval mechanism.
```elixir theme={null}
alias Kameleoon.Client
{:ok, data} = Client.get_remote_data(client, "test-key")
```
##### Parameters
| Name | Type | Description |
| ----------------------------- | ------------ | --------------------------------------------------------- |
| `key` required | `String.t()` | Key associated with the remote data you want to retrieve. |
##### Return value
| Type | Description |
| ------------------------------------------- | -------------------------------------------------------------------------------------------------------------------------------------- |
| `{:ok, String.t()\} \| {:error, Error.t()}` | Payload associated with the specified `key` on success, otherwise an error. In most cases, the payload is JSON serialized as a string. |
##### Errors
| Type | Description |
| ---------------- | -------------------------------------------------------------------------------------------------- |
| `Initialization` | Indicates that the SDK is not yet fully initialized. |
| `Network` | Returned when the remote data request fails or the server responds with a non-success status code. |
#### get\_remote\_visitor\_data()
`get_remote_visitor_data()` retrieves Kameleoon visit data for the provided `visitor_code`. The method adds the data to local visitor storage so other SDK methods can use it for targeting decisions.
Data obtained using this method is especially useful when you want to:
* use data collected from other devices.
* access a visitor's history, such as previously viewed pages from past visits.
* use data that is only available on the client side, such as datalayer variables and front-end goal conversions.
Read [this article](/developer-docs/feature-experimentation/targeting-and-segmentation/native-segmentation) for a better understanding of possible use cases.
By default, `get_remote_visitor_data()` automatically retrieves the latest stored custom data with `scope=Visitor` and attaches it to the visitor without the need to call [`add_data()`](#add_data). This is especially useful for [synchronizing custom data across multiple devices](/developer-docs/cross-device-experimentation/).
```elixir theme={null}
alias Kameleoon.Client
alias Kameleoon.Types.RemoteVisitorDataFilter
# Fetch remote visitor data without any filter.
# This will return all available data for the given visitor.
:ok = Client.get_remote_visitor_data(client, visitor_code)
# Create a filter to limit the returned data.
filter = %RemoteVisitorDataFilter{
# Include data from the last 5 visits
previous_visit_amount: 5,
# Include conversion events (e.g., goals, transactions)
conversions: true,
# Include page view history
page_views: true
}
# Fetch remote visitor data using the specified filter.
# This will return only the data matching the filter criteria.
:ok = Client.get_remote_visitor_data(client, visitor_code, filter: filter)
```
##### Parameters
| Name | Type | Description | Default |
| -------------------------------------- | ------------------------------------ | ---------------------------------------------------------------- | ---------------------------- |
| `visitor_code` required | `String.t()` | Visitor code whose data should be fetched. | |
| `filter` optional | `RemoteVisitorDataFilter.t() \| nil` | Filter describing which remote visitor data should be retrieved. | `%RemoteVisitorDataFilter{}` |
##### Return value
| Type | Description |
| ---------------------------- | ------------------------------------------------------------------------------------ |
| `:ok \| {:error, Error.t()}` | Returns successfully when the data is fetched and added locally, otherwise an error. |
##### Errors
| Type | Description |
| -------------------- | ----------------------------------------------------------------------------------------------------------------------------- |
| `Initialization` | Indicates that the SDK is not yet fully initialized. |
| `VisitorCodeInvalid` | Exception indicating that the provided visitor code is not valid. It is either empty or longer than 255 characters. |
| `Network` | Returned when the remote visitor data request fails, cannot be parsed, or the server responds with a non-success status code. |
##### Using parameters in get\_remote\_visitor\_data()
The `get_remote_visitor_data()` method lets you control which data is retrieved for a visitor. The same filtering approach works across goals, experiments, variations, and other visitor data.
For example, if you want to target users who converted on a goal during their last five visits, you can set `previous_visit_amount` to `5` and `conversions` to `true`.
The flexibility shown in this example is not limited to goal data. You can use the filter to retrieve many different visitor behaviors and make them available to targeting and reporting logic in your Elixir application.
##### `RemoteVisitorDataFilter` fields
| Name | Type | Description | Default |
| ----------------------- | ------------------- | ------------------------------------------------------------- | ------- |
| `previous_visit_amount` | `non_neg_integer()` | Number of previous visits to retrieve data from. | `1` |
| `current_visit` | `boolean()` | If `true`, current visit data will be retrieved. | `true` |
| `custom_data` | `boolean()` | If `true`, custom data will be retrieved. | `true` |
| `visitor_code` | `boolean()` | If `true`, the most recent visitor code will be reused. | `true` |
| `page_views` | `boolean()` | If `true`, page view data will be retrieved. | `false` |
| `geolocation` | `boolean()` | If `true`, geolocation data will be retrieved. | `false` |
| `device` | `boolean()` | If `true`, device data will be retrieved. | `false` |
| `browser` | `boolean()` | If `true`, browser data will be retrieved. | `false` |
| `operating_system` | `boolean()` | If `true`, operating system data will be retrieved. | `false` |
| `conversions` | `boolean()` | If `true`, conversion data will be retrieved. | `false` |
| `experiments` | `boolean()` | If `true`, experiment data will be retrieved. | `false` |
| `kcs` | `boolean()` | If `true`, Kameleoon Conversion Score data will be retrieved. | `false` |
| `personalizations` | `boolean()` | If `true`, personalization data will be retrieved. | `false` |
| `cbs` | `boolean()` | If true, Contextual Bandit score data will be retrieved. | `false` |
#### get\_visitor\_warehouse\_audience()
This method retrieves audience data associated with a visitor in your warehouse integration by using the specified `visitor_code` and, optionally, a `warehouse_key`. The `warehouse_key` is typically your internal user ID. The `custom_data_index` parameter corresponds to the Kameleoon custom data that Kameleoon uses to target your visitors.
When the call succeeds, the SDK converts the returned audience list into [`CustomData`](#customdata), adds it to the visitor locally, and makes it available for targeting purposes. For more background, see the [warehouse targeting documentation](/user-manual/integrations/data-warehouses/bigquery/use-bigquery-as-a-source-audience-targeting).
```elixir theme={null}
alias Kameleoon.Client
# Fetch audience data for a visitor using only the visitor_code.
:ok = Client.get_visitor_warehouse_audience(client, visitor_code, 98)
# Fetch audience data for a visitor using both visitor_code and warehouse_key.
# Useful when your warehouse uses a different identifier than visitor_code.
:ok = Client.get_visitor_warehouse_audience(client, visitor_code, 98, warehouse_key: "internal-user-id")
```
##### Parameters
| Name | Type | Description | Default |
| ------------------------------------------- | ------------------- | --------------------------------------------------------------------------- | -------------- |
| `visitor_code` required | `String.t()` | Visitor whose warehouse audiences should be retrieved. | |
| `custom_data_index` required | `non_neg_integer()` | Custom data index configured in Kameleoon for warehouse audience targeting. | |
| `warehouse_key` optional | `String.t() \| nil` | External warehouse key, usually your internal user ID. | `visitor_code` |
##### Return value
| Type | Description |
| ---------------------------- | ----------------------------------------------------------------------------------------- |
| `:ok \| {:error, Error.t()}` | Success when the warehouse audience data is retrieved and stored locally as `CustomData`. |
##### Errors
| Type | Description |
| -------------------- | ---------------------------------------------------------------------------------------------------------------------------- |
| `Initialization` | Indicates that the SDK is not yet fully initialized. |
| `VisitorCodeInvalid` | Exception indicating that the provided visitor code is not valid. It is either empty or longer than 255 characters. |
| `Network` | Returned when the warehouse audience request fails, cannot be parsed, or the server responds with a non-success status code. |
#### set\_legal\_consent()
You must use this method to specify whether the visitor has given legal consent to use personal data. Setting `legal_consent` to `false` limits the types of data that can be included in tracking requests. This helps you adhere to legal and regulatory requirements while responsibly managing visitor data. For more information, see the [consent management policy](/user-manual/project-management/consent-management-policy).
The Elixir SDK updates visitor cookies through the required `Kameleoon.CookieAccessor` adapter and returns the updated adapter state.
```elixir theme={null}
alias Kameleoon.Client
cookies = {PlugConnCookies, conn}
# Set consent and update cookies.
{:ok, conn} = Client.set_legal_consent(client, visitor_code, true, cookies)
# Set consent without updating cookies
{:ok, _} = Client.set_legal_consent(client, visitor_code, true, nil)
```
##### Parameters
| Name | Type | Description | Default |
| -------------------------------------- | -------------------- | ---------------------------------------------------------------------------------------------------------------------------------------- | ------- |
| `visitor_code` required | `String.t()` | The user's unique identifier. | |
| `consent` required | `boolean()` | `true` indicates the visitor has given legal consent, `false` indicates the visitor has never provided, or has withdrawn, legal consent. | |
| `cookies` optional | `{module(), term()}` | Cookie accessor module and framework-specific state used to update cookies. | `nil` |
##### Return value
| Type | Description |
| -------------------------------------- | ------------------------------------------------------------------------------------------------------------- |
| `{:ok, term()} \| {:error, Error.t()}` | Returns the updated cookie state when the visitor consent state was updated successfully, otherwise an error. |
##### Errors
| Type | Description |
| -------------------- | ------------------------------------------------------------------------------------------------------------------- |
| `Initialization` | Indicates that the SDK is not yet fully initialized. |
| `VisitorCodeInvalid` | Exception indicating that the provided visitor code is not valid. It is either empty or longer than 255 characters. |
##### Consent revocation behavior
When you call `set_legal_consent` with `legal_consent=false`, the SDK does not delete the `kameleoonVisitorCode` cookie. Instead, it stops extending the cookie's expiration date, allowing the cookie to persist until it naturally expires.
If your compliance requirements demand the immediate removal of the cookie file upon opt-out, you must delete it manually using your framework’s native cookie management methods. The SDK will not remove the file automatically.
### Goals and third-party analytics
#### track\_conversion()
* 📨 *Sends Tracking Data to Kameleoon*
Use this method to track a conversion for a specific [goal](/user-manual/assets/goals/create-a-goal) and user. This method requires `visitor_code` and `goal_id`. In addition, this method also accepts an optional `revenue`, `negative` and `metadata` arguments. The `visitor_code` is usually identical to the one that was used when triggering the experiment.
This method is non-blocking as the server call is made asynchronously.
```elixir theme={null}
alias Kameleoon.Client
alias Kameleoon.Data.CustomData
# Track a goal.
:ok = Client.track_conversion(client, visitor_code, goal_id)
# Track a goal with revenue.
:ok = Client.track_conversion(client, visitor_code, goal_id, revenue: 100.0)
# Track a goal with negative revenue.
:ok = Client.track_conversion(client, visitor_code, goal_id, revenue: 100.0, negative: true)
# Track a goal with custom metadata.
:ok =
Client.track_conversion(
client,
visitor_code,
goal_id,
metadata: [CustomData.new!(4, ["true"])]
)
```
##### Parameters
| Name | Type | Description | Default |
| -------------------------------------- | ------------------- | -------------------------------------------------------------------------------------------------------------------------------- | ------- |
| `visitor_code` required | `String.t()` | Unique identifier of the visitor. | |
| `goal_id` required | `non_neg_integer()` | ID of the goal. | |
| `revenue` optional | `number() \| nil` | Revenue of the conversion. | `0` |
| `negative` optional | `boolean()` | Defines if the revenue is positive or negative. | `false` |
| `metadata` optional | `[CustomData.t()]` | Metadata of the conversion. [Must be defined beforehand in the Kameleoon App](/user-manual/assets/goals/create-a-goal#metadata). | `[]` |
metadata values are accessible through [raw data exports](/user-manual/experiment-analytics/analyze-results/results-page/results-page-actions#Export) and [the results page](/user-manual/experiment-analytics/analyze-results/data-and-metrics/goal-metadata).
If the `metadata` parameter is provided, Kameleoon will use these specified values for the current conversion instead of what was previously collected using the [`Client.add_data`](#add_data) method. If the parameter is omitted, Kameleoon will use the last tracked values for those [`CustomData`](#customdata) prior to the conversion and within the same visit.
Kameleoon will only consider the metadata values that are explicitly passed as parameters to the `track_conversion` method.
In the example below, Kameleoon will associate the conversion only with the custom data value explicitly provided as a parameter (here: index 5 with the value 'Amex Credit Card').
```elixir theme={null}
:ok =
Client.add_data(client, visitor_code, [
CustomData.new!(5, ["Credit Card"]),
CustomData.new!(9, ["Express Delivery"])
])
:ok =
Client.track_conversion(
client, visitor_code, goal_id, metadata: [CustomData.new!(5, ["Amex Credit Card"])]
)
```
##### Return value
| Type | Description |
| ---------------------------- | ------------------------------------------------------------------------------------------------------- |
| `:ok \| {:error, Error.t()}` | Indicates whether the conversion was successfully queued for asynchronous tracking, otherwise an error. |
##### Errors
| Type | Description |
| -------------------- | ------------------------------------------------------------------------------------------------------------------- |
| `Initialization` | Indicates that the SDK is not yet fully initialized. |
| `VisitorCodeInvalid` | Exception indicating that the provided visitor code is not valid. It is either empty or longer than 255 characters. |
#### get\_engine\_tracking\_code()
Kameleoon integrates with several analytics solutions, including Mixpanel, Google Analytics 4, and Segment. To track server-side experiments correctly, call the `get_engine_tracking_code` method after the visitor triggers an experiment. The SDK returns JavaScript queue commands for the experiments that the visitor triggered during the previous five seconds. When you insert this code into the page, Engine.js processes the commands and sends the exposure events through the active analytics integration.
Refer to [hybrid experimentation](/developer-docs/feature-experimentation/get-started/hybrid-experimentation) for more information on implementing this method.
```elixir theme={null}
alias Kameleoon.Client
{:ok, tracking_code} = Client.get_engine_tracking_code(client, visitor_code)
```
* To use this feature, implement both the Elixir SDK and Kameleoon [Engine.js](/developer-docs/web-experimentation/implementation-and-deployment/standard-implementation). Because Engine.js is used only for tracking in this flow, you can install the asynchronous tag before the closing `` tag.
* If you only want to track experiments in Kameleoon and do not need to send exposure events to third-party analytics tools, use the [JavaScript / TypeScript SDK](/developer-docs/sdks/web-sdks/js-sdk). This option works well for [serverless edge compute platforms](/developer-docs/feature-experimentation/implementation-and-deployment/serverless-edge-compute-starter-kits). The JavaScript / TypeScript SDK automatically tracks variations when you call [`getVisitorCode`](/developer-docs/sdks/web-sdks/js-sdk#getvisitorcode), as long as you add the corresponding experiment assignments to `window.kameleoonQueue`.
* You can insert the returned tracking code directly into an HTML `
```
In this example, `123456` and `234567` are experiment IDs, and `7890` and `8901` are variation IDs. In your implementation, the SDK generates these values in the returned tracking code.
##### Parameters
| Name | Type | Description |
| -------------------------------------- | ------------ | --------------------------------- |
| `visitor_code` required | `String.t()` | Unique identifier of the visitor. |
##### Return value
| Type | Description |
| ------------------------------------------ | ------------------------------------------------------------------------ |
| `{:ok, String.t()} \| {:error, Error.t()}` | JavaScript code to insert into the page on success; otherwise, an error. |
##### Errors
| Type | Description |
| -------------------- | ------------------------------------------------------------------------------------------------------------------- |
| `Initialization` | Indicates that the SDK is not yet fully initialized. |
| `VisitorCodeInvalid` | Exception indicating that the provided visitor code is not valid. It is either empty or longer than 255 characters. |
### Events
#### on\_datafile\_update()
The `on_datafile_update` method allows you to handle the event when configuration has updated data. It takes one input parameter, **handler**. The handler that will be called when the configuration is updated using a real-time configuration event.
```elixir theme={null}
alias Kameleoon.Client
# Register a callback that is invoked whenever the configuration
# is updated through a polling or streaming datafile update event.
:ok =
Client.on_datafile_update(client, fn ->
# Custom logic to execute after the datafile has been updated.
IO.puts("Kameleoon datafile updated")
end)
# Unregister the datafile update callback.
# No callback will be invoked for future datafile updates.
:ok = Client.on_datafile_update(client, nil)
```
##### Parameters
| Name | Type | Description |
| --------- | ---------------------- | -------------------------------------------------------------------------------------------------------- |
| `handler` | `(() -> any()) \| nil` | The handler that will be called when the configuration is updated using a real-time configuration event. |
### Data types
This section lists the Elixir data types available under `Kameleoon.Data`.
#### ApplicationVersion
`ApplicationVersion` represents the semantic version number of your application.
A **visitor** can have only one `ApplicationVersion`. Adding a second instance will overwrite the first one.
| Name | Type | Description |
| --------------------------------- | ------------ | ----------------------------------------------------------------------------------------------------------------------------------------- |
| `version` required | `String.t()` | The application version. This field must follow semantic versioning. Accepted formats are `major`, `major.minor`, or `major.minor.patch`. |
```elixir theme={null}
alias Kameleoon.Client
alias Kameleoon.Data.ApplicationVersion
# major
:ok = Client.add_data(client, visitor_code, ApplicationVersion.new!("10"))
# major.minor
:ok = Client.add_data(client, visitor_code, ApplicationVersion.new!("10.20"))
# major.minor.patch
:ok = Client.add_data(client, visitor_code, ApplicationVersion.new!("10.20.30"))
```
#### Browser
The `Browser` data set stored here can be used to filter experiment and personalization reports by any value associated with it.
| Name | Type | Description |
| --------------------------------- | ----------------- | ----------------------------------------------------------------------------------------------- |
| `type` required | `browser_type()` | List of browsers: `:chrome`, `:internet_explorer`, `:firefox`, `:safari`, `:opera`, `:other`. |
| `version` optional | `number() \| nil` | Version of the browser, floating point number represents major and minor version of the browser |
```elixir theme={null}
alias Kameleoon.Client
alias Kameleoon.Data.Browser
# Browser data with a version
:ok = Client.add_data(client, visitor_code, Browser.new!(:safari, version: 26.4))
# Browser data without a version
:ok = Client.add_data(client, visitor_code, Browser.new!(:chrome))
```
#### Conversion
The `Conversion` data set stored here can be used to filter experiment and personalization reports by any goal associated with it.
* Each visitor can have multiple `Conversion` objects.
* You can find the `goal_id` in the Kameleoon app.
| Name | Type | Description | Default |
| ---------------------------------- | ------------------- | ----------------------------------------------- | ------- |
| `goal_id` required | `non_neg_integer()` | ID of the goal. | |
| `revenue` optional | `number() \| nil` | Revenue of the conversion | `0` |
| `negative` optional | `boolean()` | Defines if the revenue is positive or negative. | `false` |
| `metadata` optional | `[CustomData.t()]` | Metadata of the conversion. | `[]` |
```elixir theme={null}
alias Kameleoon.Client
alias Kameleoon.Data.Conversion
alias Kameleoon.Data.CustomData
# Add a simple conversion with ID 32
:ok = Client.add_data(client, visitor_code, Conversion.new!(32))
# Add conversion with ID 33 including revenue and marked as negative
:ok = Client.add_data(client, visitor_code, Conversion.new!(33, revenue: 10.0, negative: true))
# Add conversion with ID 34 including revenue, negative flag, and custom metadata
:ok =
Client.add_data(
client,
visitor_code,
Conversion.new!(34,
revenue: 10.0,
negative: true,
metadata: [
CustomData.new!(3, ["metadata1", "md2"]),
CustomData.new!(5, ["md3"])
]
)
)
```
#### Cookie
`Cookie` contains information about the cookies stored on the visitor's device.
| Name | Type | Description |
| --------- | ----------------------------- | ----------------------------------------------- |
| `cookies` | `%{String.t() => String.t()}` | A string map containing cookie keys and values. |
Each visitor can only have one `Cookie`. Adding a second `Cookie` overwrites the first one.
```elixir theme={null}
alias Kameleoon.Client
alias Kameleoon.Data.Cookie
:ok = Client.add_data(client, visitor_code, Cookie.new!(%{"segment" => "vip"}))
```
#### CustomData
`CustomData` enables the association of any type of data with each visitor, making it an effective tool for targeting conditions in [segments](/user-manual/assets/segments/create-a-segment/). Additionally, it can be used as a filter or breakdown in experiment reports. For more information about custom data, please refer to this [article](/developer-docs/custom-data).
Define custom data types in the Kameleoon app or the Data API and use them from the SDK.
| Name | Type | Description | Default |
| -------------------------------------- | -------------------------------- | --------------------------------------------------------------------------------------------------------------------------------------------------------------------------------------- | ------- |
| `index`/`name` required | `non_neg_integer()`/`String.t()` | Index or Name of the custom data. **Either `index` or `name` must be provided** to identify the data. | |
| `values` required | `[String.t()]` | Values of the custom data to be stored. | |
| `overwrite` optional | `boolean()` | Flag to explicitly control how the values are stored and how they appear in reports. [See more](/developer-docs/custom-data#default-logic-when-overwrite-parameter-is-false-or-omitted) | `true` |
* Each visitor is allowed only one `CustomData` for each unique `index`(`name`). Adding another `CustomData` with the same `index`(`name`) will replace the existing one.
* The custom data ‘index’ can be found in the [Custom Data dashboard](/user-manual/assets/custom-data/manage-custom-data) under the “INDEX” column.
* To prevent the SDK from sending data with the selected index to Kameleoon servers for privacy reasons, enable the option: **Use this data only locally for targeting purposes** when creating custom data.
* Adding a `CustomData` instance created with a name when the SDK instance is not initialized or the name is not registered, will result in the data being ignored.
```elixir theme={null}
alias Kameleoon.Client
alias Kameleoon.Data.CustomData
:ok = Client.add_data(client, visitor_code, CustomData.new!(1, ["value"]))
# With several values
:ok = Client.add_data(client, visitor_code, CustomData.new!(1, ["value1", "value2"]))
# To set the `overwrite` flag to false
:ok = Client.add_data(client, visitor_code, CustomData.new!(1, ["value"], overwrite: false))
# To use a name instead of the index
:ok = Client.add_data(client, visitor_code, CustomData.new_with_name!("my-custom-data", ["value"]))
# To use a name instead of the index and set the `overwrite` flag to false
:ok =
Client.add_data(
client, visitor_code, CustomData.new!("my-custom-data", ["value"], overwrite: false)
)
```
#### Device
You can use device data to filter experiment and personalization reports by any associated value.
| Name | Type | Description |
| ------ | --------------- | --------------------------------------------------------------------- |
| `type` | `device_type()` | Device type. Possible values are `:phone`, `:tablet`, and `:desktop`. |
```elixir theme={null}
alias Kameleoon.Client
alias Kameleoon.Data.Device
:ok = Client.add_data(client, visitor_code, Device.new!(:desktop))
```
#### Geolocation
`Geolocation` contains the visitor's geolocation details.
| Name | Type | Description |
| ------------------------------------- | -------------------------------- | ---------------------------------------------------------------------------------------------------------------- |
| `country` required | `String.t()` | The country of the visitor. |
| `region` optional | `String.t() \| nil` | The region of the visitor. |
| `city` optional | `String.t() \| nil` | The city of the visitor. |
| `postal_code` optional | `String.t() \| nil` | The postal code of the visitor. |
| `latitude` optional | `number() \| nil` | The latitude coordinate representing the location of the visitor. Coordinate number represents decimal degrees. |
| `longitude` optional | `number() \| nil` | The longitude coordinate representing the location of the visitor. Coordinate number represents decimal degrees. |
* Each visitor can have only one `Geolocation`. Adding a second `Geolocation` overwrites the first one.
```elixir theme={null}
alias Kameleoon.Client
alias Kameleoon.Data.Geolocation
geolocation =
Geolocation.new!("France",
region: "Ile-de-France",
city: "Paris",
postal_code: "75009",
latitude: 48.8720171,
longitude: 2.3338352
)
:ok = Client.add_data(client, visitor_code, geolocation)
```
#### OperatingSystem
`OperatingSystem` contains information about the operating system on the visitor's device.
| Name | Type | Description |
| ------ | ------------------------- | -------------------------------------------------------------------------------------------------------------------- |
| `type` | `operating_system_type()` | Operating system family. Possible values are `:windows`, `:mac`, `:ios`, `:linux`, `:android`, and `:windows_phone`. |
Each visitor can only have one `OperatingSystem`. Adding a second `OperatingSystem` overwrites the first one.
```elixir theme={null}
alias Kameleoon.Client
alias Kameleoon.Data.OperatingSystem
:ok = Client.add_data(client, visitor_code, OperatingSystem.new!(:windows))
```
#### PageView
Store page view events.
| Name | Type | Description | Default |
| ----------- | ------------------- | -------------------------------------------- | ------- |
| `url` | `String.t()` | URL of the page viewed. | |
| `title` | `String.t() \| nil` | Title of the page viewed. | `nil` |
| `referrers` | `[integer()]` | Referrer indices of previously viewed pages. | `[]` |
The referrer index is available in the Kameleoon app on the [acquisition channel configuration](/user-manual/assets/advanced-targeting-tools/create-an-acquisition-channel) page. Be careful: the index starts at `0`, so the first acquisition channel you create has the ID `0`, not `1`.
```elixir theme={null}
alias Kameleoon.Client
alias Kameleoon.Data.PageView
# Full constructor with url, optional title, and referrers.
:ok = Client.add_data(client, visitor_code, PageView.new!("https://example.com", title: "Homepage", referrers: [3]))
# Minimal constructor, only requires a URL.
:ok = Client.add_data(client, visitor_code, PageView.new!("https://example.com"))
```
#### UniqueIdentifier
If you do not add `UniqueIdentifier` for a visitor, `visitor_code` is used as the unique visitor identifier, which is useful for [cross-device experimentation](/developer-docs/cross-device-experimentation/). When you add `UniqueIdentifier.new!(true)`, the SDK links flushed data with the visitor associated with the specified identifier.
This can be useful in situations where you cannot access the anonymous `visitor_code` originally assigned to a visitor, but you do have access to an internal identifier connected to that visitor through session merging.
| Name | Type | Description |
| ------- | ----------- | ---------------------------------------------------------------------------- |
| `value` | `boolean()` | Whether the current `visitor_code` should be treated as a unique identifier. |
```elixir theme={null}
alias Kameleoon.Client
alias Kameleoon.Data.UniqueIdentifier
:ok = Client.add_data(client, visitor_code, UniqueIdentifier.new!(true))
```
#### UserAgent
Server-side experiments are more likely to be affected by bot traffic than client-side experiments. Kameleoon uses the IAB/ABC International Spiders and Bots List to recognize known bots and spiders, and it also uses the `UserAgent` field to filter out other unwanted traffic that might distort your conversion metrics. For more information, see the help article on [bot filtering](/user-manual/faq#how-does-kameleoon-filter-bot-traffic-from-my-results).
If you use internal bots, we recommend sending the user-agent value `curl/8.0` to exclude them from analytics.
| Name | Type | Description |
| ----- | ------------ | --------------------------------------------- |
| value | `String.t()` | User-Agent value sent with tracking requests. |
```elixir theme={null}
alias Kameleoon.Client
alias Kameleoon.Data.UserAgent
:ok = Client.add_data(client, visitor_code, UserAgent.new!("Mozilla/5.0"))
```
### Returned types
#### DataFile
The `DataFile` contains the SDK configuration details.
It can be extended with additional information if required by clients. If you need more details, please contact your Customer Success Manager.
| Name | Type | Description |
| --------------- | ---------------------------------- | --------------------------------------------------------------------------------- |
| `feature_flags` | `%{String.t() => FeatureFlag.t()}` | A map of [`FeatureFlag`](#featureflag) objects, keyed by feature flag keys. |
| `date_modified` | `non_neg_integer() \| nil` | The timestamp (in milliseconds) indicating when the `DataFile` was last modified. |
```elixir theme={null}
# Retrieves the map of feature flags from the DataFile.
# The map is keyed by feature flag identifiers, with each value being a FeatureFlag struct.
feature_flags = datafile.feature_flags
# Retrieves the last modification timestamp of the DataFile.
# The value is an integer representing milliseconds since the Unix epoch.
date_modified = datafile.date_modified
```
#### FeatureFlag
The `FeatureFlag` represents a set of properties that define a feature flag itself — for example, its [`Variations`](#variation), [`Rules`](#rule), environment status, and other related details.
It can be extended with additional information if required by clients. If you need more details, please contact your Customer Success Manager.
| Name | Type | Description |
| ----------------------- | -------------------------------- | -------------------------------------------------------------------------- |
| `environment_enabled` | `boolean()` | Indicating whether the feature flag is enabled in the current environment. |
| `default_variation_key` | `String.t()` | The key of the default variation associated with the feature flag. |
| `variations` | `%{String.t() => Variation.t()}` | A map of `Variation` objects, keyed by variation keys. |
| `rules` | `[Rule.t()]` | A list of `Rule` objects |
```elixir theme={null}
alias Kameleoon.Types.FeatureFlag
# Check whether the feature flag is enabled in the current environment.
environment_enabled = feature_flag.environment_enabled
# Retrieve the key of the default variation.
default_variation_key = feature_flag.default_variation_key
# Retrieve the default variation struct.
default_variation = FeatureFlag.default_variation(feature_flag)
# Retrieve all variations of the feature flag as a map (key = variation key, value = Variation struct).
variations = feature_flag.variations
# Retrieve all targeting rules associated with the feature flag.
rules = feature_flag.rules
```
#### Rule
The `Rule` represents a set of properties that define a rule itself — for example, its [`Variations`](#variation).
It can be extended with additional information if required by clients. If you need more details, please contact your Customer Success Manager.
| Name | Type | Description |
| ------------ | -------------------------------- | ------------------------------------------------------ |
| `variations` | `%{String.t() => Variation.t()}` | A map of `Variation` objects, keyed by variation keys. |
```elixir theme={null}
# Retrieve all variations of the rule as a map (key = variation key, value = Variation struct).
variations = rule.variations
```
#### Variation
`Variation` contains information about the visitor's assigned variation, or the default variation when no specific assignment exists.
| Name | Type | Description |
| --------------- | -------------------------------- | ----------------------------------------------------------------------------------------------------- |
| `name` | `String.t()` | The name of the variation. |
| `key` | `String.t()` | The unique key identifying the variation. |
| `id` | `non_neg_integer() \| nil` | The ID of the assigned variation, or `nil` for a default variation. |
| `experiment_id` | `non_neg_integer() \| nil` | The ID of the experiment associated with the variation, or `nil` for a default variation. |
| `variables` | `[Kameleoon.Types.Variable.t()]` | Variables associated with the variation. This collection can be empty when no variables are attached. |
* `Variation` describes the assigned or default variation, while [`Variable`](#variable) contains the details of each individual variable.
* `id` and `experiment_id` can be `nil`, which indicates a default variation that is not tied to a specific experiment assignment.
Additional helper methods:
| Method | Return type | Description |
| ------------------------ | --------------------- | ------------------------------------------------- |
| `Variation.active?` | `boolean()` | Returns `false` for the `off` variation. |
| `Variation.get_variable` | `Variable.t() \| nil` | Returns a variable by key, or `nil` if not found. |
```elixir theme={null}
alias Kameleoon.Types.Variation
# Retrieving the variation name.
variation_name = variation.name
# Retrieving the variation key.
variation_key = variation.key
# Retrieving the variation id.
variation_id = variation.id
# Retrieving the experiment id.
experiment_id = variation.experiment_id
# Retrieving the variables list.
variables = variation.variables
# Checking if the variation is active.
active? = Variation.active?(variation)
# Retrieving a variable by its key, returning nil if not found.
variable = Variation.get_variable(variation, "title")
```
#### Variable
`Variable` contains information about a variable associated with the assigned variation.
| Name | Type | Description |
| ------- | ------------------------------------- | --------------------------------------------------------------------------------------------------------------------------------------- |
| `key` | `String.t()` | The unique key identifying the variable. |
| `kind` | `String.t()` | The variable type. Possible values include `BOOLEAN`, `NUMBER`, `STRING`, `JSON`, `JS`, and `CSS`. |
| `value` | `boolean() \| number() \| String.t()` | The value of the variable. Depending on `kind`, it can hold a boolean, number, string, JSON string, JavaScript snippet, or CSS snippet. |
```elixir theme={null}
# Retrieve the list of variables associated with the variation.
variables = variation.variables
# Access the variable type (kind) for conditional handling.
kind = variable.kind
# Extract the value as a number.
number = variable.value
# Extract the value as a boolean.
apply_discount? = variable.value
# Extract the value as a string.
title = variable.value
```
# Go SDK
Source: https://docs.kameleoon.com/developer-docs/sdks/web-sdks/go-sdk
Integrate the Kameleoon Go SDK to run experiments and activate feature flags in Go web applications and services.
With the Go SDK, you can run experiments and activate feature flags. Integrating our SDK into your web application is easy, and its footprint (memory and network usage) is low.
**Getting started**: For help getting started, see the [developer guide](#developer-guide).
**Changelog**: Latest version of the Go SDK: 3.20.0 [Changelog](https://github.com/Kameleoon/client-go/blob/master/CHANGELOG.md).
**SDK methods**: For the full reference documentation of the Go SDK, see the [reference](#reference) section.
## Developer guide
Follow this section to install and configure the SDK, and learn about advanced features.
### Getting started
#### Installing the Go client
To install the Kameleoon Go SDK, use the `go get` command and install our package directly from our GitHub repository. Simply run the command below:
```shell theme={null}
go get github.com/Kameleoon/client-go/v3
```
#### Additional configuration
To provide additional settings for the Go SDK, you can use a configuration file, which lets you customize the SDK's behavior. You can download a sample configuration file [here](/assets/developer-docs/sdks/web-sdks/client-configs/client-go.yaml).
We recommend installing this file to the default path `/etc/kameleoon/client-go.yaml`, which will be read automatically. If you need to customize this path, you can provide an additional argument to the `NewClient()` method. Either specify a string that indicates an alternative path to the configuration file, or add a JavaScript object (map) containing the configuration.
The current version of the Go SDK has the following keys available in the configuration file:
| Key | Description | Default value |
| ----------------------------------------------------------------- | ---------------------------------------------------------------------------------------------------------------------------------------------------------------------------------------------------------------------------------------------------------------------------------------------------------------------------------------------------------------------------------------------------------------------------------------------------------------------------------------------------------------------------------------------------------------------------------------------------------------------------- | -------------------- |
| `ClientID` / `client_id` required | Required for authentication to the Kameleoon service. To find your `client_id`, see the [API credentials](/user-manual/account-and-team-management/users-and-teams/api-credentials) documentation. | |
| `ClientSecret` / `client_secret` required | Required for authentication to the Kameleoon service. To find your `client_secret`, see the [API credentials](/user-manual/account-and-team-management/users-and-teams/api-credentials) documentation. | |
| `SessionDuration` / `session_duration` optional | Designates the predefined time interval that Kameleoon stores the visitor and their associated data in memory (RAM). Note that increasing the session duration increases the amount of RAM that needs to be allocated to store visitor data. | `30` minutes |
| `RefreshInterval` / `refresh_interval` optional | Specifies the refresh interval, in minutes, that the SDK fetches the configuration for the active experiments and feature flags. The value determines the maximum time it takes to propagate changes, such as activating or deactivating feature flags or launching experiments, to your production servers. Additionally, we offer a [streaming mode](/developer-docs/feature-experimentation/technical-reference/technical-considerations/#streaming-premium-option) that uses server-sent events (SSE) to push new configurations to the SDK automatically and apply new configurations in real-time, without any delays. | `60` minutes |
| `DefaultTimeout` / `default_timeout` optional | Specifies the timeout, in milliseconds, for network requests from the SDK. Set the value to 30 seconds or more if you do not have a stable connection. Some methods have an additional parameter that you can use to override the default timeout for that particular method. If you do not specify the timeout for a method explicitly, the SDK uses this default value. | `10000` milliseconds |
| `TrackingInterval` / `tracking_interval` optional | Specifies the interval for tracking requests in milliseconds. All visitors who Kameleoon evaluated for any feature flag or had data flushed are included in this tracking request, which the SDK performs once per interval. The minimum value is `1000` ms, which is also the default, and the maximum value is `5000` ms. | `1000` milliseconds |
| `Environment` / `environment` optional | Environment from which the feature flag’s configuration is to be used. The value can be `production`, `staging`, `development`. See the [managing environments](/user-manual/experimentation/feature-experimentation/configure-your-feature-flags/manage-environments) article for details. | `production` |
| `TopLevelDomain` / `top_level_domain` *(required in hybrid mode)* | The current top-level domain for your website . Use the format: `example.com`. Don't include `https://`, `www`, or other subdomains. Kameleoon uses this information to set the corresponding cookie on the top-level domain. | `""` |
| `ProxyUrl` / `proxy_url` optional | Sets the proxy host for all outgoing server calls made by the SDK. | `""` |
| `NetworkDomain` / `network_domain` optional | Custom domain used by SDKs for outgoing requests, often for proxying. Must be a valid domain (e.g., example.com or sub.example.com). Invalid formats default to Kameleoon's value. | `""` |
| `VerboseMode` / `verbose_mode` *(deprecated)* | Boolean value (`true` or `false`) that turns on additional logging, including network requests and debug information. This field is deprecated and will be removed in SDK version `4.0.0`. Use [`logging.SetLogLevel`](#log-levels) instead. | `false` |
To learn more about `client_id` and `client_secret`, and instructions on how to obtain them, please refer to this [article](/user-manual/account-and-team-management/users-and-teams/api-credentials). It's worth noting that our Go SDK utilizes the Automation API and follows the OAuth 2.0 client credentials flow.
#### Initializing the Kameleoon Client
Once you have installed our SDK in your application, you must initialize Kameleoon. All interactions with the SDK, such as triggering an experiment, are accomplished via the object (the Kameleoon client) created using the `NewClient()` method.
You can customize the behavior of the SDK (for example, the environment or the credentials) by providing a [configuration object](#additional-configuration).
```go theme={null}
import (
kameleoon "github.com/Kameleoon/client-go/v3"
)
// First option
config := &kameleoon.KameleoonClientConfig{
Network: kameleoon.NetworkConfig{ // Optional
ProxyURL: "http://proxy-pass:1234/", // Optional
DoTimeout: 10 * time.Second, // Optional
ReadTimeout: 5 * time.Second, // Optional
WriteTimeout: 5 * time.Second, // Optional
MaxConnsPerHost: 10000, // Optional
},
ClientID: "your-client-id", // This field is required. Please enter your client_id here.
ClientSecret: "your-client-secret", // This field is required. Please enter your client_secret here.
TopLevelDomain: "example.com", // This field is strictly recommended, otherwise you may have problems when using subdomains.
RefreshInterval: time.Hour, // Optional (60 minutes by default)
TrackingInterval: time.Second, // Optional (1000 ms by default)
Environment: "staging", // Optional
SessionDuration: 30 * time.Minute, // Optional (30 minutes by default)
NetworkDomain: "example.com", // Optional
}
client, err := KameleoonClientFactory.Create("your-project-sitecode", config)
// Second option
config, err := LoadConfig("/etc/kameleoon/client-go.yaml")
client, err := KameleoonClientFactory.Create("your-project-sitecode", config)
// Notice: In the example above, the configuration is loaded every time. To load it once, use `CreateFromFile`.
// Third option
client, err := KameleoonClientFactory.CreateFromFile("your-project-sitecode", "/etc/kameleoon/client-go.yaml")
```
#### Activating a feature flag
##### Assigning a unique ID to a user
To assign a unique ID to a user, you can use the [`GetVisitorCode()`](#getvisitorcode) method. If a **visitor code** doesn’t exist (from the request headers cookie), the method generates a random unique ID or uses a `defaultVisitorCode` that you would have generated. The ID is then set in a response headers cookie.
If you are using Kameleoon in [Hybrid mode](/developer-docs/feature-experimentation/get-started/hybrid-experimentation), calling the `GetVisitorCode()` method ensures that the unique ID (**visitor code**) is shared between the application file `engine.js` (previously named, `kameleoon.js`) and the SDK.
##### Retrieving a flag configuration
To implement a feature flag in your code, you must first create the feature flag in your Kameleoon account.
To determine the status or variation of a feature flag for a specific user, you should use the [`GetVariation()`](#getvariation) or [`IsFeatureActive()`](#isfeatureactive) method to retrieve the configuration based on the `featureKey`.
The `GetVariation()` method handles both simple feature flags with ON/OFF states and more complex flags with multiple variations. The method retrieves the appropriate variation for the user by checking the feature rules, assigning the variation, and returning it based on the `featureKey` and `visitorCode`.
The `IsFeatureActive()` method can be used if you want to retrieve the configuration of a simple feature flag that has only an ON or OFF state, as opposed to more complex feature flags with multiple variations or targeting options.
If your feature flag has associated variables (such as specific behaviors tied to each variation) `GetVariation()` also enables you to access the [`Variation`](#variation) object, which provides details about the assigned variation and its associated experiment. This method checks whether the user is targeted, finds the visitor’s assigned variation, and saves it to storage. When `GetVariationOptParams.Track=true`, the SDK will send the exposure event to the specified experiment on the next tracking request, which is automatically triggered based on the SDK’s [`tracking_interval`](#additional-configuration). By default, this interval is set to 1000 milliseconds (1 second).
The `GetVariation()` method allows you to control whether tracking is done. If `GetVariationOptParams.Track=false`, no exposure events will be sent by the SDK. This is useful if you prefer not to track data through the SDK and instead rely on client-side tracking managed by the Kameleoon engine, for example. Additionally, setting `GetVariationOptParams.Track=false` is helpful when using the `GetVariations()` method, where you might only need the variations for all flags without triggering any tracking events. If you want to know more about how tracking works, view [this article](/developer-docs/feature-experimentation/technical-reference/faq-global#when-does-the-sdk-send-a-tracking-request-for-analytics)
##### Adding data points to target a user or filter / breakdown visits in reports
To target a user, ensure you've added relevant data points to their profile before retrieving the feature variation or checking if the flag is active. Use the [`AddData()`](#adddata) method to add these data points to the user's profile.
To retrieve data points collected on other devices or to access past user data (collected client-side when using Kameleoon in Hybrid mode), use the [`GetRemoteVisitorData()`](#getremotevisitordata) method. This method asynchronously fetches data from the servers. It is important to call `GetRemoteVisitorData()` *before* retrieving the variation or checking if the feature flag is active, as this data might be required to assign a user to a given variation.
To learn more about available targeting conditions, see the [detailed article on the subject](/developer-docs/feature-experimentation/targeting-and-segmentation/native-segmentation).
Additionally, the data points you add to the visitor profile will be available when analyzing your experiments, allowing you to filter and break down your results by factors like device and browser. Kameleoon Hybrid mode automatically collects a variety of data points on the client-side, making it easy to break down your results based on these pre-collected data points. See the complete list [here](/user-manual/experiment-analytics/analyze-results/results-page/results-page-settings#breakdown-audience).
If you need to track additional data points beyond what's automatically collected, you can use Kameleoon's [Custom Data feature](#customdata). Custom Data allows you to capture and analyze specific information relevant to your experiments. Don't forget to call the [`Flush*()`](#flushall--flushvisitor--flushvisitorinstantly) method to send the collected data to Kameleoon servers for analysis.
To ensure your results are accurate, it's recommended to filter out bots by using the [`UserAgent`](#useragent) data type.
##### Tracking flag exposition and goal conversions
When a user completes a desired action (such as making a purchase), it is recorded as a conversion. To track conversions, use the [`TrackConversion()`](#trackconversion) method and provide the required `visitorCode` and `goalId` parameters.
The conversion tracking request will be sent along with the next scheduled tracking request, which the SDK sends at regular intervals (defined by [`tracking_interval`](#additional-configuration)). If you prefer to send the request immediately, use the [`FlushVisitorInstantly()`](#flushall--flushvisitor--flushvisitorinstantly) method.
##### Sending events to analytics solutions
To track conversions and send exposure events to your customer analytics solution, you must first implement Kameleoon in [Hybrid mode](/developer-docs/feature-experimentation/get-started/hybrid-experimentation/). Then, use the [`GetEngineTrackingCode()`](#getenginetrackingcode) method.
The `GetEngineTrackingCode()` method retrieves the unique tracking code required to send exposure events to your analytics solution. Using this method allows you to record events and send them to your desired analytics platform.
### Cross-device experimentation
To support visitors who access an app from multiple devices, Kameleoon allows the synchronization of previously collected visitor data across each of the visitor's devices and reconciliation of their visit history across devices through cross-device experimentation. Case studies and detailed information on how Kameleoon handles data across devices are available in the [article on cross-device experimentation](/developer-docs/cross-device-experimentation).
#### Synchronizing custom data across devices
Although custom mapping synchronization is used to align visitor data across devices, it is not always necessary. Below are two scenarios where custom mapping sync is not required:
**Same user ID across devices**
If the same user ID is used consistently across all devices, synchronization is handled automatically without a custom mapping sync. It is enough to call the `GetRemoteVisitorData()` method when you want to sync the data collected between multiple devices.
**Multi-server instances with consistent IDs**
In complex setups involving multiple servers (for example, distributed server instances), where the same user ID is available across servers, synchronization between servers (with `GetRemoteVisitorData()`) is sufficient without additional custom mapping sync.
Customers who need additional data can refer to the [`GetRemoteVisitorData()`](#getremotevisitordata) method description for further guidance. In the below code, it is assumed that the same unique identifier (in this case, the `visitorCode`, which can also be referred to as `userId`) is used consistently between the two devices for accurate data retrieval.
If you want to sync collected data in real time, you need to choose the scope **Visitor** for your custom data.
```go title="Device A" theme={null}
// In this example, Custom data with index `90` was set to "Visitor" scope in Kameleoon.
const VisitorScopeCustomDataIndex = 90
kameleoonClient.AddData(visitorCode, types.NewCustomData(VisitorScopeCustomDataIndex, "your data"))
err := kameleoonClient.FlushVisitor(visitorCode)
```
```go title="Device B" theme={null}
// Before working with the data, call the `GetRemoteVisitorData` method.
_, err := kameleoonClient.GetRemoteVisitorData(visitorCode, true)
// After calling the method, the SDK on Device B will have access to CustomData of Visitor scope defined on Device A.
// So, "your data" will be available for targeting and tracking the visitor.
```
#### Using custom data for session merging
[Cross-device experimentation](/developer-docs/cross-device-experimentation) allows for combining a visitor's history across each of their devices (history reconciliation). History reconciliation allows merging different visitor sessions into one. To reconcile visit history, use [`CustomData`](#customdata) to provide a unique identifier for the visitor. For more information, see the [dedicated documentation](/developer-docs/cross-device-experimentation/#activating-cross-device-history-reconciliation).
After cross-device reconciliation is enabled, calling [`GetRemoteVisitorData()`](#getremotevisitordata) with the parameter `userId` retrieves all known data for a given user.
Sessions with the same identifier will always be shown the same variation in an experiment. In the Visitor view of your experiment's results pages, these sessions will appear as a single visitor.
The SDK configuration ensures that associated sessions always see the same variation of the experiment. However, there are some limitations regarding cross-device variation allocation. These limitations are outlined [here](/developer-docs/cross-device-experimentation#critical-points-and-practical-insights).
Follow the [activating cross-device history reconciliation](#cross-device-experimentation) guide to set up your custom data on the Kameleoon platform.
Afterwards, you can use the SDK normally. The following methods that may be helpful in the context of session merging:
* `GetRemoteVisitorData()` with added `UniqueIdentifier(true)` - to retrieve data for all linked visitors.
* [`TrackConversion()`](#trackconversion) or [`Flush*()`](#flushall--flushvisitor--flushvisitorinstantly) with added `UniqueIdentifier(true)` data - to track some data for specific visitor that is associated with another visitor.
As the custom data you use as the identifier must be set to **Visitor scope**, you need to use [cross-device custom data synchronization](/developer-docs/cross-device-experimentation) to retrieve the identifier with the [`GetRemoteVisitorData()`](#getremotevisitordata) method on each device.
Here's an example of how to use custom data for session merging.
```go theme={null}
// In this example, `91` represents the Custom Data's index
// configured as a unique identifier in Kameleoon.
const MappingIndex = 91
const FeatureKey = "ff123"
// 1. Before the visitor is authenticated
// Retrieve the variation for an unauthenticated visitor.
// Assume `anonymousVisitorCode` is the randomly generated ID for that visitor.
anonymousVariation, err := kameleoonClient.GetVariation(anonymousVisitorCode, FeatureKey)
// 2. After the visitor is authenticated
// Assume `userId` is the authenticated visitor's visitor code.
kameleoonClient.AddData(anonymousVisitorCode, types.NewCustomData(MappingIndex, userId))
err := kameleoonClient.FlushVisitorInstantly(anonymousVisitorCode)
// Indicate that `userId` is a unique identifier.
kameleoonClient.AddData(userId, types.NewUniqueIdentifier(true))
// 3. After the visitor has been authenticated
// Retrieve the variation for the `userId`, which will match the anonymous visitor code's variation.
userVariation, err := kameleoonClient.GetVariation(userId, FeatureKey)
isSameVariation := userVariation.Key == anonymousVariation.Key // true
// The `userId` and `anonymousVisitorCode` are now linked and tracked as a single visitor.
err := kameleoonClient.TrackConversionRevenue(userId, 123, 10.0)
// Additionally, the linked visitors will share all fetched remote visitor data.
_, err := kameleoonClient.GetRemoteVisitorData(userId, true)
```
In this example, the application has a login page. Since the user ID is unknown at the moment of login, an anonymous visitor identifier generated by the [`GetVisitorCode()`](#getvisitorcode) method is used. After the user logs in, the anonymous visitor is associated with the user ID and used as a unique identifier for the visitor.
### Using a custom bucketing key
By default, Kameleoon uses a unique, anonymous visitor ID (`visitorCode`) to assign users to feature flag variations. This ID is typically generated and stored on the user's device (in a browser cookie for client-side and server-side SDKs—in persistent storage for mobile SDKs). However, in certain scenarios you may need to ensure all users of the same organization see the same variant of a feature flag.
The **Custom Bucketing Key** option allows you to override this default behavior by providing your own custom identifier for bucketing. This override ensures that Kameleoon's assignment logic uses your specified key instead of the default `visitorCode`.
#### Use cases
Using a custom bucketing key is essential for maintaining consistency and accuracy in your feature flag assignments, particularly in these situations:
* **Account-level or organizational experiments:** For B2B products or scenarios where you want to assign all users from the same organization to the same variation, you can use an identifier like an `accountId`. Custom bucketing keys are crucial for A/B testing features that impact an entire team or company.
By implementing a custom bucketing key, you ensure greater consistency and accuracy in your experiments, leading to more reliable results and a better user experience.
#### Technical details
When you configure a custom bucketing key for a feature flag, you provide Kameleoon with a specific identifier from your application's data:
```go theme={null}
client.AddData(visitorCode, types.NewCustomData(index, "newVisitorCode"))
```
* **Providing the custom key:** You provide your custom identifier to the Kameleoon SDK using the [`AddData()`](#adddata) method. In this method, you will pass your chosen custom bucketing key as a [`CustomData`](#customdata) object. Here, `newVisitorCode` refers to the identifier you wish to use for your bucketing (for example, the new `userId` or `accountId`).
For the custom bucketing key to function correctly, it must also be defined and configured for the feature flag during the flag creation or editing process. Without this corresponding configuration, the SDK's bucketing will not apply your custom key. For detailed instructions on how to set this up in Kameleoon, refer to this [article](/user-manual/experimentation/feature-experimentation/create-and-manage-flags/create-a-feature-flag#Advanced_Flag_Settings).
* **Bucketing logic:** Once a custom bucketing key is provided through the `AddData()` method, all hash calculations for assigning users to variations will use this `newVisitorCode` (your custom key) instead of the default `visitorCode`. Using the `newVisitorCode` means that the bucketing decision is tied to your custom identifier, ensuring consistent assignments across various contexts where that identifier is present.
* **Data tracking and analytics:** It's crucial to note that while the `newVisitorCode` (your custom key) is used for bucketing decisions, **all subsequent data (tracking events and conversions, for example) is sent and associated with the *original* `visitorCode`.** This separation ensures that your analytics accurately reflect individual user journeys and interactions within your experiment's broader context, even when bucketing is performed at a higher level (like an account) or across multiple devices/sessions. Your original visitor data remains intact for comprehensive reporting.
#### Technical requirements
To effectively use a custom bucketing key:
* The key must be a `string`.
* It must be unique for the entity you intend to bucket (for example, if using a `userId`, each user's ID should be unique).
* The key must be available to the SDK at the exact moment the feature flag decision is evaluated for that user or request.
### Targeting conditions
The Kameleoon SDKs support a variety of predefined targeting conditions that you can use to target users in your campaigns. For the list of conditions this SDK supports, see [use visit history to target users](/developer-docs/feature-experimentation/targeting-and-segmentation/native-segmentation).
You can also use your own [external data to target users](/developer-docs/apis/data-api-rest/tutorials/storing-and-retrieving-external-data-to-target-users).
### Logging
The SDK generates logs to reflect various internal processes and issues.
#### Log levels
The SDK supports configuring limiting logging by a log level.
```go theme={null}
import (
"development.kameleoon.net/sdk/go-sdk/v3/logging"
)
// The `NONE` log level does not allow logging.
logging.SetLogLevel(logging.NONE)
// The `ERROR` log level only allows logging issues that may affect the SDK's primary behavior.
logging.SetLogLevel(logging.ERROR)
// The `WARNING` log level allows logging issues which may require additional attention.
// It extends the `ERROR` log level.
// The `WARNING` log level is a default log level.
logging.SetLogLevel(logging.WARNING)
//The `INFO` log level allows logging general information on the SDK's internal processes.
// It extends the `WARNING` log level.
logging.SetLogLevel(logging.INFO)
// The `DEBUG` level logs additional details about the SDK’s internal processes and extends the `INFO` level
// with more granular diagnostic output.
// This information is not intended for end-user interpretation but can be sent to our support team
// to assist with internal troubleshooting.
logging.SetLogLevel(logging.DEBUG)
```
#### Custom handling of logs
The SDK writes its logs to the console output by default. This behaviour can be overridden.
Logging limiting by a log level is performed apart from the log handling logic.
```go theme={null}
import (
"development.kameleoon.net/sdk/go-sdk/v3/logging"
"github.com/sirupsen/logrus"
)
type CustomLogger struct {
}
func NewCustomLogger() logging.LoggerWithLevel {
return &CustomLogger{}
}
func (dl CustomLogger) Log(level logging.LogLevel, message string) {
switch level {
case logging.NONE:
case logging.ERROR:
logrus.Error(message)
case logging.WARNING:
logrus.Warn(message)
case logging.INFO:
logrus.Info(message)
case logging.DEBUG:
logrus.Debug(message)
}
}
// Log level filtering is applied separately from log handling logic.
// The custom logger will only accept logs that meet or exceed the specified log level.
// Ensure the log level is set correctly.
logging.SetLogLevel(logging.DEBUG) // Optional; defaults to `logging.WARNING`.
logging.SetLogger(NewCustomLogger())
```
## Reference
This is a full reference documentation of the Go SDK.
### Initialization
#### Create()
Call this method before any others to initialize the SDK. This method is in `KameleoonClientFactory`. This creates an instance of `KameleoonClient` to manage all interactions between the SDK and your app.
```go theme={null}
const siteCode = "sitecode"
config := &kameleoon.KameleoonClientConfig{
// ...
}
client, err := KameleoonClientFactory.Create(siteCode, config)
```
##### Parameters
| Name | Type | Description |
| -------------------------------- | ----------------------- | ------------------------------------------------------------------------------------------------------------------------------------------------------------------------------ |
| siteCode required | string | This is a [unique key](/user-manual/faq#how-do-i-find-my-sitecode) of the Kameleoon project you are using with the SDK. |
| cfg required | \*KameleoonClientConfig | Represents either the path to the SDK configuration file or the configuration object. If you provide the configuration object, it must contain the correct configuration keys. |
##### Return value
| Type | Description |
| --------------- | ------------------------------------------------------------------------------------------------------------------- |
| KameleoonClient | An instance of the **KameleoonClient** that will be used to manage your experiments and feature flags. |
| error | An error occurred in the `Create` call. The error can be `errs.SiteCodeIsEmpty` or `errs.ConfigCredentialsInvalid`. |
#### CreateFromFile()
Call this method before any others to initialize the SDK. This method is in `KameleoonClientFactory`. This creates an instance of `KameleoonClient` to manage all interactions between the SDK and your app.
```go theme={null}
const siteCode = "sitecode"
client, err := KameleoonClientFactory.CreateFromFile(siteCode, "/etc/kameleoon/client-go.yaml")
```
###### Parameters
| Name | Type | Description |
| -------------------------------- | ------ | --------------------------------------------------------------------------------------------------------------------------------------------------------------- |
| siteCode required | string | A Kameleoon **siteCode**. |
| cfgPath required | string | A path to the config file. The file is loaded if only the `KameleoonClientFactory` does not store a `KameleoonClient` instance with the specified **siteCode**. |
###### Return value
| Type | Description |
| --------------- | -------------------------------------------------------------------------------------------------------------- |
| KameleoonClient | An instance of the **KameleoonClient** that will be used to manage your experiments and feature flags. |
| error | An error occurred within `Create`. The error can be `errs.SiteCodeIsEmpty` or `errs.ConfigCredentialsInvalid`. |
#### Forget()
The `Forget` method removes a `KameleoonClient` instance from the `KameleoonClientFactory` with the specified **siteCode** and frees resources used by the `KameleoonClient` instance. The `KameleoonClient` instance must not be used after calling the `Forget` method.
```go theme={null}
const siteCode = "sitecode"
KameleoonClientFactory.Forget(siteCode)
```
###### Parameters
| Name | Type | Description |
| -------- | ------ | ---------------------------------------------------------------------------------------------------------------------------- |
| siteCode | string | The **siteCode** of the `KameleoonClient` instance to be removed from the `KameleoonClientFactory`. This field is mandatory. |
#### WaitInit()
The initialization of the Kameleoon Client is not immediate, as it requires a server request to our CDN (Content Delivery Network) to retrieve the current configuration for all active experiments and feature flags.
The `WaitInit` method of the `kameleoon.KameleoonClient` allows you to wait until the `KameleoonClient` instance is ready for use.
```go theme={null}
err := client.WaitInit()
if err != nil {
// Client wasn't initialized properly
fmt.Println(err)
} else {
// The SDK has been initialized; you can fetch a feature flag / experiment configuration here.
}
```
##### Return value
| Type | Description |
| ----- | ---------------------------------------------------- |
| error | An error occurred during the initialization process. |
### Feature flags and variations
#### IsFeatureActive() / IsFeatureActiveWithTracking()
* 📨 *Sends Tracking Data to Kameleoon (depending on the `track` parameter)*
Use this method if you want to retrieve the configuration of a simple feature flag, that has only a turn ON / OFF state, as opposed to more complex feature flags with multiple variations or targeting options. If your feature flag has variations and variables, you should use the [`GetVariation`](#getvariation) method.
It takes a **visitorCode** and **featureKey** as mandatory arguments to check if the feature flag is active for a given user.
If the user has not been associated with your feature flag before, the SDK returns a random boolean value (**true** if the user should have this feature or **false** if not). However, if the user has already been registered with this feature flag, the SDK detects the previous feature flag value.
It is important to set up proper error handling in your code to catch any potential exceptions that may occur, as shown in the code example.
If you specify a `visitorCode`, the `IsFeatureActive` method uses it as the unique visitor identifier, which is useful for [cross-device experimentation](/developer-docs/cross-device-experimentation). When you specify a `visitorCode` and set the `isUniqueIdentifier` parameter to `true`, the SDK links the flushed data with the visitor associated with the specified identifier.
The parameter `isUniqueIdentifier` is deprecated. Please use [`UniqueIdentifier`](#uniqueidentifier) instead.
The `isUniqueIdentifier` can be helpful in unique situations; for example, if you cannot access the anonymous `visitorCode` given to a visitor, but you can use an internal ID linked to that visitor through session merging.
Kameleoon uses tracking to count sessions and visitors when you call certain methods, such as `IsFeatureActive()`, `GetVariation()` or `GetVariations()`.
Use the default `true` value for the `GetVariationOptParams.Track` parameter when you expose visitors to a variation and need to count them. Set the `GetVariationOptParams.Track` parameter to `false` only if you call these methods before you expose visitors.
For example, if you call `GetVariations()` to retrieve all variations before you expose visitors, set the `GetVariationsOptParams.Track` parameter to `false`. This setting prevents Kameleoon from prematurely counting a session. You can then trigger tracking later when you explicitly expose the visitor.
Kameleoon sends tracking data every second by default. You can configure this interval up to five seconds using the tracking interval configuration option. Kameleoon groups tracking events into a single session as long as the interval between events is less than 30 minutes. If more than 30 minutes elapse between tracking events, Kameleoon counts the events as separate sessions. A visit appears in your reports 30 minutes after the last recorded event in the session.
```go theme={null}
const featureKey = "new_checkout"
// Check if a Feature Flag is active (ON / OFF)
hasNewCheckout, err := client.IsFeatureActive(visitorCode, featureKey)
// disabling tracking
hasNewCheckout, err := client.IsFeatureActiveWithTracking(visitorCode, featureKey, false)
if err != nil {
switch err.(type) {
case *errs.VisitorCodeInvalid:
// The provided visitor code is not valid. Trigger the old checkout for this visitor.
hasNewCheckout = false
case *errs.FeatureConfigNotFound:
// The Feature Key is not yet in the configuration file that has been fetched by the SDK. Trigger the old checkout for this visitor.
hasNewCheckout = false
default:
// Handle unexpected errors
panic(err)
}
}
if hasNewCheckout {
// Implement new checkout code here
}
```
The `IsFeatureActive()` method evaluates the served variant, not the master flag state. If you exclude rules, the method uses the **Then, for everyone else serve** default state. If you select **Off** for this default state, the method always returns `false` even when the master feature flag is **On**.
##### Parameters
| Name | Type | Description |
| ------------------------------- | ------ | ------------------------------------------------------------------------------------------------------------------------------------------------------------------------------------------------------------------------------------------ |
| visitorCode | string | The user's unique identifier. This field is mandatory. |
| featureKey | string | The key of the feature you want to expose to a user. This field is mandatory. |
| isUniqueIdentifier (Deprecated) | bool | A parameter for specifying if the visitorCode is a unique identifier. If not provided, the default value is `false`. The field is optional. |
| track | bool | A parameter of the `IsFeatureActiveWithTracking` method to enable or disable tracking of the feature evaluation. `IsFeatureActive(visitorCode, featureKey)` is equivalent to `IsFeatureActiveWithTracking(visitorCode, featureKey, true)`. |
##### Return value
| Type | Description |
| ---- | ------------------------------------------------------------------------- |
| bool | Value of the feature flag that is registered for a given **visitorCode**. |
##### Exceptions thrown
| Type | Description |
| -------------------------- | ----------------------------------------------------------------------------------------------------------------------------------------------------------------------------------------------------------------------------------------------------------------------------------------------------------------------------------------------------------- |
| errs.FeatureConfigNotFound | This error indicates that the requested feature key could not be found in the internal configuration of the SDK. This typically occurs when the feature flag has not yet been retrieved by the SDK, which can happen if the SDK is in [polling](/developer-docs/feature-experimentation/technical-reference/technical-considerations#polling-default) mode. |
| errs.VisitorCodeInvalid | This error is returned when the visitor code provided is invalid, meaning that it is either empty or its length exceeds 255 characters. |
#### GetVariation()
* 📨 *Sends Tracking Data to Kameleoon (depending on the `GetVariationOptParams.Track` parameter)*
Retrieves the [`Variation`](#variation) assigned to a given visitor for a specific feature flag.
This method takes a `visitorCode` and `featureKey` as mandatory arguments. The `GetVariationOptParams.Track` argument is optional and defaults to `true`.
It returns the assigned `Variation` for the visitor. If the visitor is not associated with any feature flag rules, the method returns the default `Variation` for the given feature flag.
Ensure that proper error handling is implemented in your code to manage potential exceptions.
The default variation refers to the variation assigned to a visitor when they do not match any predefined delivery rules for a feature flag. In other words, it is the fallback variation applied to all users who are not targeted by specific rules. It's represented as the variation in the "Then, for everyone else..." section in a management interface.
```go theme={null}
const featureKey = "new_checkout"
variation, err := client.GetVariation(visitorCode, featureKey)
// disabling tracking
variation, err := client.GetVariation(visitorCode, featureKey, NewGetVariationOptParams().Track(false))
if err != nil {
// handle error
}
// Fetch a variable value for the assigned variation
title := variation.Variables["title"].Value
switch (variation.Key) {
case "on":
// Main variation key is selected for visitorCode
case "alternative_variation":
// Alternative variation key
default:
// Default variation key
}
```
##### Parameters
| Name | Type | Description | Default |
| ----------------------------------------------------- | -------- | ------------------------------------------------------------------------------ | ------- |
| `visitorCode` required | `string` | Unique identifier of the visitor. | |
| `featureKey` required | `string` | Key of the feature you want to expose to a visitor. | |
| `GetVariationOptParams.Track` optional | `bool` | An optional parameter to enable or disable tracking of the feature evaluation. | `true` |
##### Return value
| Type | Description |
| ----------- | -------------------------------------------------------------------------------------------------------------------- |
| `Variation` | An assigned [`Variation`](#variation) to a given visitor for a specific feature flag on success, otherwise an error. |
##### Exceptions thrown
| Type | Description |
| --------------------------------- | --------------------------------------------------------------------------------------------------------------------------------------------------------------------------------------------------------------------------------------------------------------------- |
| `errs.VisitorCodeInvalid` | Exception indicating that the provided visitor code is not valid. It is either empty or longer than 255 characters. |
| `errs.FeatureNotFound` | Exception indicating that the requested feature key wasn't found in the internal configuration of the SDK. This usually means that the feature flag is not activated in the Kameleoon app (but code implementing the feature is already deployed in the application). |
| `errs.FeatureEnvironmentDisabled` | Exception indicating that feature flag is disabled for the visitor's current environment (for example, production, staging, or development). |
#### GetVariations()
* 📨 *Sends Tracking Data to Kameleoon (depending on the `GetVariationsOptParams.Track` parameter)*
Retrieves a map of [`Variation`](#variation) objects assigned to a given visitor across all feature flags.
This method iterates over all available feature flags and returns the assigned `Variation` for each flag associated with the specified visitor. It takes `visitorCode` as a mandatory argument, while `GetVariationsOptParams.OnlyActive` and `GetVariationsOptParams.Track` are optional.
* If `GetVariationsOptParams.OnlyActive` is set to `true`, the method `GetVariations()` will return feature flags variations provided the user is not bucketed with the `off` variation.
* The `GetVariationsOptParams.Track` parameter controls whether or not the method will track the variation assignments. By default, it is set to `true`. If set to `false`, the tracking will be disabled.
The returned map consists of feature flag keys as keys and their corresponding `Variation` as values. If no variation is assigned for a feature flag, the method returns the default `Variation` for that flag.
Proper error handling should be implemented to manage potential exceptions.
The default variation refers to the variation assigned to a visitor when they do not match any predefined delivery rules for a feature flag. In other words, it is the fallback variation applied to all users who are not targeted by specific rules. It's represented as the variation in the "Then, for everyone else..." section in a management interface.
```go theme={null}
variations, err := client.GetVariations(visitorCode)
// all active variations
variations, err := client.GetVariations(visitorCode, NewGetVariationsOptParams().OnlyActive(true))
// disable tracking
variations, err := client.GetVariations(visitorCode, NewGetVariationsOptParams().Track(false))
if err != nil {
// handle error
}
```
##### Parameters
| Name | Type | Description | Default |
| ----------------------------------------------------------- | -------- | ----------------------------------------------------------------------------------------------------------------- | ------- |
| `visitorCode` required | `string` | Unique identifier of the visitor. | |
| `GetVariationsOptParams.OnlyActive` optional | `bool` | An optional parameter indicating whether to return variations for active (`true`) or all (`false`) feature flags. | `false` |
| `GetVariationsOptParams.Track` optional | `bool` | An optional parameter to enable or disable tracking of the feature evaluation. | `true` |
##### Return value
| Type | Description |
| ---------------------- | ------------------------------------------------------------------------------------------------------------------------------------------------------------------ |
| `map[string]Variation` | Map that contains the assigned [`Variation`](#variation) objects of the feature flags using the keys of the corresponding features on success, otherwise an error. |
##### Exceptions thrown
| Type | Description |
| ------------------------- | ------------------------------------------------------------------------------------------------------------------- |
| `errs.VisitorCodeInvalid` | Exception indicating that the provided visitor code is not valid. It is either empty or longer than 255 characters. |
##### Parameters
| Name | Type | Description |
| ----------- | ------ | --------------------------------------------------------------------------------------------------------------------------------------- |
| visitorCode | string | Unique identifier of the user. This field is required. |
| OnlyActive | bool | An optional parameter indicating whether to return variations for active (`true`) or all (`false`) feature flags (Defaults to `false`). |
| Track | bool | An optional parameter to enable or disable tracking of the feature evaluation (Defaults to `true`). |
##### Return value
| Type | Description |
| ---------------------- | ---------------------------------------------------------------------------------------------------------------------------- |
| `map[string]Variation` | Map that contains the assigned [`Variations`](#variation) of the feature flags using the keys of the corresponding features. |
##### Exceptions thrown
| Type | Description |
| ------------------ | ------------------------------------------------------------------------------------------------------------------- |
| VisitorCodeInvalid | Exception indicating that the provided visitor code is not valid. It is either empty or longer than 255 characters. |
#### SetForcedVariation()
The method allows you to programmatically assign a specific [`Variation`](#variation) to a user, bypassing the standard evaluation process. This is especially valuable for controlled experiments where the usual evaluation logic is not required or must be skipped. It can also be helpful in scenarios like debugging or custom testing.
When a **forced** variation is set, it overrides Kameleoon's real-time evaluation logic. Processes like segmentation, targeting conditions, and algorithmic calculations are skipped. To preserve segmentation and targeting conditions during an experiment, set `SetForcedVariationOptParams.ForceTargeting=false` instead.
**Simulated** variations always take precedence in the execution order. If a **simulated** variation calculation is triggered, it will be fully processed and completed first.
A forced variation is treated the same as an evaluated variation. It is tracked in analytics and stored in the user context like any standard evaluated variation, ensuring consistency in reporting.
The method may throw exceptions under certain conditions (e.g., invalid parameters, user context, or internal issues). Proper exception handling is essential to ensure that your application remains stable and resilient.
It’s important to distinguish **forced** variations from **[simulated](#getvisitorcode)** variations:
* **Forced variations**: Are specific to an individual experiment.
* **Simulated variations**: Affect the overall **feature flag** result.
```go theme={null}
const experimentId = 9516
// Forcing the variation "on" in the experiment 9516 for the visitor.
err := client.SetForcedVariation(visitorCode, experimentId, "on")
// Forcing the variation "on" while preserving segmentation and targeting conditions during the experiment.
err := client.SetForcedVariation(
visitorCode, experimentId, "on", NewSetForcedVariationOptParams().ForceTargeting(false),
)
// Resetting the forced variation in the experiment 9516 for the visitor.
err := client.SetForcedVariation(visitorCode, experimentId, "")
if err != nil {
// Handling the error
}
```
##### Parameters
| Name | Type | Description | Default |
| -------------------------------------------------------------------- | -------- | -------------------------------------------------------------------------------------------------------------------------------------------------------------------------- | ------- |
| `visitorCode` required | `string` | Unique identifier of the visitor. | |
| `experimentId` required | `int` | **Experiment Id** that will be targeted and selected during the evaluation process. | |
| `variationKey` required | `string` | **Variation Key** corresponding to a `Variation` that should be forced as the returned value for the experiment. If the value is `""`, the forced variation will be reset. | |
| `SetForcedVariationOptParams.ForceTargeting` optional | `bool` | Indicates whether targeting for the experiment should be forced and skipped (`true`) or applied as in the standard evaluation process (`false`). | `true` |
##### Exceptions thrown
| Type | Description |
| -------------------------------- | ----------------------------------------------------------------------------------------------------------------------------------------------------------------------------------------------------------------------------------------------------- |
| `errs.VisitorCodeInvalid` | Exception indicating that the provided visitor code is not valid. It is either empty or longer than 255 characters. |
| `errs.FeatureExperimentNotFound` | Exception indicating that the requested experiment id has not been found in the SDK's internal configuration. This is usually normal and means that the rule's corresponding experiment has not yet been activated on Kameleoon's side. |
| `errs.FeatureVariationNotFound` | Exception indicating that the requested variation key(id) has not been found in the internal configuration of the SDK. This is usually normal and means that the variation's corresponding experiment has not yet been activated on Kameleoon's side. |
#### EvaluateAudiences()
* 📨 *Sends Tracking Data to Kameleoon*
This method evaluates visitors against all available Audiences Explorer segments and tracks those who match.
`EvaluateAudiences()` should be called **after all relevant visitor data has been set or updated**, and **just before** getting a feature variation or checking a feature flag. This approach ensures that the visitor is evaluated against the most current data available, allowing for accurate audience assignment based on all criteria.
After calling this method, you can perform a detailed analysis of segment performance in Audiences Explorer.
```go theme={null}
if err := client.EvaluateAudiences(visitorCode); err != nil {
// Handling the error
}
```
##### Parameters
| Name | Type | Description |
| ------------------------------------- | -------- | --------------------------------- |
| `visitorCode` required | `string` | Unique identifier of the visitor. |
##### Exceptions thrown
| Type | Description |
| ------------------------- | ------------------------------------------------------------------------------------------------------------------- |
| `errs.VisitorCodeInvalid` | Exception indicating that the provided visitor code is not valid. It is either empty or longer than 255 characters. |
#### GetDataFile()
To evaluate all feature flags, use [`GetVariations()`](#getvariations). This method is more efficient than calling `DataFile` and iterating through flags with [`GetVariation()`](#getvariation).
Returns the current SDK configuration as a [`DataFile`](#datafile) object.
```go theme={null}
dataFile := client.GetDataFile()
```
##### Return value
| Type | Description |
| ---------- | ------------------------------------------------------------ |
| `DataFile` | The [`DataFile`](#datafile) containing the SDK configuration |
### Visitor data
#### GetVisitorCode()
This method was previously called `ObtainVisitorCode`, which was removed in SDK version `3.0.0`.
To ensure user identification consistency, especially when using Kameleoon in [hybrid mode](/developer-docs/feature-experimentation/get-started/hybrid-experimentation/), you should call the [`GetVisitorCode()`](#getvisitorcode) method to obtain the Kameleoon `visitorCode` for the current visitor. Here's how it works:
1. Kameleoon checks if there is a **kameleoonVisitorCode** cookie associated with the current HTTP request. If found, Kameleoon this code as the visitor identifier.
2. If no cookie is found, the method will either randomly generate a new identifier, or use the **defaultVisitorCode** argument if it is passed. Using your identifiers as visitor codes allows you to match Kameleoon visitors with your own users without additional look-ups.
3. The server-side **kameleoonVisitorCode** cookie is then set with the identifier value via HTTP header and the method returns the identifier value.
For more information, please refer to this [article](/developer-docs/feature-experimentation/get-started/hybrid-experimentation).
If you decide to provide your own `User ID` instead of using the Kameleoon generated visitorCode, it is your responsibility to ensure that the User ID is unique. The SDK does not check for uniqueness. It's important to note that the User ID you provide must not exceed 255 characters, as any excess characters will result in an exception being thrown.
The `GetVisitorCode()` method allows you to set **simulated** variations for a visitor. When cookies (from a **request** or **document**) contain the key `kameleoonSimulationFFData`, the standard evaluation process is bypassed. Instead, the method directly returns a [`Variation`](#variation) based on the provided data.
You can apply simulations in two ways:
* **Automatically (recommended):** If using Kameleoon Web Experimentation or the SDK in [Hybrid mode](/developer-docs/feature-experimentation/get-started/hybrid-experimentation#linking-feature-experiments-with-front-end-tracking-code), the cookie is created automatically when simulating a variant's display using the [Simulation Panel](/user-manual/experimentation/feature-experimentation/using-the-rollout-planner/validation-and-rollback/using-simulation-mode).
* **Manually:** Set the `kameleoonSimulationFFData` cookie manually.
It’s important to distinguish **simulated** variations from **[forced](#setforcedvariation)** variations:
* **Simulated variations**: Affect the overall **feature flag** result.
* **Forced variations**: Are specific to an individual experiment.
⚙️ **Manual setup**
Please ensure the `kameleoonSimulationFFData` cookie follows this format:
* `kameleoonSimulationFFData={"featureKey":{"expId":10,"varId":20}}`: Simulates the variation with `varId` of experiment `expId` for the given `featureKey`.
* `kameleoonSimulationFFData={"featureKey":{"expId":0}}`: Simulates the default variation (defined in the **Then, for everyone else in Production, serve** section) for the given `featureKey`.
⚠️ To ensure proper functionality, the cookie value must be encoded as a URI component using a method such as [`encodeURIComponent`](https://developer.mozilla.org/en-US/docs/Web/JavaScript/Reference/Global_Objects/encodeURIComponent).
```go theme={null}
visitorCode, err := client.GetVisitorCode(req, resp)
visitorCode, err := client.GetVisitorCode(req, resp, "defaultVisitorCode")
```
##### Parameters
| Name | Type | Description |
| ------------------ | ------------------- | ------------------------------------------------------------------------------------------------------------------------------------------------------------------------------------------------------------- |
| request | \*fasthttp.Request | The current fasthttp.Request object should be passed as the first parameter. This field is mandatory. |
| response | \*fasthttp.Response | The current fasthttp.Response object should be passed as the second parameter. This field is mandatory. |
| defaultVisitorCode | string | This parameter will be used as the **visitorCode** if no existing **kameleoonVisitorCode** cookie is found on the request. This field is optional, and by default a random **visitorCode** will be generated. |
##### Return value
| Type | Description |
| --------------- | ------------------------------------------------------------------------------------------------------------------------------------------------------ |
| (string, error) | A pair consisting of a **visitorCode** that will be associated with this particular user and an error. It should be used with most methods of the SDK. |
##### Exceptions thrown
| Error Message | Description |
| ----------------------- | --------------------------------------------------------------------------------------------------------------------------------------- |
| errs.VisitorCodeInvalid | This error is returned when the visitor code provided is invalid, meaning that it is either empty or its length exceeds 255 characters. |
#### AddData()
The `AddData()` method adds [targeting data](#data-types) to storage so other methods can use the data to decide whether or not to target the current visitor.
The `AddData()` method does not return any value and does not interact with Kameleoon back-end servers on its own. Instead, all the declared data is saved for future transmission using the [`Flush*()`](#flushall--flushvisitor--flushvisitorinstantly) method. This approach reduces the number of server calls made, as the data is typically grouped into a single server call that is triggered by the `Flush*()`.
The [`TrackConversion()`](#trackconversion) method also sends out any previously associated data, just like the `Flush*()`. The same holds true for [`GetVariation()`](#getvariation) and [`GetVariations()`](#getvariations) methods if an experimentation rule is triggered.
Each visitor can only have one instance of associated data for most data types. However, [`CustomData`](#customdata) is an exception. Visitors can have one instance of associated `CustomData` per index.
```go theme={null}
import (
"github.com/Kameleoon/client-go/v3/types"
)
// Add a single data item (tracked by default)
client.AddData(visitorCode, types.NewBrowser(types.BrowserTypeChrome))
// Add multiple data items (tracked by default)
client.AddData(visitorCode,
types.NewPageViewWithTitle("https://url.com", "title", 3),
types.UserAgent("UserAgent"),
)
// Add multiple data items stored locally for targeting only (not sent to the Kameleoon Data API)
client.AddDataWithOptParams(
visitorCode,
NewAddDataOptParams().Track(false),
types.NewPageViewWithTitle("https://url.com", "title", 3),
types.UserAgent("UserAgent")
)
```
##### Parameters
| Name | Type | Description | Default value |
| ------------------------------------- | --------------- | -------------------------------------------------------------------------------------------------------------------------------------------------------------------------------------------- | ------------- |
| `visitorCode` required | `string` | Unique identifier of the visitor. | |
| `track` optional | `bool` | Specifies whether the added data is eligible for tracking. When set to `false`, the data is stored locally and used only for targeting evaluation; it is not sent to the Kameleoon Data API. | `true` |
| `allData` required | `...types.Data` | Collection of Kameleoon data types. | |
##### Exceptions
| Type | Description |
| ------------------------- | ------------------------------------------------------------------------------------------------------------------- |
| `errs.VisitorCodeInvalid` | Exception indicating that the provided visitor code is not valid. It is either empty or longer than 255 characters. |
#### FlushAll() / FlushVisitor() / FlushVisitorInstantly()
* 📨 *Sends Tracking Data to Kameleoon*
The `FlushAll()/FlushVisitor()/FlushVisitorInstantly()` methods collects the Kameleoon data linked to the visitor. It then sends a tracking request, along with all data added using the `AddData` method, which has not yet been sent using one of [these methods](/developer-docs/feature-experimentation/technical-reference/faq-global#when-does-the-sdk-send-a-tracking-request-for-analytics). `Flush*()` is non-blocking as the server call is made asynchronously.
`Flush*()` lets you control when the data associated with a given `visitorCode` is sent to our servers. For instance, if you call `AddData()` a dozen times, it would be inefficient to send data to the server after each time `AddData()` is invoked, so all you have to do is call `Flush()` once at the end.
The `FlushVisitor()/FlushVisitorInstantly()` method uses `visitorCode` as the unique visitor identifier, which is useful for [cross-device experimentation](/developer-docs/cross-device-experimentation). When you specify a `visitorCode` and set the `isUniqueIdentifier` parameter to `true`, the SDK links the flushed data with the visitor associated with the specified identifier.
The parameter `isUniqueIdentifier` is deprecated. Please use [`UniqueIdentifier`](#uniqueidentifier) instead.
The `isUniqueIdentifier` can be helpful in unique situations; for example, if you cannot access the anonymous `visitorCode` given to a visitor, but you can use an internal ID linked to that visitor through session merging.
```go theme={null}
import (
"github.com/Kameleoon/client-go/v3/types"
)
visitorCode, err := client.GetVisitorCode(req, resp)
client.AddData(visitorCode, types.NewBrowser(types.BrowserTypeChrome))
client.AddData(visitorCode, types.NewConversionWithRevenue(32, 10, false))
client.FlushVisitor(visitorCode) // Interval tracking (most performant tracking method)
client.FlushAll() // Interval tracking for all visitors' unsent data
client.FlushVisitorInstantly(visitorCode) // Instant tracking
client.FlushAll(true) // Instant tracking for all visitors' unsent data
// if you operate with a unique ID
client.AddData(types.NewUniqueIdentifier(true))
client.FlushVisitor(visitorCode)
```
##### Parameters
| Name | Type | Description |
| ------------------------------- | ------ | ------------------------------------------------------------------------------------------------------------------------------------------------------------------------ |
| visitorCode | string | The user's unique identifier. This field is mandatory for `FlushVisitor()/FlushVisitorInstantly()`. |
| isUniqueIdentifier (Deprecated) | bool | A parameter of the `FlushVisitor` method for specifying if the visitorCode is a unique identifier. If not provided, the default value is `false`. The field is optional. |
##### Exceptions thrown
| Type | Description |
| ----------------------- | ----------------------------------------------------------------------------------------------------------------------------------------- |
| errs.VisitorCodeInvalid | This exception is raised when the visitor code provided is invalid, meaning that it is either empty or its length exceeds 255 characters. |
#### GetRemoteData()
The `GetRemoteData()` method retrieves external data stored on Kameleoon's remote server for the specified **siteCode** (specified in `KameleoonClient` constructor) according to a **key** passed as an argument. This key is typically the Kameleoon Visitor Code or your User ID.
You can use this method to retrieve user preferences, historical data, or any other data relevant to your application's logic. By storing this data on our highly scalable servers using our Data API, you can efficiently manage massive amounts of data and retrieve it for all of your visitors or users.
The return value of the method is a JSON object that can be decoded using the `json.Unmarshal()` function. You can use this data to build advanced targeting segments for feature flags and experiments, or filter experiment and personalization reports based on any value stored in the retrieved data.
```go theme={null}
type Test1 struct {
Value string `json:"some field to insert or update"`
}
remoteData, err := s.client.GetRemoteData("USER_ID") // uses default timeout
var test1 Test1
err = json.Unmarshal(remoteData, &test1)
remoteData, err := s.client.GetRemoteData("USER_ID", 1000)
```
Note that, since a server call is required, this mechanism is asynchronous.
We offer built-in integrations with Mixpanel, Segment, and GA4 to fetch external cohorts and utilize them in feature experiments. The key utilized in these integrations is either our Visitor code or your User ID. You can refer to the sample code provided below to retrieve and utilize Mixpanel cohorts:
```go theme={null}
//Retrieve and use Mixpanel Cohorts
type Cohort struct {
Id string `json:"mixpanel_cohort_id"`
Name string `json:"mixpanel_cohort_name"`
ProjectId string `json:"mixpanel_cohort_project_id"`
}
type MixPanelCohorts struct {
Cohorts []Cohort `json:"mixpanel_cohorts"`
}
remoteData, err := s.client.GetRemoteData("USER_ID")
var mixPanel MixPanelCohorts
if err = json.Unmarshal(remoteData, &mixPanel); err == nil {
cohorts := make([]string, len(mixPanel.Cohorts))
for _, cohort := range mixPanel.Cohorts {
cohorts = append(cohorts, cohort.Id)
}
client.AddData(visitorCode, types.NewCustomData(customDataIndex, cohorts...))
}
```
##### Parameters
| Name | Type | Description |
| ------- | ------ | -------------------------------------------------------------------------------------------------------------------------------------------------------------------------------------------------------------------------------------------------------------------- |
| key | string | The key with which the data you are trying to retrieve is associated. This field is mandatory. This key is typically the Kameleoon Visitor Code or your own User ID. |
| timeout | int | The timeout parameter specifies the maximum amount of time the method can block to wait for a result, in milliseconds. This field is optional; if not provided, the method will use the default timeout value provided when [initializing the SDK](#initialization). |
##### Return value
| Type | Description |
| ------- | ---------------------------------------------------------------------------------------------------------------------------------------------------------- |
| \[]byte | This returns the information associated with retrieving data for a specific **key**. The result needs to be decoded using the `json.Unmarshal`() function. |
##### Exceptions thrown
| Type | Description |
| ----- | -------------------------------------------- |
| error | Error indicating that the request timed out. |
#### GetRemoteVisitorData()
`GetRemoteVisitorData()` is an asynchronous method for retrieving Kameleoon Visits Data for the `VisitorCode` from the Kameleoon Data API. The method adds the data to storage for other methods to use when making targeting decisions.
Data obtained using this method plays an important role when you want to:
* use data collected from other devices.
* access a user's history, such as previously visited pages during past visits.
* use data that is only accessible on the client-side, like datalayer variables and goals that only convert on the front-end.
Read [this article](/developer-docs/feature-experimentation/targeting-and-segmentation/native-segmentation) for a better understanding of possible use cases.
By default, `GetRemoteVisitorData()` automatically retrieves the latest stored custom data with `Scope=Visitor` and attaches them to the visitor without the need to call the `AddData()` method. It is particularly useful for [synchronizing custom data between multiple devices](/developer-docs/sdks/web-sdks/nodejs-sdk#synchronizing-custom-data-across-devices).
The parameter `IsUniqueIdentifier` is deprecated. Please use [`UniqueIdentifier`](#uniqueidentifier) instead.
The `isUniqueIdentifier` can be helpful in unique situations; for example, if you cannot access the anonymous `visitorCode` given to a visitor, but you can use an internal ID linked to that visitor through session merging.
```go theme={null}
visitorCode := "visitorCode"
var visitorData []types.Data
var err error
// Visitor data will be fetched and automatically added for `visitorCode`
visitorData, err = client.GetRemoteVisitorData(visitorCode, true) // default timeout will be used
visitorData, err = client.GetRemoteVisitorData(visitorCode, true, time.Second) // 1000 milliseconds timeout
// If you only want to fetch data and add it yourself manually, set `addData` to `false`.
visitorData, err = client.GetRemoteVisitorData(visitorCode, false) // default timeout will be used
visitorData, err = client.GetRemoteVisitorData(visitorCode, false, time.Second) // 1000 milliseconds timeout
// If you operate with a unique ID
client.AddData(types.NewUniqueIdentifier(true))
visitorData, err = client.GetRemoteVisitorData(visitorCode, true)
// If you want to fetch a custom list of data types
var visitorData = client.GetRemoteVisitorDataWithFilter(
visitorCode,
true,
types.RemoteVisitorDataFilter{PreviousVisitAmount: 10, CustomData: true, Conversion: true, Experiments: true},
// default timeout will be used
)
// or
var visitorData = client.GetRemoteVisitorDataWithFilter(
visitorCode,
true,
types.RemoteVisitorDataFilter{PreviousVisitAmount: 10, CustomData: true, Conversion: true, Experiments: true},
time.Second, // 1000 milliseconds timeout
)
```
##### Parameters of GetRemoteVisitorData
| Name | Type | Description |
| ----------- | ------------- | -------------------------------------------------------------------------------------------------------------------------------------------------------------------------------------------------------------------------------------------------------------------- |
| visitorCode | string | The visitor code for which you want to retrieve the assigned data. This field is mandatory. |
| addData | bool | A boolean indicating whether the method should automatically add retrieved data for a visitor. This field is mandatory. |
| timeout | time.Duration | The timeout parameter specifies the maximum amount of time the method can block to wait for a result, in milliseconds. This field is optional; if not provided, the method will use the default timeout value provided when [initializing the SDK](#initialization). |
##### Parameters of GetRemoteVisitorDataWithFilter
| Name | Type | Description |
| ----------- | ----------------------------- | -------------------------------------------------------------------------------------------------------------------------------------------------------------------------------------------------------------------------------------------------------------------- |
| visitorCode | string | The visitor code for which you want to retrieve the assigned data. This field is mandatory. |
| addData | bool | A boolean indicating whether the method should automatically add retrieved data for a visitor. This field is mandatory. |
| filter | types.RemoteVisitorDataFilter | Filter for specifying what data should be retrieved from visits. This field is mandatory. |
| timeout | time.Duration | The timeout parameter specifies the maximum amount of time the method can block to wait for a result, in milliseconds. This field is optional; if not provided, the method will use the default timeout value provided when [initializing the SDK](#initialization). |
##### Parameters of GetRemoteVisitorDataWithOptParams
The `GetRemoteVisitorDataWithOptParams` method is deprecated. Please use [`GetRemoteVisitorDataWithFilter`](/developer-docs/sdks/web-sdks/go-sdk#arguments-of-getremotevisitordatawithfilter) and [`UniqueIdentifier`](#uniqueidentifier). instead.
| Name | Type | Description |
| ----------- | ------------------------------------ | ----------------------------------------------------------------------------------------------------------------------- |
| visitorCode | string | The visitor code for which you want to retrieve the assigned data. This field is mandatory. |
| addData | bool | A boolean indicating whether the method should automatically add retrieved data for a visitor. This field is mandatory. |
| filter | types.RemoteVisitorDataFilter | Filter for specifying what data should be retrieved from visits. This field is mandatory. |
| params | kameleoon.RemoteVisitorDataOptParams | Optional parameters. |
Here is the list of `kameleoon.RemoteVisitorDataOptParams` fields:
| Name | Type | Description |
| ------------------------------------------------------- | --------------- | -------------------------------------------------------------------------------------------------------------------------------------------------------------------------------------------------------------------------------------------------------------------- |
| IsUniqueIdentifier optional (Deprecated) | `bool` | A parameter for specifying if the visitorCode is a unique identifier. If not provided, the default value is `false`. |
| Timeout optional | `time.Duration` | The timeout parameter specifies the maximum amount of time the method can block to wait for a result, in milliseconds. This field is optional; if not provided, the method will use the default timeout value provided when [initializing the SDK](#initialization). |
The default value of `kameleoon.RemoteVisitorDataOptParams` which is `types.RemoteVisitorDataFilter{PreviousVisitAmount: 1, CurrentVisit: true, CustomData: true}`, can be gotten with `types.DefaultRemoteVisitorDataFilter()` function.
##### Return value
| Type | Description |
| ------------- | ---------------------------------------------- |
| \[]types.Data | A slice of data assigned to the given visitor. |
| error | An occurred error. |
##### Using parameters in GetRemoteVisitorData()
The `GetRemoteVisitorData()` method offers flexibility by allowing you to define various parameters when retrieving data on visitors. Whether you're targeting based on goals, experiments, or variations, the same approach applies across all data types.
For example, let's say you want to retrieve data on visitors who completed a goal "Order transaction". You can specify parameters within the `GetRemoteVisitorData()` method to refine your targeting. For instance, if you want to target only users who converted on the goal in their last five visits, you can set the `PreviousVisitAmount` parameter to 5 and `Conversions` to true.
The flexibility shown in this example is not limited to goal data. You can use parameters within the `GetRemoteVisitorData()` method to retrieve data on a variety of visitor behaviors.
Here is the list of available `types.RemoteVisitorDataFilter` options:
| Name | Type | Description | Default |
| ------------------------------------------- | ------ | ----------------------------------------------------------------------------------------------------------------------------------------------------------------------------------------------------------------------------------------------------------------------------------------------------------------------------------------------- | ------- |
| PreviousVisitAmount optional | `int` | Number of previous visits to retrieve data from. Number between `1` and `25` | `1` |
| CurrentVisit optional | `bool` | If true, current visit data will be retrieved | `true` |
| CustomData optional | `bool` | If true, custom data will be retrieved. | `true` |
| PageViews optional | `bool` | If true, page data will be retrieved. | `false` |
| Geolocation optional | `bool` | If true, geolocation data will be retrieved. | `false` |
| Device optional | `bool` | If true, device data will be retrieved. | `false` |
| Browser optional | `bool` | If true, browser data will be retrieved. | `false` |
| OperatingSystem optional | `bool` | If true, operating system data will be retrieved. | `false` |
| Conversions optional | `bool` | If true, conversion data will be retrieved. | `false` |
| Experiments optional | `bool` | If true, experiment data will be retrieved. | `false` |
| Kcs optional | `bool` | If true, Kameleoon Conversion Score (KCS) will be retrieved. Requires the [AI Predictive Targeting add-on](/user-manual/ai-predictive-targeting/target-users-based-on-likelihood-to-convert) | `false` |
| VisitorCode optional | `bool` | If true, Kameleoon will retrieve the `visitorCode` from the most recent visit and use it for the current visit. This is necessary if you want to ensure that the visitor, identified by their `visitorCode`, always receives the same variation across visits for [Cross-device experimentation](/developer-docs/cross-device-experimentation). | `true` |
| Personalization optional | `bool` | If true, personalization data will be retrieved. This is required for the personalization condition. | `false` |
| cbs optional | `bool` | If true, Contextual Bandit score data will be retrieved. | `false` |
#### GetVisitorWarehouseAudience()
Retrieves all audience data associated with the visitor in your data warehouse using the specified `VisitorCode` and `WarehouseKey`. The `WarehouseKey` is typically your internal user ID. The `CustomDataIndex` parameter corresponds to the Kameleoon custom data that Kameleoon uses to target your visitors. You can refer to the [warehouse targeting documentation](/user-manual/integrations/data-warehouses/bigquery/use-bigquery-as-a-source-audience-targeting) for additional details. The method returns a `CustomData` object, confirming that the data has been added to the visitor and is available for targeting purposes.
```go theme={null}
customData, err = client.GetVisitorWarehouseAudience(VisitorWarehouseAudienceParams{
VisitorCode: "visitorCode",
CustomDataIndex: 10,
WarehouseKey: "warehouseKey", // optional
Timeout: 5 * time.Second, // optional
})
customData, err = c.GetVisitorWarehouseAudienceWithOptParams(
"visitorCode", 10, VisitorWarehouseAudienceOptParams{WarehouseKey: "warehouseKey", Timeout: 5 * time.Second})
```
##### Parameters of GetVisitorWarehouseAudience
| Name | Type | Description |
| --------------- | ------------- | -------------------------------------------------------------------------------------------------------------------------------------------------------------------------------------------------------------------------------------------------------------------------------------------- |
| VisitorCode | string | A unique visitor identification string, can't exceed 255 characters length. |
| CustomDataIndex | int | An integer representing the index of the custom data you want to use to target your BigQuery Audiences. |
| WarehouseKey | string | A unique key to identify the warehouse data (usually, your internal user ID). This field is optional. |
| Timeout | time.Duration | The timeout parameter specifies the maximum amount of time the method can block to wait for a result, in milliseconds. This field is optional; if not provided, the method will use the default timeout value provided when [initializing the SDK](#initialization). This field is optional. |
##### Parameters of GetVisitorWarehouseAudienceWithOptParams
| Name | Type | Description |
| --------------- | --------------------------------------------- | ------------------------------------------------------------------------------------------------------- |
| visitorCode | string | A unique visitor identification string, can't exceed 255 characters length. |
| customDataIndex | int | An integer representing the index of the custom data you want to use to target your BigQuery Audiences. |
| params | `kameleoon.VisitorWarehouseAudienceOptParams` | Optional parameters. |
Here is the list of `kameleoon.VisitorWarehouseAudienceOptParams` fields:
| Name | Type | Description |
| ------------ | --------------- | ---------------------------------------------------------------------------------------------------------------------------------------------------------------------------------------------------------------------------------------------------------------------------- |
| WarehouseKey | `string` | A unique key to identify the warehouse data (usually, your internal user ID). This field is optional. |
| Timeout | `time.Duration` | The timeout parameter specifies the maximum amount of time the method can block to wait for a result, in milliseconds. This field is optional; if not provided, the method will use the default timeout value provided when \[initializing the SDK]. This field is optional. |
For `GetVisitorWarehouseAudience` method parameters are passed into the function as `params` of struct `VisitorWarehouseAudienceParams` to make some of them optional (`WarehouseKey` and `Timeout`).
For `GetVisitorWarehouseAudienceWithOptParams` method only optional parameters are passed into the function as `params` of struct `VisitorWarehouseAudienceOptParams`.
##### Return value
| Type | Description |
| ------------------ | ------------------------------------------------------------------------------- |
| \*types.CustomData | A `CustomData` instance confirming that the data has been added to the visitor. |
| error | An occurred error. |
#### SetLegalConsent()
You must use this method to specify whether the visitor has given legal consent to use personal data. Setting the `legalConsent` parameter to `false` limits the types of data that you can include in tracking requests. This method helps you adhere to legal and regulatory requirements while responsibly managing visitor data. You can find more information on personal data in the [consent management policy](/user-manual/project-management/consent-management-policy).
```go theme={null}
visitorCode, err := kameleoonClient.GetVisitorCode(req, resp)
err := kameleoonClient.SetLegalConsent(visitorCode, true, resp)
```
##### Parameters
| Name | Type | Description |
| ----------- | ------------------- | ----------------------------------------------------------------------------------------------------------------------------------------------------------------------------------------------------------------------- |
| visitorCode | string | The user's unique identifier. This field is required. |
| consent | bool | A boolean value representing the legal consent status. `true` indicates the visitor has given legal consent, `false` indicates the visitor has never provided, or has withdrawn, legal consent. This field is required. |
| response | \*fasthttp.Response | The HTTP response where values in the cookies will be adjusted based on the legal consent status. This field is optional. |
##### Exceptions thrown
| Type | Description |
| ----------------------- | --------------------------------------------------------------------------------------------------------------------------------------- |
| errs.VisitorCodeInvalid | This error is returned when the visitor code provided is invalid, meaning that it is either empty or its length exceeds 255 characters. |
##### Consent revocation behavior
When you call `SetLegalConsent()` with `consent=false`, the SDK does not delete the `kameleoonVisitorCode` cookie. Instead, it stops extending the cookie's expiration date, allowing the cookie to persist until it naturally expires.
If your compliance requirements demand the immediate removal of the cookie file upon opt-out, you must delete it manually using your framework’s native cookie management methods. The SDK will not remove the file automatically.
### Goals and third-party analytics
#### TrackConversion()
* 📨 *Sends Tracking Data to Kameleoon*
Use this method to track a conversion for a specific [goal](/user-manual/assets/goals/create-a-goal) and user. This method requires `visitorCode` and `goalId`. In addition, this method also accepts an optional `TrackConversionOptParams.Revenue`, `TrackConversionOptParams.Negative` and `TrackConversionOptParams.Metadata` arguments. The `visitorCode` is usually identical to the one that was used when triggering the experiment.
The `TrackConversion()` method doesn't return any value. This method is non-blocking as the server call is made asynchronously.
The parameter `isUniqueIdentifier` is deprecated. Please use [`UniqueIdentifier`](#uniqueidentifier) instead.
The `isUniqueIdentifier` can also be useful in other edge-case scenarios, such as when you can't access the anonymous `visitorCode` that was originally assigned to the visitor, but you do have access to an internal ID that is connected to the anonymous visitor using session merging capabilities.
```go theme={null}
import (
"github.com/Kameleoon/client-go/v3/types"
)
const goalID = 83023
client.TrackConversion(visitorCode, goalID)
client.TrackConversionRevenue(visitorCode, goalID, 10.0)
// Add metadata
client.TrackConversionWithOptParams(visitorCode, goalID, TrackConversionOptParams{
Metadata: []*types.CustomData{
types.NewCustomData(3, "metadata1", "md2"),
types.NewCustomData(5, "md3")
},
})
```
##### Parameters
| Name | Type | Description | Default |
| ----------------------------------------------------------- | --------------- | ------------------------------------------------------------------------------------------------------------------------------------------------------------------------------------------------------------------------------------------------------------------------------------------------------------------------------------ | ------- |
| `visitorCode` required | `string` | Unique identifier of the visitor. | |
| `goalId` required | `int` | ID of the goal. | |
| `TrackConversionOptParams.Revenue` optional | `float64` | Revenue of the conversion. | `0` |
| `TrackConversionOptParams.Negative` optional | `bool` | Defines if the revenue is positive or negative. | `false` |
| `TrackConversionOptParams.Metadata` optional | `[]*CustomData` | Lets you set specific values for custom data which have been defined as metadata for the goal in the Kameleoon App. Example: `[CustomData{id: 5, value: "Payment Type"}, CustomData{id: 6, value: "Delivery Method"}]`. In this example, `5` and `6` are the indexes of the custom data (5 = “Payment Type”, 6 = “Delivery Method”). | `nil` |
| `isUniqueIdentifier` *(deprecated)* | `bool` | An optional parameter for specifying if the visitorCode is a unique identifier. | `false` |
TrackConversionOptParams.Metadata values are accessible through [raw data exports](/user-manual/experiment-analytics/analyze-results/results-page/results-page-actions#Export) and [the results page](/user-manual/experiment-analytics/analyze-results/data-and-metrics/goal-metadata).
If the `TrackConversionOptParams.Metadata` parameter is provided, Kameleoon will use these specified values for the current conversion instead of what was previously collected using the [`AddData()`](#adddata) method. If the parameter is omitted, Kameleoon will use the last tracked values for those [`CustomData`](#customdata) prior to the conversion and within the same visit.
Kameleoon will only consider the metadata values that are explicitly passed as parameters to the `TrackConversion()` method.
In the example below, Kameleoon will associate the conversion only with the custom data value explicitly provided as a parameter (here: index 5 with the value 'Amex Credit Card').
```go theme={null}
kameleoonClient.AddData(visitorCode, types.NewCustomData(5, "Credit Card"), types.NewCustomData(9, "Express Delivery"));
kameleoonClient.TrackConversionWithOptParams(visitorCode, 10, TrackConversionOptParams{
Metadata: []*types.CustomData{
types.NewCustomData(9, "Amex Credit Card"),
},
})
```
##### Exceptions
| Type | Description |
| ------------------------- | ------------------------------------------------------------------------------------------------------------------- |
| `errs.VisitorCodeInvalid` | Exception indicating that the provided visitor code is not valid. It is either empty or longer than 255 characters. |
#### GetEngineTrackingCode()
Kameleoon integrates with several analytics solutions, including Mixpanel, Google Analytics 4, and Segment. To track server-side experiments correctly, call the `GetEngineTrackingCode()` method after the visitor triggers an experiment. The SDK returns JavaScript queue commands for the experiments that the visitor triggered during the previous five seconds. When you insert this code into the page, Engine.js processes the commands and sends the exposure events through the active analytics integration.
Refer to [hybrid experimentation](/developer-docs/feature-experimentation/get-started/hybrid-experimentation) for more information on implementing this method.
```go theme={null}
engineTrackingCode := kameleoonClient.GetEngineTrackingCode(visitorCode)
```
* To use this feature, implement both the Go SDK and Kameleoon [Engine.js](/developer-docs/web-experimentation/implementation-and-deployment/standard-implementation). Because Engine.js is used only for tracking in this flow, you can install the asynchronous tag before the closing `` tag.
* If you only want to track experiments in Kameleoon and do not need to send exposure events to third-party analytics tools, use the [JavaScript / TypeScript SDK](/developer-docs/sdks/web-sdks/js-sdk). This option works well for [serverless edge compute platforms](/developer-docs/feature-experimentation/implementation-and-deployment/serverless-edge-compute-starter-kits). The JavaScript / TypeScript SDK automatically tracks variations when you call [`getVisitorCode`](/developer-docs/sdks/web-sdks/js-sdk#getvisitorcode), as long as you add the corresponding experiment assignments to `window.kameleoonQueue`.
* You can insert the returned tracking code directly into an HTML `
```
In this example, `123456` and `234567` are experiment IDs, and `7890` and `8901` are variation IDs. In your implementation, the SDK generates these values in the returned tracking code.
##### Parameters
| Name | Type | Description |
| ------------------------------------- | -------- | --------------------------------- |
| `visitorCode` required | `string` | Unique identifier of the visitor. |
##### Return value
| Type | Description |
| -------- | ---------------------------------------- |
| `string` | JavaScript code to insert into the page. |
### Events
#### OnUpdateConfiguration()
```go theme={null}
kameleoonClient.OnUpdateConfiguration(
// configuration was updated
)
```
The `OnUpdateConfiguration` method allows you to handle the event when configuration has updated data. It takes one input parameter, **handler**. The handler that will be called when the configuration is updated using a real-time configuration event.
##### Parameters
| Name | Type | Description |
| --------- | -------- | -------------------------------------------------------------------------------------------------------- |
| `handler` | `func()` | The handler that will be called when the configuration is updated using a real-time configuration event. |
### Data types
#### Browser
The `Browser` data set stored here can be used to filter experiment and personalization reports by any value associated with it.
| Name | Type | Description |
| ------------------------------------- | ------------- | ------------------------------------------------------------------------------------------------------------------------------------------ |
| `browserType` required | `BrowserType` | List of browsers: `BrowserTypeChrome`, `BrowserTypeIE`, `BrowserTypeFirefox`, `BrowserTypeSafari`, `BrowserTypeOpera`, `BrowserTypeOther`. |
| `version` optional | `float32` | Version of the browser, floating point number represents major and minor version of the browser |
```go theme={null}
client.AddData(visitorCode, types.NewBrowser(types.BrowserTypeChrome))
client.AddData(visitorCode, types.NewBrowser(types.BrowserTypeSafari, 16.0))
```
#### Conversion
The `Conversion` data set stored here can be used to filter experiment and personalization reports by any goal associated with it.
* Each visitor can have multiple `Conversion` objects.
* You can find the `goalId` in the Kameleoon app.
| Name | Type | Description | Default |
| ------------------------------------------------------ | --------------------- | ----------------------------------------------- | ------- |
| `goalId` required | `int` | ID of the goal. | |
| `ConversionOptParams.Revenue` optional | `float64` | Revenue of the conversion | `0` |
| `ConversionOptParams.Negative` optional | `bool` | Defines if the revenue is positive or negative. | `false` |
| `ConversionOptParams.Metadata` optional | `[]*types.CustomData` | Metadata of the conversion. | `nil` |
```go theme={null}
client.AddData(visitorCode, types.NewConversion(32, true))
client.AddData(visitorCode, types.NewConversionWithRevenue(33, 10.0, false))
client.AddData(
visitorCode,
types.NewConversionWithOptParams(34, types.ConversionOptParams{
Revenue: 5.0,
Metadata: []*types.CustomData{
types.NewCustomData(3, "metadata1", "md2"),
types.NewCustomData(5, "md3"),
},
}),
)
```
```go theme={null}
client.AddData(visitorCode, types.NewConversion(32, false))
client.AddData(visitorCode, types.NewConversionWithRevenue(32, 10, false))
```
#### Cookie
`Cookie` contains information about the cookie stored on the visitor's device.
| Name | Type | Description |
| ------- | ------------------- | --------------------------------------------------------------------------------- |
| cookies | `map[string]string` | A string object map consisting of cookie keys and values. This field is required. |
Each visitor can only have one `Cookie`. Adding second `Cookie` overwrites the first one.
```go theme={null}
cookie := types.NewCookie(map[string]string{
"k1": "v1",
"k2": "v2",
})
client.AddData(visitorCode, cookie)
```
#### Geolocation
`Geolocation` contains the visitor's geolocation details.
| Name | Type | Description |
| ------------------------------------ | --------------------- | ---------------------------------------------------------------------------------------------------------------- |
| `country` required | `string` | The country of the visitor. |
| `region` optional | `string` | The region of the visitor. |
| `city` optional | `string` | The city of the visitor. |
| `postalCode` optional | `string` | The postal code of the visitor. |
| `latitude` optional | `float64` | The latitude coordinate representing the location of the visitor. Coordinate number represents decimal degrees. |
| `longitude` optional | `float64` | The longitude coordinate representing the location of the visitor. Coordinate number represents decimal degrees. |
* Each visitor can have only one `Geolocation`. Adding a second `Geolocation` overwrites the first one.
```go theme={null}
client.AddData(visitorCode, types.NewGeolocation("France", "Île-de-France", "Paris"))
client.AddData(visitorCode, types.NewGeolocationWithCoords(48.856667, 2.352222, "France", "Île-de-France", "Paris"))
```
#### CustomData
`CustomData` allows any type of data to be easily associated with each visitor. It can then be used as a targeting condition in [segments](/user-manual/assets/segments/create-a-segment/) or as a filter/breakdown in experiment reports. To learn more about custom data, please refer to this [article](/developer-docs/custom-data).
| Name | Type | Description | Default |
| ---------------------------------- | -------------- | --------------------------------------------------------------------------------------------------------------------------------------------------------------------------------------- | ------- |
| index/name required | `int`/`string` | Index or Name of the custom data. **Either `index` or `name` must be provided** to identify the data. | |
| values required | `...string` | The values of the custom data to be stored. | |
| overwrite optional | `bool` | Flag to explicitly control how the values are stored and how they appear in reports. [See more](/developer-docs/custom-data#default-logic-when-overwrite-parameter-is-false-or-omitted) | `true` |
```go theme={null}
client.AddData(visitorCode, types.NewCustomData(1, "value"))
// With several values
client.AddData(visitorCode, types.NewCustomData(1, "value1", "value2"))
// To set the 'overwrite' flag to false
client.AddData(
visitorCode,
types.NewCustomDataWithOptParams(1, NewCustomDataOptParams().Overwrite(false), "value"),
)
// To use a name instead of the index
client.AddData(visitorCode, types.NewNamedCustomData("my-custom-data", "value"))
// To use a name instead of the index
// and set the 'overwrite' flag to false
client.AddData(
visitorCode,
types.NewNamedCustomDataWithOptParams("my-custom-data", NewCustomDataOptParams().Overwrite(false), "value"),
)
```
* Each visitor is allowed only one `CustomData` for each unique `index`. Adding another `CustomData` with the same `index` will replace the existing one.
* The custom data ‘index’ can be found in the [Custom Data dashboard](/user-manual/assets/custom-data/manage-custom-data) under the “INDEX” column.
* To prevent the SDK from sending data with the selected index to Kameleoon servers for privacy reasons, enable the option: **Use this data only locally for targeting purposes** when creating custom data.
* Adding a `CustomData` instance created with a name when the SDK instance configuration is not up to date or the name is not registered, will result in the data being ignored.
#### Device
You can use device data to filter experiment or personalization reports by any associated value.
###### NewDevice
| Name | Type | Description |
| ---------- | ---------- | ----------------------------------------------------------------------------- |
| deviceType | DeviceType | List of devices: **Phone**, **Tablet**, **Desktop**. This field is mandatory. |
```go theme={null}
client.AddData(visitorCode, types.NewDevice(types.DeviceTypeDesktop))
```
#### OperatingSystem
`OperatingSystem` contains information about the operating system on the visitor's device.
##### NewOperatingSystem
| Name | Type | Description |
| ---- | --------------------------- | ------------------------------------------------------------------------------------------------------------------------------ |
| type | `types.OperatingSystemType` | List of operating systems: **Windows**, **Mac**, **iOS**, **Linux**, **Android** and **WindowsPhone**. This field is required. |
Each visitor can only have one `OperatingSystem`. Adding a second `OperatingSystem` overwrites the first one.
```go theme={null}
client.AddData(visitorCode, types.NewOperatingSystem(types.OperatingSystemTypeWindows))
```
#### PageView
You can use pageview data to filter experiment or personalization reports by any associated value.
The index or ID of the [referrer](/user-manual/assets/advanced-targeting-tools/create-an-acquisition-channel) can be found in your Kameleoon account. It is important to note that this index starts at 0. This means the first acquisition channel you create for a given site will be assigned 0 as its ID, not 1.
##### NewPageView
| Name | Type | Description |
| --------- | ------ | ---------------------------------------------------------- |
| url | string | The URL of the page viewed. This field is mandatory. |
| referrers | ...int | The referrers of the viewed pages. This field is optional. |
##### NewPageViewWithTitle
| Name | Type | Description |
| --------- | ------ | ---------------------------------------------------------- |
| url | string | The URL of the page viewed. This field is mandatory. |
| title | string | The title of the page viewed. This field is mandatory. |
| referrers | ...int | The referrers of the viewed pages. This field is optional. |
```go theme={null}
client.AddData(visitorCode, types.NewPageView("https://url.com", 3))
client.AddData(visitorCode, types.NewPageViewWithTitle("https://url.com", "title", 3))
```
#### UserAgent
Server-side experiments are more likely to be affected by bot traffic than client-side experiments. Kameleoon uses the IAB/ABC International Spiders and Bots List to tackle this issue and recognize known bots and spiders. Kameleoon also uses the `UserAgent` field to filter out bots and other unwanted traffic that might distort your conversion metrics. For more details, see our help article on [bot filtering](/user-manual/faq#how-does-kameleoon-filter-bot-traffic-from-my-results).
If you use internal bots, we suggest that you pass the value **curl/8.0** of the userAgent to exclude them from our analytics.
##### NewUserAgent
| Name | Type | Description |
| ----- | ------ | --------------------------------------------------------------------------------------- |
| value | string | The User-Agent value that will be sent with tracking requests. This field is mandatory. |
```go theme={null}
client.AddData(visitorCode, types.NewUserAgent("visitor_user_agent"))
```
#### UniqueIdentifier
If you don't add `UniqueIdentifier` for a visitor, `visitorCode` is used as the unique visitor identifier, which is useful for [Cross-device experimentation](/developer-docs/cross-device-experimentation). When you add `UniqueIdentifier` for a visitor, the SDK links the flushed data with the visitor associated with the specified identifier.
The `isUniqueIdentifier` can be helpful in unique situations; for example, if you cannot access the anonymous `visitorCode` given to a visitor, but you can use an internal ID linked to that visitor through session merging.
##### NewUniqueIdentifier
| Name | Type | Description |
| ----- | ---- | ---------------------------------------------------------------------------------------------- |
| value | bool | Parameter for specifying if the visitor\_code is a unique identifier. This field is mandatory. |
```go theme={null}
client.AddData(visitorCode, types.NewUniqueIdentifier(true))
```
#### ApplicationVersion
`ApplicationVersion` represents the semantic version number of your application.
A **visitor** can have only one `ApplicationVersion`. Adding a second instance will overwrite the first one.
##### NewApplicationVersion
| Name | Type | Description |
| ------------------------------- | -------- | ------------------------------------------------------------------------------------------------------------------------------------------------ |
| version optional | `string` | The mobile application version. This field must follow semantic versioning. Accepted formats are `major`, `major.minor`, or `major.minor.patch`. |
```go theme={null}
client.AddData(visitorCode, types.NewApplicationVersion("10")) // major
client.AddData(visitorCode, types.NewApplicationVersion("10.20")) // major.minor
client.AddData(visitorCode, types.NewApplicationVersion("10.20.30")) // major.minor.patch
```
### Returned Types
#### DataFile
The `DataFile` contains the SDK configuration details.
It can be extended with additional information if required by clients. If you need more details, please contact your Customer Success Manager.
| Name | Type | Description |
| -------------- | ------------------------ | --------------------------------------------------------------------------------- |
| `FeatureFlags` | `map[string]FeatureFlag` | A map of [`FeatureFlag`](#featureflag) objects, keyed by feature flag keys. |
| `DateModified` | `int64` | The timestamp (in milliseconds) indicating when the `DataFile` was last modified. |
```go theme={null}
// Retrieves the map of feature flags from the DataFile.
// The map is keyed by feature flag identifiers, with each value being a FeatureFlag object.
featureFlags := dataFile.FeatureFlags
// Retrieves the last modification timestamp of the DataFile.
// The value is an int64 representing milliseconds since the Unix epoch.
dateModified := dataFile.DateModified
```
#### FeatureFlag
The `FeatureFlag` represents a set of properties that define a feature flag itself — for example, its [`Variations`](#variation), [`Rules`](#rule), environment status, and other related details.
It can be extended with additional information if required by clients. If you need more details, please contact your Customer Success Manager.
| Name | Type | Description |
| ---------------------- | ---------------------- | -------------------------------------------------------------------------- |
| `IsEnvironmentEnabled` | `bool` | Indicating whether the feature flag is enabled in the current environment. |
| `DefaultVariationKey` | `string` | The key of the default variation associated with the feature flag. |
| `Variations` | `map[string]Variation` | A map of `Variation` objects, keyed by variation keys. |
| `Rules` | `[]Rule` | A list of `Rule` objects |
```go theme={null}
// Check whether the feature flag is enabled in the current environment
isEnvironmentEnabled := featureFlag.IsEnvironmentEnabled
// Retrieve the key of the default variation
defaultVariationKey = featureFlag.DefaultVariationKey
// Retrieve the default variation object
defaultVariation := featureFlag.DefaultVariation()
// Retrieve all variations of the feature flag as a map (key = variation key, value = Variation object)
variations := featureFlag.Variations
// Retrieve all targeting rules associated with the feature flag
rules := featureFlag.Rules
```
#### Rule
The `Rule` represents a set of properties that define a rule itself — for example, its [`Variations`](#variation).
It can be extended with additional information if required by clients. If you need more details, please contact your Customer Success Manager.
| Name | Type | Description |
| ------------ | ---------------------- | ------------------------------------------------------ |
| `Variations` | `map[string]Variation` | A map of `Variation` objects, keyed by variation keys. |
```go theme={null}
// Retrieve all variations of the rule as a map (key = variation key, value = Variation object)
variations := rule.Variations
```
#### Variation
`Variation` contains information about the visitor's assigned variation (or the default variation, if no specific assignment exists).
| Name | Type | Description |
| ------------ | --------------------- | ---------------------------------------------------------------------------------------------------------------------------------------------------- |
| Name | `string` | The name of the variation. |
| Key | `string` | The unique key identifying the variation. |
| VariationID | `*int` | The ID of the assigned variation (or `nil` if it's the default variation). |
| ExperimentID | `*int` | The ID of the experiment associated with the variation (or `nil` if default). |
| Variables | `map[string]Variable` | A map containing the variables of the assigned variation, keyed by variable names. This could be an empty collection if no variables are associated. |
* The `Variation` object provides details about the assigned variation and its associated experiment, while the [`Variable`](#variable) object contains specific details about each variable within a variation.
* Ensure that your code handles the case where `VariationID` or `ExperimentID` may be `nil`, indicating a default variation.
* The `Variables` map might be empty if no variables are associated with the variation.
```go theme={null}
// Retrieving the variation name
var variationName string = variation.Name
// Retrieving the variation key
var variationKey string = variation.Key
// Retrieving the variation id
var variationID *int = variation.VariationID
// Retrieving the experiment id
var experimentID *int = variation.ExperimentID
// Retrieving the variables map
var variables map[string]Variable = variation.Variables
```
#### Variable
`Variable` contains information about a variable associated with the assigned variation.
| Name | Type | Description |
| ----- | ------------- | ----------------------------------------------------------------------------------------------------------------------------- |
| Key | `string` | The unique key identifying the variable. |
| Type | `string` | The type of the variable. Possible values: **BOOLEAN**, **NUMBER**, **STRING**, **JSON**, **JS**, **CSS**. |
| Value | `interface{}` | The value of the variable, which can be of the following types: **bool**, **int**, **float**, **string**, **map**, **array**. |
```go theme={null}
// Retrieving the variables map
var variables map[string]Variable = variation.Variables
// Variable type can be retrieved for further processing
var variableType string = variables["isDiscount"].Type
// Retrieving the variable value by key
var isDiscount bool = variables["isDiscount"].Value.(bool)
// Variable value can be of different types
var title string = variables["title"].Value.(string)
```
### Deprecated methods
These methods are deprecated and will be removed in SDK version `4.0.0`.
#### GetFeatureVariationKey()
* 📨 *Sends Tracking Data to Kameleoon*
Use [`GetVariation()`](#getvariation) instead.
This method retrieves the configuration of a [feature experiment](/user-manual/experimentation/feature-experimentation/using-the-rollout-planner/optimizations-and-scheduling/create-feature-experiments) with several feature variations. You can use it to get a variation key for a given user by providing the **visitorCode** and **featureKey** as mandatory arguments.
If the user has never been associated with the feature flag, the SDK returns a variation key randomly, following the feature flag rules. If the user is already registered with the feature flag, the SDK detects the previous **variation key** value. If the user doesn't match any of the rules, the default value defined in Kameleoon's feature flag delivery rules will be returned. It's important to note that the default value may not be a variation key, but a boolean value or another data type, depending on the feature flag configuration.
Don't forget to handle potential exceptions with proper error handling in your code. See the example code for guidance.
If you specify a `visitorCode`, the `GetFeatureVariationKey` method uses it as the unique visitor identifier, which is useful for [cross-device experimentation](/developer-docs/cross-device-experimentation). When you specify a `visitorCode` and set the `isUniqueIdentifier` parameter to `true`, the SDK links the flushed data with the visitor associated with the specified identifier.
The parameter `isUniqueIdentifier` is deprecated. Please use [`UniqueIdentifier`](#uniqueidentifier) instead.
The `isUniqueIdentifier` can be helpful in unique situations; for example, if you cannot access the anonymous `visitorCode` given to a visitor, but you can use an internal ID linked to that visitor through session merging.
```go theme={null}
// Feature Experiment with variations
const variationKey = ""
if variationKey, err := s.client.GetFeatureVariationKey(visitorCode, featureKey); err == nil {
switch variationKey {
case "variation 1":
// The visitor has been bucketed with variation 1 key.
case "variation 2":
// The visitor has been bucketed with variation 2 key.
default:
//The visitor has been bucketed with the default variation or is part of the unallocated traffic sample.
}
} else {
// An error occurred; the feature flag key has not been found in the current configuration fetched by the SDK.
}
```
##### Parameters
| Name | Type | Description |
| ------------------------------- | ------ | ------------------------------------------------------------------------------------------------------------------------------------------- |
| visitorCode | string | The user's unique identifier. This field is mandatory. |
| featureKey | string | The key of the feature you want to expose to a user. This field is mandatory. |
| isUniqueIdentifier (Deprecated) | bool | A parameter for specifying if the visitorCode is a unique identifier. If not provided, the default value is `false`. The field is optional. |
##### Return value
| Type | Description |
| ------ | --------------------------------------------------------------------------------- |
| string | Variation key of the feature flag that is registered for a given **visitorCode**. |
##### Exceptions thrown
| Type | Description |
| ------------------------------- | ----------------------------------------------------------------------------------------------------------------------------------------------------------------------------------------------------------------------------------------------------------------------------------------------------------------------------------------------------------- |
| errs.FeatureConfigNotFound | This error indicates that the requested feature key could not be found in the internal configuration of the SDK. This typically occurs when the feature flag has not yet been retrieved by the SDK, which can happen if the SDK is in [polling](/developer-docs/feature-experimentation/technical-reference/technical-considerations#polling-default) mode. |
| errs.VisitorCodeInvalid | This error is returned when the visitor code provided is invalid, meaning that it is either empty or its length exceeds 255 characters. |
| errs.FeatureEnvironmentDisabled | This error indicates that the feature flag is disabled for the current environment. |
#### GetActiveFeatureListForVisitor()
Use [`GetActiveFeatures()`](#getactivefeatures) instead.
The `GetActiveFeatureListForVisitor()` method takes a `visitorCode` parameter. When you call this method with a specific `visitorCode`, the method returns a list of feature flag keys that are available for that `visitorCode`.
Don't forget to handle potential exceptions with proper error handling in your code. For example, see the following code:
```go theme={null}
arrayFeatureFlagKeys, err := client.GetActiveFeatureListForVisitor(visitorCode)
```
##### Arguments
| Name | Type | Description |
| ----------- | ------ | ------------------------------------------------------ |
| visitorCode | string | The user's unique identifier. This field is mandatory. |
##### Return value
| Type | Description |
| --------- | ----------------------------------------------------------------------- |
| \[]string | List of feature flag keys that are active for a specific `visitorCode`. |
##### Exceptions thrown
| Type | Description |
| ----------------------- | --------------------------------------------------------------------------------------------------------------------------------------- |
| errs.VisitorCodeInvalid | This error is returned when the visitor code provided is invalid, meaning that it is either empty or its length exceeds 255 characters. |
#### GetActiveFeatures()
Use [`GetVariations()`](#getvariations) instead.
The `GetActiveFeatures()` method retrieves information about the active feature flags that are available for the specified visitor code.
Don't forget to handle potential exceptions with proper error handling in your code. For example, see the following code:
```go theme={null}
activeFeatures, err := client.GetActiveFeatures(visitorCode)
```
##### Arguments
| Name | Type | Description |
| ----------- | ------ | ------------------------------------------------------ |
| visitorCode | string | The user's unique identifier. This field is mandatory. |
##### Return value
| Type | Description |
| --------------------------- | ------------------------------------------------------------------------------------------------------ |
| map\[string]types.Variation | Map that contains the assigned variations of the active features using the active feature IDs as keys. |
##### Exceptions thrown
| Type | Description |
| ----------------------- | --------------------------------------------------------------------------------------------------------------------------------------- |
| errs.VisitorCodeInvalid | This error is returned when the visitor code provided is invalid, meaning that it is either empty or its length exceeds 255 characters. |
#### GetFeatureVariable()
* 📨 *Sends Tracking Data to Kameleoon*
Use [`GetVariation()`](#getvariation) instead.
To get a [feature variable](/user-manual/experimentation/feature-experimentation/configure-your-feature-flags/define-feature-variables) of a variation key associated with a user, call the `GetFeatureVariable()` method of our SDK.
This method takes a **visitorCode**, **featureKey** and **variableKey** as mandatory arguments to get a variable of the variation key for a given user.
If the user has never been associated with the feature flag, the SDK returns a variable value of the variation key randomly, following the feature flag rules. If the user is already registered with the feature flag, the SDK detects the previous **variation key** value and returns the **variable** value. If the user doesn't match any of the rules, the default value will be returned.
Don't forget to handle potential exceptions with proper error handling in your code. See the example code for guidance.
The parameter `isUniqueIdentifier` is deprecated. Please use [`UniqueIdentifier`](#uniqueidentifier) instead.
The `isUniqueIdentifier` can be helpful in unique situations; for example, if you cannot access the anonymous `visitorCode` given to a visitor, but you can use an internal ID linked to that visitor through session merging.
```go theme={null}
visitorCode, err := client.GetVisitorCode(req, resp)
featureKey := "featureKey"
variableKey = "variableKey"
if variableValue, err := s.client.GetFeatureVariable(visitorCode, featureKey, variableKey); err == nil {
// your custom code depending on variableValue
} else {
// An error occurred; the feature flag has not been found in the current configuration fetched by the SDK.
}
```
##### Parameters
| Name | Type | Description |
| ------------------------------- | ------ | ------------------------------------------------------------------------------------------------------------------------------------------- |
| visitorCode | string | The user's unique identifier. This field is mandatory. |
| featureKey | string | The key of the feature you want to expose to a user. This field is mandatory. |
| variableKey | string | The name of the variable for which you want to get a value. This field is mandatory. |
| isUniqueIdentifier (Deprecated) | bool | A parameter for specifying if the visitorCode is a unique identifier. If not provided, the default value is `false`. The field is optional. |
##### Return value
| Type | Description |
| --------- | ----------------------------------------------------------------------------------------------------------------------------------------------------------------------------------------------- |
| interface | The value of a variable associated with a particular feature flag's variation that has been registered for a specific visitorCode. Possible types: bool, float64, string, map\[string]interface |
##### Exceptions thrown
| Type | Description |
| ------------------------------- | ------------------------------------------------------------------------------------------------------------------------------------------------------------------------------------------------------------------------------------------------------------------------------------------------------------------------------------------------------- |
| errs.FeatureConfigNotFound | This error indicates that the requested feature key could not be found in the SDK's internal configuration. This typically occurs when the feature flag has not yet been retrieved by the SDK, which can happen if the SDK is in [polling](/developer-docs/feature-experimentation/technical-reference/technical-considerations#polling-default) mode. |
| errs.VisitorCodeInvalid | This error is returned when the visitor code provided is invalid, meaning that it is either empty or its length exceeds 255 characters. |
| errs.FeatureVariationNotFound | This error indicates that the requested variation ID could not be found in the SDK's internal configuration. This typically occurs when the feature flag has not yet been retrieved by the SDK, which can happen if the SDK is in [polling](/developer-docs/feature-experimentation/technical-reference/technical-considerations#polling-default) mode. |
| errs.FeatureVariableNotFound | This error indicates that the requested variable key has not been found. Check that the variable's key defined in the Kameleoon Platform matches the one in your code. |
| errs.FeatureEnvironmentDisabled | This error indicates that the feature flag is disabled for the current environment. |
#### GetFeatureVariationVariables()
Use [`GetVariation()`](#getvariation) instead.
To retrieve all variables associated with a feature flag, you must call the `GetFeatureVariationVariables` method. This method requires two mandatory arguments: **featureKey** and **variationKey**. The method returns the data with the object type, as defined in the Kameleoon Platform.
Don't forget to handle potential exceptions with proper error handling in your code. Check out the example code for guidance.
```go theme={null}
featureKey := "test_feature_variables"
variationKey := "on"
if allVariables, err := s.client.GetFeatureVariationVariables(featureKey, variationKey); err == nil {
// your custom code
} else {
// An error occurred; the feature flag or variation doesn't exist in the client configuration
}
```
##### Parameters
| Name | Type | Description |
| ------------ | ------ | ------------------------------------------------------------------------ |
| featureKey | string | The key of the feature flag you want to obtain. This field is mandatory. |
| variationKey | string | The key of the variation you want to obtain. This field is mandatory. |
##### Return value
| Type | Description |
| --------------------- | -------------------------------------------------------------------------------------------------------------------------------------------------------------------------------- |
| map\[string]interface | Data associated with this feature flag and variation. Possible values: string, bool, float64 or map\[string]interface (depending on the type defined in the Kameleoon Platform). |
##### Exceptions thrown
| Type | Description |
| ------------------------------- | -------------------------------------------------------------------------------------------------------------------------------------------------------------------------------------------------------------------------------------------------------------------------------------------------------------------------------------------------------- |
| errs.FeatureConfigNotFound | This error indicates that the requested feature key could not be found in the SDK's internal configuration. This typically occurs when the feature flag has not yet been retrieved by the SDK, which can happen if the SDK is in [polling](/developer-docs/feature-experimentation/technical-reference/technical-considerations#polling-default) mode. |
| errs.FeatureVariationNotFound | This error indicates that the requested variation key could not be found in the SDK's internal configuration. This typically occurs when the feature flag has not yet been retrieved by the SDK, which can happen if the SDK is in [polling](/developer-docs/feature-experimentation/technical-reference/technical-considerations#polling-default) mode. |
| errs.FeatureEnvironmentDisabled | This error indicates that the feature flag is disabled for the current environment. |
#### GetFeatureList()
Returns a list of feature flag keys currently available for the SDK.
```go theme={null}
arrayFeatureKeys := client.GetFeatureList()
```
##### Return value
| Type | Description |
| ---------- | ------------------------- |
| `[]string` | List of feature flag keys |
# Java SDK
Source: https://docs.kameleoon.com/developer-docs/sdks/web-sdks/java-sdk
Integrate the Kameleoon Java SDK to run experiments and activate feature flags on Java EE or Jakarta EE application servers.
With the Kameleoon Java SDK, you can run experiments and activate feature flags on your Java EE / Jakarta EE application server.
**Getting started**: For help getting started, see the [developer guide](#developer-guide)
**Changelog**: Latest version of the Java SDK: 4.22.0 [Changelog](https://github.com/Kameleoon/client-java/blob/master/CHANGELOG.md).
**SDK methods**: For the full reference documentation of the Java SDK, see the [reference](#reference) section.
## Developer guide
This guide is designed to help you integrate our SDK in a few minutes and start running experiments in your Java applications.
### Getting started
#### Starter kit
To help with getting started, Kameleoon provides a starter kit and demo application to test the SDK. The starter kit includes a fully configured app with examples demonstrating how SDK methods can be used in an app. The starter kit, demo application, and detailed instructions are available at [Starter kit for Java](https://github.com/Kameleoon/java-examples)
#### Install the Java client
The installation package is available on the Maven Central repository. You can install the Java SDK by adding a dependency into your project's `pom.xml` file, as shown in the example to the right. If you're using another project management system, see the [integrations](https://search.maven.org/artifact/com.kameleoon/kameleoon-client-java) page for additional examples.
```java title="pom.xml" theme={null}
com.kameleoon
kameleoon-client-java
4.16.0
```
```java title="pom.xml" theme={null}
com.kameleoon
kameleoon-client-java-jakarta
4.16.0
```
#### Additional configuration
Create a `.properties` configuration file to provide credentials and customize SDK behavior. You can also [download our sample configuration](/assets/developer-docs/sdks/web-sdks/client-configs/client-java.properties) file.
We recommend saving this file to the default path, `/etc/kameleoon/client-java.conf`, but you can save it anywhere in the classpath as `kameleoon-client-java.properties`.
The following table shows the available properties that you can set:
| Key | Description | Default value |
| ---------------------------------------------------------------------------- | ---------------------------------------------------------------------------------------------------------------------------------------------------------------------------------------------------------------------------------------------------------------------------------------------------------------------------------------------------------------------------------------------------------------------------------------------------------------------------------------------------------------------------------------------------------------------------------------------------------------------------- | -------------------- |
| `clientId` / `client_id` required | Required for authentication to the Kameleoon service. To find your `client_id`, see the [API credentials](/user-manual/account-and-team-management/users-and-teams/api-credentials) documentation. | |
| `clientSecret` / `client_secret` required | Required for authentication to the Kameleoon service. To find your `client_secret`, see the [API credentials](/user-manual/account-and-team-management/users-and-teams/api-credentials) documentation. | |
| `sessionDuration` / `session_duration_minute` optional | Designates the predefined time interval that Kameleoon stores the visitor and their associated data in memory (RAM). Note that increasing the session duration increases the amount of RAM that needs to be allocated to store visitor data. | `30` minutes |
| `refreshInterval` / `refresh_interval_minute` optional | Specifies the refresh interval, in minutes, that the SDK fetches the configuration for the active experiments and feature flags. The value determines the maximum time it takes to propagate changes, such as activating or deactivating feature flags or launching experiments, to your production servers. Additionally, we offer a [streaming mode](/developer-docs/feature-experimentation/technical-reference/technical-considerations/#streaming-premium-option) that uses server-sent events (SSE) to push new configurations to the SDK automatically and apply new configurations in real-time, without any delays. | `60` minutes |
| `defaultTimeout` / `default_timeout_millisecond` optional | Specifies the timeout, in milliseconds, for network requests from the SDK. Set the value to 30 seconds or more if you do not have a stable connection. Some methods have an additional parameter that you can use to override the default timeout for that particular method. If you do not specify the timeout for a method explicitly, the SDK uses this default value. | `10000` milliseconds |
| `trackingInterval` / `tracking_interval_millisecond` optional | Specifies the interval for tracking requests in milliseconds. All visitors who Kameleoon evaluated for any feature flag or had data flushed are included in this tracking request, which the SDK performs once per interval. The minimum value is `1000` ms, which is also the default, and the maximum value is `5000` ms. | `1000` milliseconds |
| `environment` / `environment` optional | Environment from which the feature flag’s configuration is to be used. The value can be `production`, `staging`, `development`. See the [managing environments](/user-manual/experimentation/feature-experimentation/configure-your-feature-flags/manage-environments) article for details. | `production` |
| `topLevelDomain` / `top_level_domain` *(required in hybrid mode)* | The current top-level domain for your website . Use the format: `example.com`. Don't include `https://`, `www`, or other subdomains. Kameleoon uses this information to set the corresponding cookie on the top-level domain. | `null` |
| `proxyHost` / `proxy_host` optional | Sets the proxy host for all outgoing server calls made by the SDK. | `null` |
| `networkDomain` / `network_domain` optional | Custom domain used by SDKs for outgoing requests, often for proxying. Must be a valid domain (e.g., example.com or sub.example.com). Invalid formats default to Kameleoon's value. | `null` |
#### Initialize the Kameleoon client
After you've installed the SDK into your application and configured your credentials and SDK behavior (in `/etc/kameleoon/client-java.conf`), the next step is creating the Kameleoon client in your application code. For example:
```java theme={null}
import com.kameleoon.KameleoonClientFactory;
String siteCode = "a8st4f59bj";
try {
KameleoonClient kameleoonClient = KameleoonClientFactory.create(siteCode, "custom/file/path/client-java.properties");
} catch (KameleoonException.SiteCodeIsEmpty e) {
// indicates that provided site code is empty
} catch (KameleoonException.ConfigCredentialsInvalid exception) {
// indicates that provided clientId / clientSecret are not valid
}
try {
KameleoonClientConfig config = new KameleoonClientConfig.Builder()
.clientId("") // mandatory
.clientSecret("") // mandatory
.refreshInterval(60) // in minutes, optional (60 minutes by default)
.sessionDuration(30) // in minutes, optional (30 minutes by default)
.defaultTimeout(10_000) // in milliseconds, optional (10000 ms by default)
.trackingInterval(1000) // in milliseconds, optional (1000 ms by default)
.topLevelDomain("example.com") // mandatory if you use hybrid mode (engine or web experiments)
.environment("development") // optional
.proxyHost(new HttpHost("192.168.0.25", 8080, "http")) // optional
.networkDomain("example.com") // optional
.build();
KameleoonClientFactory.create(siteCode, config);
} catch (KameleoonException.SiteCodeIsEmpty e) {
// indicates that provided site code is empty
} catch (KameleoonException.ConfigCredentialsInvalid exception) {
// indicates that provided clientId / clientSecret are not valid
}
```
A KameleoonClient is a singleton object that bridges your application and the Kameleoon platform. It includes all the methods and properties you need to run an experiment. Note that we also support the use of an HTTP proxy in the Java SDK (see the [`create()` method reference](#create) for details).
It's your responsibility to ensure the proper logic of your application code within the context of A/B testing via Kameleoon. A good practice is to always assume that you can exclude the current visitor from the experiment if you haven't launched the experiment. This exclusion is simple because it corresponds to the implementation of the default and reference variation logic.
You're now ready to begin creating and implementing experiments and feature flagging.
#### Activating a feature flag
##### Assigning a unique ID to a user
To assign a unique ID to a user, you can use the [`getVisitorCode()`](#getvisitorcode) method. If a **visitor code** doesn’t exist (from the request headers cookie), the method generates a random unique ID or uses a `defaultVisitorCode` that you would have generated. The ID is then set in a response headers cookie.
If you are using Kameleoon in [Hybrid mode](/developer-docs/feature-experimentation/get-started/hybrid-experimentation), calling the `getVisitorCode()` method ensures that the unique ID (**visitor code**) is shared between the application file `engine.js` (previously named, `kameleoon.js`) and the SDK.
##### Retrieving a flag configuration
To implement a feature flag in your code, you must first create the feature flag in your Kameleoon account.
To determine the status or variation of a feature flag for a specific user, you should use the [`getVariation()`](#getvariation) or [`isFeatureActive()`](#isfeatureactive) method to retrieve the configuration based on the `featureKey`.
The `getVariation()` method handles both simple feature flags with ON/OFF states and more complex flags with multiple variations. The method retrieves the appropriate variation for the user by checking the feature rules, assigning the variation, and returning it based on the `featureKey` and `visitorCode`.
The `isFeatureActive()` method can be used if you want to retrieve the configuration of a simple feature flag that has only an ON or OFF state, as opposed to more complex feature flags with multiple variations or targeting options.
If your feature flag has associated variables (such as specific behaviors tied to each variation) `getVariation()` also enables you to access the [`Variation`](#variation) object, which provides details about the assigned variation and its associated experiment. This method checks whether the user is targeted, finds the visitor’s assigned variation, and saves it to storage. When `track=true`, the SDK will send the exposure event to the specified experiment on the next tracking request, which is automatically triggered based on the SDK’s [`tracking_interval_millisecond`](#additional-configuration). By default, this interval is set to 1000 milliseconds (1 second).
The `getVariation()` method allows you to control whether tracking is done. If `track=false`, no exposure events will be sent by the SDK. This is useful if you prefer not to track data through the SDK and instead rely on client-side tracking managed by the Kameleoon engine, for example. Additionally, setting `track=false` is helpful when using the `getVariations()` method, where you might only need the variations for all flags without triggering any tracking events. If you want to know more about how tracking works, view [this article](/developer-docs/feature-experimentation/technical-reference/faq-global#when-does-the-sdk-send-a-tracking-request-for-analytics)
##### Adding data points to target a user or filter / breakdown visits in reports
To target a user, ensure you've added relevant data points to their profile before retrieving the feature variation or checking if the flag is active. Use the [`addData()`](#adddata) method to add these data points to the user's profile.
To retrieve data points collected on other devices or to access past user data (collected client-side when using Kameleoon in Hybrid mode), use the [`getRemoteVisitorData()`](#getremotevisitordata) method. This method asynchronously fetches data from the servers. It is important to call `getRemoteVisitorData()` *before* retrieving the variation or checking if the feature flag is active, as this data might be required to assign a user to a given variation.
To learn more about available targeting conditions, see the [detailed article on the subject](/developer-docs/feature-experimentation/targeting-and-segmentation/native-segmentation).
Additionally, the data points you add to the visitor profile will be available when analyzing your experiments, allowing you to filter and break down your results by factors like device and browser. Kameleoon Hybrid mode automatically collects a variety of data points on the client-side, making it easy to break down your results based on these pre-collected data points. See the complete list [here](/user-manual/experiment-analytics/analyze-results/results-page/results-page-settings#breakdown-audience).
If you need to track additional data points beyond what's automatically collected, you can use Kameleoon's [Custom Data feature](#customdata). Custom Data allows you to capture and analyze specific information relevant to your experiments. Don't forget to call the [`flush()`](#flush) method to send the collected data to Kameleoon servers for analysis.
To ensure your results are accurate, it's recommended to filter out bots by using the [`UserAgent`](#useragent) data type.
##### Tracking goal conversions
When a user completes a desired action (such as making a purchase), it is recorded as a conversion. To track conversions, use the [`trackConversion()`](#trackconversion) method and provide the required `visitorCode` and `goalId` parameters.
The conversion tracking request will be sent along with the next scheduled tracking request, which the SDK sends at regular intervals (defined by [`tracking_interval_millisecond`](#additional-configuration)). If you prefer to send the request immediately, use the [`flush()`](#flush) method with the parameter `instant=true`.
##### Sending events to analytics solutions
To track conversions and send exposure events to your customer analytics solution, you must first implement Kameleoon in [Hybrid mode](/developer-docs/feature-experimentation/get-started/hybrid-experimentation/). Then, use the [`getEngineTrackingCode()`](#getenginetrackingcode) method.
The `getEngineTrackingCode()` method retrieves the unique tracking code required to send exposure events to your analytics solution. Using this method allows you to record events and send them to your desired analytics platform.
### Using a custom bucketing key
By default, Kameleoon uses a unique, anonymous visitor ID (`visitorCode`) to assign users to feature flag variations. This ID is typically generated and stored on the user's device (in a browser cookie for client-side and server-side SDKs—in persistent storage for mobile SDKs). However, in certain scenarios you may need to ensure all users of the same organization see the same variant of a feature flag.
The **Custom Bucketing Key** option allows you to override this default behavior by providing your own custom identifier for bucketing. This override ensures that Kameleoon's assignment logic uses your specified key instead of the default `visitorCode`.
#### Use cases
Using a custom bucketing key is essential for maintaining consistency and accuracy in your feature flag assignments, particularly in these situations:
* **Account-level or organizational experiments:** For B2B products or scenarios where you want to assign all users from the same organization to the same variation, you can use an identifier like an `accountId`. Custom bucketing keys are crucial for A/B testing features that impact an entire team or company.
By implementing a custom bucketing key, you ensure greater consistency and accuracy in your experiments, leading to more reliable results and a better user experience.
#### Technical details
When you configure a custom bucketing key for a feature flag, you provide Kameleoon with a specific identifier from your application's data:
```java theme={null}
kameleoonClient.addData(visitorCode, new CustomData(index, "newVisitorCode"));
```
* **Providing the custom key:** You provide your custom identifier to the Kameleoon SDK using the [`addData()`](#adddata) method. In this method, you will pass your chosen custom bucketing key as a [`CustomData`](#customdata) object. Here, `newVisitorCode` refers to the identifier you wish to use for your bucketing (for example, the new `userId` or `accountId`).
For the custom bucketing key to function correctly, it must also be defined and configured for the feature flag during the flag creation or editing process. Without this corresponding configuration, the SDK's bucketing will not apply your custom key. For detailed instructions on how to set this up in Kameleoon, refer to this [article](/user-manual/experimentation/feature-experimentation/create-and-manage-flags/create-a-feature-flag#Advanced_Flag_Settings).
* **Bucketing logic:** Once a custom bucketing key is provided through the `addData()` method, all hash calculations for assigning users to variations will use this `newVisitorCode` (your custom key) instead of the default `visitorCode`. Using the `newVisitorCode` means that the bucketing decision is tied to your custom identifier, ensuring consistent assignments across various contexts where that identifier is present.
* **Data tracking and analytics:** It's crucial to note that while the `newVisitorCode` (your custom key) is used for bucketing decisions, **all subsequent data (tracking events and conversions, for example) is sent and associated with the *original* `visitorCode`.** This separation ensures that your analytics accurately reflect individual user journeys and interactions within your experiment's broader context, even when bucketing is performed at a higher level (like an account) or across multiple devices/sessions. Your original visitor data remains intact for comprehensive reporting.
#### Technical requirements
To effectively use a custom bucketing key:
* The key must be a `String`.
* It must be unique for the entity you intend to bucket (for example, if using a `userId`, each user's ID should be unique).
* The key must be available to the SDK at the exact moment the feature flag decision is evaluated for that user or request.
### Targeting conditions
The Kameleoon SDKs support a variety of predefined targeting conditions that you can use to target users in your campaigns. For the list of conditions this SDK supports, see [use visit history to target users](/developer-docs/feature-experimentation/targeting-and-segmentation/native-segmentation).
You can also use your own [external data to target users](/developer-docs/apis/data-api-rest/tutorials/storing-and-retrieving-external-data-to-target-users).
### Cross-device experimentation
To support visitors who access an app from multiple devices, Kameleoon allows the synchronization of previously collected visitor data across each of the visitor's devices and reconciliation of their visit history across devices through cross-device experimentation. Case studies and detailed information on how Kameleoon handles data across devices are available in the [article on cross-device experimentation](/developer-docs/cross-device-experimentation).
#### Synchronizing custom data across devices
Although custom mapping synchronization is used to align visitor data across devices, it is not always necessary. Below are two scenarios where custom mapping sync is not required:
**Same user ID across devices**
If the same user ID is used consistently across all devices, synchronization is handled automatically without a custom mapping sync. It is enough to call the `getRemoteVisitorData()` method when you want to sync the data collected between multiple devices.
**Multi-server instances with consistent IDs**
In complex setups involving multiple servers (for example, distributed server instances), where the same user ID is available across servers, synchronization between servers (with `getRemoteVisitorData()`) is sufficient without additional custom mapping sync.
Customers who need additional data can refer to the [`getRemoteVisitorData()`](#getremotevisitordata) method description for further guidance. In the below code, it is assumed that the same unique identifier (in this case, the `visitorCode`, which can also be referred to as `userId`) is used consistently between the two devices for accurate data retrieval.
If you want to sync collected data in real time, you need to choose the scope **Visitor** for your custom data.
```java title="Device A" theme={null}
// In this example, a Custom data with index `90` was set to "Visitor" scope in Kameleoon.
final int VISITOR_SCOPE_CUSTOM_DATA_INDEX = 90;
kameleoonClient.addData(visitorCode, new CustomData(VISITOR_SCOPE_CUSTOM_DATA_INDEX, "your data"));
kameleoonClient.flush(visitorCode);
```
```java title="Device B" theme={null}
// Before working with the data, call the `getRemoteVisitorData` method.
kameleoonClient.getRemoteVisitorData(visitorCode).get();
// After calling the method, the SDK on Device B will have access to CustomData of Visitor scope defined on Device A.
// So, "your data" will be available for targeting and tracking the visitor.
```
#### Using custom data for session merging
[Cross-device experimentation](/developer-docs/cross-device-experimentation) allows for combining a visitor's history across each of their devices (history reconciliation). History reconciliation allows merging different visitor sessions into one. To reconcile visit history, use [`CustomData`](#customdata) to provide a unique identifier for the visitor. For more information, see the [dedicated documentation](/developer-docs/cross-device-experimentation/#activating-cross-device-history-reconciliation).
After cross-device reconciliation is enabled, calling [`getRemoteVisitorData()`](#getremotevisitordata) with the parameter `userId` retrieves all known data for a given user.
Sessions with the same identifier will always be shown the same variation in an experiment. In the Visitor view of your experiment's results pages, these sessions will appear as a single visitor.
The SDK configuration ensures that associated sessions always see the same variation of the experiment. However, there are some limitations regarding cross-device variation allocation. These limitations are outlined [here](/developer-docs/cross-device-experimentation#critical-points-and-practical-insights).
Follow the [activating cross-device history reconciliation](#cross-device-experimentation) guide to set up your custom data on the Kameleoon platform.
Afterwards, you can use the SDK normally. The following methods that may be helpful in the context of session merging:
* `getRemoteVisitorData()` with added `UniqueIdentifier(true)` - to retrieve data for all linked visitors.
* [`trackConversion()`](#trackconversion) or [`flush()`](#flush) with added `UniqueIdentifier(true)` data - to track some data for specific visitor that is associated with another visitor.
As the custom data you use as the identifier must be set to **Visitor scope**, you need to use [cross-device custom data synchronization](/developer-docs/cross-device-experimentation) to retrieve the identifier with the [`getRemoteVisitorData()`](#getremotevisitordata) method on each device.
Here's an example of how to use custom data for session merging.
```java theme={null}
// In this example, 91 represents the Custom Data's index configured as a unique identifier in Kameleoon.
final int MAPPING_INDEX = 91;
final String FEATURE_KEY = "ff123";
// 1. Before the visitor is authenticated
// Retrieve the variation for an unauthenticated visitor.
// Assume anonymousVisitorCode is the randomly generated ID for that visitor.
Variation anonymousVariation = kameleoonClient.getVariation(anonymousVisitorCode, FEATURE_KEY);
// 2. After the visitor is authenticated
// Assume `userId` is the visitor code of the authenticated visitor.
kameleoonClient.addData(anonymousVisitorCode, new CustomData(MAPPING_INDEX, userId));
kameleoonClient.flush(true, anonymousVisitorCode);
// Indicate that `userId` is a unique identifier.
kameleoonClient.addData(userId, new UniqueIdentifier(true));
// 3. After the visitor was authorized
// Retrieve the variation for the `userId`, which will match the anonymous visitor code's variation.
Variation userVariation = kameleoonClient.getVariation(userId, FEATURE_KEY);
boolean isSameVariation = userVariation.getKey().equals(anonymousVariation.getKey()); // true
// `userId` and `anonymousVisitorCode` are now linked and can be tracked as a single visitor.
kameleoonClient.trackConversion(userId, 123, 10.0);
// Additionally, the linked visitors share all fetched previously tracked remote data.
kameleoonClient.getRemoteVisitorData(userId).get();
```
In this example, the application has a login page. Since the user ID is unknown at the moment of login, an anonymous visitor identifier generated by the [`getVisitorCode()`](#getvisitorcode) method is used. After the user logs in, the anonymous visitor is associated with the user ID and used as a unique identifier for the visitor.
### Logging
The SDK generates logs to reflect various internal processes and issues.
#### Log levels
The SDK supports configuring limiting logging by a log level.
```java theme={null}
// The `NONE` log level does not allow logging.
com.kameleoon.logging.KameleoonLogger.setLogLevel(com.kameleoon.logging.LogLevel.NONE);
// The `ERROR` log level only allows logging issues that may affect the SDK's primary behaviour.
com.kameleoon.logging.KameleoonLogger.setLogLevel(com.kameleoon.logging.LogLevel.ERROR);
// The `WARNING` log level allows logging issues which may require an attention.
// It extends the `ERROR` log level.
// The `WARNING` log level is a default log level.
com.kameleoon.logging.KameleoonLogger.setLogLevel(com.kameleoon.logging.LogLevel.WARNING);
// The `INFO` log level allows logging general information on the SDK's internal processes.
// It extends the `WARNING` log level.
com.kameleoon.logging.KameleoonLogger.setLogLevel(com.kameleoon.logging.LogLevel.INFO);
// The `DEBUG` level logs additional details about the SDK’s internal processes and extends the `INFO` level
// with more granular diagnostic output.
// This information is not intended for end-user interpretation but can be sent to our support team
// to assist with internal troubleshooting.
com.kameleoon.logging.KameleoonLogger.setLogLevel(com.kameleoon.logging.LogLevel.DEBUG);
```
#### Custom handling of logs
The SDK writes its logs to the console output by default. This behaviour can be overridden.
Logging limiting by a log level is performed apart from the log handling logic.
```java theme={null}
public class CustomLogger implements com.kameleoon.logging.Logger {
private final java.util.logging.Logger inner;
public CustomLogger(java.util.logging.Logger inner) {
this.inner = inner;
}
// `log` method accepts logs from the SDK
@Override
public void log(com.kameleoon.logging.LogLevel level, String message) {
// Custom log handling logic here. For example:
switch (level) {
case ERROR:
inner.log(java.util.logging.Level.SEVERE, message);
break;
case WARNING:
inner.log(java.util.logging.Level.WARNING, message);
break;
case INFO:
inner.log(java.util.logging.Level.INFO, message);
break;
case DEBUG:
inner.log(java.util.logging.Level.FINE, message);
break;
}
}
}
// Log level filtering is applied separately from log handling logic.
// The custom logger will only accept logs that meet or exceed the specified log level.
// Ensure the log level is set correctly.
com.kameleoon.logging.KameleoonLogger.setLogLevel(com.kameleoon.logging.LogLevel.DEBUG); // Optional; defaults to `LogLevel.WARNING`.
com.kameleoon.logging.KameleoonLogger.setLogger(new CustomLogger());
```
## Reference
This is the full reference documentation for the Java SDK.
### Initialization
#### create()
To use the SDK, you must finish initialization. Your app conducts all interactions with the SDK through an object of the `KameleoonClient` class. Create this object using the static method `create()` in `KameleoonClientFactory`.
```java theme={null}
import com.kameleoon.KameleoonClientFactory;
String siteCode = "a8st4f59bj";
try {
KameleoonClient kameleoonClient = KameleoonClientFactory.create(siteCode, "custom/file/path/client-java.properties");
} catch (KameleoonException.SiteCodeIsEmpty e) {
// indicates that provided site code is empty
} catch (KameleoonException.ConfigCredentialsInvalid exception) {
// indicates that provided clientId / clientSecret are not valid
}
try {
KameleoonClientConfig config = new KameleoonClientConfig.Builder()
.clientId("") // mandatory
.clientSecret("") // mandatory
.refreshInterval(60) // in minutes, optional (60 minutes by default)
.sessionDuration(30) // in minutes, optional (30 minutes by default)
.defaultTimeout(10_000) // in milliseconds, optional (10000 ms by default)
.trackingInterval(1000) // in milliseconds, optional (1000 ms by default)
.topLevelDomain("example.com") // mandatory if you use hybrid mode (engine or web experiments)
.environment("development") // optional
.proxyHost(new HttpHost("192.168.0.25", 8080, "http")) // optional
.networkDomain("example.com") // optional
.build();
KameleoonClientFactory.create(siteCode, config);
} catch (KameleoonException.SiteCodeIsEmpty e) {
// indicates that provided site code is empty
} catch (KameleoonException.ConfigCredentialsInvalid exception) {
// indicates that provided clientId / clientSecret are not valid
}
```
##### Parameters
| Name | Type | Description | Default value |
| ----------------------------------------- | ----------------------- | ----------------------------------------------------------------------------------------------------------------------- | --------------------------------- |
| siteCode required | `String` | This is a [unique key](/user-manual/faq#how-do-i-find-my-sitecode) of the Kameleoon project you are using with the SDK. | |
| configurationPath optional | `String` | Path to the SDK configuration file. | `/etc/kameleoon/client-java.conf` |
| kameleoonConfig optional | `KameleoonClientConfig` | Configuration SDK object that you can pass instead of using a configuration file. | `null` |
##### Return value
| Type | Description |
| ----------------- | ------------------------------------------------------------------------------------------------------------------- |
| `KameleoonClient` | An instance of the `KameleoonClient` class that your app can then use to manage your experiments and feature flags. |
##### Exceptions thrown
| Type | Description |
| ------------------------------------------- | --------------------------------------------------------------------------------------------------------------------------------------- |
| KameleoonException.ConfigCredentialsInvalid | Exception indicating that the requested credentials were not provided (either in the configuration file or as arguments to the method). |
| KameleoonException.SiteCodeIsEmpty | Exception indicating that the specified site code is empty string which is invalid value. |
#### waitInit()
`waitInit()` awaits the initialization of the `KameleoonClient`. This method allows you to check if the SDK has successfully initialized the client before proceeding with other operations.
If the `waitInit()` method fails, the initialization process will continue without interruption. Subsequent calls to the `waitInit()` method will return results that reflect the current state of the `KameleoonClient`. Thus, you can invoke the `waitInit()` method multiple times to check the status of the SDK.
```java theme={null}
// Synchronized approach
try {
kameleoonClient.waitInit().get();
} catch (InterruptedException | ExecutionException exception) {
// Indicates that the client could not be initialized due to the thrown exception.
}
// Asynchronous approach
kameleeoonClient.waitInit().handle((res, ex) -> {
if (ex != null) {
// Indicates that the client could not be initialized due to the thrown exception.
}
return res;
});
```
##### Return value
| Type | Description |
| ------------------------- | ------------------------------------------------------------------------- |
| `CompletableFuture` | The task will complete when the client has been successfully initialized. |
##### Exceptions thrown
| Type | Description |
| ----------- | ------------------------------------------------------------------------------------ |
| SDKNotReady | Exception indicating that client is not initialized properly and cannot be used yet. |
#### isReady()
`isReady()` checks whether the SDK is ready for use, i.e. its configuration has been successfully loaded. Unlike [`waitInit()`](#waitinit), this method returns immediately without blocking or throwing.
Readiness is monotonic: once the SDK becomes ready it stays ready. Even if a later configuration refresh fails, the SDK keeps using the previously downloaded configuration, so it never reverts to a not-ready state.
```java theme={null}
boolean ready = kameleoonClient.isReady();
```
##### Return value
| Type | Description |
| --------- | --------------------------------------------------------------------------------------------------------------------------------------- |
| `boolean` | `true` if the SDK has been successfully initialized; `false` otherwise (including while initialization is still pending or has failed). |
### Feature flags and variations
#### isFeatureActive()
* *📨 Sends Tracking Data to Kameleoon (depending on the `track` parameter)*
This method was previously called `activeFeature`, which was removed in SDK version `4.0.0`.
Call this method to check whether a feature flag should be active for a specified user. This method takes a `visitorCode` and a `featureKey` as mandatory arguments to check if the feature is active for the user.
If the user has never been associated with this feature flag, the SDK returns a random boolean value (either `true` to add the user to this feature or `false` to exclude them from the feature). If a user with the specified `visitorCode` is already registered with this feature flag, the SDK detects the previous `featureFlag`value.
Make sure you catch and handle potential exceptions.
If you specify a `visitorCode`, the `isFeatureActive()` method uses it as the unique visitor identifier, which is useful for [Cross-device experimentation](/developer-docs/cross-device-experimentation). When you specify a `visitorCode` and set the `isUniqueIdentifier` parameter to `true`, the SDK links the flushed data with the visitor associated with the specified identifier.
The parameter `isUniqueIdentifier` is deprecated. Please use [`UniqueIdentifier`](#uniqueidentifier) instead.
The `isUniqueIdentifier` can be helpful in unique situations; for example, if you cannot access the anonymous `visitorCode` given to a visitor, but you can use an internal ID linked to that visitor through session merging.
```java theme={null}
String visitorCode = kameleoonClient.getVisitorCode(httpServletRequest, httpServletResponse);
String featureKey = "new_checkout";
Boolean hasNewCheckout = false;
try {
hasNewCheckout = kameleoonClient.isFeatureActive(visitorCode, featureKey);
// disabling tracking
hasNewCheckout = kameleoonClient.isFeatureActive(false, visitorCode, featureKey);
} catch (KameleoonException.FeatureNotFound e) {
// Feature toggle not yet activated on Kameleoon's side - we consider the feature inactive.
hasNewCheckout = false;
} catch (Exception e) {
// This is a generic exception handler that handles all exceptions.
System.out.println("Exception occurred");
}
if (hasNewCheckout)
{
// Implement new checkout code here
}
```
##### Parameters
| Name | Type | Description |
| ------------------------------- | --------- | ----------------------------------------------------------------------------------------------------------------------------------------------------- |
| track | `boolean` | An optional parameter to enable or disable tracking of the feature evaluation (`true` by default). |
| visitorCode | `String` | Unique identifier of the user. This field is required. |
| featureKey | `String` | Key of the feature that you want to check the status of for the user. This field is required. |
| isUniqueIdentifier (Deprecated) | `boolean` | An optional parameter for specifying if the visitorCode is a unique identifier. If not provided, the default value is `false`. The field is optional. |
##### Return value
| Type | Description |
| --------- | ------------------------------------------------------------------------ |
| `boolean` | Value of the feature that is registered for the specified `visitorCode`. |
##### Exceptions thrown
| Type | Description |
| ------------------------------------- | ------------------------------------------------------------------------------------------------------------------------------------------------------------------------------------------------------------------------------------------------------------------------------------- |
| KameleoonException.FeatureNotFound | Exception indicating that the requested feature ID wasn't found in the SDK's internal configuration. This exception usually means that the feature flag has not yet been activated on Kameleoon's side (but code that implements the feature is already deployed in the application). |
| KameleoonException.VisitorCodeInvalid | Exception indicating that the provided visitor code is not valid. It is either empty or longer than 255 characters. |
#### getVariation()
* 📨 *Sends Tracking Data to Kameleoon (depending on the `track` parameter)*
Retrieves the [`Variation`](#variation) assigned to a given visitor for a specific feature flag.
This method takes a `visitorCode` and `featureKey` as mandatory arguments. The `track` argument is optional and defaults to `true`.
It returns the assigned `Variation` for the visitor. If the visitor is not associated with any feature flag rules, the method returns the default `Variation` for the given feature flag.
Ensure that proper error handling is implemented in your code to manage potential exceptions.
The default variation refers to the variation assigned to a visitor when they do not match any predefined delivery rules for a feature flag. In other words, it is the fallback variation applied to all users who are not targeted by specific rules. It's represented as the variation in the "Then, for everyone else..." section in a management interface.
```java theme={null}
String visitorCode = kameleoonClient.getVisitorCode(httpServletRequest, httpServletResponse);
String featureKey = "new_checkout";
Variation variation;
try {
variation = kameleoonClient.getVariation(visitorCode, featureKey);
// disabling tracking
variation = kameleoonClient.getVariation(visitorCode, featureKey, false);
} catch (KameleoonException.FeatureNotFound e) {
// The error has occurred; the feature flag isn't found in the current configuration.
} catch (KameleoonException.FeatureEnvironmentDisabled e) {
// The feature flag is disabled for the environment.
} catch (KameleoonException.VisitorCodeInvalid e) {
// The visitor code you passed to the method is invalid and can't be accepted by SDK.
} catch (KameleoonException ex) {
// Handle the common Kameleoon Exception
}
// Fetch a variable value for the assigned variation
String title = (String) variation.getVariables().get("title").getValue();
switch (variation.getKey()) {
case 'on':
// Main variation key is selected for visitorCode
break;
case 'alternative_variation':
// Alternative variation key
break;
default:
// Default variation key
break;
}
```
##### Parameters
| Name | Type | Description | Default |
| ------------------------------------- | --------- | ------------------------------------------------------------------------------ | ------- |
| `visitorCode` required | `String` | Unique identifier of the visitor. | |
| `featureKey` required | `String` | Key of the feature you want to expose to a visitor. | |
| `track` optional | `boolean` | An optional parameter to enable or disable tracking of the feature evaluation. | `true` |
##### Return value
| Type | Description |
| ----------- | ------------------------------------------------------------------------------------- |
| `Variation` | An assigned [`Variation`](#variation) to a given visitor for a specific feature flag. |
##### Exceptions thrown
| Type | Description |
| ---------------------------- | --------------------------------------------------------------------------------------------------------------------------------------------------------------------------------------------------------------------------------------------------------------------- |
| `VisitorCodeInvalid` | Exception indicating that the provided visitor code is not valid. It is either empty or longer than 255 characters. |
| `FeatureNotFound` | Exception indicating that the requested feature key wasn't found in the internal configuration of the SDK. This usually means that the feature flag is not activated in the Kameleoon app (but code implementing the feature is already deployed in the application). |
| `FeatureEnvironmentDisabled` | Exception indicating that feature flag is disabled for the visitor's current environment (for example, production, staging, or development). |
#### getVariations()
* 📨 *Sends Tracking Data to Kameleoon (depending on the `track` parameter)*
Retrieves a map of [`Variation`](#variation) objects assigned to a given visitor across all feature flags.
This method iterates over all available feature flags and returns the assigned `Variation` for each flag associated with the specified visitor. It takes `visitorCode` as a mandatory argument, while `onlyActive` and `track` are optional.
* If `onlyActive` is set to `true`, the method `getVariations()` will return feature flags variations provided the user is not bucketed with the `off` variation.
* The `track` parameter controls whether or not the method will track the variation assignments. By default, it is set to `true`. If set to `false`, the tracking will be disabled.
The returned map consists of feature flag keys as keys and their corresponding `Variation` as values. If no variation is assigned for a feature flag, the method returns the default `Variation` for that flag.
Proper error handling should be implemented to manage potential exceptions.
The default variation refers to the variation assigned to a visitor when they do not match any predefined delivery rules for a feature flag. In other words, it is the fallback variation applied to all users who are not targeted by specific rules. It's represented as the variation in the "Then, for everyone else..." section in a management interface.
```java theme={null}
try {
Map variations = kameleoonClient.getVariations(visitorCode);
// only active variations
Map variations = kameleoonClient.getVariations(visitorCode, true);
// disable tracking
Map variations = kameleoonClient.getVariations(visitorCode, true, false);
} catch (VisitorCodeInvalid e) {
// Handle exception
}
```
##### Parameters
| Name | Type | Description | Default |
| ------------------------------------- | --------- | ----------------------------------------------------------------------------------------------------------------- | ------- |
| `visitorCode` required | `String` | Unique identifier of the visitor. | |
| `onlyActive` optional | `boolean` | An optional parameter indicating whether to return variations for active (`true`) or all (`false`) feature flags. | `false` |
| `track` optional | `boolean` | An optional parameter to enable or disable tracking of the feature evaluation. | `true` |
##### Return value
| Type | Description |
| ------------------------ | ----------------------------------------------------------------------------------------------------------------------------------- |
| `Map` | Map that contains the assigned [`Variation`](#variation) objects of the feature flags using the keys of the corresponding features. |
##### Exceptions thrown
| Type | Description |
| -------------------- | ------------------------------------------------------------------------------------------------------------------- |
| `VisitorCodeInvalid` | Exception indicating that the provided visitor code is not valid. It is either empty or longer than 255 characters. |
#### setForcedVariation()
The method allows you to programmatically assign a specific [`Variation`](#variation) to a user, bypassing the standard evaluation process. This is especially valuable for controlled experiments where the usual evaluation logic is not required or must be skipped. It can also be helpful in scenarios like debugging or custom testing.
When a **forced** variation is set, it overrides Kameleoon's real-time evaluation logic. Processes like segmentation, targeting conditions, and algorithmic calculations are skipped. To preserve segmentation and targeting conditions during an experiment, set `forceTargeting=false` instead.
**Simulated** variations always take precedence in the execution order. If a **simulated** variation calculation is triggered, it will be fully processed and completed first.
A forced variation is treated the same as an evaluated variation. It is tracked in analytics and stored in the user context like any standard evaluated variation, ensuring consistency in reporting.
The method may throw exceptions under certain conditions (e.g., invalid parameters, user context, or internal issues). Proper exception handling is essential to ensure that your application remains stable and resilient.
It’s important to distinguish **forced** variations from **[simulated](#getvisitorcode)** variations:
* **Forced variations**: Are specific to an individual experiment.
* **Simulated variations**: Affect the overall **feature flag** result.
```java theme={null}
try {
// Forcing the variation "on" for the feature flag "featureKey1" for the visitor
final int experimentId = 9516;
kameleoonClient.setForcedVariation(visitorCode, experimentId, "on");
// Resetting the forced variation for the feature flag "featureKey1" for the visitor
kameleoonClient.setForcedVariation(visitorCode, experimentId, null);
} catch (KameleoonException ex) {
// Handle the common Kameleoon Exception
}
```
##### Parameters
| Name | Type | Description | Default |
| ---------------------------------------- | --------- | ---------------------------------------------------------------------------------------------------------------------------------------------------------------------------- | ------- |
| `visitorCode` required | `String` | Unique identifier of the visitor. | |
| `experimentId` required | `int` | **Experiment Id** that will be targeted and selected during the evaluation process. | |
| `variationKey` required | `String` | **Variation Key** corresponding to a `Variation` that should be forced as the returned value for the experiment. If the value is `null`, the forced variation will be reset. | |
| `forceTargeting` optional | `boolean` | Indicates whether targeting for the experiment should be forced and skipped (`true`) or applied as in the standard evaluation process (`false`). | `true` |
##### Exceptions thrown
| Type | Description |
| --------------------------- | ----------------------------------------------------------------------------------------------------------------------------------------------------------------------------------------------------------------------------------------------------- |
| `VisitorCodeInvalid` | Exception indicating that the provided visitor code is not valid. It is either empty or longer than 255 characters. |
| `FeatureExperimentNotFound` | Exception indicating that the requested experiment id has not been found in the SDK's internal configuration. This is usually normal and means that the rule's corresponding experiment has not yet been activated on Kameleoon's side. |
| `FeatureVariationNotFound` | Exception indicating that the requested variation key(id) has not been found in the internal configuration of the SDK. This is usually normal and means that the variation's corresponding experiment has not yet been activated on Kameleoon's side. |
In most cases, only the basic error, `KameleoonException`, needs to be handled, as demonstrated in the example. However, if different types of errors require a response, handle each one separately based on specific requirements. Additionally, for enhanced reliability, general language errors can be handled by including `Exception`.
#### evaluateAudiences()
* 📨 *Sends Tracking Data to Kameleoon*
This method evaluates visitors against all available Audiences Explorer segments and tracks those who match.
`evaluateAudiences()` should be called **after all relevant visitor data has been set or updated**, and **just before** getting a feature variation or checking a feature flag. This approach ensures that the visitor is evaluated against the most current data available, allowing for accurate audience assignment based on all criteria.
After calling this method, you can perform a detailed analysis of segment performance in Audiences Explorer.
```java theme={null}
try {
kameleoonClient.evaluateAudiences(visitorCode);
} catch (KameleoonException ex) {
// Handle the common Kameleoon Exception
}
```
##### Parameters
| Name | Type | Description |
| ------------------------------------- | -------- | --------------------------------- |
| `visitorCode` required | `String` | Unique identifier of the visitor. |
##### Exceptions thrown
| Type | Description |
| -------------------- | ------------------------------------------------------------------------------------------------------------------- |
| `VisitorCodeInvalid` | Exception indicating that the provided visitor code is not valid. It is either empty or longer than 255 characters. |
In most cases, only the basic error, `KameleoonException`, needs to be handled, as demonstrated in the example. However, if different types of errors require a response, handle each one separately based on specific requirements. Additionally, for enhanced reliability, general language errors can be handled by including `Exception`.
#### getFeatureList()
This method was previously called `obtainFeatureList`, which was removed in SDK version `4.0.0`.
Returns a list of feature flag keys currently available for the SDK.
```java theme={null}
List allFeatureFlagKey = kameleoonClient.getFeatureList();
```
##### Return value
| Type | Description |
| -------------- | ------------------------- |
| `List` | List of feature flag keys |
#### getDataFile()
To evaluate all feature flags, use [`getVariations()`](#getvariations). This method is more efficient than calling `DataFile` and iterating through flags with [`getVariation()`](#getvariation).
Returns the current SDK configuration as a [`DataFile`](#datafile) object.
```java theme={null}
try {
DataFile dataFile = kameleoonClient.getDataFile();
} catch (Exception e) {
// Recommended (but optional) safeguard for unexpected exceptions from third-party libraries
}
```
##### Return value
| Type | Description |
| ---------- | ------------------------------------------------------------ |
| `DataFile` | The [`DataFile`](#datafile) containing the SDK configuration |
### Visitor data
#### getVisitorCode()
This method was previously called `obtainVisitorCode`, which was removed in SDK version `4.0.0`.
The `getVisitorCode()` method should be called to obtain the Kameleoon `visitorCode` for the current visitor. This method is especially important when using Kameleoon in a mixed front-end and back-end environment, where user identification consistency must be guaranteed. The implementation logic is described here:
1. We check if a `kameleoonVisitorCode` cookie or query parameter associated with the current HTTP request can be found. If it can, we use this `kameleoonVisitorCode` as the visitor identifier.
2. If no cookie / parameter is found in the current request, we either randomly generate a new identifier or use the `defaultVisitorCode` argument as identifier if it is passed. This process allows our customers to use their identifiers as visitor codes, should they wish to. This flexibility has the added benefit of matching Kameleoon visitors with their own users without any additional look-ups in a matching table.
3. Regardless, the server-side (via HTTP header) `kameleoonVisitorCode` cookie is set with the relevant value. Then, the method returns this identifier value.
For more information, refer to [this article](/developer-docs/feature-experimentation/get-started/hybrid-experimentation/).
If you provide a `visitorCode`, its uniqueness must be guaranteed on your end - the SDK cannot check it. Also, note that the length of `visitorCode` is limited to `255` characters. Any excess characters will throw an exception.
The `getVisitorCode()` method allows you to set **simulated** variations for a visitor. When cookies (from a **request** or **document**) contain the key `kameleoonSimulationFFData`, the standard evaluation process is bypassed. Instead, the method directly returns a [`Variation`](#variation) based on the provided data.
You can apply simulations in two ways:
* **Automatically (recommended):** If using Kameleoon Web Experimentation or the SDK in [Hybrid mode](/developer-docs/feature-experimentation/get-started/hybrid-experimentation#linking-feature-experiments-with-front-end-tracking-code), the cookie is created automatically when simulating a variant's display using the [Simulation Panel](/user-manual/experimentation/feature-experimentation/using-the-rollout-planner/validation-and-rollback/using-simulation-mode).
* **Manually:** Set the `kameleoonSimulationFFData` cookie manually.
It’s important to distinguish **simulated** variations from **[forced](#setforcedvariation)** variations:
* **Simulated variations**: Affect the overall **feature flag** result.
* **Forced variations**: Are specific to an individual experiment.
⚙️ **Manual setup**
Please ensure the `kameleoonSimulationFFData` cookie follows this format:
* `kameleoonSimulationFFData={"featureKey":{"expId":10,"varId":20}}`: Simulates the variation with `varId` of experiment `expId` for the given `featureKey`.
* `kameleoonSimulationFFData={"featureKey":{"expId":0}}`: Simulates the default variation (defined in the **Then, for everyone else in Production, serve** section) for the given `featureKey`.
⚠️ To ensure proper functionality, the cookie value must be encoded as a URI component using a method such as [`encodeURIComponent`](https://developer.mozilla.org/en-US/docs/Web/JavaScript/Reference/Global_Objects/encodeURIComponent).
```java theme={null}
import javax.servlet.http.HttpServletRequest;
import javax.servlet.http.HttpServletResponse;
String visitorCode = kameleoonClient.getVisitorCode(httpServletRequest, httpServletResponse);
String visitorCode = kameleoonClient.getVisitorCode(httpServletRequest, httpServletResponse, defaultVisitorCode);
```
##### Parameters
| Name | Type | Description |
| ------------------- | --------------------- | --------------------------------------------------------------------------------------------------------------------------------------------------------------------------------------------------------------------------------------------------------------- |
| httpServletRequest | `HttpServletRequest` | The current HttpServletRequest object should be passed as the first parameter. This field is mandatory. |
| httpServletResponse | `HttpServletResponse` | The current HttpServletResponse object should be passed as the second parameter. This field is mandatory. |
| defaultVisitorCode | `String` | This parameter will be used as the `visitorCode` when an existing `kameleoonVisitorCode` cookie is not found on the request. This field is optional. If not specified, the SDK generates a random `visitorCode` when no existing `kameleoonVisitorCode` cookie. |
##### Return value
| Type | Description |
| -------- | ------------------------------------------------------------------------------------------------------------------------- |
| `String` | A `visitorCode` that will be associated with this particular user and should be used with most of the methods of the SDK. |
#### addData()
The `addData()` method adds [targeting data](#data-types) to storage so other methods can use the data to decide whether or not to target the current visitor.
The `addData()` method does not return any value and does not interact with Kameleoon back-end servers on its own. Instead, all the declared data is saved for future transmission using the [`flush()`](#flush) method. This approach reduces the number of server calls made, as the data is typically grouped into a single server call that is triggered by the `flush()`.
The [`trackConversion()`](#trackconversion) method also sends out any previously associated data, just like the `flush()`. The same holds true for [`getVariation()`](#getvariation) and [`getVariations()`](#getvariations) methods if an experimentation rule is triggered.
Each visitor can only have one instance of associated data for most data types. However, [`CustomData`](#customdata) is an exception. Visitors can have one instance of associated `CustomData` per index.
```java theme={null}
// Add a single data item (tracked by default)
kameleoonClient.addData(visitorCode, Browser.chrome());
// Add multiple data items (tracked by default)
kameleoonClient.addData(visitorCode, new PageView("https://url.com", "title"), new UserAgent("UserAgent"));
// Add multiple data items stored locally for targeting only (not sent to the Kameleoon Data API)
kameleoonClient.addData(visitorCode, false, new PageView("https://url.com", "title"), new UserAgent("UserAgent"));
```
##### Parameters
| Name | Type | Description | Default value |
| ------------------------------------- | --------- | -------------------------------------------------------------------------------------------------------------------------------------------------------------------------------------------- | ------------- |
| `visitorCode` required | `String` | Unique identifier of the visitor. | |
| `track` optional | `boolean` | Specifies whether the added data is eligible for tracking. When set to `false`, the data is stored locally and used only for targeting evaluation; it is not sent to the Kameleoon Data API. | `true` |
| `data` required | `Data...` | Collection of Kameleoon data types. | |
##### Exceptions
| Type | Description |
| -------------------- | ------------------------------------------------------------------------------------------------------------------- |
| `VisitorCodeInvalid` | Exception indicating that the provided visitor code is not valid. It is either empty or longer than 255 characters. |
#### flush()
* *📨 Sends Tracking Data to Kameleoon*
The `flush()` method collects the Kameleoon data linked to the visitor. It then sends a tracking request, along with all data added using the `addData` method, which has not yet been sent using one of [these methods](/developer-docs/feature-experimentation/technical-reference/faq-global#when-does-the-sdk-send-a-tracking-request-for-analytics). `flush()` is non-blocking as the server call is made asynchronously.
`flush` allows you to control when data associated with a given `visitorCode` is sent to our servers. For instance, if you call `addData()` a dozen times, it would be inefficient to send data to the server each time `addData()` is invoked. So, all you have to do is call `flush()` once.
If you specify a `visitorCode`, the `flush()` method uses this code as the unique visitor identifier, which is useful for [cross-device experimentation](/developer-docs/cross-device-experimentation). When you specify a `visitorCode` and set the `isUniqueIdentifier` parameter to `true`, the SDK links the flushed data to the visitor associated with the specified identifier.
The parameter `isUniqueIdentifier` is deprecated. Please use [`UniqueIdentifier`](#uniqueidentifier) instead.
The `isUniqueIdentifier` can be helpful in unique situations; for example, if you cannot access the anonymous `visitorCode` given to a visitor, but you can use an internal ID linked to that visitor through session merging.
```java theme={null}
try {
kameleoonClient.flush(visitorCode); // Interval tracking (most performant tracking method)
kameleoonClient.flush(true, visitorCode); // Instant tracking
} catch (VisitorCodeInvalid e) {
// Catch exception
}
```
##### Parameters
| Name | Type | Description |
| ------------------------------- | --------- | ------------------------------------------------------------------------------------------------------------------------------------------------------------------------------------------------------------------------------------------------------------------------------------ |
| instant | `boolean` | Boolean flag indicating whether the data should be sent instantly (`true`) or according to the default tracking interval (`false`) set with the SDK parameter [`tracking_interval_millisecond`](#additional-configuration). This field is optional. |
| visitorCode | `String` | User's unique identifier. This field is required. |
| isUniqueIdentifier (Deprecated) | `boolean` | An optional parameter for specifying if the visitorCode is a unique identifier. The `visitorCode` should be provided and not `null` to apply `isUniqueIdentifier` for a visitor, otherwise it will be ignored. If not provided, the default value is `false`. The field is optional. |
#### getRemoteData()
This method was previously called `retrieveDataFromRemoteSource`, which was removed in SDK version `4.0.0`.
The `getRemoteData()` method allows you to retrieve data (according to a `key` passed as argument) for the specified `siteCode` stored on the Kameleoon server. Your site code is specified in `KameleoonClientFactory.create()`. Usually, data is stored on our remote servers using our Data API. This method, along with the availability of our scalable servers, provides a convenient way to store additional data that you can later retrieve for your app.
```java theme={null}
CompletableFuture data = kameleoonClient.getRemoteData("key");
try {
JsonObject test = kameleoonClient.getRemoteData("key").get(5_000, TimeUnit.MILLISECONDS);
} catch (InterruptedException | ExecutionException | TimeoutException e) {
// Catch exception
}
```
##### Parameters
| Name | Type | Description |
| ---- | -------- | ---------------------------------------------------------------------------- |
| key | `String` | The key that is associated with the retrieved data. This field is mandatory. |
##### Return value
| Type | Description |
| ------------------------------- | ------------------------------------------------------------------------- |
| `CompletableFuture` | Future `JsonObject` associated with retrieving data for specific **key**. |
#### getRemoteVisitorData()
`getRemoteVisitorData()` is an asynchronous method for retrieving Kameleoon Visits Data for the `visitorCode` from the Kameleoon Data API. The method adds the data to storage for other methods to use when making targeting decisions.
Data obtained using this method plays an important role when you want to:
* use data collected from other devices.
* access a user's history, such as previously visited pages during past visits.
* use data that is only accessible on the client-side, like datalayer variables and goals that convert on the front-end.
Read [this article](/developer-docs/feature-experimentation/targeting-and-segmentation/native-segmentation) for a better understanding of possible use cases.
By default, `getRemoteVisitorData()` automatically retrieves the latest stored custom data with `scope=Visitor` and attaches them to the visitor without the need to call the method `addData()`. It is particularly useful for [synchronizing custom data between multiple devices](/developer-docs/sdks/web-sdks/nodejs-sdk#synchronizing-custom-data-across-devices).
The parameter `isUniqueIdentifier` is deprecated. Please use [`UniqueIdentifier`](#uniqueidentifier) instead.
The `isUniqueIdentifier` can be helpful in unique situations; for example, if you cannot access the anonymous `visitorCode` given to a visitor, but you can use an internal ID linked to that visitor through session merging.
```java theme={null}
String visitorCode = "visitorCode";
// Visitor data will be fetched and automatically added for `visitorCode`
CompletableFuture> visitorData = kameleoonClient.getRemoteVisitorData(visitorCode);
// If you only want to fetch data and add it yourself manually, set addData == `false`
CompletableFuture> visitorData = kameleoonClient.getRemoteVisitorData(visitorCode, false);
// If you want to fetch custom list of data types
RemoteVisitorDataFilter filter = RemoteVisitorDataFilter.builder()
.previousVisitAmount(25)
.customData(false)
.conversions(true)
.build();
CompletableFuture> visitorData = kameleoonClient.getRemoteVisitorData(visitorCode, filter, true, false);
try {
List visitorData = kameleoonClient.getRemoteVisitorData(visitorCode).get(5_000, TimeUnit.MILLISECONDS);
// Your custom code
} catch (CancellationException | InterruptedException | ExecutionException | TimeoutException e) {
// Catch exception
}
```
##### Parameters
| Name | Type | Description |
| ------------------------------- | ------------------------- | ------------------------------------------------------------------------------------------------------------------------------------------------------------------------------------------------------------------------------------------------------------------------------------------------------------- |
| visitorCode | string | The visitor code for the data you want to retrieve. This field is mandatory. |
| filter | `RemoteVisitorDataFilter` | Filter for specifying what data should be retrieved from visits. By default, only `CustomData` is retrieved from the current and latest previous visit (`RemoteVisitorDataFilter.builder().build()` or `new RemoteVisitorDataFilter()`). Other filters parameters are set to `false`. This field is optional. |
| addData | `boolean` | A boolean indicating whether the method should automatically add retrieved data for a visitor. This field is optional. |
| isUniqueIdentifier (Deprecated) | `boolean` | An optional parameter for specifying if the `visitorCode` is a unique identifier. If not provided, the default value is `false`. The field is optional. |
##### Return value
| Type | Description |
| ------------------------------- | ---------------------------------------------------- |
| `CompletableFuture>` | Future `List` associated with a given visitor. |
##### Using parameters in getRemoteVisitorData()
The `getRemoteVisitorData()` method offers flexibility by allowing you to define various parameters when retrieving data on visitors. Whether you're targeting based on goals, experiments, or variations, the same approach applies across all data types.
For example, let's say you want to retrieve data on visitors who completed a goal "Order transaction". You can specify parameters within the `getRemoteVisitorData()` method to refine your targeting. For instance, if you want to target only users who converted on the goal in their last five visits, you can set the `previousVisitAmount` parameter to 5 and `conversions` to true.
The flexibility shown in this example is not limited to goal data. You can use parameters within the `getRemoteVisitorData()` method to retrieve data on a variety of visitor behaviors.
Here is the list of available `kameleoon.types.RemoteVisitorDataFilter` options:
| Name | Type | Description | Default |
| ------------------------------------------- | --------- | ----------------------------------------------------------------------------------------------------------------------------------------------------------------------------------------------------------------------------------------------------------------------------------------------------------------------------------------------- | ------- |
| previousVisitAmount optional | `int` | Number of previous visits to retrieve data from. Number between `1` and `25` | `1` |
| currentVisit optional | `boolean` | If true, current visit data will be retrieved | `true` |
| customData optional | `boolean` | If true, custom data will be retrieved. | `true` |
| pageViews optional | `boolean` | If true, page data will be retrieved. | `false` |
| geolocation optional | `boolean` | If true, geolocation data will be retrieved. | `false` |
| device optional | `boolean` | If true, device data will be retrieved. | `false` |
| browser optional | `boolean` | If true, browser data will be retrieved. | `false` |
| operatingSystem optional | `boolean` | If true, operating system data will be retrieved. | `false` |
| conversions optional | `boolean` | If true, conversion data will be retrieved. | `false` |
| experiments optional | `boolean` | If true, experiment data will be retrieved. | `false` |
| kcs optional | `boolean` | If true, Kameleoon Conversion Score (KCS) will be retrieved. Requires the [AI Predictive Targeting add-on](/user-manual/ai-predictive-targeting/target-users-based-on-likelihood-to-convert) | `false` |
| visitorCode optional | `boolean` | If true, Kameleoon will retrieve the `visitorCode` from the most recent visit and use it for the current visit. This is necessary if you want to ensure that the visitor, identified by their `visitorCode`, always receives the same variation across visits for [Cross-device experimentation](/developer-docs/cross-device-experimentation). | `true` |
| personalization optional | `boolean` | If true, personalization data will be retrieved. This is required for the personalization condition. | `false` |
| cbs optional | `boolean` | If true, Contextual Bandit score data will be retrieved. | `false` |
#### getVisitorWarehouseAudience()
This method retrieves all audience data associated with the visitor in your data warehouse using the specified `visitorCode` and `warehouseKey`. The `warehouseKey` is typically your internal user ID. The `customDataIndex` parameter corresponds to the Kameleoon custom data that Kameleoon uses to target your visitors. You can refer to the [warehouse targeting documentation](/user-manual/integrations/data-warehouses/bigquery/use-bigquery-as-a-source-audience-targeting) for additional details. The method passes the result to the returned future as a `CustomData` object, confirming that the data has been added to the visitor and is available for targeting purposes.
```java theme={null}
CompletableFuture warehouseAudienceDataCF =
kameleoonClient.getVisitorWarehouseAudience(visitorCode, warehouseKeyValue, customDataIndex);
// If you need to specify warehouse key
CompletableFuture warehouseAudienceDataCF =
kameleoonClient.getVisitorWarehouseAudience(visitorCode, customDataIndex);
try {
CustomData warehouseAudienceData = warehouseAudienceDataCF.get(5_000, TimeUnit.MILLISECONDS);
// Your custom code
} catch (CancellationException | InterruptedException | ExecutionException | TimeoutException e) {
// Catch exception
}
```
##### Parameters
| Name | Type | Description |
| --------------- | -------- | ------------------------------------------------------------------------------------------------------- |
| visitorCode | `String` | The unique identifier of the visitor for whom you want to retrieve and add the data. |
| warehouseKey | `String` | The unique key to identify the warehouse data (usually, your internal user ID). This field is optional. |
| customDataIndex | `int` | An integer representing the index of the custom data you want to use to target your BigQuery Audiences. |
##### Return value
| Type | Description |
| ------------------------------- | ------------------------------------------------------------------------------------ |
| `CompletableFuture` | Future `CustomData` instance confirming that the data has been added to the visitor. |
##### Exceptions thrown
| Type | Description |
| -------------------- | -------------------------------------------------------------------------------------------------------------------- |
| `VisitorCodeInvalid` | Exception indicating that the provided visitor code is not valid (it is either empty or longer than 255 characters). |
#### setLegalConsent()
You must use this method to specify whether the visitor has given legal consent to use personal data. Setting the `legalConsent` parameter to `false` limits the types of data that you can include in tracking requests. This method helps you adhere to legal and regulatory requirements while responsibly managing visitor data. You can find more information on personal data in the [consent management policy](/user-manual/project-management/consent-management-policy).
```java theme={null}
// if you do not need to set the visitor code in a cookie to respond
kameleoonClient.setLegalConsent(visitorCode, true);
String visitorCode = kameleoonClient.getVisitorCode(httpServletRequest, httpServletResponse);
kameleoonClient.setLegalConsent(visitorCode, true, httpServletResponse);
```
##### Parameters
| Name | Type | Description |
| ------------ | ------------------- | ----------------------------------------------------------------------------------------------------------------------------------------------------------------------------------------------------------------------- |
| visitorCode | `String` | The user's unique identifier. This field is required. |
| legalConsent | `boolean` | A boolean value representing the legal consent status. `true` indicates the visitor has given legal consent, `false` indicates the visitor has never provided, or has withdrawn, legal consent. This field is required. |
| response | HttpServletResponse | The HTTP servlet response where values in the cookies will be adjusted based on the legal consent status. The field is optional. |
##### Exceptions thrown
| Type | Description |
| ------------------------------------- | ----------------------------------------------------------------------------------------------------------------- |
| KameleoonException.VisitorCodeInvalid | Exception indicating that the provided visitor code is invalid. It is either empty or longer than 255 characters. |
##### Consent revocation behavior
When you call `setLegalConsent()` with `legalConsent=false`, the SDK does not delete the `kameleoonVisitorCode` cookie. Instead, it stops extending the cookie's expiration date, allowing the cookie to persist until it naturally expires.
If your compliance requirements demand the immediate removal of the cookie file upon opt-out, you must delete it manually using your framework’s native cookie management methods. The SDK will not remove the file automatically.
### Goals and third-party analytics
#### trackConversion()
* 📨 *Sends Tracking Data to Kameleoon*
Use this method to track a conversion for a specific [goal](/user-manual/assets/goals/create-a-goal) and user. This method requires `visitorCode` and `goalId`. In addition, this method also accepts an optional `revenue`, `negative` and `metadata` arguments. The `visitorCode` is usually identical to the one that was used when triggering the experiment.
The `trackConversion()` method doesn't return any value. This method is non-blocking as the server call is made asynchronously.
The parameter `isUniqueIdentifier` is deprecated. Please use [`UniqueIdentifier`](#uniqueidentifier) instead.
The `isUniqueIdentifier` can also be useful in other edge-case scenarios, such as when you can't access the anonymous `visitorCode` that was originally assigned to the visitor, but you do have access to an internal ID that is connected to the anonymous visitor using session merging capabilities.
```java theme={null}
String visitorCode = kameleoonClient.getVisitorCode(httpServletRequest, httpServletResponse);
int goalId = 83023;
kameleoonClient.trackConversion(visitorCode, goalId);
// Add metadata
CustomData cd = new CustomData(1, "metadata");
kameleoonClient.trackConversion(visitorCode, goalId, cd);
```
##### Parameters
| Name | Type | Description | Default |
| ------------------------------------- | --------------- | ------------------------------------------------------------------------------------------------------------------------------------------------------------------------------------------------------------------------------------------------------------------------------------------------------------------------------------ | ------------------- |
| `visitorCode` required | `String` | Unique identifier of the visitor. | |
| `goalId` required | `int` | ID of the goal. | |
| `revenue` optional | `float` | Revenue of the conversion. | `0` |
| `negative` optional | `boolean` | Defines if the revenue is positive or negative. | `false` |
| `metadata` optional | `CustomData...` | Lets you set specific values for custom data which have been defined as metadata for the goal in the Kameleoon App. Example: `[CustomData{id: 5, value: "Payment Type"}, CustomData{id: 6, value: "Delivery Method"}]`. In this example, `5` and `6` are the indexes of the custom data (5 = “Payment Type”, 6 = “Delivery Method”). | `new CustomData[0]` |
| `isUniqueIdentifier` *(deprecated)* | `boolean` | An optional parameter for specifying if the visitorCode is a unique identifier. | `false` |
metadata values are accessible through [raw data exports](/user-manual/experiment-analytics/analyze-results/results-page/results-page-actions#Export) and [the results page](/user-manual/experiment-analytics/analyze-results/data-and-metrics/goal-metadata).
If the `metadata` parameter is provided, Kameleoon will use these specified values for the current conversion instead of what was previously collected using the [`addData()`](#adddata) method. If the parameter is omitted, Kameleoon will use the last tracked values for those [`CustomData`](#customdata) prior to the conversion and within the same visit.
Kameleoon will only consider the metadata values that are explicitly passed as parameters to the `trackConversion()` method.
In the example below, Kameleoon will associate the conversion only with the custom data value explicitly provided as a parameter (here: index 5 with the value 'Amex Credit Card').
```java theme={null}
kameleoonClient.addData(visitorCode, new CustomData(5, "Credit Card"), new CustomData(9, "Express Delivery"));
kameleoonClient.trackConversion(visitorCode, 1000, new CustomData(5, "Amex Credit Card"));
```
##### Exceptions
| Type | Description |
| -------------------- | ------------------------------------------------------------------------------------------------------------------- |
| `VisitorCodeInvalid` | Exception indicating that the provided visitor code is not valid. It is either empty or longer than 255 characters. |
#### getEngineTrackingCode()
Kameleoon integrates with several analytics solutions, including Mixpanel, Google Analytics 4, and Segment. To track server-side experiments correctly, call the `getEngineTrackingCode()` method after the visitor triggers an experiment. The SDK returns JavaScript queue commands for the experiments that the visitor triggered during the previous five seconds. When you insert this code into the page, Engine.js processes the commands and sends the exposure events through the active analytics integration.
Refer to [hybrid experimentation](/developer-docs/feature-experimentation/get-started/hybrid-experimentation) for more information on implementing this method.
```java theme={null}
String engineTrackingCode = kameleoonClient.getEngineTrackingCode(visitorCode);
```
* To use this feature, implement both the Java SDK and Kameleoon [Engine.js](/developer-docs/web-experimentation/implementation-and-deployment/standard-implementation). Because Engine.js is used only for tracking in this flow, you can install the asynchronous tag before the closing `` tag.
* If you only want to track experiments in Kameleoon and do not need to send exposure events to third-party analytics tools, use the [JavaScript / TypeScript SDK](/developer-docs/sdks/web-sdks/js-sdk). This option works well for [serverless edge compute platforms](/developer-docs/feature-experimentation/implementation-and-deployment/serverless-edge-compute-starter-kits). The JavaScript / TypeScript SDK automatically tracks variations when you call [`getVisitorCode`](/developer-docs/sdks/web-sdks/js-sdk#getvisitorcode), as long as you add the corresponding experiment assignments to `window.kameleoonQueue`.
* You can insert the returned tracking code directly into an HTML `
```
In this example, `123456` and `234567` are experiment IDs, and `7890` and `8901` are variation IDs. In your implementation, the SDK generates these values in the returned tracking code.
##### Parameters
| Name | Type | Description |
| ------------------------------------- | -------- | --------------------------------- |
| `visitorCode` required | `String` | Unique identifier of the visitor. |
##### Return value
| Type | Description |
| -------- | ---------------------------------------- |
| `String` | JavaScript code to insert into the page. |
### Events
#### setEventHandler()
Use this method to register a handler for SDK events. The SDK calls the handler when the selected event occurs. Registering a new handler for the same event type replaces the previous handler.
Passing `null` as the `handler` removes the current handler for the selected event type.
```java theme={null}
import com.kameleoon.events.DataFileUpdateEvent;
import com.kameleoon.events.EventType;
kameleoonClient.setEventHandler(EventType.DATAFILE_UPDATE, event -> {
DataFileUpdateEvent.Source source = event.getSource(); // POLLING or STREAMING
long dateModified = event.getDateModified(); // Data file modification date in milliseconds.
// React to the data file update.
});
// Clear the handler.
kameleoonClient.setEventHandler(EventType.DATAFILE_UPDATE, null);
```
`DataFileUpdateEvent` contains information about an SDK data file update.
| Name | Type | Description |
| -------------- | ---------------------------- | ---------------------------------------------------------------------------------------------------------------------------------------------------------------------------------------------------------------------------------------------------------------------------------------------------------------------------------------------------------------------------- |
| `source` | `DataFileUpdateEvent.Source` | The update source. [`POLLING`](/developer-docs/feature-experimentation/technical-reference/technical-considerations#polling-default) indicates a scheduled data file refresh, and [`STREAMING`](/developer-docs/feature-experimentation/technical-reference/technical-considerations#streaming-premium-option) indicates a real-time update received through streaming mode. |
| `dateModified` | `long` | The modification date of the updated data file, in milliseconds. |
```java theme={null}
import com.kameleoon.events.EventType;
import com.kameleoon.events.HttpRequestFailure;
import com.kameleoon.events.HttpRequestHandler;
import com.kameleoon.events.HttpRequestHandler.RequestType;
kameleoonClient.setEventHandler(EventType.HTTP_REQUEST, new HttpRequestHandler() {
@Override
public void onRequestSucceeded(RequestType requestType, int httpStatus, long durationMillis) {
// The SDK request completed successfully.
}
@Override
public void onRequestFailed(RequestType requestType, HttpRequestFailure failure, long durationMillis) {
HttpRequestFailure.Reason reason = failure.getReason();
Integer httpStatus = failure.getHttpStatus();
Throwable cause = failure.getCause();
// The SDK request failed.
}
});
// Clear the handler.
kameleoonClient.setEventHandler(EventType.HTTP_REQUEST, null);
```
`HttpRequestHandler` lets you react to completed SDK HTTP requests. The SDK calls `onRequestSucceeded()` for successful responses and `onRequestFailed()` for failed responses, exceptions, or cancelled requests.
| Method | Description |
| ---------------------- | -------------------------------------------------------------------------------------------- |
| `onRequestSucceeded()` | Called when an SDK HTTP request completes successfully. |
| `onRequestFailed()` | Called when an SDK HTTP request fails because of an HTTP status, exception, or cancellation. |
##### Callback parameters
| Name | Type | Description |
| ---------------- | -------------------------------- | --------------------------------------------------------------------------------------------------------------------------- |
| `requestType` | `HttpRequestHandler.RequestType` | The SDK request type. Possible values are `DATAFILE`, `TRACKING`, `REMOTE_VISITOR_DATA`, `REMOTE_DATA`, and `ACCESS_TOKEN`. |
| `httpStatus` | `int` | The HTTP status code returned by the request. Passed only to `onRequestSucceeded()`. |
| `failure` | `HttpRequestFailure` | Details about why the request failed. Passed only to `onRequestFailed()`. |
| `durationMillis` | `long` | The request duration in milliseconds. |
##### HttpRequestFailure
`HttpRequestFailure` contains details about a failed SDK HTTP request.
| Name | Type | Description |
| ------------ | --------------------------- | ---------------------------------------------------------------------------------------------------------------------------------------- |
| `reason` | `HttpRequestFailure.Reason` | The failure reason. Possible values are `HTTP_STATUS`, `EXCEPTION`, and `CANCELLED`. |
| `httpStatus` | `Integer` | The HTTP status code for failures caused by an unsuccessful HTTP response. This value is `null` for exception and cancellation failures. |
| `cause` | `Throwable` | The exception that caused the request to fail. This value is `null` when the request failed because of an HTTP status or cancellation. |
##### Parameters
| Name | Type | Description |
| ----------------------------------- | ------------------------ | ----------------------------------------------------------------------------------------------------------------------------------------------------------------------------------------------------------------------- |
| `eventType` required | `EventType` | The SDK event type to handle. Use `EventType.DATAFILE_UPDATE` to react to SDK data file updates, or `EventType.HTTP_REQUEST` to react to completed SDK HTTP requests. |
| `handler` required | `T extends EventHandler` | The handler to register for the selected event type. Use a `DataFileUpdateHandler` for `EventType.DATAFILE_UPDATE`, or an `HttpRequestHandler` for `EventType.HTTP_REQUEST`. Pass `null` to remove the current handler. |
### Data types
This section lists the data types supported by Kameleoon in `com.kameleoon.Data`. We provide several standard data types as well as the `CustomData` type that allows you to define custom data types.
#### Browser
The `Browser` data set stored here can be used to filter experiment and personalization reports by any value associated with it.
| Name | Type | Description |
| --------------------------------- | -------------- | ----------------------------------------------------------------------------------------------- |
| `type` required | `Browser.Type` | List of browsers: `CHROME`, `INTERNET_EXPLORER`, `FIREFOX`, `SAFARI`, `OPERA`, `OTHER`. |
| `version` optional | `Float` | Version of the browser, floating point number represents major and minor version of the browser |
```java theme={null}
kameleoonClient.addData(visitorCode, Browser.chrome());
kameleoonClient.addData(visitorCode, Browser.safari());
kameleoonClient.addData(visitorCode, new Browser(Browser.Type.CHROME, 10.0));
```
#### Conversion
The `Conversion` data set stored here can be used to filter experiment and personalization reports by any goal associated with it.
* Each visitor can have multiple `Conversion` objects.
* You can find the `goalId` in the Kameleoon app.
| Name | Type | Description | Default |
| ---------------------------------- | --------------- | ----------------------------------------------- | ------------------- |
| `goalId` required | `int` | ID of the goal. | |
| `revenue` optional | `float` | Revenue of the conversion | `0` |
| `negative` optional | `boolean` | Defines if the revenue is positive or negative. | `false` |
| `metadata` optional | `CustomData...` | Metadata of the conversion. | `new CustomData[0]` |
```java theme={null}
kameleoonClient.addData(visitorCode, new Conversion(32, 10f));
kameleoonClient.addData(visitorCode, new Conversion(33, null, true));
kameleoonClient.addData(
visitorCode,
new Conversion(34, 5f, new CustomData(3, "metadata1", "md2"), new CustomData(5, "md3"))
);
```
#### Cookie
`Cookie` contains information about the cookie stored on the visitor's device.
| Name | Type | Description |
| ------- | --------------------- | --------------------------------------------------------------------------------- |
| cookies | `Map` | A string object map consisting of cookie keys and values. This field is required. |
Each visitor can only have one `Cookie`. Adding a second `Cookie` overwrites the first one.
```java theme={null}
Cookie cookie = new Cookie (new HashMap() {{
put("my_key1", "my_value1");
put("my_key2", "my_value1");
}});
kameleoonClient.addData(visitorCode, cookie);
```
#### Geolocation
`Geolocation` contains the visitor's geolocation details.
| Name | Type | Description |
| ------------------------------------ | --------------------- | ---------------------------------------------------------------------------------------------------------------- |
| `country` required | `String` | The country of the visitor. |
| `region` optional | `String` | The region of the visitor. |
| `city` optional | `String` | The city of the visitor. |
| `postalCode` optional | `String` | The postal code of the visitor. |
| `latitude` optional | `float` | The latitude coordinate representing the location of the visitor. Coordinate number represents decimal degrees. |
| `longitude` optional | `float` | The longitude coordinate representing the location of the visitor. Coordinate number represents decimal degrees. |
* Each visitor can have only one `Geolocation`. Adding a second `Geolocation` overwrites the first one.
```java theme={null}
kameleoonClient.addData(visitorCode, new Geolocation("France", "Île-de-France", "Paris"));
```
#### CustomData
`CustomData` enables the association of any type of data with each visitor, making it an effective tool for targeting conditions in [segments](/user-manual/assets/segments/create-a-segment/). Additionally, it can be used as a filter or breakdown in experiment reports. For more information about custom data, please refer to this [article](/developer-docs/custom-data).
Define custom data types in the Kameleoon app or the Data API and use them from the SDK.
| Name | Type | Description | Default |
| ---------------------------------- | -------------------------- | --------------------------------------------------------------------------------------------------------------------------------------------------------------------------------------- | ------- |
| index/name required | `int`/`String` | Index or Name of the custom data. **Either `index` or `name` must be provided** to identify the data.. | |
| values required | `String...`/`List` | Values of the custom data to be stored. | |
| overwrite optional | `boolean` | Flag to explicitly control how the values are stored and how they appear in reports. [See more](/developer-docs/custom-data#default-logic-when-overwrite-parameter-is-false-or-omitted) | `true` |
* Each visitor is allowed only one `CustomData` for each unique `index`(`name`). Adding another `CustomData` with the same `index`(`name`) will replace the existing one.
* The custom data ‘index’ can be found in the [Custom Data dashboard](/user-manual/assets/custom-data/manage-custom-data) under the “INDEX” column.
* To prevent the SDK from sending data with the selected index to Kameleoon servers for privacy reasons, enable the option: **Use this data only locally for targeting purposes** when creating custom data.
* Adding a `CustomData` instance created with a name when the SDK instance is not initialized or the name is not registered, will result in the data being ignored.
```java theme={null}
kameleoonClient.addData(visitorCode, new CustomData(1, "value"));
// With several values
kameleoonClient.addData(visitorCode, new CustomData(1, "value1", "value2"));
// To set the 'overwrite' flag to false
kameleoonClient.addData(visitorCode, new CustomData(1, false, "value"));
// To use a name instead of the index
kameleoonClient.addData(visitorCode, new CustomData("my-custom-data", "value"));
```
#### Device
| Name | Type | Description |
| ------ | -------- | ---------------------------------------------------------------------- |
| device | `Device` | List of devices: `PHONE`, `TABLET`, `DESKTOP`. This field is required. |
```java theme={null}
kameleoonClient.addData(visitorCode, Device.desktop());
```
#### PageView
Store page view events.
| Name | Type | Description |
| --------- | --------------- | -------------------------------------------------- |
| url | `String` | URL of the page viewed. This field is required. |
| title | `String` | Title of the page viewed. This field is required. |
| referrers | `List` | Referrers of viewed pages. This field is optional. |
The referrer's index (ID) is available in the Kameleoon app in the [acquisition channel configuration](/user-manual/assets/advanced-targeting-tools/create-an-acquisition-channel) page. Be careful: this index starts at 0, so the first acquisition channel you create for the specified site would have the ID 0, not 1.
```java theme={null}
kameleoonClient.addData(
visitorCode,
new PageView("https://url.com", "title", Array.asList(3))
);
```
#### UserAgent
Server-side experiments are more likely to be affected by bot traffic than client-side experiments. Kameleoon uses the IAB/ABC International Spiders and Bots List to tackle this issue and recognize known bots and spiders. Kameleoon also uses the `UserAgent` field to filter out bots and other unwanted traffic that might distort your conversion metrics. For more details, see our help article on [bot filtering](/user-manual/faq#how-does-kameleoon-filter-bot-traffic-from-my-results).
If you use internal bots, we suggest that you pass the value **curl/8.0** of the userAgent to exclude them from our analytics.
| Name | Type | Description |
| ----- | -------- | -------------------------------------------------------------------------------------- |
| value | `String` | The User-Agent value that will be sent with tracking requests. This field is required. |
```java theme={null}
kameleoonClient.addData(visitorCode, new UserAgent("Your User Agent"));
```
#### UniqueIdentifier
If you don't add `UniqueIdentifier` for a visitor, `visitorCode` is used as the unique visitor identifier, which is useful for [Cross-device experimentation](/developer-docs/cross-device-experimentation). When you add `UniqueIdentifier` for a visitor, the SDK links the flushed data with the visitor associated with the specified identifier.
The `isUniqueIdentifier` can be helpful in unique situations; for example, if you cannot access the anonymous `visitorCode` given to a visitor, but you can use an internal ID linked to that visitor through session merging.
| Name | Type | Description |
| ----- | --------- | --------------------------------------------------------------------------------------- |
| value | `boolean` | Parameter specifying if the visitorCode is a unique identifier. This field is required. |
```java theme={null}
kameleoonClient.addData(visitorCode, new UniqueIdentifier(true));
```
#### OperatingSystem
`OperatingSystem` contains information about the operating system on the visitor's device.
| Name | Type | Description |
| ---- | ---------------------- | -------------------------------------------------------------------------------------------------------------------- |
| type | `OperatingSystem.Type` | List of operating systems: `WINDOWS_PHONE`, `WINDOWS`, `ANDROID`, `LINUX`, `MAC`, and `IOS`. This field is required. |
Each visitor can only have one `OperatingSystem`. Adding a second `OperatingSystem` overwrites the first one.
```java theme={null}
kameleoonClient.addData(visitorCode, new OperatingSystem(OperatingSystem.Type.WINDOWS));
kameleoonClient.addData(visitorCode, OperatingSystem.mac());
```
#### ApplicationVersion
`ApplicationVersion` represents the semantic version number of your application.
A **visitor** can have only one `ApplicationVersion`. Adding a second instance will overwrite the first one.
| Name | Type | Description |
| ------------------------------- | -------- | ------------------------------------------------------------------------------------------------------------------------------------------------ |
| version optional | `String` | The mobile application version. This field must follow semantic versioning. Accepted formats are `major`, `major.minor`, or `major.minor.patch`. |
```java theme={null}
kameleoonClient.addData(visitorCode, new ApplicationVersion("10")); // major
kameleoonClient.addData(visitorCode, new ApplicationVersion("10.20")); // major.minor
kameleoonClient.addData(visitorCode, new ApplicationVersion("10.20.30")); // major.minor.patch
```
### Returned Types
#### DataFile
The `DataFile` contains the SDK configuration details.
It can be extended with additional information if required by clients. If you need more details, please contact your Customer Success Manager.
| Name | Type | Description |
| -------------- | -------------------------- | --------------------------------------------------------------------------------- |
| `featureFlags` | `Map` | A map of [`FeatureFlag`](#featureflag) objects, keyed by feature flag keys. |
| `dateModified` | `long` | The timestamp (in milliseconds) indicating when the `DataFile` was last modified. |
```java theme={null}
// Retrieves the map of feature flags from the DataFile.
// The map is keyed by feature flag identifiers, with each value being a FeatureFlag object.
Map featureFlags = dataFile.getFeatureFlags();
// Retrieves the last modification timestamp of the DataFile.
// The value is a long representing milliseconds since the Unix epoch.
long dateModified = dataFile.getDateModified();
```
#### FeatureFlag
The `FeatureFlag` represents a set of properties that define a feature flag itself — for example, its [`Variations`](#variation), [`Rules`](#rule), environment status, and other related details.
It can be extended with additional information if required by clients. If you need more details, please contact your Customer Success Manager.
| Name | Type | Description |
| --------------------- | ------------------------ | -------------------------------------------------------------------------- |
| `environmentEnabled` | `boolean` | Indicating whether the feature flag is enabled in the current environment. |
| `defaultVariationKey` | `String` | The key of the default variation associated with the feature flag. |
| `variations` | `Map` | A map of `Variation` objects, keyed by variation keys. |
| `rules` | `List` | A list of `Rule` objects |
```java theme={null}
// Check whether the feature flag is enabled in the current environment
boolean isEnvironmentEnabled = featureFlag.isEnvironmentEnabled();
// Retrieve the key of the default variation
String defaultVariationKey = featureFlag.getDefaultVariationKey();
// Retrieve the default variation object
Variation defaultVariation = featureFlag.getDefaultVariation();
// Retrieve all variations of the feature flag as a map (key = variation key, value = Variation object)
Map variations = featureFlag.getVariations();
// Retrieve all targeting rules associated with the feature flag
List rules = featureFlag.getRules();
```
#### Rule
The `Rule` represents a set of properties that define a rule itself — for example, its [`Variations`](#variation).
It can be extended with additional information if required by clients. If you need more details, please contact your Customer Success Manager.
| Name | Type | Description |
| ------------ | ------------------------ | ------------------------------------------------------ |
| `variations` | `Map` | A map of `Variation` objects, keyed by variation keys. |
```java theme={null}
// Retrieve all variations of the rule as a map (key = variation key, value = Variation object)
Map variations = rule.getVariations();
```
#### Variation
`Variation` contains information about the visitor's assigned variation (or the default variation, if no specific assignment exists).
| Name | Type | Description |
| ------------ | ----------------------- | ---------------------------------------------------------------------------------------------------------------------------------------------------- |
| name | `String` | The name of the variation. |
| key | `String` | The unique key identifying the variation. |
| id | `Integer` | The ID of the assigned variation (or `null` if it's the default variation). |
| experimentId | `Integer` | The ID of the experiment associated with the variation (or `null` if default). |
| variables | `Map` | A map containing the variables of the assigned variation, keyed by variable names. This could be an empty collection if no variables are associated. |
* The `Variation` object provides details about the assigned variation and its associated experiment, while the [`Variable`](#variable) object contains specific details about each variable within a variation.
* Ensure that your code handles the case where `id` or `experimentId` may be `null`, indicating a default variation.
* The `variables` map might be empty if no variables are associated with the variation.
```java theme={null}
// Retrieving the variation name
String variationName = variation.getName();
// Retrieving the variation key
String variationKey = variation.getKey();
// Retrieving the variation id
Integer variationId = variation.getId();
// Retrieving the experiment id
Integer experimentId = variation.getExperimentId();
// Retrieving the variables map
Map variables = variation.getVariables();
```
#### Variable
`Variable` contains information about a variable associated with the assigned variation.
| Name | Type | Description |
| ----- | -------- | ---------------------------------------------------------------------------------------------------------------------------------------------------------- |
| key | `String` | The unique key identifying the variable. |
| type | `String` | The type of the variable. Possible values: **BOOLEAN**, **NUMBER**, **STRING**, **JSON**, **JS**, **CSS**. |
| value | `Object` | The value of the variable, which can be of the following types: **Boolean**, **Integer**, **Long**, **Double**, **String**, **JsonObject**, **JsonArray**. |
```java theme={null}
// Retrieving the variables map
Map variables = variation.getVariables();
// Variable type can be retrieved for further processing
String type = variables.get("isDiscount").getType();
// Retrieving the variable value by key
Boolean isDiscount = (Boolean) variables.get("isDiscount").getValue();
// Variable value can be of different types
String title = (String) variables.get("title").getValue();
```
### Deprecated methods
These methods are deprecated and will be removed in SDK version `5.0.0`.
#### getFeatureVariationKey()
* *📨 Sends Tracking Data to Kameleoon*
Use [`getVariation()`](#getvariation) instead.
Call this method to get the feature variation key for a specified user and feature. This method takes a `visitorCode` and `featureKey` as mandatory arguments to get the variation key for the user and feature.
If the user has never been associated with this feature flag, the SDK returns a randomly-assigned variation key (according to the feature flag rules). If a user with the specified `visitorCode` is already registered with this feature flag, the SDK detects the previous variation key value. If the user doesn't match any of the rules, the default value is returned, which you can customize in the Kameleoon app.
Make sure you catch and handle potential exceptions.
If you specify a `visitorCode`, the `flush()` method uses it as the unique visitor identifier, which is useful for [Cross-device experimentation](/developer-docs/cross-device-experimentation). When you specify a `visitorCode` and set the `isUniqueIdentifier` parameter to `true`, the SDK links the flushed data with the visitor associated with the specified identifier.
The parameter `isUniqueIdentifier` is deprecated. Please use [`UniqueIdentifier`](#uniqueidentifier) instead.
The `isUniqueIdentifier` can be helpful in unique situations; for example, if you cannot access the anonymous `visitorCode` given to a visitor, but you can use an internal ID linked to that visitor through session merging.
```java theme={null}
String visitorCode = kameleoonClient.getVisitorCode(httpServletRequest, httpServletResponse);
String featureKey = "new_checkout";
String variationKey = ""
try {
variationKey = kameleoonClient.GetFeatureVariationKey(visitorCode, featureKey);
} catch (KameleoonException.FeatureNotFound e) {
// The error has occurred; the feature flag isn't found in the current configuration
} catch (KameleoonException.FeatureEnvironmentDisabled e) {
// The feature flag is disabled for the environment
} catch (KameleoonException.VisitorCodeInvalid e) {
// The visitor code you passed to the method is invalid and can't be accepted by SDK.
}
switch (variationKey) {
case 'on':
// Main variation key is selected for visitorCode
break;
case 'alternative_variation':
// Alternative variation key
break;
default:
// Default variation key
break;
}
```
##### Parameters
| Name | Type | Description |
| ------------------------------- | --------- | ----------------------------------------------------------------------------------------------------------------------------------------------------- |
| visitorCode | `String` | Unique identifier of the user. This field is required. |
| featureKey | `String` | Key of the feature you want to expose to a user. This field is required. |
| isUniqueIdentifier (Deprecated) | `boolean` | An optional parameter for specifying if the visitorCode is a unique identifier. If not provided, the default value is `false`. The field is optional. |
##### Return value
| Type | Description |
| -------- | ------------------------------------------------------------------------------------- |
| `String` | Variation key of the feature flag that is registered for the specified `visitorCode`. |
##### Exceptions thrown
| Type | Description |
| --------------------------------------------- | --------------------------------------------------------------------------------------------------------------------------------------------------------------------------------------------------------------------------------------------------------------------------- |
| KameleoonException.FeatureNotFound | Exception indicating that the requested feature key wasn't found in the SDK's internal configuration. This exception usually means that the feature flag is not activated in the Kameleoon app (but code implementing the feature is already deployed on your application). |
| KameleoonException.FeatureEnvironmentDisabled | Exception indicating that feature flag is disabled for the visitor's current environment (for example, production, staging, or development). |
| KameleoonException.VisitorCodeInvalid | Exception indicating that the provided visitor code is not valid. It is empty or longer than 255 characters. |
#### getActiveFeatures()
Use [`getVariations()`](#getvariations) instead.
This method takes a single **visitorCode** parameter. Result contains only active features for a given visitor.
```java theme={null}
try {
Map activeFeatures = kameleoonClient.getActiveFeatures(visitorCode);
} catch (VisitorCodeInvalid e) {
// Handle exception
}
```
##### Parameters
| Name | Type | Description |
| ----------- | ------ | ------------------------------------------------- |
| visitorCode | String | User's unique identifier. This field is required. |
##### Return value
| Type | Description |
| ------------------------ | --------------------------------------------------------------------------------------------------------------- |
| `Map` | Map that contains the assigned variations of the active features using the corresponding active features' keys. |
##### Exceptions thrown
| Type | Description |
| ------------------ | ------------------------------------------------------------------------------------------------------------------- |
| VisitorCodeInvalid | Exception indicating that the provided visitor code is not valid. It is either empty or longer than 255 characters. |
#### getActiveFeatureListForVisitorCode()
* Use [`getVariations()`](#getvariations) instead.
* This method was previously called `obtainFeatureListForVisitorCode`, which was removed in SDK version `4.0.0`.
This method takes a single `visitorCode` parameter. Return only the active feature flags for the specified visitor.
```java theme={null}
List listActiveFeatureFlags = kameleoonClient.getActiveFeatureListForVisitorCode(visitorCode);
```
##### Parameters
| Name | Type | Description |
| ----------- | -------- | ------------------------------------------------- |
| visitorCode | `String` | User's unique identifier. This field is required. |
##### Return value
| Type | Description |
| -------------- | --------------------------------------------------------------------- |
| `List` | List of active feature flag keys available for specific `visitorCode` |
#### getFeatureVariable()
* *📨 Sends Tracking Data to Kameleoon*
Use [`getVariation()`](#getvariation) instead.
Call this method to get a user's associated feature variation value. This method takes a `visitorCode`, `featureKey` and `variableKey` as required arguments to get the variation key's variable for the specified user.
If a user has never been associated with this feature flag, the SDK returns a randomly assigned variable value of the variation key according to the feature flag rules. If a user with the specified `visitorCode` is already registered with this feature flag, the SDK returns the variable value for previously associated variation. If the user does not match any of the rules, the default variable is returned.
Make sure you catch and handle potential exceptions.
If you specify a `visitorCode`, the `getFeatureVariable()` method uses the code as the unique visitor identifier, which is useful for [cross-device experimentation](/developer-docs/cross-device-experimentation). When you specify a `visitorCode` and set the `isUniqueIdentifier` parameter to `true`, the SDK links the flushed data with the visitor associated with the specified identifier.
The parameter `isUniqueIdentifier` is deprecated. Please use [`UniqueIdentifier`](#uniqueidentifier) instead.
The `isUniqueIdentifier` can be helpful in unique situations; for example, if you cannot access the anonymous `visitorCode` given to a visitor, but you can use an internal ID linked to that visitor through session merging.
```java theme={null}
String visitorCode = kameleoonClient.getVisitorCode(httpServletRequest, httpServletResponse);
String featureKey = "feature_key";
String variableKey = "var"
try {
var variableValue = kameleoonClient.getFeatureVariable(visitorCode, featureKey, variableKey);
// Your custom code, depending on variableValue.
} catch (KameleoonException.FeatureNotFound e) {
// The error has occurred; the feature flag isn't found in current configuration
} catch (KameleoonException.FeatureEnvironmentDisabled e) {
// The feature flag is disabled for the environment.
} catch (KameleoonException.FeatureVariableNotFound e) {
// Requested variable not defined on Kameleoon's side
} catch (KameleoonException.VisitorCodeInvalid e) {
// The visitor code passed to the method is invalid and can't be accepted by SDK.
}
```
##### Parameters
| Name | Type | Description |
| ------------------------------- | --------- | ----------------------------------------------------------------------------------------------------------------------------------------------------- |
| visitorCode | `String` | Unique identifier of the user. This field is required. |
| featureKey | `String` | Key of the feature you want to expose to a user. This field is required. |
| variableKey | `String` | Name of the variable you want to get a value for. This field is required. |
| isUniqueIdentifier (Deprecated) | `boolean` | An optional parameter for specifying if the visitorCode is a unique identifier. If not provided, the default value is `false`. The field is optional. |
##### Return value
| Type | Description |
| ------ | ------------------------------------------------------------------------------------------------------------------------------------------------------------------------------- |
| object | Value of variable of variation that is registered for the specified `visitorCode` for this feature flag. Possible types: `bool`, `int`, `double`, `string`, `JObject`, `JArray` |
##### Exceptions thrown
| Type | Description |
| --------------------------------------------- | ------------------------------------------------------------------------------------------------------------------------------------------------------------------------------------------------------------------------------------------------------------------------- |
| KameleoonException.FeatureNotFound | Exception indicating that the requested feature key wasn't found in the internal SDK configuration. This usually means that the feature flag has not yet been activated in the Kameleoon app (but code implementing the feature is already deployed in your application). |
| KameleoonException.FeatureEnvironmentDisabled | Exception indicating that feature flag is disabled for the visitor's current environment (for example, production, staging, or development). |
| KameleoonException.FeatureVariableNotFound | Exception indicating that the requested variable wasn't found. Check that the variable's key in the Kameleoon app matches your code. |
| KameleoonException.VisitorCodeInvalid | Exception indicating that the specified visitor code is not valid. (It is either empty or longer than 255 characters). |
#### getFeatureVariables()
* *📨 Sends Tracking Data to Kameleoon*
Use [`getVariation()`](#getvariation) instead.
This method retrieves a map containing variable keys and their values assigned according the variation that the visitor is assigned in the specified feature flag. Feature variables can be modified in the Kameleoon app.
If a user has never been associated with this feature flag, the SDK returns a randomly assigned set of variable values in the variation according to the feature flag rules. If a user with the specified `visitorCode` is already registered with this feature flag, the SDK returns the variable values for the variation used previously. If the user does not match any of the rules, the default variables are returned.
Make sure you catch and handle potential exceptions.
```java theme={null}
String visitorCode = kameleoonClient.getVisitorCode(httpServletRequest, httpServletResponse);
String featureKey = "feature_key";
String variableKey = "var"
try {
var variableValue = kameleoonClient.getFeatureVariables(visitorCode, featureKey);
// Your custom code, depending on variable values.
} catch (KameleoonException.FeatureNotFound e) {
// The error has occurred; the feature flag isn't found in current configuration.
} catch (KameleoonException.FeatureEnvironmentDisabled e) {
// The feature flag is disabled for the environment.
} catch (KameleoonException.FeatureVariableNotFound e) {
// Requested variable not defined on Kameleoon's side
} catch (KameleoonException.VisitorCodeInvalid e) {
// The visitor code passed to the method is invalid and can't be accepted by SDK.
}
```
##### Parameters
| Name | Type | Description |
| ------------ | -------- | ---------------------------------------------------------------- |
| featureKey | `String` | Key of the feature you want to obtain. This field is required. |
| variationKey | `String` | Key of the variation you want to obtain. This field is required. |
##### Return value
| Type | Description |
| -------------------- | ---------------------------------------------------------------------------------------------------------------------------------------------------------------------------- |
| `Map` | Data associated with this feature flag. The values can be `Boolean`, `Integer`, `Double`, `String`, `JsonObject`, or `JsonArray` (the type is defined in the Kameleoon app). |
##### Exceptions thrown
| Type | Description |
| --------------------------------------------- | ------------------------------------------------------------------------------------------------------------------------------------------------------------------------------------------------------------------------------------------------------------------------------- |
| KameleoonException.FeatureNotFound | Exception indicating that the requested feature key wasn't found in the internal SDK configuration. This exception usually means that the feature flag has not been activated in the Kameleoon app (but code implementing the feature is already deployed in your application). |
| KameleoonException.FeatureEnvironmentDisabled | Exception indicating that feature flag is disabled for the visitor's current environment (for example, production, staging, or development). |
| KameleoonException.FeatureVariationNotFound | Exception indicating that the requested variation key wasn't found in the internal configuration of the SDK. This usually means that the variation's corresponding experiment is not activated in the Kameleoon app. |
| KameleoonException.VisitorCodeInvalid | Exception indicating that the specified visitor code is not valid. (It is either empty or longer than 255 characters). |
#### getFeatureVariationVariables()
* Use [`getVariation()`](#getvariation) instead.
* This method was previously called `getFeatureAllVariables`, which was removed in SDK version `4.0.0`.
Call this method to retrieve all feature variables for a feature. You can modify feature variables in the Kameleoon app.
This method takes two input parameters: `featureKey` and `variationKey`. It returns the data with the `Map` type as defined in the Kameleoon app. It throws an exception (`KameleoonException.FeatureNotFound`) if the feature you request isn't found in the SDK's internal configuration.
```java theme={null}
String featureKey = "featureKey";
String variationKey = "variationKey";
try {
Map allVariables = kameleoonClient.getFeatureVariationVariables(featureKey, variationKey);
} catch (KameleoonException.FeatureNotFound e) {
// The feature is not activated in the Kameleoon app.
} catch (KameleoonException.FeatureEnvironmentDisabled e) {
// The feature flag is disabled for the environment.
} catch (KameleoonException.FeatureVariationNotFound e) {
// The variation is not activated in the Kameleoon app (most likely, the associated experiment is not active)
} catch (Exception e) {
// This is a generic Exception handler which will handle all exceptions.
System.out.println("Exception occurred");
}
```
##### Parameters
| Name | Type | Description |
| ------------ | ------ | ---------------------------------------------------------------- |
| featureKey | String | Key of the feature you want to obtain. This field is required. |
| variationKey | String | Key of the variation you want to obtain. This field is required. |
##### Return value
| Type | Description |
| -------------------- | ----------------------------------------------------------------------------------------------------------------------------------------------------------------------------------- |
| `Map` | Data associated with this feature flag. The values can be `Boolean`, `Integer`, `Double`, `String`, `JsonObject`, `JsonArray` (depending on the type defined in the Kameleoon app). |
##### Exceptions thrown
| Type | Description |
| --------------------------------------------- | -------------------------------------------------------------------------------------------------------------------------------------------------------------------------------------------------------------------- |
| KameleoonException.FeatureNotFound | Exception indicating that the requested feature wasn't found in the internal configuration of the SDK. This exception usually means that the feature flag is not activated in the Kameleoon app. |
| KameleoonException.FeatureEnvironmentDisabled | Exception indicating that feature flag is disabled for the visitor's current environment (for example, production, staging, or development). |
| KameleoonException.FeatureVariationNotFound | Exception indicating that the requested variation key wasn't found in the internal configuration of the SDK. This usually means that the variation's corresponding experiment is not activated in the Kameleoon app. |
#### updateConfigurationHandler()
The `updateConfigurationHandler()` method allows you to handle the event when configuration has updated data. It takes one input parameter, **handler**. The handler that will be called when the configuration is updated using a real-time configuration event.
```java theme={null}
kameleoonClient.updateConfigurationHandler(() -> {
// Configuration was updated
});
```
##### Parameters
| Name | Type | Description |
| --------- | ------------------------------------- | -------------------------------------------------------------------------------------------------------- |
| `handler` | `KameleoonUpdateConfigurationHandler` | The handler that will be called when the configuration is updated using a real-time configuration event. |
# JavaScript / TypeScript SDK
Source: https://docs.kameleoon.com/developer-docs/sdks/web-sdks/js-sdk
Integrate the Kameleoon JavaScript/TypeScript SDK to run experiments and activate feature flags in client-side web applications.
With the Kameleoon JavaScript SDK, you can run experiments and activate feature flags. Integrating our SDK into your web application is easy, and its footprint (memory and network usage) is low.
**Getting started**: For help getting started, see the [developer guide](#developer-guide).
**Changelog**: Details on the latest version of JavaScript / TypeScript SDK can be found in the [changelog](https://github.com/Kameleoon/client-js/blob/main/CHANGELOG.md).
**SDK methods**: For the full reference documentation of the JavaScript SDK, see the [reference](#reference) section.
## Developer guide
This section will help you get started as well as introduce you to some of the more advanced concepts.
### Getting started
#### Installation
The Kameleoon SDK Installation tool is the best method to install the SDK quickly. The **SDK Installer** helps you install the SDK of your choice, generate a basic code sample, and configure [external dependencies](#external-dependencies) if needed.
To use the SDK Installation tool, install and run it globally:
```bash theme={null}
npm install --global @kameleoon/sdk-installer
kameleoon-sdk
```
Or run it directly with `npx`:
```bash theme={null}
npx @kameleoon/sdk-installer
```
You can also inject the JavaScript SDK into your app as a single file using the `
Hello, World!