> ## Documentation Index
> Fetch the complete documentation index at: https://docs.kameleoon.com/llms.txt
> Use this file to discover all available pages before exploring further.
# PBXでウィジェットを作成する
> AI駆動のUIジェネレーターであるPBXを使用して、自然言語プロンプトでウィジェットを構築する方法を学びます。
# PBXでウィジェットを作成する
**PBX Widgets** は、新しいパーソナライゼーションビルダーで作成された実験やパーソナライゼーション用のウィジェットの作成を支援するAI駆動のUIジェネレーターです。HTML、CSS、JavaScriptを手動で記述する代わりに、ウィジェットを自然言語で記述すると、PBXがコンポーネントを自動的に生成します。
このアプローチにより、マーケター、プロダクトマネージャー、CROスペシャリストは、技術的な専門知識なしにUIコンポーネントを迅速に構築できます。
PBXで作成される典型的なウィジェットには、次のようなものがあります。
* ニュースレター登録ポップアップ
* プロモーションバナー
* 離脱意図オファー
* リードキャプチャフォーム
* 商品レコメンデーションパネル
* 調査またはフィードバックモーダル
PBXウィジェットは、レガシーパーソナライゼーションと互換性がありません。必要に応じて、CSMに新しいパーソナライゼーションへのアクセスをリクエストできます。
## ウィジェットを作成する
PBXを使用してウィジェットを生成および調整するには、次の手順に従います。
### 1. PBXを開く
Kameleoonインターフェースでウィジェットの生成を開始するには:
1. **Studio** > **Widgets** に移動します。
2. **New widget** をクリックします。
3. **Using a prompt** を選択します。
4. ポップインメニューで必要な情報を入力します。
5. **Create** をクリックします。
### 2. プロンプトを書く
プロンプトフィールドに、構築したいウィジェットを記述します。PBXはこの説明を使用して、ウィジェットUIを自動的に生成します。
**プロンプトの例:**
```text theme={null}
Create a centered modal popup widget.
- Layout: Two columns with an image placeholder on the left and a subscription form on the right.
- Content:
- Title: Join an Exclusive Community
- Description: Subscribe for exclusive discounts and get 15% off your next purchase.
- Form: Email input field with placeholder "Enter your email address"
- CTA button: Subscribe now
- Secondary link: No thanks
- Style:
- Modern ecommerce design
- Rounded UI elements
- Light beige background
- Dark CTA button
- Behavior:
- Display after 5 seconds
- Close button in top right corner
- Close popup when clicking "No thanks"
- Tracking: Track a goal called "Newsletter Signup" when the CTA button is clicked.
- Image: Use the following image in the image placeholder on the left: [https://www.whereyourimagelives.com](https://www.whereyourimagelives.com)
```

### 3. プレビューと反復
希望する結果に到達する最速の方法は、プロンプト反復ワークフローを使用することです。生成されたウィジェットを確認し、フォローアッププロンプトを書いて調整します。例:
* "Make the CTA button larger"
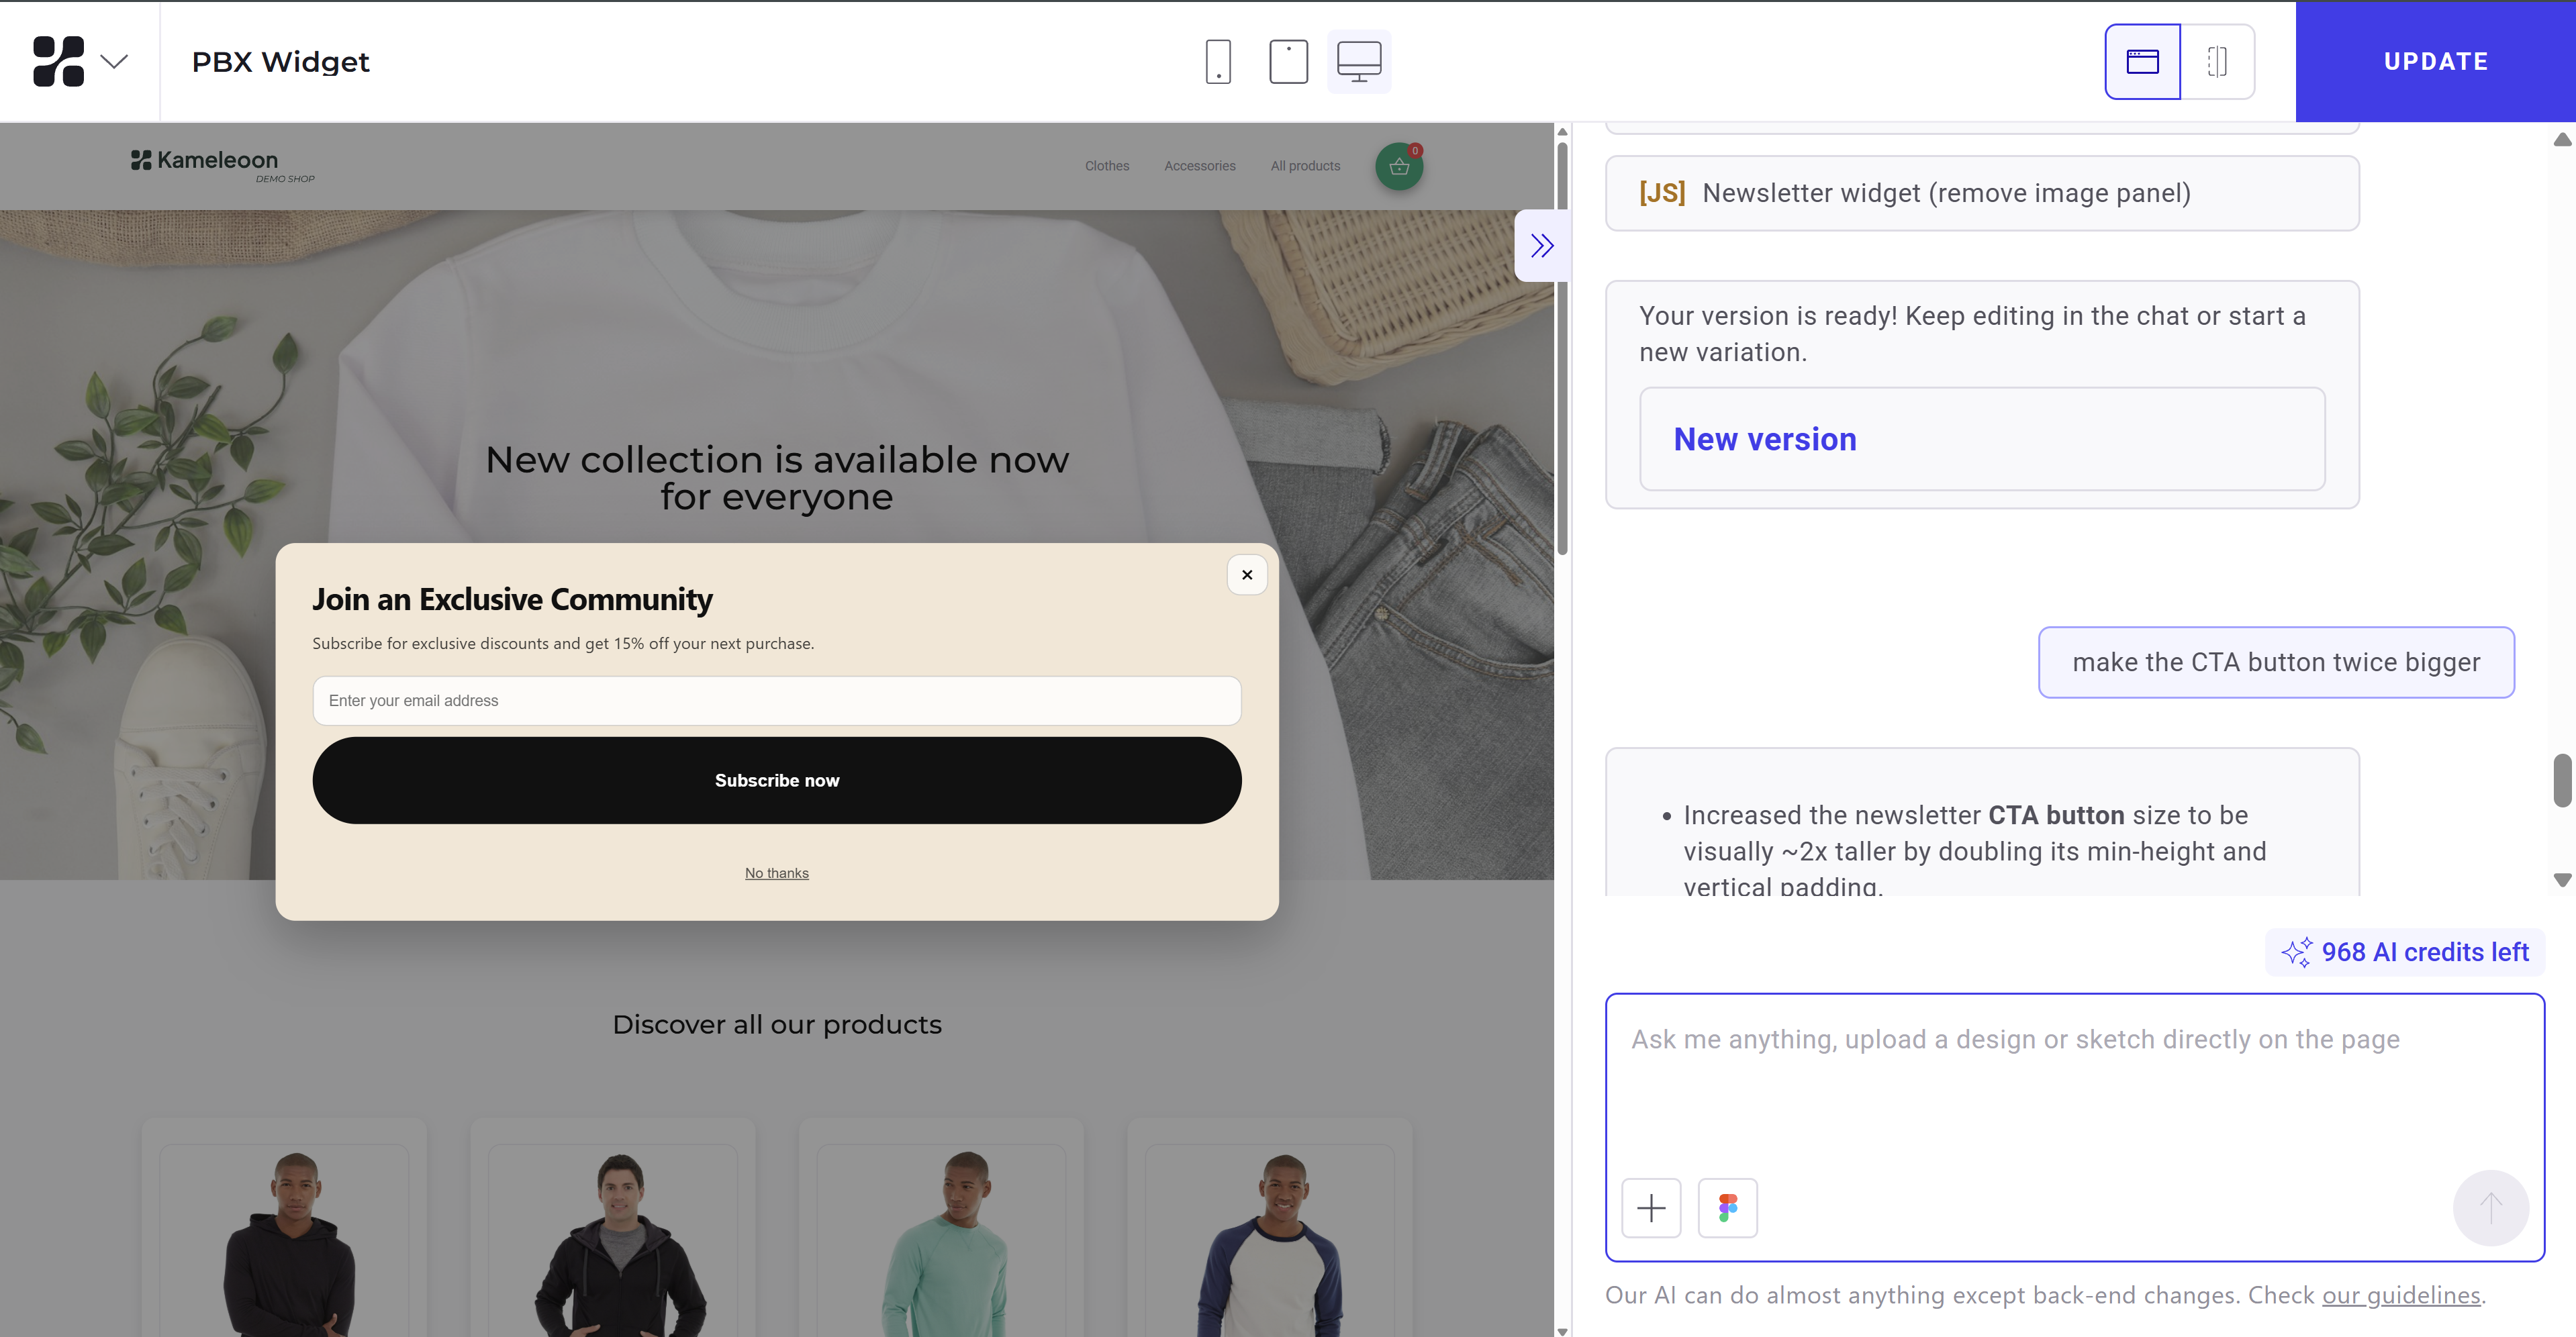
* "Change the background color to a darker beige"

* "Make the popup appear after 3 seconds"
### 4. ゴールを追加する
プロンプトにゴールを追加することで、メール送信、ボタンクリック、フォーム完了、ウィジェット表示などのユーザーインタラクションを追跡します。
PBXウィジェットでゴールを追跡するには、事前に [**Settings**](../goals/create-a-goal) でゴールを設定する必要があります。
**ゴールのプロンプト例:**
* Newsletter signup: `Track a goal called "Newsletter Signup" when the user clicks the Subscribe button.`
* CTA click: `Track a goal when the CTA button is clicked. Goal name: Promo CTA Click`
* Widget engagement: `Track a goal when the popup is displayed. Goal name: Widget Viewed`
## ウィジェットのレスポンスをGoogle Sheetsに送信する(オプション)
PBXウィジェットを設定して、[アンケートとフォームのレスポンスを直接Google Sheetsに送信](./create-a-widget-with-the-widget-studio/create-csat-nps-and-surveys/send-survey-responses-to-google-sheets)できます。まず、[このガイド](./create-a-widget-with-the-widget-studio/create-csat-nps-and-surveys/send-survey-responses-to-google-sheets)に記載されている通り、Google Sheetを設定する必要があります。
ウィジェットをGoogle Sheetsに接続するためのプロンプトを書く際は、次のガイドラインに従ってください。
1. **明確な送信トリガーを定義する:** リクエストをトリガーする要素を指定します。トリガーは通常、メインのCTAボタン(たとえば、`SubmitButton`)です。
2. **外部HTTP POSTリクエストを使用する:** メソッドを **POST** に設定し、Google Apps Script Web AppのURLを含めます。
3. **Web App URLを明示的に指定する:** 常に完全なURL(たとえば、`https://script.google.com/macros/s/XXXXXXXX/exec`)を含めます。PBXはこれを自動的に推測または生成できません。
4. **送信するすべての要素をリストアップする:** すべてのフィールドを明示的に指定します(たとえば、`email`、`rating`、`comment`)。
暗黙的な動作に頼らないでください。PBXは正確なフィールド名を必要とします。
5. **パラメーター名を完全に一致させる:** ウィジェット要素名、リクエストペイロード、およびGoogle Sheetsの列ヘッダーの間で名前が完全に一致することを確認します。
**Google Sheets統合のプロンプト例:**
```text id="example_pbx_google_sheets" theme={null}
Add a system to send widget form data to a Google Sheet using an HTTP request.
- Submission trigger: Use the button named "SubmitButton"
- Request configuration:
- Request name: SendToGoogleSheets
- Method: POST
- Action URL: https://script.google.com/macros/s/AKfycbxxxxxxx/exec
- Data to send: Send the values of the following elements as parameters:
- email
- rating
- comment
- Payload rules:
- Each parameter key must exactly match the element name
- Keys must also match the column headers in the Google Sheet
- Behavior:
- Trigger the request when the SubmitButton is clicked
- After successful submission, display a confirmation message: "Thank you for your response"
- Optionally handle errors if the request fails
```
## 効果的なプロンプトの書き方
うまく書かれたプロンプトは、生成されるウィジェットの品質を大幅に向上させます。
### 明確な構造を使う
最良のプロンプトは論理的な構造に従います。
```text theme={null}
- Widget type
- Layout
- Content
- Style
- Behavior
```
**例:**
```text theme={null}
Create a modal popup widget.
- Layout: Two columns with an image on the left and a form on the right.
- Content:
- Title: Join our community
- Description: Get 15% off your first order
- Email field
- CTA button: Subscribe now
- Style:
- Modern ecommerce design
- Rounded buttons
- Dark beige background
- Behavior:
- Display after 5 seconds
- Close button in top right corner
- Image: Use the following image in the image placeholder on the left: https://www.whereyourimagelives.com
```
### 具体的にする
具体的なプロンプトは、より正確なレイアウトとスタイルを生み出します。
**悪いプロンプト:**
`Create a popup for a newsletter`
**より良いプロンプト:**
`Create a centered modal popup for newsletter subscription with a modern ecommerce design. Include an email input field and a large CTA button offering 15% off.`
### UI要素を明示的に定義する
タイトル、ボタン、入力、セカンダリリンク、アイコン、画像など、必要な要素を常に指定します。
**例:**
```text theme={null}
Add:
- Email input field
- Large CTA button
- Small legal disclaimer text
- "No thanks" link below the button
```
### 動作を記述する
PBXは、指定すればウィジェットのロジックを生成できます。
**例:**
* `Show popup after 5 seconds`
* `Close popup when clicking outside`
* `Close popup when clicking "No thanks"`
### 書き直すのではなく反復する
プロンプト全体を書き直すのではなく、ウィジェットを段階的に調整します。反復的なプロンプトは結果を効率的に改善します。
**例:**
* `Make the CTA button darker`
* `Increase padding inside the popup`
* `Add rounded corners to the input field`