> ## Documentation Index
> Fetch the complete documentation index at: https://docs.kameleoon.com/llms.txt
> Use this file to discover all available pages before exploring further.
# 外部データの保存と取得によるユーザーのターゲティング
> Data API の Map エンドポイントを使用して外部の CRM または CDP ユーザーデータを Kameleoon に保存し、実験セグメントのターゲティング条件として利用します。
Kameleoon Web および Feature Experimentation ソリューションでは、[Data API の Map エンドポイント](/api-reference/map/update-data-for-several-keys) と [カスタムデータ](../../../custom-data) を使用して、他のシステム(CRM や CDP など)に保存されている外部データに基づいてユーザーをターゲティングできます。
このチュートリアルでは、次のことを取り上げます。
* [POST Map エンドポイント](/api-reference/map/update-data-for-several-keys) を使用した外部ユーザーデータの保存。
* [GET Map エンドポイント](/api-reference/map/get-data-for-a-key) を使用したユーザーデータの読み取り。(注: [このステップ](#retrievedatafromremotesource-activation-api-を使用してデータを取得する) では、**Data API** をラップする **Web Experimentation** 用の Activation API メソッドを使用します。**Feature Experimentation** の場合、Kameleoon SDK 全体で同様のメソッドが利用可能で、手動の API 呼び出しロジックを回避することでプロセスを簡略化します)。
* 実験でカスタムデータを使用することにより、保存されたデータをターゲティングセグメントで活用する。
## DATA API の MAP エンドポイントを使ってデータをポストする
Data API は **REST API** であるため、[MAP](/api-reference/map/update-data-for-several-keys) エンドポイントへの **POST** リクエストは、ユーザーが Web サイトを訪問したときに提供される特定のキー(通常、訪問者コードまたは内部ユーザー ID を表す)に関連付けられた追加情報を保存します。
MAP エンドポイントにアクセスするための認証トークンを、JSON Web トークンを使用した [Automation API](../../automation-api-rest/get-started/get-started#認証) と同じフローで取得できます(オプション)。認証とレート制限について詳しくは、[この記事](../overview#authentication-and-rate-limiting)を参照してください。
cURL リクエストには、次のパラメーターを含める必要があります。
* **`siteCode`**: 実験プロジェクトを識別する英数字の文字列。取得方法については[この記事](/user-manual/faq#how-do-i-find-my-sitecode)を参照してください。
* **JSON オブジェクト**: リクエスト本文には、キーと関連するユーザーデータのリストで構成されるオブジェクトが含まれます。
* **`User-Agent`**: ボットやスパイダーとして識別されたリクエストは、[IAB/ABC ユーザーエージェントフィルタリングルール](https://www.iab.com/guidelines/iab-abc-international-spiders-bots-list/) に従って拒否されます。Kameleoon は単一パス方式を使用しているため、標準的な Web ブラウザライブラリ(XHR など)からのリクエストの場合は何も操作する必要はありません。**ただし、それ以外の場合は、ライブラリのデフォルトを上書きするためにカスタム `User-Agent` 値を設定してください。**
```shell theme={null}
curl -X POST -L 'https://eu-data.kameleoon.io/map/maps?siteCode=f17c21u1ag' \
-H 'Content-Type: application/json' \
-H 'User-Agent: MyCustomUserAgent/1.0' \
-d '{
"myUserID1": {
"audiencesNames": {
"premium": true
}
},
"myUserID2": {
"audiencesNames": {
"premium": false
}
},
...
}'
```
処理されたリクエストはコンテンツを返しません。成功を検証するには、次の URL を使用して[このエンドポイント](/api-reference/map/get-data-for-a-key)にリクエストを送信します: `https://eu-data.kameleoon.io/map/map?siteCode=f17c21u1ag&key=myUserID1`
## `retrieveDataFromRemoteSource` (Activation API) を使用してデータを取得する
データが Kameleoon サーバーに保存されている場合、カスタムデータを使用してサイトを訪問している個々のユーザーに関する情報にアクセスします。カスタムデータは、実験セグメント内の**ターゲティング条件**として機能します。
まず、Kameleoon でカスタムデータを作成して構成します。
Kameleoon ダッシュボードの左側メニューで、**Configure** の下にある **Custom data** をクリックします。
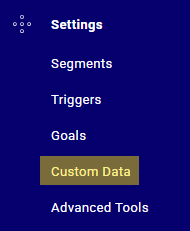
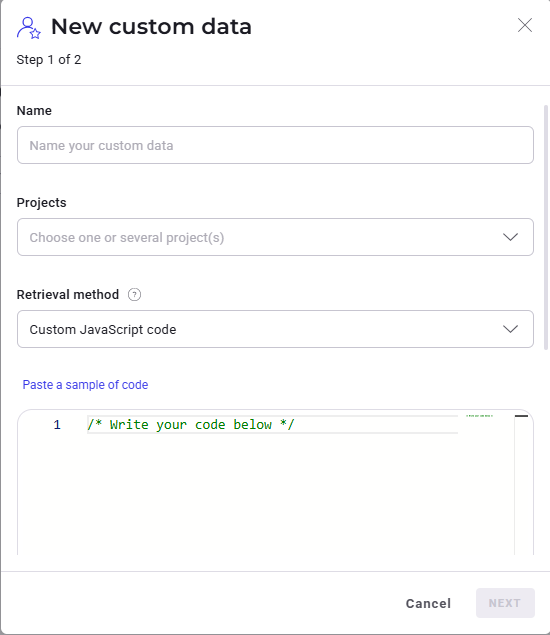
カスタムデータダッシュボードにリダイレクトされます。右上隅の **New custom data** をクリックします。

**Edit the custom data** ウィンドウが表示されます。
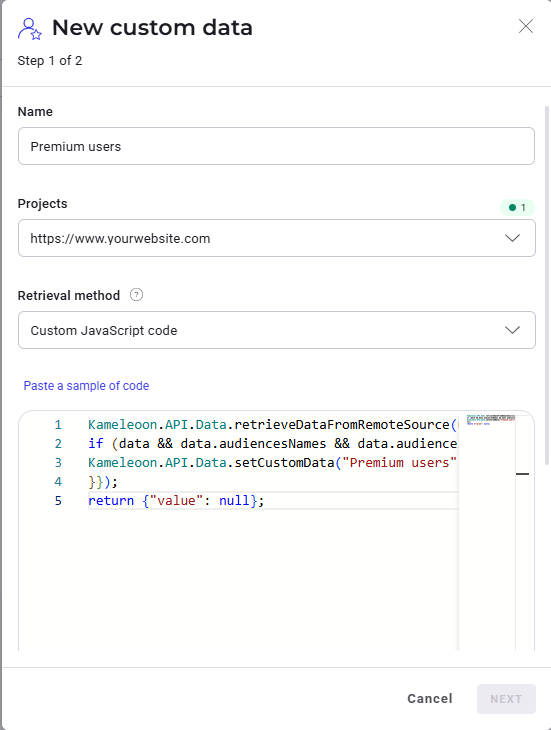
例: 「premium」ステータスが `true` のユーザーに対して、「Premium users」という名前のカスタムデータを作成します。この情報は[前のステップ](#post-data-using-the-data-apis-map-endpoint)で保存しました。
```shell theme={null}
"audiencesNames": {
"premium": true
}
```
premium ステータスが `true` のユーザーを識別するには、取得方法を **Custom JavaScript** に変更し、**Paste a sample code** の下にある `retrieveDataFromRemoteSource` メソッドのために次のコードを挿入します。
```javascript theme={null}
Kameleoon.API.Data.retrieveDataFromRemoteSource(user_id, function (data) {
if (data && data.audiencesNames && data.audiencesNames.premium !== undefined) {
Kameleoon.API.Data.setCustomData("Premium users", data.audiencesNames.premium);
}});
return {"value": null};
```
このメソッドは、特定のユーザーに対して保存されている値を取得します。サンプルコードでは、変数 `user_id` にはユーザーの一意の ID が含まれています。
Kameleoon Feature Experimentation を利用しているプロジェクトでは、フィーチャーフラグコード内で SDK メソッド `getRemoteData()` を使用してデータを取得できます。
カスタムデータ作成ウィンドウのすべての情報が入力されたら、**Next** をクリックします。
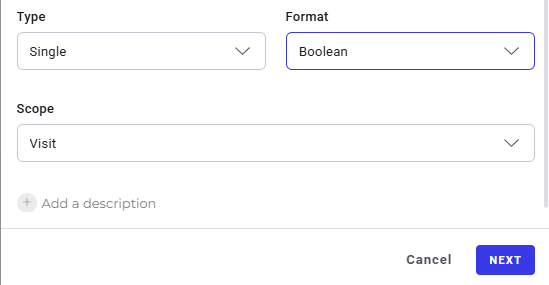
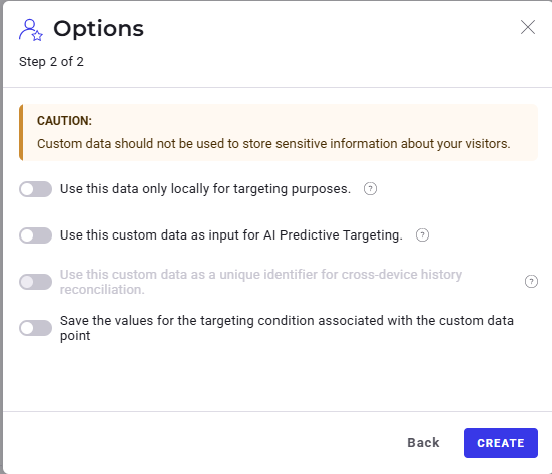
次のウィンドウには、オプションの追加構成オプションが表示されます。**Create** をクリックします。
カスタムデータダッシュボードにリダイレクトされ、**Premium** users カスタムデータが表示されます。

カスタムデータ「Premium users」が確立されたら、実験のターゲティングに使用できます。
そのためには、ダッシュボードの左側にある **Configure** の下の **Segments** をクリックします。
たとえば、**New segment** で作業する場合は、**Edit** をクリックします。

次に、**Segment** 構成ウィンドウの左側にある **Conditions** > **Technical** で、先ほど作成した **Premium users** カスタムデータを選択します。
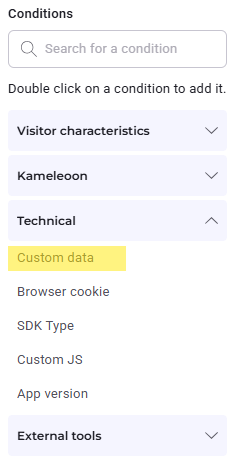
次に、**Definitions** の下で、**Premium users custom data** が **true** に設定されている訪問を含めるようカスタムデータを構成します。
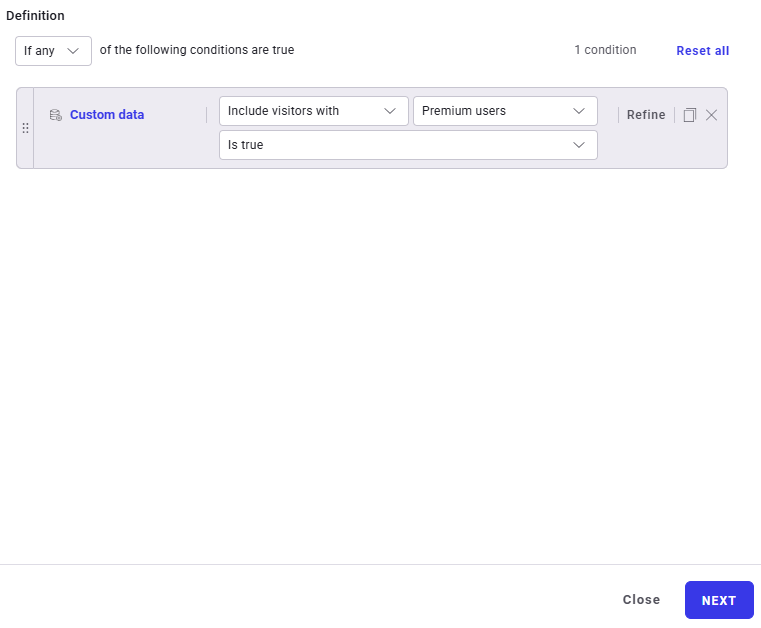
次に、**Next** > **Edit segment** をクリックします。
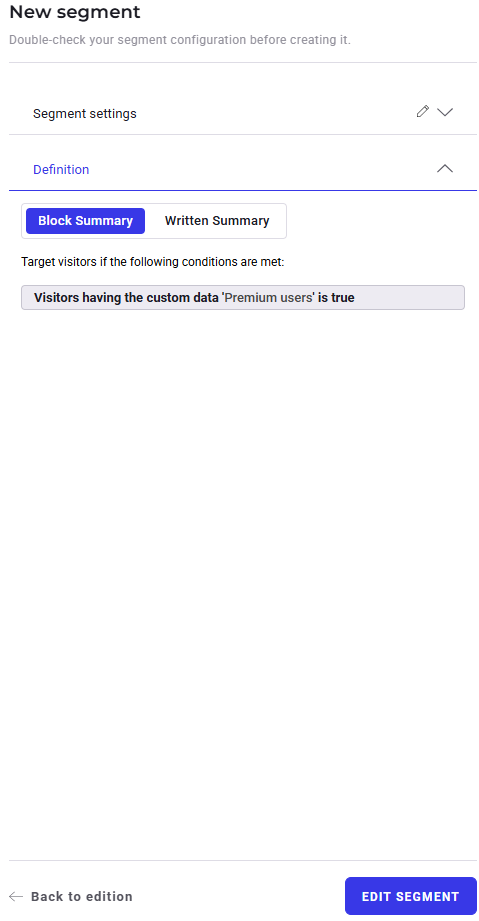
これで、**Premium users** カスタムデータを持つ訪問を含むようにセグメントが正常に構成されました。
New segment を実験で使用するには、実験ダッシュボードに戻ります。
**New segment** を関連付ける実験の横にある **Edit** をクリックします。

次のウィンドウにリダイレクトされたら、左上隅の **Targeting** を選択します。
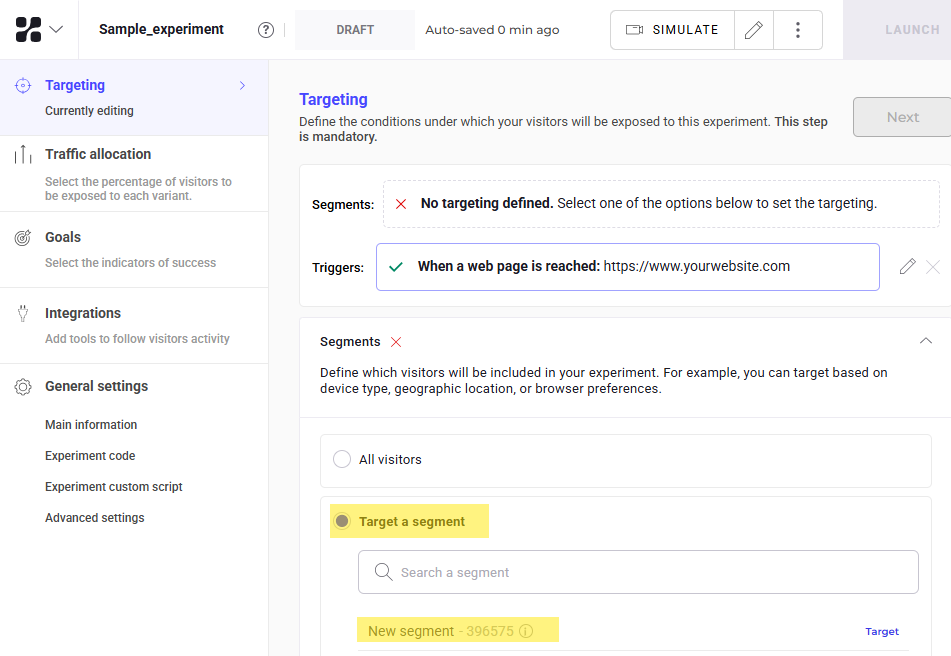
**Targeting** で **Target a segment** を選択し、次に **New segment** を選択します。
画面に次のように表示されます。

次に、右上隅の **Launch** をクリックします。

実験ドラフトのサマリーが表示されます。
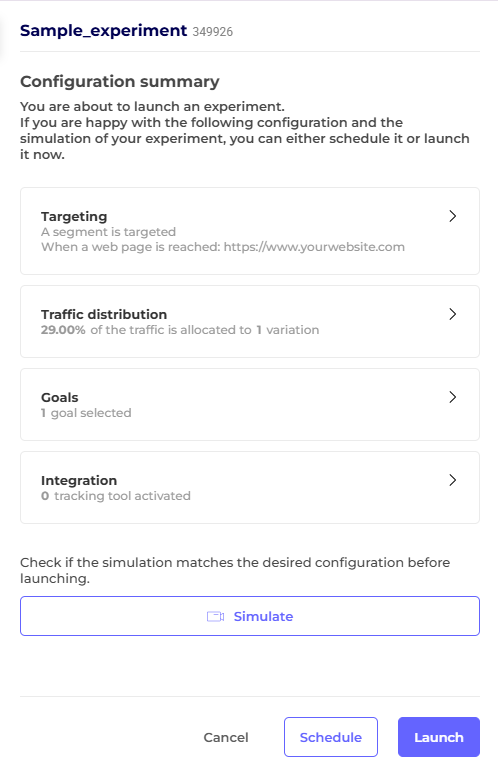
既存の構成に問題がなければ、**Launch** をクリックします。
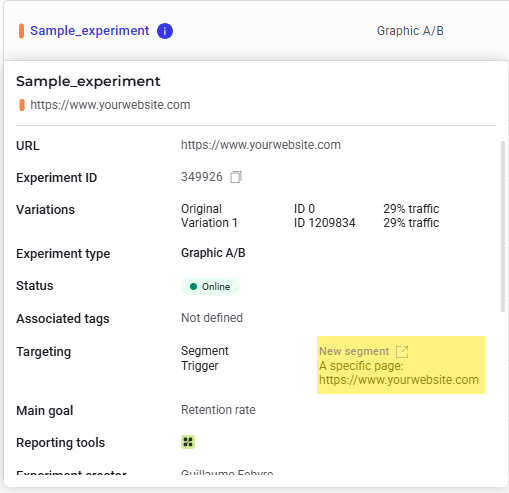
ダッシュボードに戻り、セグメントを関連付けた実験をクリックします。**New segment** が実験に正常に追加されたことを確認できます。