> ## Documentation Index
> Fetch the complete documentation index at: https://docs.kameleoon.com/llms.txt
> Use this file to discover all available pages before exploring further.
# Application file self-hosting with Fastly CDN
> Self-host the Kameleoon application file on Fastly CDN to reduce DNS latency and SSL handshake overhead compared to using the default Kameleoon CDN.
`kameleoon.js` is deprecated and has been replaced by `engine.js` in all Kameleoon implementation snippets. `kameleoon.js` will no longer be supported after **June 1st, 2026**. After this date, any campaigns on websites still referencing `kameleoon.js` will stop functioning. Update your implementation snippet accordingly.
## Fastly configuration[](#fastly-configuration "Direct link to Fastly configuration")
Log in to your Fastly account and create an origin host and two content headers as follows:
### Create the origin host[](#create-the-origin-host "Direct link to Create the origin host")
1. Navigate to the tab `Service configuration` and click on the left entry `Origins > Hosts`. Click `Create host` and create a new condition to target your Kameleoon Application file. Give it a descriptive name, such as **Kameleoon JavaScript Application File**.
2. In the Apply if box, provide this condition `req.url ~ "^/kameleoon/engine.js"`
3. Save your new condition to apply it to your new origin host.
4. Apply the following configuration parameters to your origin host, where `YOUR_SITECODE` is replaced with your Kameleoon Project ID (follow the steps outlined in this [article](/user-manual/faq#how-do-i-find-my-sitecode) to retrieve it):
* **Name**: YOUR\_SITECODE.kameleoon.io
* **Address**: YOUR\_SITECODE.kameleoon.io
* **Certificate hostname**: YOUR\_SITECODE.kameleoon.io
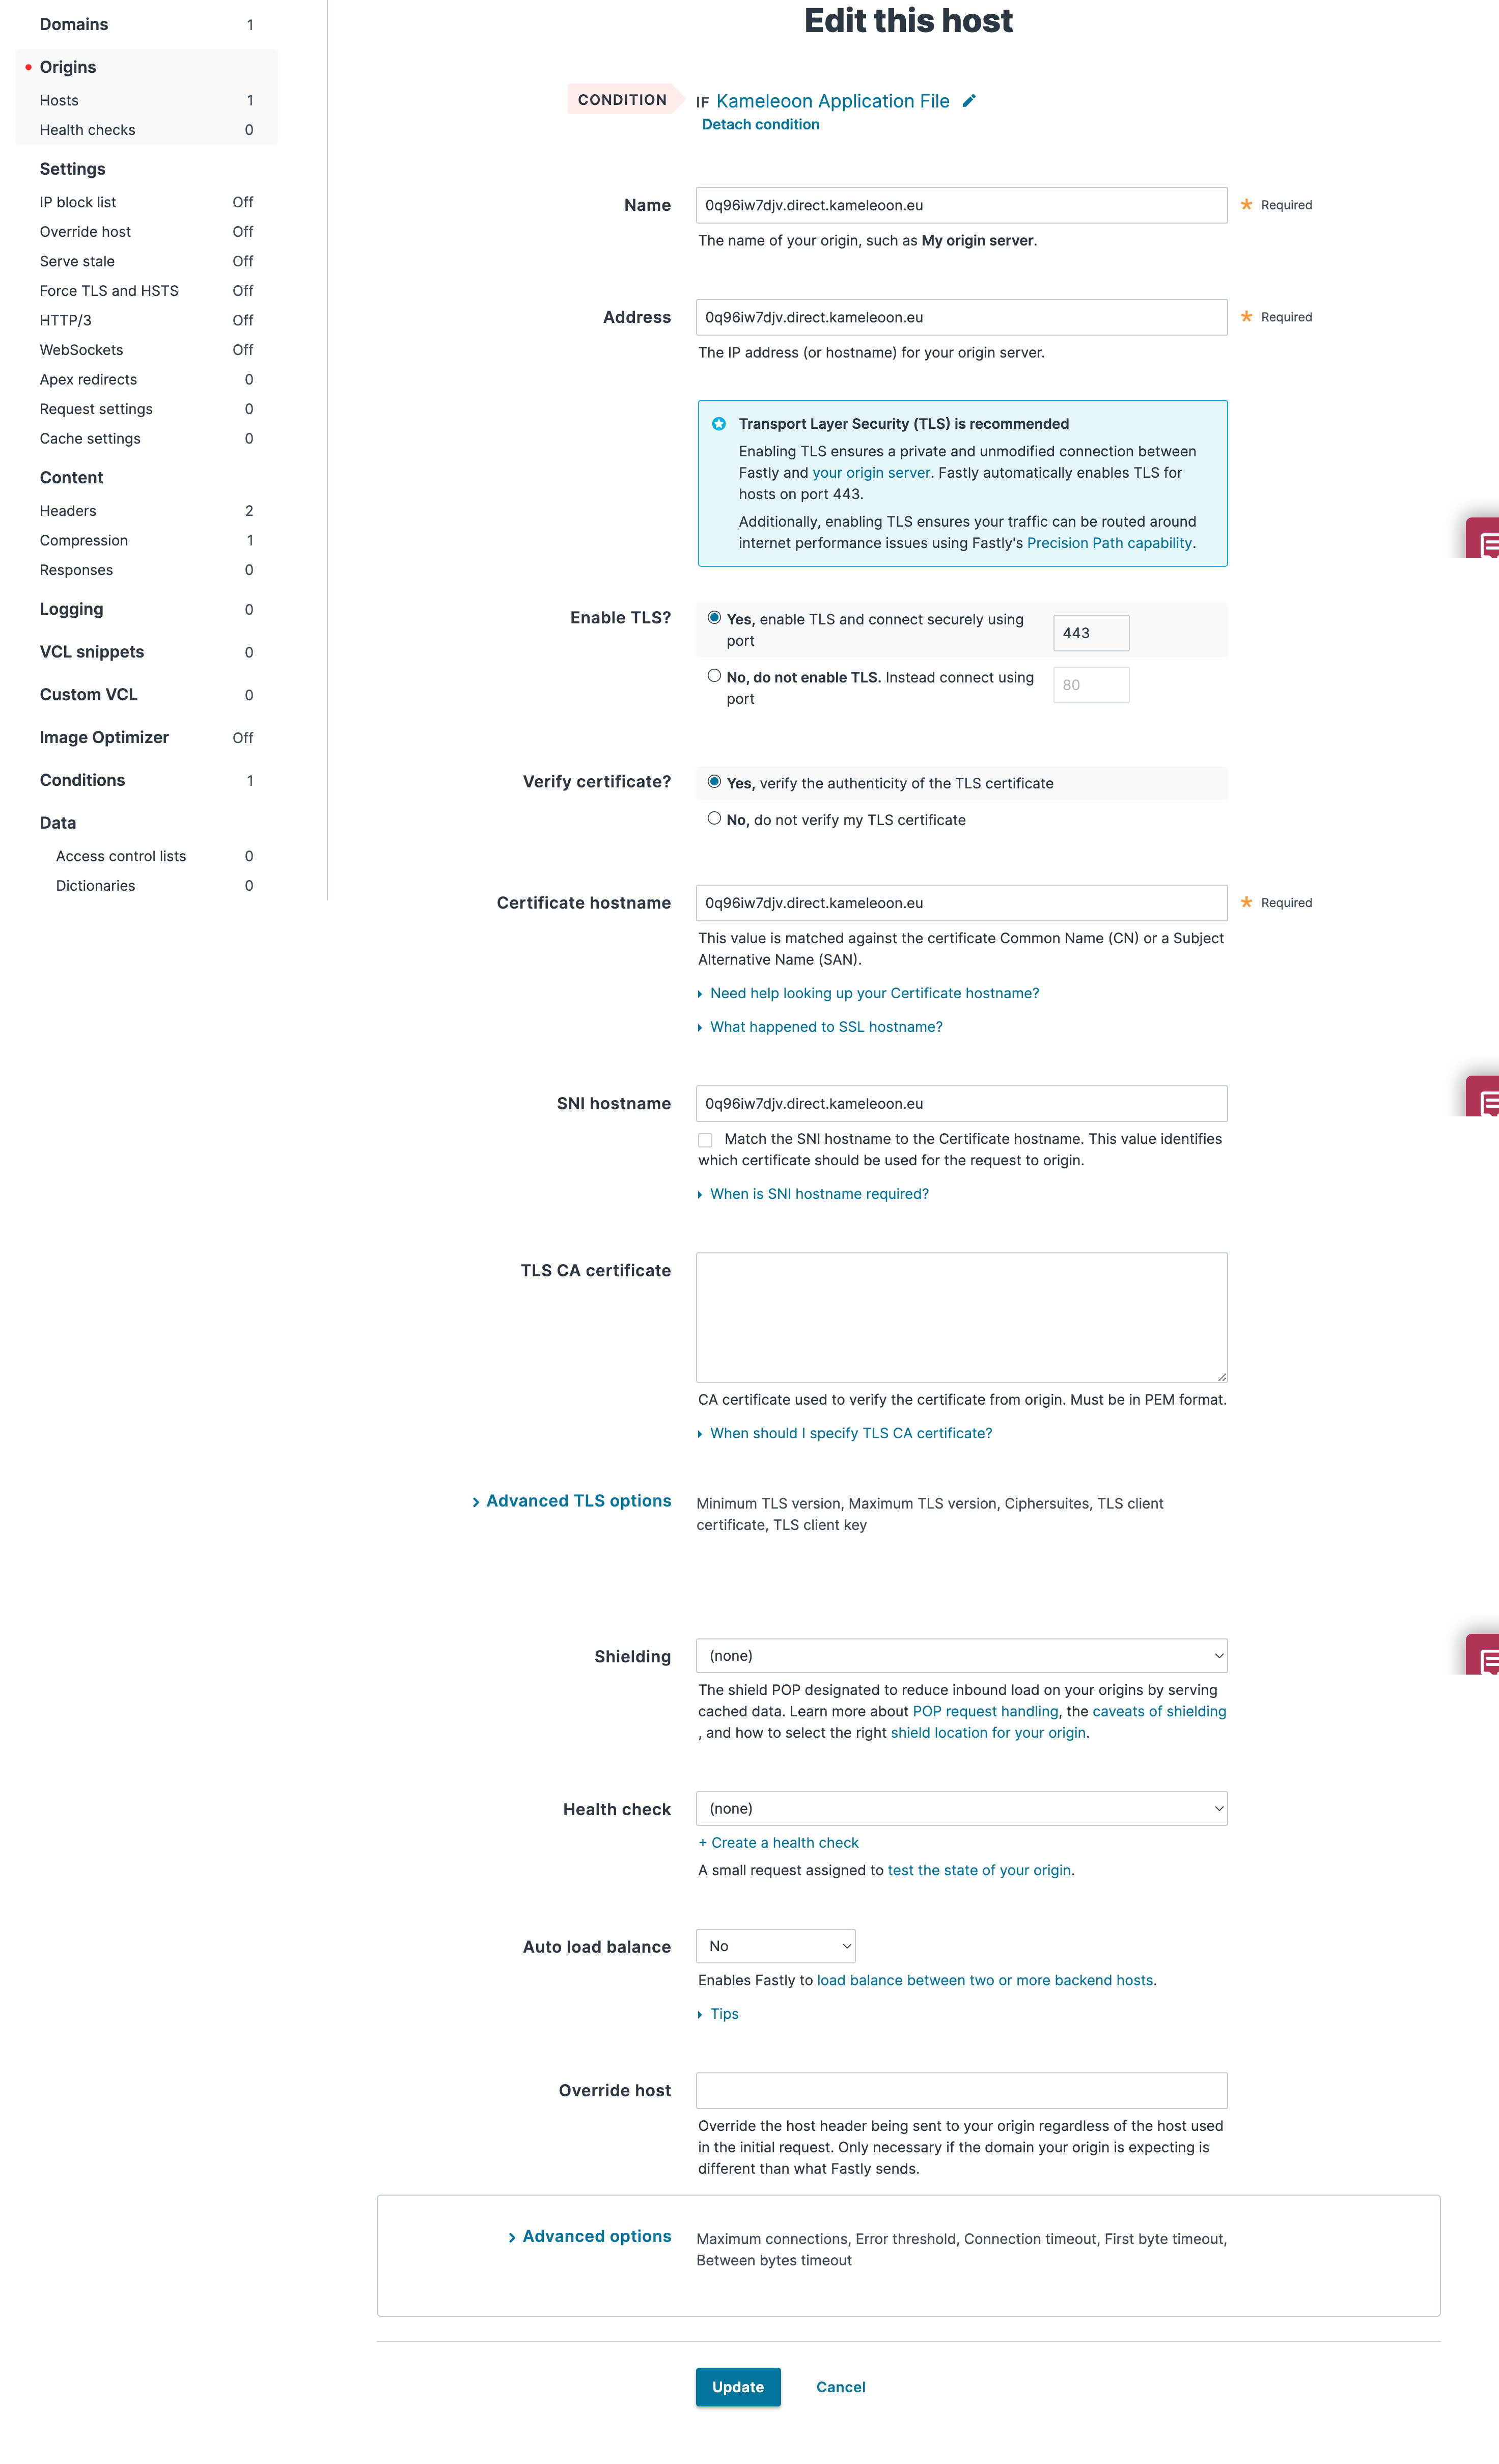
Note: The domain for your Kameleoon scripts may vary from one project to another. Your projects may be hosted on either `kameleoon.eu` or `kameleoon.io` depending on their creation date. Make sure you use the domain displayed in your project in the Kameleoon App.
### Create the headers[](#create-the-headers "Direct link to Create the headers")
You need to create headers to specify how you want content served to your users from your website:
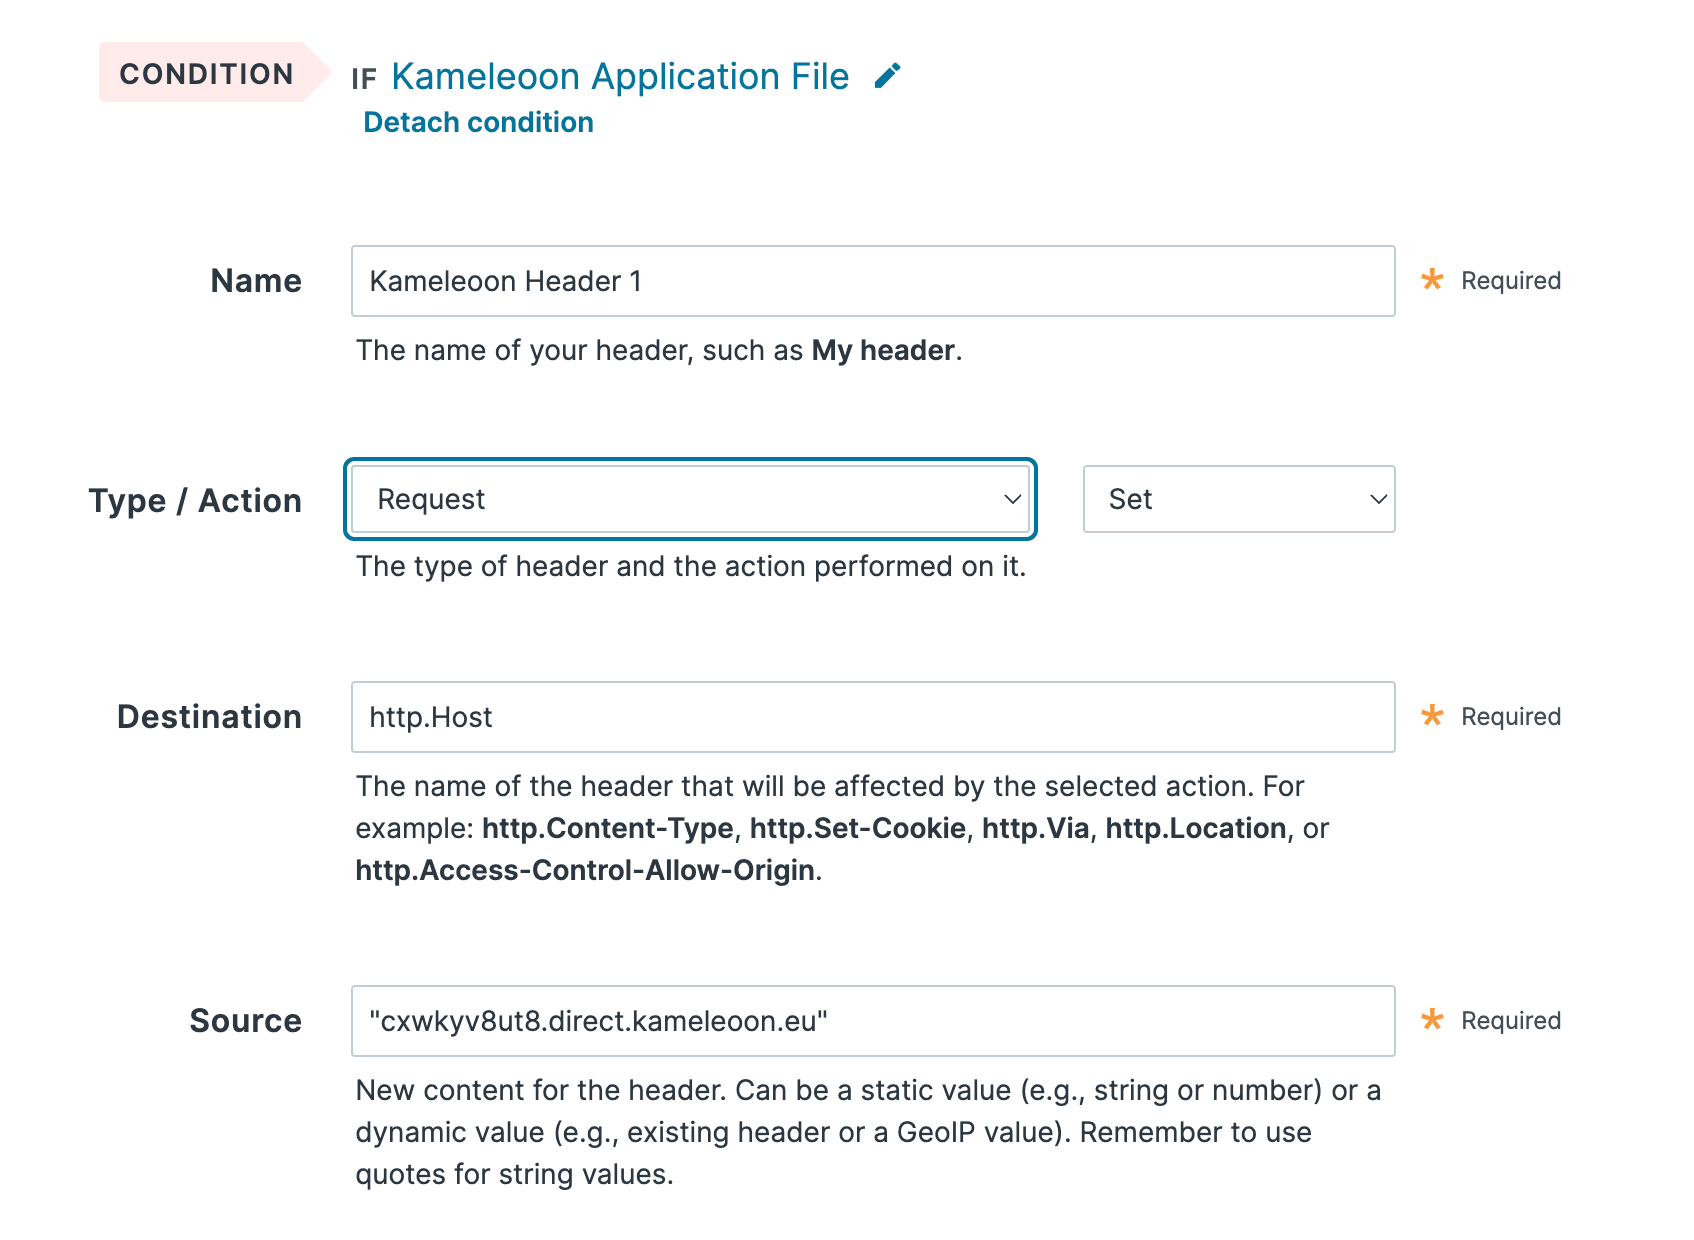
1. Click on the left entry `Content > Headers`. Click `Create a header`.
2. Attach the same condition you built for the host to target the new Kameleoon JavaScript Application File on your site.
3. Give your header a name (eg. YOUR\_SITECODE.direct.kameleoon.io host) and make sure it is configured as follow, where `YOUR_SITECODE` is replaced with your Kameleoon Project ID.
* **Type / Action**: Request - Set
* **Destination**: http.Host
* **Source**: "YOUR\_SITECODE.direct.kameleoon.io"
4. Click Create to save your header.
\[
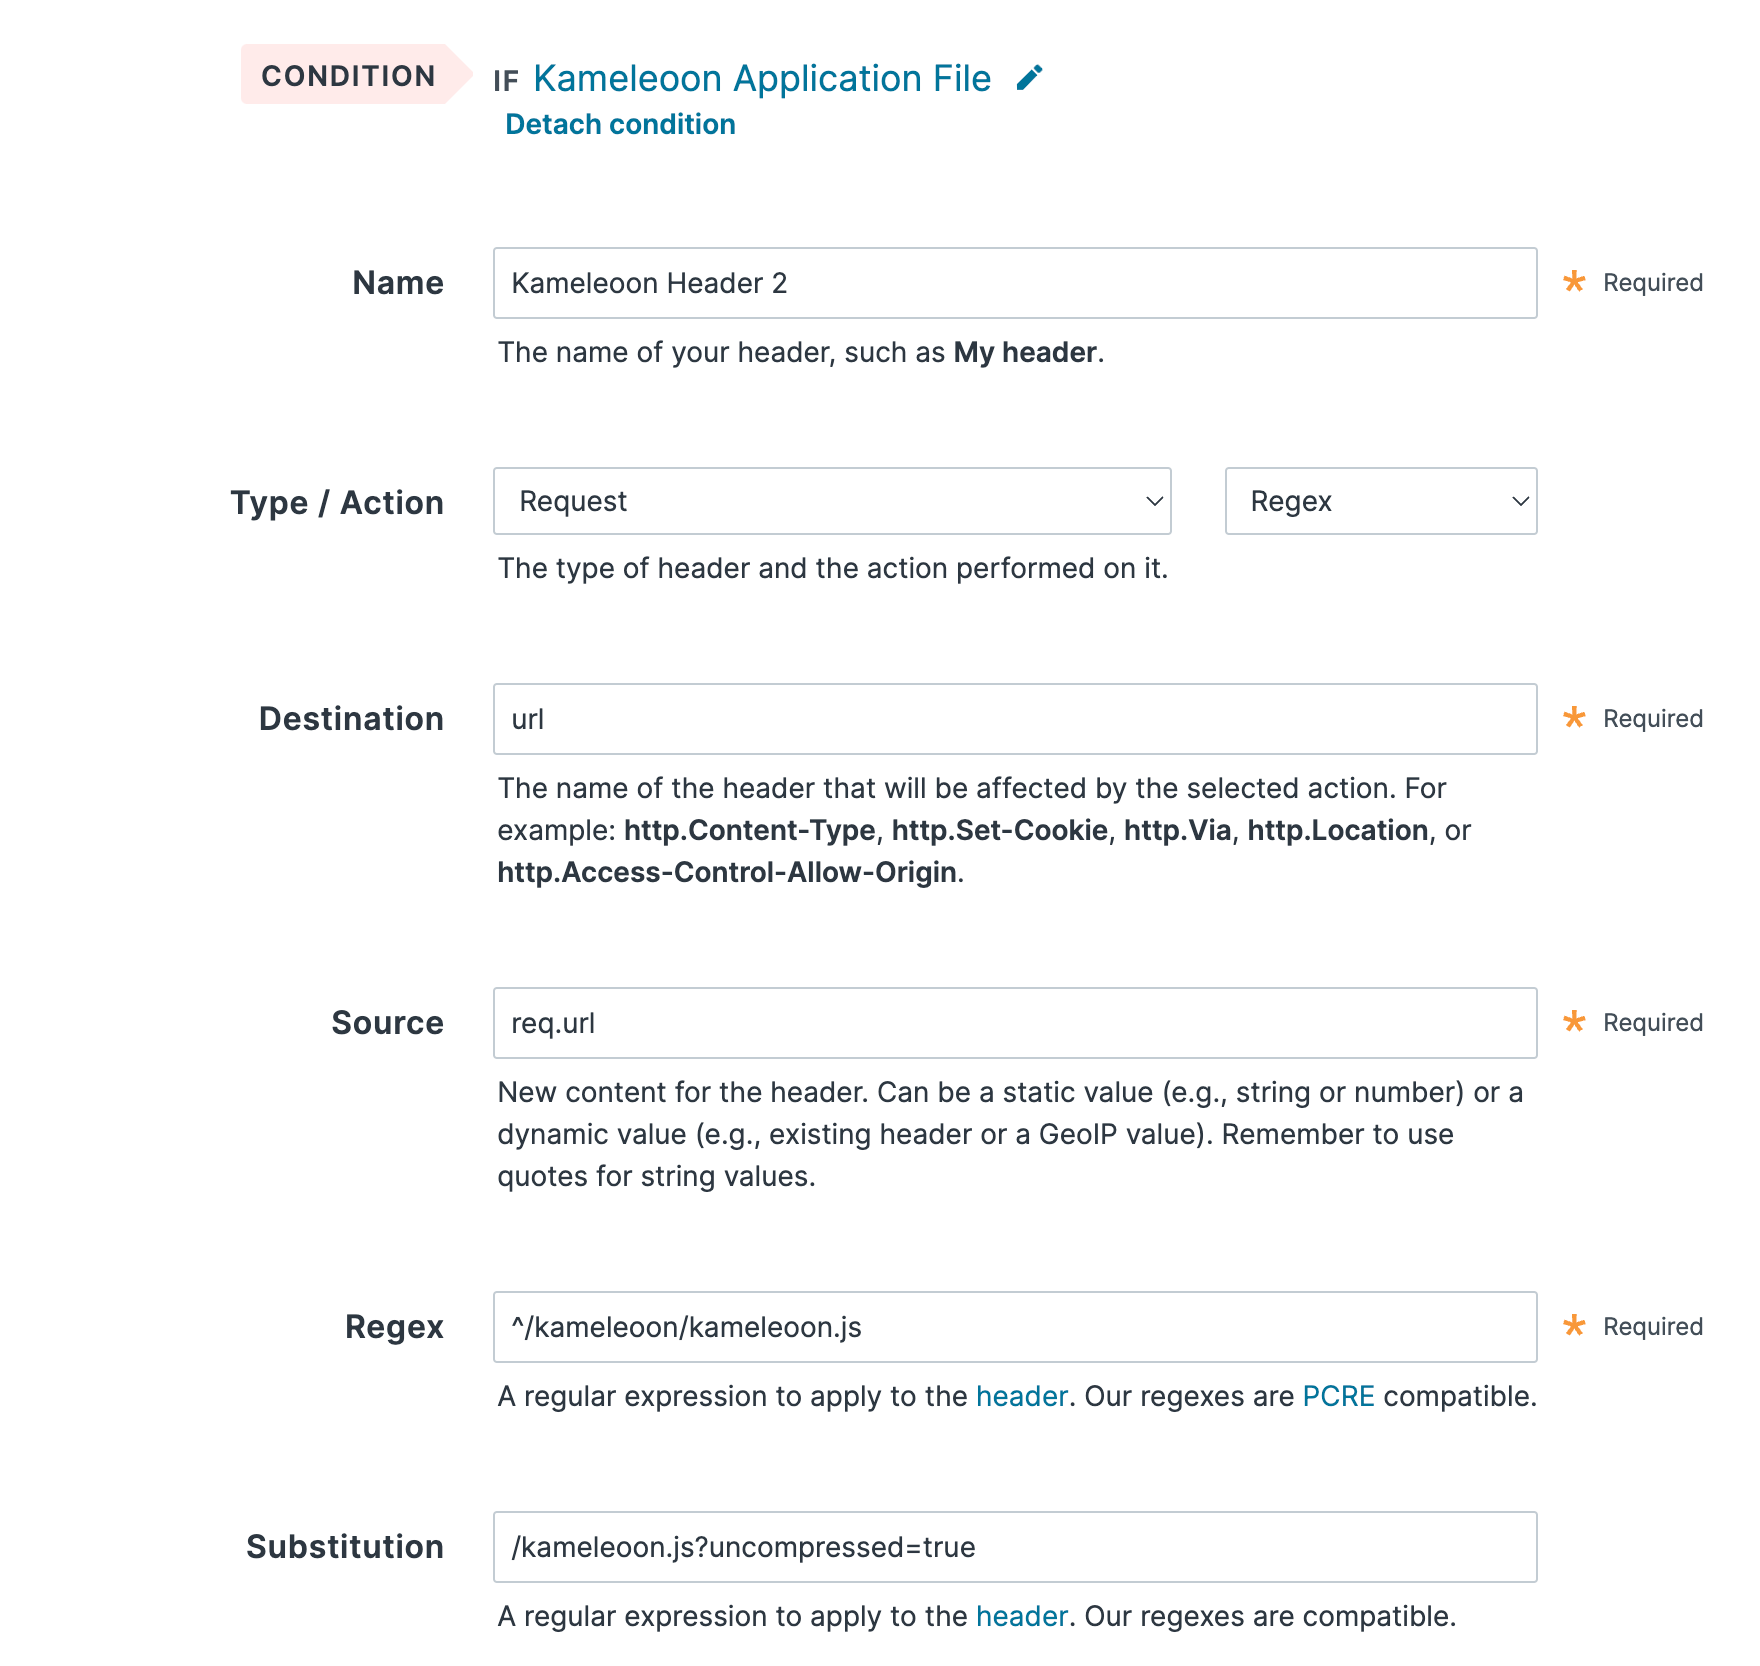
Before activating your new configuration, you need to create a second header to modify the base of the request
1. Click `Create a header`
2. Attach the same condition you built for the host to target the new Kameleoon JavaScript Application File on your site.
3. Give your header a name (eg. YOUR\_SITECODE.direct.kameleoon.io base) and make sure it is configured as follow, where `YOUR_SITECODE` is replaced with your Kameleoon Project ID.
* **Type / Action**: Request - Regex
* **Destination**: url
* **Source**: req.url
* **Regex**: ^/kameleoon/engine.js
* **Substitution**: /engine.js?uncompressed=true
4. Click Create to save your header.
\[
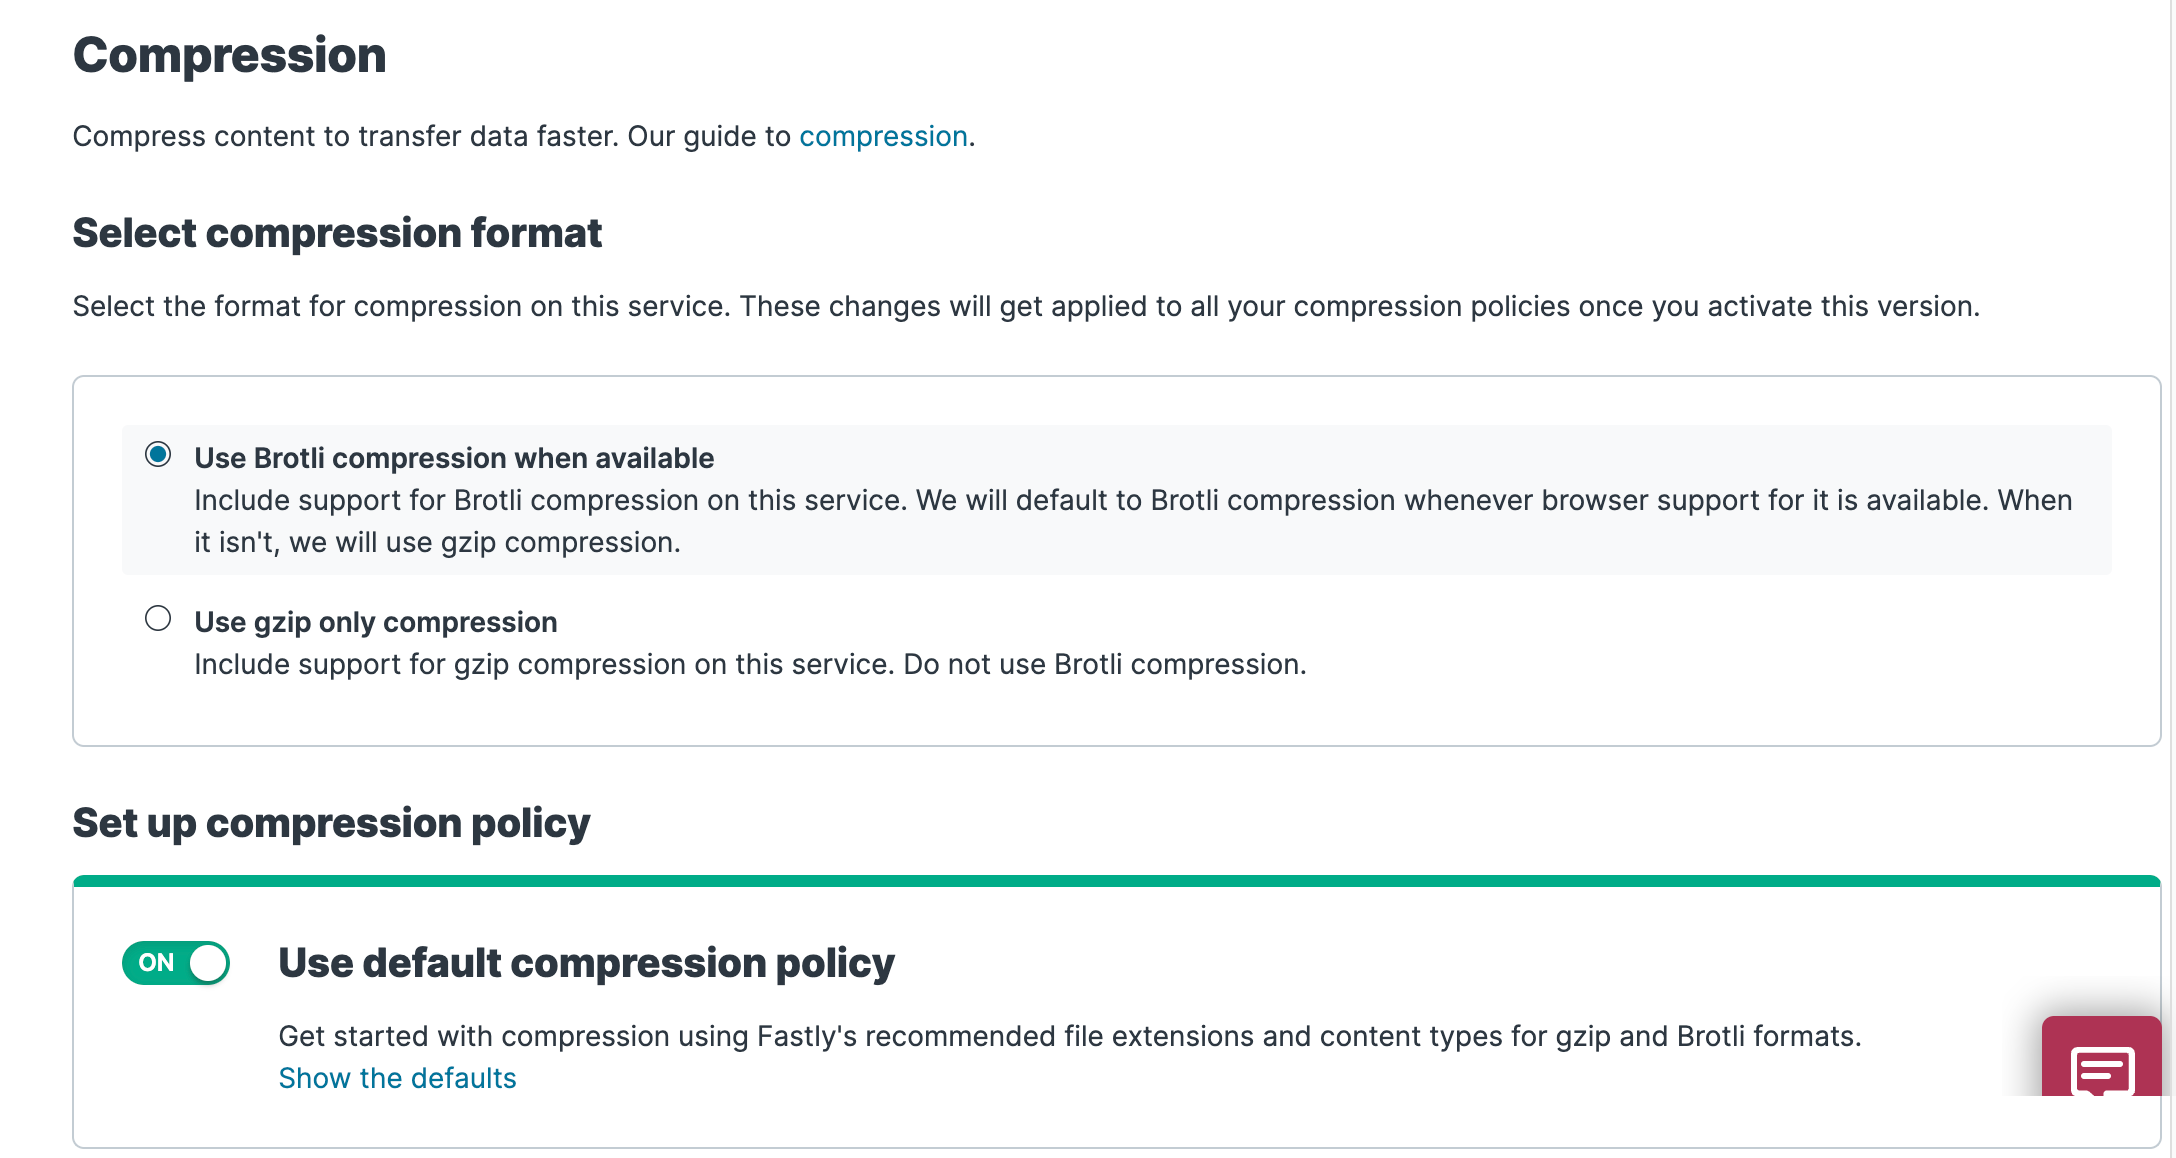
### Select compression format[](#select-compression-format "Direct link to Select compression format")
To enable compression, start by selecting a compression format using the steps below:
1. Click the left entry `Content`.
2. Scroll to the Compression area. The Compression controls appear.
3. Select `Use Brotli compression when available` to use Brotli compression by default for browsers that support it.
\[
Remember to activate your new Fastly configuration to allow it to take effect before updating your source code.
## Add the Kameleoon snippet in your source code[](#add-the-kameleoon-snippet-in-your-source-code "Direct link to Add the Kameleoon snippet in your source code")
Refer to this [article](../implementation-and-deployment/standard-implementation) to understand how to implement Kameleoon on your website.
The final step is to replace the default Kameleoon Application JavaScript URL in the installation tag with your Fastly URL. For instance, if you are using the JavaScript File ([Asynchronous Loading with Anti-Flicker](../implementation-and-deployment/standard-implementation#asynchronous-tag-without-anti-flicker)) implementation method, the Kameleoon application file is by default hosted on `//SITE_CODE.kameleoon.io/engine.js`. You just need to change this URL in the installation tag, replacing it with your own Fastly URL.